Configure PhenixID as SAML IDP for SSO
miniOrange Identity Broker service solution enables cross protocol authentication. You can configure PhenixID as an IDP for Single Sign-On (SSO) into your applications/websites. Here, PhenixID will act as an Identity Provider (IDP) and miniOrange will act as a broker.
We offer a pre-built solution for integrating with PhenixID, making it easier and quick to implement. Our team can also help you set up PhenixID as SAML IDP to login into your applications.
Get Free Installation Help
miniOrange offers free help through a consultation call with our System Engineers to configure SSO for different apps using PhenixID as IDP in your environment with 30-day free trial.
For this, you need to just send us an email at idpsupport@xecurify.com to book a slot and we'll help you in no time.
Connect with External Source of Users
miniOrange provides user authentication from various external sources, which can be Directories (like ADFS, Microsoft Active Directory, OpenLDAP, AWS etc), Identity Providers (like Microsoft Entra ID, Okta, AWS), and many more. You can configure your existing directory/user store or add users in miniOrange.
Prerequisite:
- To get started you need to have an active PhenixID account with administrator rights for your organization.
- Get the miniOrange SP metadata that you will require in the first step. For this, go to the miniOrange Admin Console >> Identity Providers >> Add Identity provider. Under Choose Identity Provider, select SAML from the dropdown and go to SAML Provider. Then click on the Click here link.
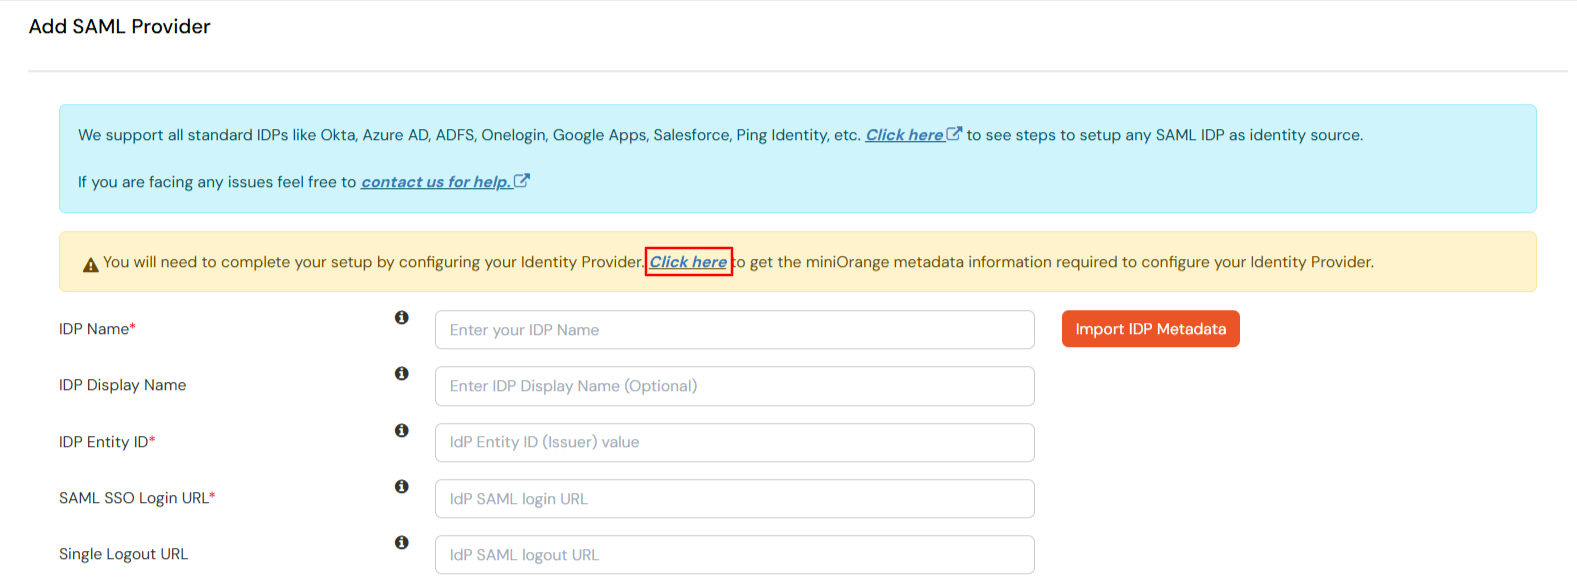
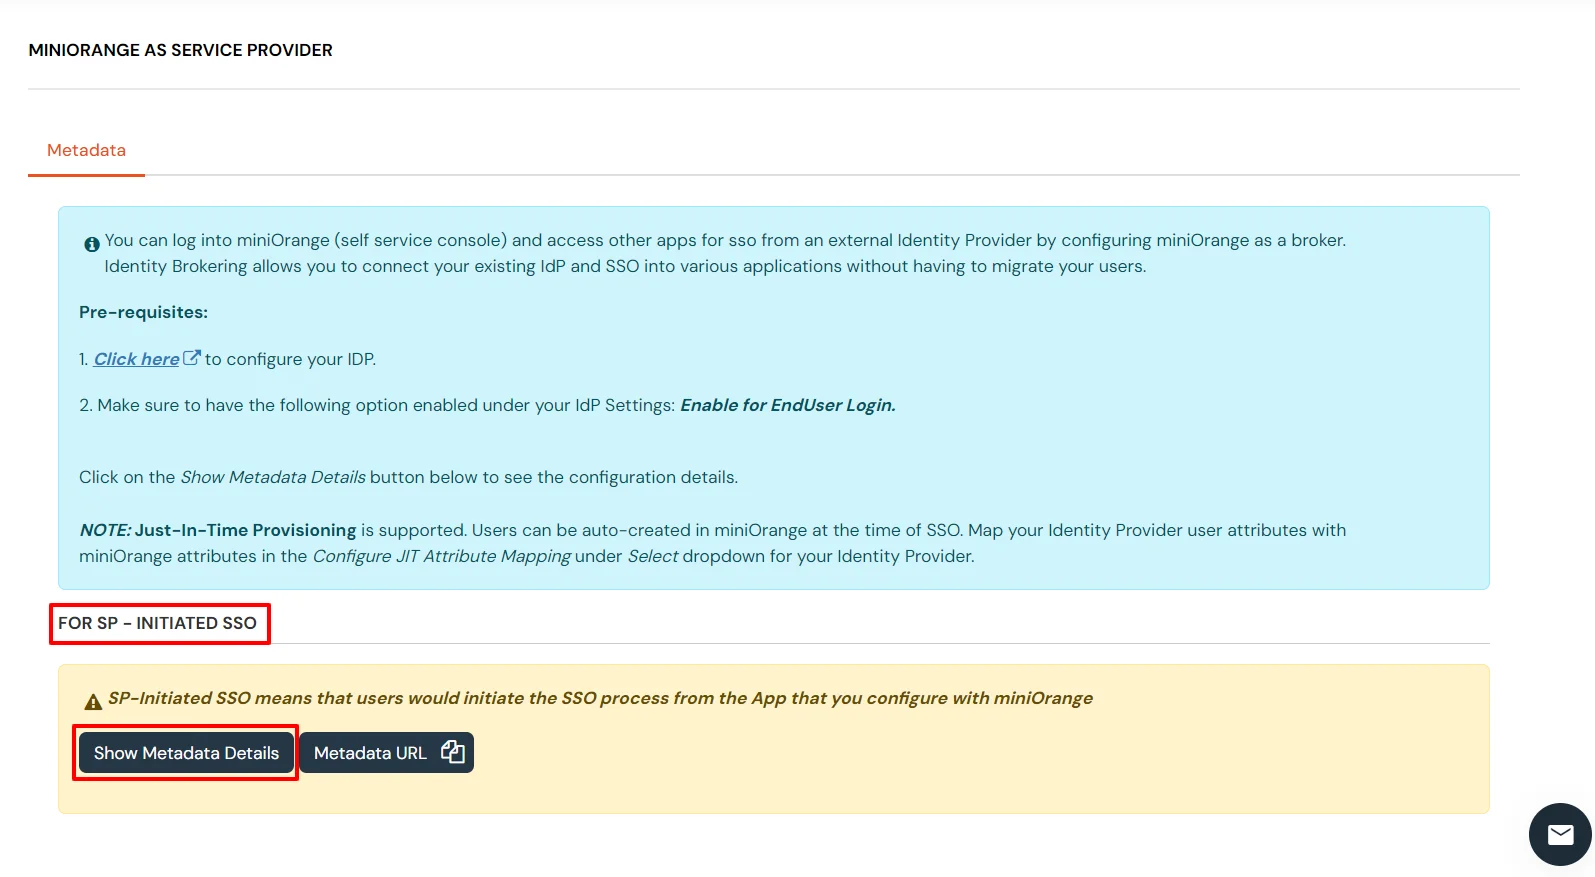
- Click on Show metadata Details under For SP - Initiated SSO. Click on Download Metadata. You will require this in PhenixID console at Step 1.

Steps to setup PhenixID as an IDP and miniOrange as a Service Provider (SP) for SSO login
1. Configure miniOrange as Service Provider (SP) in PhenixID
- First login to the PhenixID server admin console with your credentials.
- Navigate to Scenarios tab and click on Federation.
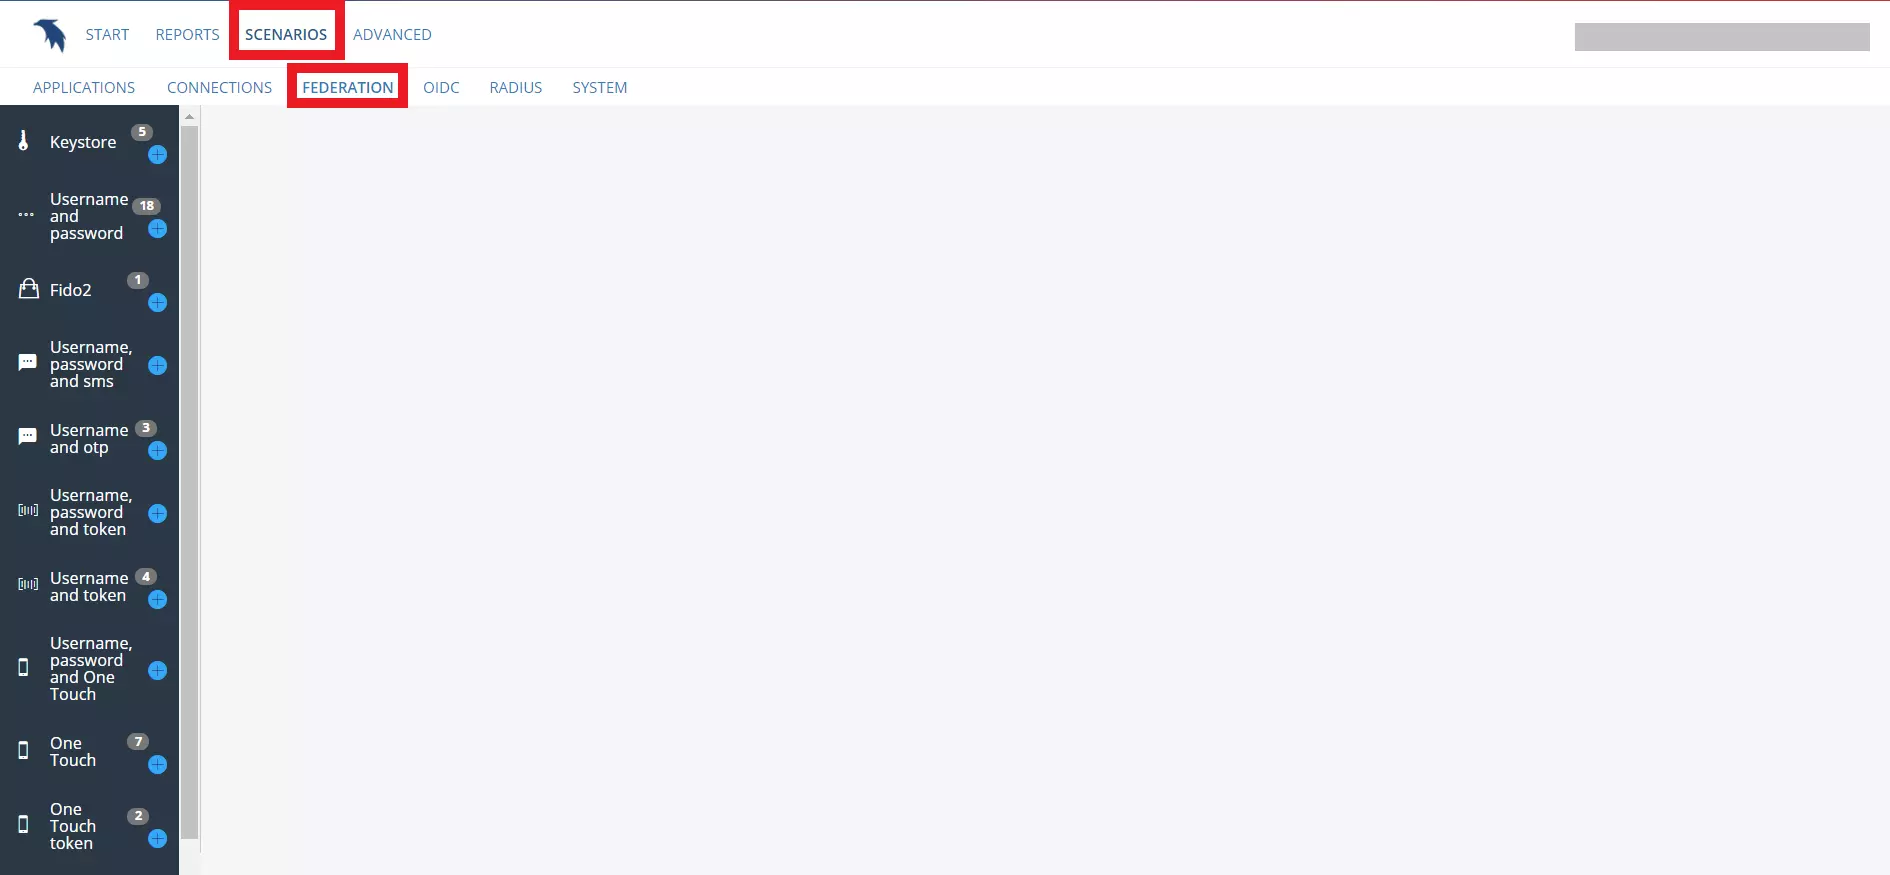
- In the left pane, scroll down and select SAML Metadata Upload and click on + sign.
- In the Metadata tab, enter the application NAME (metadata) and DESCRIPTION (optional).
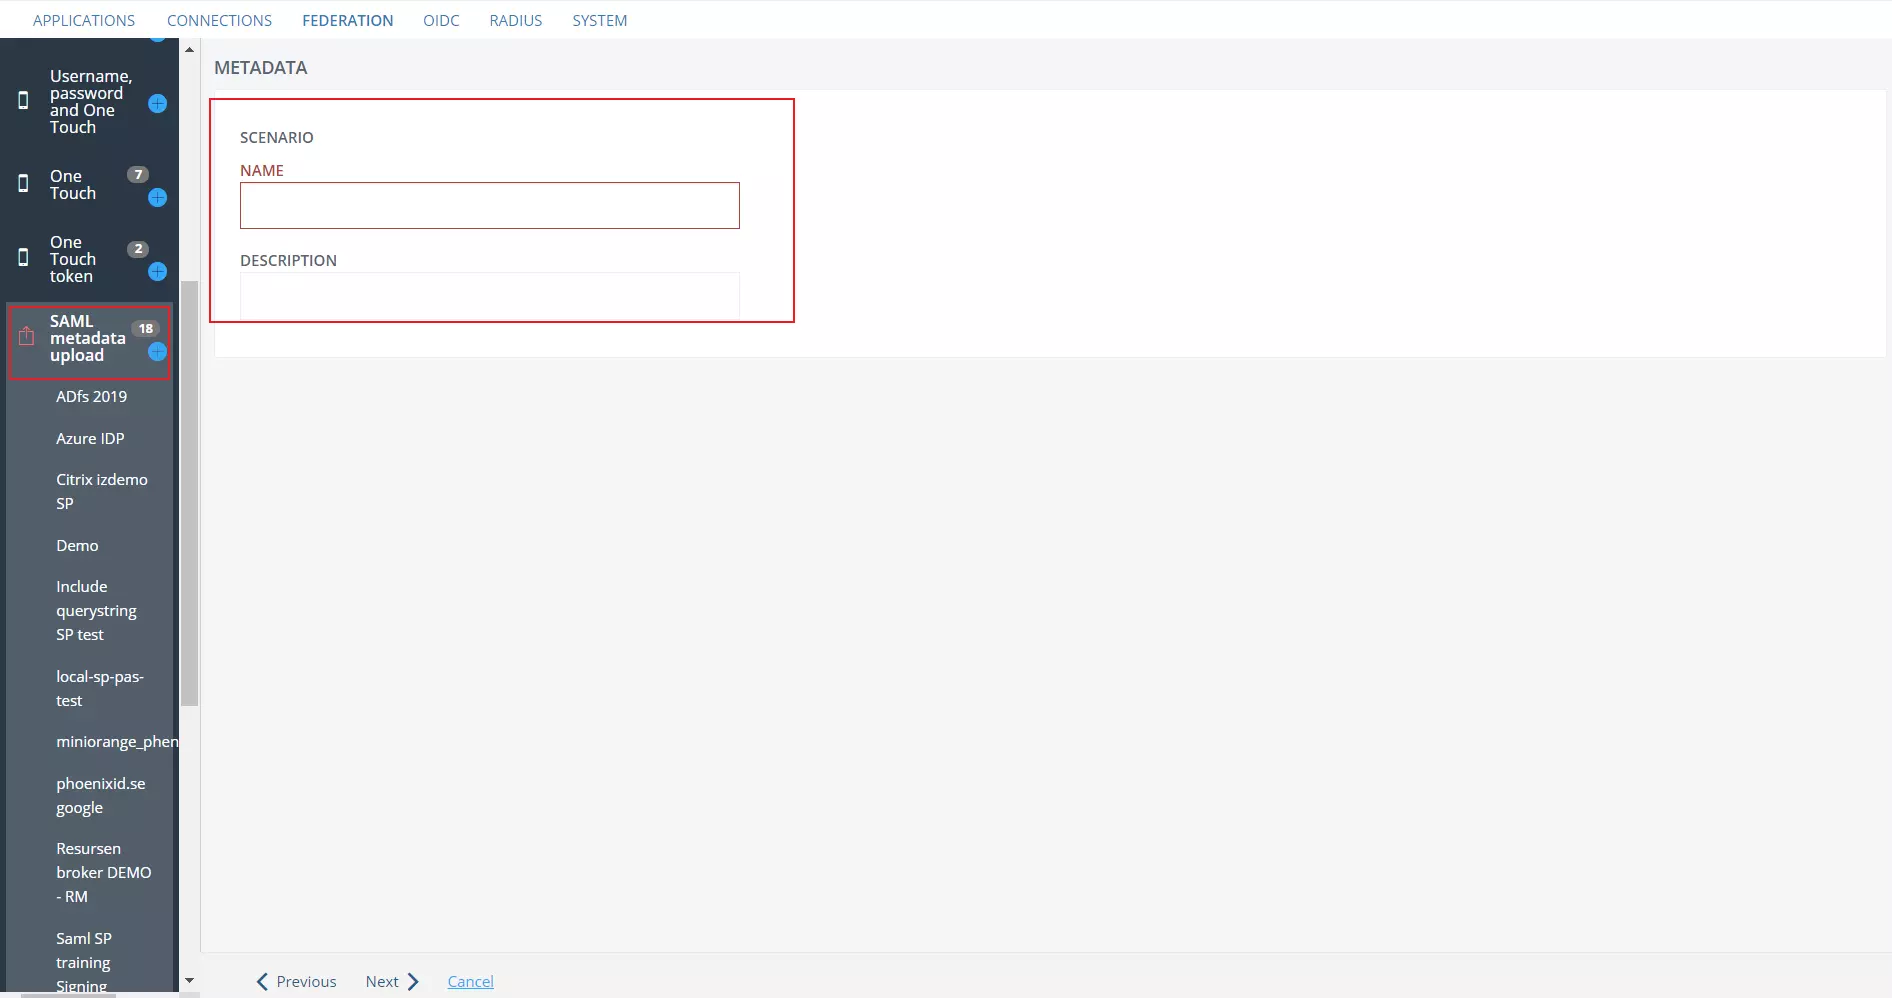
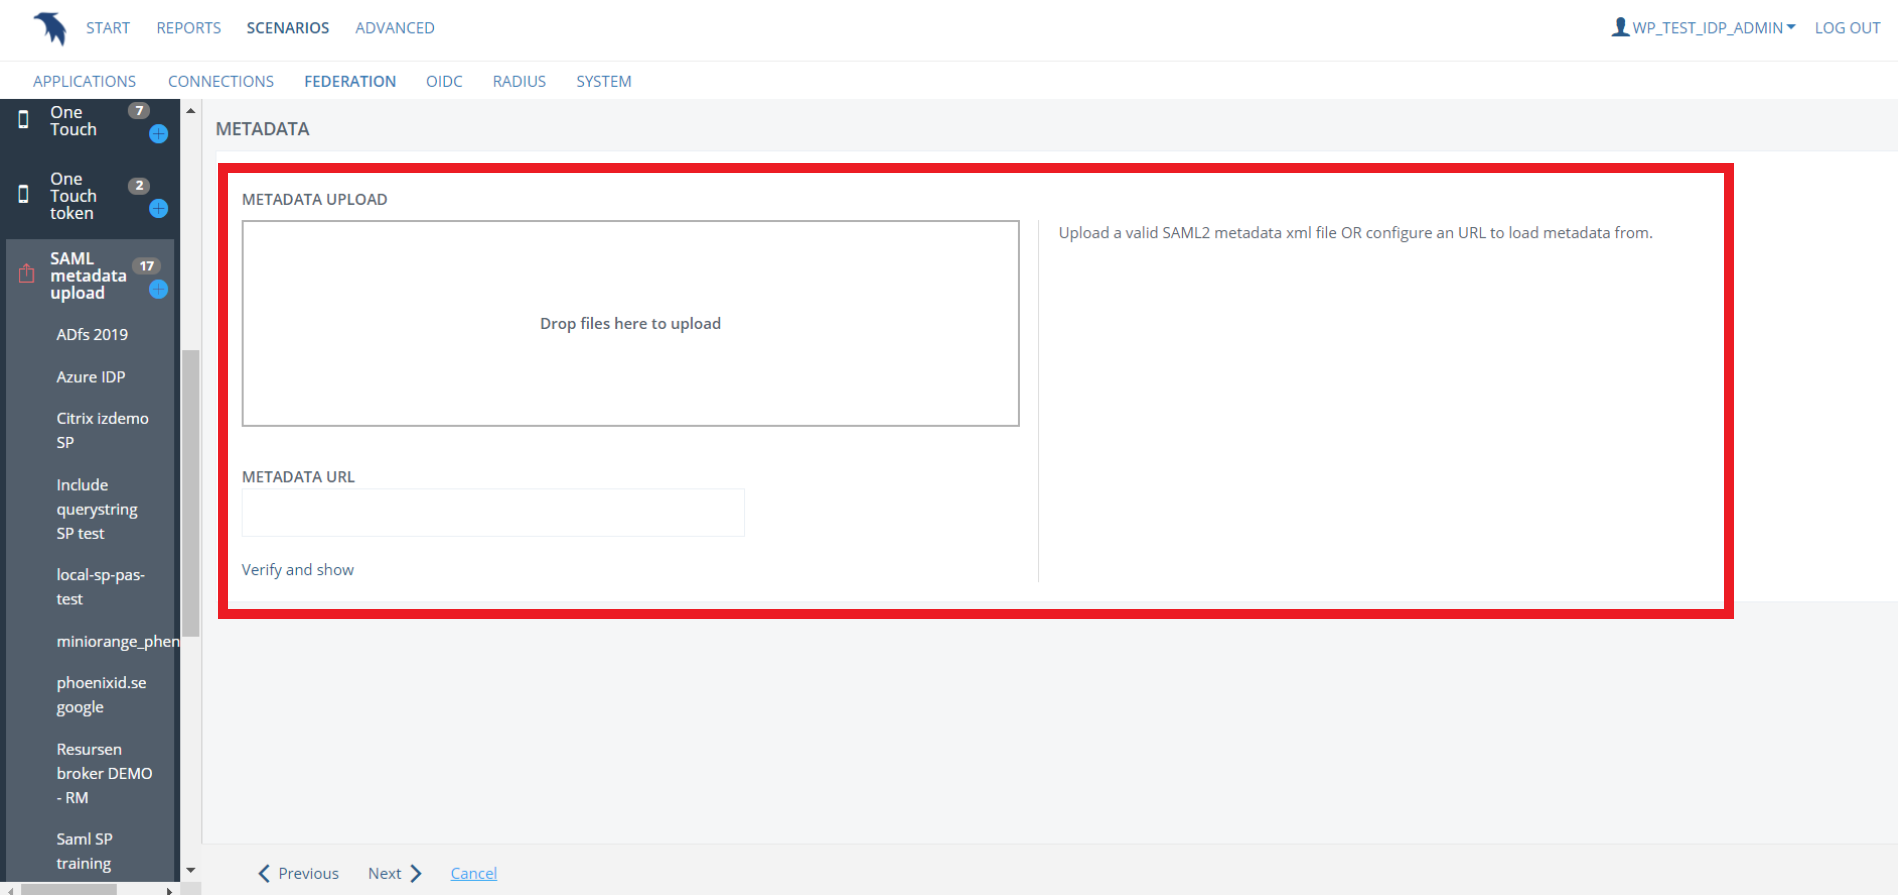
- Then click on Verify and show.
Configure Username and Password
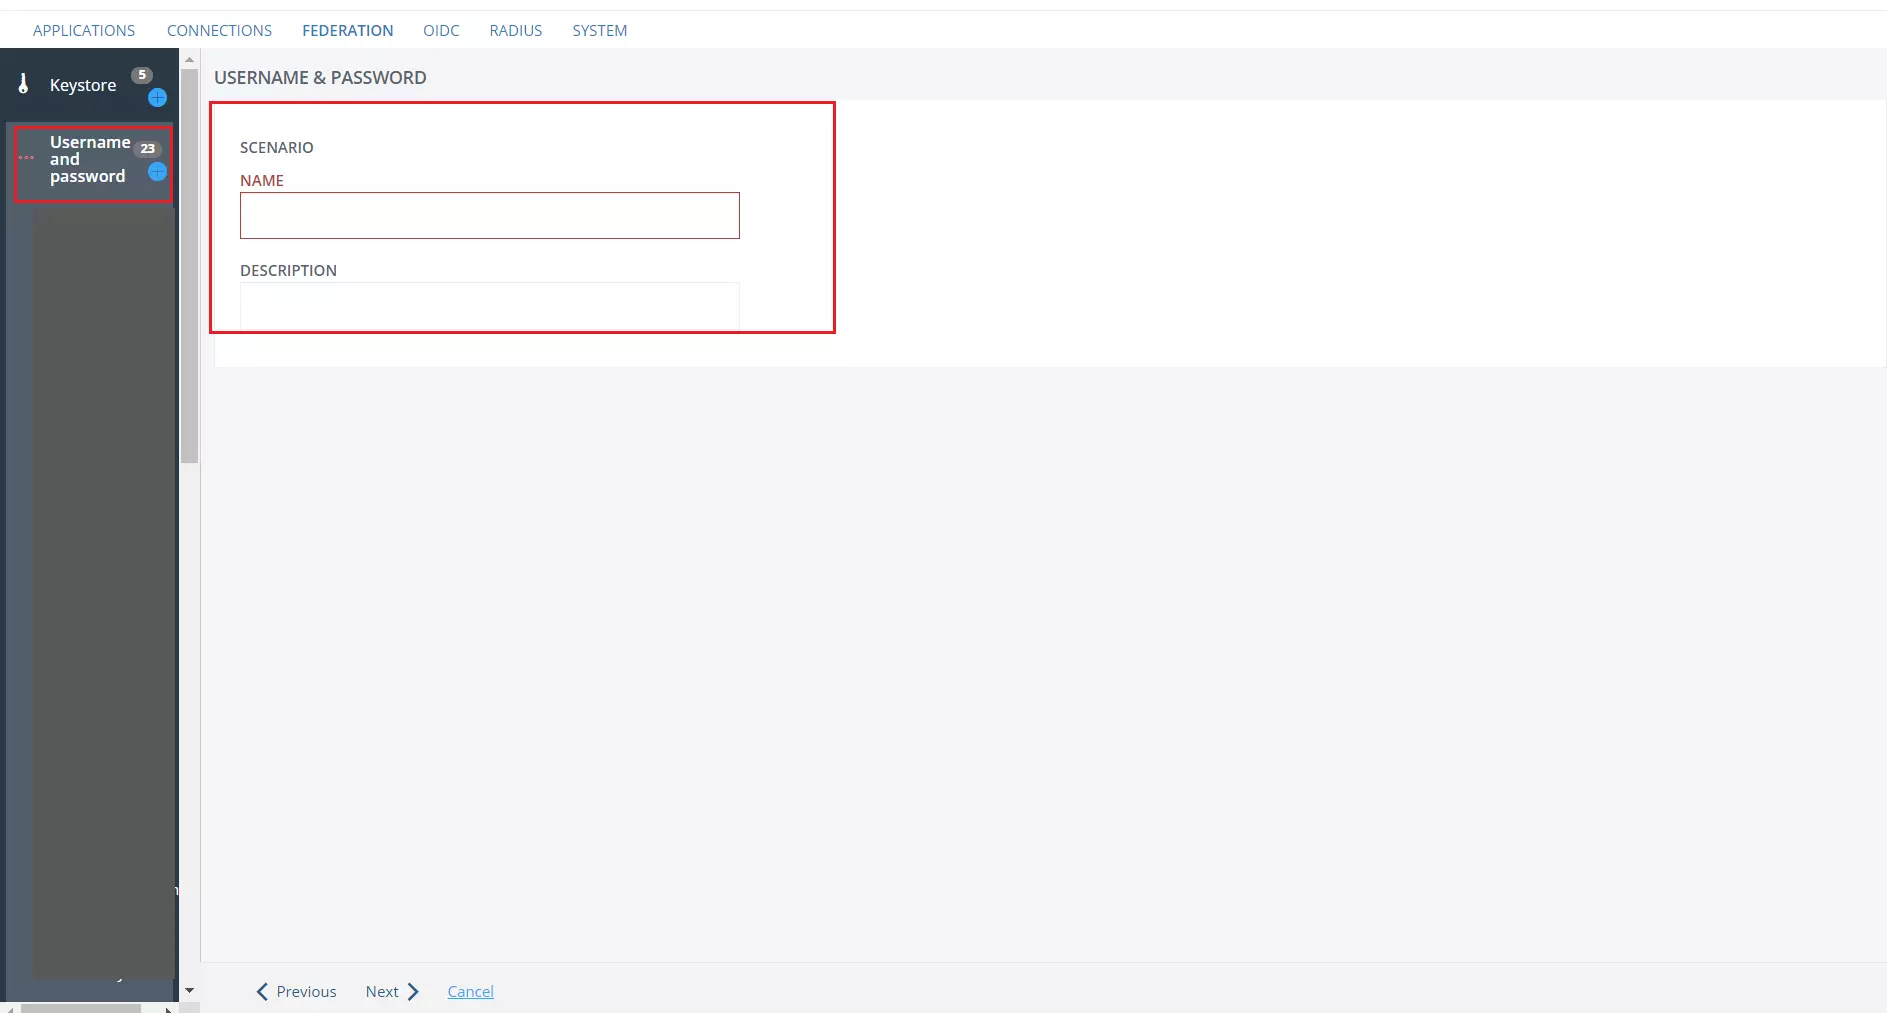
- In the left pane, select Username and Password.
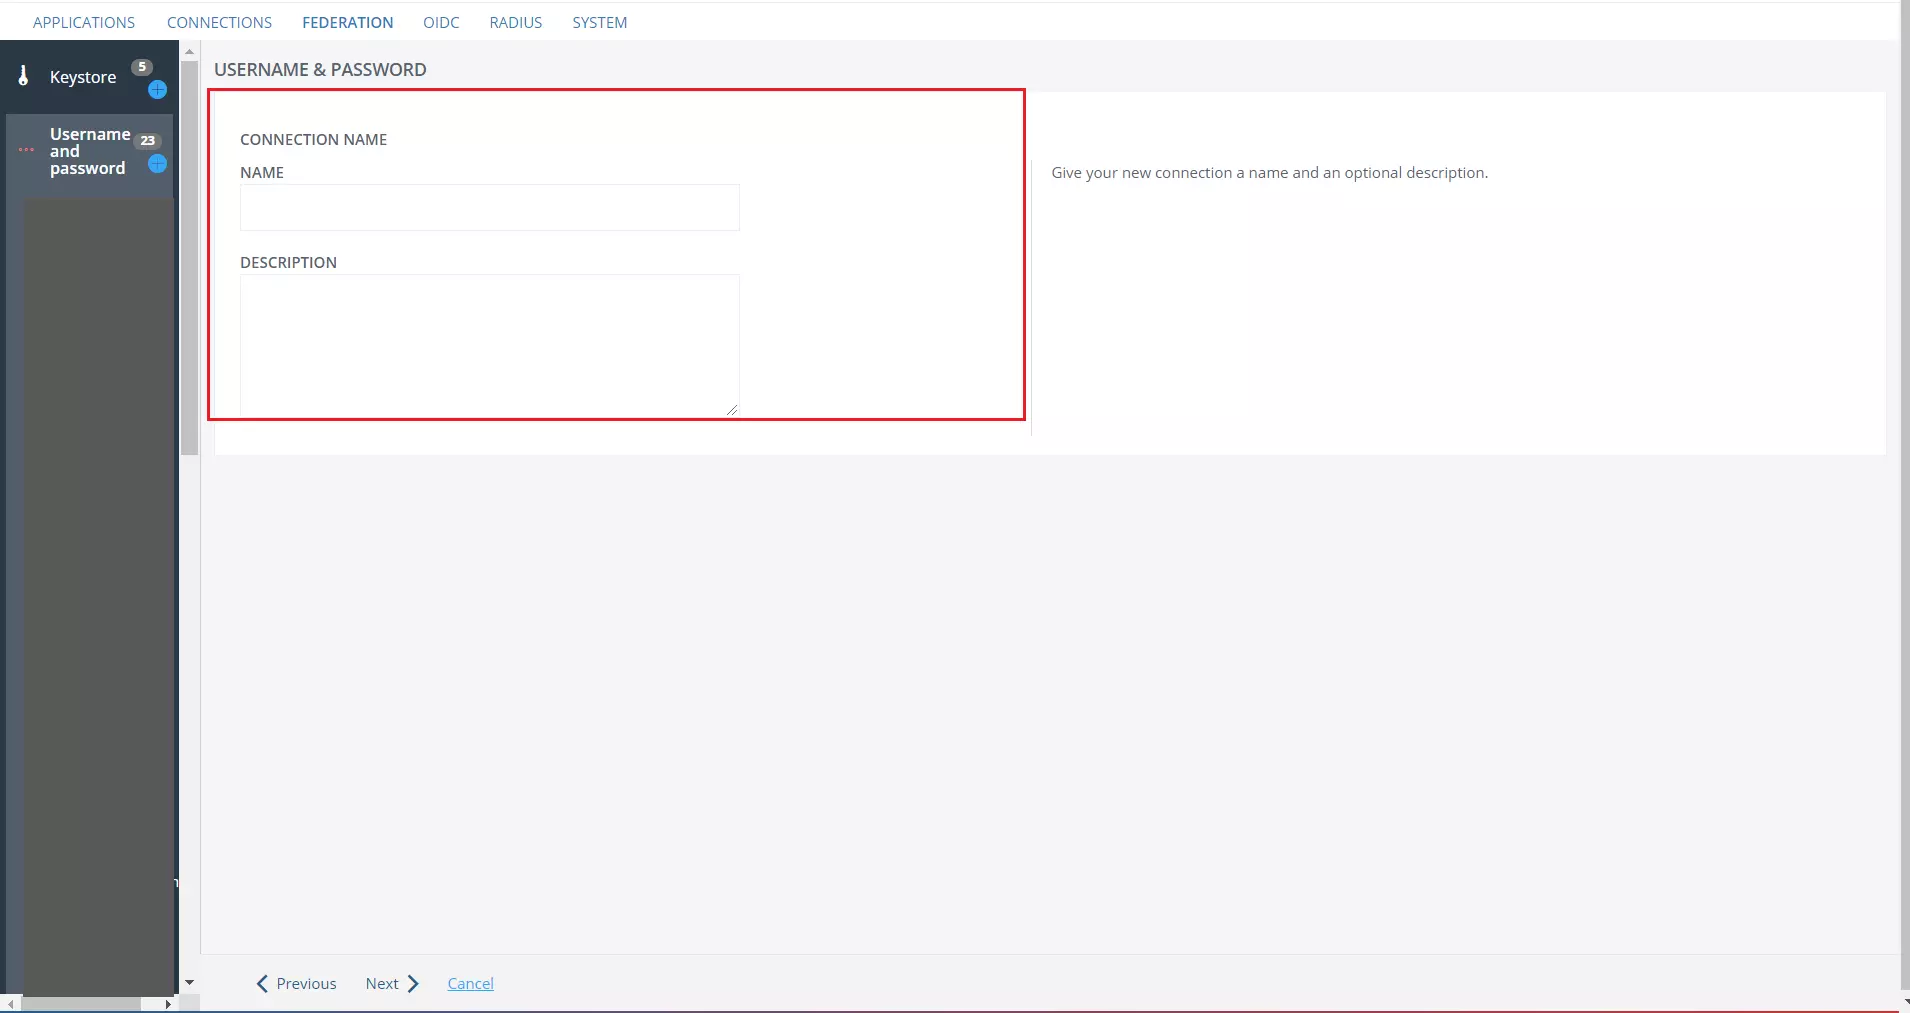
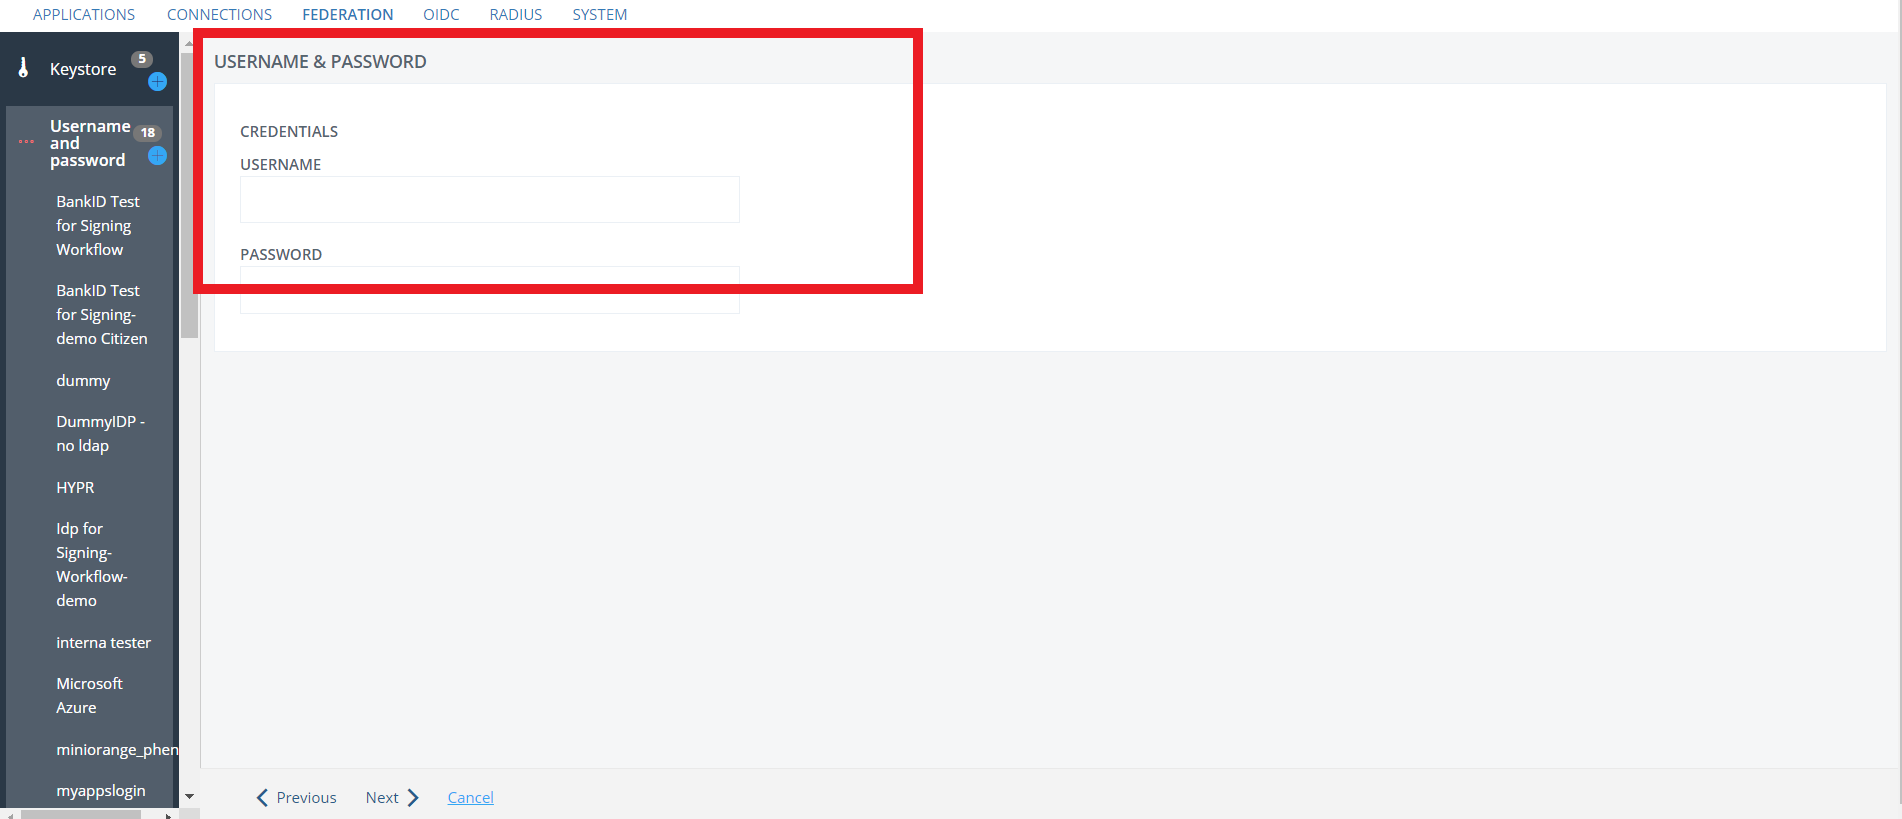
- Click on + sign to provide IDP NAME and DESCRIPTION (Optional) then click on Next.
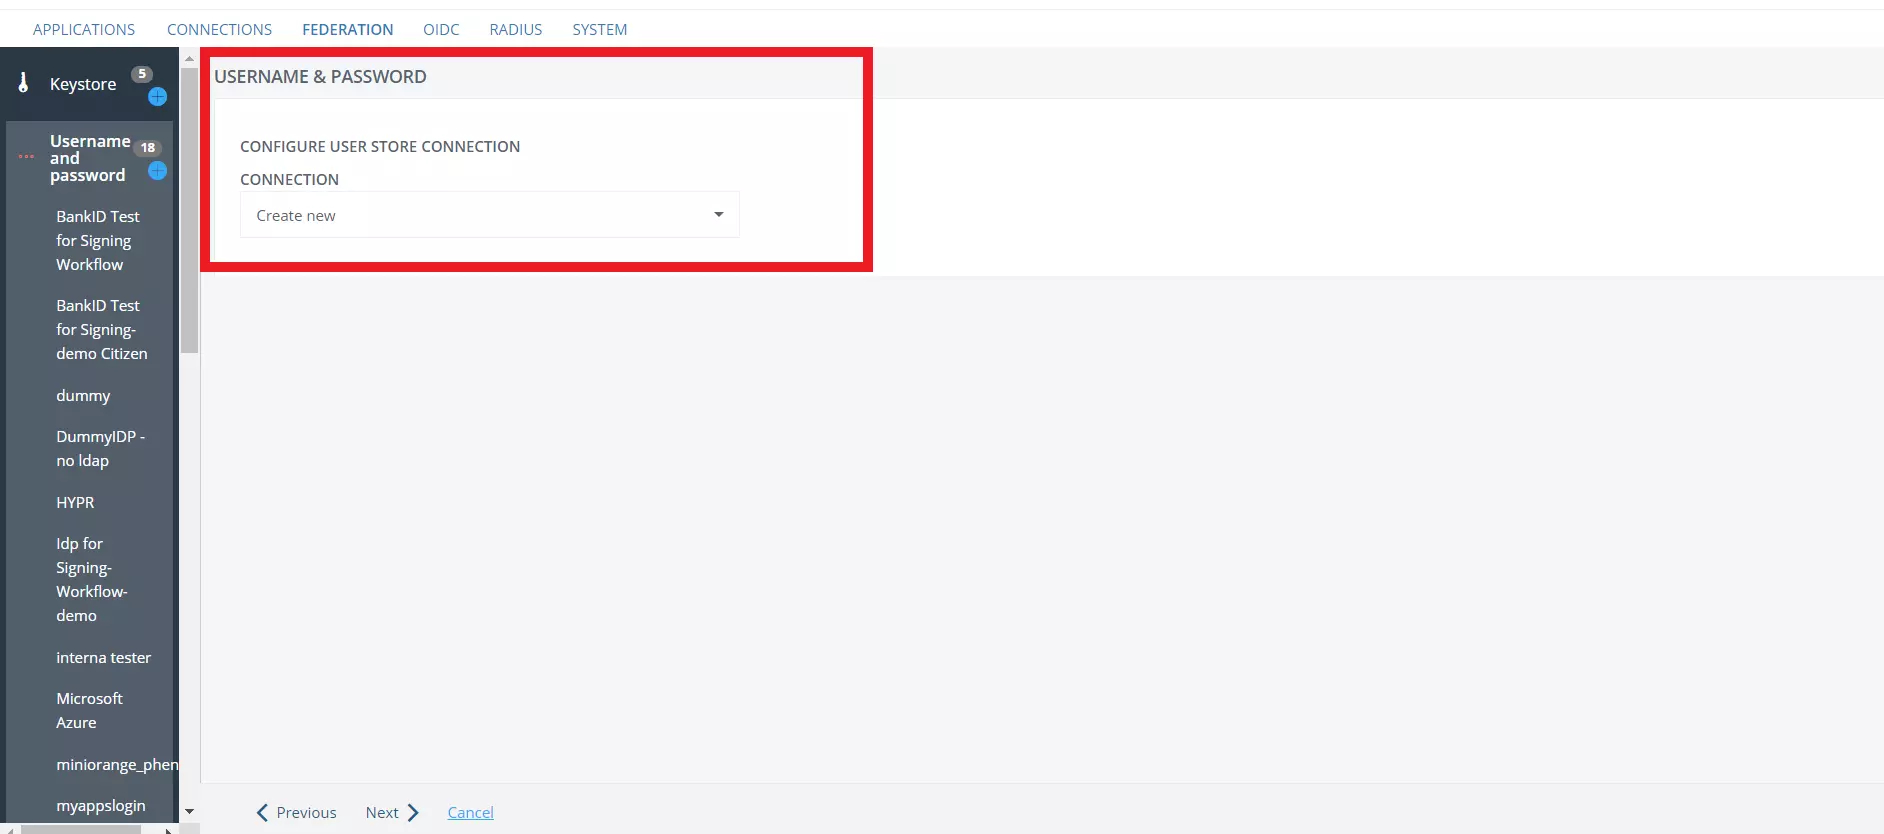
- In the CONNECTION tab, select Create New then proceed to Next page.
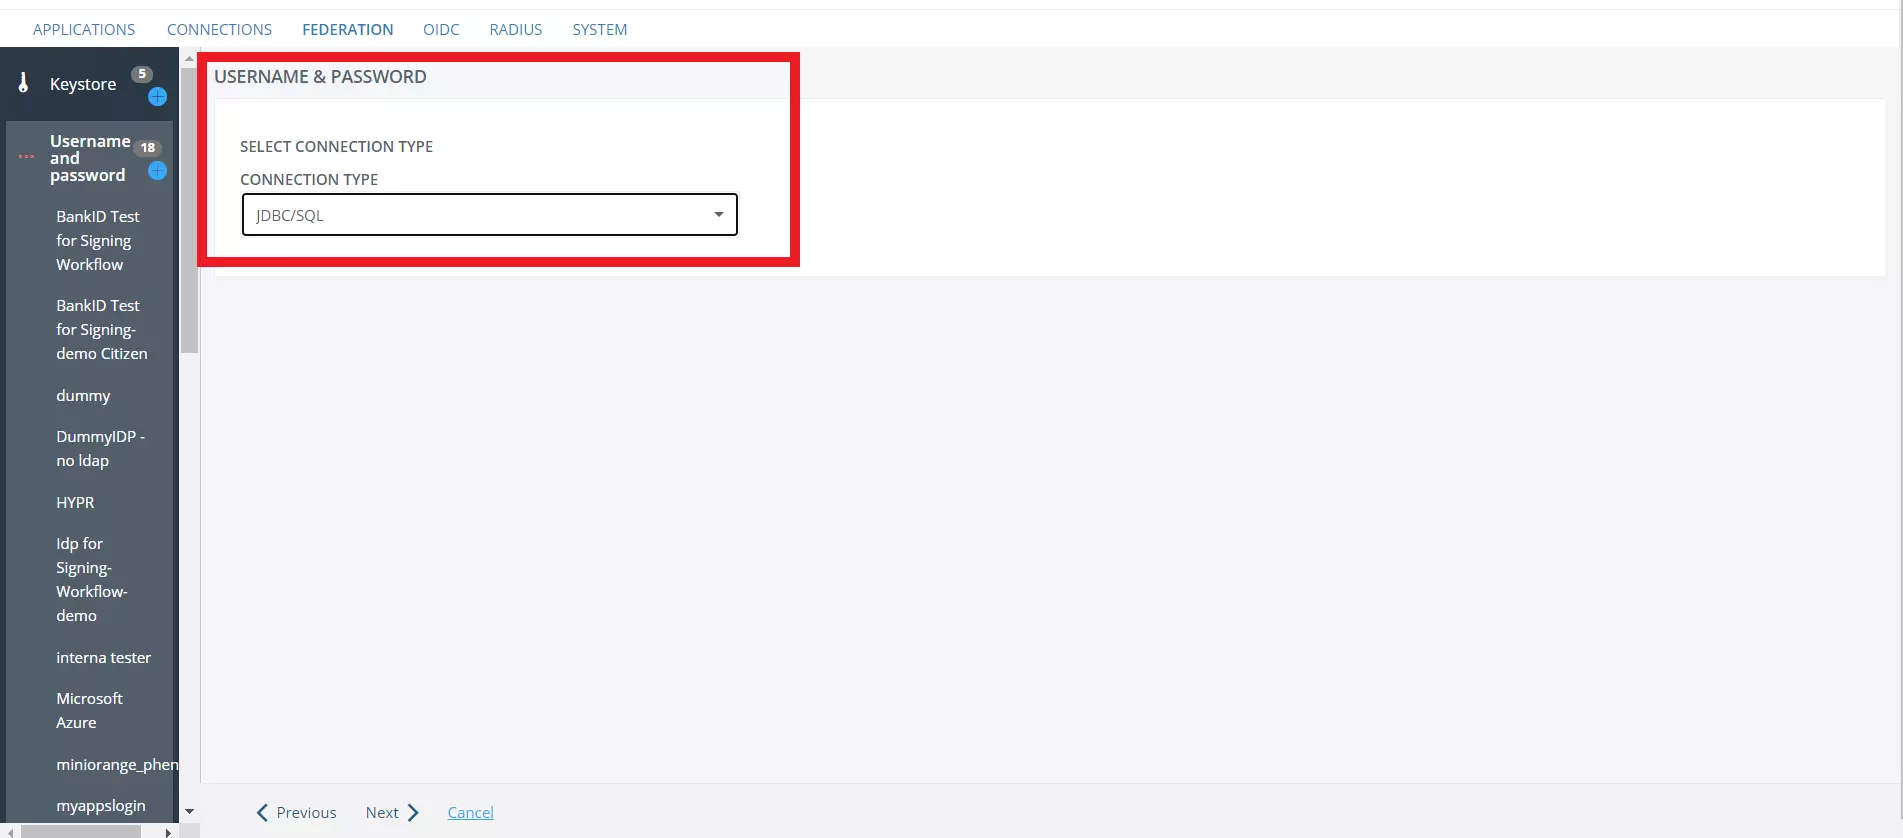
- Choose the required Connection Type from the SELECT CONNECTION TYPE dropdown.
- Give your connection a NAME and DESCRIPTION (Optional) and then click on Next.
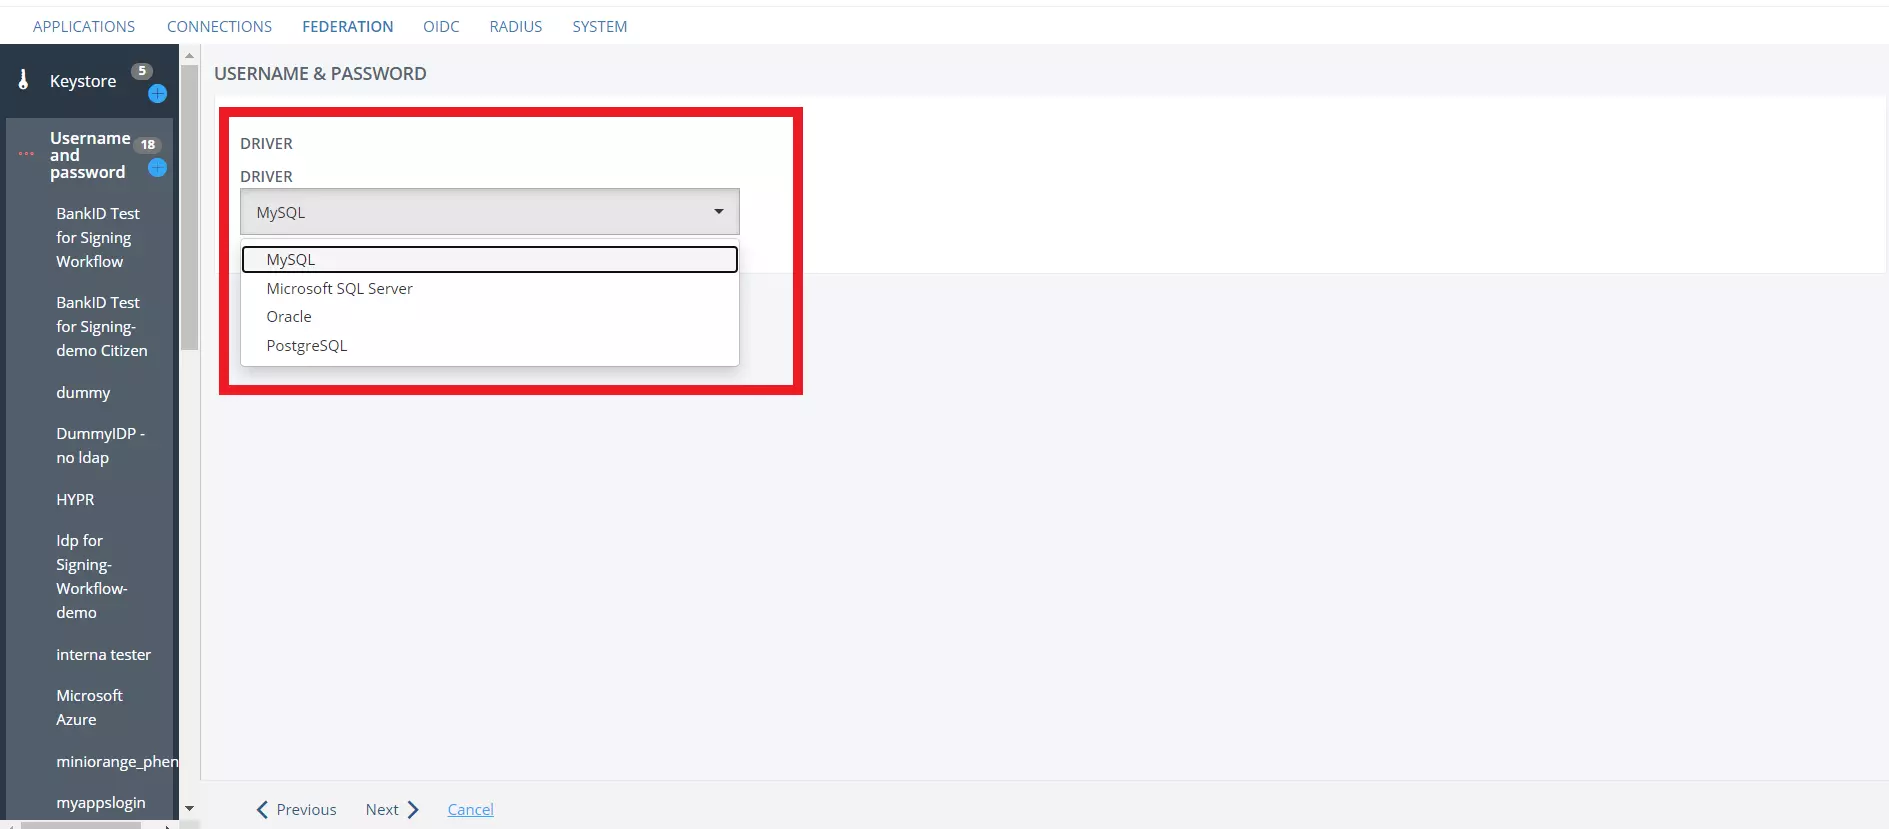
- In the Driver tab, select the database driver according to your database and proceed to next screen.
- Under CONNECTION DETAILS enter your database HOST.

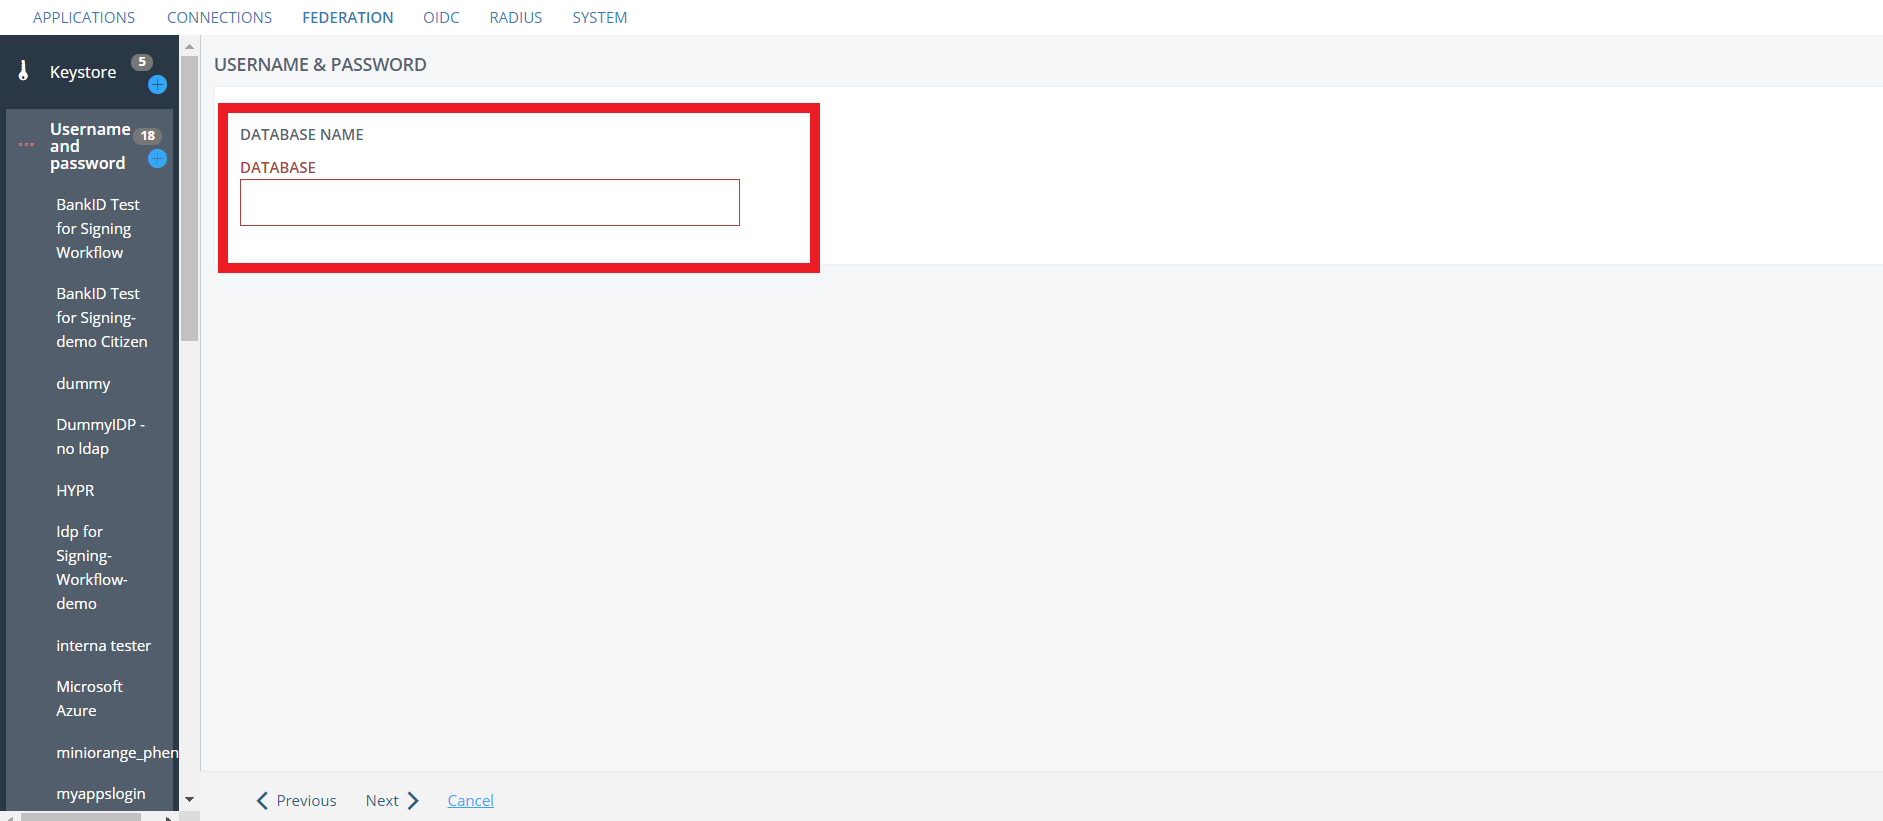
- Enter your DATABASE NAME.
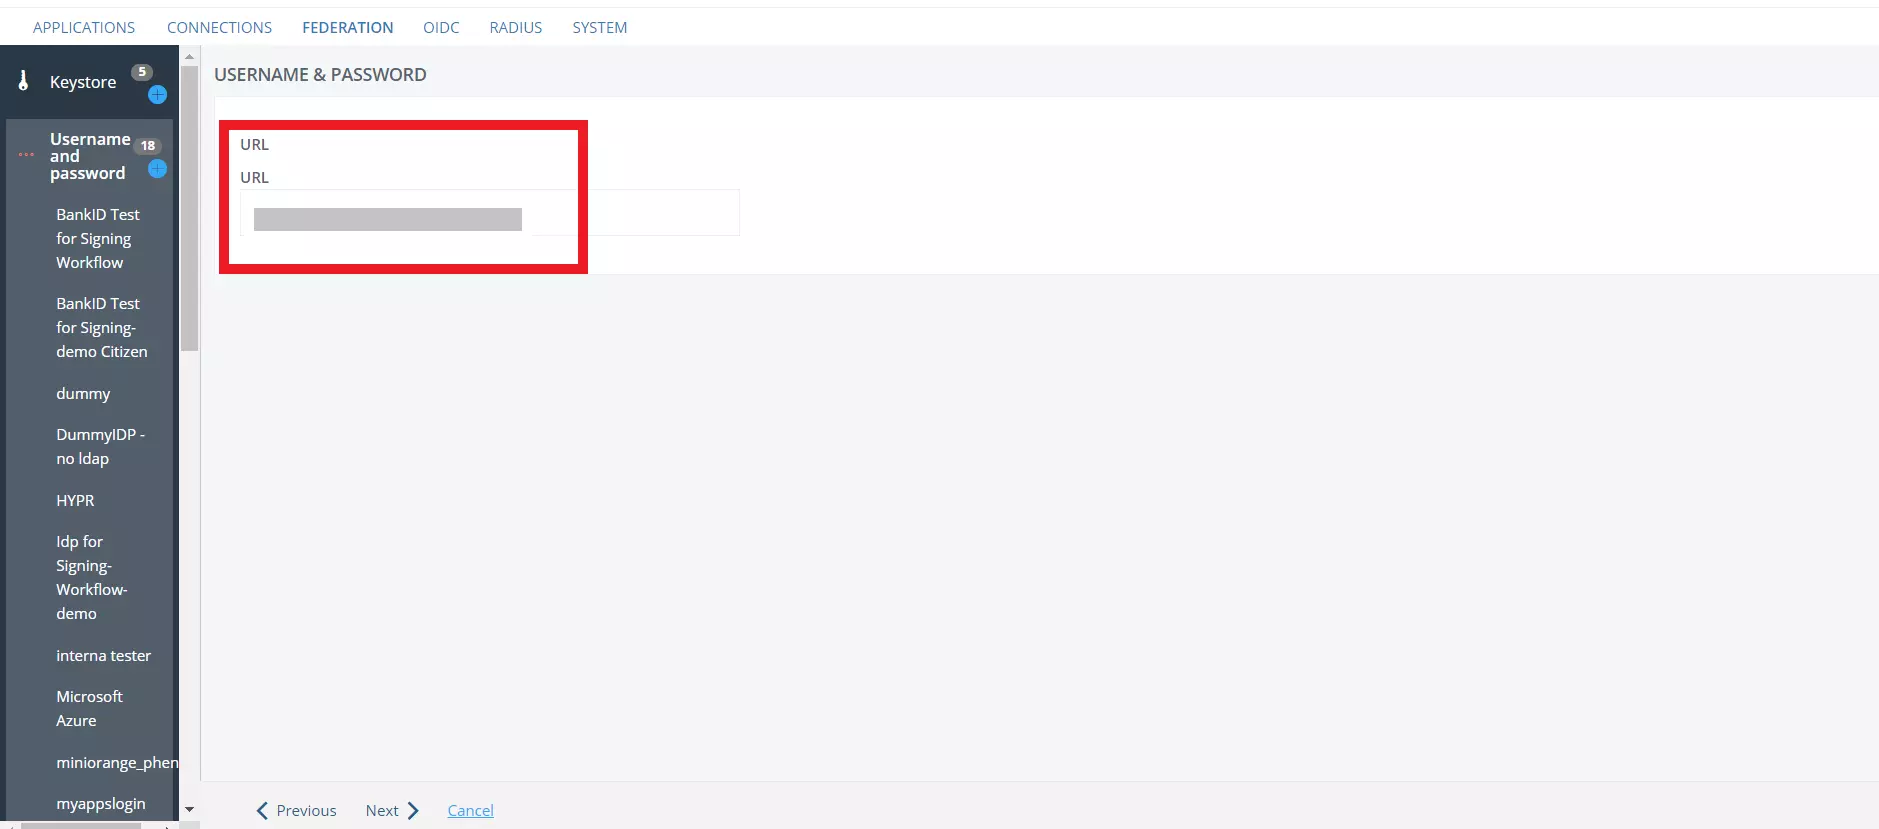
- The console will now provide you with your database connection URL, verify it and click on Next.
- Under the Credentials tab enter your database Username and Password.
Configure the Database
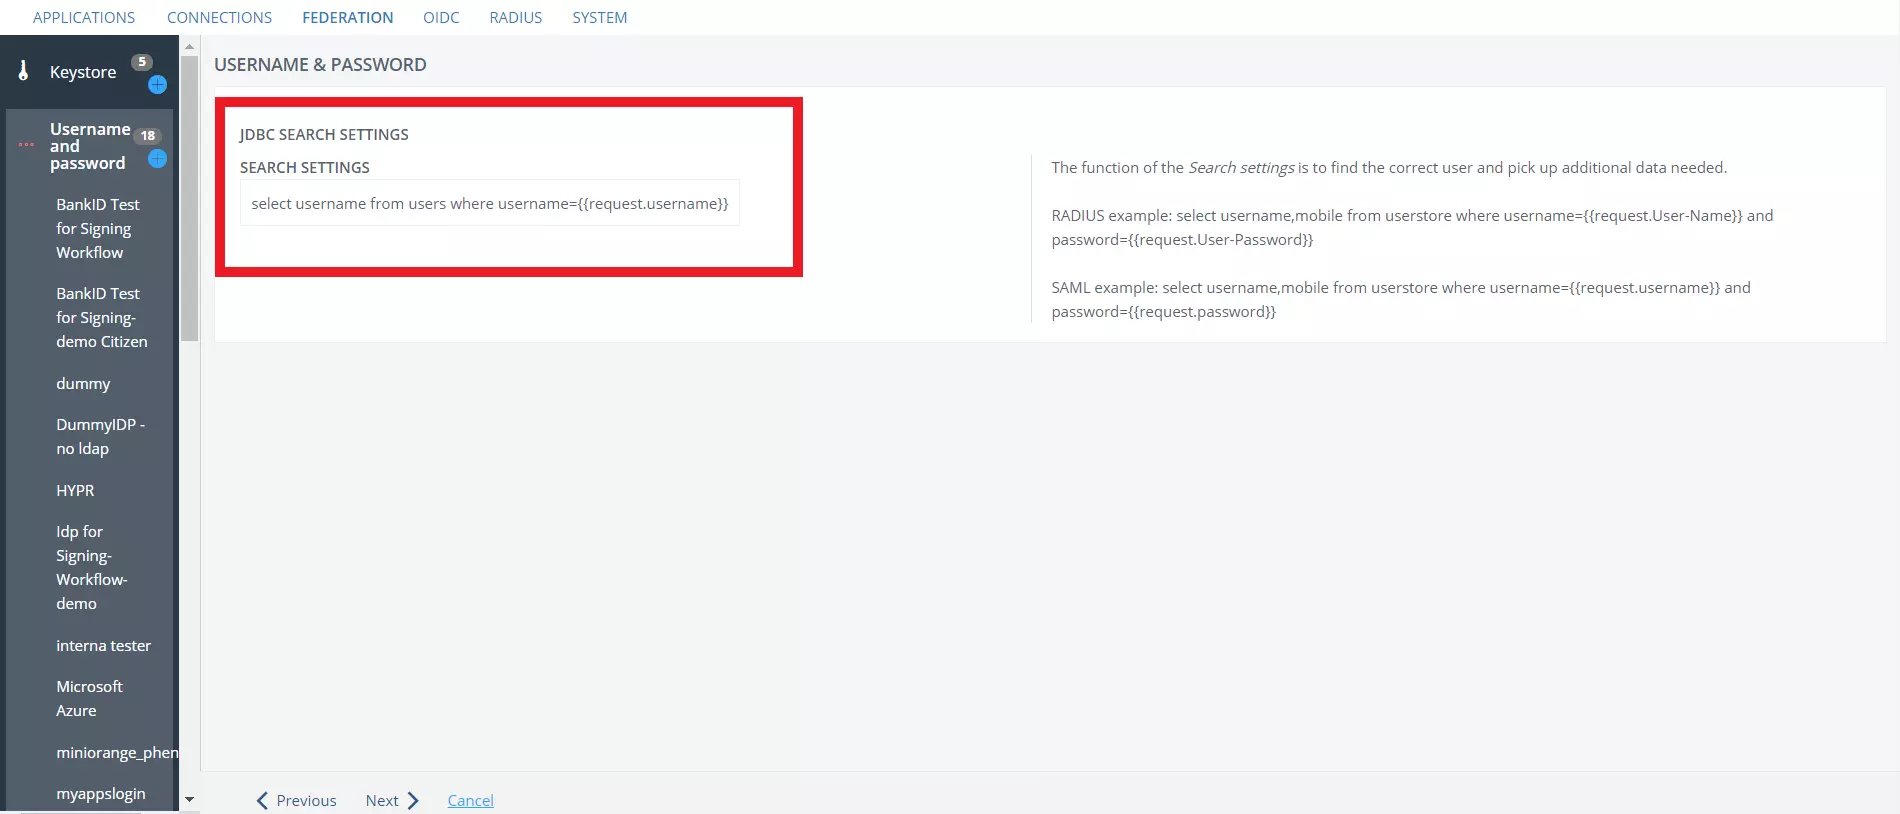
- In the JDBC SEARCH SETTINGS tab, provide the database query required for mapping the attributes.
- Make sure that attributes givenName, mail and sn are returned in the query then click on Next.
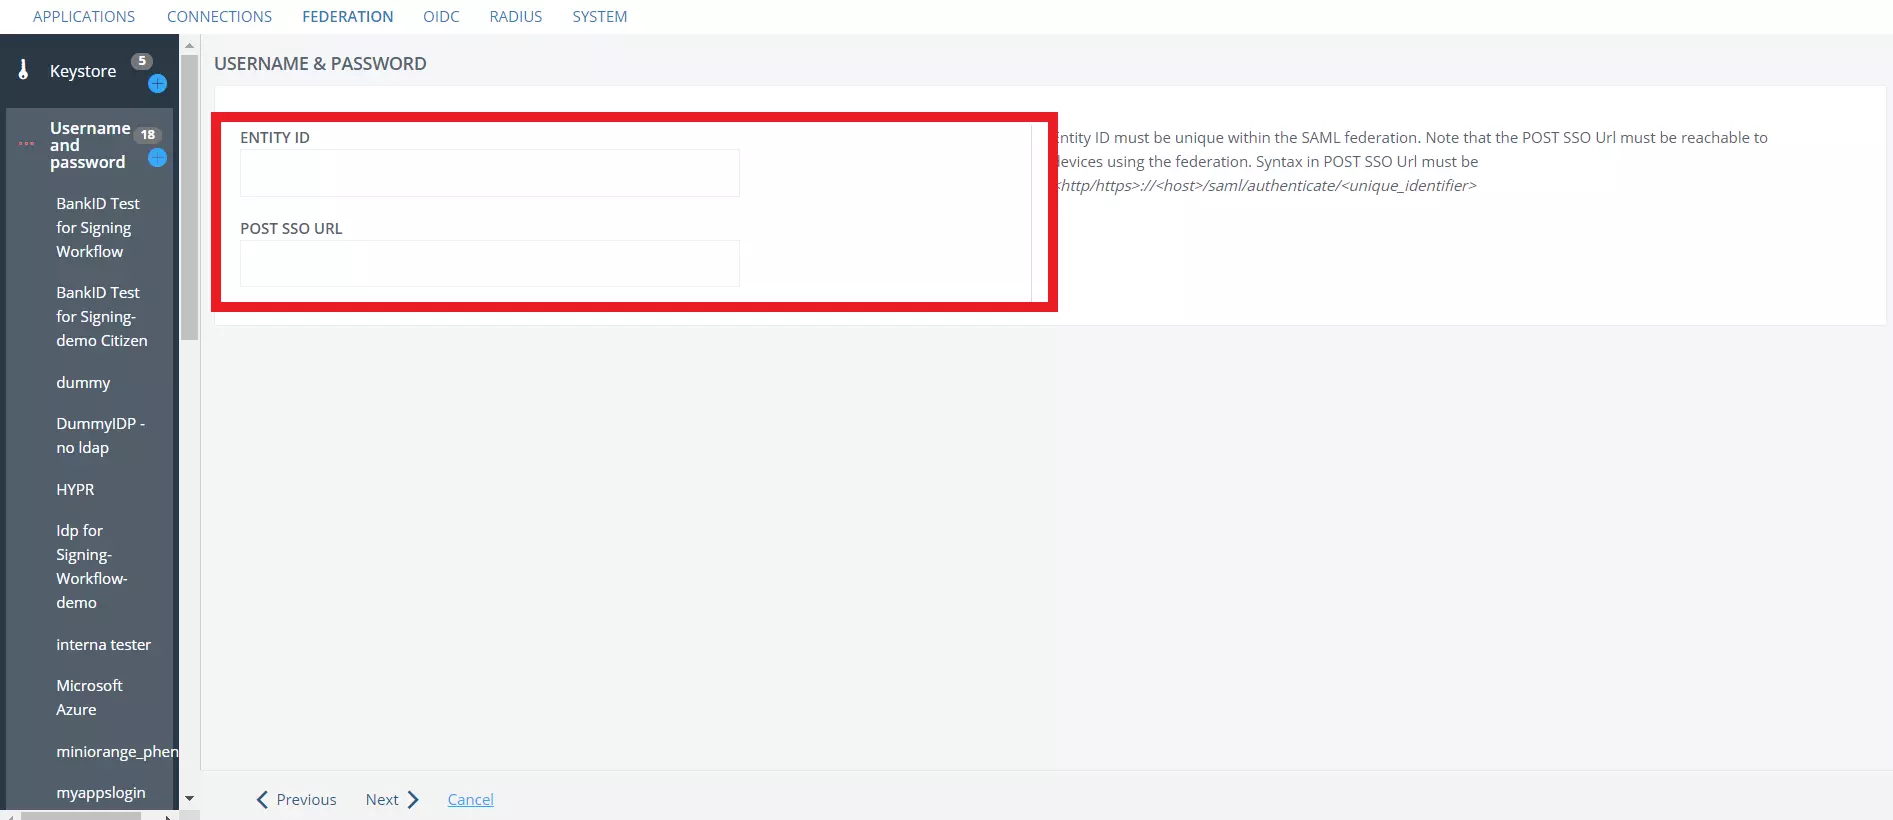
- Now create an Entity ID for your IDP and make sure it is unique.
- Also provide a POST SSO URL in the format specified.
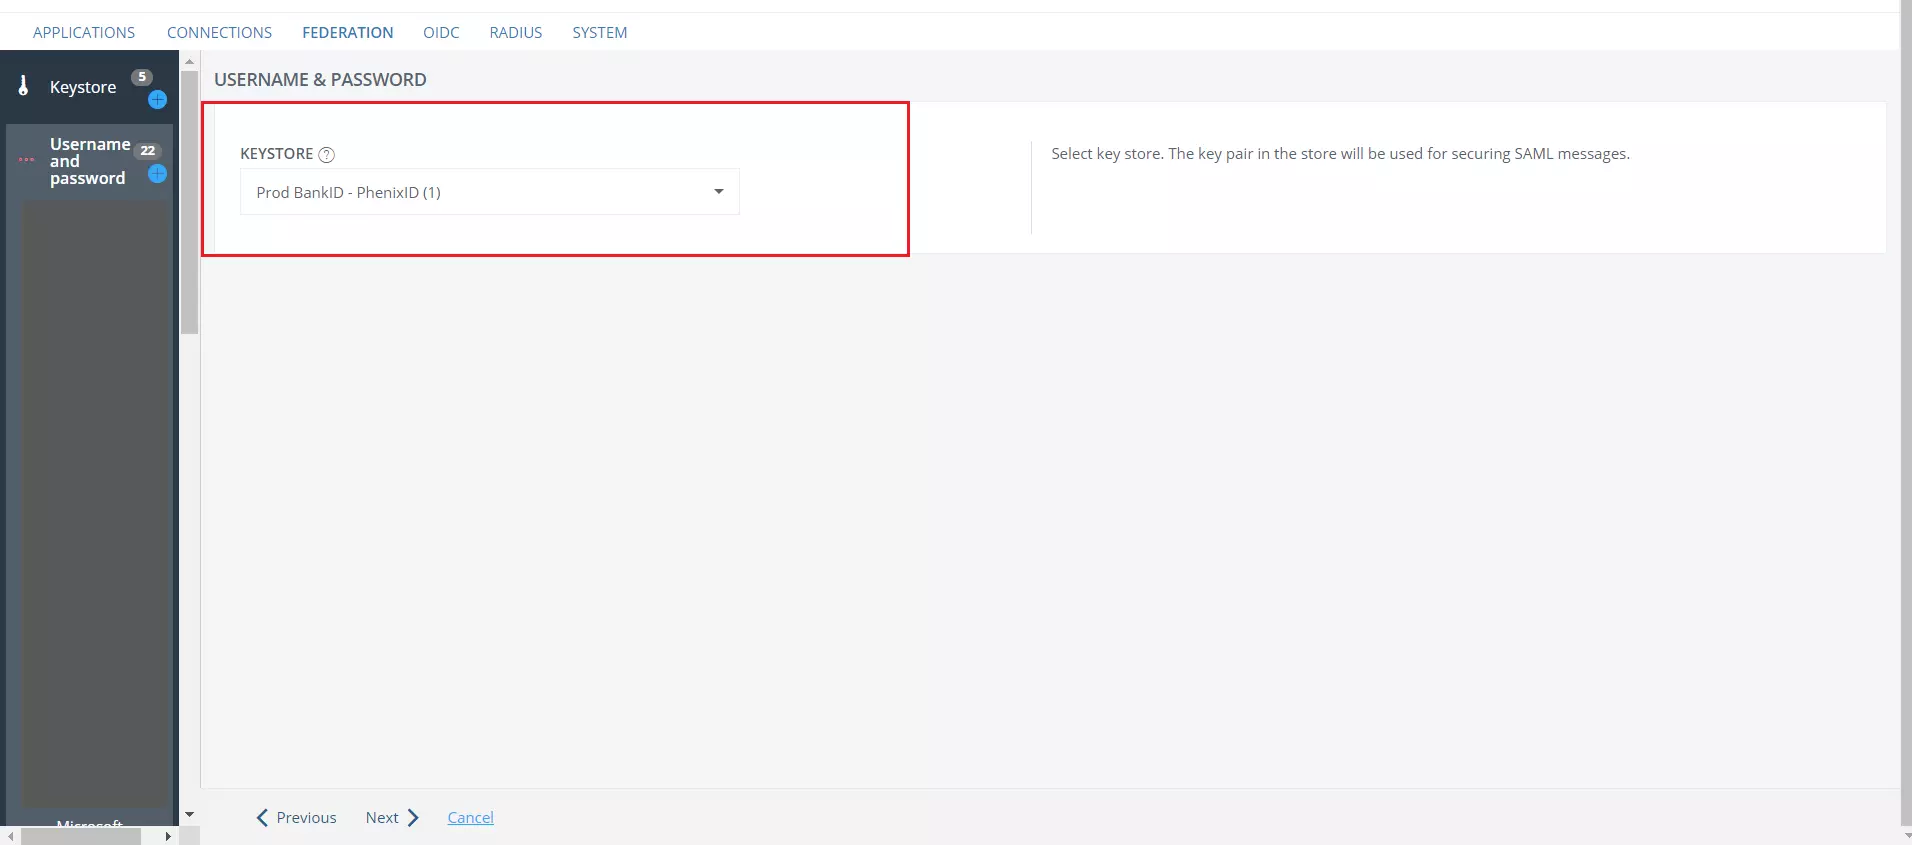
- Next screen will show you the Keystore tab, you can choose Keystore of your choice or can keep it as a default.
- Click on Next.
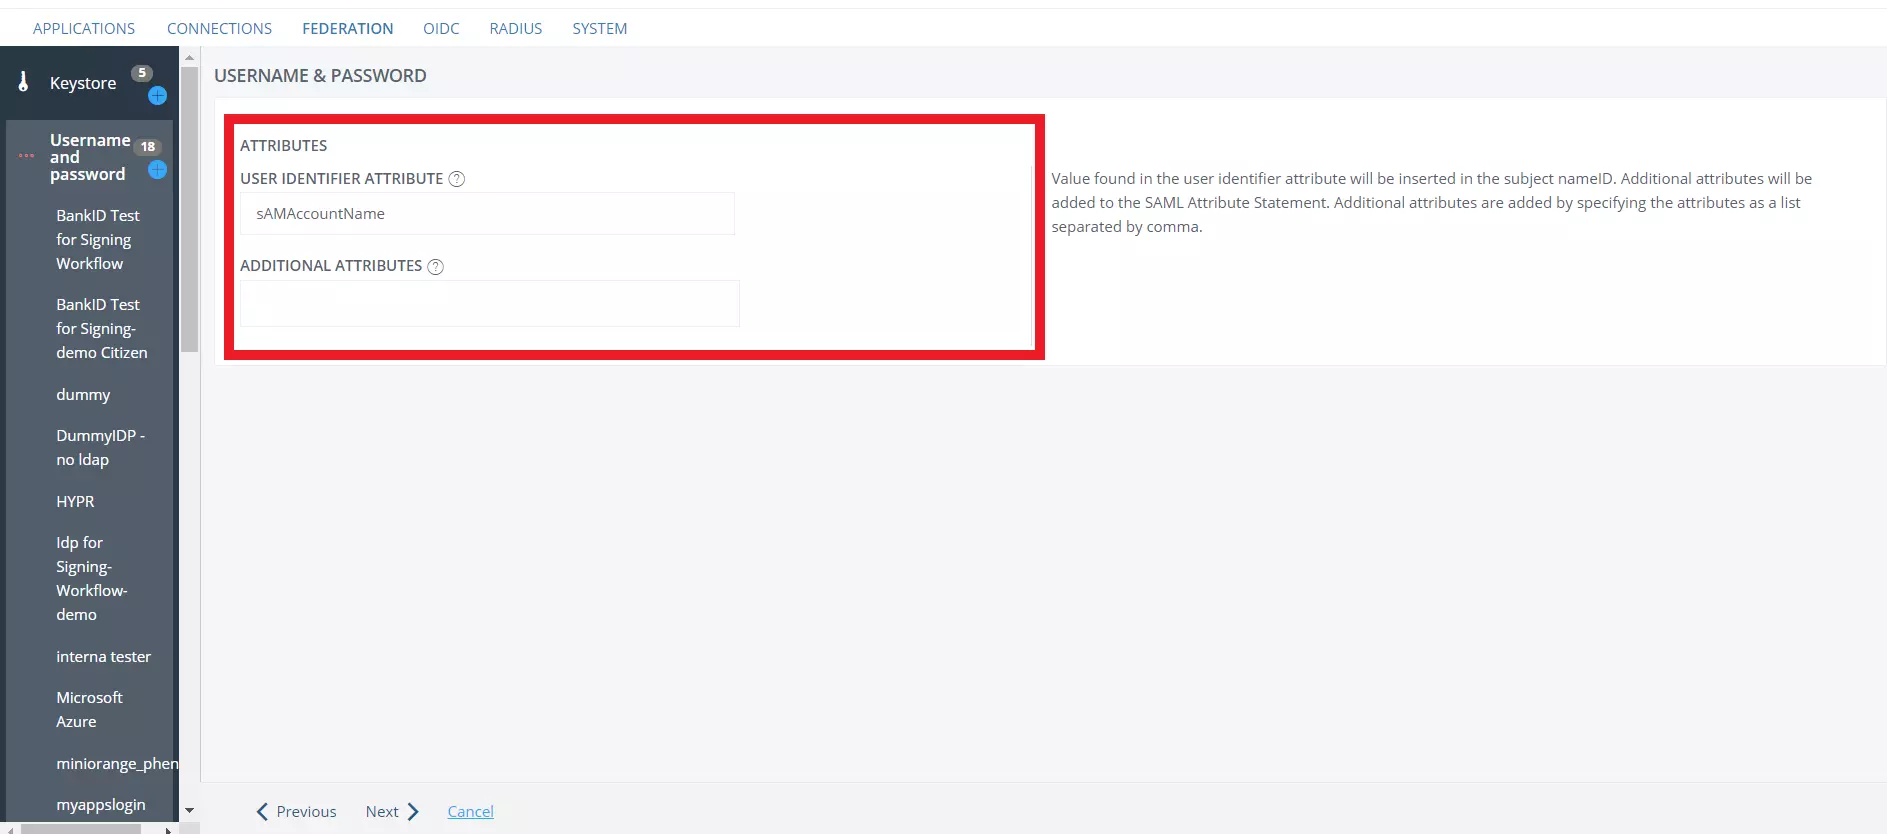
- In the Attributes tab, enter the User Identifier attribute and additional attributes if there are any and proceed to the next screen.
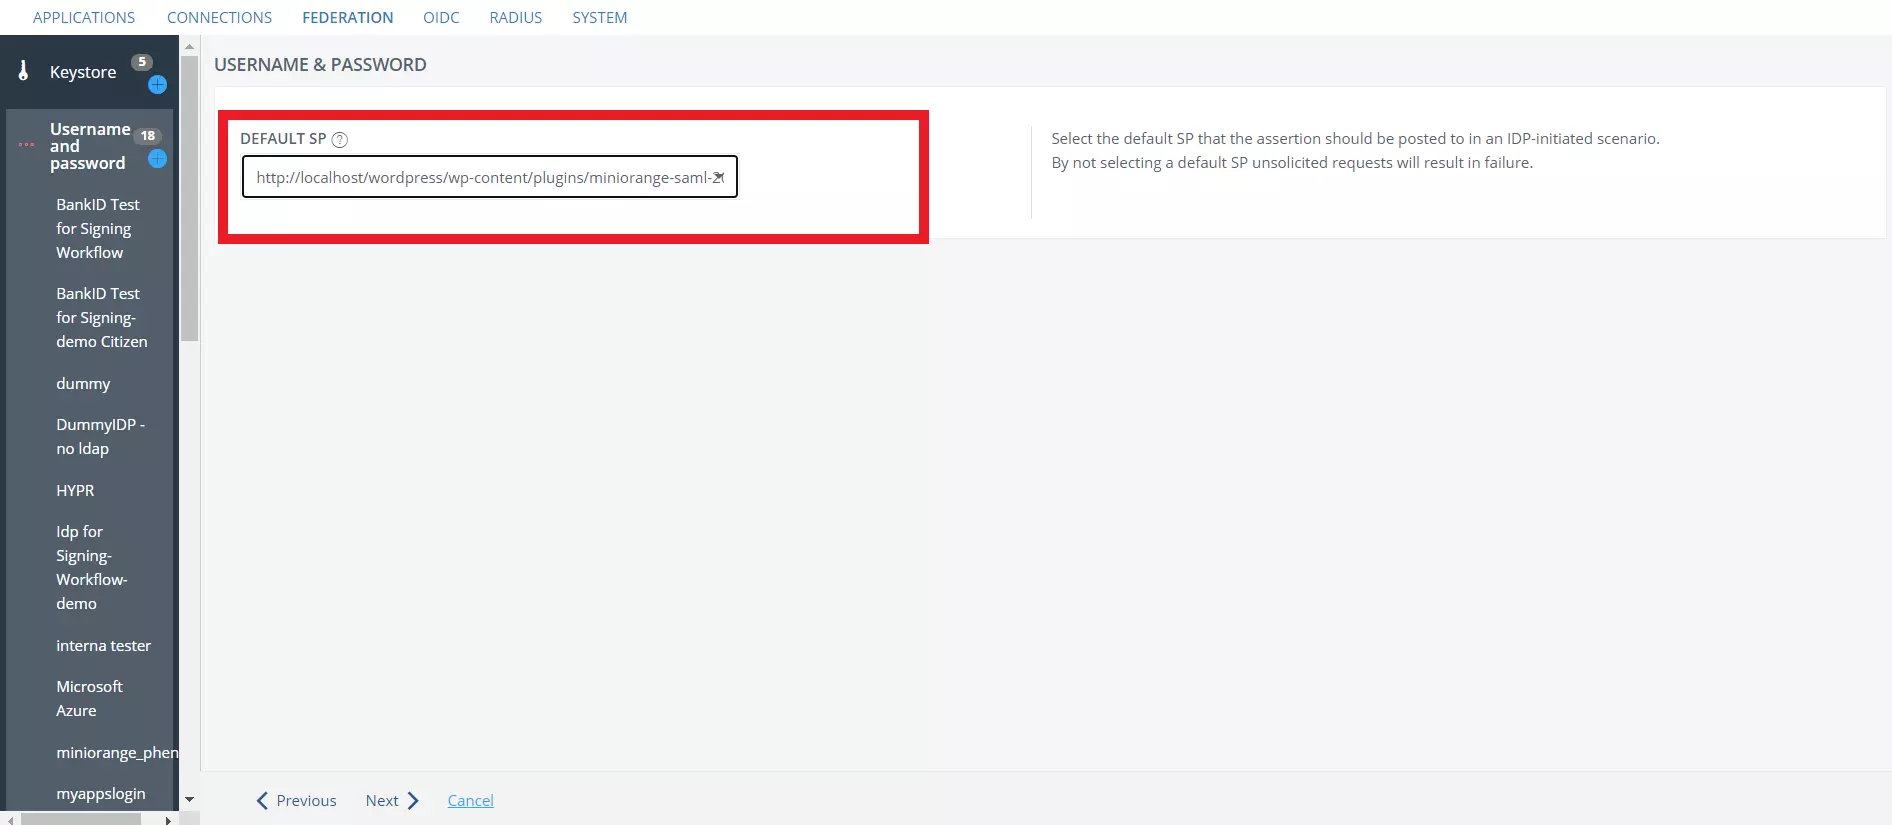
- Select the SP you previously set up as Default SP from the dropdown.
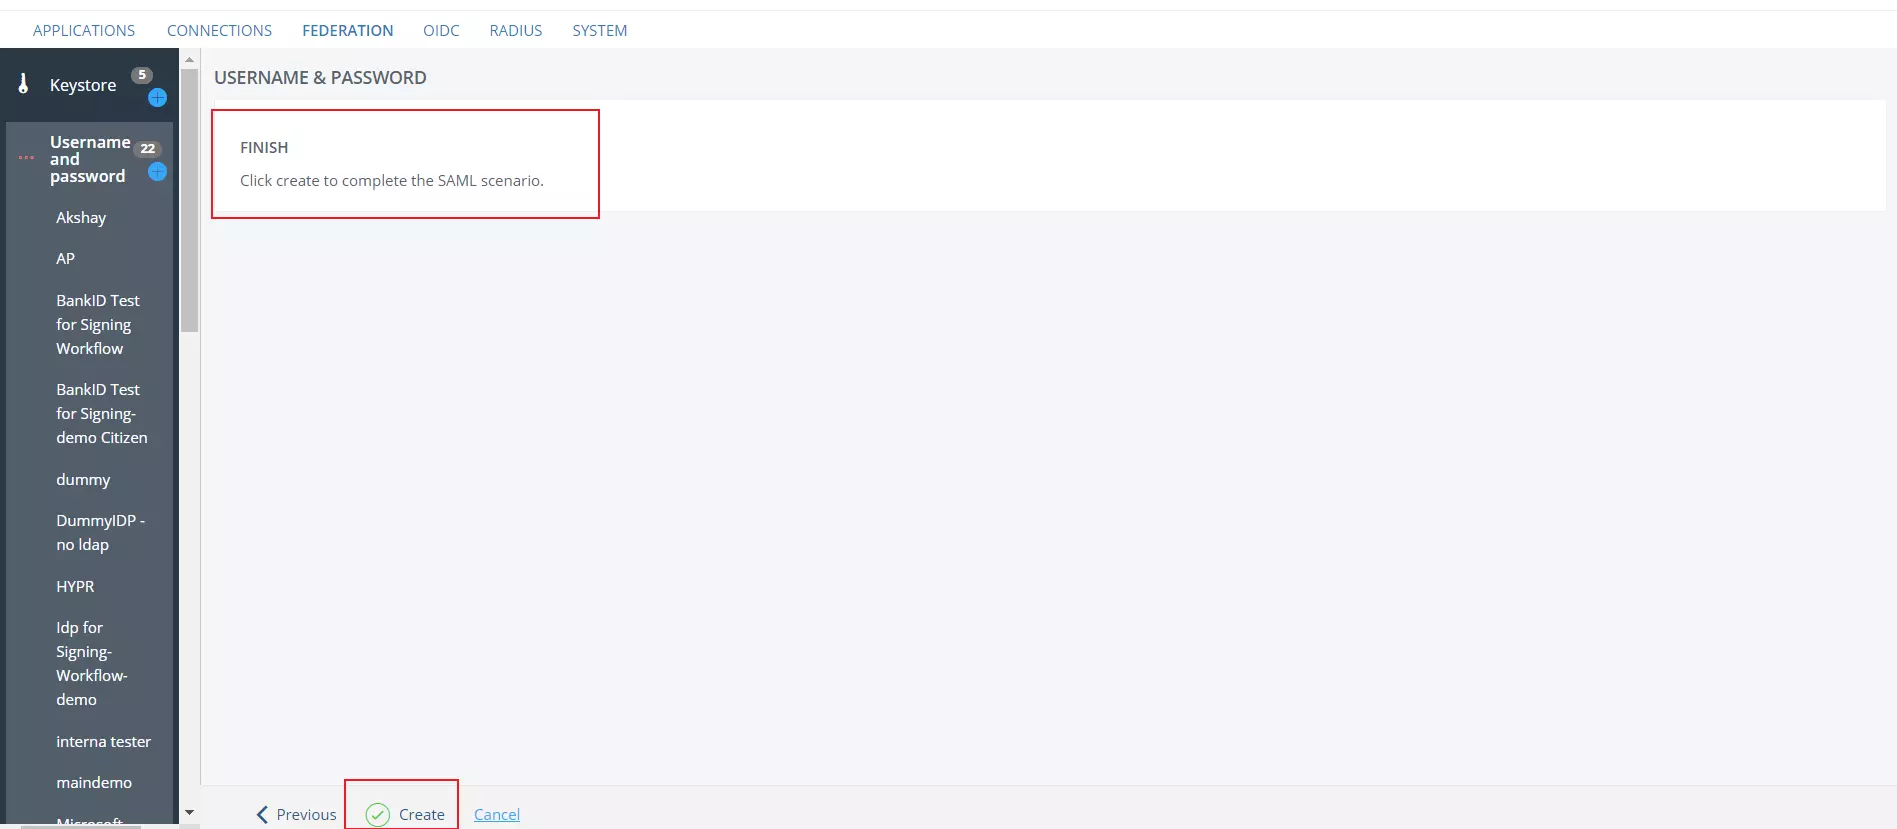
- Click on Create to complete the setup.
- You can find your IDP listed on sidebar as submenu to Username and Password.
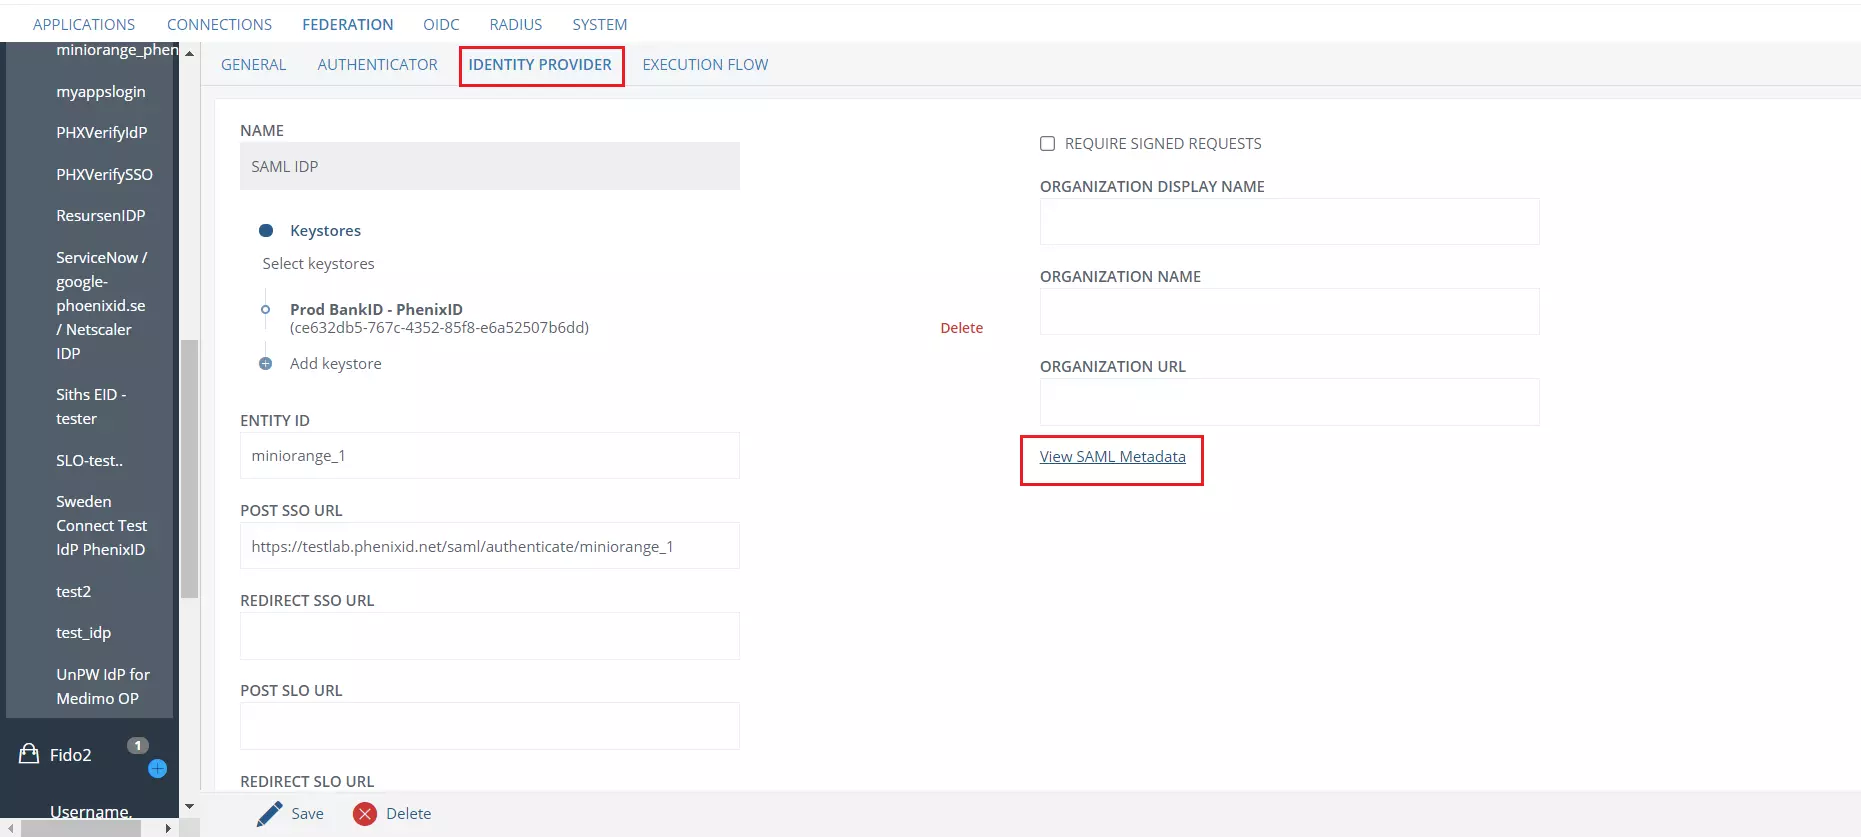
- Select your IDP name, then navigate to the IDENTITY PROVIDER tab and click on View SAML Metadata to save the metadata XML file.
- Switch to the EXECUTION FLOW tab, select Find User and Validate Password.
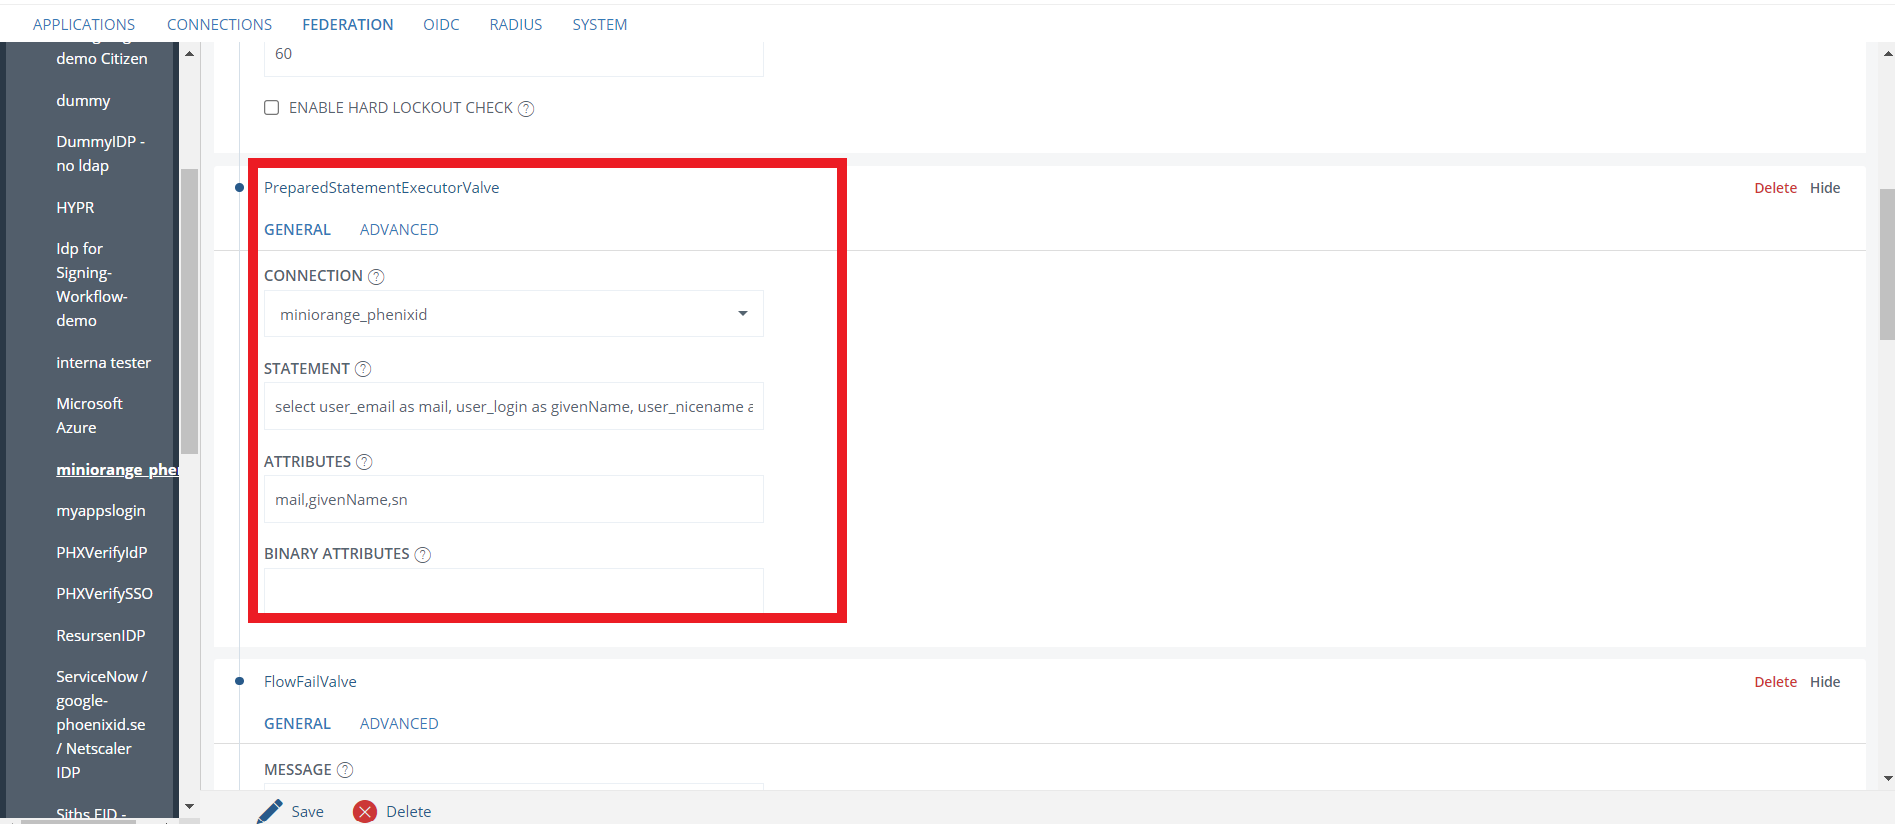
- Click on PreparedStatementExecutorValve and provide the attributes givenName, mail and sn Attributes box and click on Save.
You have successfully configured PhenixID as SAML IdP (Identity Provider) for achieving PhenixID SSO login.
2. Configure PhenixID as IDP in miniOrange
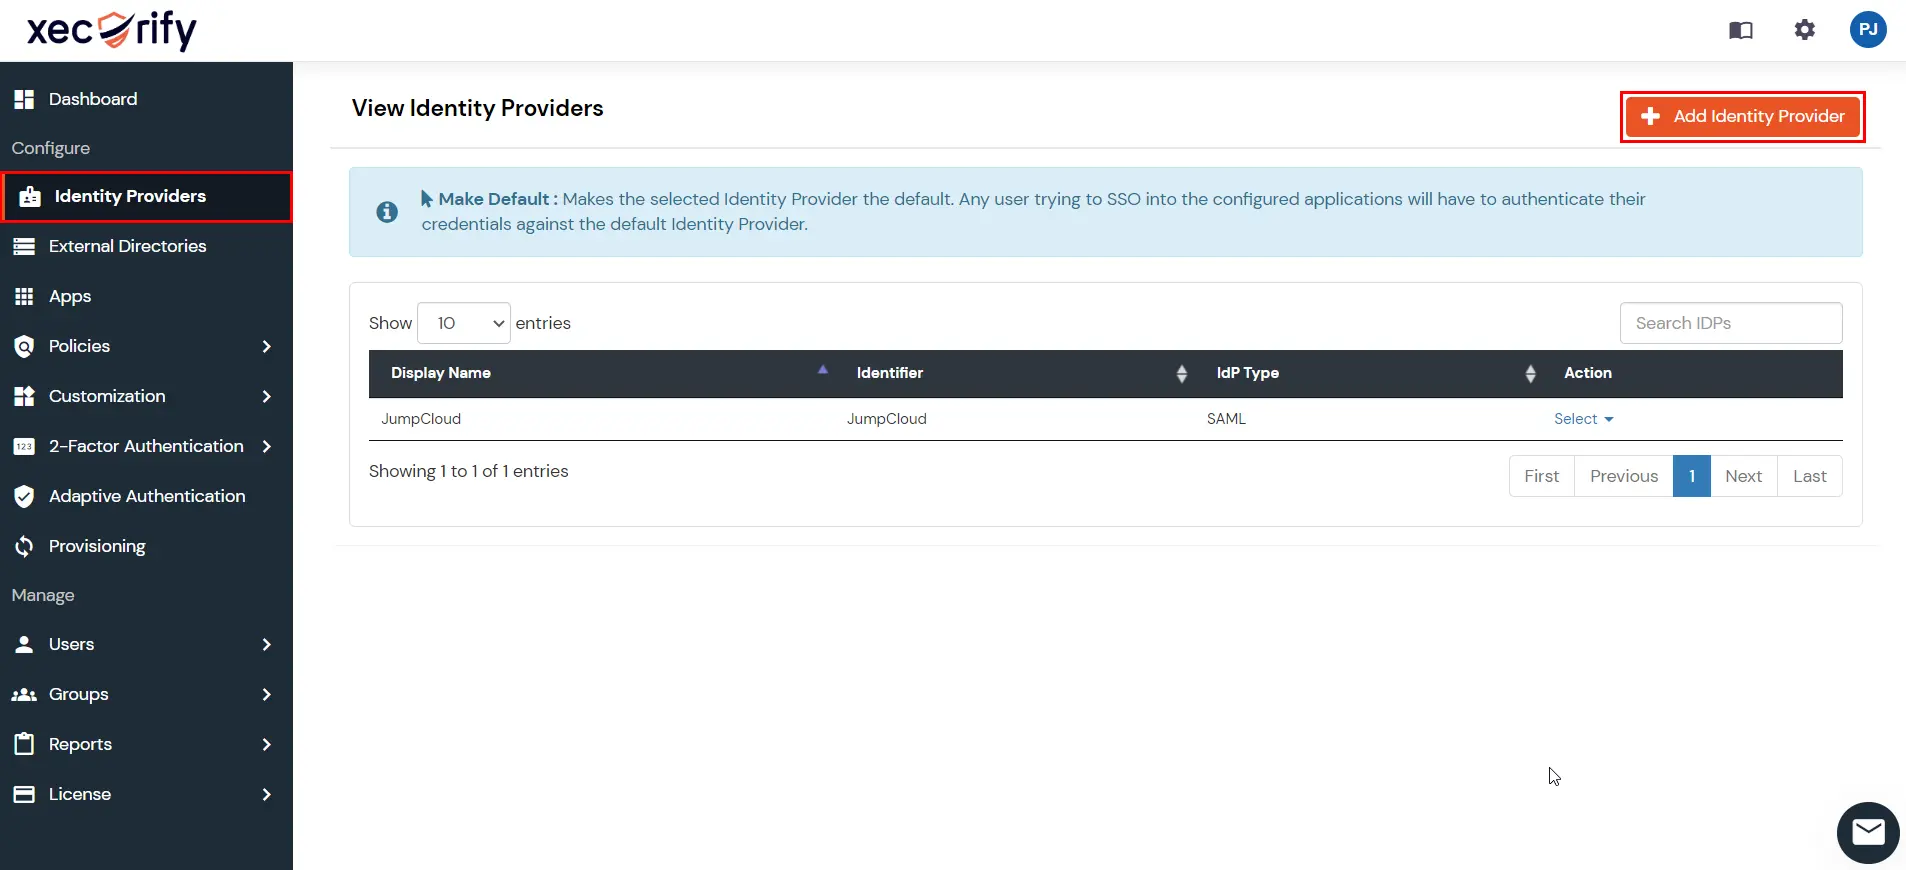
- Go back to the miniOrange Admin console and navigate to Identity Providers in the left navigation menu. Then, click on Add Identity Provider button.
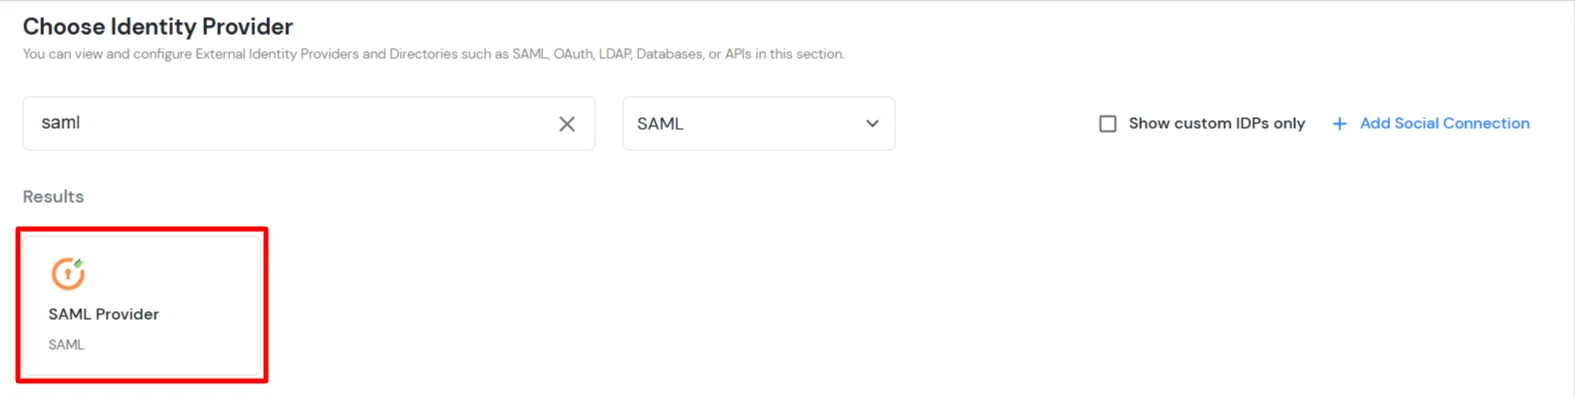
- In Choose Identity Provider, select SAML from the dropdown.

- Search for SAML Provider.
- Click on Import IDP metadata.
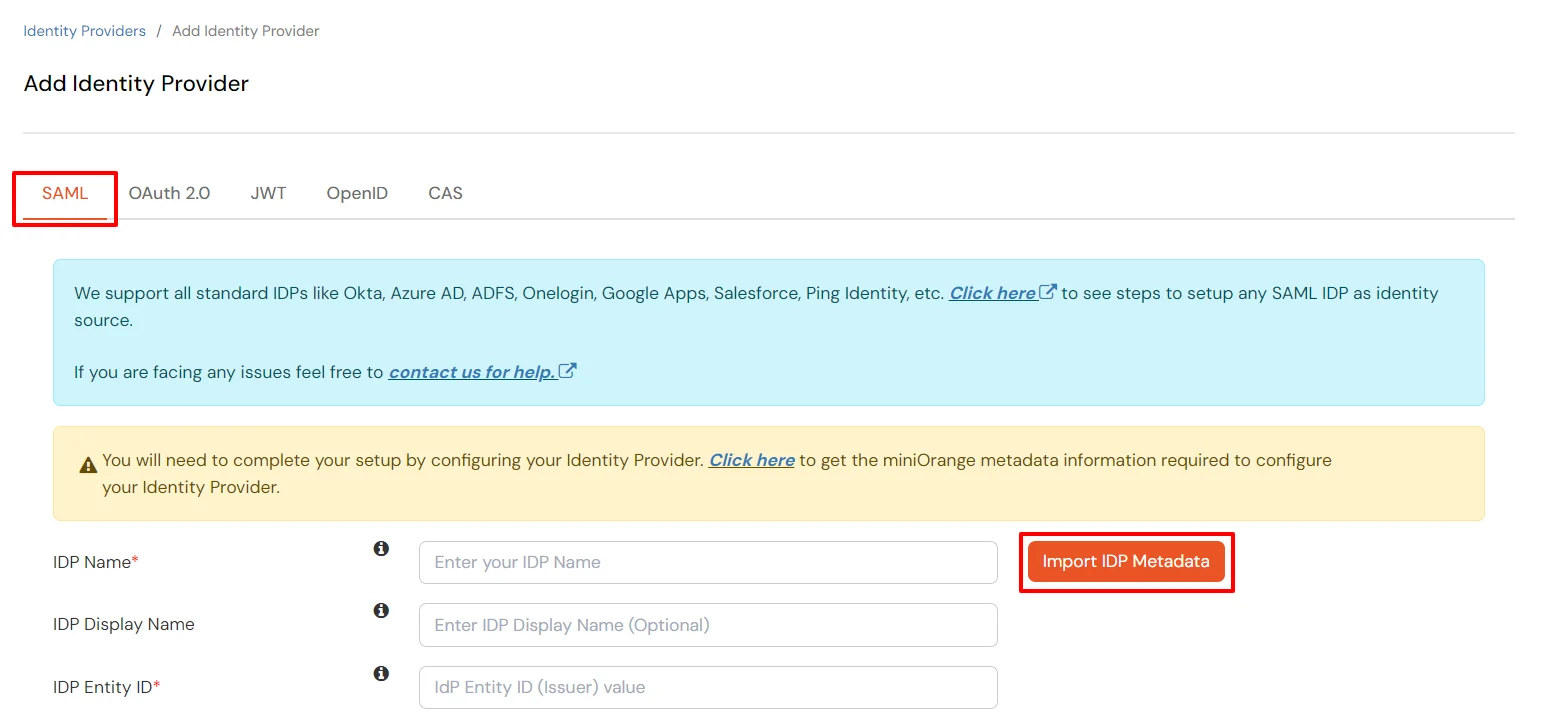
- Upload the XML metadata file that you downloaded from the PhenixID in Step 1 using the Import IDP Metadata feature.
- Enter the IDP Name as PhenixID, select File as the IDP Metadata format and upload the XML file.
- Then click on the Import button.
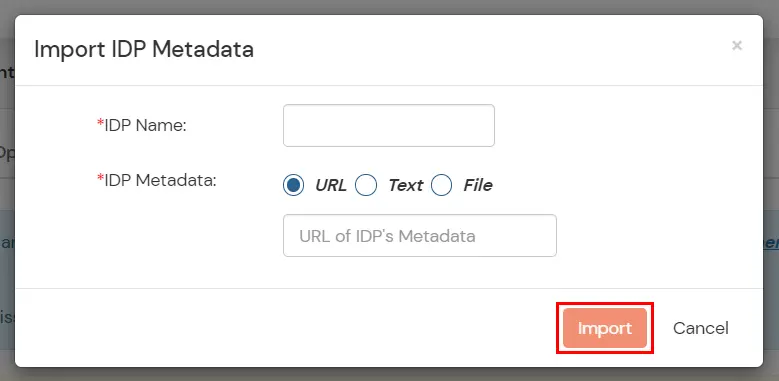
- Your IDP metadata details will be auto-filled.
- Few other optional features that can be added to the Identity Provider(IDP) are listed in the table below:
| Domain Mapping |
Can be used to redirect specific domain user to specific IDP |
| Show IdP to Users |
Enable this if you want to show this IDP to all users during Login |
| Send Configured Attributes |
Enabling this would allow you to add attributes to be sent from IDP |
- Click on Save.
3. Test Connection
- Visit your Login Page URL.
- Go to Identity Providers tab.
- Search for your app, click the three dots in the Actions menu, and select Test Connection against the Identity Provider (IDP) you configured.
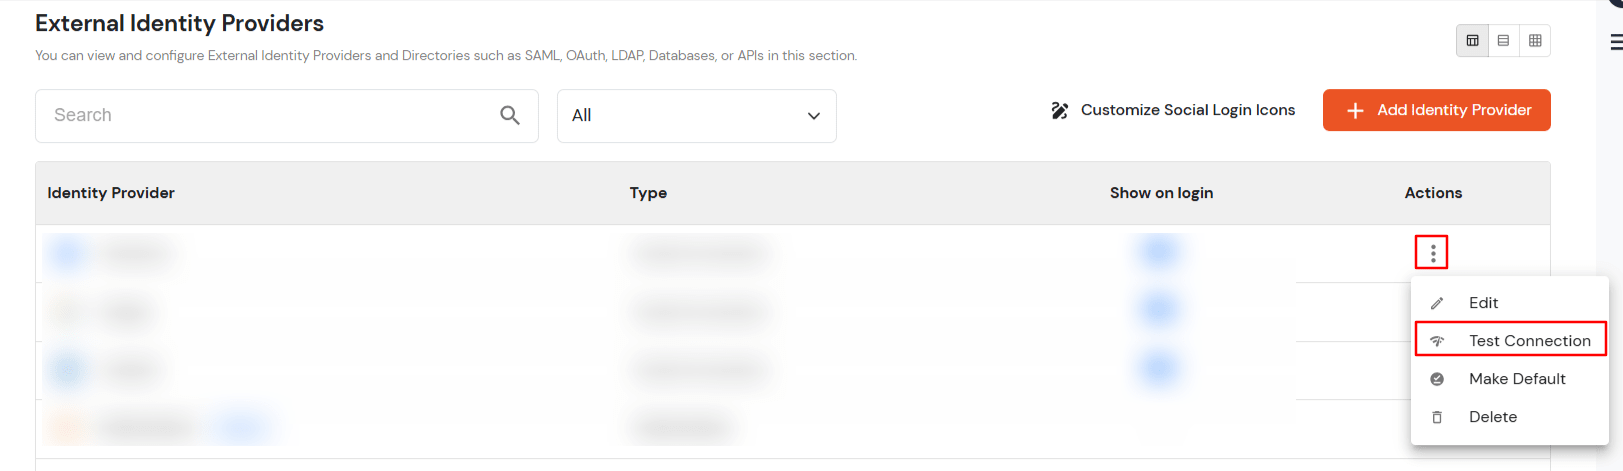
- On entering valid PhenixID credentials (credentials of user assigned to app created in PhenixID), you will see a pop-up window which is shown in the below screen.

- Hence your configuration of PhenixID as IDP in miniOrange is successfully completed.
Note:
You can follow this guide, if you want to configure SAML/WS-FED, OAuth/OIDC, JWT, Radius etc
Configure Attribute Mapping
- Go to Identity Providers.
- Click the three dots in the Actions menu, and select Attribute Mapping against the Identity Provider (IDP) you configured.
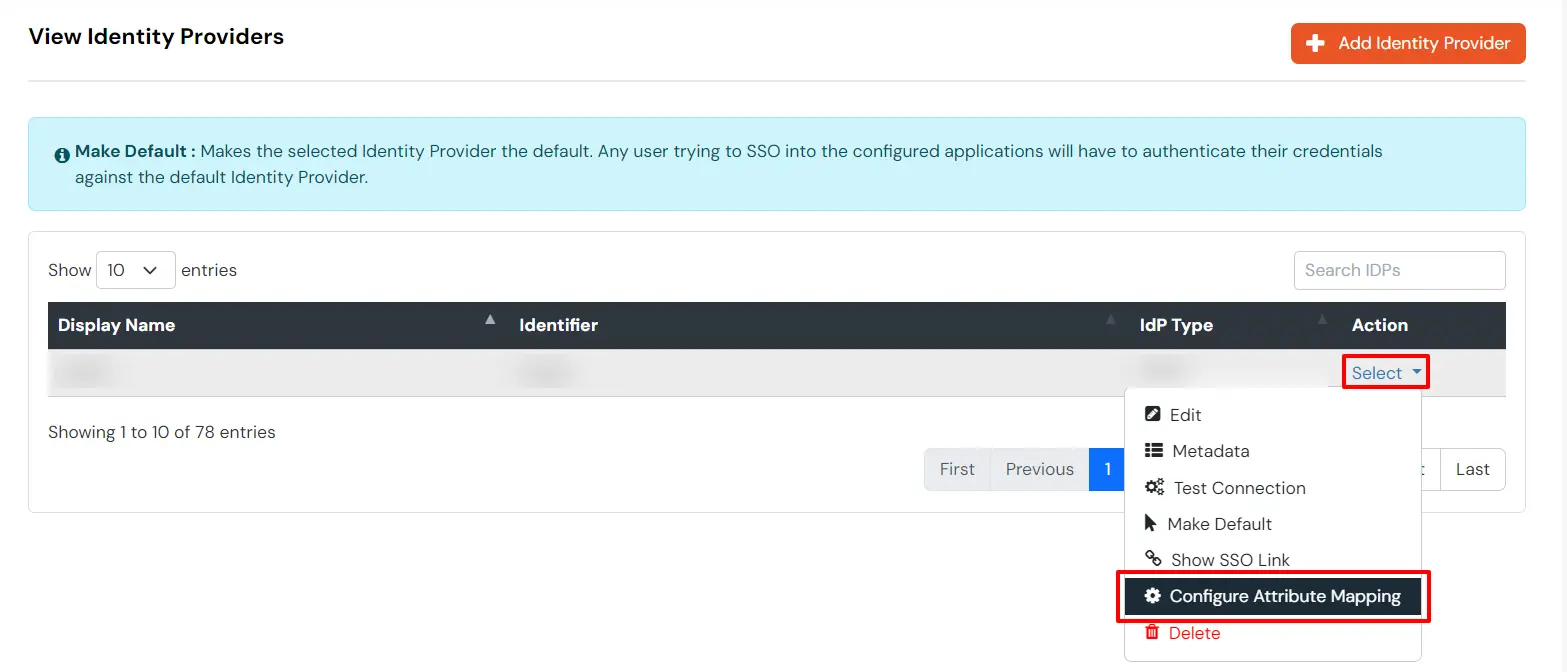
Maps information, such as email and username, during Just-In-Time (JIT) user creation. Email and Username attributes are necessary to create the user profile.
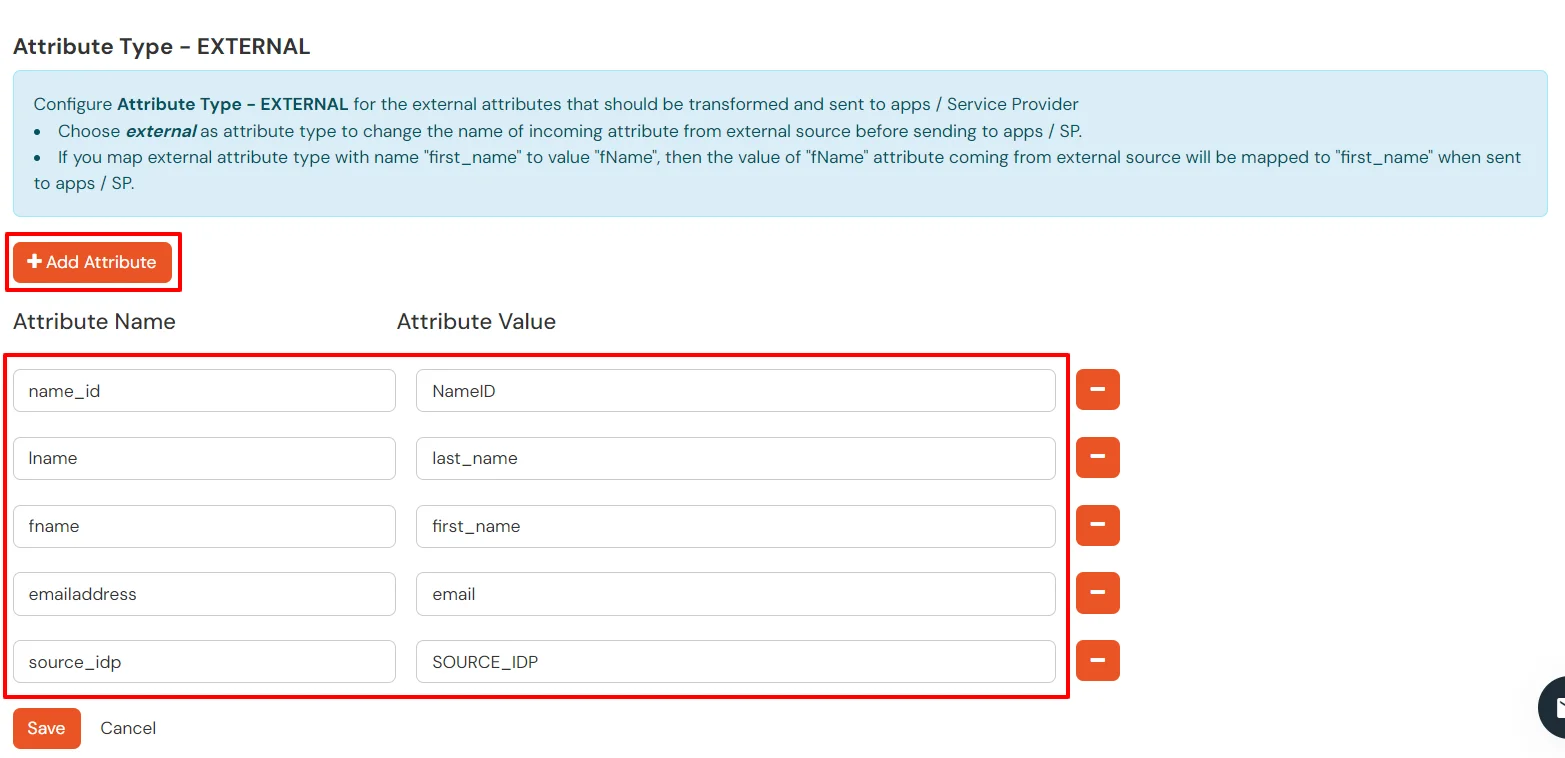
- Click on the + Add Attribute button to add the attribute fields.

- Check the attributes in the Test Connection window from the previous step. Choose any attribute names you want to send to your application under Attribute Name sent to SP.
- Enter the values of the attributes coming from IdP into the Attribute Name from IdP field on the Xecurify side.
EXTERNAL mappings help alter incoming attribute names before sending them to apps, ensuring that the data is in the correct format.
- Click on the + Add Attribute button to add the attribute fields.
- Check attributes in test connection window from last step. Enter the attribute names (any name) that you want to send to your application under Attribute Name sent to SP.
- Enter the value of attributes that are coming from IdP into the Attribute Name from IdP field on the Xecurify side.
Configure Multiple IDPs:
You can follow this guide, if you want to configure multiple IDPs (Identity Providers) and give users the option to select the IDP of their choice to authenticate with.
