Hello there!

Need Help? We are right here!

Support Icon
miniOrange Email Support
success

Thanks for your Enquiry. Our team will soon reach out to you.

If you don't hear from us within 24 hours, please feel free to send a follow-up email to info@xecurify.com

Search Results:

×

Configure SiteMinder as SAML IDP for SSO


miniOrange Identity Broker service solution enables cross protocol authentication. You can configure SiteMinder as an IDP for Single Sign-On (SSO) into your applications/websites. Here, SiteMinder will act as an Identity Provider (IDP) and miniOrange will act as a broker.

We offer a pre-built solution for integrating with SiteMinder, making it easier and quick to implement. Our team can also help you set up SiteMinder as SAML IDP to login into your applications.


Get Free Installation Help


miniOrange offers free help through a consultation call with our System Engineers to configure SSO for different apps using SiteMinder as IDP in your environment with 30-day free trial.

For this, you need to just send us an email at idpsupport@xecurify.com to book a slot and we'll help you in no time.


Connect with External Source of Users


miniOrange provides user authentication from various external sources, which can be Directories (like ADFS, Microsoft Active Directory, OpenLDAP, AWS etc), Identity Providers (like Microsoft Entra ID, Okta, AWS), and many more. You can configure your existing directory/user store or add users in miniOrange.
Prerequisite:

  • To get started you need to have an active SiteMinder account with administrator rights for your organization.
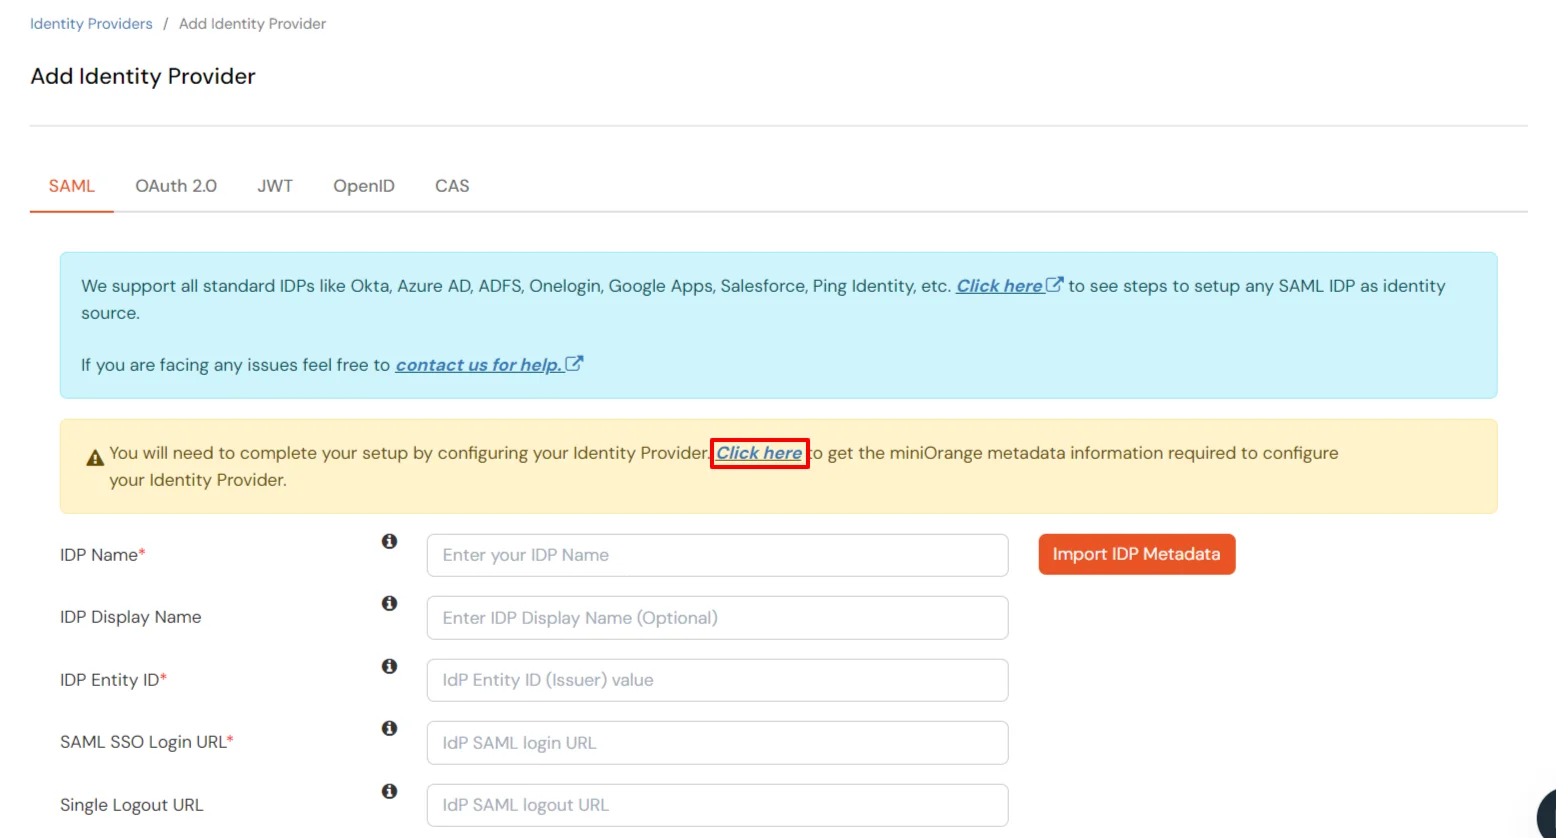
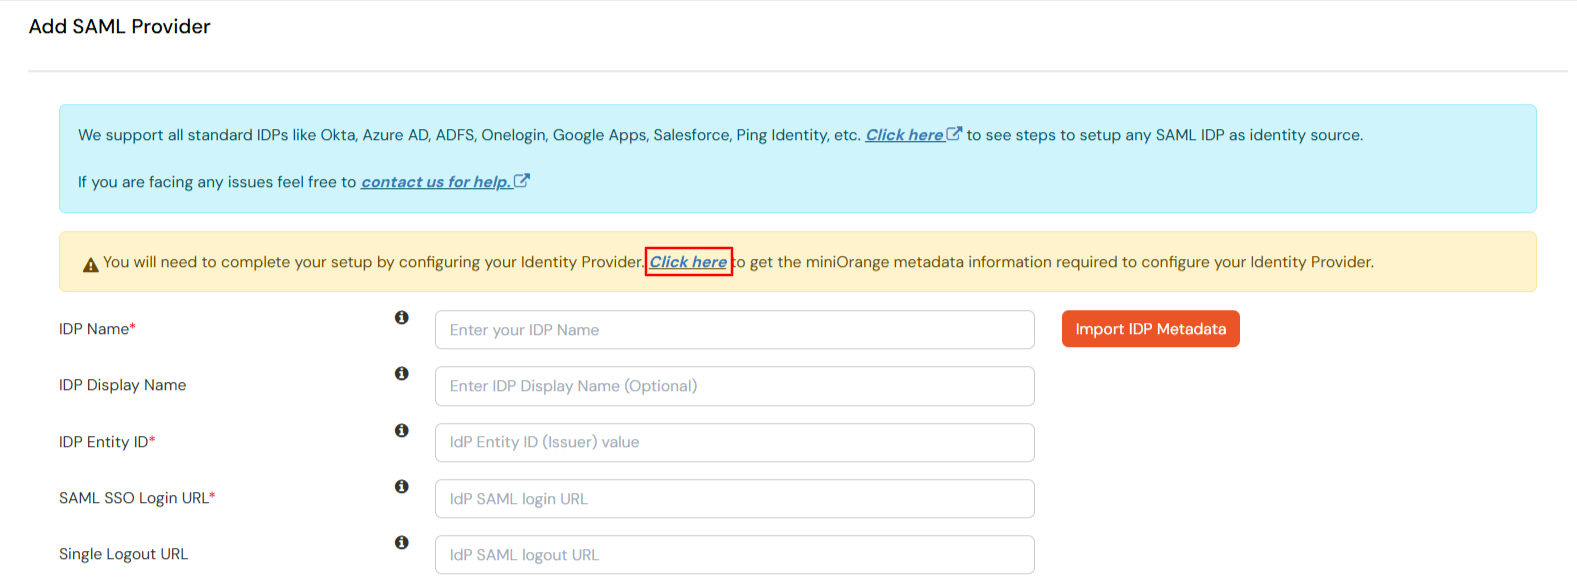
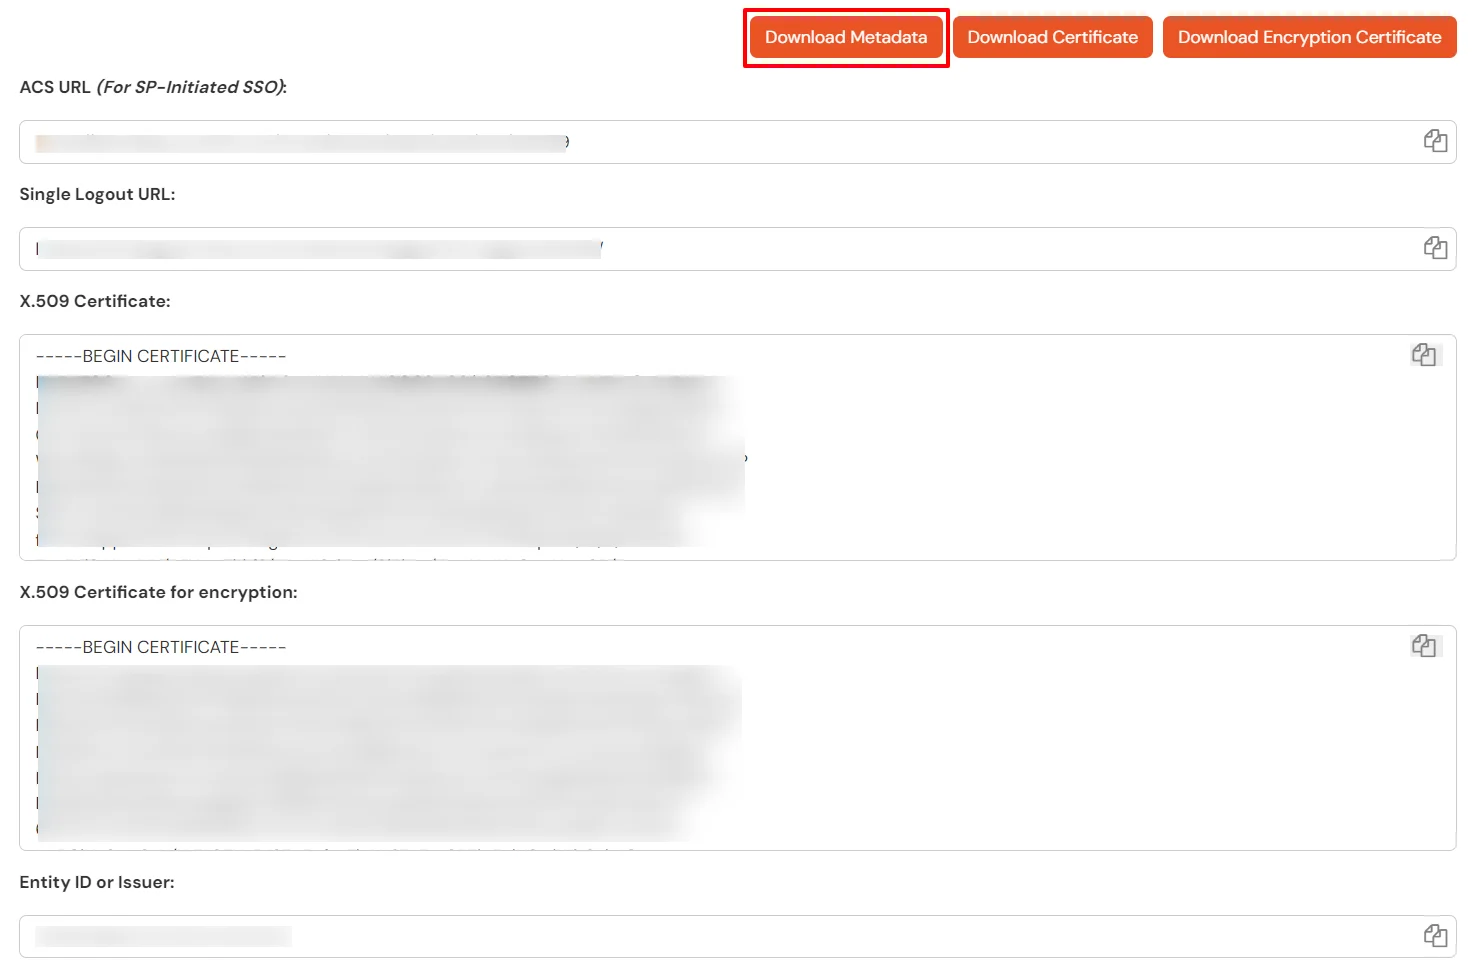
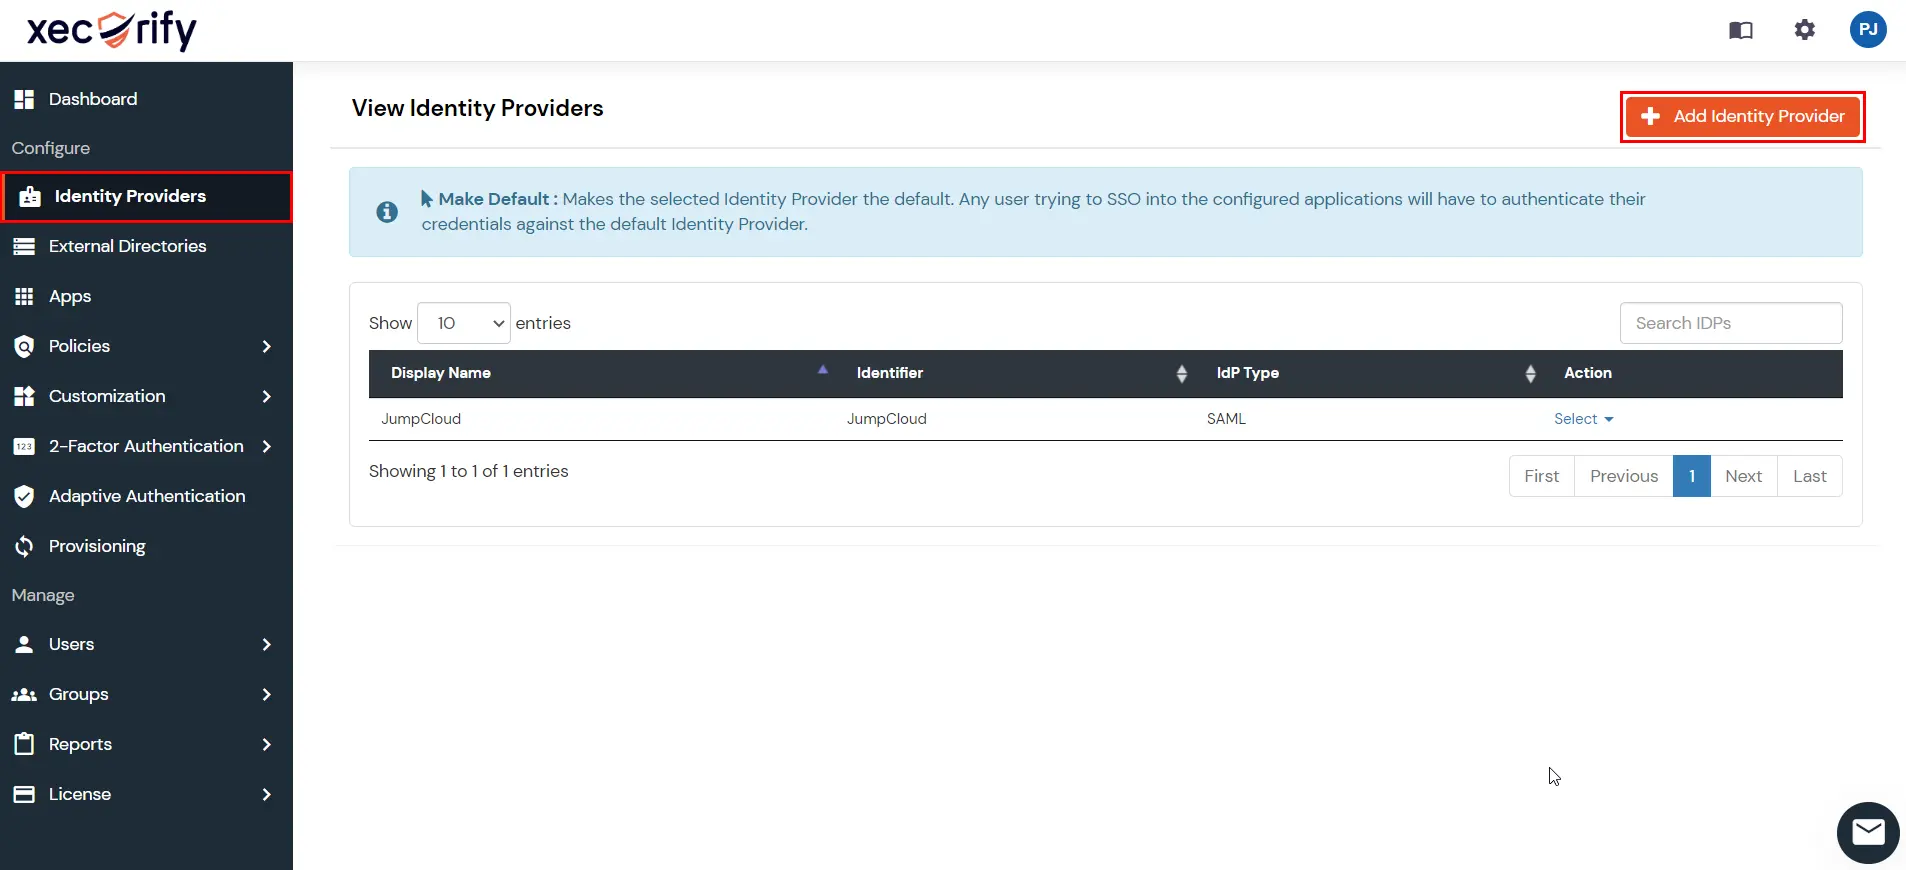
  • Get the miniOrange SP metadata that you will require in the first step. For this, go to the miniOrange Admin Console >> Identity Providers >> Add Identity provider. Under Choose Identity Provider, select SAML from the dropdown and go to SAML Provider. Then click on the Click here link.
  • SiteMinder as IDP : Get metadetails to configure SiteMinder SAML IDP

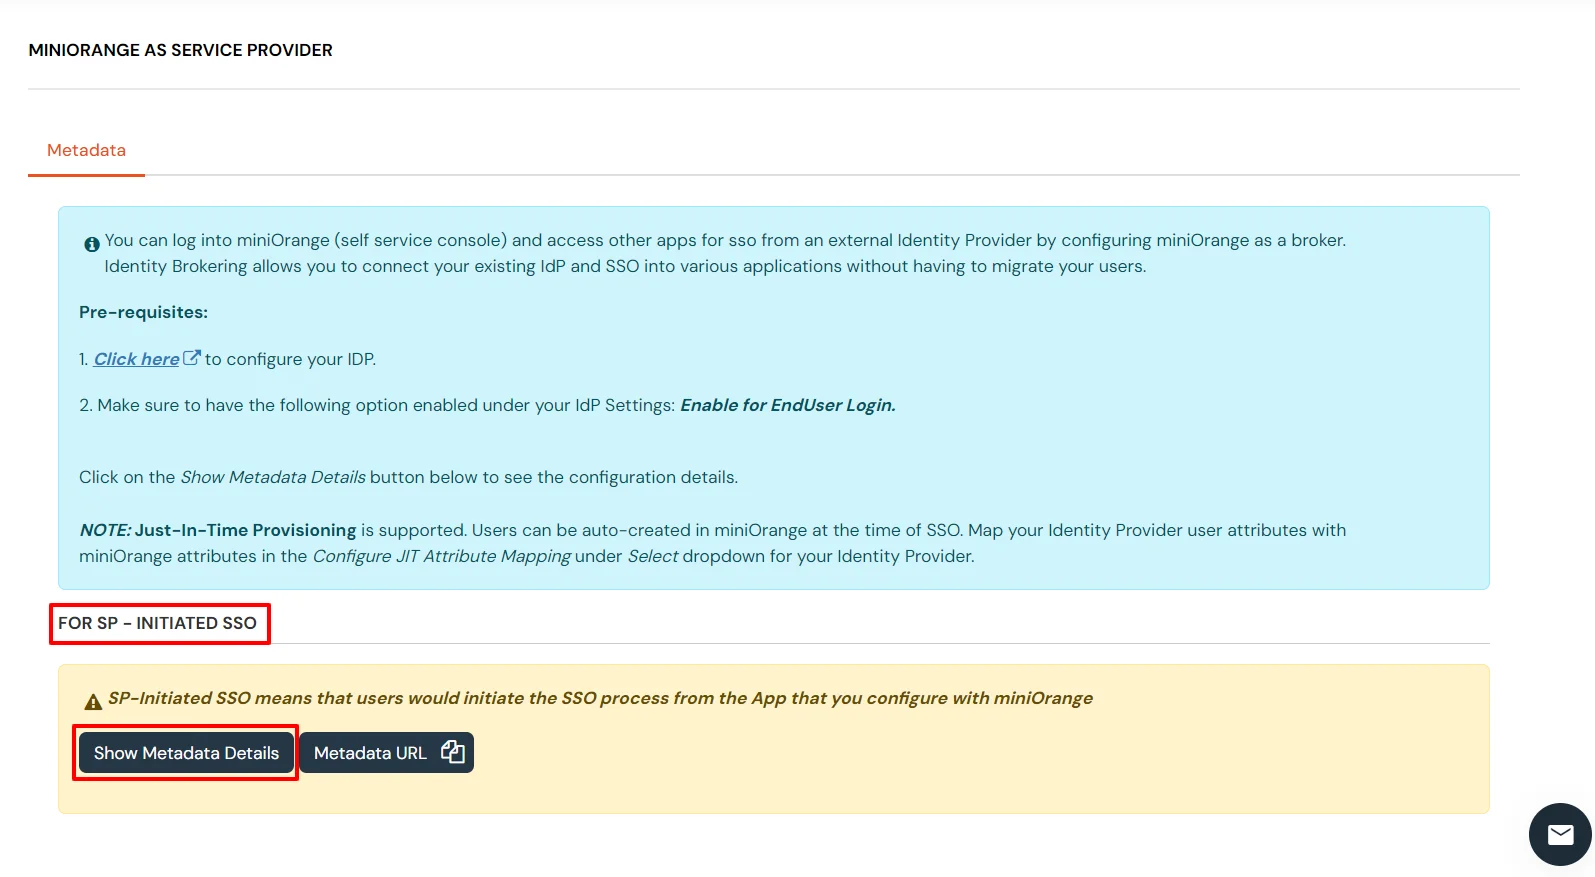
  • Click on Show Metadata Details under For SP - Initiated SSO. Click on Download Metadata. You will require this in SiteMinder console at Step 2.
  • SiteMinder as ID: Click SP-intiated SSO Metadata

    SiteMinder as ID: Click Download Metadata

Steps to set up SiteMinder as an IDP and miniOrange as a Service Provider (SP) for SSO login

1. Configure SiteMinder as IDP in miniOrange

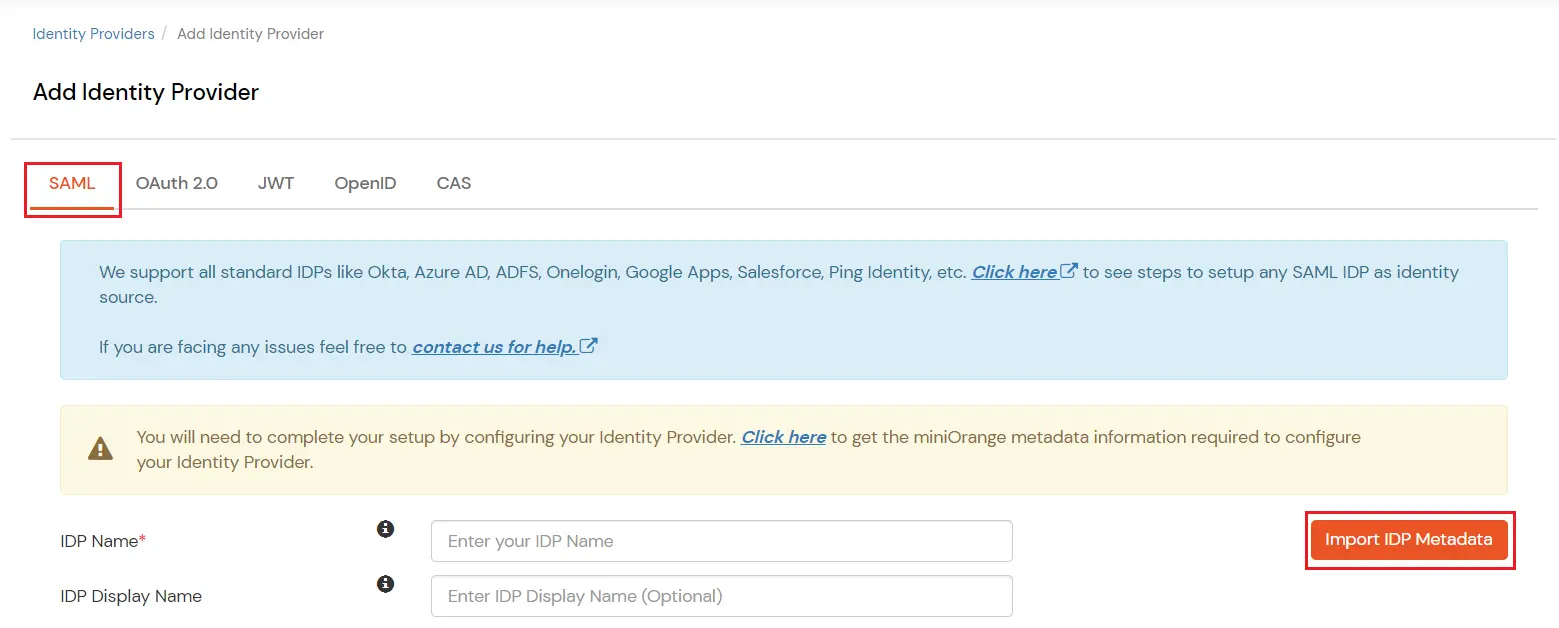
  • Go back to the miniOrange Admin console and navigate to Identity Providers in the left navigation menu. Then, click on Add Identity Provider button.
  • SiteMinder as IDP :  Add Identity Provider

  • In Choose Identity Provider, select SAML from the dropdown.
  • SiteMinder as IDP :  Select SAML from dropdown

  • Search for SAML Provider.
  • SiteMinder as IDP :  Search SAML

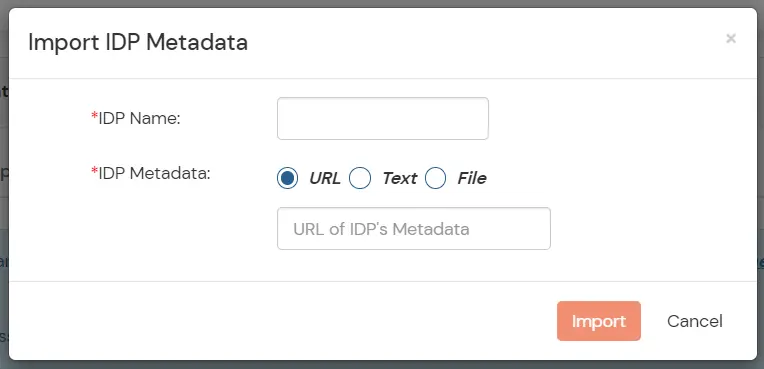
  • Upload the XML metadata file that you downloaded from the SiteMinder in Step 2 using the Import IDP Metadata feature.
  • SiteMinder as IDP : Upload Metadata File

  • Enter the IDP Name as SiteMinder, select File as the IDP Metadata format and upload the XML file.
  • Then click on the Import button.
  • SiteMinder as IDP :  Enter IDP name and upload the file

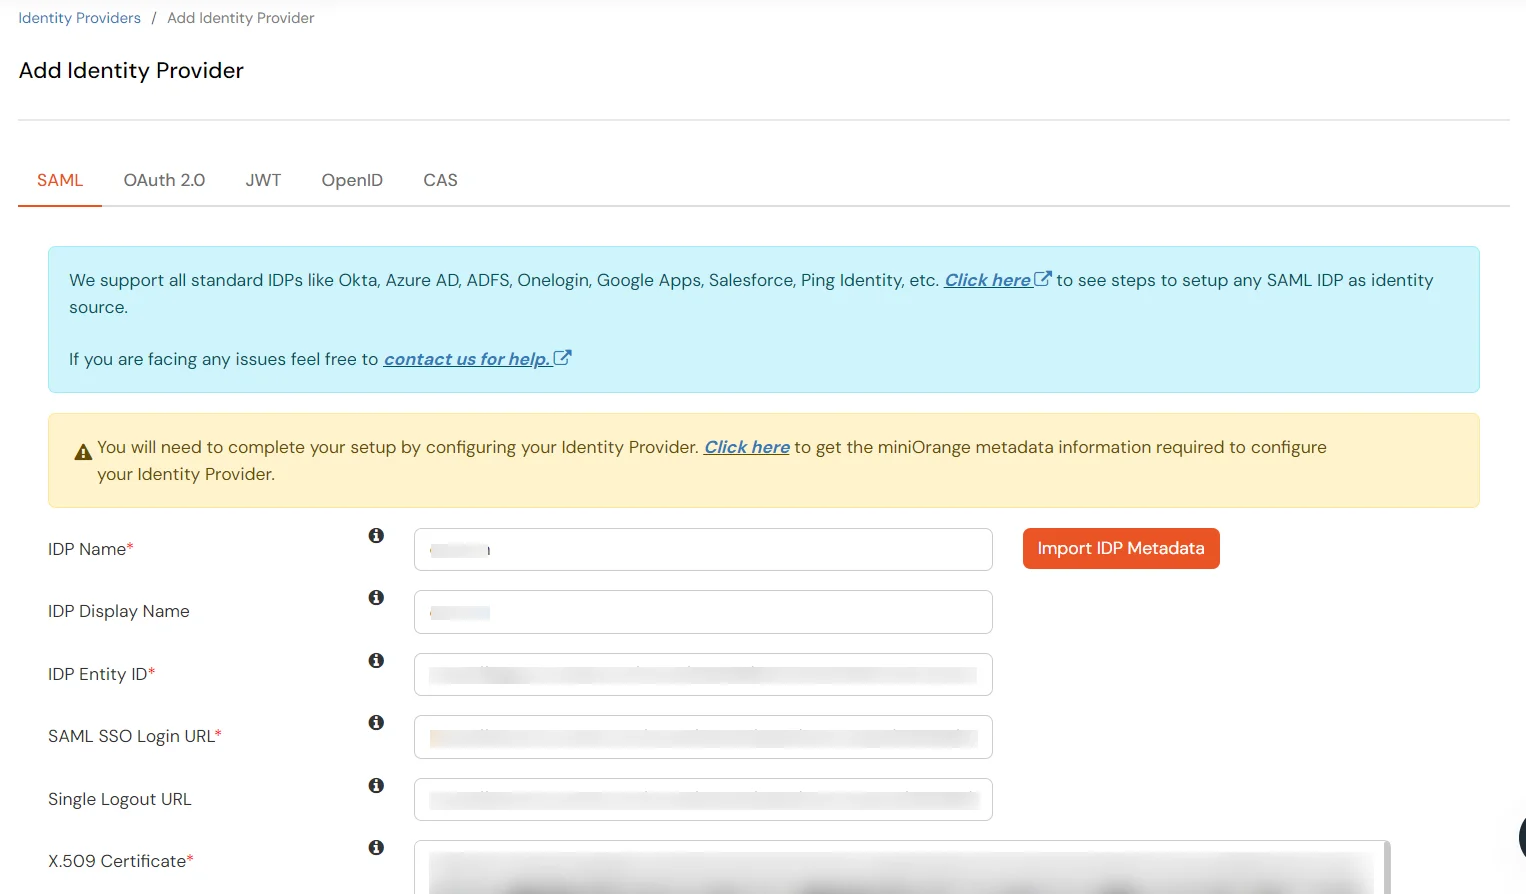
  • Your IDP metadata details will be auto-filled.
  • SiteMinder as IDP :  Auto-filled all the details

  • Click on Save.

2. Configure miniOrange as Service Provider (SP) in SiteMinder

  • Log in to your CA SSO portal as a SiteMinder Single Sign-On administrator.
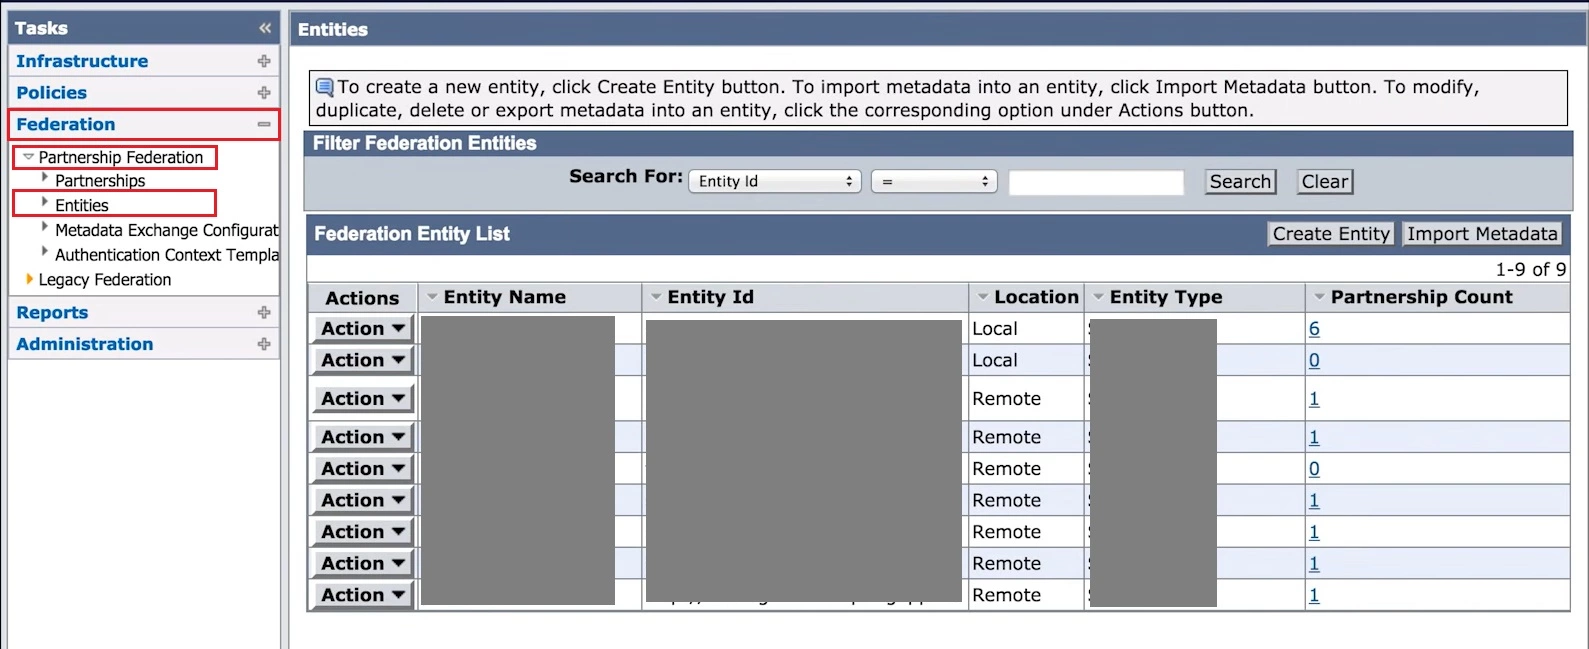
  • Click on Federation tab.
  • Now go to Partnership Federation -> Entities.
  • SiteMinder SAML Single Sign-On (SSO)

    Create a Local Identity Provider
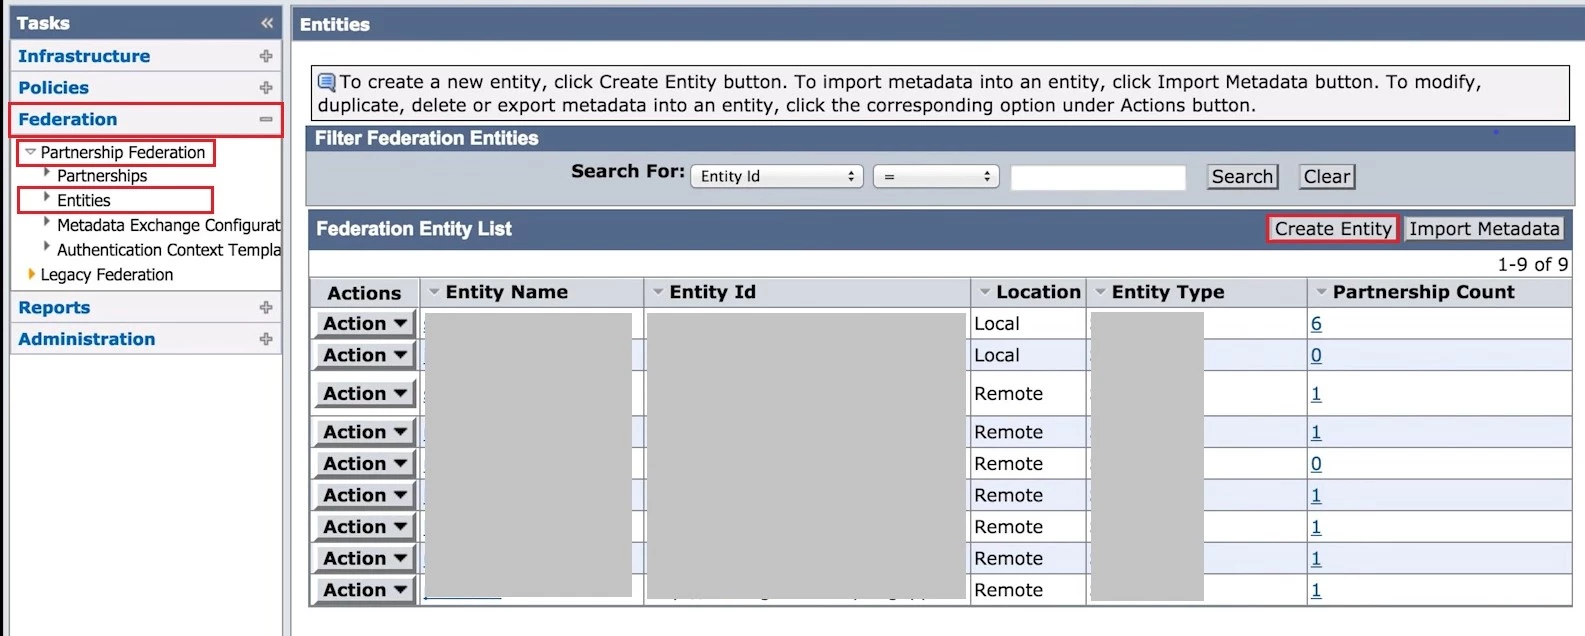
    • Click on Create Entity.
    • SiteMinder SAML Single Sign-On (SSO)

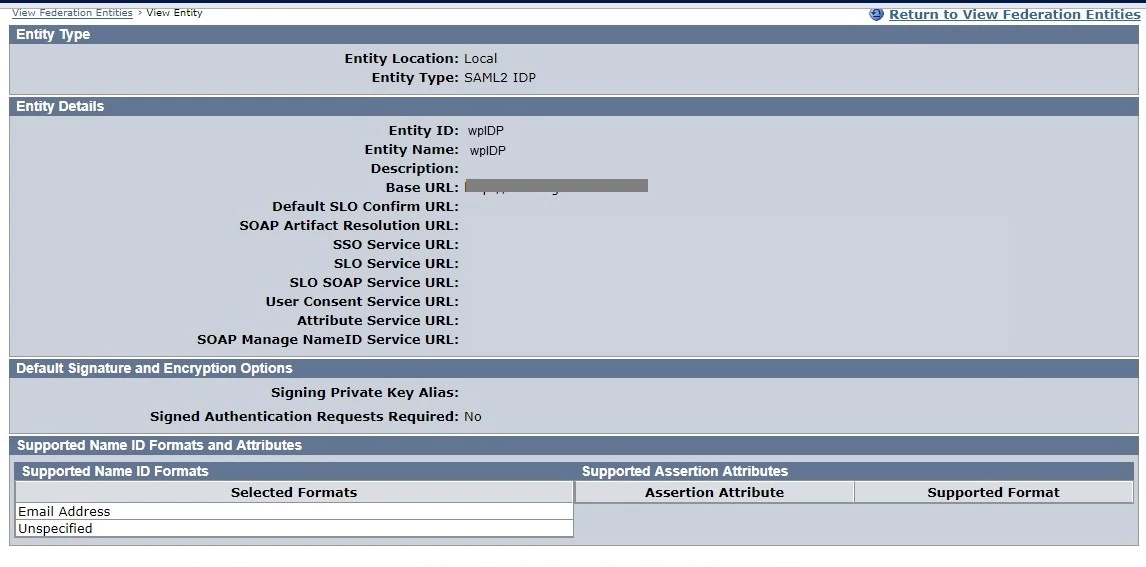
    • To create a local entity, configure the following:
    • Entity Location Local
      Entity Type SAML2 IDP
      Entity ID Enter an ID for your local identity provider for identification.
      Entity Name Create a name for your local identity provider.
      Base URL Enter the fully-qualified domain name for the host service
      SiteMinder SSO Federation Web Services.
      Signed Authentication
      Requests Required
      No
      Supported NameID format urn:oasis:names:tc:SAML:1.1:nameid-format:emailAddress
      urn:oasis:names:tc:SAML:1.1:nameid-format:unspecified
      SiteMinder SAML Single Sign-On (SSO)

    Create a Remote Service Provider

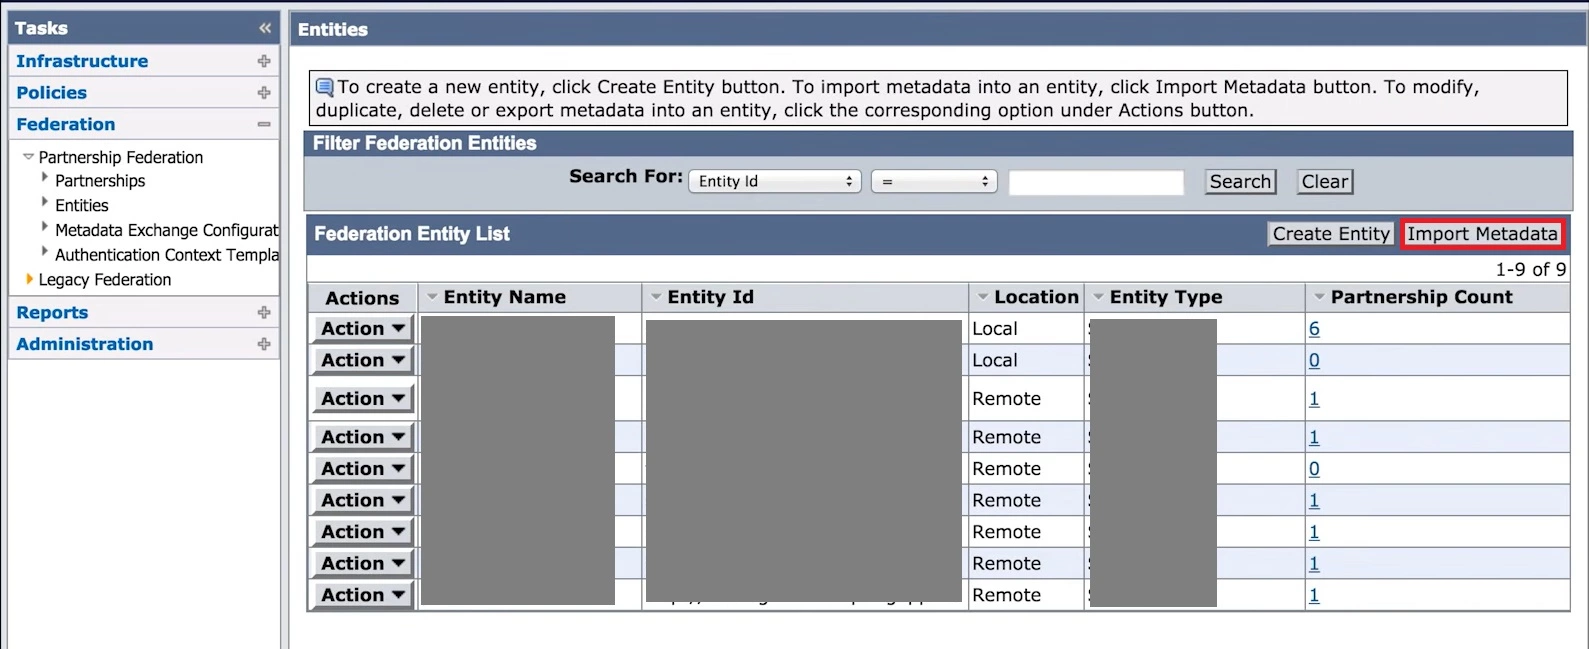
    • Download Metadata XML File from the Prerequisite section.
    • Click on Import Metadata and upload the downloaded XML metadata file.
    • SiteMinder SAML Single Sign-On (SSO)

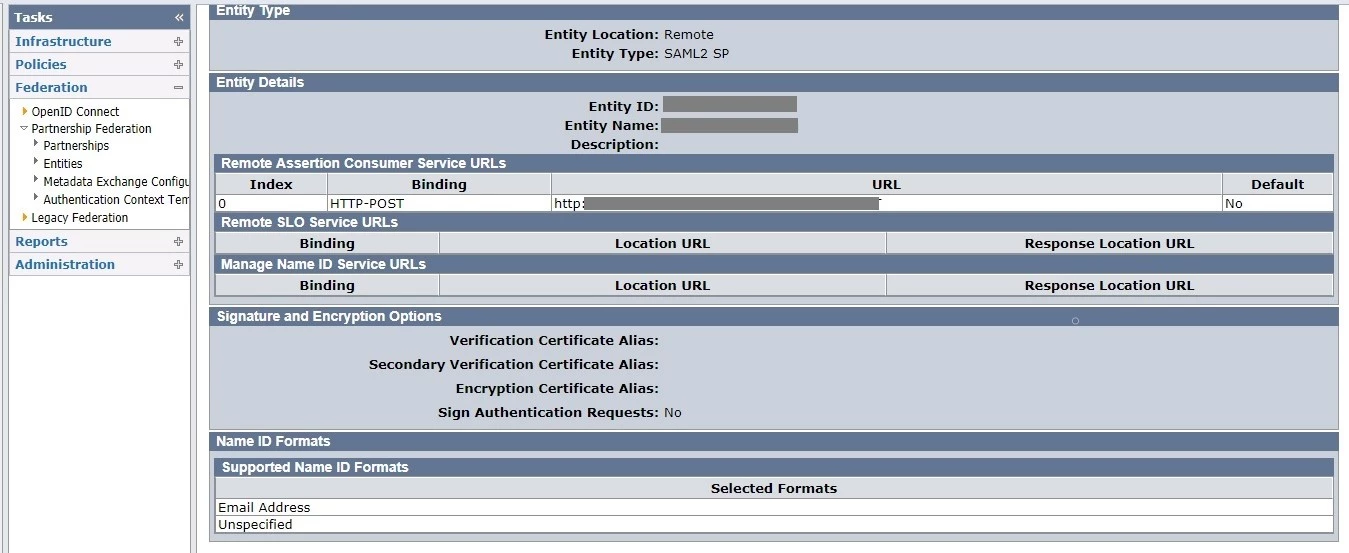
    • For Import As, select Remote Entity.
    • Provide a name for the Remote Service Provider Entity.
    • SiteMinder SAML Single Sign-On (SSO)

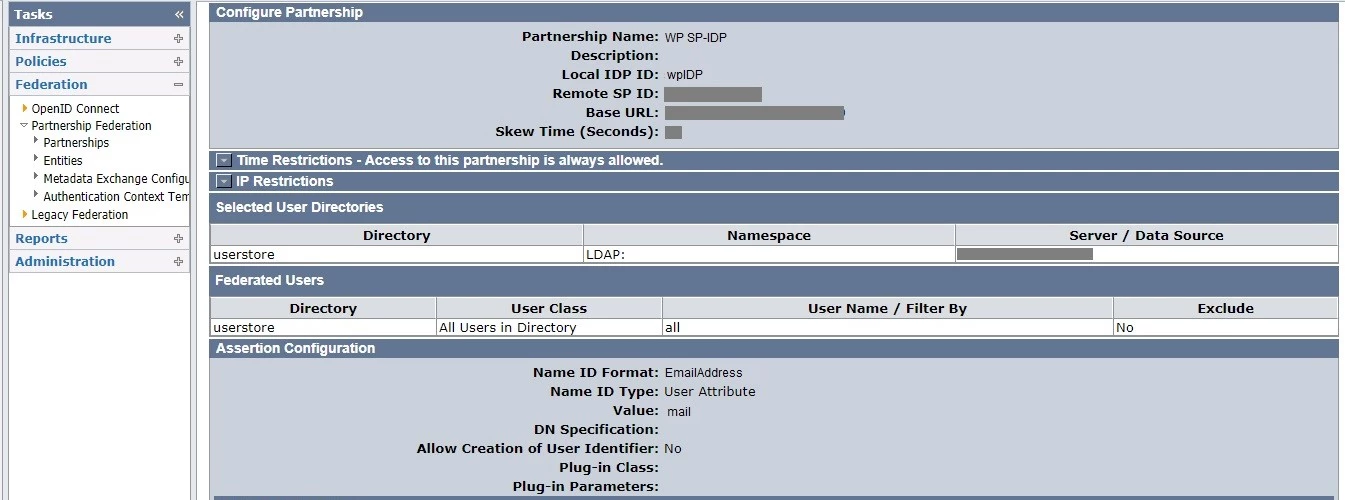
    Create a Partnership between SP and IDP

    • For creating a partnership, configure the following:
      Add Partnership Name Enter a name for your partnership.
      (Optional) Description Enter a relevant description for your partnership.
      Local IDP ID Enter the Local Identity Provider ID created while adding a Local Entity.
      Remote SP ID Enter the Remote Service Provider ID created while adding a Remote Entity.
      Base URL This field will be pre-populated.
      Skew Time Enter any skew time required by your environment.
      User Directories and Search Order Select the required directories in the required search order.
  • On the Federation Users page, add the users you want to include in the partnership.
  • In the Assertion Configuration section, configure following:
    • NameID format: Email Address
    • Name ID Type: User Attribute
    • Value: mail
    • (Optional) Assertion Attributes: Specify any application or group attributes that you want to map to users
  • SiteMinder SAML Single Sign-On (SSO)

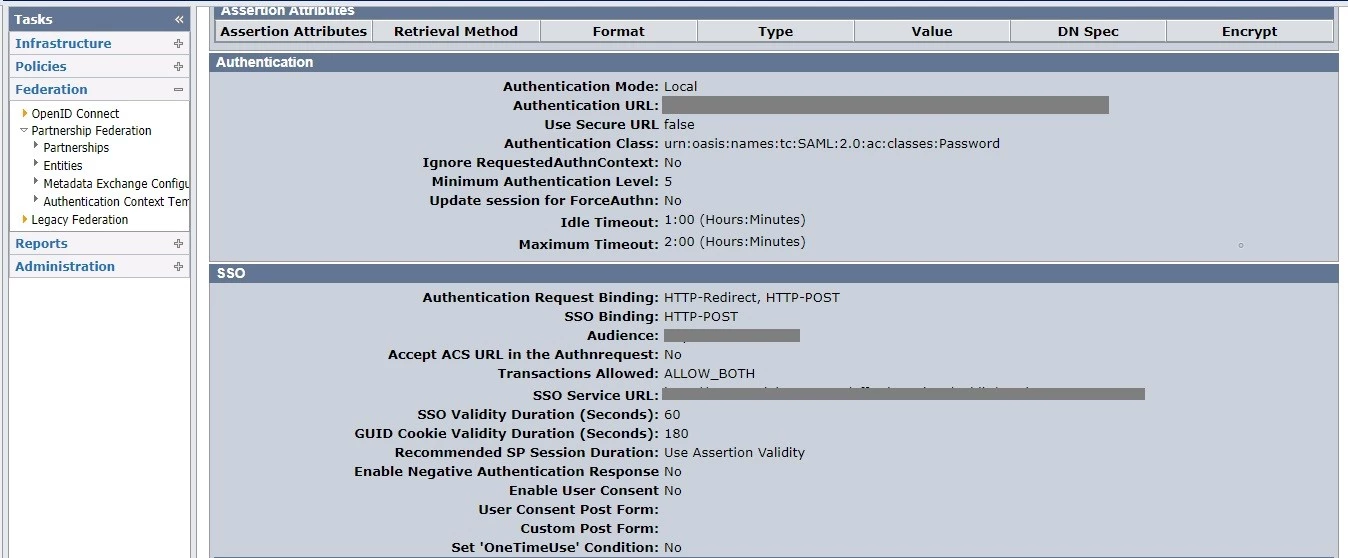
  • In the SSO and SLO section, perform the following steps:
    • SSO Binding: HTTP-POST
    • Transactions Allowed: Both IDP and SP initiated
  • SiteMinder SAML Single Sign-On (SSO)

  • In the Signature and Encryption section, select Post Signature as Sign Both.

  • Activate Partnership

    • In the Federation Partnership List, expand the Action dropdown for your partnership and click Activate.
    • To get the IDP metadata, Click the Action button and click Export Metadata. This data will be used to configure SiteMinder in miniOrange.

You have successfully configured SiteMinder as SAML IdP (Identity Provider) for achieving SiteMinder SSO login.

3. Test Connection

  • Visit your Login Page URL.
  • Go to Identity Providers tab.
  • Search for your app, click the three dots in the Actions menu, and select Test Connection against the Identity Provider (IDP) you configured.
  • SiteMinder-IDP-TestConnection

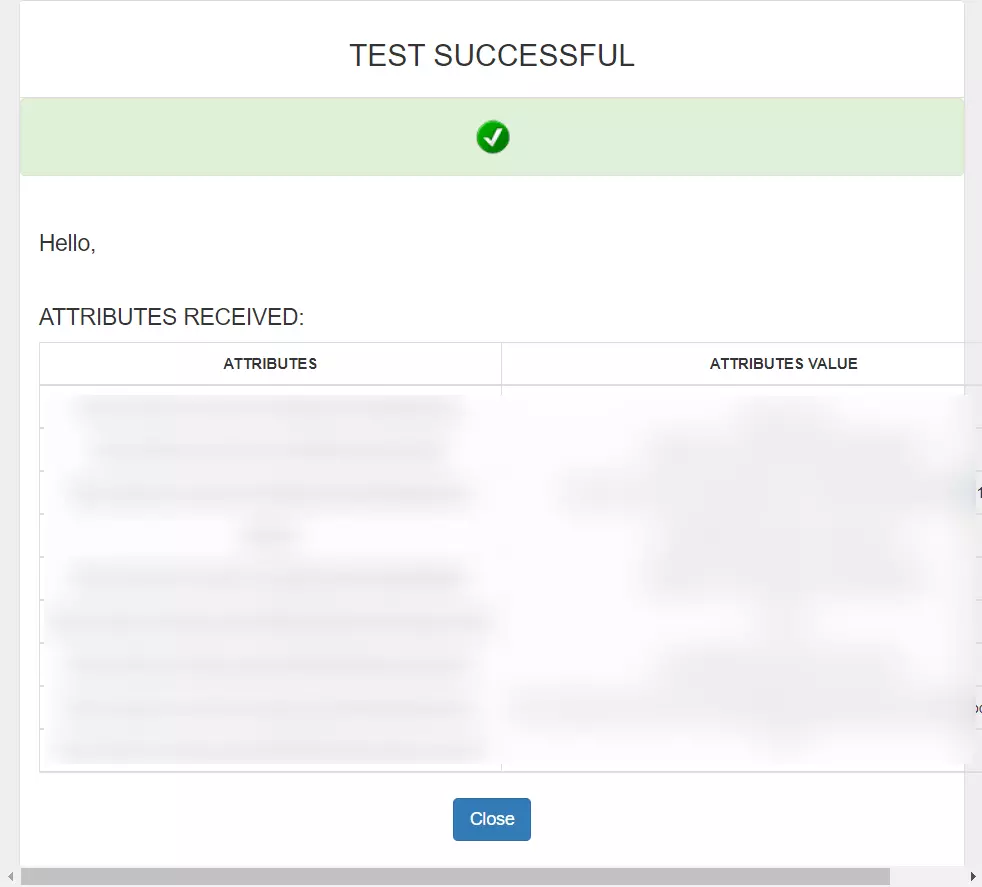
  • On entering valid SiteMinder credentials (credentials of user assigned to app created in SiteMinder), you will see a pop-up window which is shown in the below screen.
  • SucessTestConn-SiteMinder-IDP

  • Hence your configuration of SiteMinder as IDP in miniOrange is successfully completed.

Note:

You can follow this guide, if you want to configure SAML/WS-FED, OAuth/OIDC, JWT, Radius etc
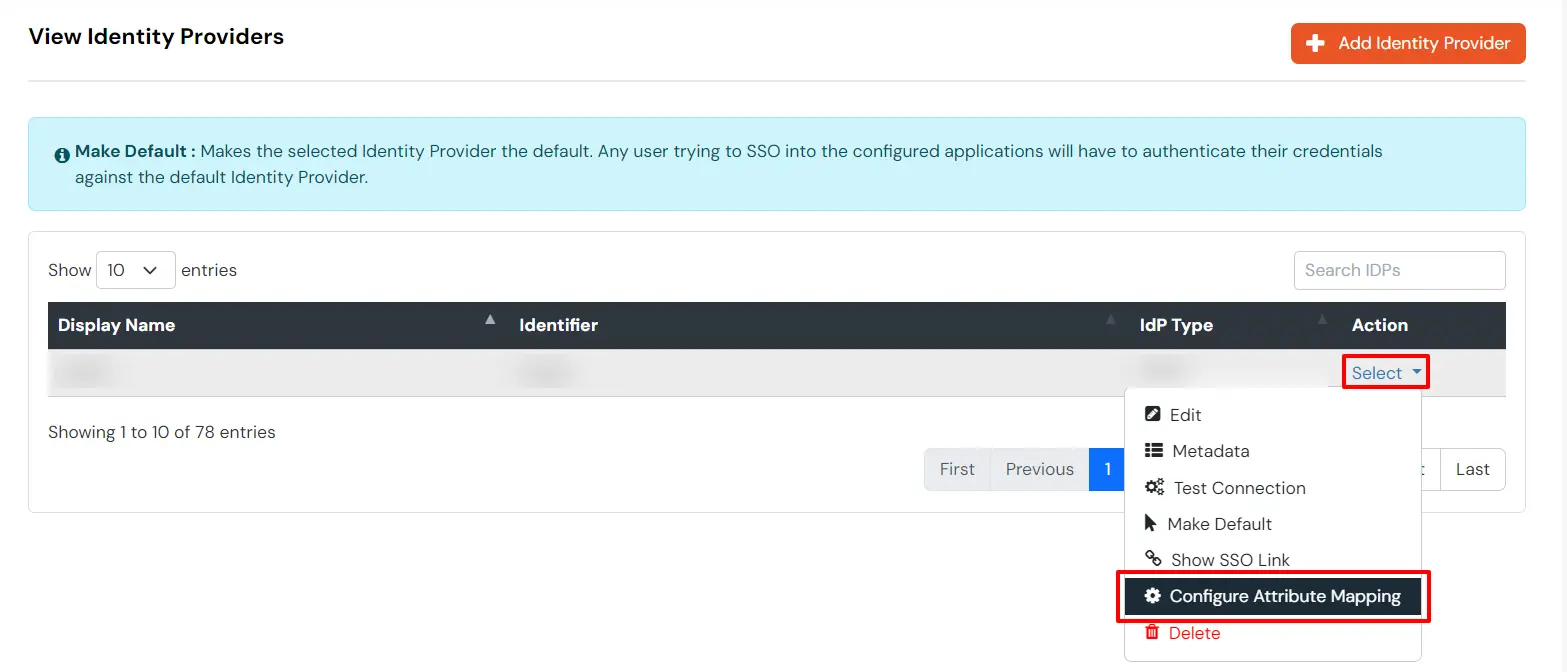

Configure Attribute Mapping

  • Go to Identity Providers.
  • Click the three dots in the Actions menu, and select Attribute Mapping against the Identity Provider (IDP) you configured.
  • SiteMinder Single Sign-On SSO Select and Configure Attribute Mapping


Maps information, such as email and username, during Just-In-Time (JIT) user creation. Email and Username attributes are necessary to create the user profile.
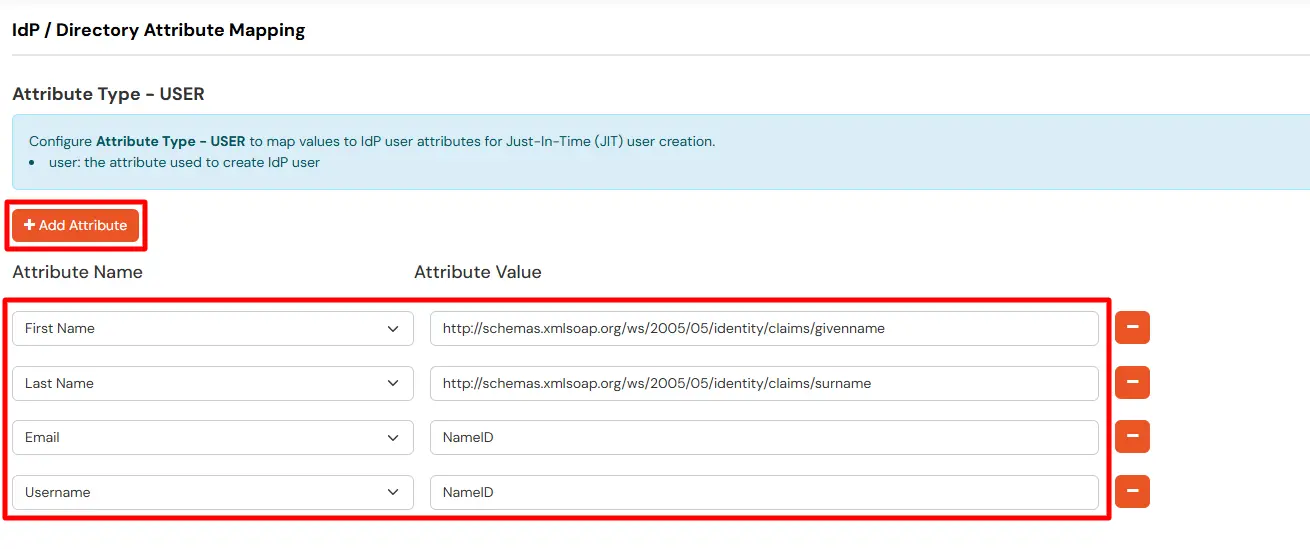
  • Click on the + Add Attribute button to add the attribute fields.
  • SiteMinder Single Sign-On SSO Map USER Attribute

  • Check the attributes in the Test Connection window from the previous step. Choose any attribute names you want to send to your application under Attribute Name sent to SP.
  • Enter the values of the attributes coming from IdP into the Attribute Name from IdP field on the Xecurify side.

EXTERNAL mappings help alter incoming attribute names before sending them to apps, ensuring that the data is in the correct format.
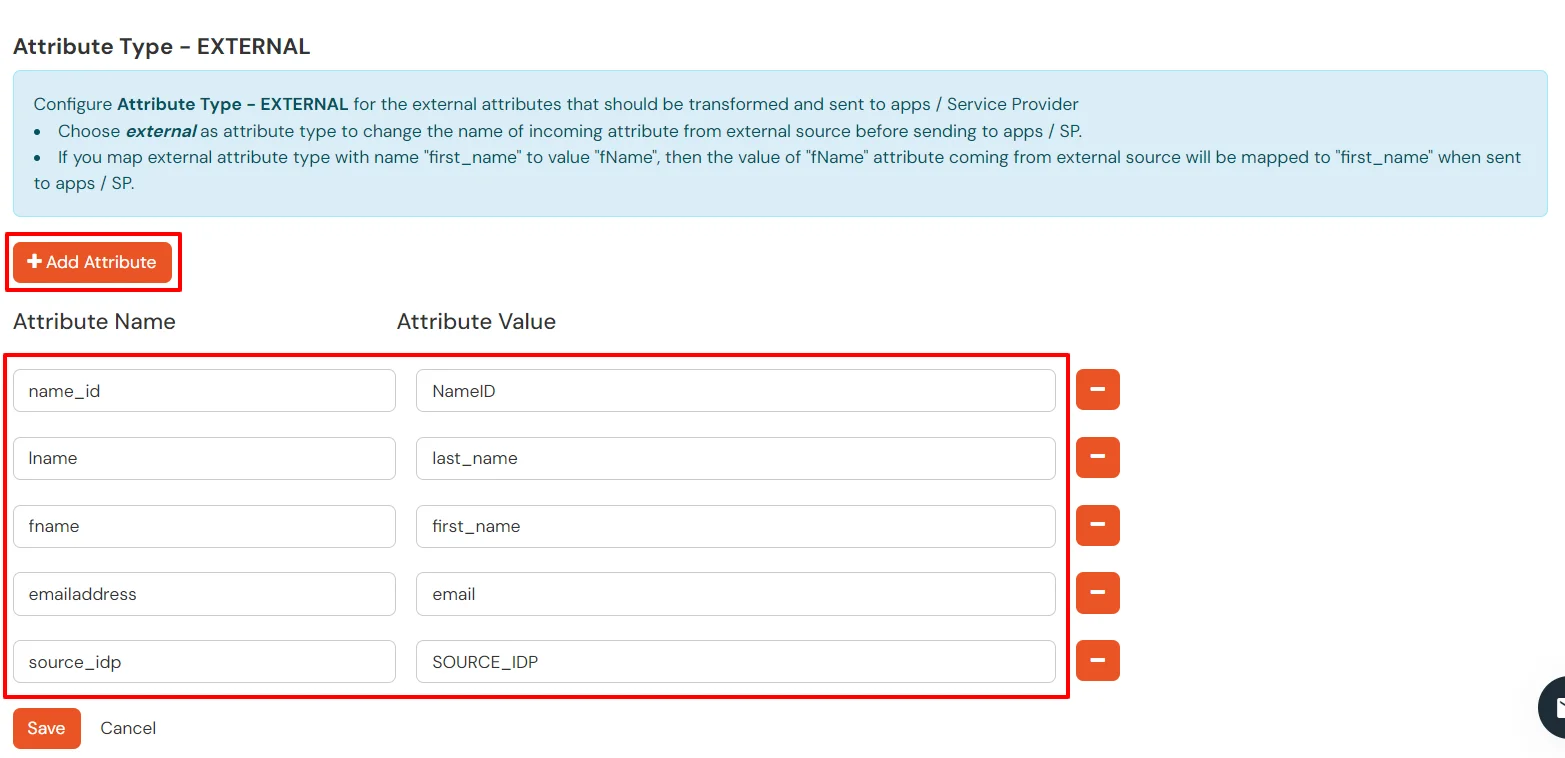
  • Click on the + Add Attribute button to add the attribute fields.
  • SiteMinder Single Sign-On SSO Map EXTERNAL Attribute

  • Check attributes in test connection window from last step. Enter the attribute names (any name) that you want to send to your application under Attribute Name sent to SP.
  • Enter the value of attributes that are coming from IdP into the Attribute Name from IdP field on the Xecurify side.

Configure Multiple IDPs:

You can follow this guide, if you want to configure multiple IDPs (Identity Providers) and give users the option to select the IDP of their choice to authenticate with.


Want To Schedule A Demo?

Request a Demo


Our Other Identity & Access Management Products