Hello there!
Need Help? We are right here!
Need Help? We are right here!
Search Results:
×Streamline the configuration of Salesforce SSO with this comprehensive setup guide provided by miniOrange. Our SAML Single Sign-On (SSO) solution enables seamless login to Salesforce Channels and various applications using a unified set of credentials. By enabling SSO for Salesforce, users can securely access Salesforce with just one click, eliminating the need to re-enter their username and password. Simplify your Salesforce authentication process and enhance security with miniOrange's user-friendly SSO solution.
With miniOrange Salesforce SSO, you can:
miniOrange offers free help through a consultation call with our System Engineers to Install or Setup Salesforce SSO solution in your environment with 30-day free trial.
For this, you need to just send us an email at idpsupport@xecurify.com to book a slot and we'll help you in no time.
miniOrange-Salesforce SAML integration supports the following features:
miniOrange provides user authentication from various external sources, which can be Directories (like ADFS, Microsoft Active Directory, OpenLDAP, AWS etc), Identity Providers (like Microsoft Entra ID, Okta, AWS), and many more. You can configure your existing directory/user store or add users in miniOrange.
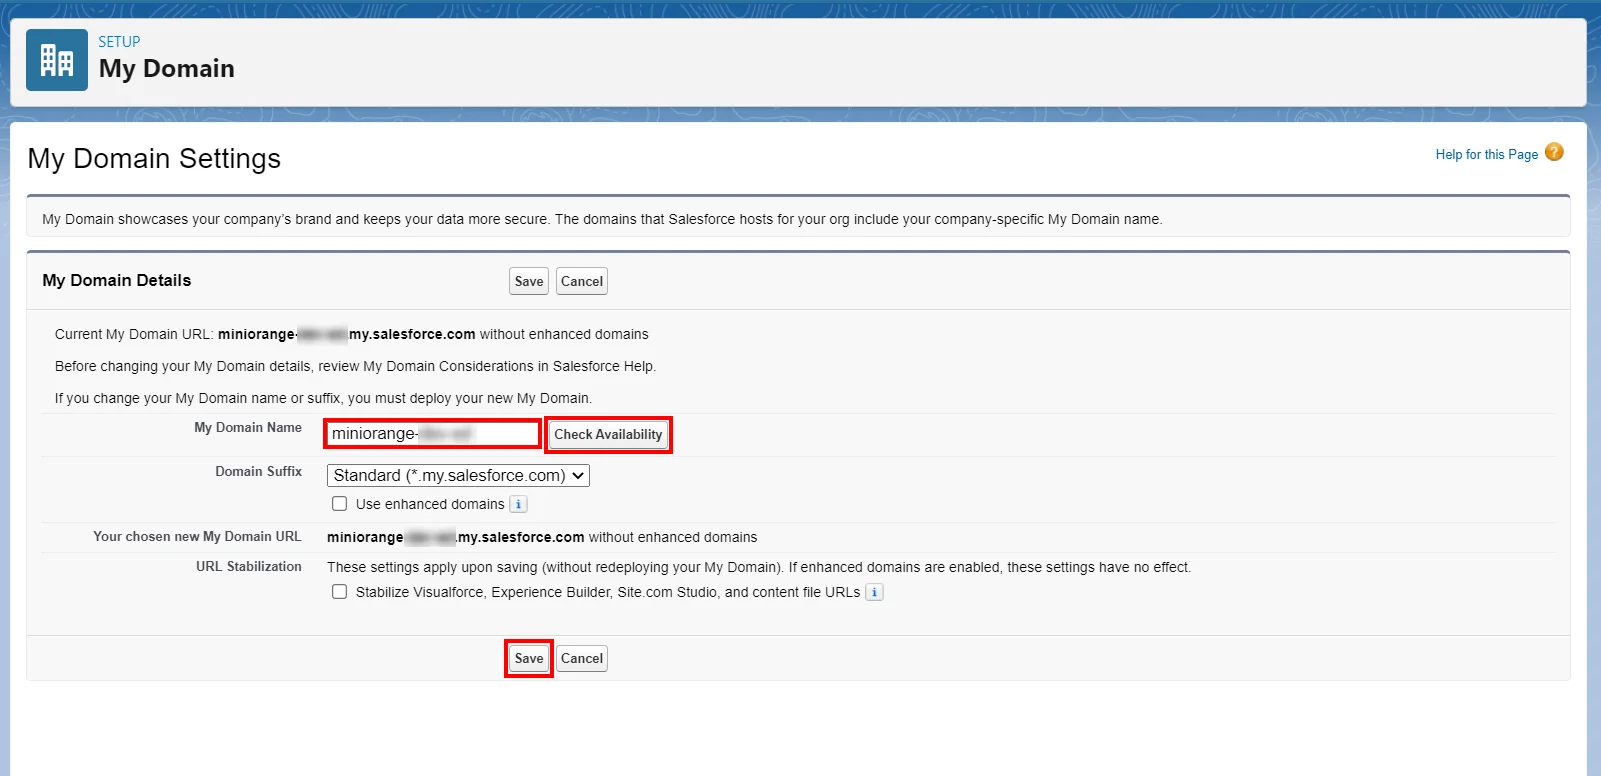
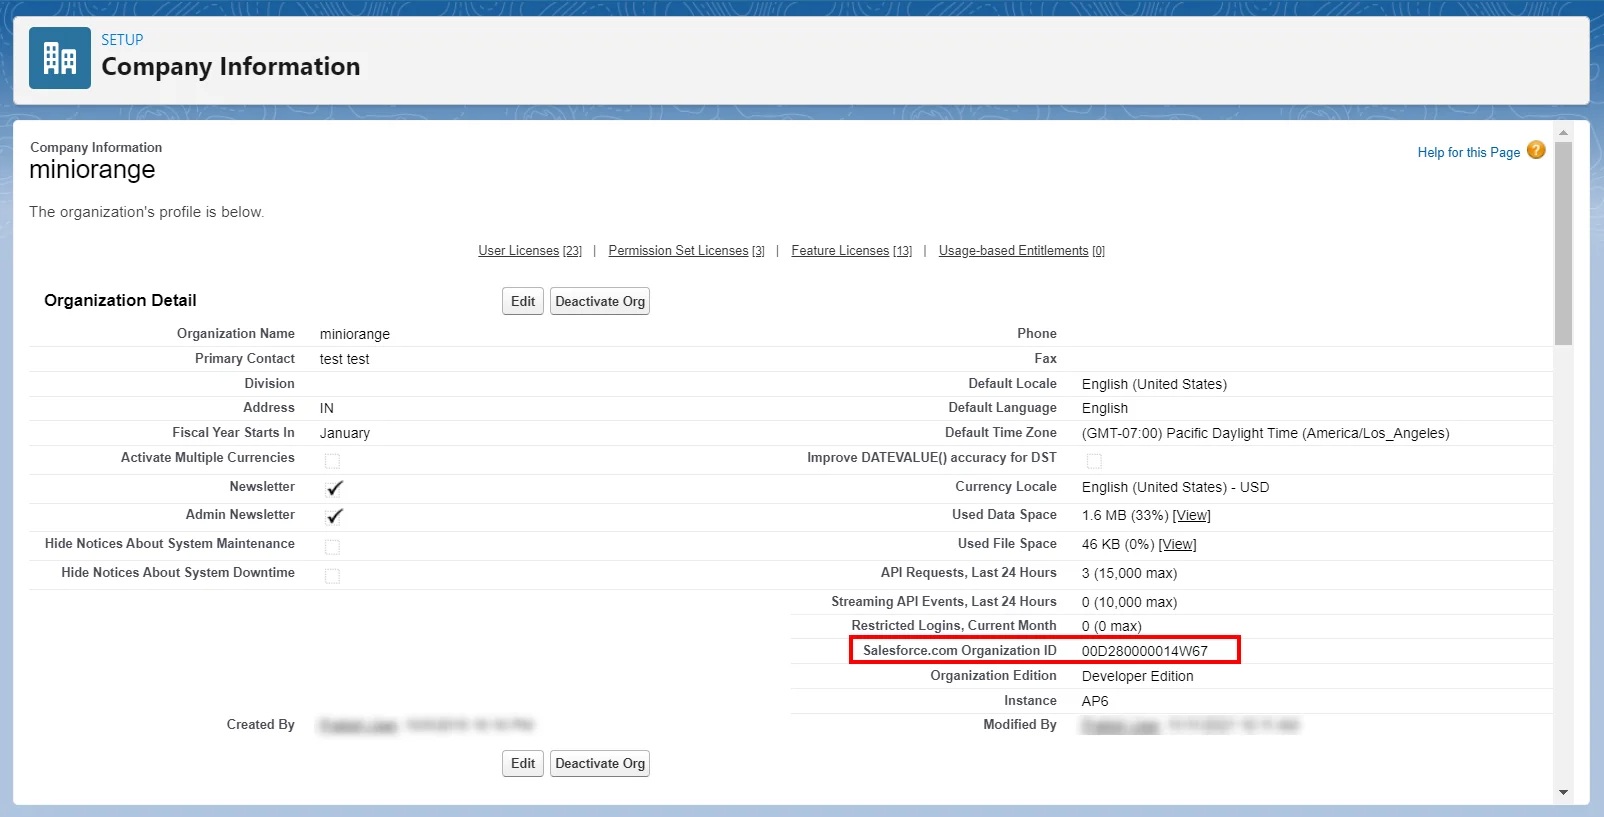
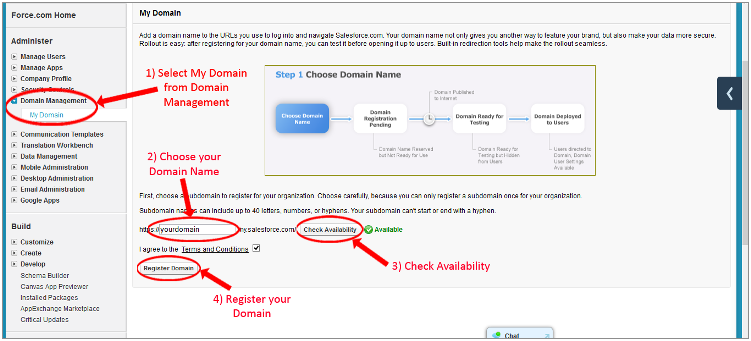

Salesforcehttps://[yourdomain].my.salesforce.com/ https://[yourdomain].my.salesforce.com/?so=[organization_id] https://[yourdomain].my.salesforce.comON
(Follow the steps given here to find out Salesforce profileId.)
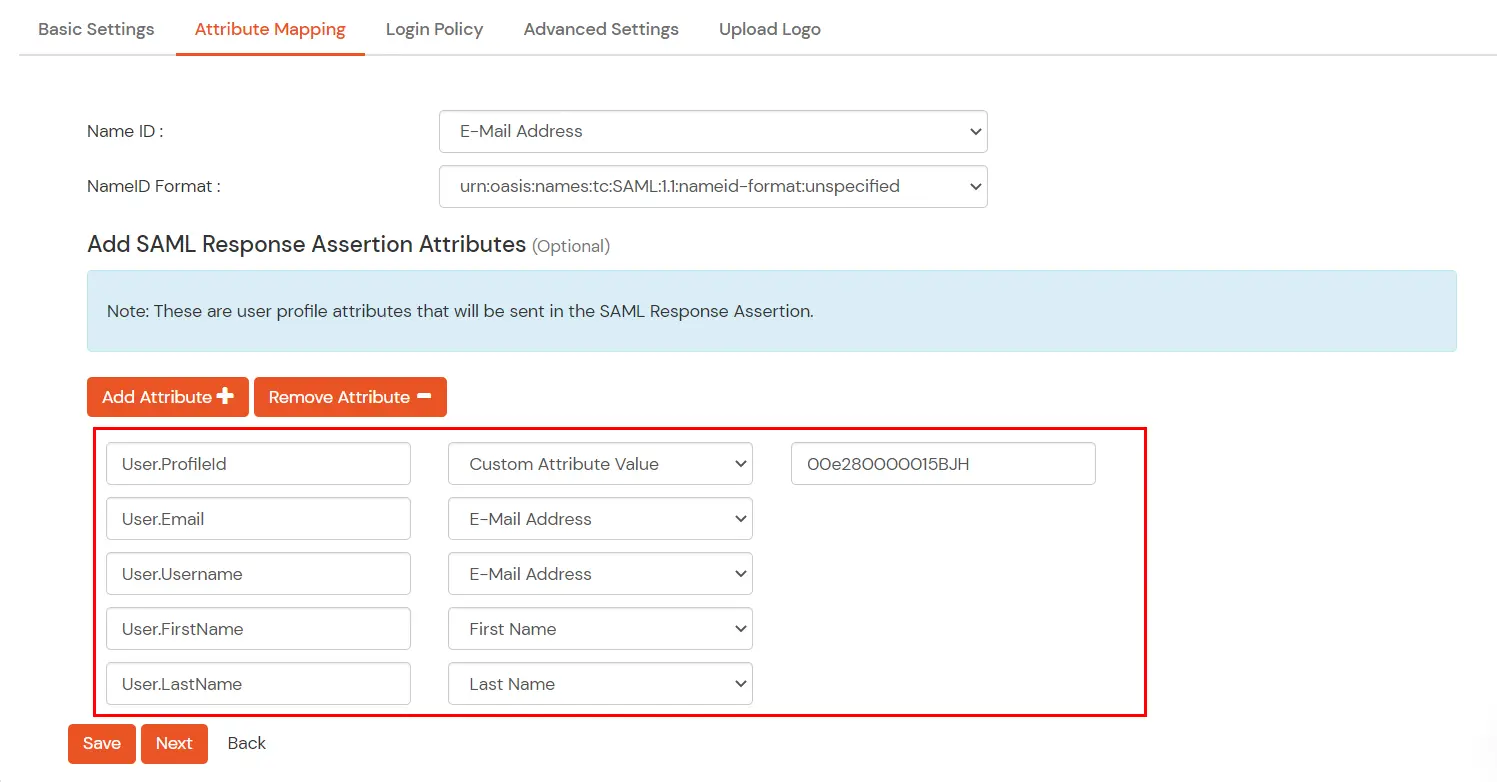

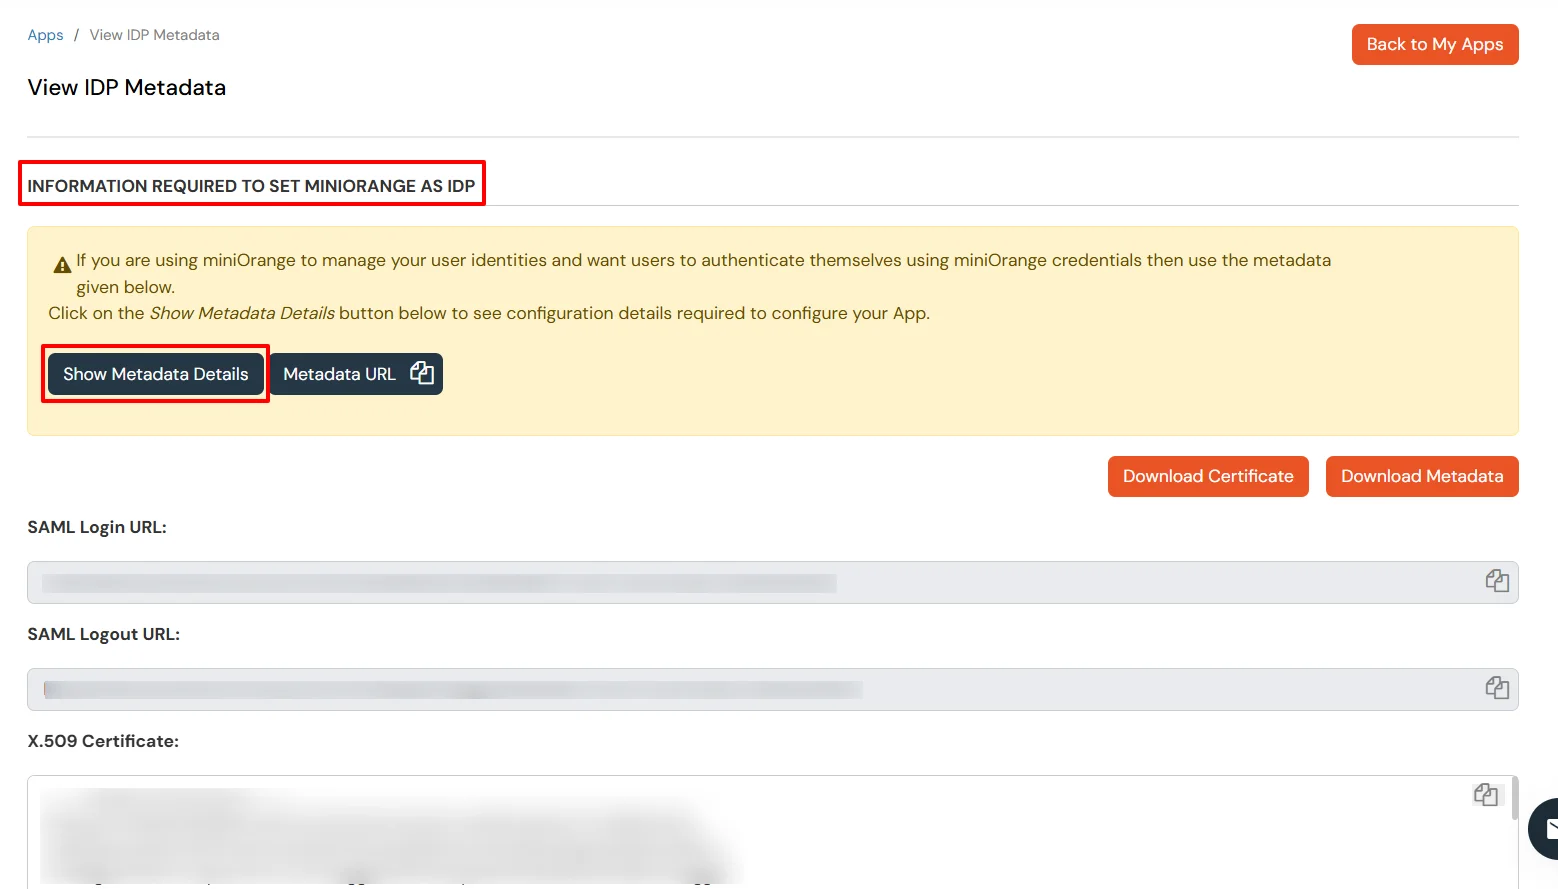
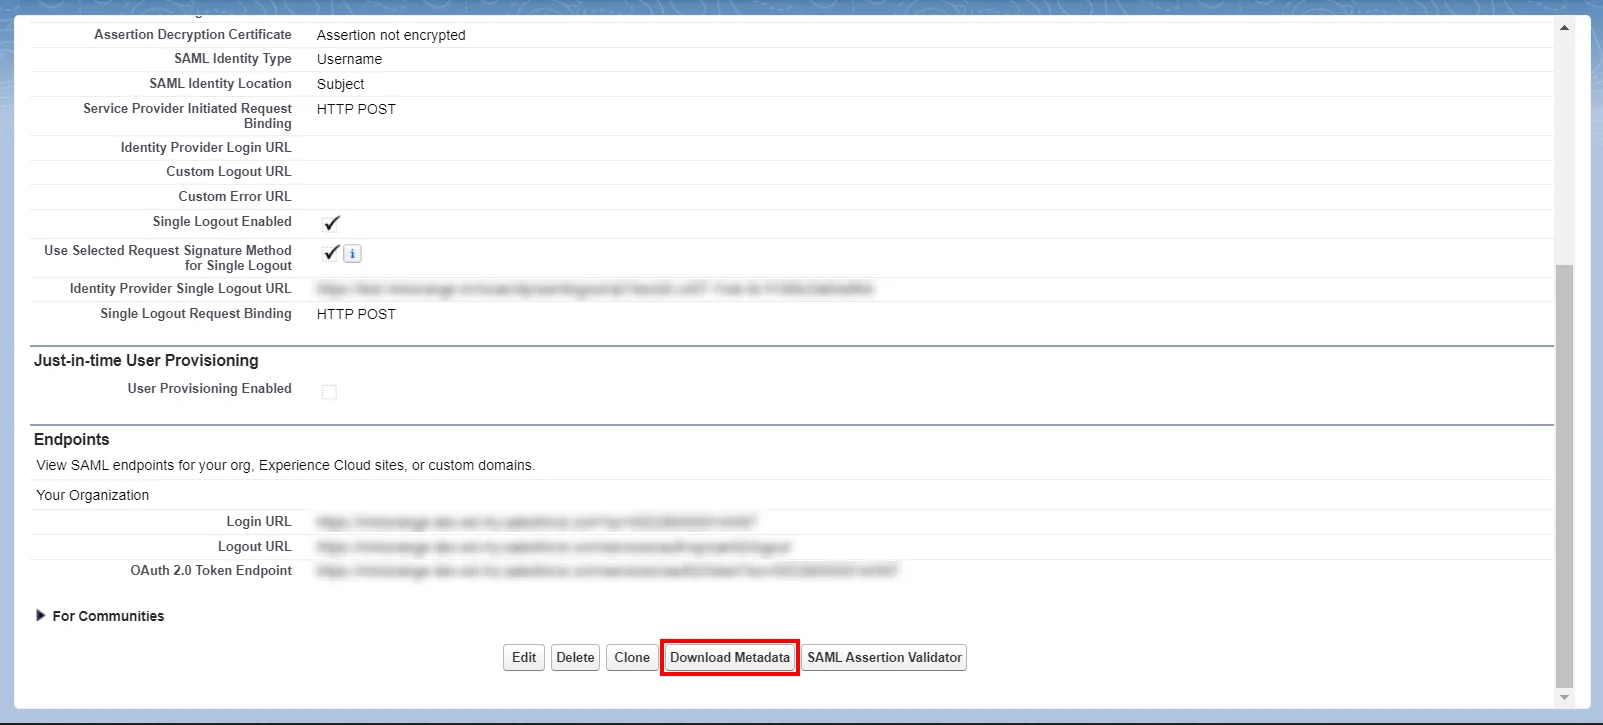
IDP Entity ID/Issuer in miniorange metadatahttps://[yourdomain].my.salesforce.com Upload Certificate from miniOrange metadata RSA-SHA256Not encryptedAssertion contains the User's Salesforce usernameIdentity is in the NameIdentifier element of the Subject statementHTTP RedirectSAML Login URL in miniOrange metadatahttps://[yourdomain].my.salesforce.com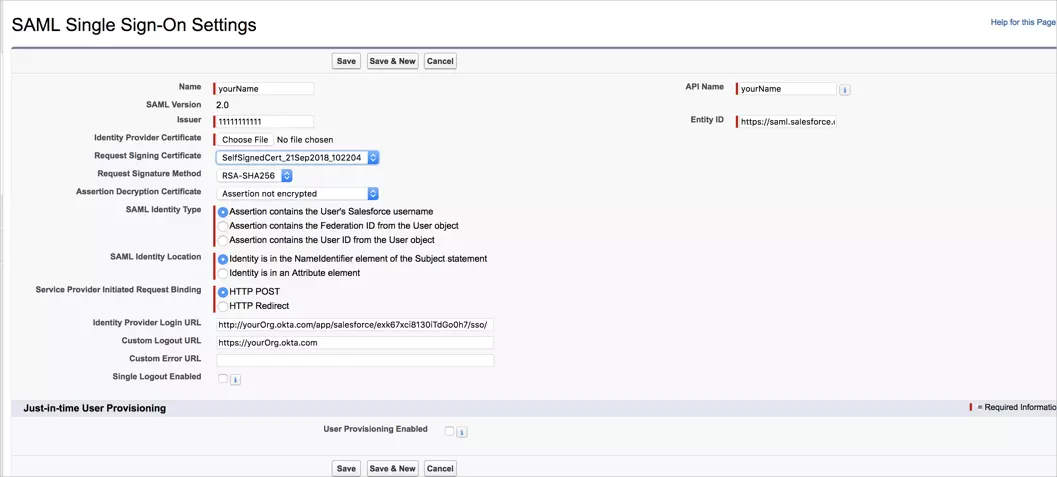
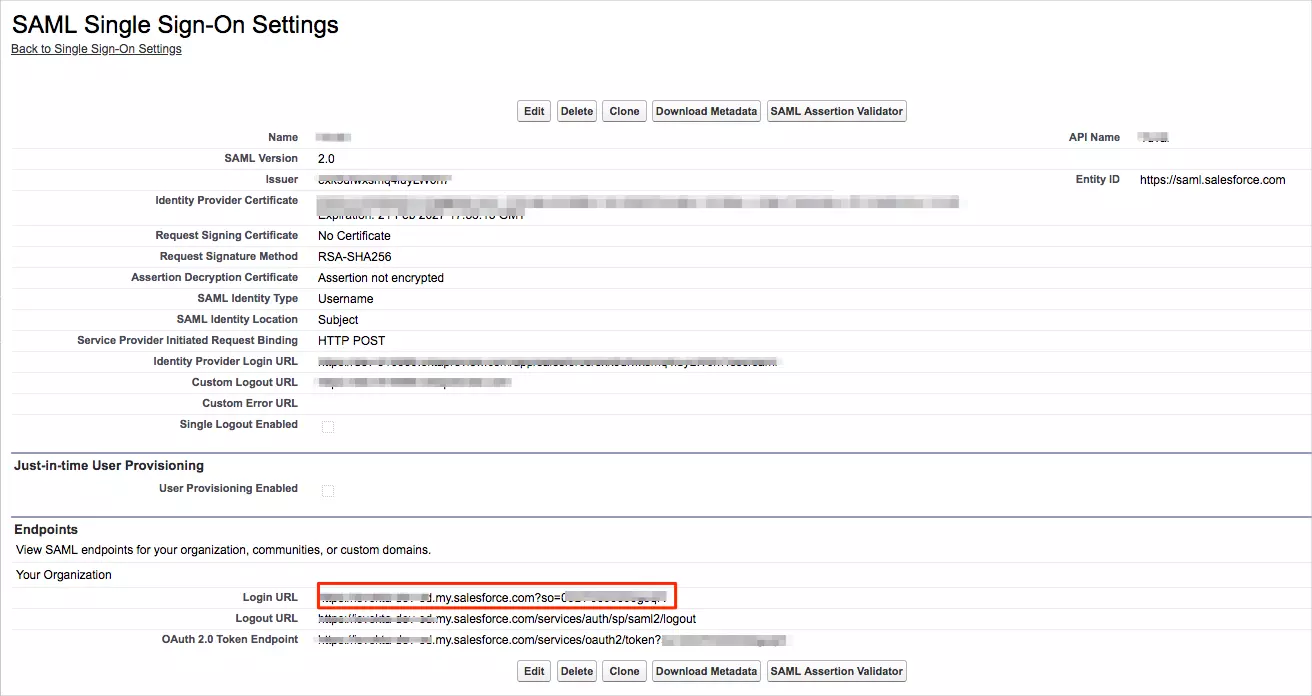
Test SSO login to your Salesforce account with miniOrange IdP:
Contact us or email us at idpsupport@xecurify.com and we'll help you setting it up in no time.
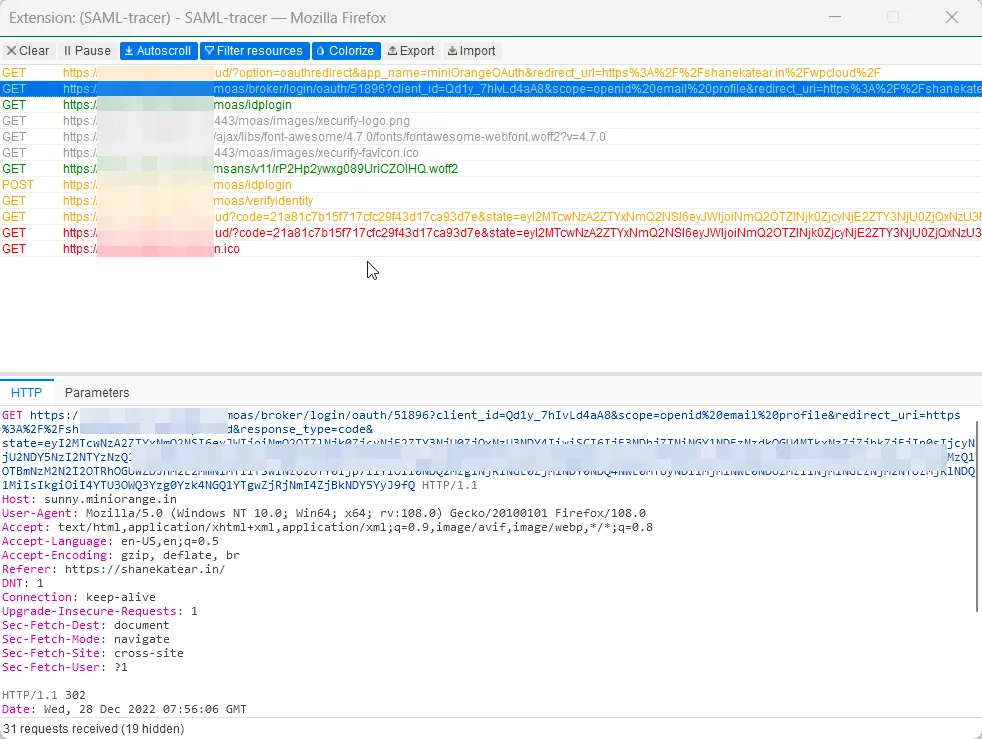
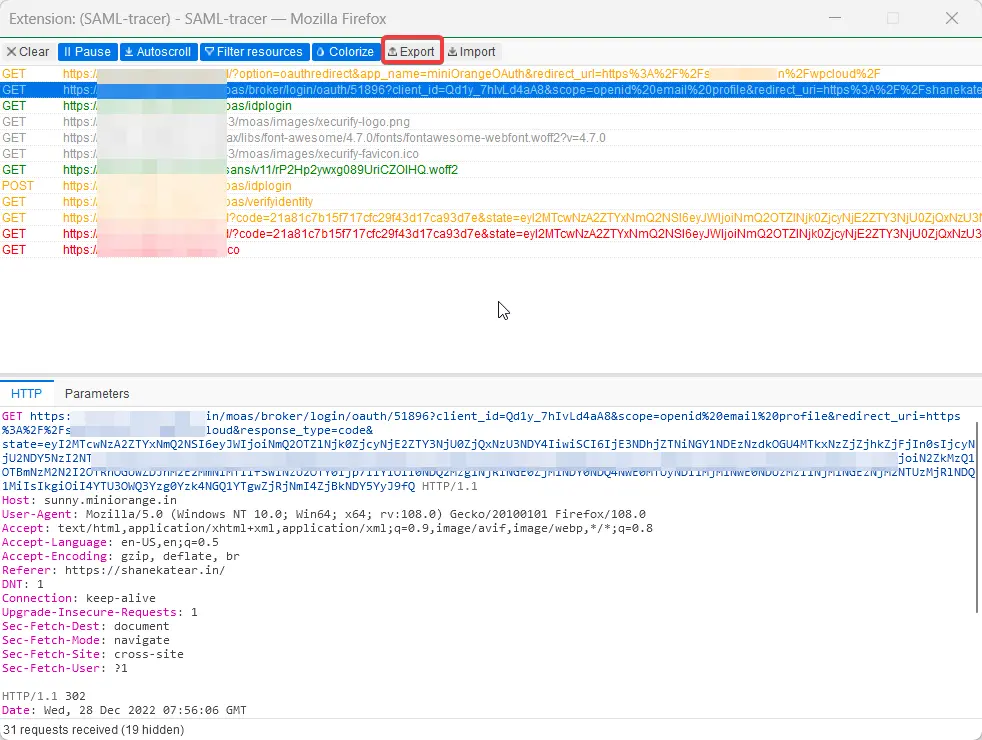
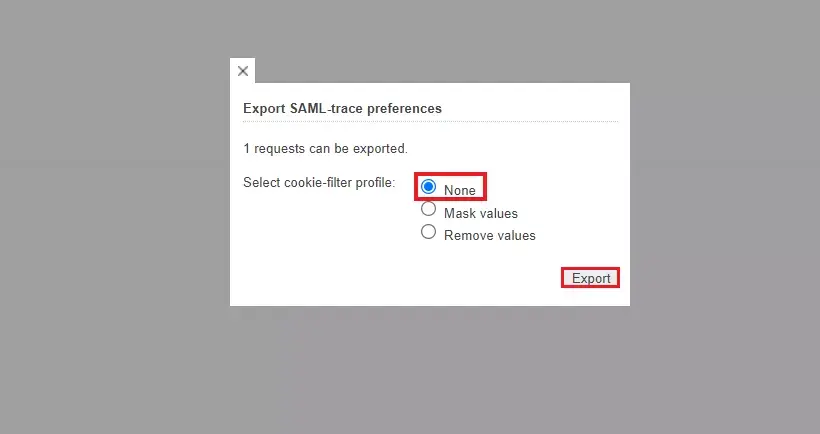
For Firefox: Add SAML tracer Add-On from the Firefox marketplace.
For Chrome / Edge or Chromium-based browsers: Install the SAML tracer extension from Chrome Webstore.