Two-Factor Authentication (2FA) for ClearSlide
Two Factor Authentication (2FA) or Multifactor Authentication is the process of the authentication in which you have to provide two factors to gain the access. First Factor is the one that you know username and password and Second factor is what you might have as unique like a phone (For OTP) or Fingerprint. This additional layer prevents the unauthorized person from accessing the resources even if they know your username and password. miniOrange provides 15+ authentication methods and solutions for various use cases.
Connect with External Source of Users
miniOrange provides user authentication from various external sources, which can be Directories (like ADFS, Microsoft Active Directory, OpenLDAP, AWS etc), Identity Providers (like Microsoft Entra ID, Okta, AWS), and many more. You can configure your existing directory/user store or add users in miniOrange.

miniOrange
Authenticator App
Google
Authenticator App

Authy 2-Factor
Authentication App
Microsoft
Authenticator App
Follow the Step-by-Step Guide given below for ClearSlide Single Sign-On (SSO)
1. Configure ClearSlide in miniOrange
- Login into miniOrange Admin Console.
- Go to Apps and click on Add Application button.

- In Choose Application Type, select SAML/WS-FED from the All Apps dropdown.
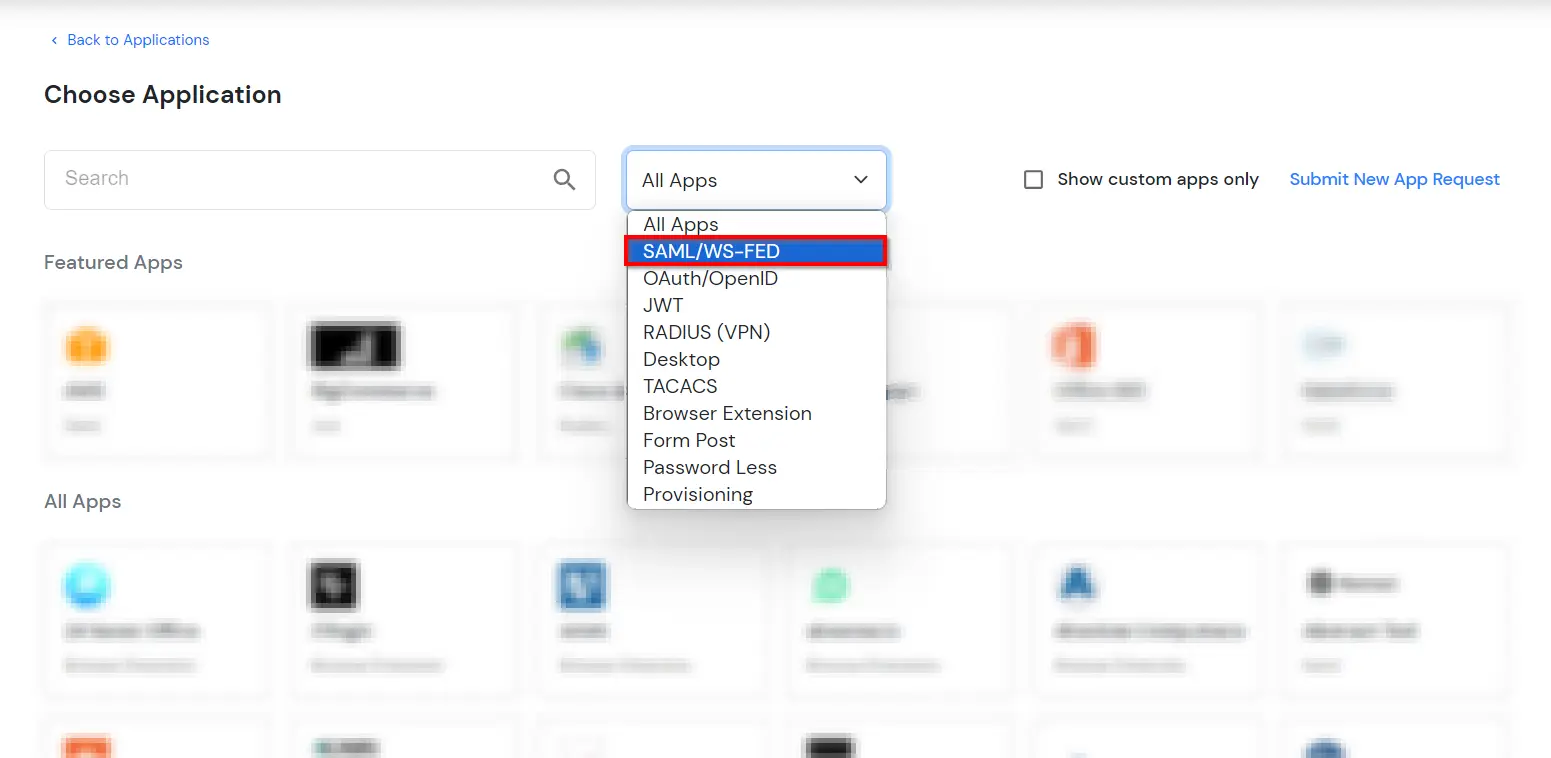
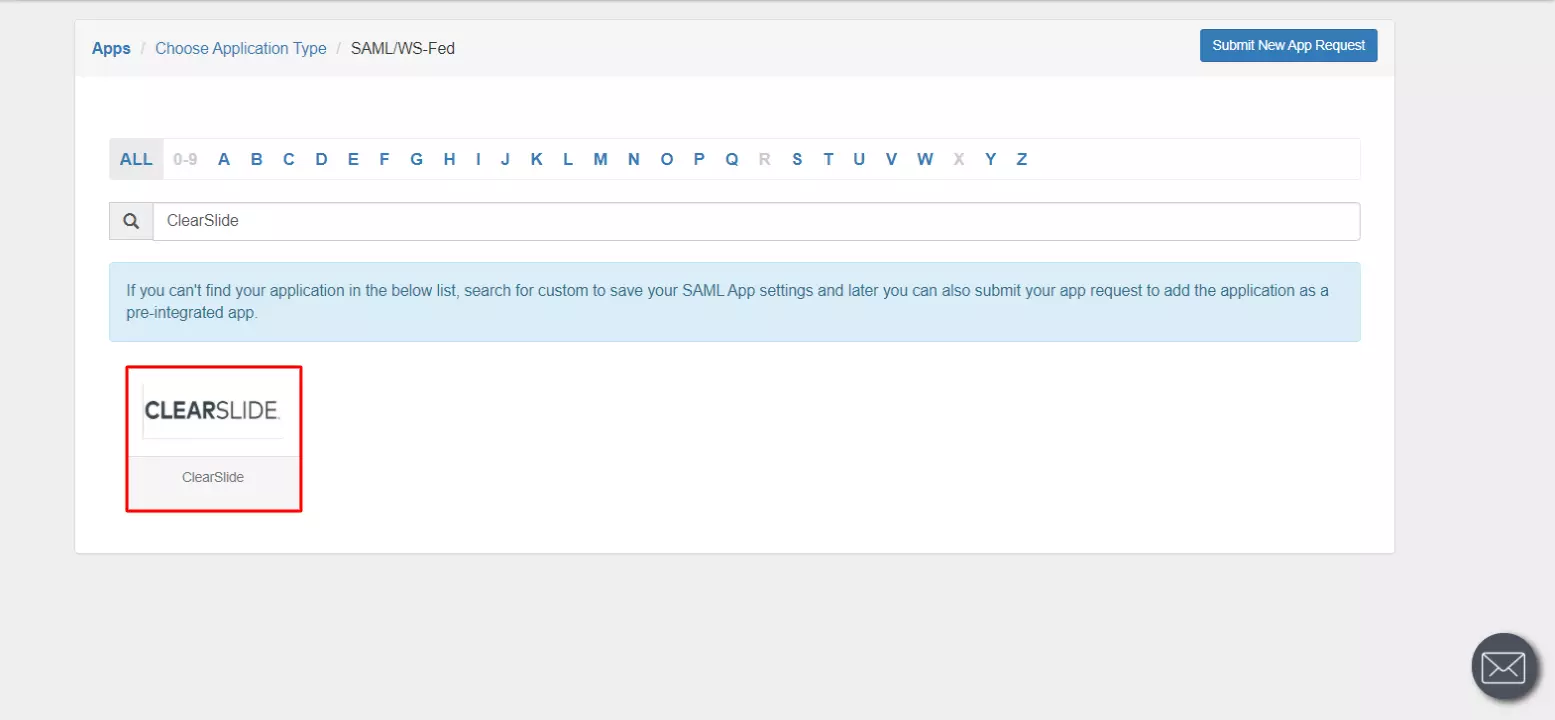
- Search for ClearSlide in the list, if you don't find ClearSlide in the list then, search for custom and you can set up your application in Custom SAML App.
- Enter the SP Entity ID or Issuer.
- Enter the ACS URL which you will get from your ClearSlide Single Sign-On Settings.
- Enter the Single Logout URL.
- Leave the Attributes section empty.
- Go to the Add Policy and select DEFAULT from the Group Name dropdown.
- Now enter the name for your app authentication policy in the Policy Name field.
- Select PASSWORD from the First Factor Type dropdown.
- Click on Save to configure ClearSlide.
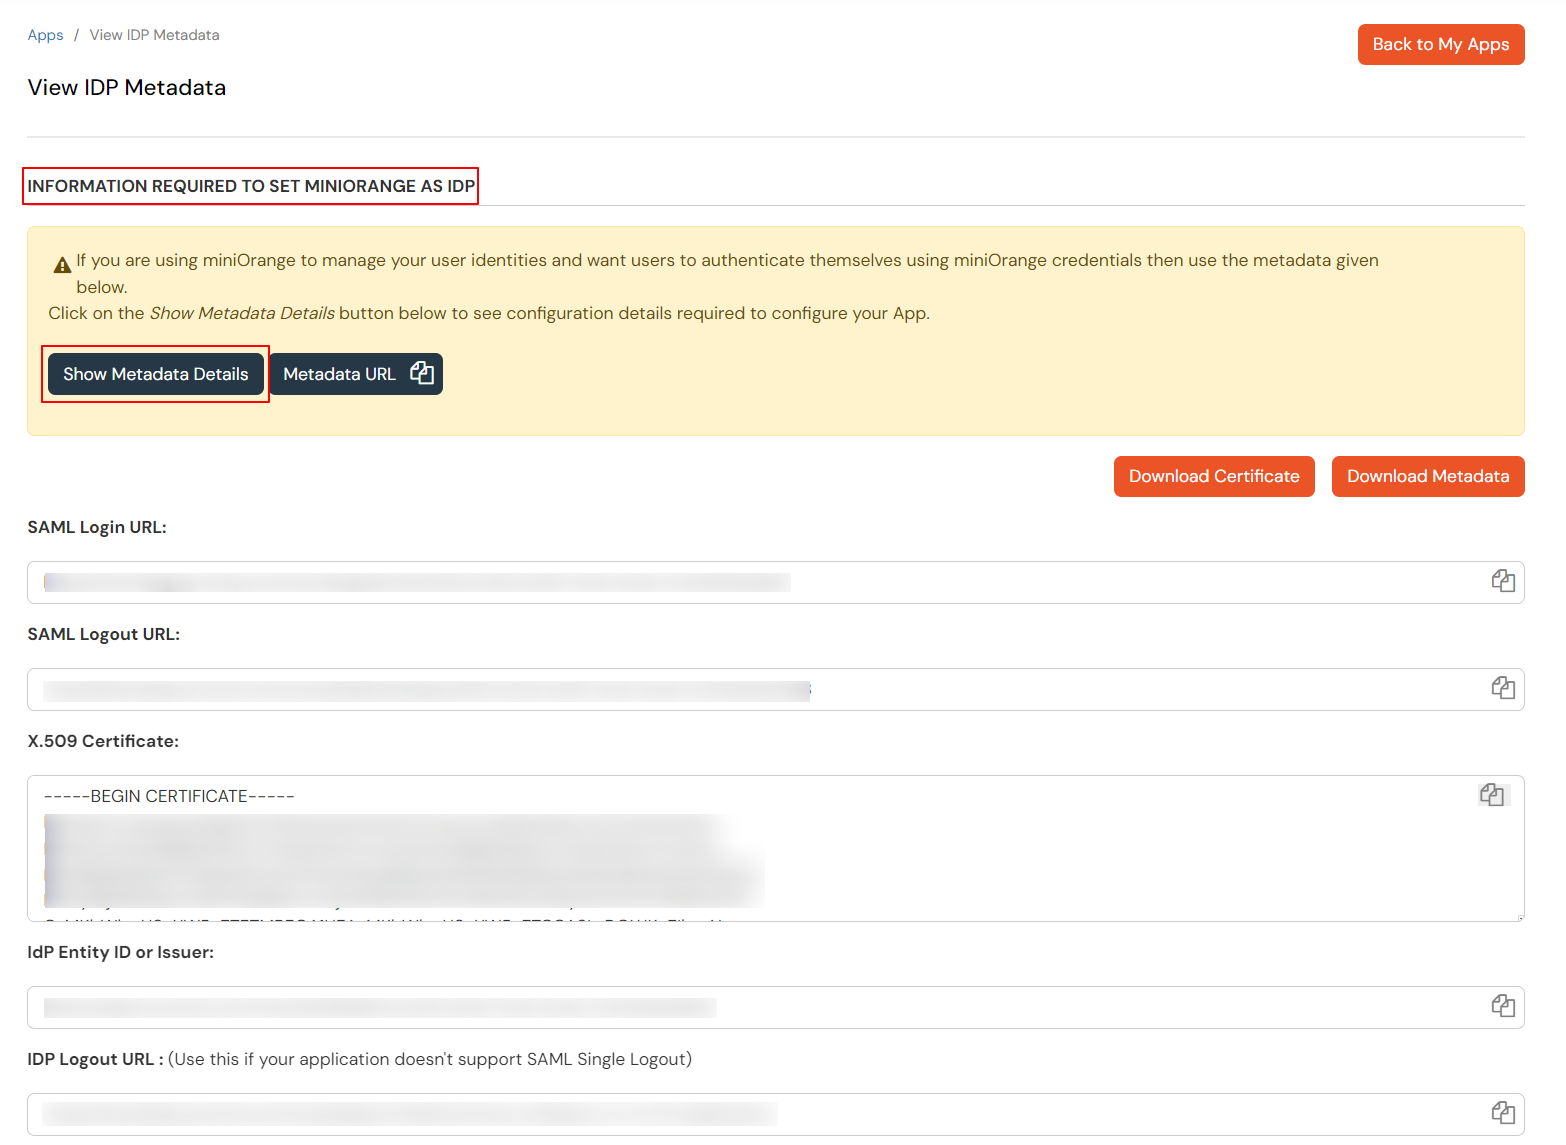
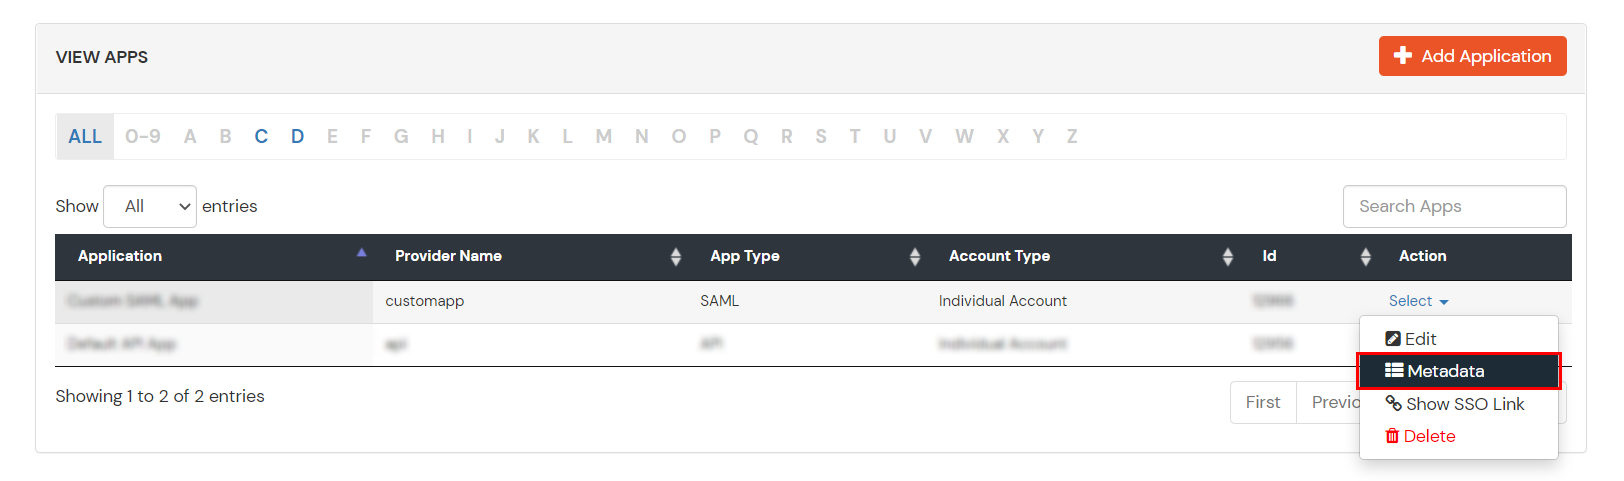
- Click on Metadata link to download the metadata which will be required later. Click on Link to see the IDP initiated SSO link for ClearSlide.
- Keep SAML Login URL , SAML Logout URL and click on the Download Certificate button which you will require in Step 4.
2. Configure SSO in ClearSlide
- Contact ClearSlide and request that they enable SAML for your account.
- Sign in to your ClearSlide account.
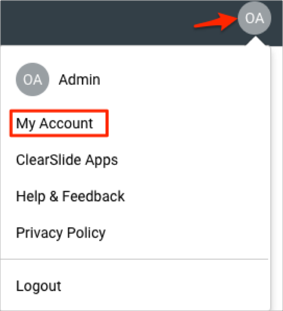
- Navigate to your account icon and select My Account:
- Select Single Sign-On Settings, then enter the following (see screenshot at end of step for reference):
- Check Automatically create user to enable Just In Time (JIT) provisioning.
- Check Require Single Sign-On for all users if you want users to login to ClearSlide only with their SSO credentials.
- Custom Login URL: Create a user-friendly URL that your team can use to login to ClearSlide with Single Sign-On.
- Single Sign-Out URL: This you will get from the IdP Metadata.
- SAML Consumer URL: This you have to enter in the configuration settings of IdP.
- IDP Metadata URL: Paste the Metadata URL which you will get from Step 1.
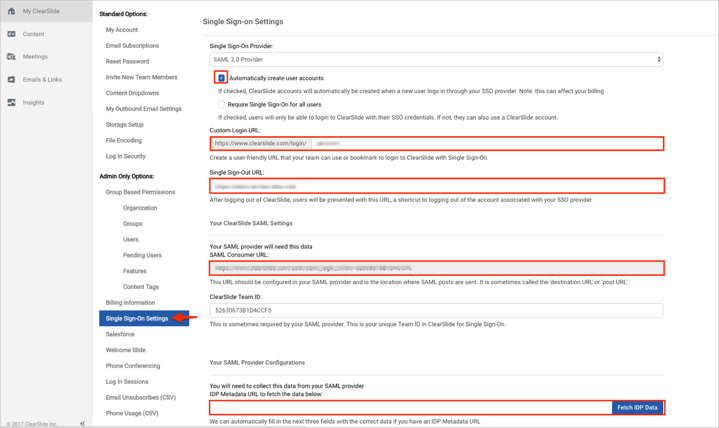
- Click Save.
3. Configure 2FA for ClearSlide
3.1: Enable 2FA for Users of ClearSlide app
- To enable 2FA for Users of ClearSlide application. Go to Policies >> App Login Policy
- Click on Edit icon against the application you have configured.
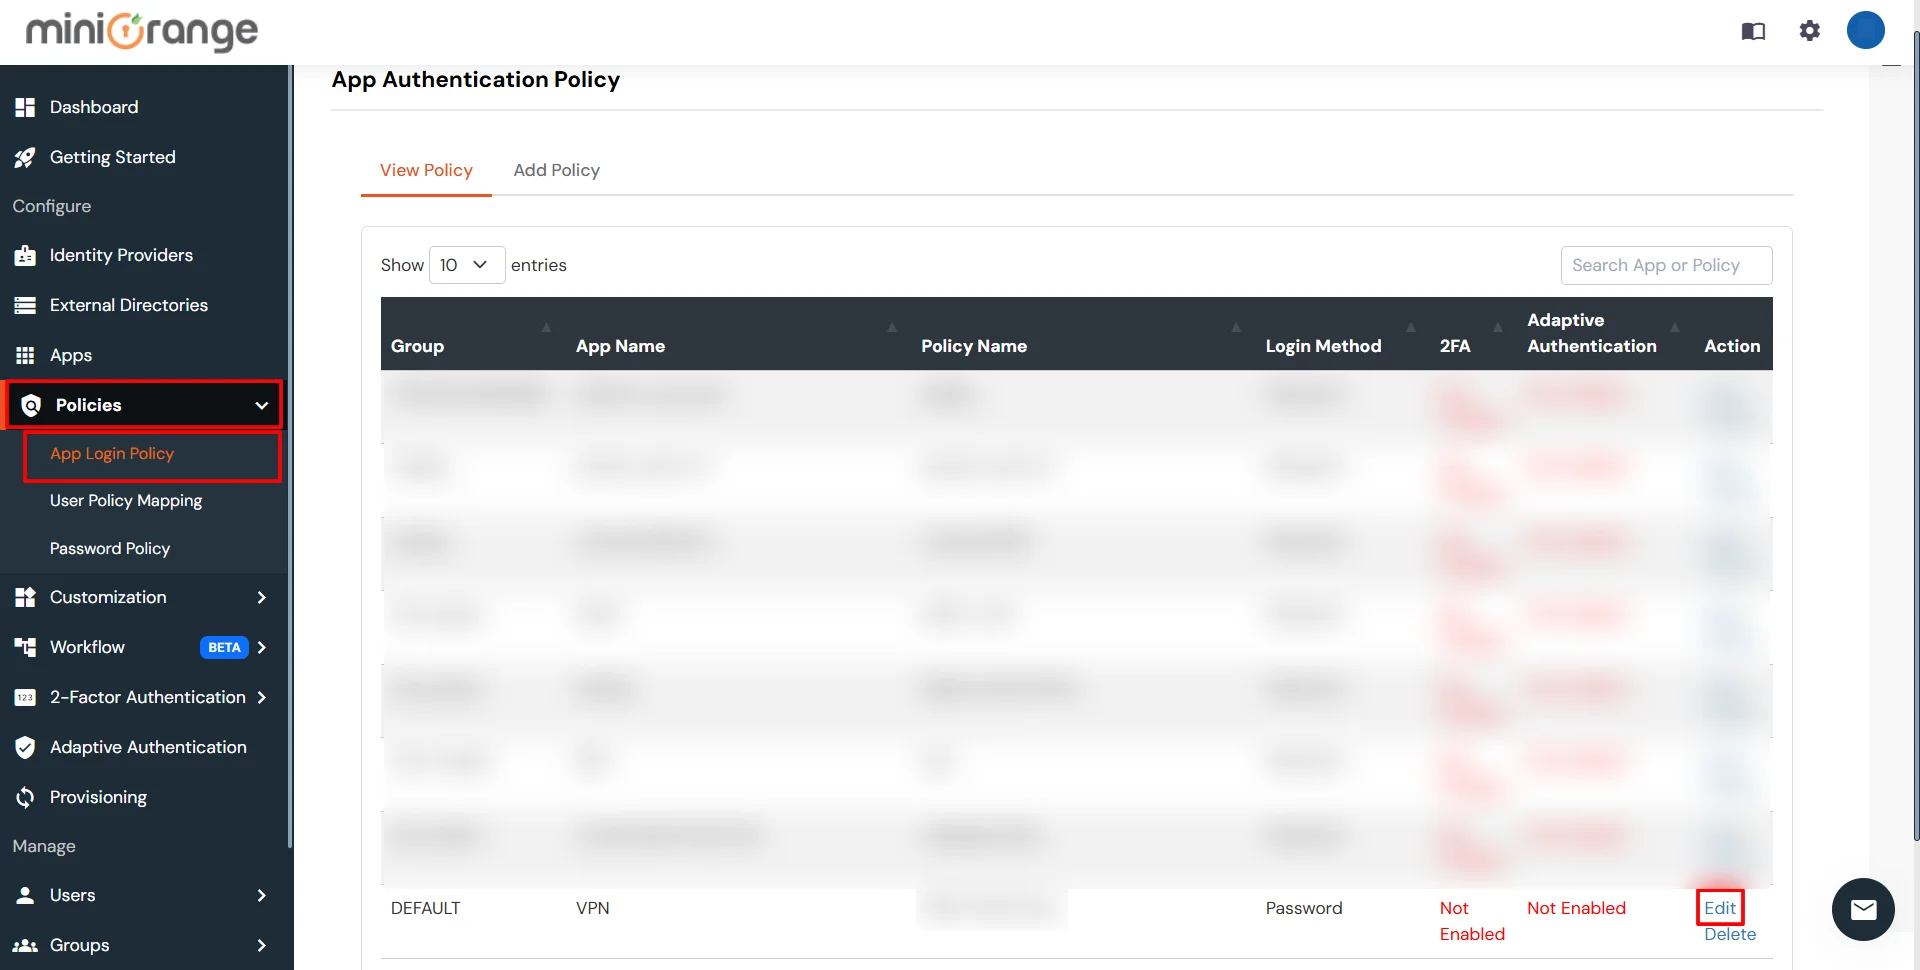
- Check the Enable 2-Factor Authentication (MFA) option.
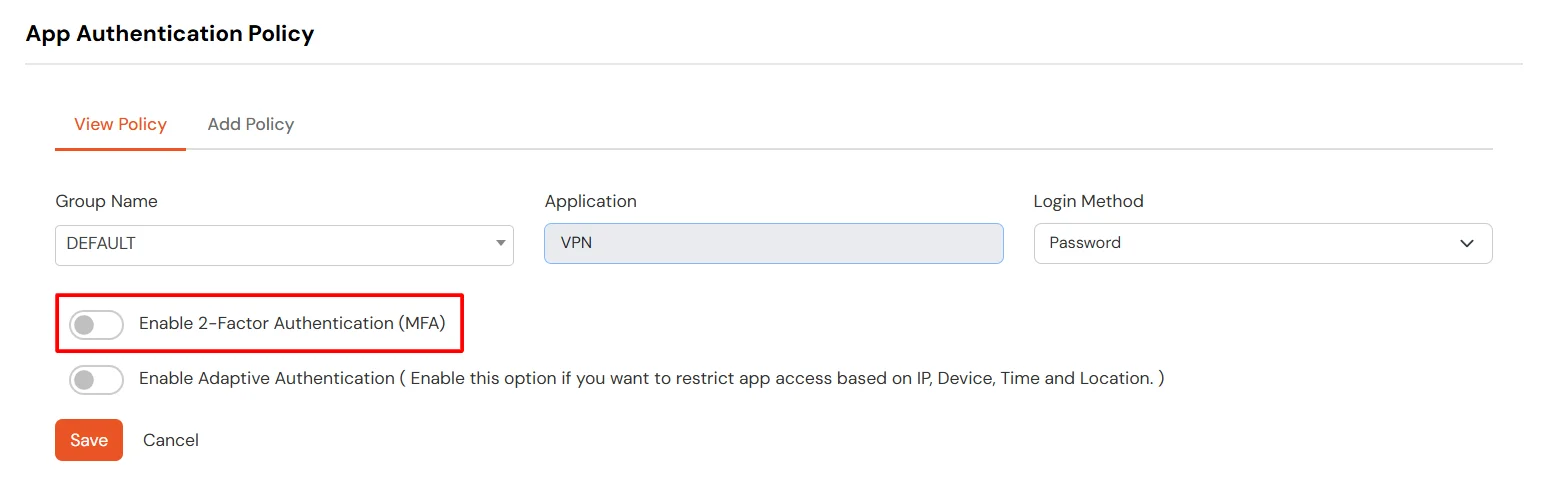
- Click on Submit.
3.2: Configure 2FA for your Endusers
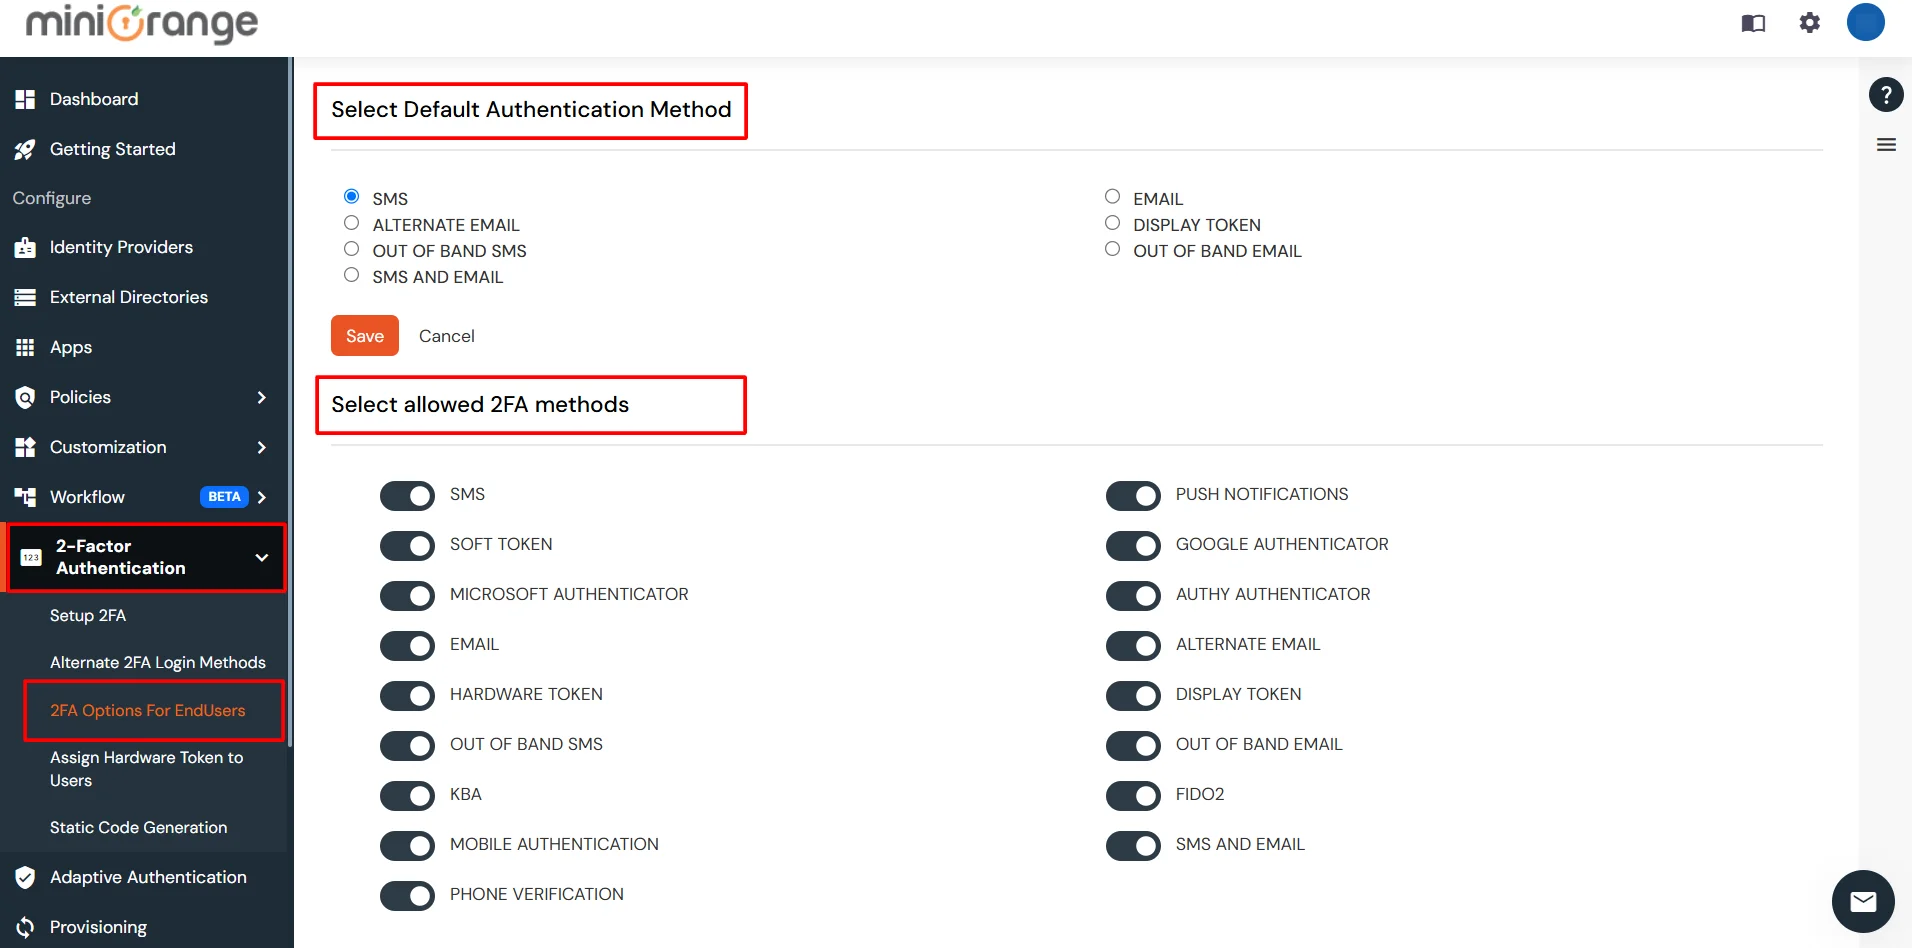
- To enable 2FA/MFA for endusers, go to 2-Factor Authentication >> 2FA Options For EndUsers.
- Select default Two-Factor authentication method for end users. Also, you can select particular 2FA methods, which you want to show on the end users dashboard.
- Once Done with the settings, click on Save to configure your 2FA settings.
3.3: Enduser 2FA Setup
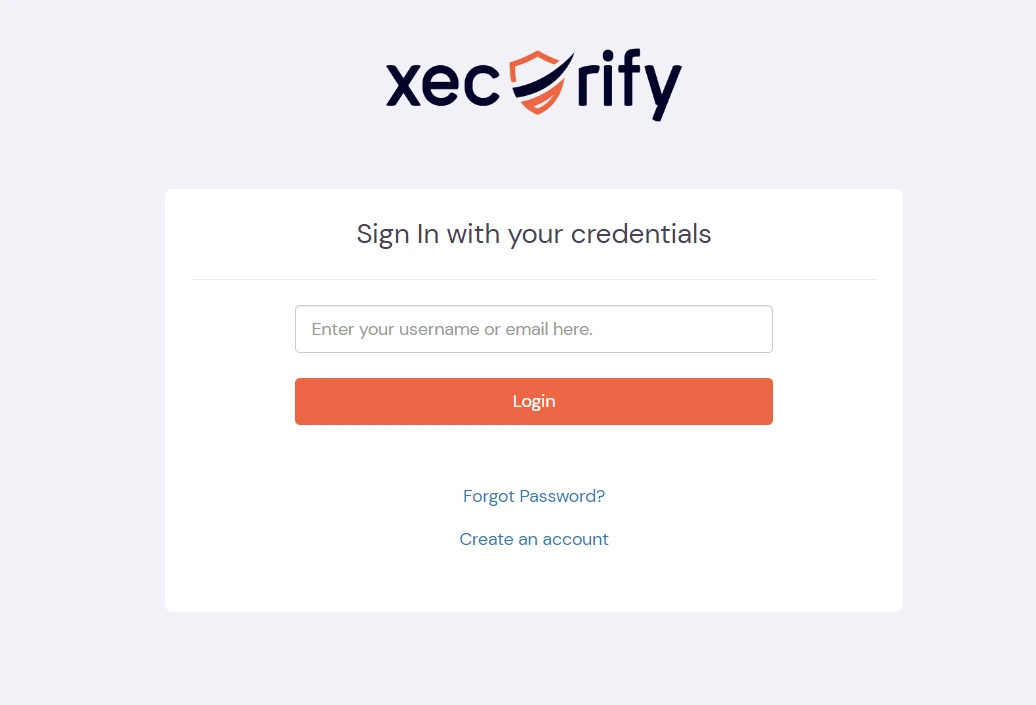
- Login to End-User Dashboard using end user login URL.
- For Cloud Version: The login URL (branding url) which you have set.
- For On-Premise version: The login URL will be the same as of Admin Login URL.
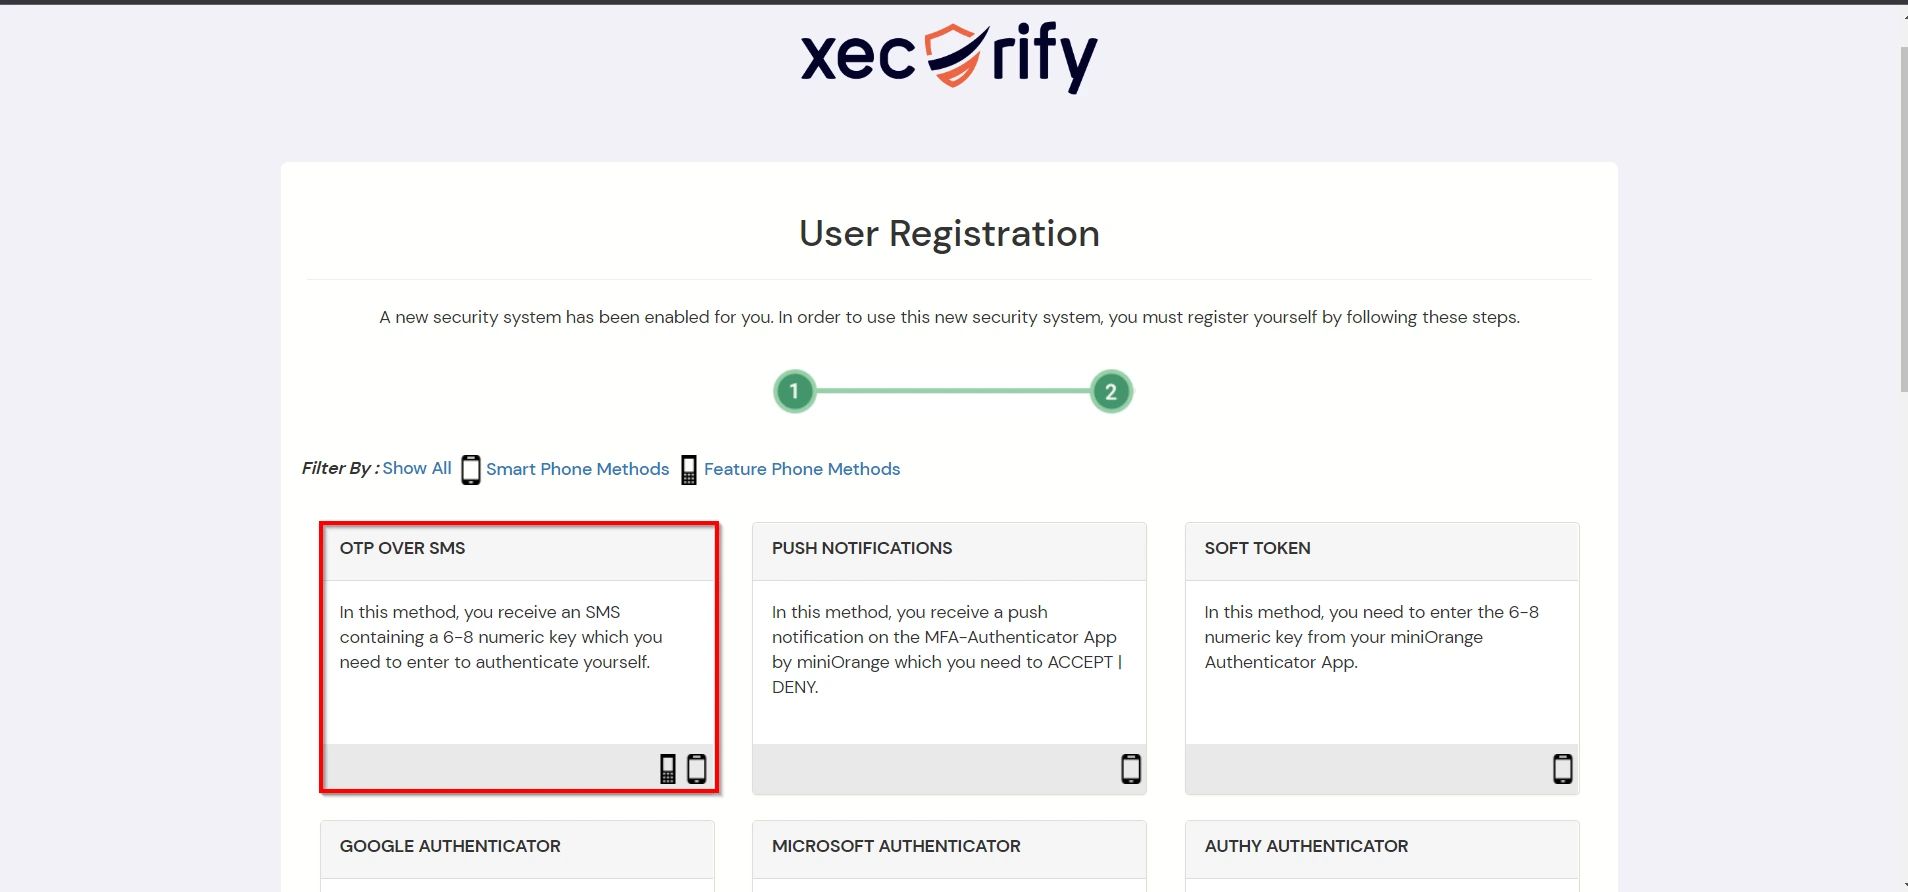
- Select Setup 2FA from left panel. Then select any of the 2FA method available.
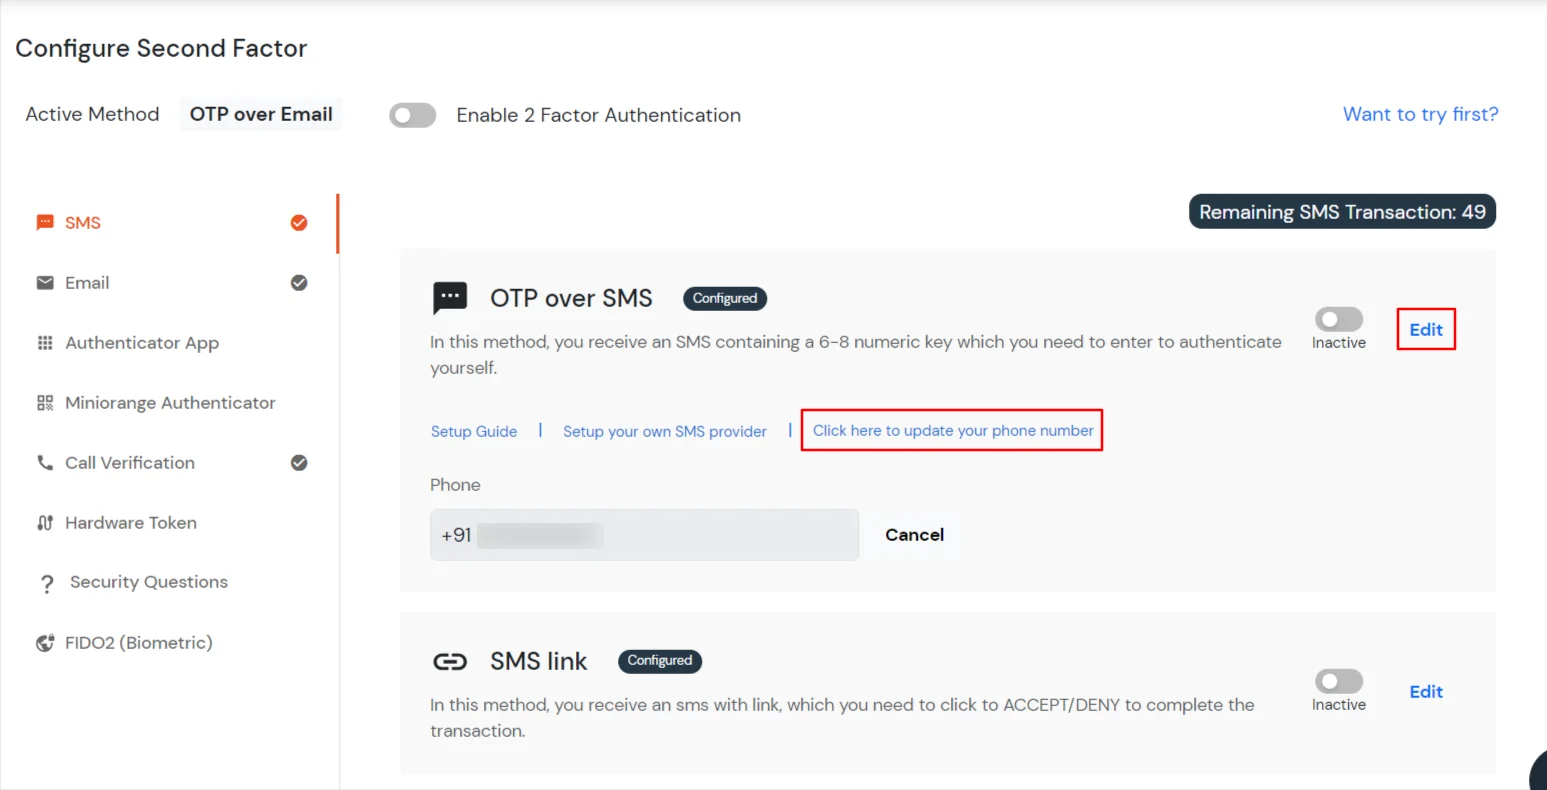
- For now, we have selected the SMS >> OTP OVER SMS as our 2FA method. You can explore the guide to setup other 2FA methods here.
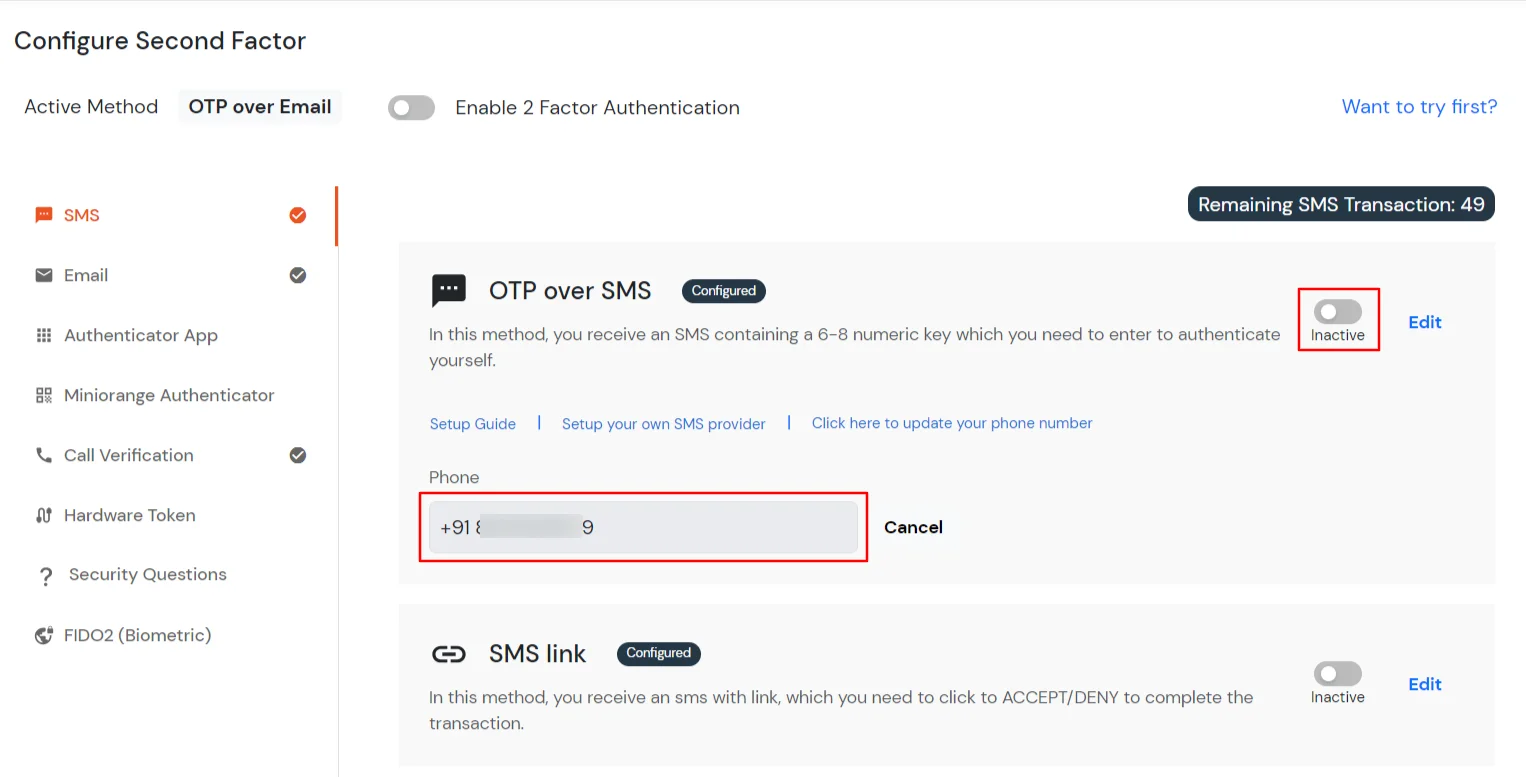
- Enable the OTP over SMS if you have your phone number added under your account information else click on Edit >> Click here to update your phone number link.
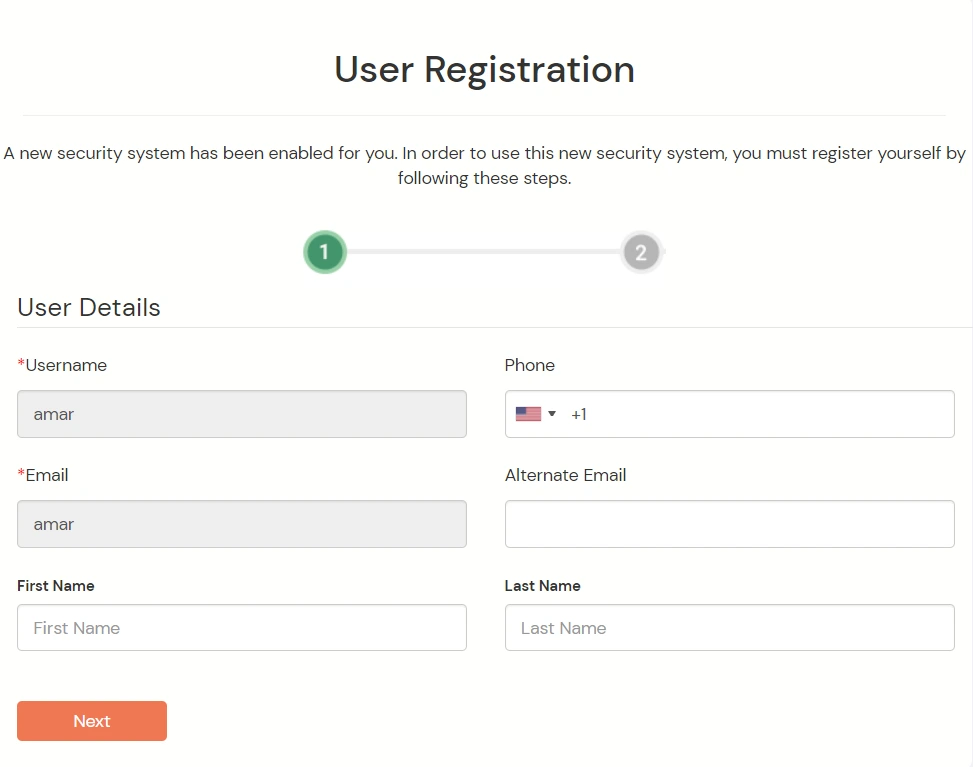
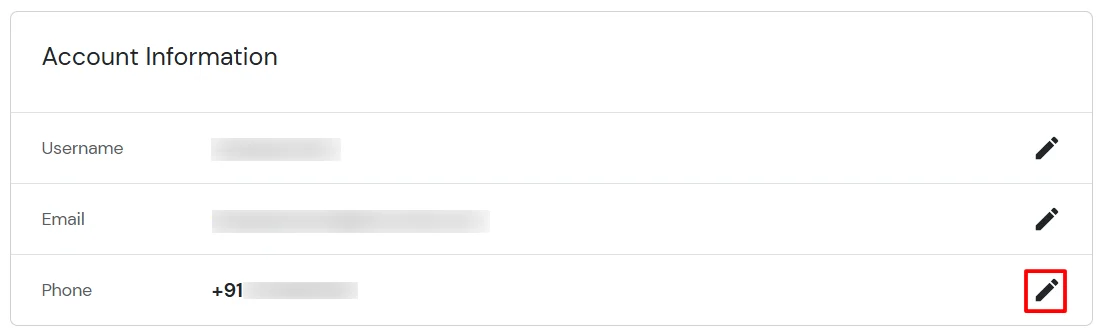
- In Account Information, click on edit icon.
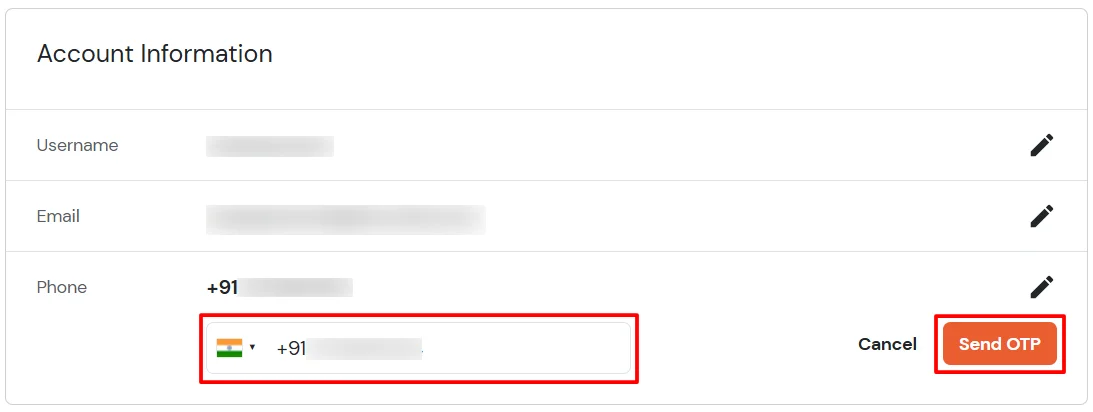
- Select your country code, enter your mobile number, and click Send OTP.
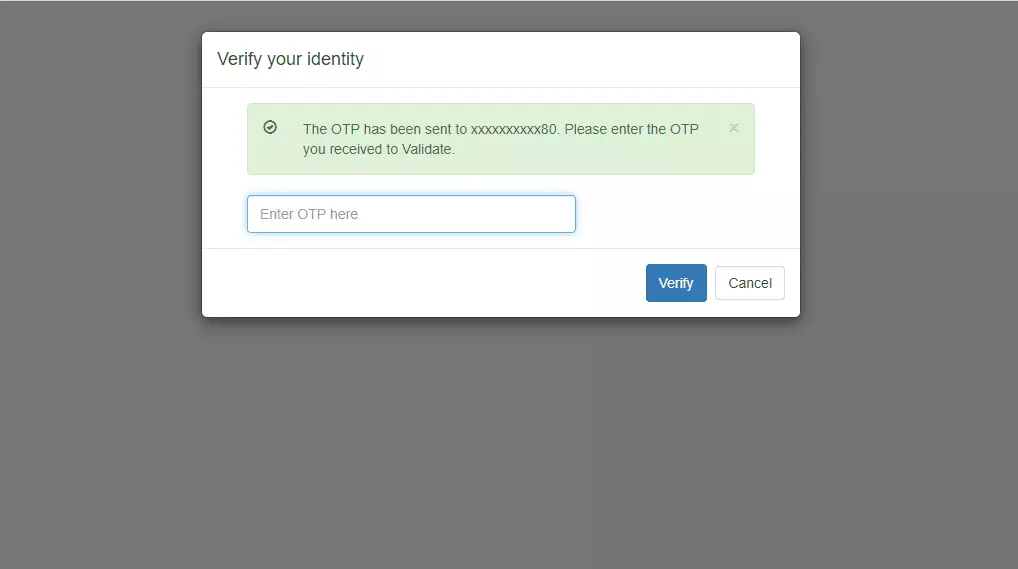
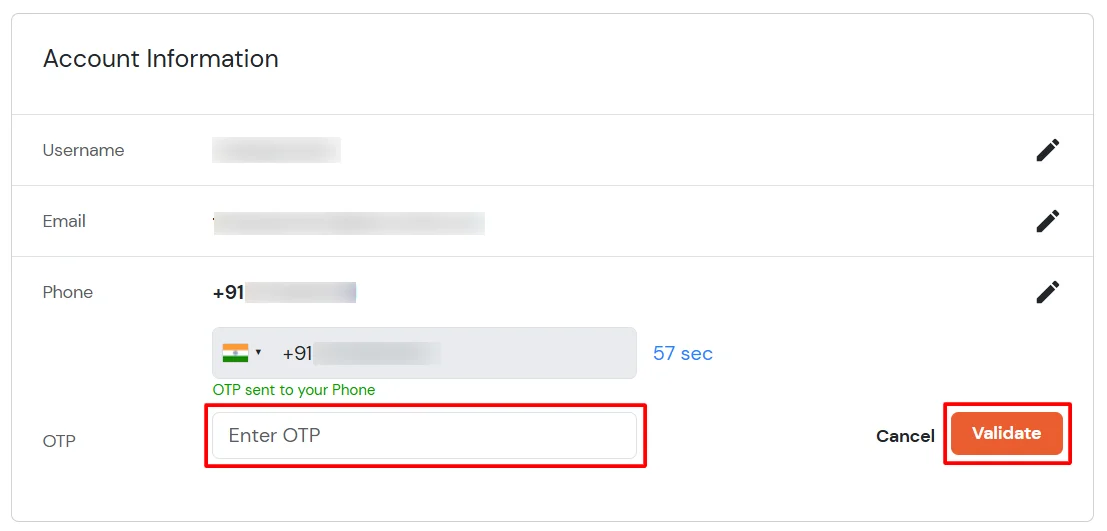
- Enter the OTP sent to your phone and click Validate.
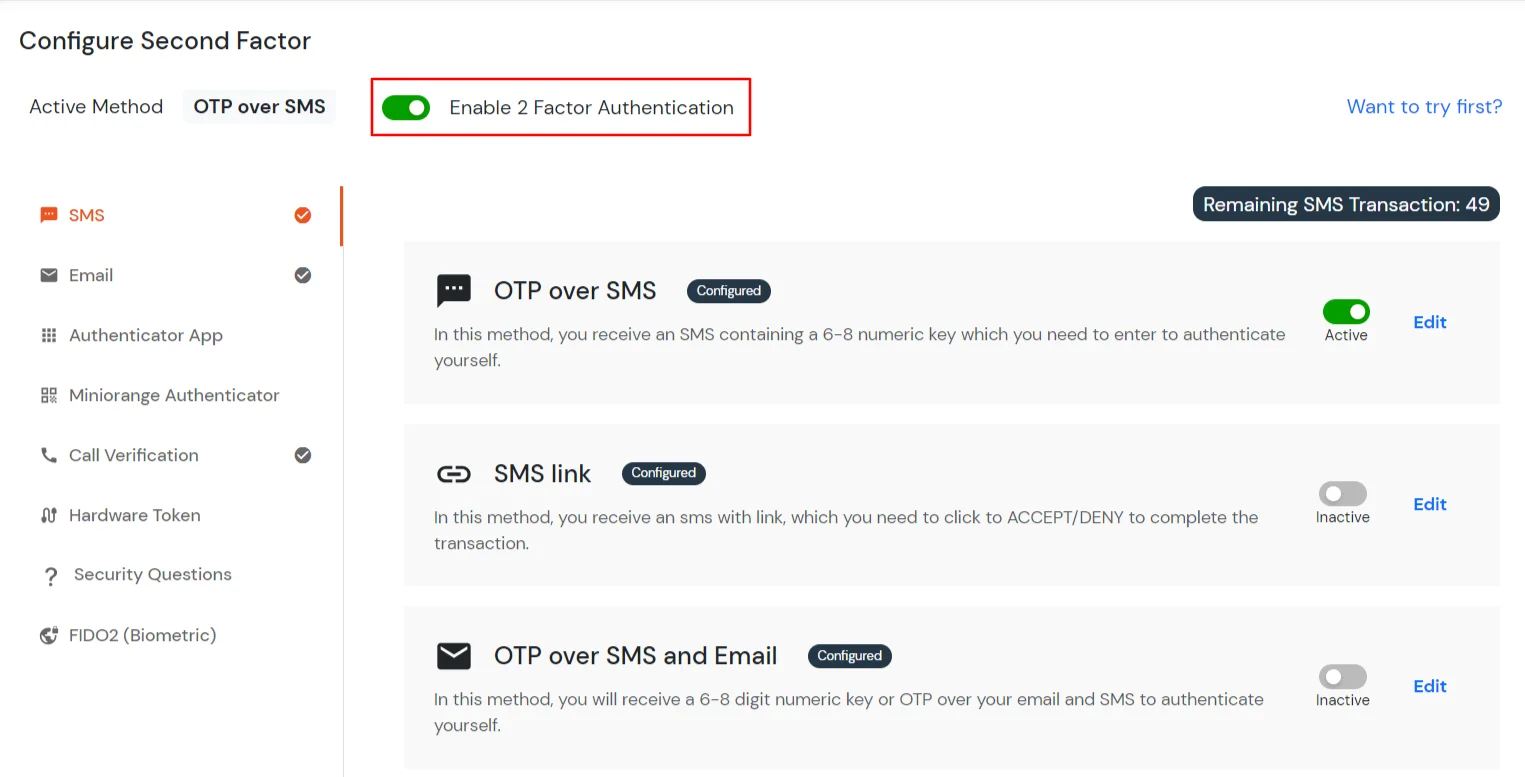
- After adding your phone number, turn on the toggle to activate OTP over SMS.
- Now Enable 2 Factor Authentication toggle if not done before as shown below.
4. Test 2FA for ClearSlide
5. Adaptive Authentication with ClearSlide
A. Restricting access to ClearSlide with IP Configuration
You can use adaptive authentication with Single Sign-On (SSO) for ClearSlide to improve the security and functionality of Single Sign-On. You can allow a IP Address in certain range for SSO or you can deny it based your requirements and you can also challenge the user to verify his authenticity. Adaptive authentication manages the user authentication bases on different factors such as Device ID, Location, Time of Access, IP Address and many more.
You can configure Adaptive Authentication with IP Blocking in following way :
- Login to Self Service Console >> Adaptive Authentication >> Add Policy.
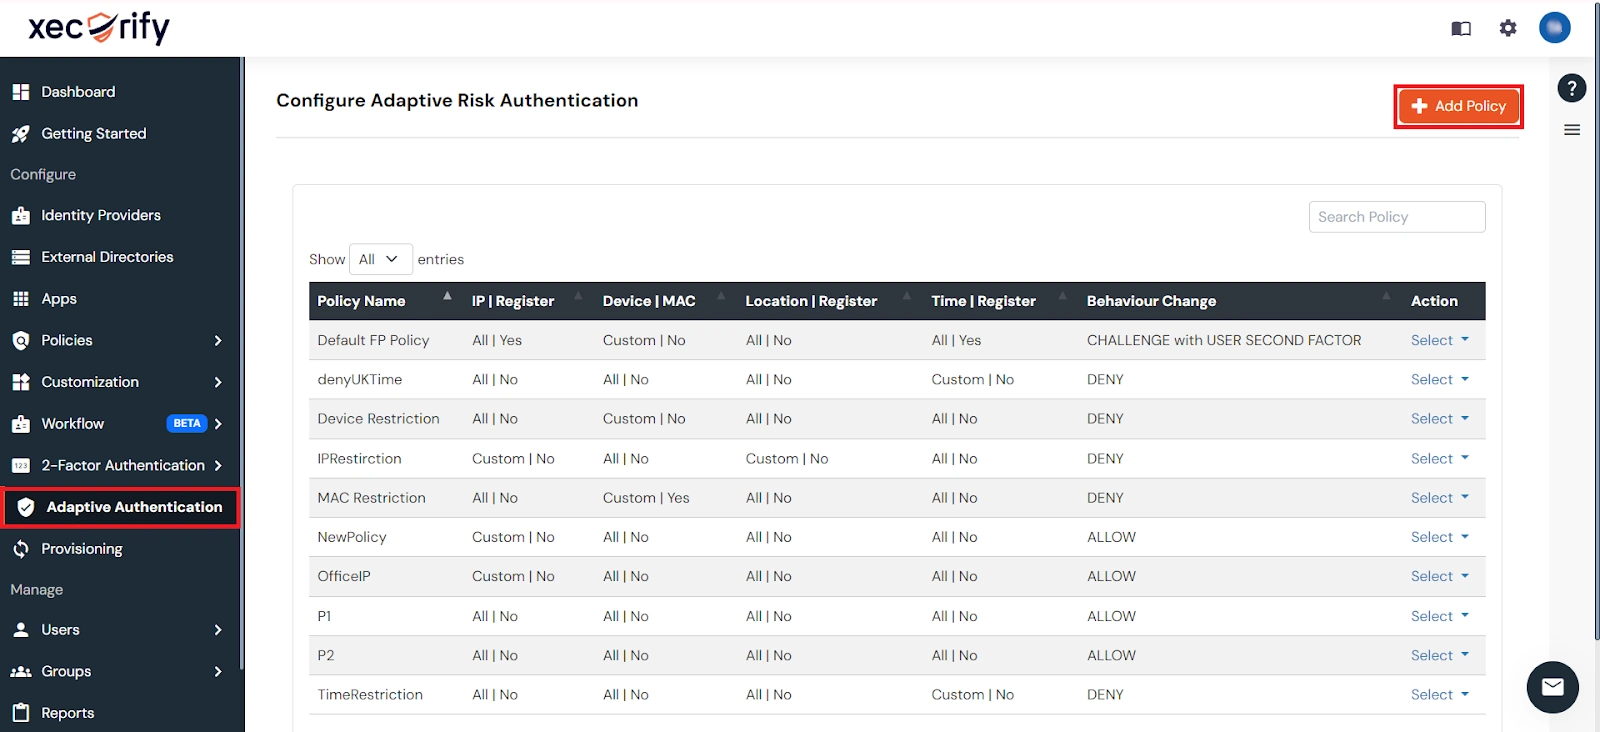
- Add a Policy Name for your Adative Authentication Policy.
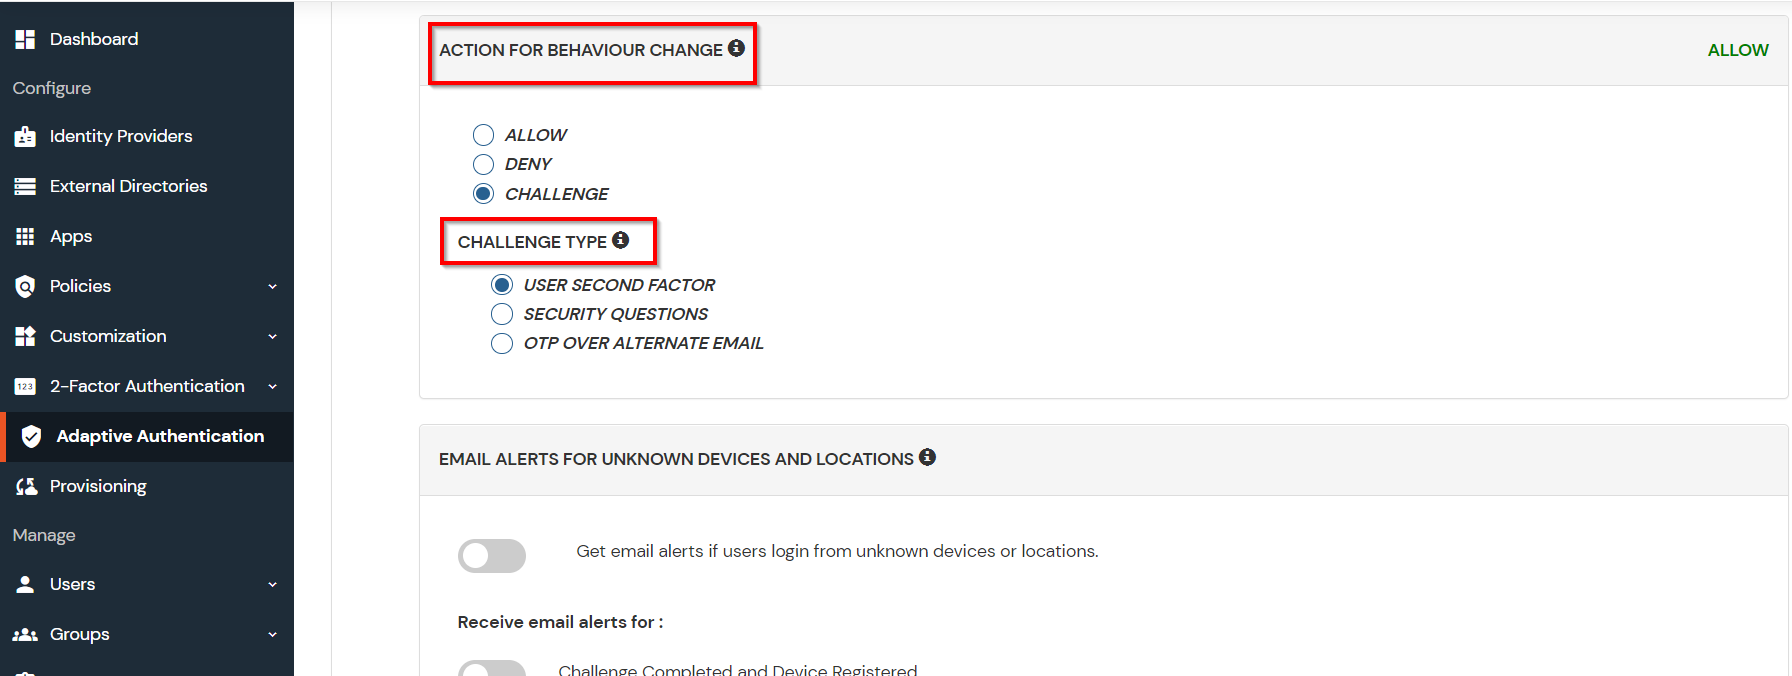
- Select Action for Behavior Change, click the Edit link, and then choose the appropriate Action and Challenge Type for the user from that section.
Action for behavior Change Options :
| Attribute |
Description |
| Allow |
Allow users to authenticate and use services if Adaptive authentication condition is true. |
| Deny |
Deny user authentications and access to services if Adaptive authentication condition is true. |
| Challenge |
Challenge users with one of the three methods mentioned below for verifying user authenticity. |
Challenge Type Options :
| Attribute |
Description |
| User second Factor |
The User needs to authenticate using the second factor he has opted or assigned for such as
- OTP over SMS
- PUSH Notification
- OTP over Email and, many more.
|
| KBA (Knowledge-based authentication) |
The System will ask the user for 2 of 3 questions he has configured in his Self-Service Console. Only after the right answer to both questions is the user allowed to proceed further. |
| OTP over Alternate Email |
User will receive an OTP on the alternate email they have configured through the Self Service Console. Once the user provides the correct OTP, they are allowed to proceed further. |
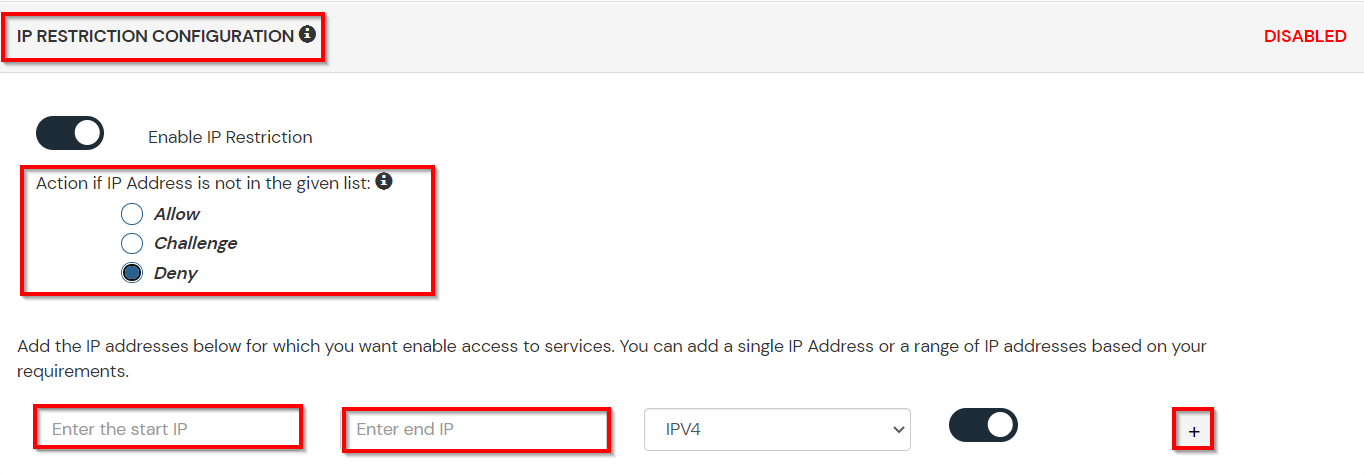
- Now click Edit option from the IP Configuration section to configure custom IP range.
- Select Add IP if the User's IP Address is not in the configured list.
- Specify the IP Address that you want to whitelist. For the IP Range other than the whitelisted one, you can select the above setting to reflect.
- Choose either allow or deny by selecting the corresponding option from the dropdown.
- If a user tries to login with the whitelisted IP address, they will always be allowed access.
- We support IP address range in three formats i.e., IPv4, IPv4 CIDR, and IPv6 CIDR. You can choose whichever is suitable for you from the dropdown menu.
- You can add multiple IPs or IP ranges by clicking the + Add IP button.
- Once the changes are made, scroll down to the end and click on Save.
B. Adaptive Authentication with Limiting number of devices
Using Adaptive Authentication you can also restrict the number of devices the end user can access the Services on. You can allow end users to access services on a fixed no. of devices. The end users will be able to access services provided by us on this fixed no. of devices.
You can configure Adaptive Authentication with Device Restriction in following way
- Login to Self Service Console >> Adaptive Authentication >> Add Policy.
- Add a Policy Name for your Adaptive Authentication Policy.
- Select your Action for behavior Change and Challenge Type for user from the Action for behavior Change Section.
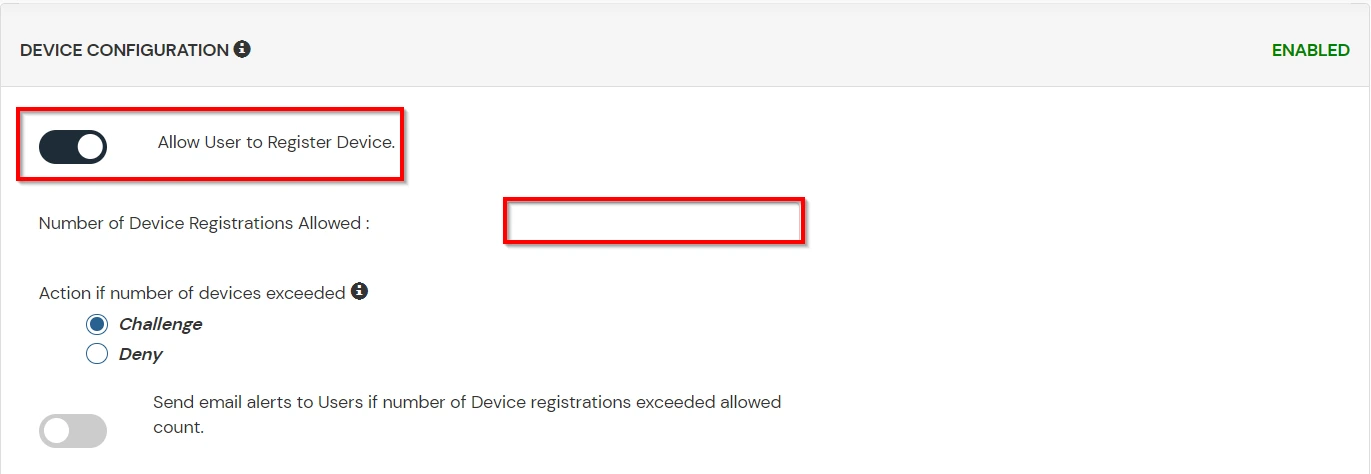
- On the Add Policy tab, go to the Device Configuration section and click the Edit button.
- Enter the Number of Device Registrations Allowed as per your requirement. (2-3 devices are recommended.)
- Choose Action if number of devices exceeded (This will override your setting for Action for behavior Change.)
- Challenge: The user needs to verify himself using any of the three methods mentioned in table in step 5.1
- Deny : Deny users access to the system
- Enable Mobile Device Restriction to block logins from mobile devices. This ensures all login attempts from mobile devices will be declined.
- Enable MAC Address Based Restriction if you want to restrict access based on device MAC address.
- Scroll down to the bottom of the page and click on Save.
C. Add Adaptive Authentication policy to ClearSlide
- Login to Self Service Console >> Policies >> Add Login Policy.
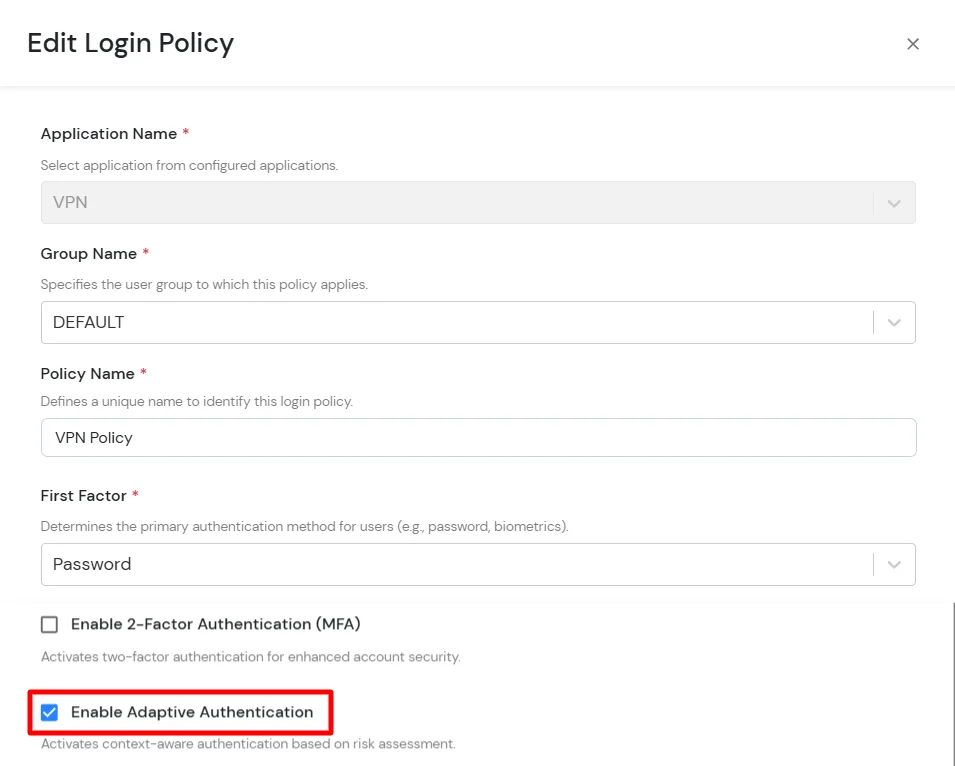
- Click on Edit icon option for predefined app policy.
- Set your policy in the Policy Name and select Password as First Factor.
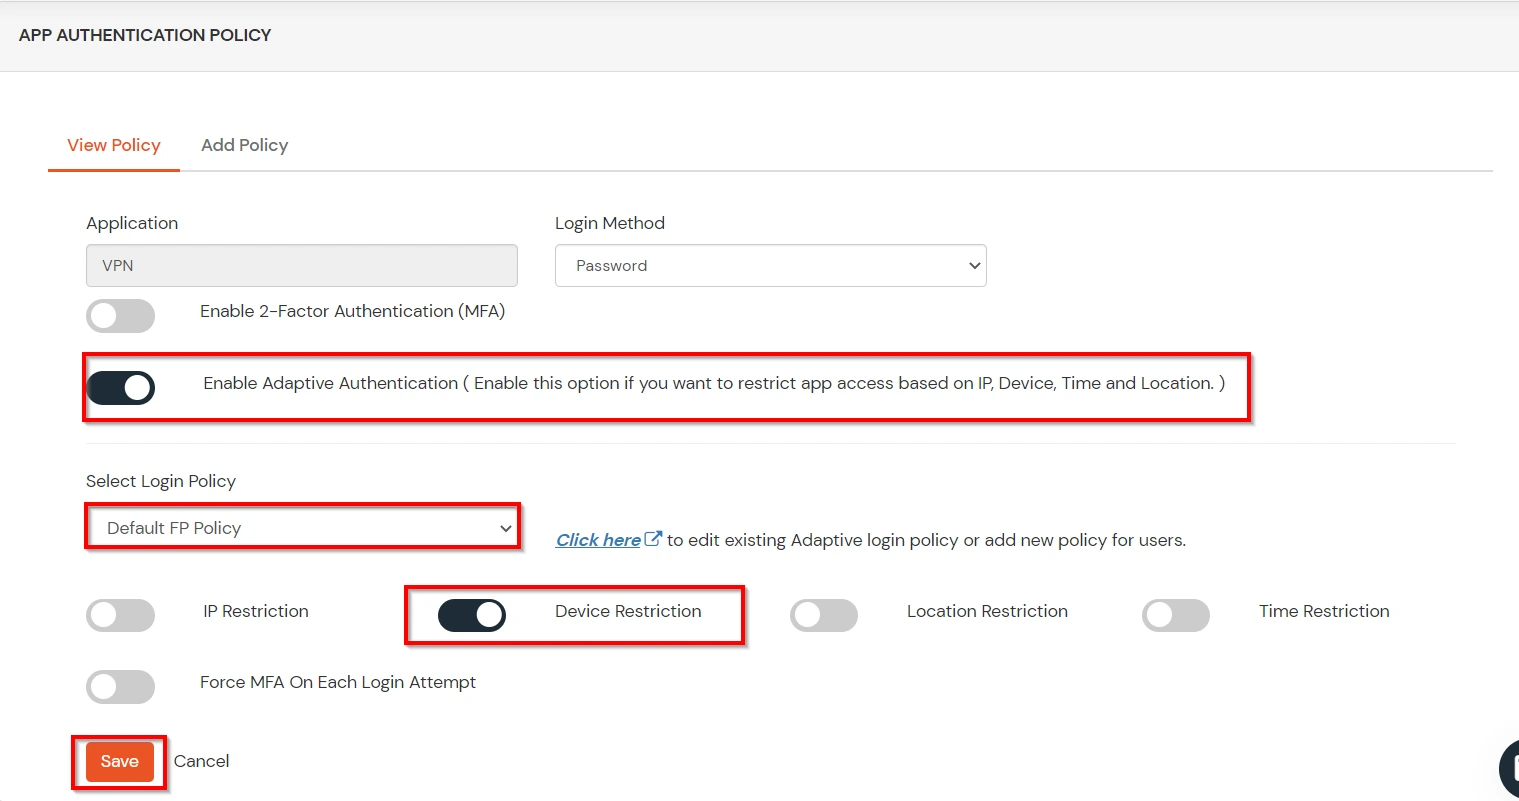
- Enable Adaptive Authentication on Edit Login Policy page and select the required restriction method as an option.
- From Select Login Policy dropdown select the policy we created in last step and click on Submit.
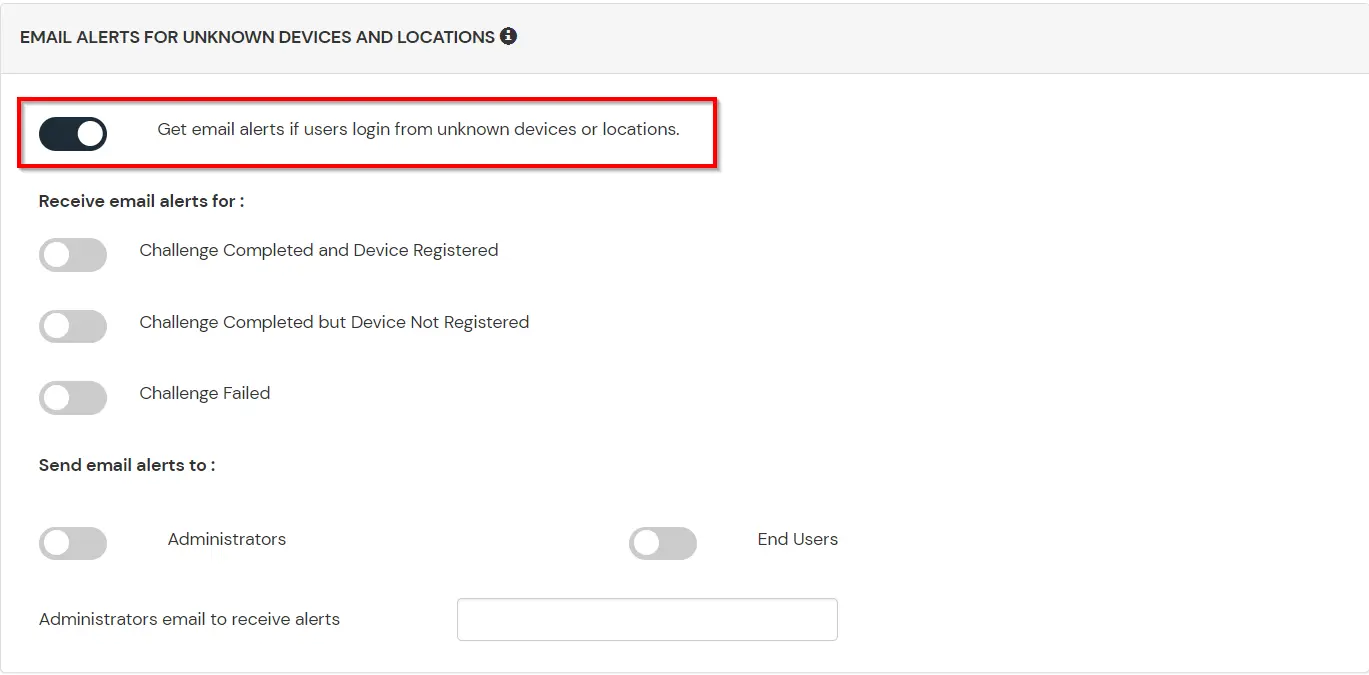
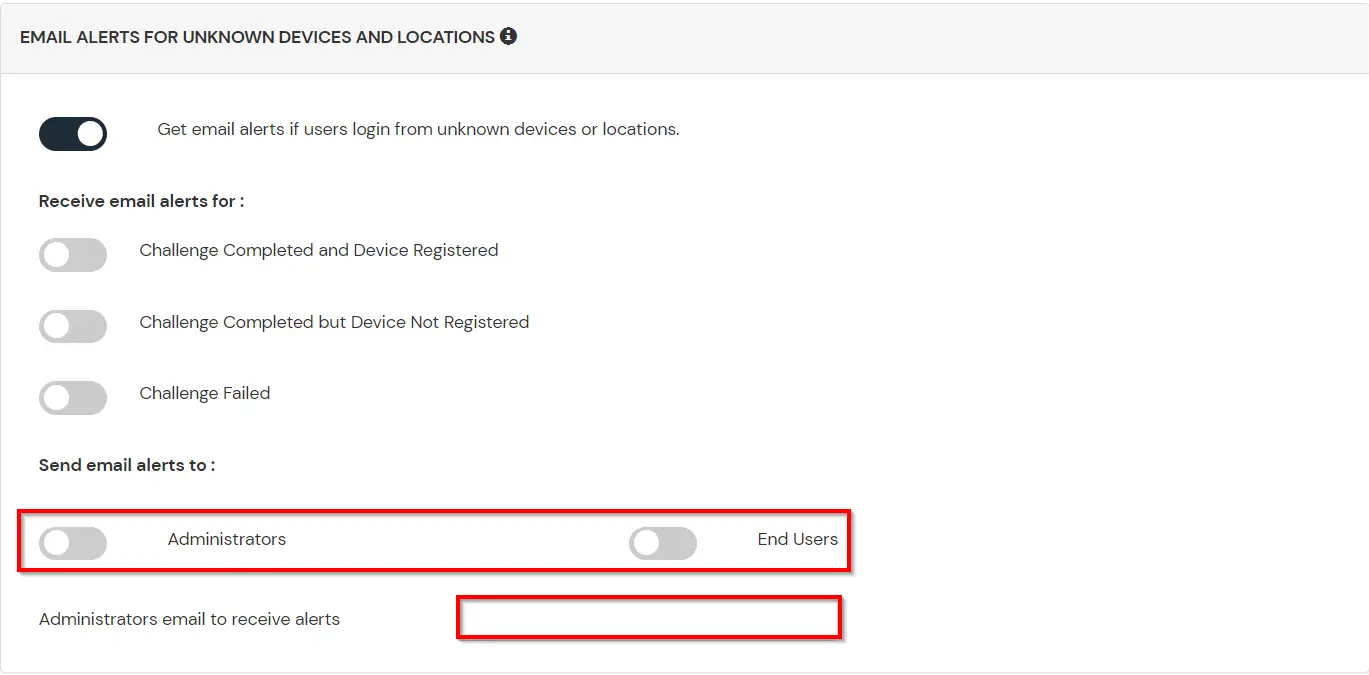
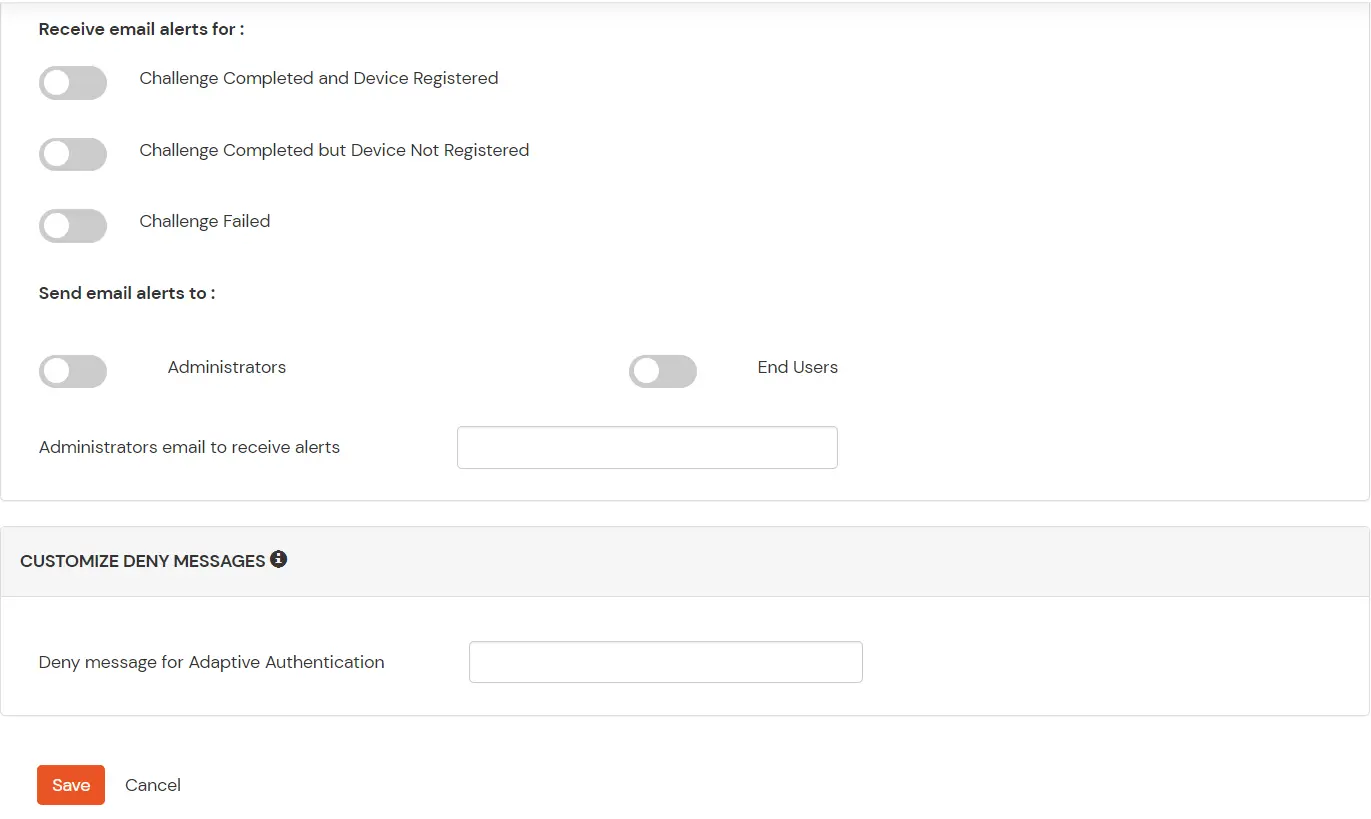
D. Notification and Alert Message.
How to add a trusted Device
- When End-user log in to the self service console after the policy for device restriction is on, he is provided the option to add the current device as a trusted device.
External References