Hello there!
Need Help? We are right here!
Need Help? We are right here!
Search Results:
×Insightly SCIM Provisioning allows to create account in a simplified way and link Insightly SCIM users' account to their existing or new apps. Insightly SCIM Provisioning automates user provisioning with their identities.
Provisioning saves time when setting up new users and teams, and also manages access privileges through the user lifecycle. miniOrange can create, read, and update user accounts for new or existing users, remove accounts for deactivated users, and synchronize attributes across multiple user stores.
miniOrange SCIM User provisioning and deprovisioning actions are bi-directional, so you can create accounts inside an external application and import them into miniOrange, or alternatively create the accounts in miniOrange and then push them out to any linked external applications.
Insightly SCIM Deprovisioning means deleting a user and removing their access from multiple applications and network systems at once. Deprovisioning action is triggered when an employee leaves a company or changes roles within the organization. The deprovisioning features increase your organization's security profile by removing access to sensitive applications and content from people who leave your organization.
miniOrange provides Provisioning solutions for all scenarios of user management (provisioning), which includes AD Integration, LDAP Integration and automated provisioning for all External Applications such as Insightly SCIM, Google Workspace, Workday, etc
To regenerate the SCIM token, the Regenerate button can be clicked. This will invalidate any previously generated tokens. Once regenerated, Save does not have to be clicked as the new token will be instantly saved.

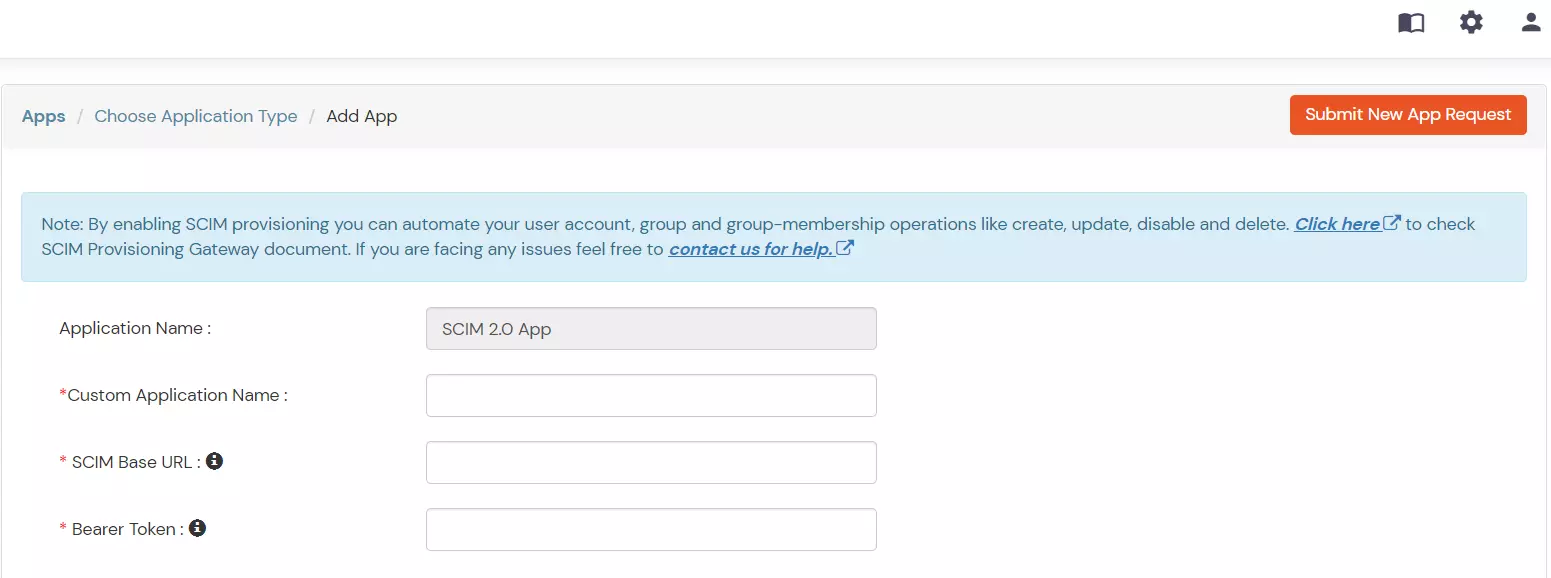
Note: The givenName, familyName, userName, and displayName and email fields are required.


| Operation | Description | Notes |
|---|---|---|
| GET /Users | Gets a list of users | Returns both active and inactive users. Paging per SCIM spec. |
| GET /Users/{id} | Gets a single user | Returns a user whether active or inactive |
| GET /Users?filter=userName eq "user@example.com" | Get users by query | Returns both active and inactive users that match the filter. Insightly only supports the “userName eq” filter. |
| POST /Users | Creates a user | |
| PUT /Users/{id} | Updates a user | |
| name.givenName | User.FIRST_NAME | |
| PATCH /Users/{id} | Updates fields included in the request only. | Insightly only supports the “replace” operation. |
| DELETE /Users/{id} | Deactivates a user | Insightly does not support hard deleting users. This operation is equivalent to setting active=false. |
| GET /Schemas | Returns attributes supported by Insightly. |
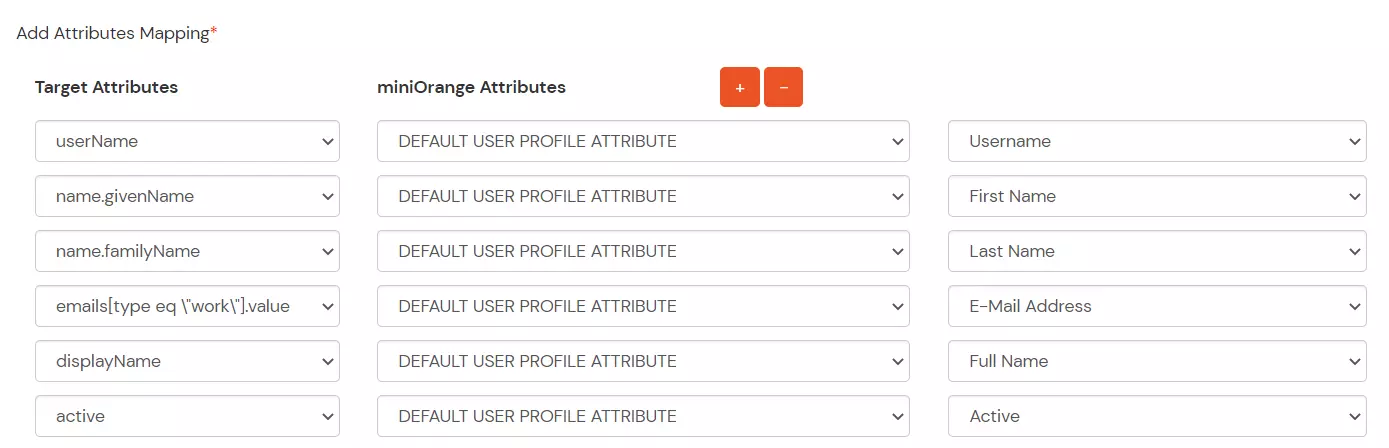
| SCIM Attribute | Insightly Field | Notes |
|---|---|---|
| id (readonly) | User.USER_ID | Insightly generated unique identifier of a User. |
| meta.resourceType (readonly) | “User” | |
| meta.created (readonly) | User.DATE_CREATED_UTC | Insightly generated. |
| meta.lastModified (readonly) | User.DATE_UPDATED_UTC | Insightly generated. |
| active | User.ACTIVE | Editable, but set to “true” when creating a new User. |
| name.givenName | User.FIRST_NAME | |
| name.familyName | User.LAST_NAME | |
| emails (readonly) | User.EMAIL_ADDRESS | Contains a single email address with type=work |
