Setup SSO via JWT using SAML IDP
This solution allows you to setup Single Sign-On into . It allows setting up JWT SSO.You can allow your users to Single Sign-On into by verifying Identity with your existing compliant Identity Provider. This is done using JSON Web Token (JWT) tokens and it can be easily integrated with built in any framework or language.
In case you need our help with below integration or sample code for JWT for your language, feel free to reach out at idpsupport@xecurify.com.
Prerequisites
- Add an Identity Provider. You can add any external IDP or directories (In case you don’t have IdP, you can use miniOrange as an Identity Provider)
- Customizations support in mobile app to integrate sample code for enabling SSO.
Connect with External Source of Users
miniOrange provides user authentication from various external sources, which can be Directories (like ADFS, Microsoft Active Directory, OpenLDAP, AWS etc), Identity Providers (like Microsoft Entra ID, Okta, AWS), and many more. You can configure your existing directory/user store or add users in miniOrange.
Follow the Step-by-Step Guide given below for Single Sign-On (SSO)
1. Set up your Identity Provider in miniOrange
We are using ADFS to show the setup.
You can directly move to Step 3 if you have already configured an IDP.
- Login to your miniOrange dashboard. If you don’t have an IDP you can use miniOrange as your IDP.
- Go to the Identity Provider tab and click on Add Identity Provider button.
- Select the SAML tab.
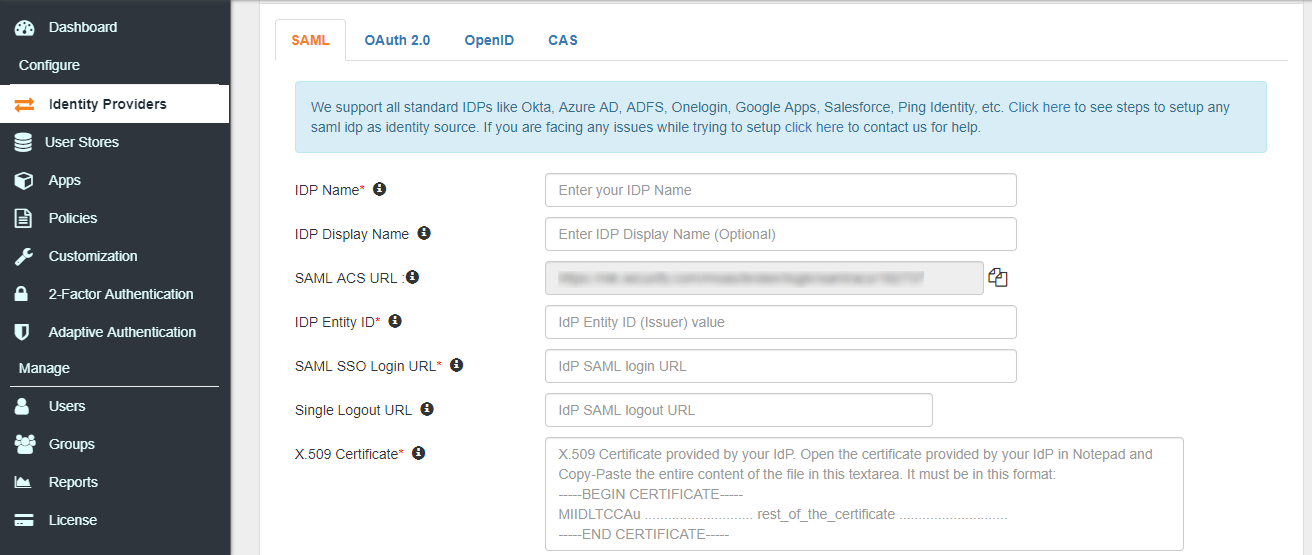
- Add configuration details of your IdP with minimum required configuration parameters below:
| IDP Name |
Enter Your IDP Name |
| IDP Entity ID |
http://<YOUR_ADFS_DOMAIN>/adfs/services/trust |
| SAML SSO Login URL |
http://<YOUR_ADFS_DOMAIN>/adfs/ls/ |
| X.509 Certificate |
Provide the ADFS signing certificate |
2. Configure miniOrange settings in your Identity Provider
- Add configuration details below which will be required by your IdP:
A. Service Provider Entity ID / Issuer: https://login.xecurify.com/moas
B. Assertion Consumption Service (ACS) URL: Find SAML ACS URL option in added Identity Source.
- Choose ACS URL For SP-Initiated SSO.

C. Download Metadata: This is required if you want to Download metadata.Download metadata to avoid putting the values manually.
- Go to Identity Providers tab and find your configured IdP.
- Click the Metadata link to view the metadata.
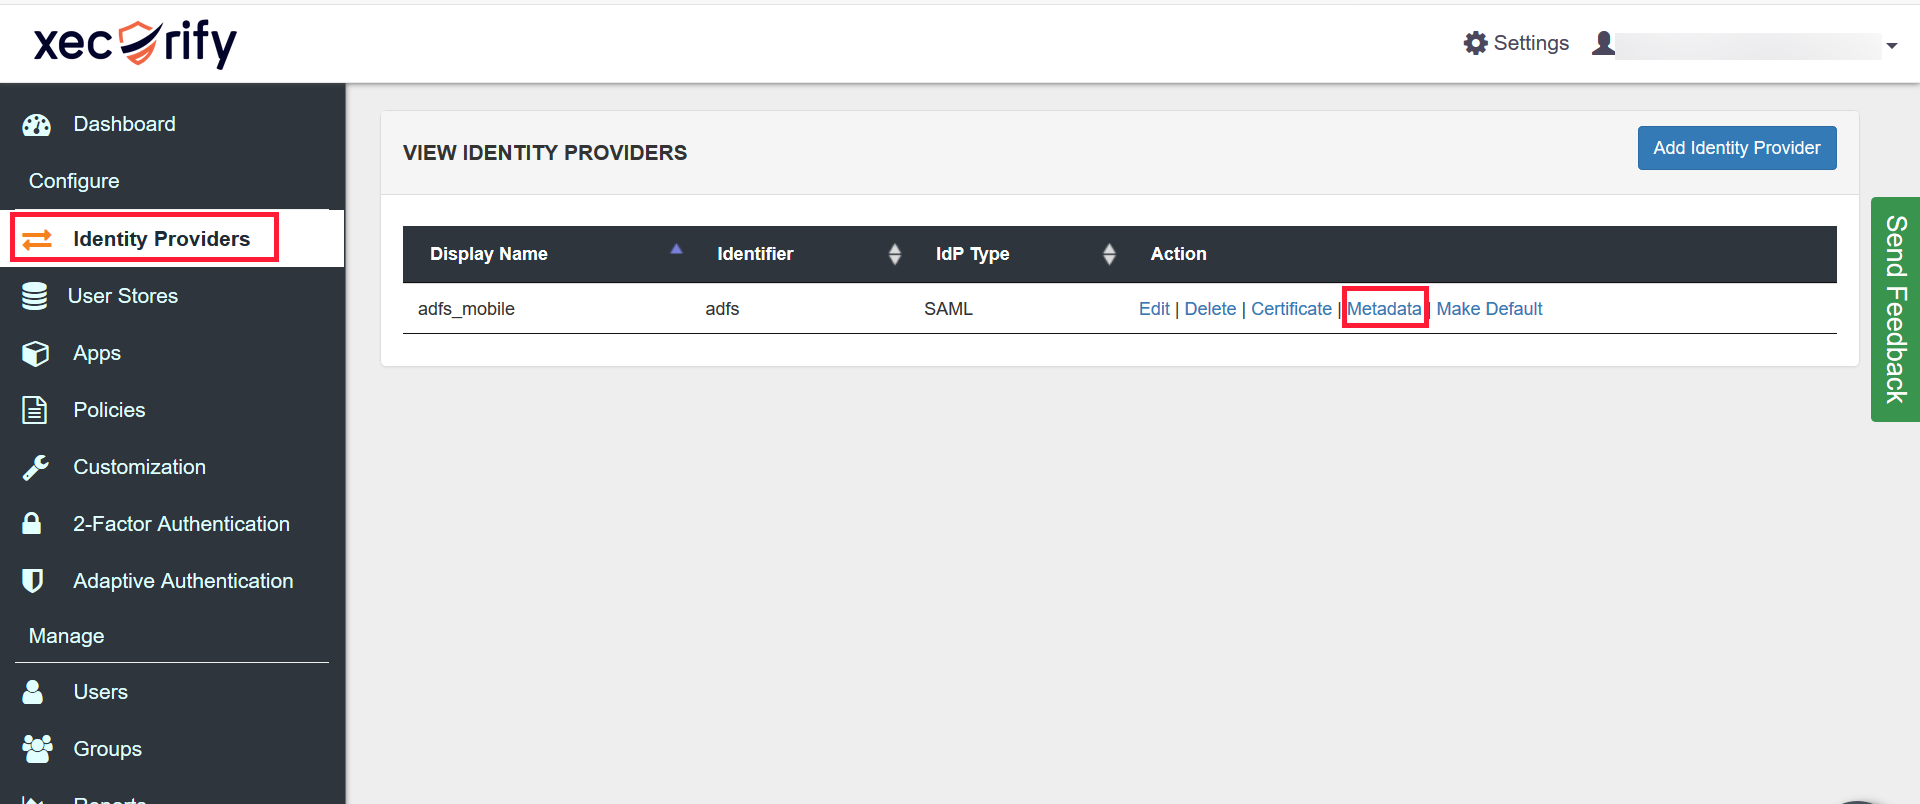
- A new page will get opened having metadata.
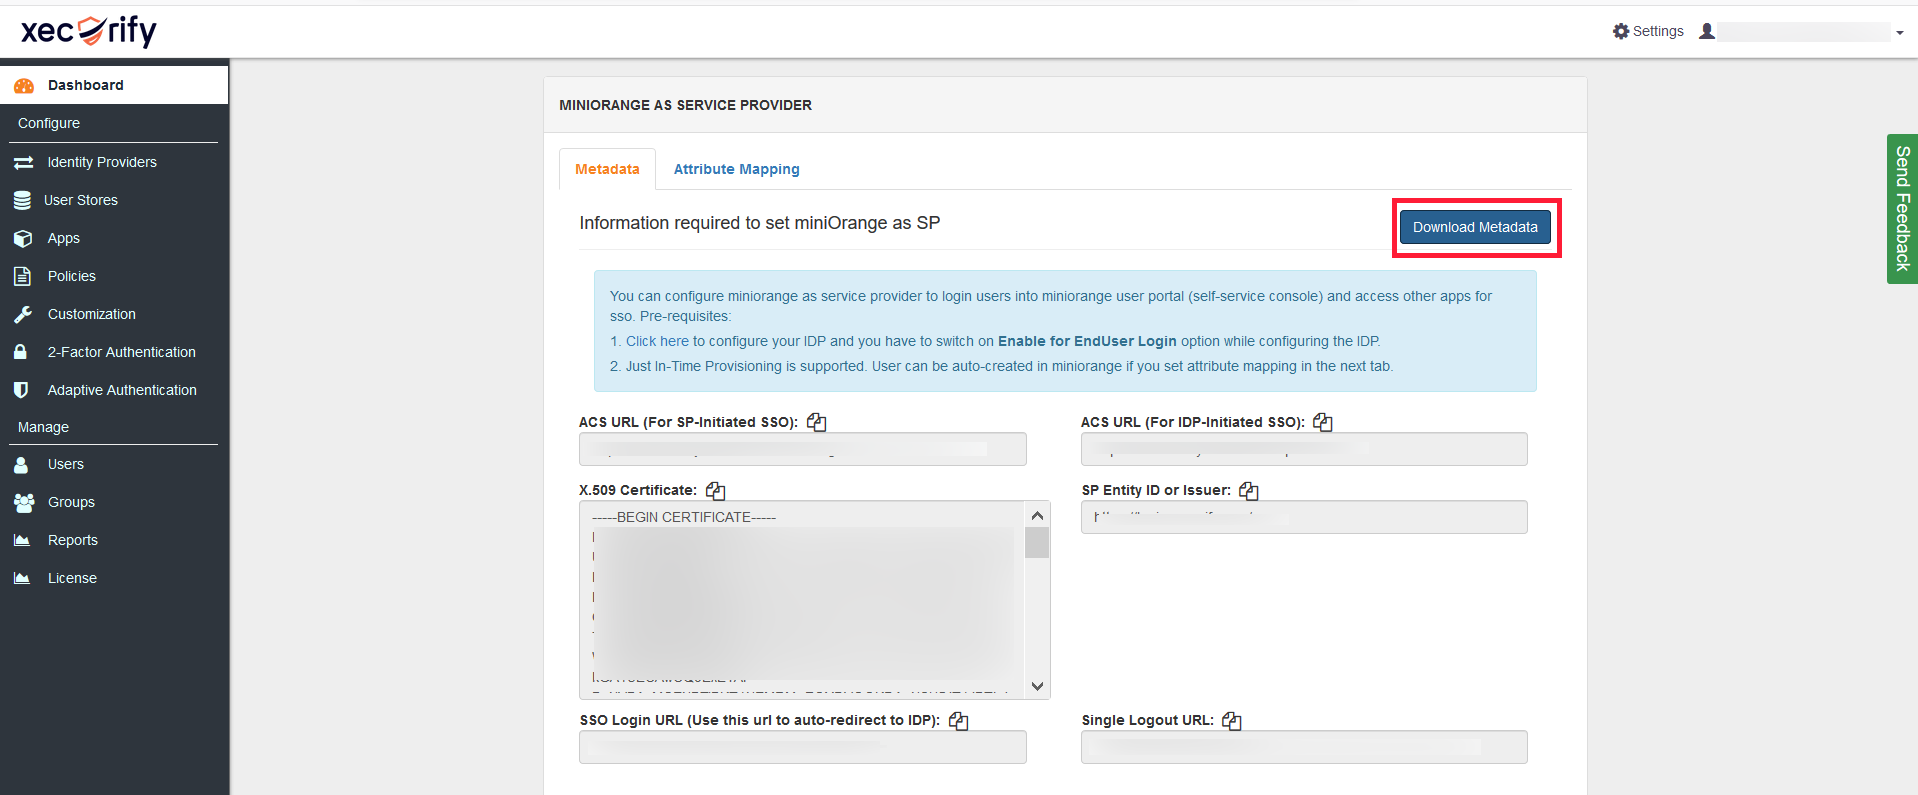
- Click on the Download Metadata link to download the metadata. mo-sp-metadata.xml file will be downloaded.
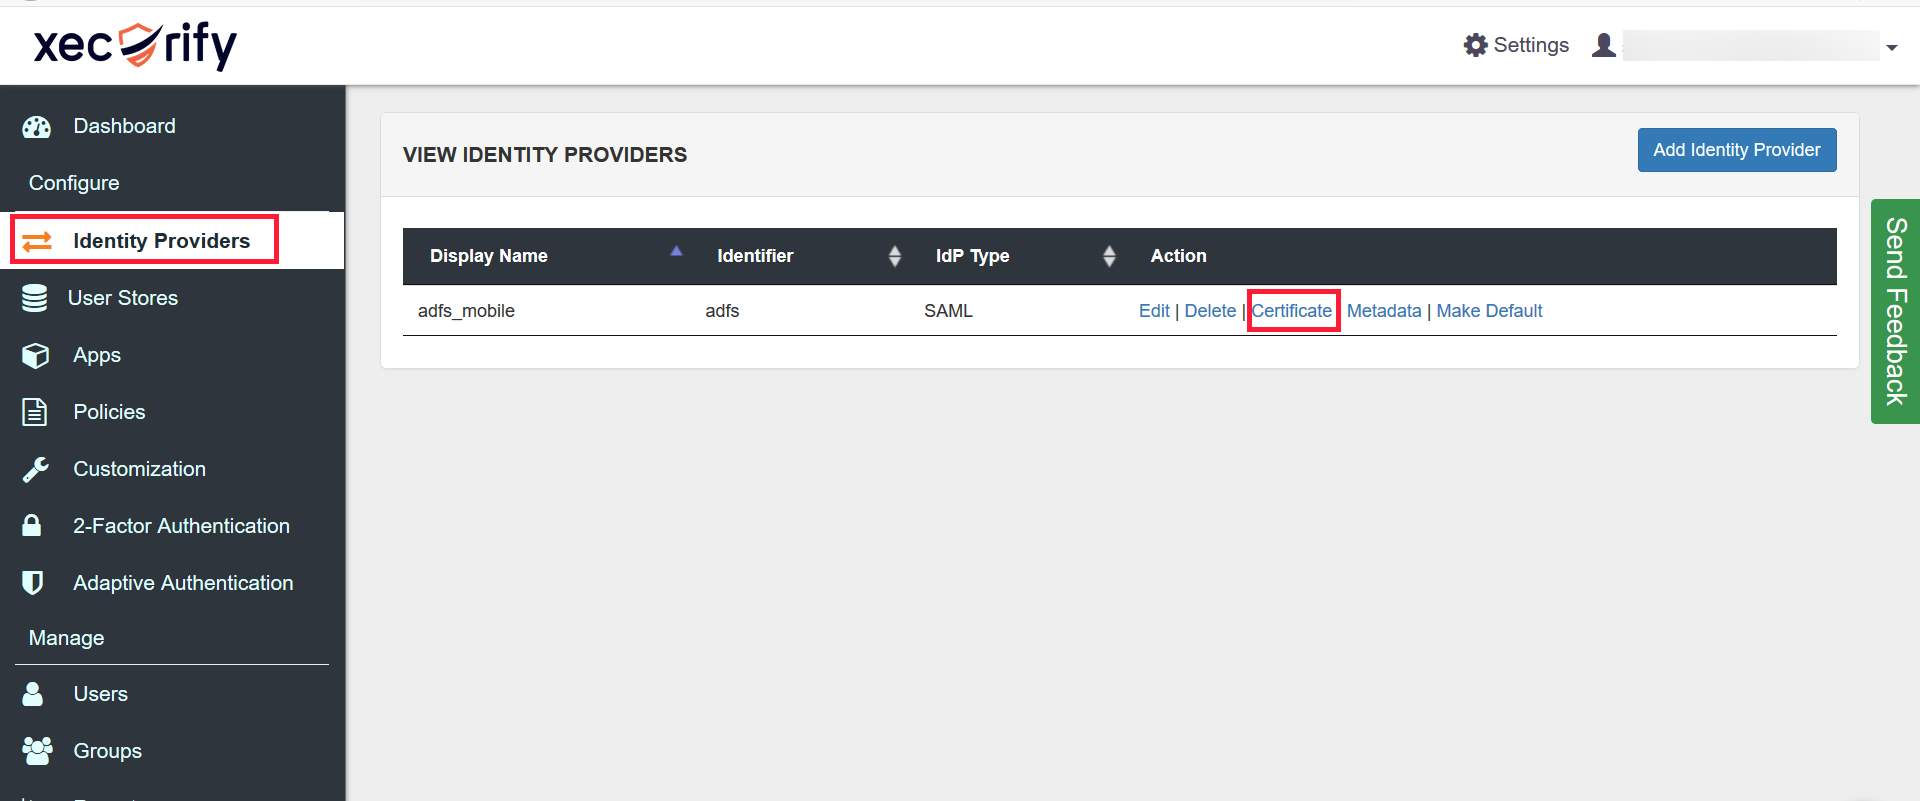
D. Signing Certificate (Optional): This is required if you want to enable signed SAML Auth request.
so than IdP can verify that the contents have not been altered in transit. Download the signing certificate with the steps below.
- Go to Identity Providers tab and find your configured IdP.
- Click he Certificate link to download the certificate.
E. Configure miniOrange as a relying party in ADFS:
- Open ADFS Management console.
- Go to Trust Relationships > Relying Party Trusts. Click Start.
- Click on Add Relying Party Trust. Select Enter about the relying party manually. Click Next.
- Enter Display Name. Click Next.
- Select ADFS Profile. Click Next. Click Next again.
- Select Enable support for the SAML 2.0 WebSSO protocol.
- Enter the URL as
https://login.xecurify.com/moas/login/broker/login/saml/acs/{YOUR_CUSTOMER_KEY} in the Relying Party URL text box and click Next the button.
- Enter the Relying party trust identifier as
https://login.xecurify.com/moas/login
- Click on Add. Click on Next until the last screen.
- Check Open the Edit Claim Rules. Checkbox and click Close.
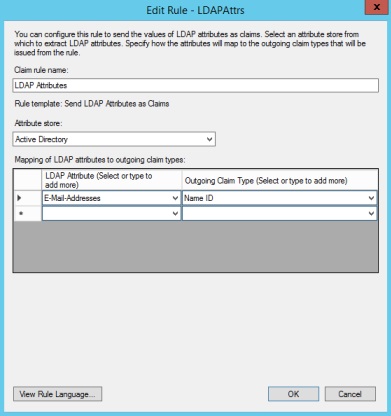
- Click on Add Rule and select Send LDAP Attributes as Claims and Click Next.
- Enter Claim Rule name and select Attribute Store.
- Select Email Addresses as LDAP Attribute and Name ID as Outgoing Claim Type. Click Finish.
3. Configure in miniOrange
A. Add app in miniOrange:
In miniOrange dashboard, you can add JWT application with steps below:
- Login into miniOrange Admin Console.
- Go to Apps >> Manage Apps.
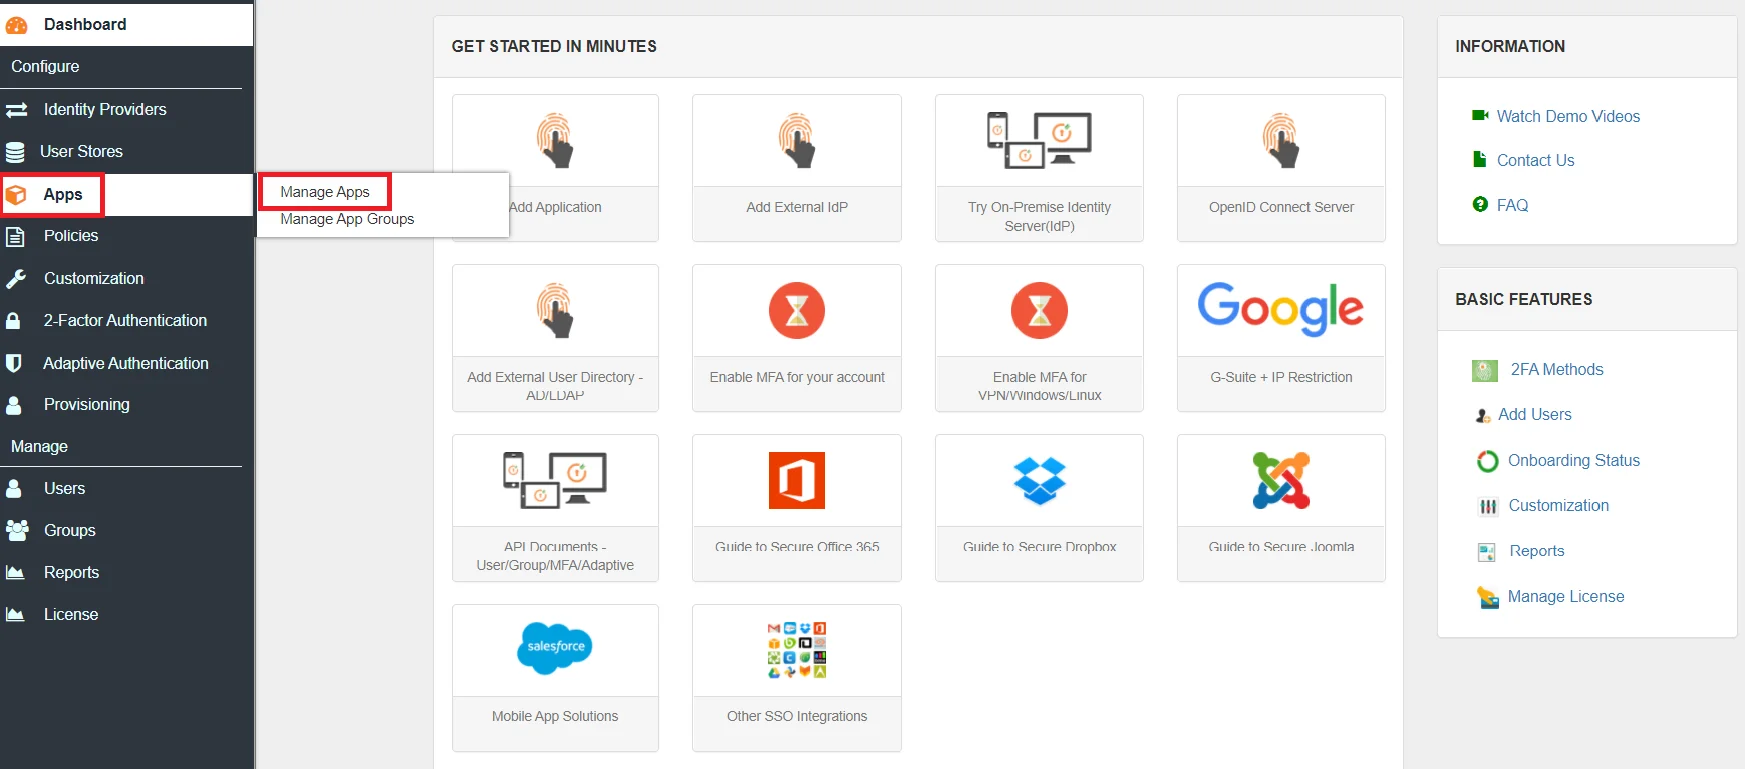
- Click on Add Applicaton button.

- In Choose Application Type click on Create App button in JWT application type.
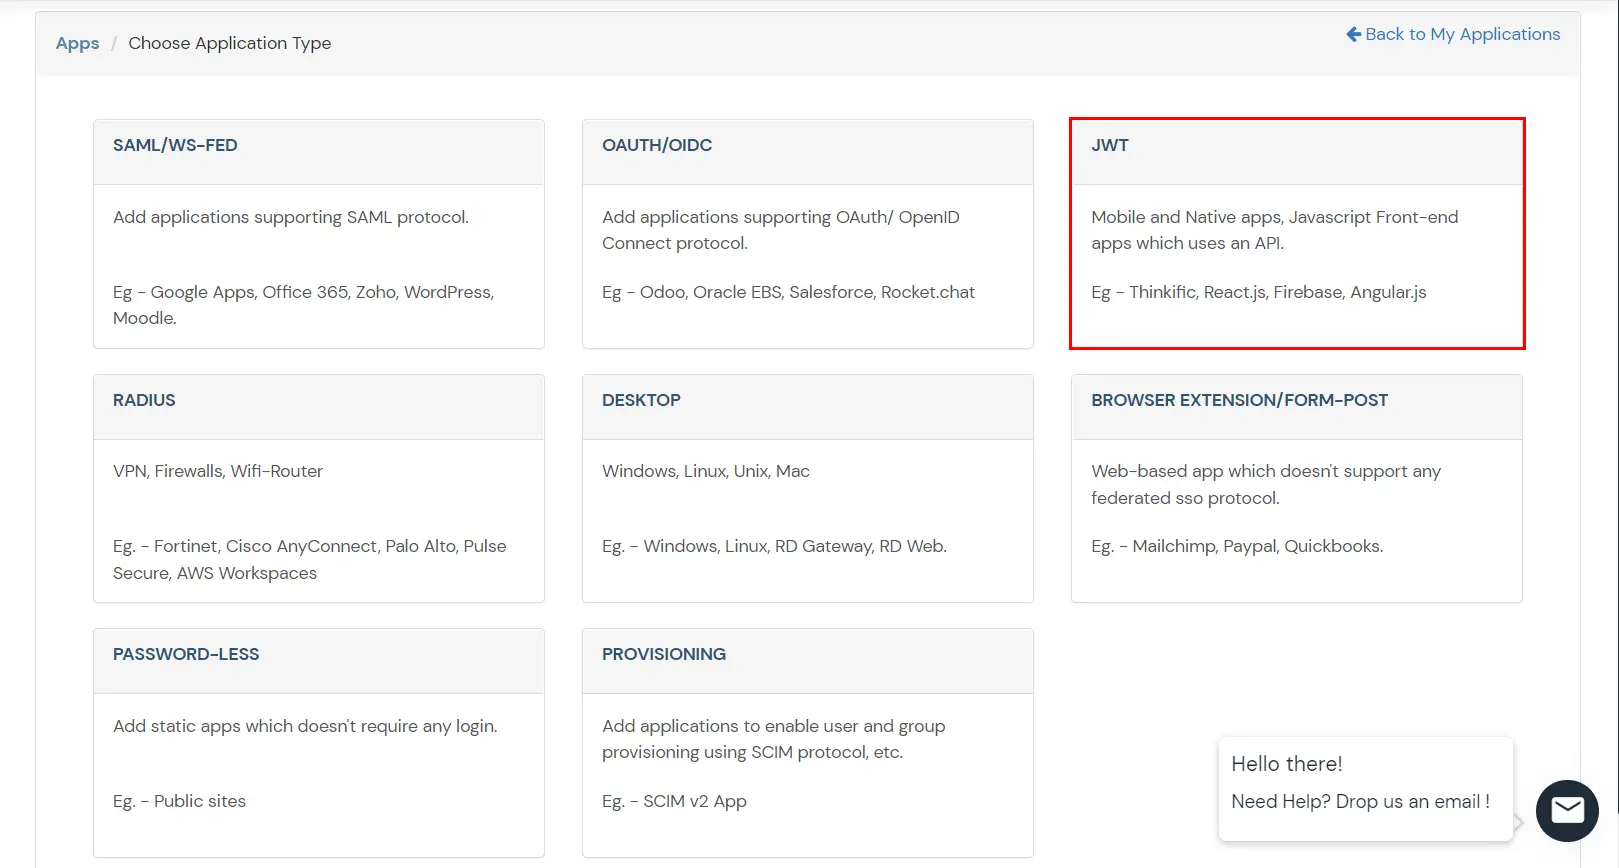
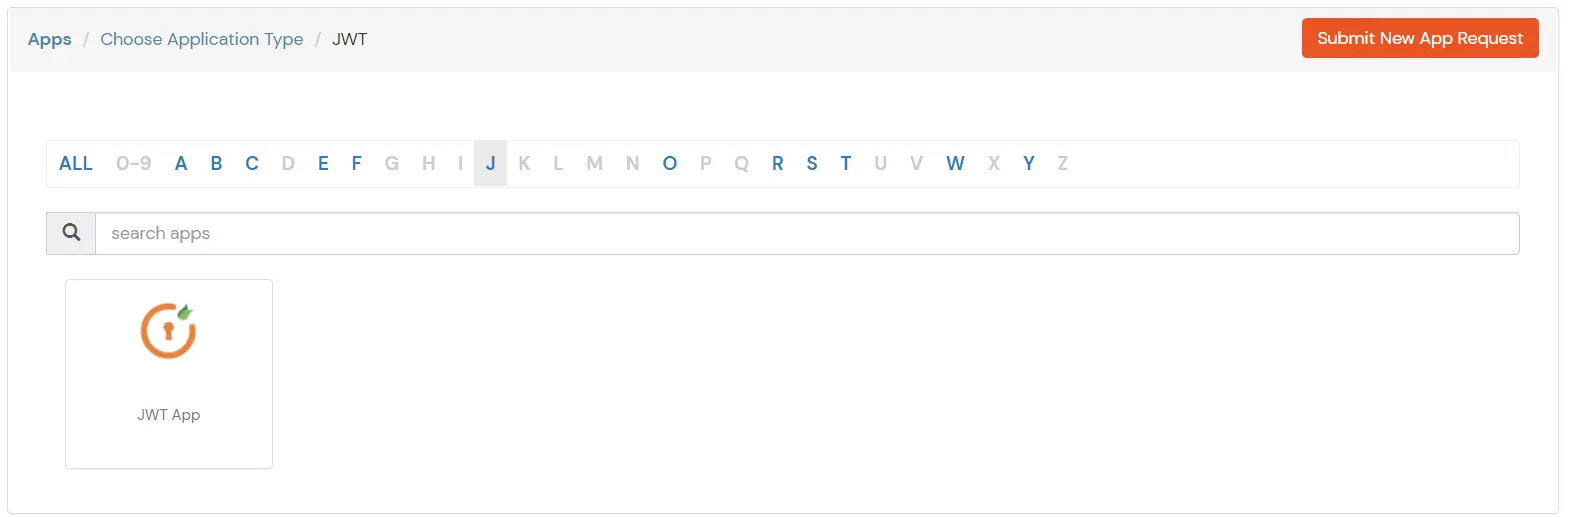
- In the next step, search for your application from the list, if your application is not found. Search for External / JWT App and you can set up your Application.
- Configure the name for and configure Redirect-URL which tells where to send JWT response. Redirect-URL should be an endpoint on where you want to achieve SSO.
- In case you are setting up SSO with Mobile Applications where you can’t create an endpoint for Redirect or Callback URL, use below URL.
https://login.xecurify.com/moas/jwt/mobile
- Copy Client ID of the generated application and keep it with you for next the steps.
B. Add SSO link in :
https://login.xecurify.com/moas/broker/login/jwt/<customer-id>?client_id=<client-id>&redirect_uri=<redirect-url>- You need to replace below values in URL:
| customer-id |
Customer ID of your miniOrange account which can be found under settings menu.Refer image below. |
| client-id |
Client Id of JWT application created above(Step 3.a). |
| redirect-url |
Configured Redirect URL against JWT application. |
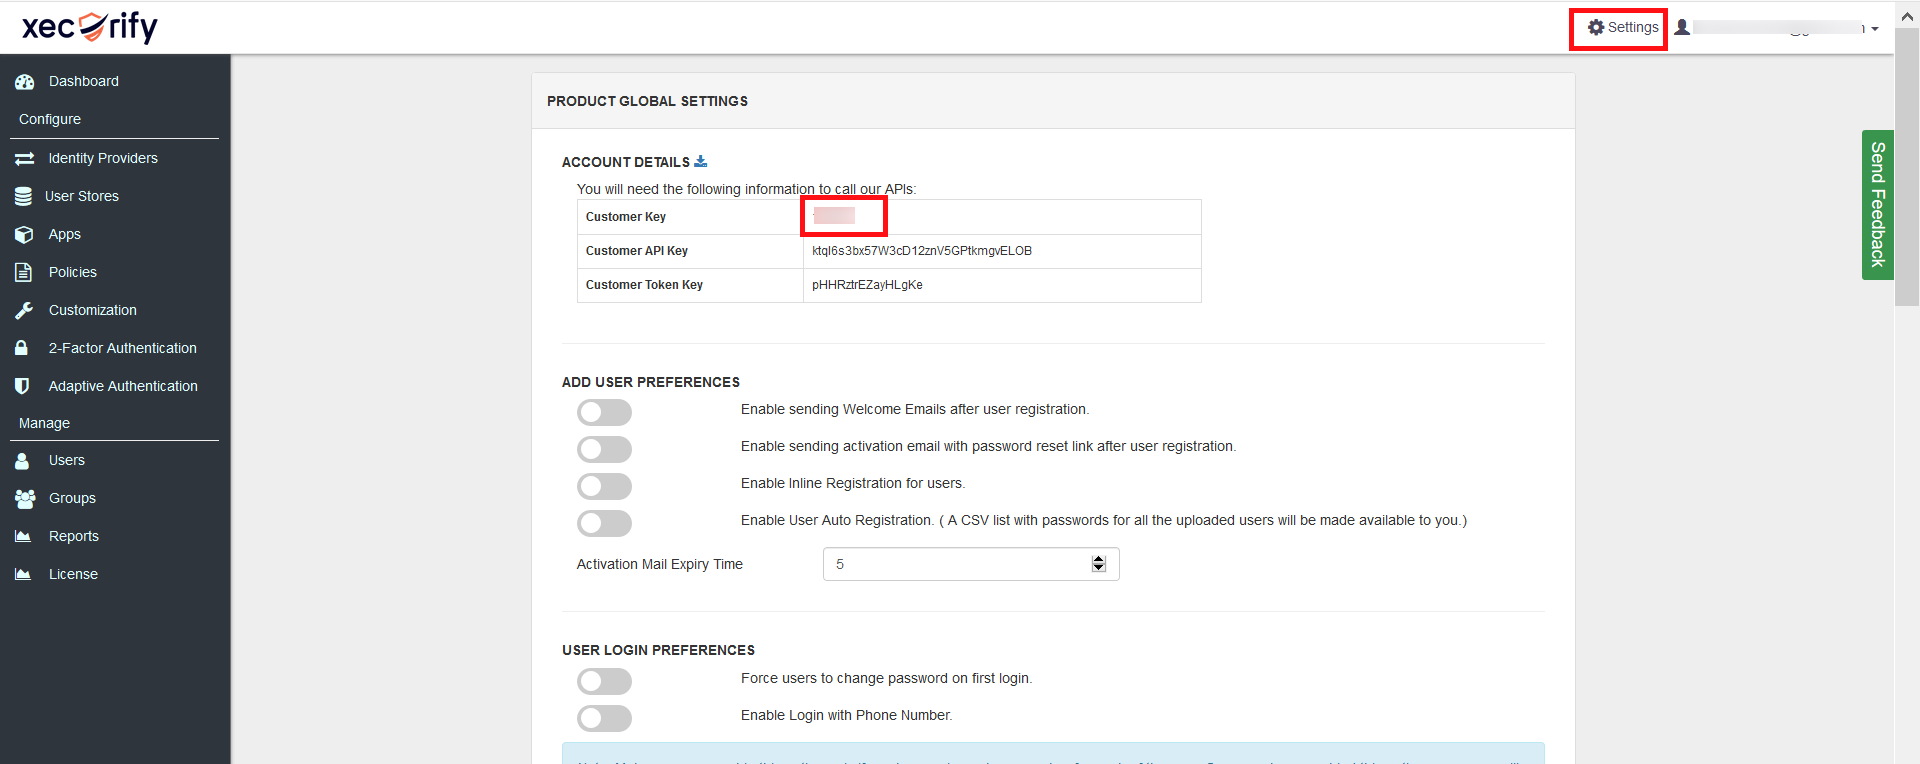
- Get CustomerID.
- Go to the Settings section, present on the top right corner.
- Copy the value mentioned against Customer Key
C. Verify JWT token and parse user details for SSO:
- On your Callback endpoint, you can read and parse the JWT token.
- Structure of JSON Web Token (JWT): JSON Web Tokens consist of three parts separated by dots (.), which are:
- Header: Contains the signature algorithm name used to sign the payload.
- Payload: Contains user attributes.
- Signature: Signature value of the payload.
eg. xxxx.yyyyyyyyyyyy.zzzzzz
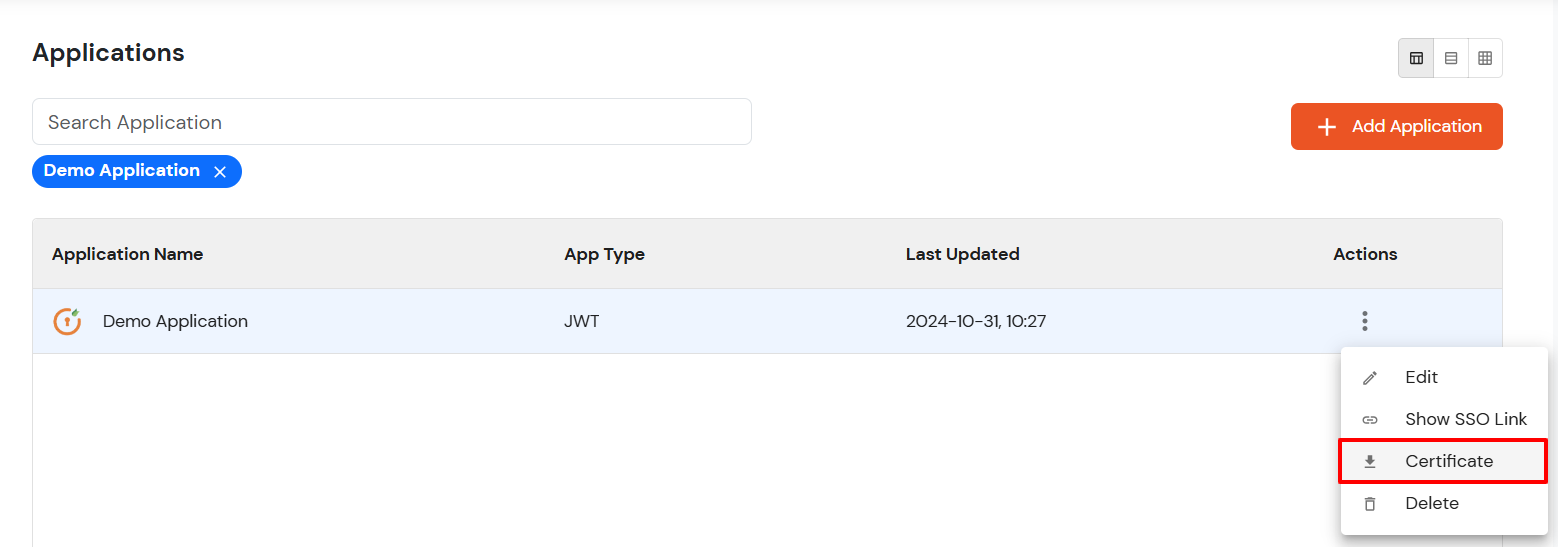
- You will need to download a certificate from App > Manage Apps and click Certificate link against your configured application.
This certificate will be used for signature validation of the JWT response.
- Verify JSON web token: Click here to verify your JSON token.
D. Perform SSO:
- Once you have added the link above on , you can verify the SSO setup by clicking a link.
- On successful authentication, you will be redirected to configured Redirect or Callback URL with JWT token
4. Single Logout (SLO)
This is an optional step. If you want to ensure that all sessions (SP and IDP) for a user are properly closed, you can configure Single Logout with the steps below.
A. Configure miniOrange with IdP SLO endpoint:
- Go to the Identity Provider tab and edit the configured Identity Provider.
- Find the option Single Logout URL and configure the SLO URL provided by your IdP.

B. Configure IdP with miniOrange SLO endpoint:
- Configure your Identity Provider with below Single logout endpoint.
https://login.xecurify.in/moas/broker/login/saml_logout/<your-customer-id>
- You can find the SSO Binding option to configure the logout binding type to either REDIRECT or POST.
C. Configure your JWT application with SLO endpoint:
- Configure your JWT application with below Single logout endpoint.
https://login.xecurify.in/moas/broker/login/jwt/logout/<your-customer-id>?redirect_uri=<redirect-url>
| your-customer-id |
You have to add your miniOragne account customer ID here. |
| redirect-url |
This should be replaced with the logout URL of your JWT application. |
