Two-Factor Authentication (2FA/MFA) for PostgreSQL
PostgreSQL is a database which uses techniques to provide security to site-to-site connections. Also, it secures a point-to-point connection. You can enable two-factor authentication (2FA) for your PostgreSQL with Active Directory as a user store to increase security level. When you enable 2FA, your users enter their username and password (first factor) as usual, and as a second factor they have to enter an authentication code which will be shared virtually on their device or in the form of a hardware token. This 2FA/MFA solution adds an additional security measure to prevent unwanted users getting access to your PostgreSQL .
Types of 2FA Authentication with RADIUS
The 2-factor authentication can be of two types depending on the applications.
miniOrange 2FA authentication for PostgreSQL Login
miniOrange accomplishes this by acting as a RADIUS server that accepts the username/password of the user entered as a RADIUS request and validates the user against the user store as Active Directory (AD). After the first level of authentication, miniOrange prompts the user with 2-factor authentication and either grants/revokes access based on the input by the user.
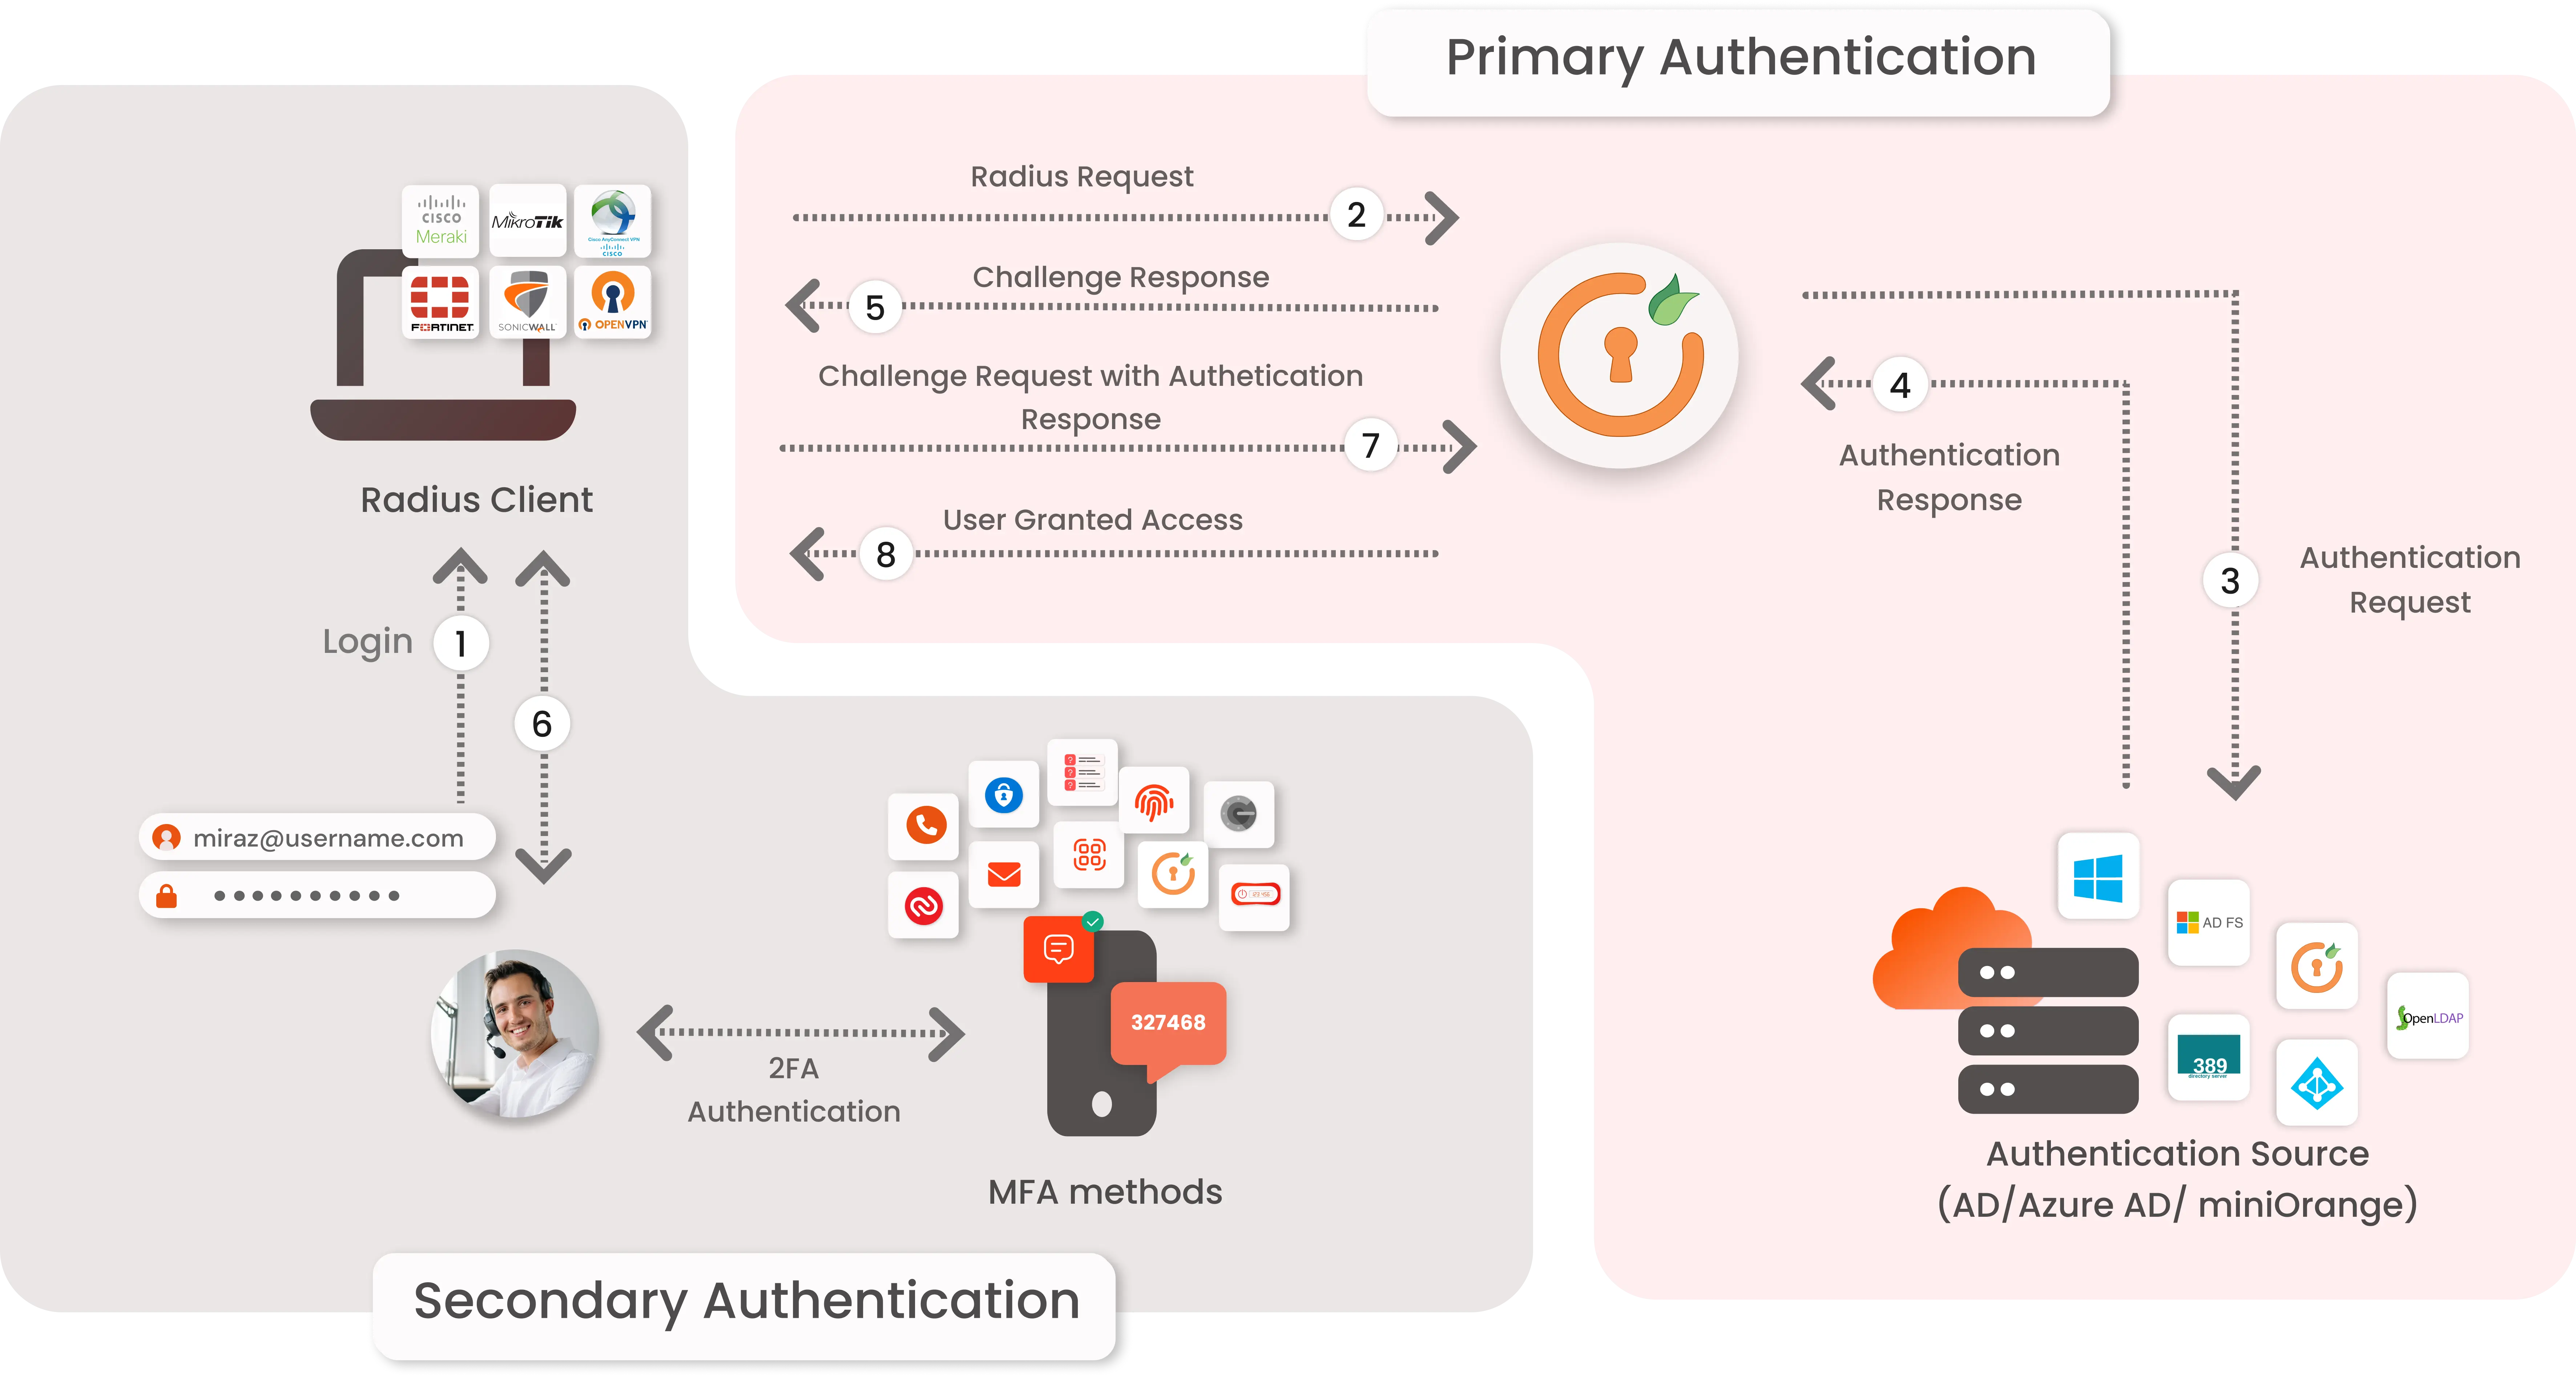
- Primary authentication initiates with the user submitting his Username and Password for PostgreSQL .
- User request acts as an authentication request to RADIUS Server(miniOrange).
- miniOrange RADIUS server passes user credentials to validate against the credentials stored in AD (Active Directory) / Database.
- Once the user's first level of authentication gets validated AD sends the confirmation to RADIUS Server.
- Now miniOrange RADIUS Server asks for a 2-factor authentication challenge to the user.
- Here user submits the response/code which he receives on his hardware/phone.
- User response is checked at miniOrange’s RADIUS Server side.
- On successful 2nd factor authentication the user is granted access to login.
What are different 2FA/MFA methods for PostgreSQL supported by miniOrange?
miniOrange supports multiple 2FA/MFA authentication methods for PostgreSQL secure access such as, Push Notification, Soft Token, Microsoft / Google Authenticator etc.
| Authentication Type | Method | Supported |
|---|
| miniOrange Authenticator | Soft Token | |
| miniOrange Push Notification | |
| Mobile Token | Google Authenticator | |
| Microsoft Authenticator | |
| Authy Authenticator | |
| SMS | OTP Over SMS | |
| SMS with Link | |
| Email | OTP Over Email | |
| Email with Link | |
| Call Verification | OTP Over Call | |
| Hardware Token | YubiKey Hardware Token | |
| Display Hardware Token | |
You can opt for any of the 2FA methods to secure your PostgreSQL . To integrate 2FA, you can enable RADIUS authentication in PostgreSQL and configure policies in miniOrange to enable or disable 2FA for users.
Connect with any External Directories
miniOrange provides user authentication from various external directories such as miniOrange Directory, Microsoft AD, Microsoft Entra ID/LDAP, AWS Cognito and many more.
Can't find your Directory? Contact us on idpsupport@xecurify.com
Enable Multi Factor Authentication 2FA/MFA for PostgreSQL
1. Configure PostgreSQL in miniOrange
- Login into miniOrange Admin Console.
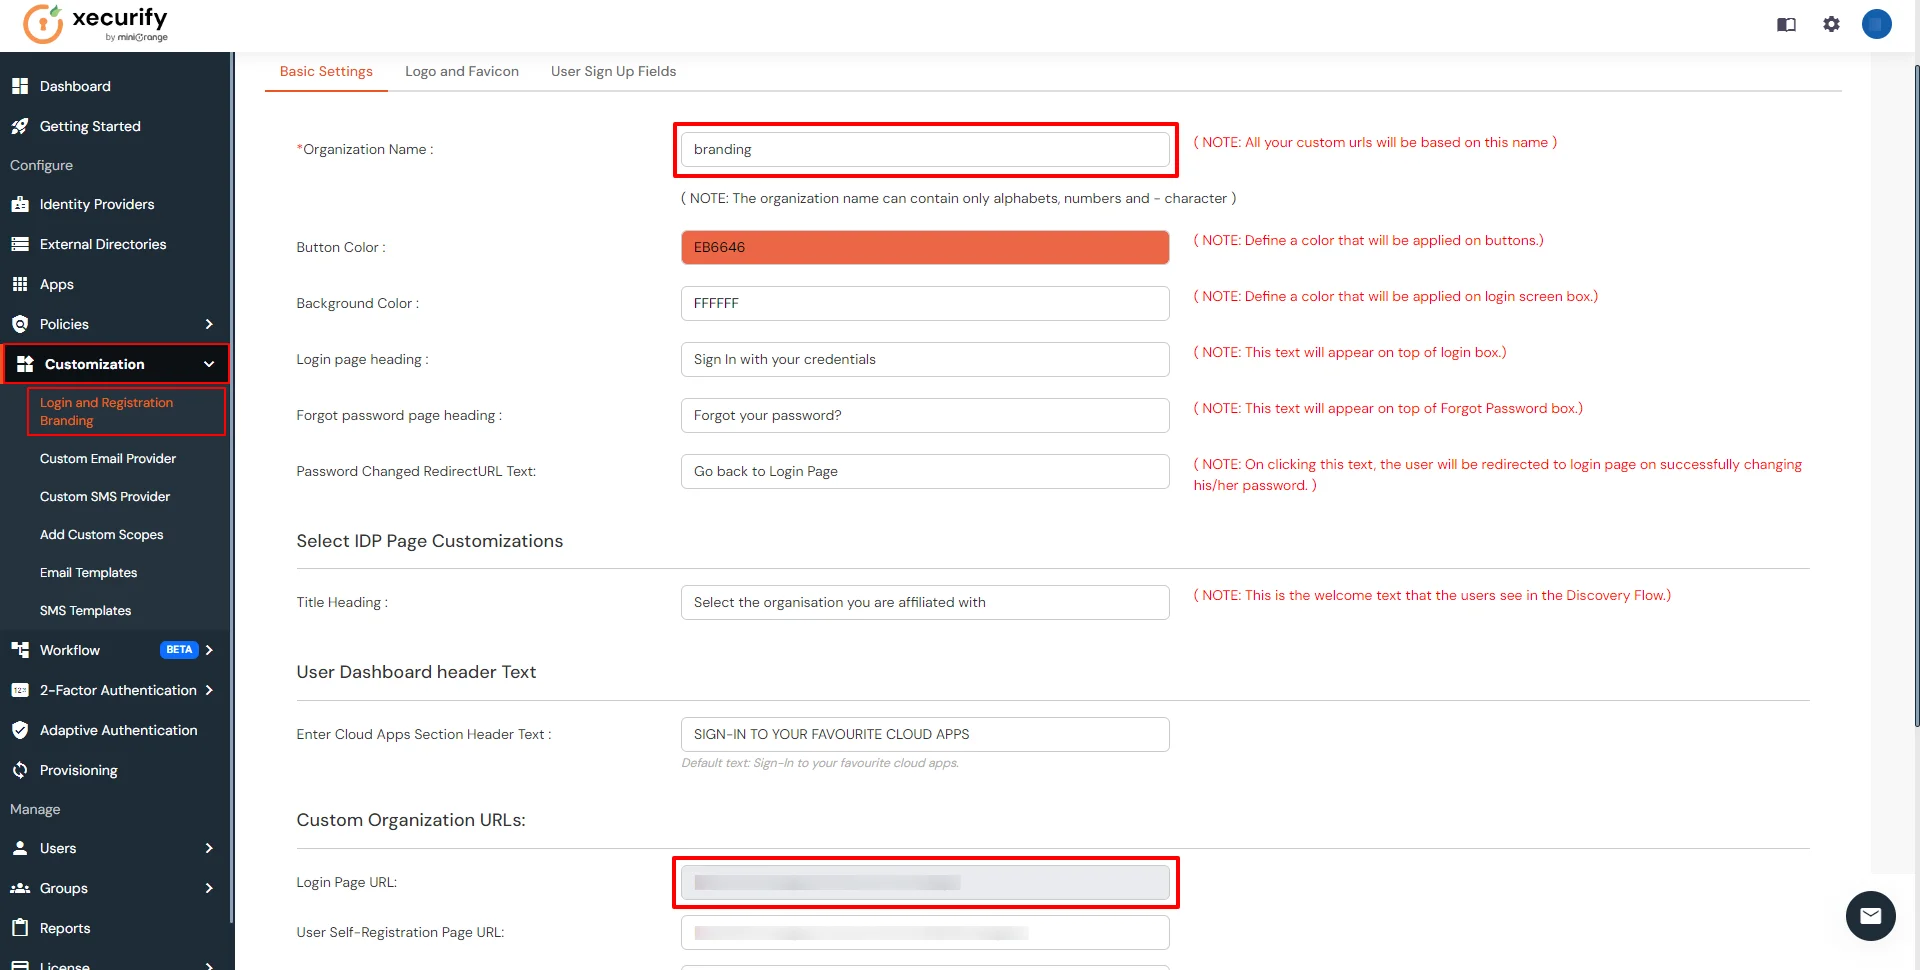
- Click on Customization >> Login and Registration Branding in the left menu of the dashboard.
- In Basic Settings, set the Organization Name as the custom_domain name.
- Click Save. Once that is set, the branded login URL would be of the format https://<custom_domain>.xecurify.com/moas/login
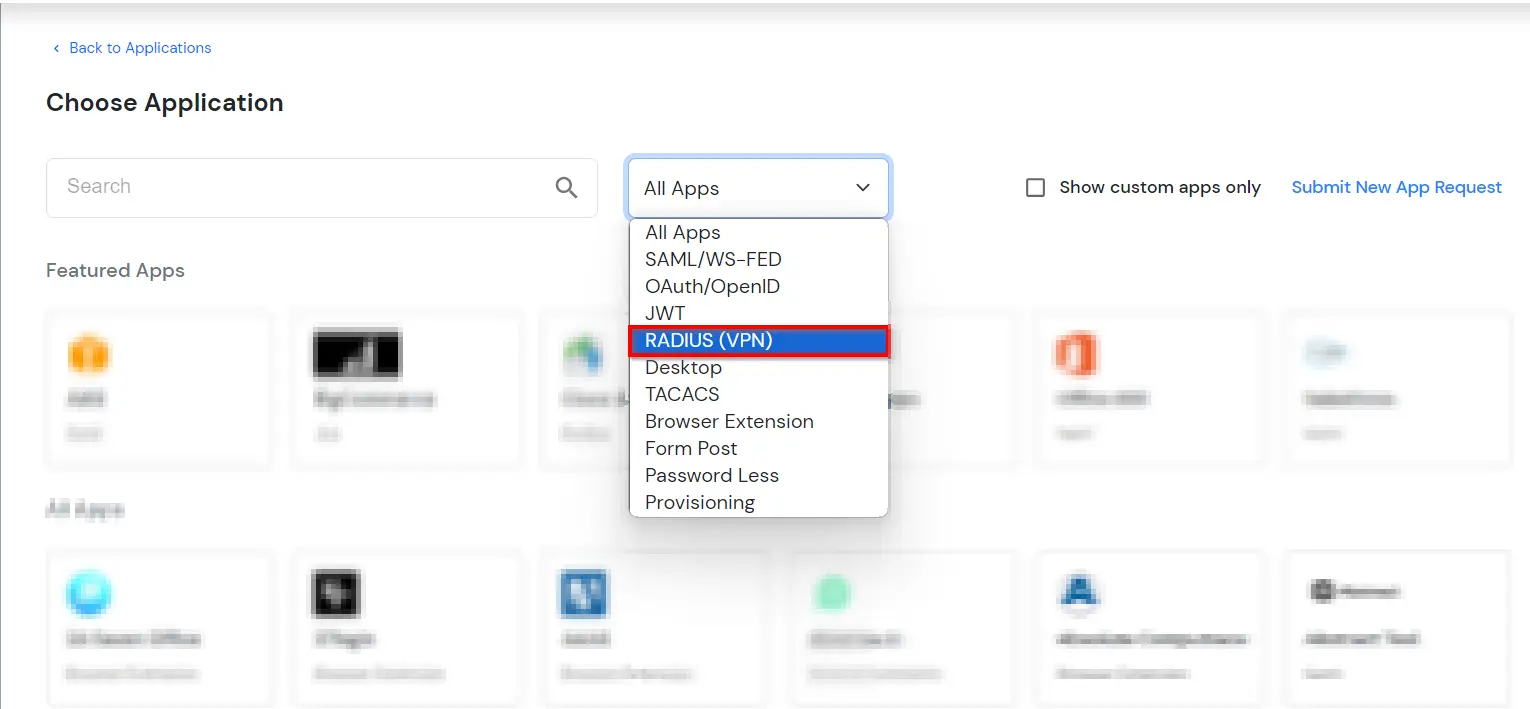
- Go to Apps, and click on Add Application button.

- In Choose Application, select RADIUS (VPN) from the application type dropdown.
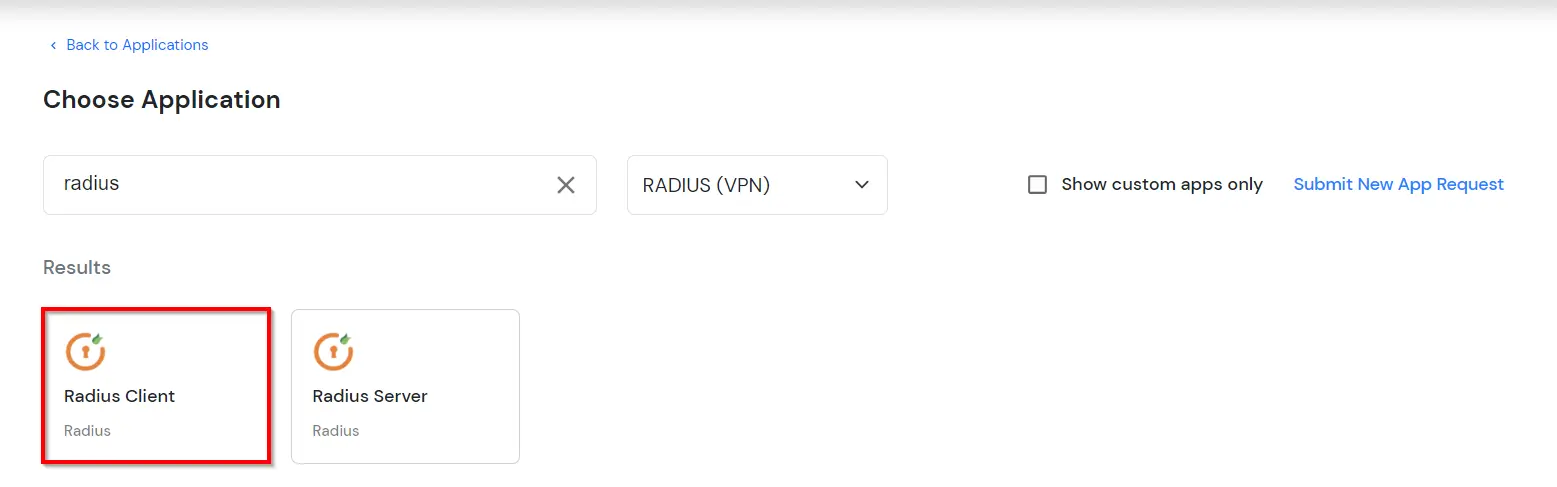
- Click on PostgreSQL application tab. If you don't find your application click on Radius Client application tab.
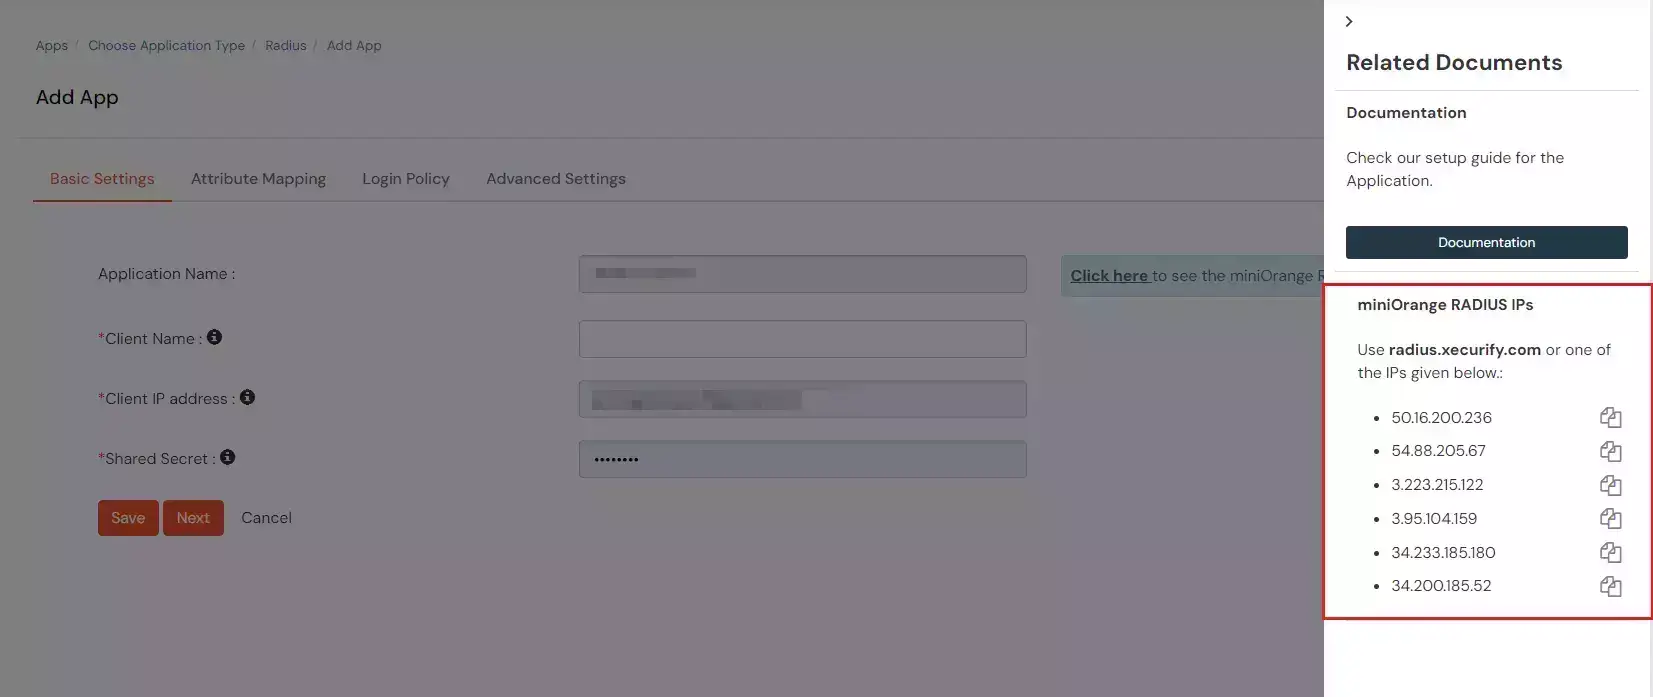
- Click on "View RADIUS IPs" to get the Radius server IPs.
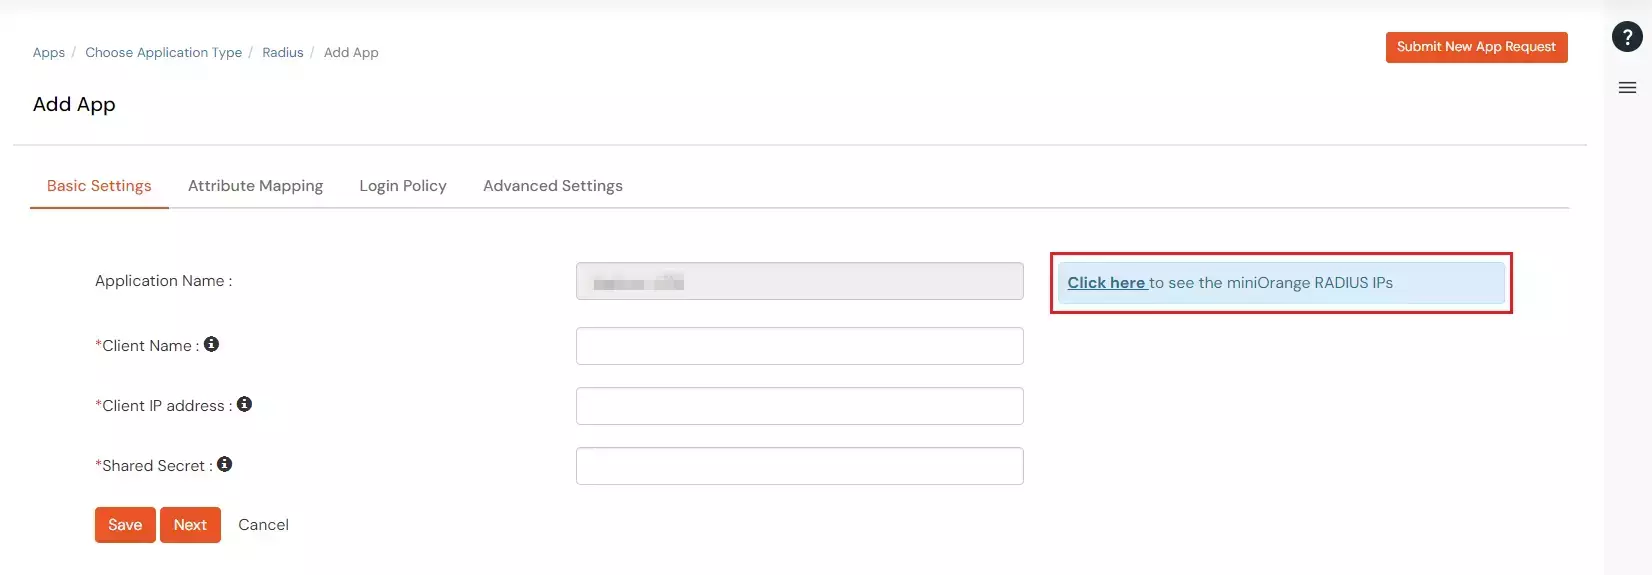
- Copy and save the Radius server IP which will be required to configure your Radius client.
- Configure the below details to add Radius Client.
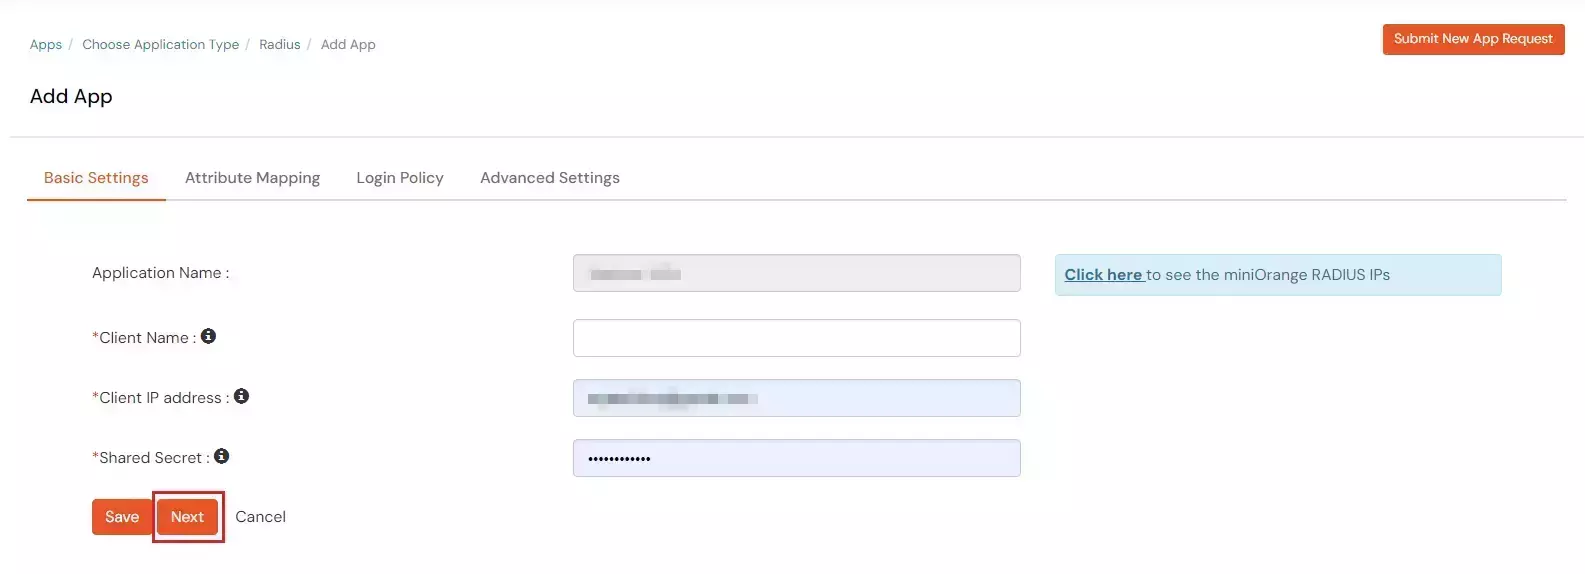
| Display Name: |
Any name for your reference. |
| Client IP: |
IP address of VPN server which will send Radius authentication request. |
| Shared Secret: |
Security key.
For Eg. "sharedsecret"
(Keep this with you, you will need to configure same on VPN Server). |
- Click Next.
- Under the Attribute Mappings tab, enable the toggle if you want to Send Custom Attributes in response.
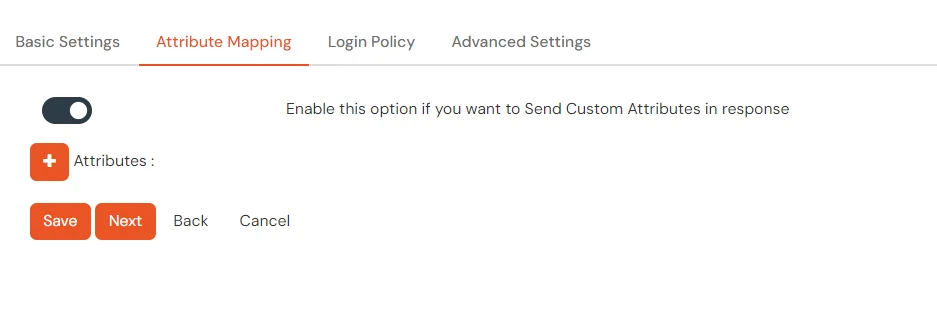
- To send groups in response, you can refer the below table for Vendor group attributes id.
| Vendor Name |
Vendor Attribute |
Value Type |
Attribute |
| Cisco ASA |
ASA-Group_policy |
User |
Groups |
| Fortinet |
Fortinet-Group-Name |
User |
Groups |
| Palo Alto |
PaloAlto-user-Group |
User |
Groups |
| SonicWall |
Sonicwall-user-group |
User |
Groups |
| Citrix |
Citrix-user-groups |
User |
Groups |
| Default(Can be used if your vendor is not in the list) |
Filter-Id |
User |
Groups |
- Value Type and Attribute can be changed based on the requirement.
- Click on Next to proceed.
- Navigate to Policies tab, and click on Add Policy button.

- Configure the following Policy details for the Radius Client.
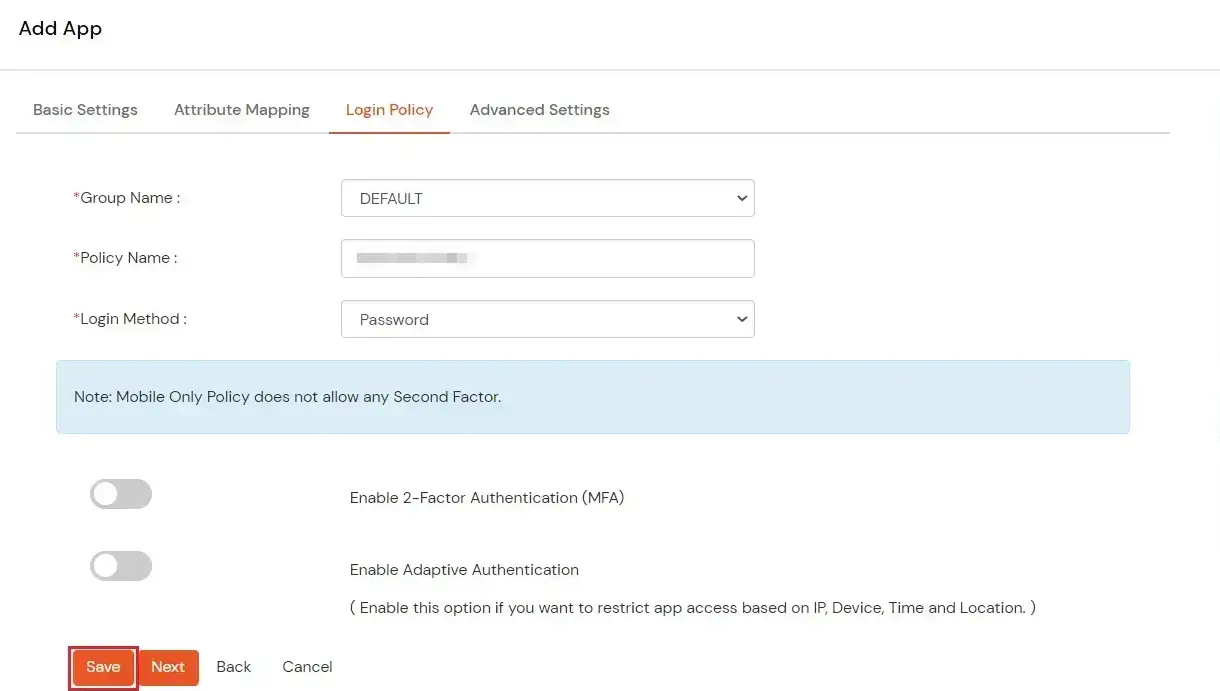
| Group Name: |
Group for which the policy will apply. |
| Policy Name: |
Any Identifier that specifies policy name. |
| First Factor |
Login Method for the users associated with this policy. |
| Enable 2-Factor Authentication |
Enables Second Factor during Login for users associated with this policy. |
| Enable Adaptive Authentication |
Enables Adaptive Authentication for Login of users associated with this policy. |
- After configuring the given above details, Click on Submit button.
Note: You can follow
this guide, if you want to configure Radius MFA using MSCHAPv2 protocol.
NOTE: For On-Premise version follow the below steps before testing the connectivity.
Only For On-Premise Version
Open Firewall Ports.
- In order to receive the RADIUS request, it is necessary to open UDP traffic on ports 1812 and 1813 for the machine where On-Premise IdP is deployed.
- If the hosting machine is a Windows Machine then you can follow this document.
- If the hosting machine is a Linux Machine then you can follow this document.
NOTE: If your machine is hosted on AWS, then enable the ports from the AWS panel.
2. Configure PostgreSQL Server as radius client
- Locate and edit the pg_hba.conf configuration file and perform the following commands in command line.
    updatedb
    locate pg_hba.conf
    vi /etc/postgresql/12/main/pg_hba.conf
- Add the following line at the beginning of this file.
host all all 0.0.0.0/0 radius radiusservers=<MO Radius IP> radiussecrets=<radius password> radiusports=1812
- Restart the PostgreSQL service using service postgresql restart
- Connect to the PostgreSQL server using the admin account and the password set on the Active directory using psql -h 127.0.0.1 -U <username> -W <password>
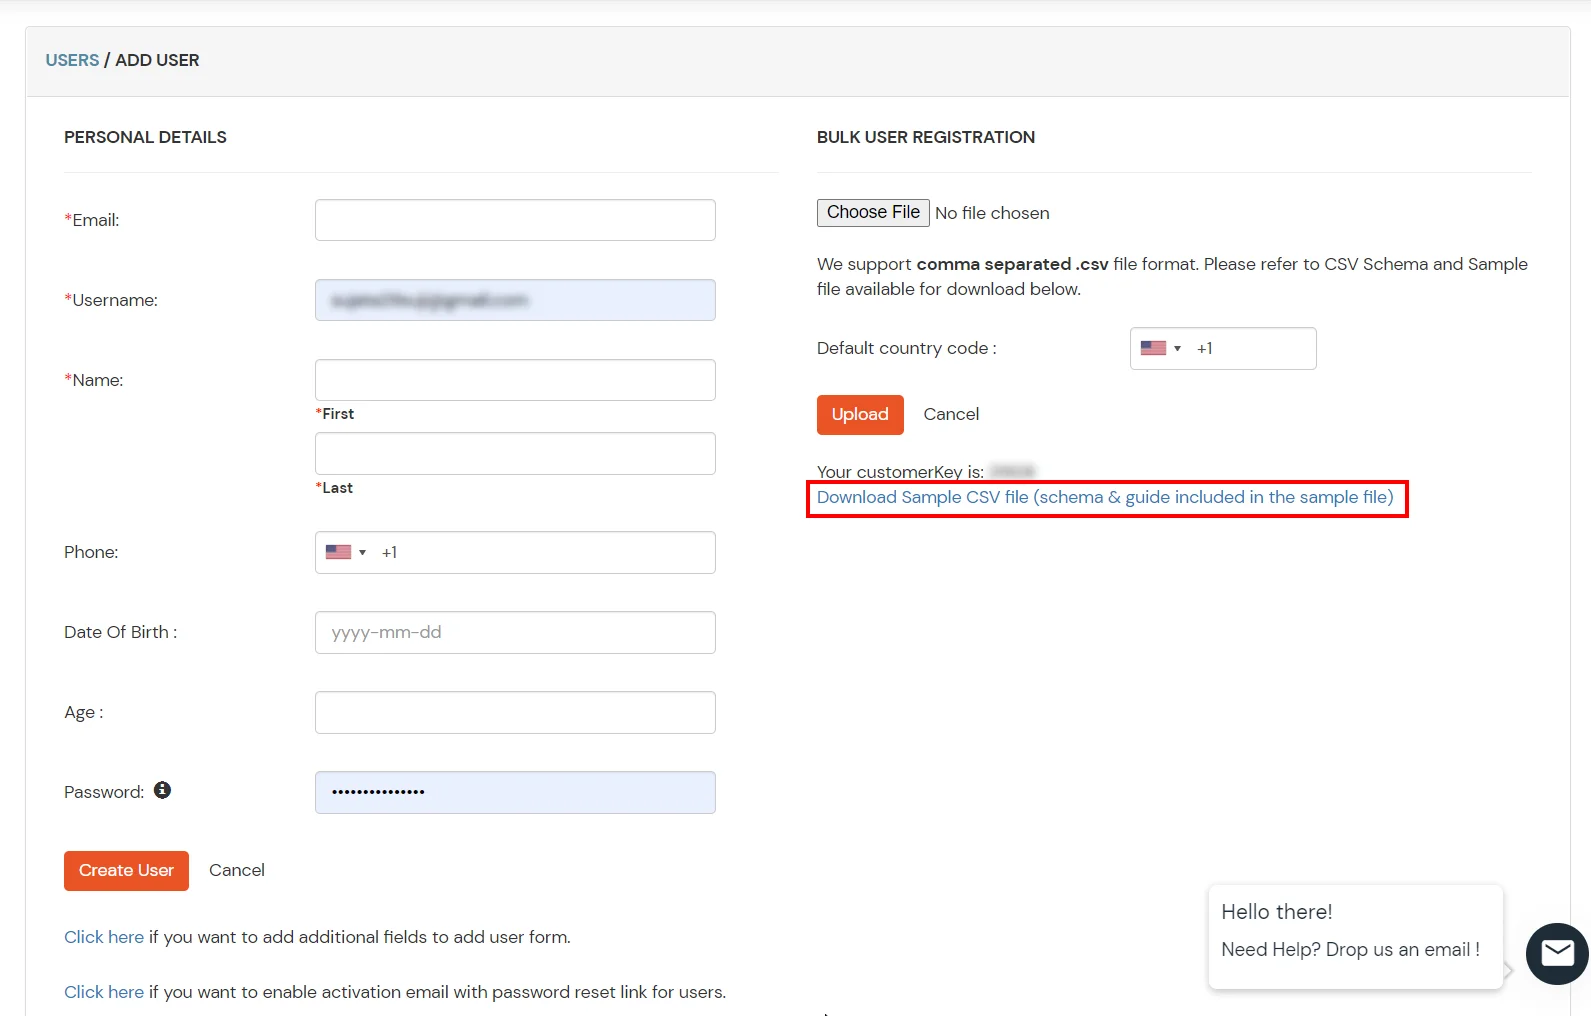
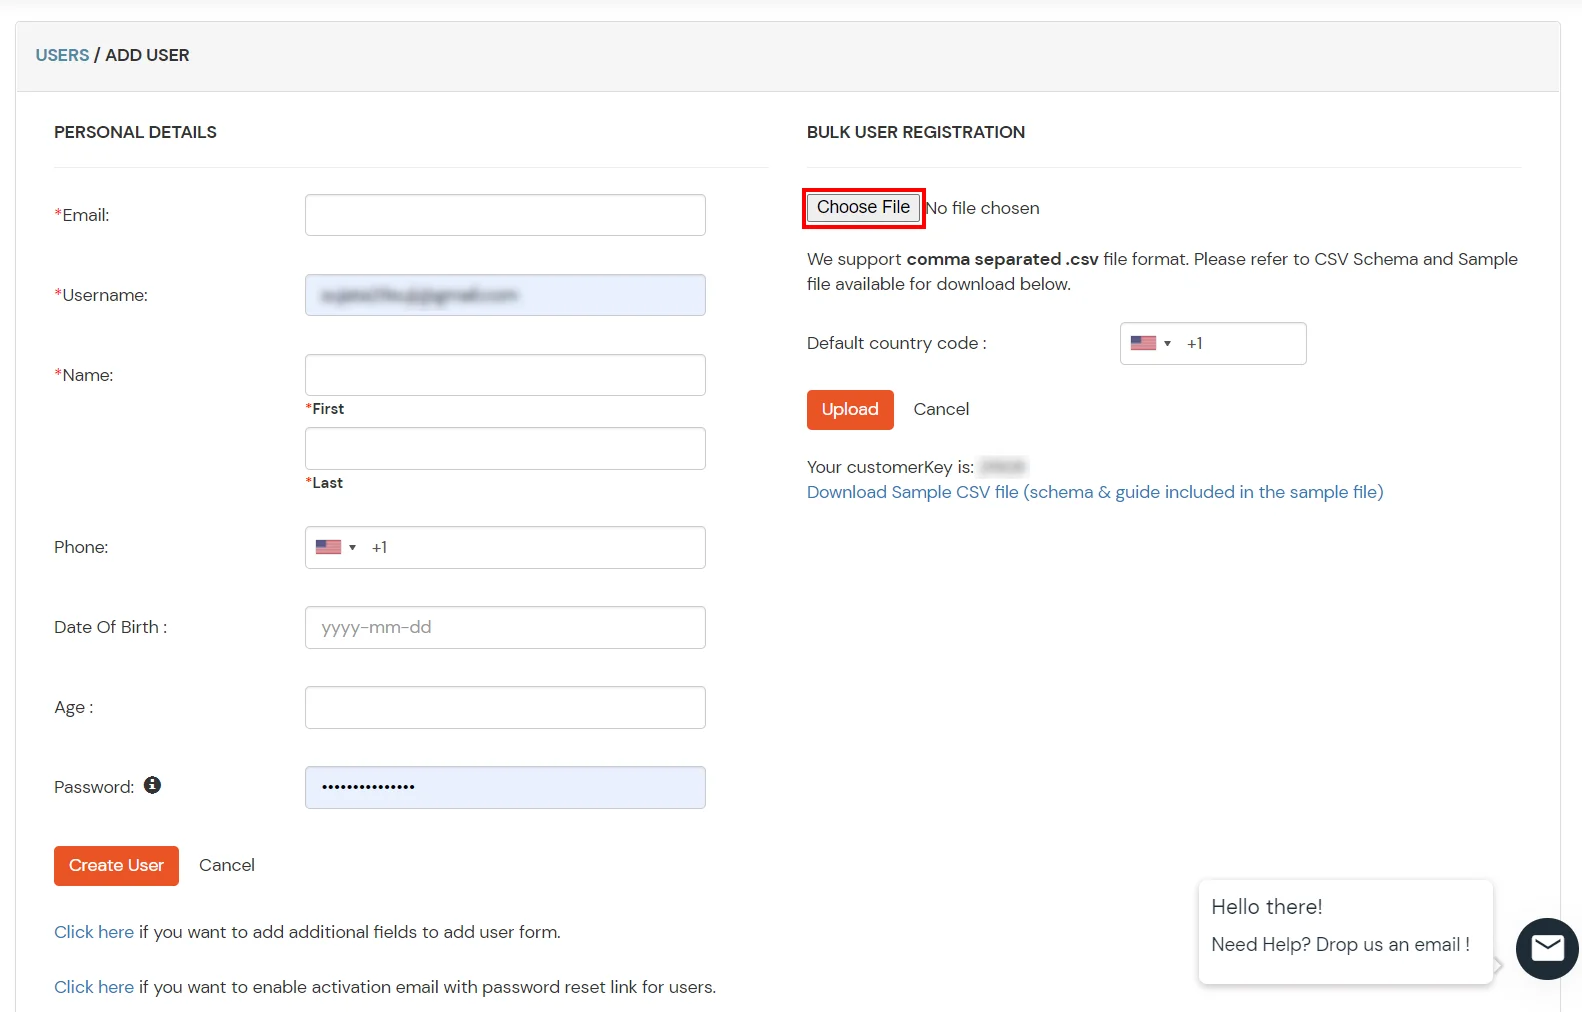
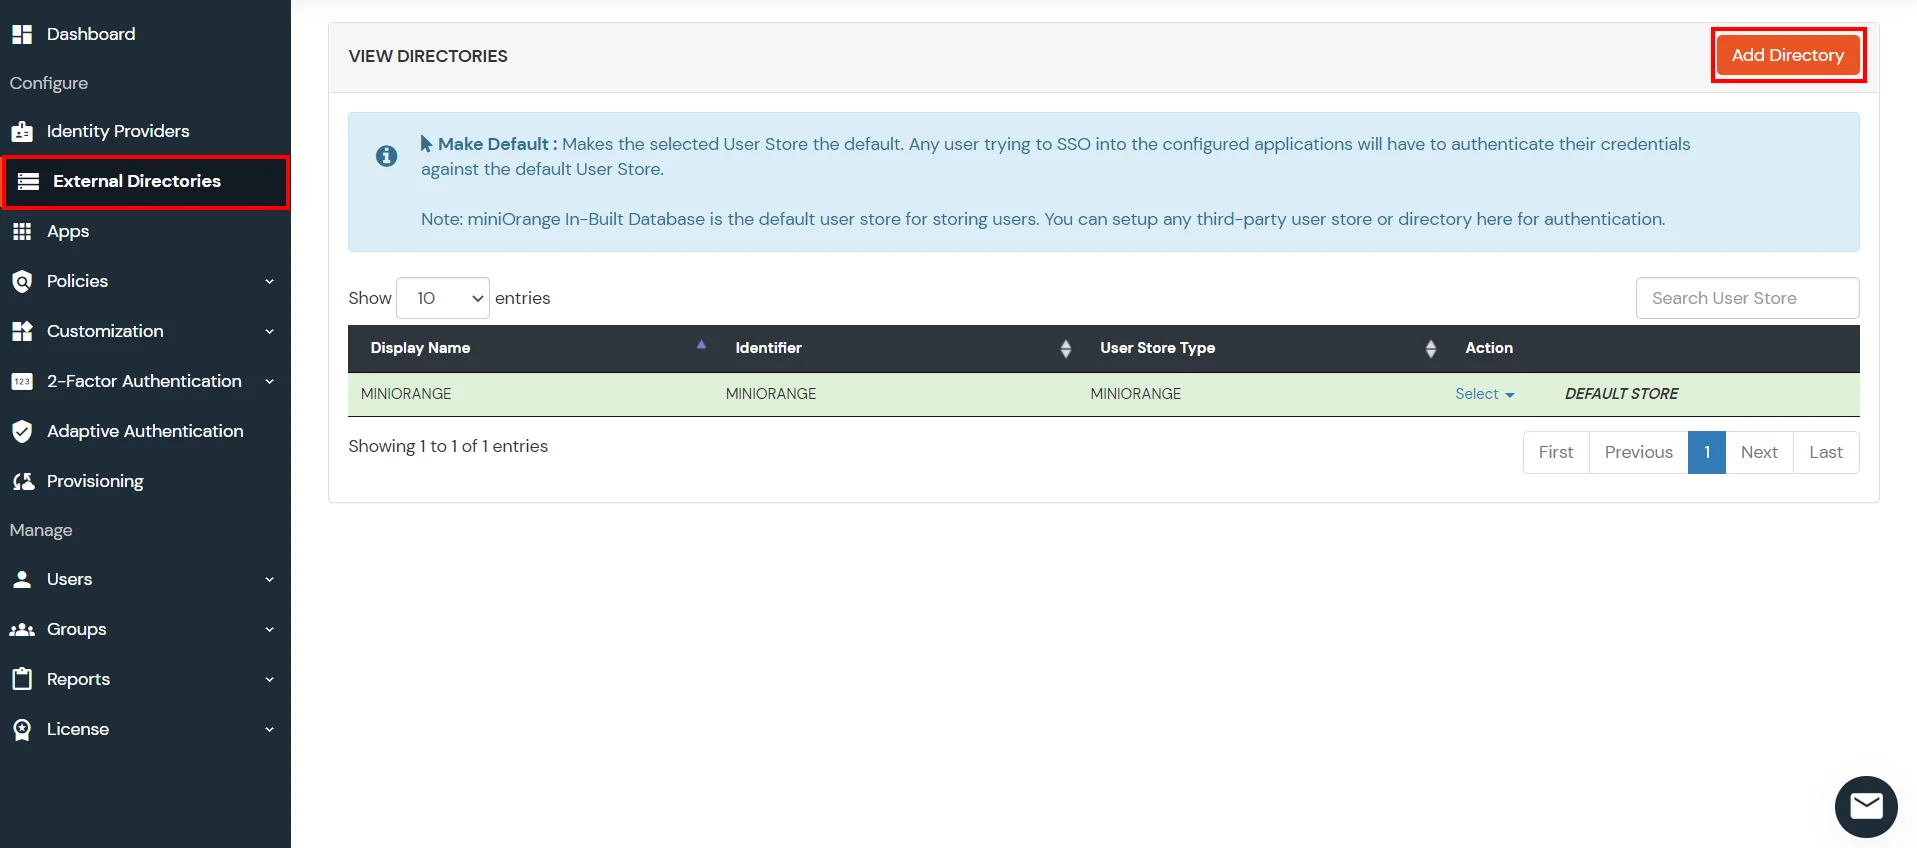
3. Configure Your User Directory
miniOrange provides user authentication from various external sources, which can be Directories (like ADFS, Microsoft Active Directory, Microsoft Entra ID, OpenLDAP, Google, AWS Cognito etc), Identity Providers (like Okta, Shibboleth, Ping, OneLogin, KeyCloak), Databases (like MySQL, Maria DB, PostgreSQL) and many more. You can configure your existing directory/user store or add users in miniOrange.
Note: You can follow this guide, if you want to configure Radius MFA with your users stored in Microsoft Entra ID using OAuth Password Grant.
Setup AD/LDAP as User Directory
Setup miniOrange as User Directory
Configure your existing directories such as Microsoft Active Directory, Microsoft Entra ID, OpenLDAP, etc.
- Click on Identity Providers >> Add Identity Provider in the left menu of the dashboard.
- In Choose Identity Provider, select AD/LDAP Directories from the dropdown.

- Then search for AD/LDAP and click it.
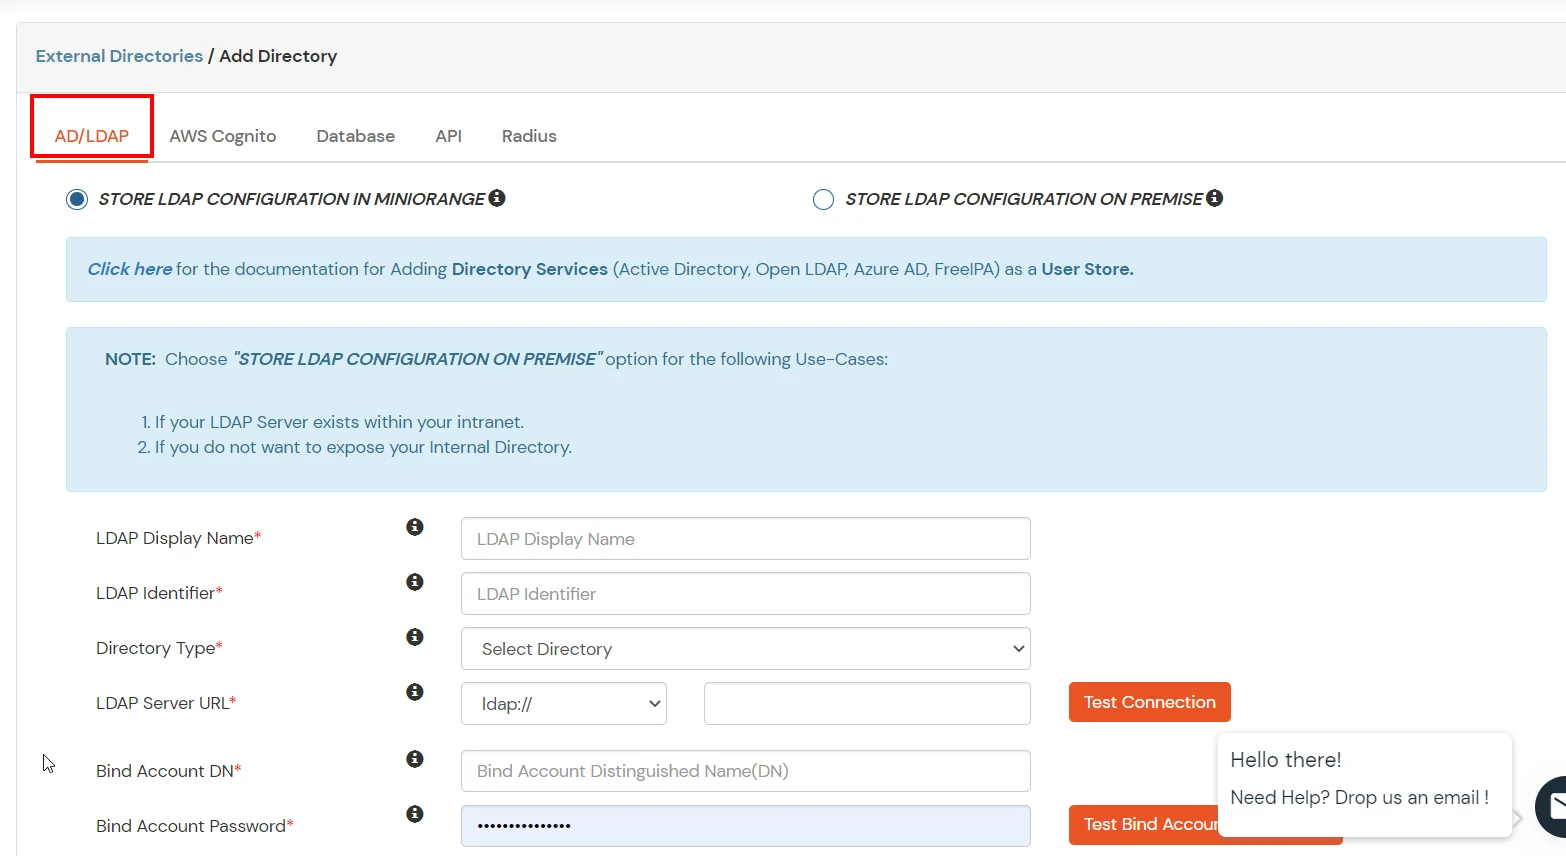
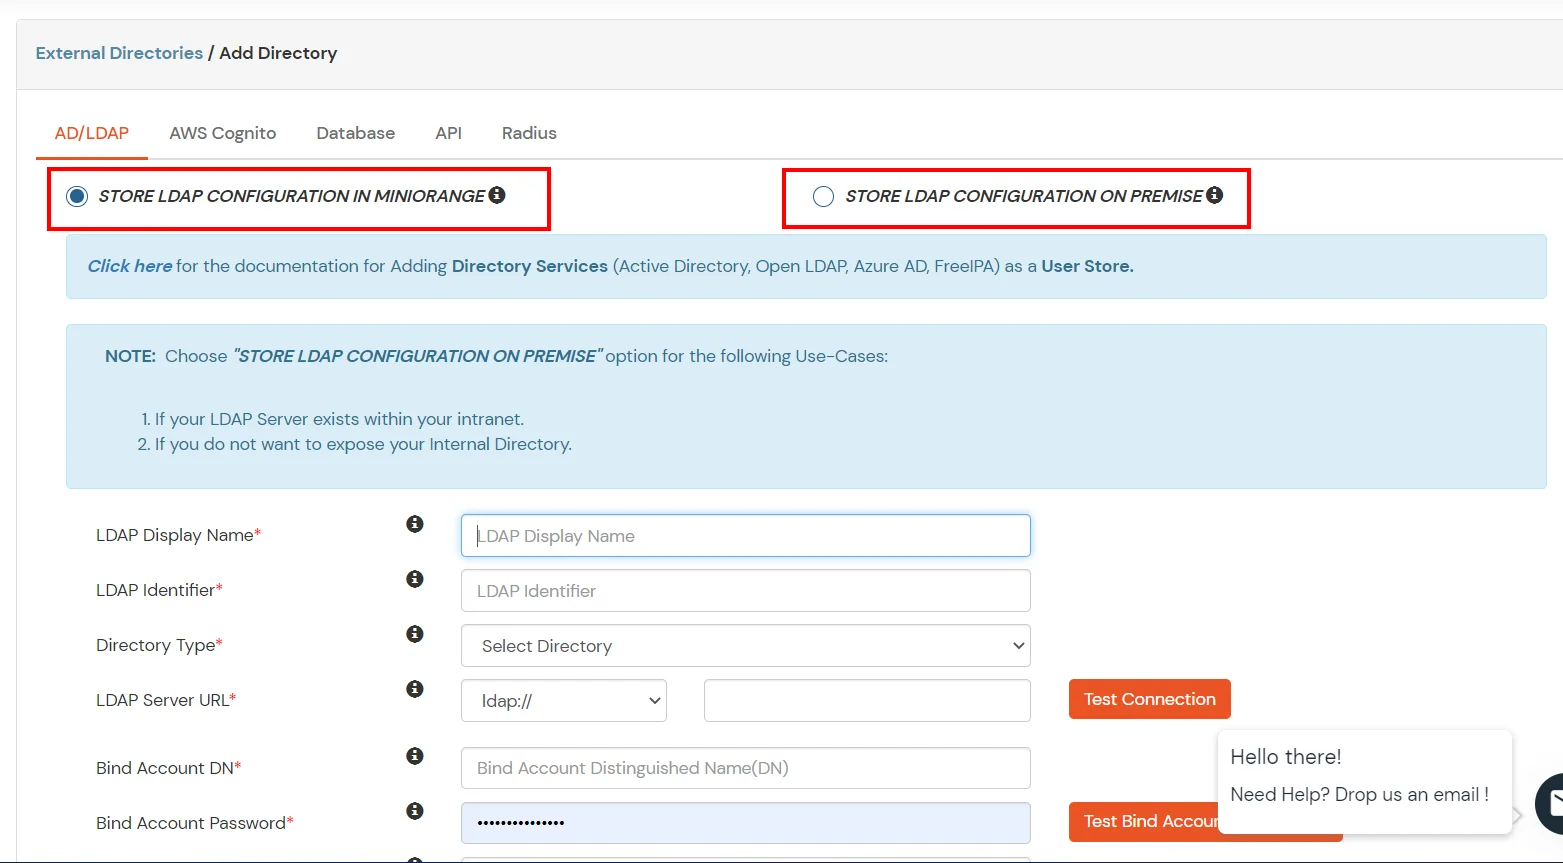
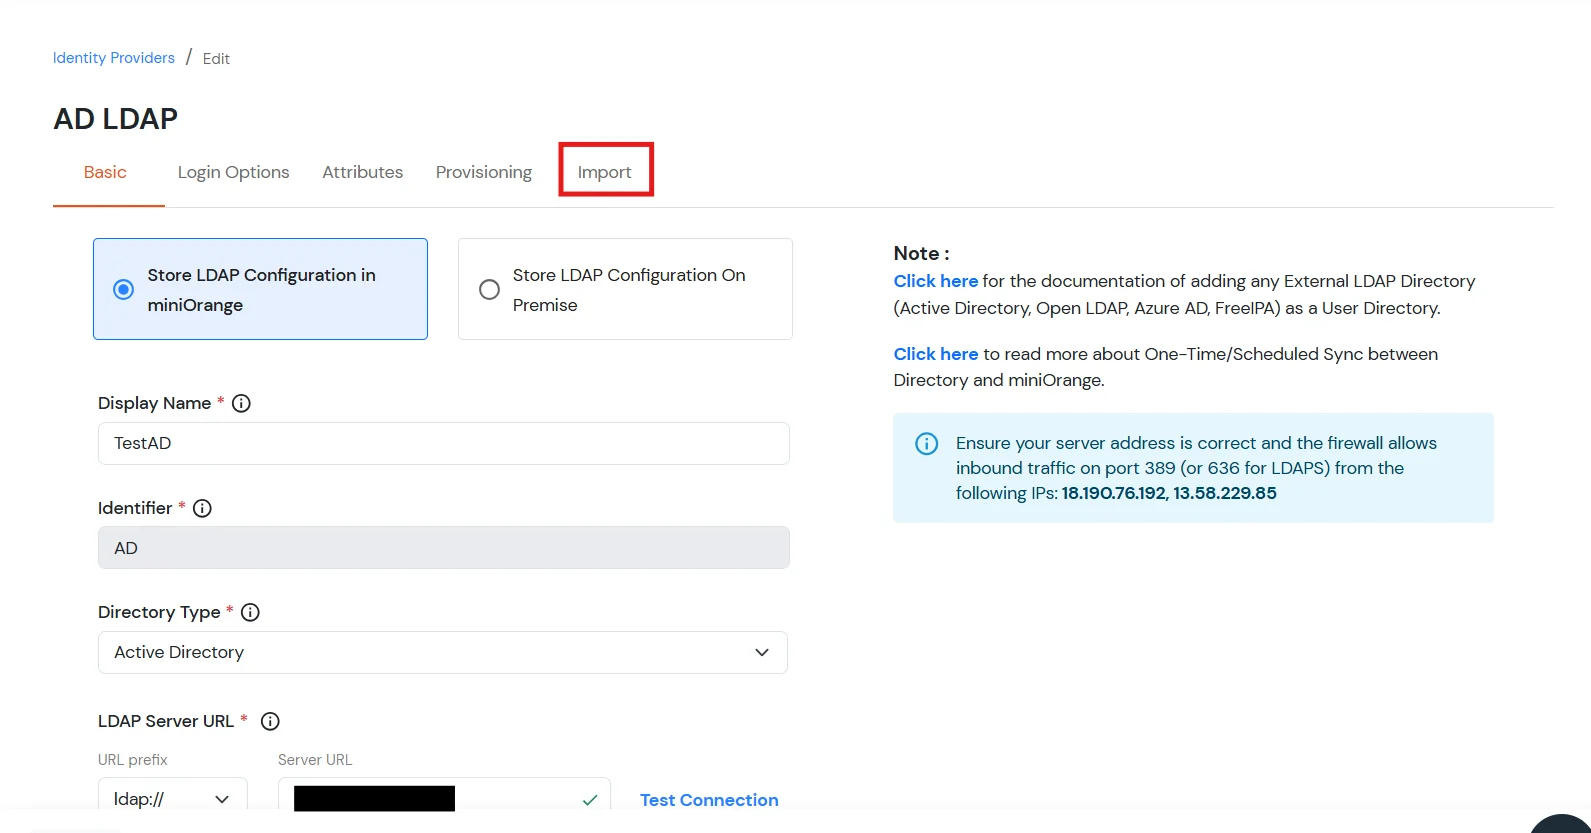
- STORE LDAP CONFIGURATION IN MINIORANGE: Choose this option if you want to keep your configuration in miniOrange. If the active directory is behind a firewall, you will need to open the firewall to allow incoming requests to your AD.
- STORE LDAP CONFIGURATION ON PREMISE: Choose this option if you want to keep your configuration in your premise and only allow access to AD inside premises. You will have to download and install miniOrange gateway on your premise.
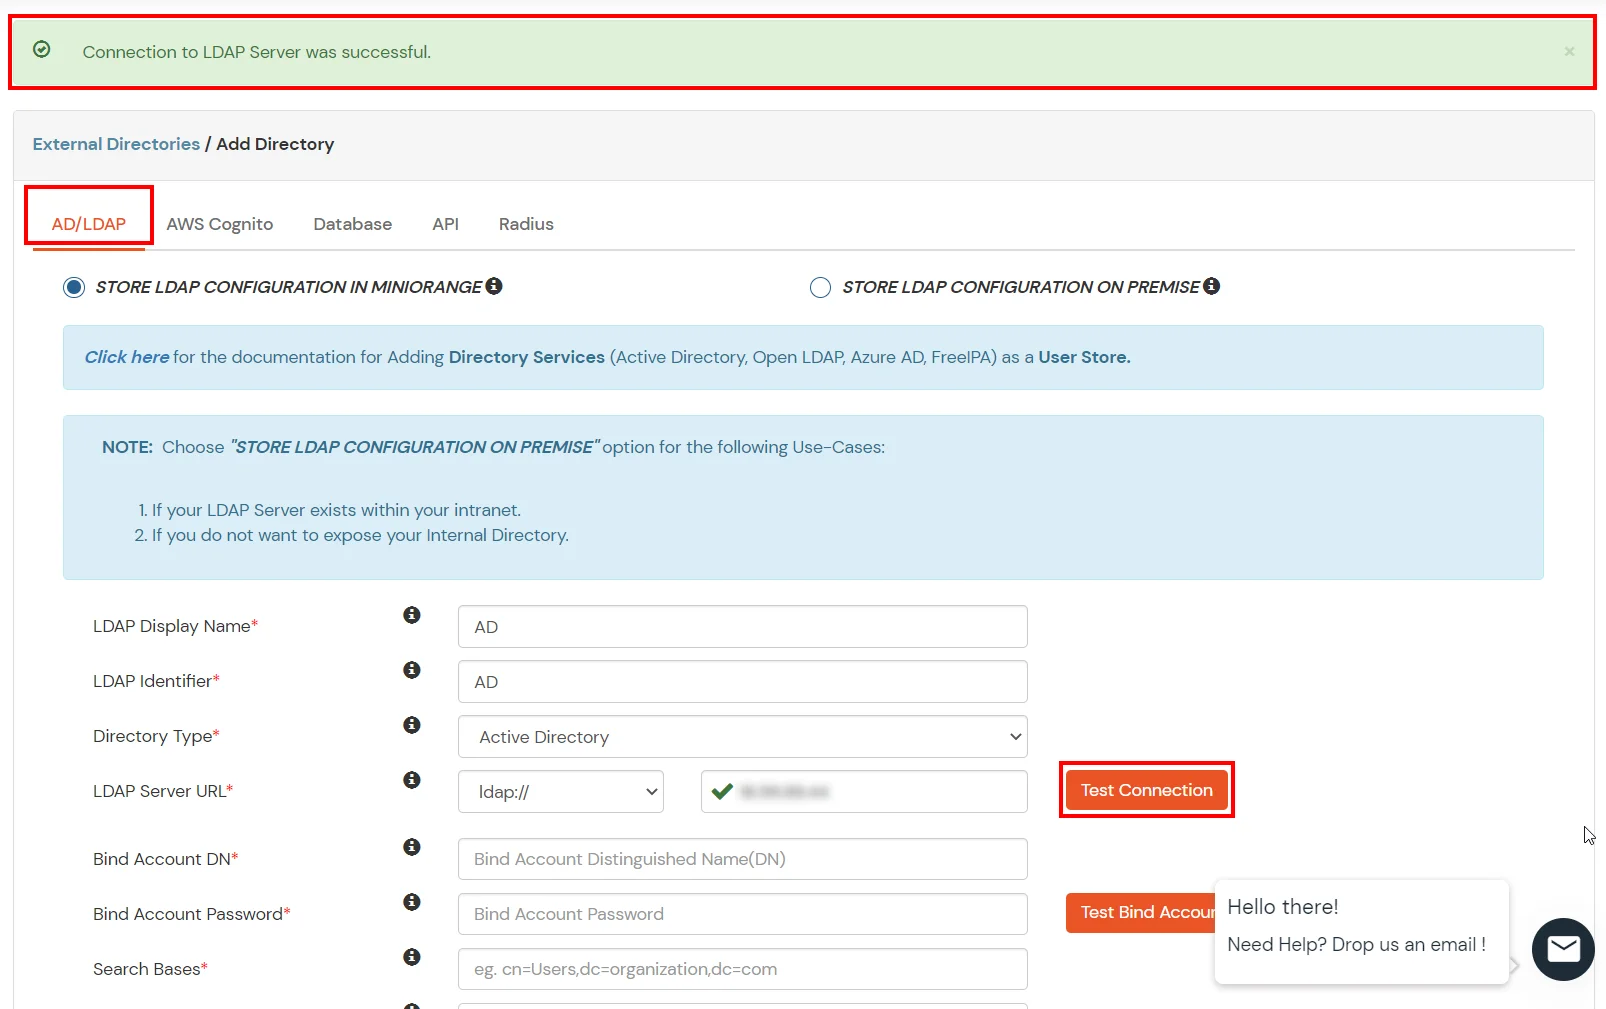
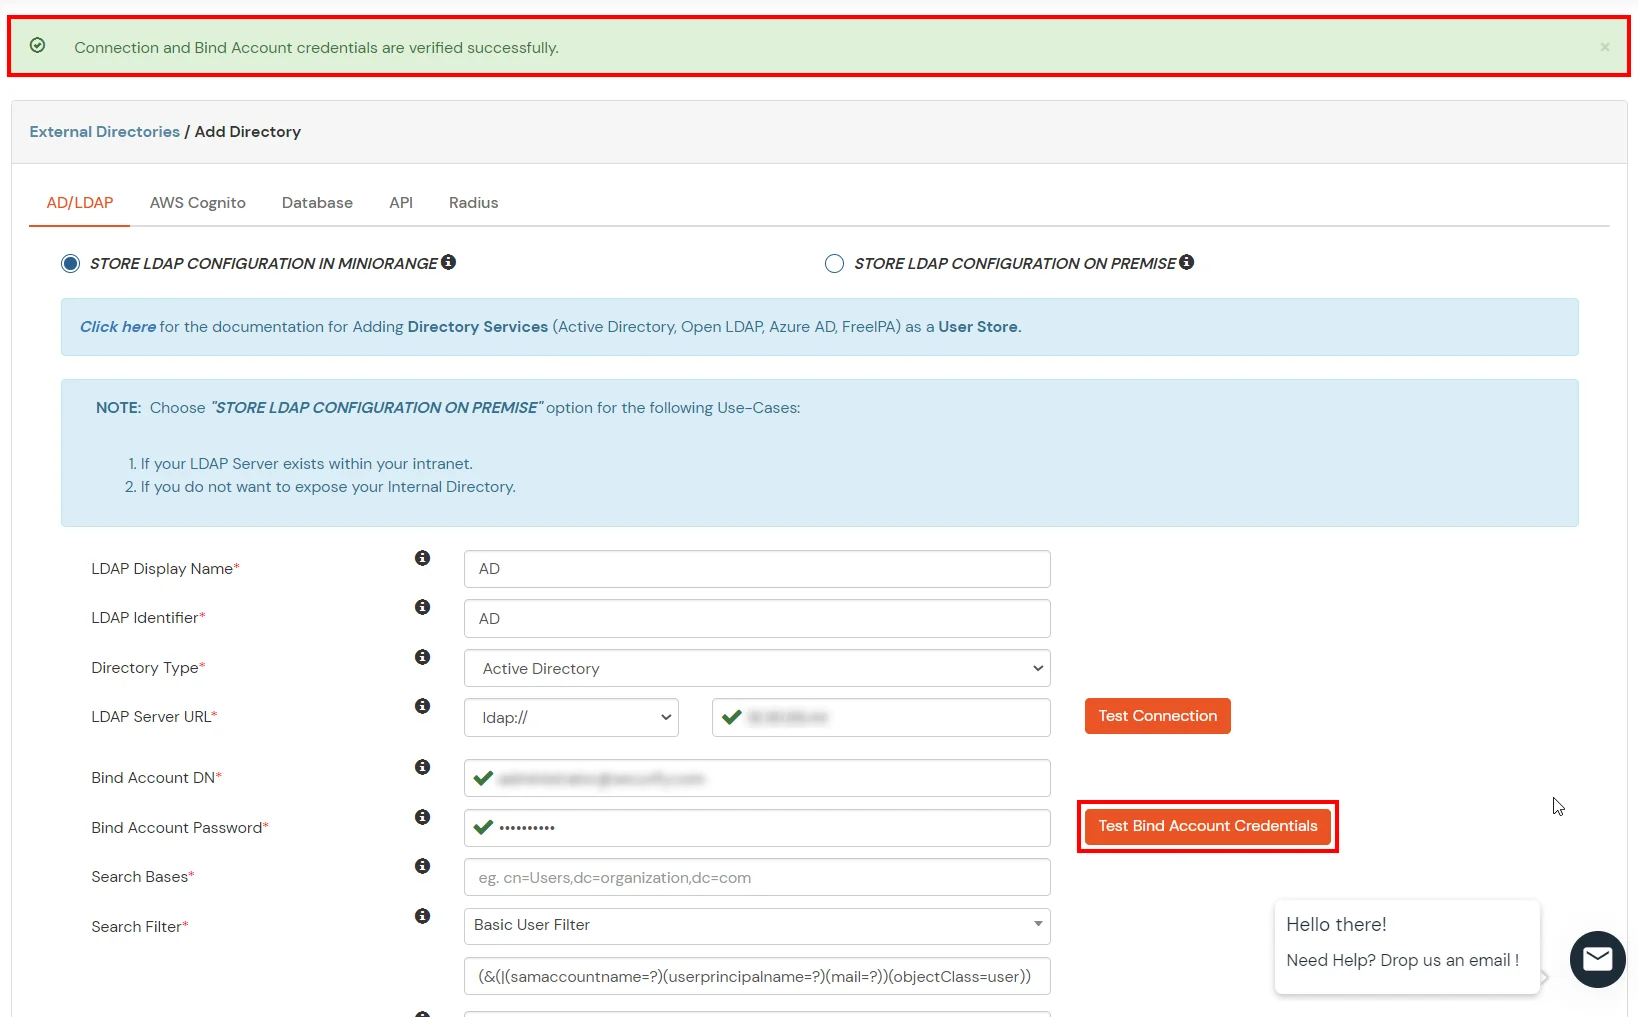
- Enter LDAP Display Name and Identifier name.
- Select Directory Type as Active Directory.
- Enter the LDAP Server URL or IP Address against the LDAP Server URL field.
- Click on the Test Connection button to verify if you have made a successful connection with your LDAP server.
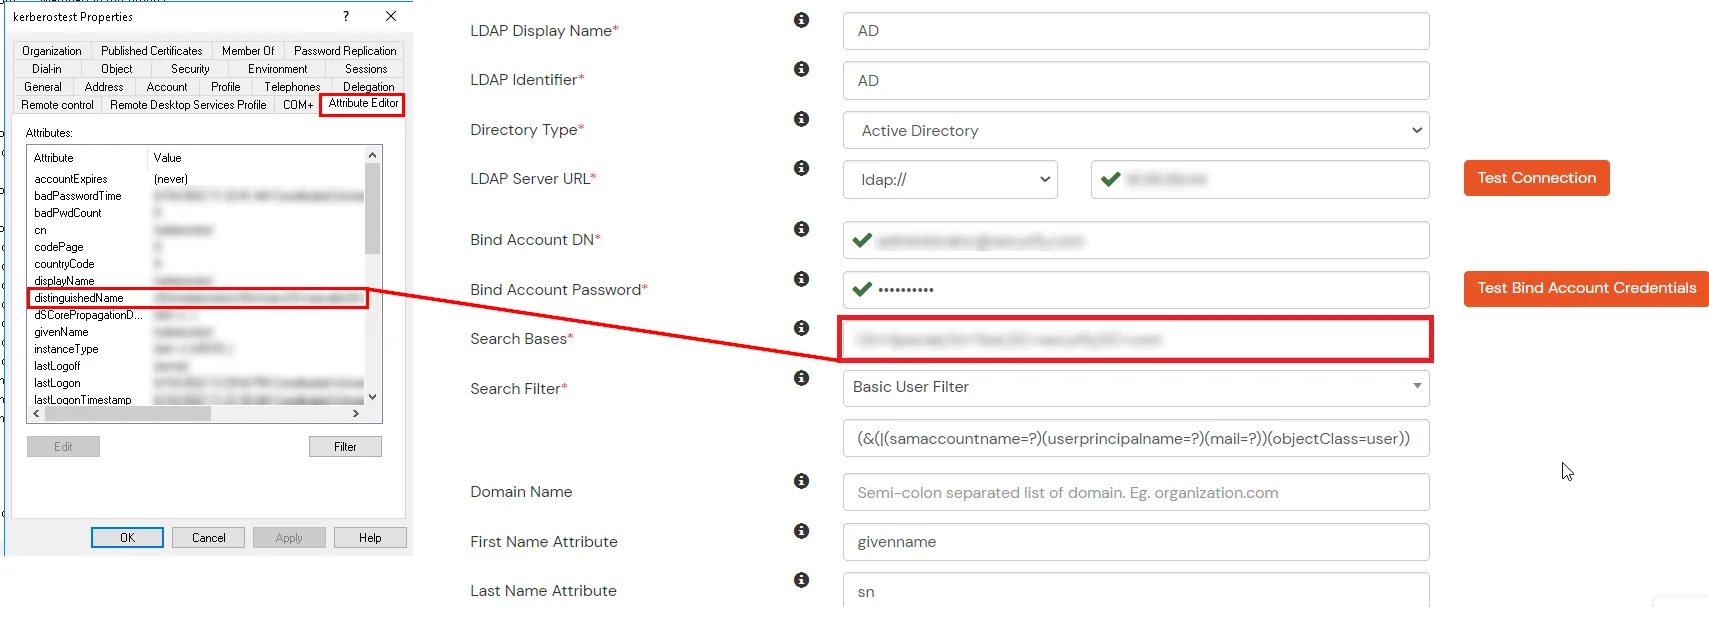
- In Active Directory, go to the properties of user containers/OU's and search for the Distinguished Name attribute. The bind account should have minimum required read privileges in Active Directory to allow directory lookups. If the use case involves provisioning (such as creating, updating, or deleting users or groups), the account must also be granted appropriate write permissions.
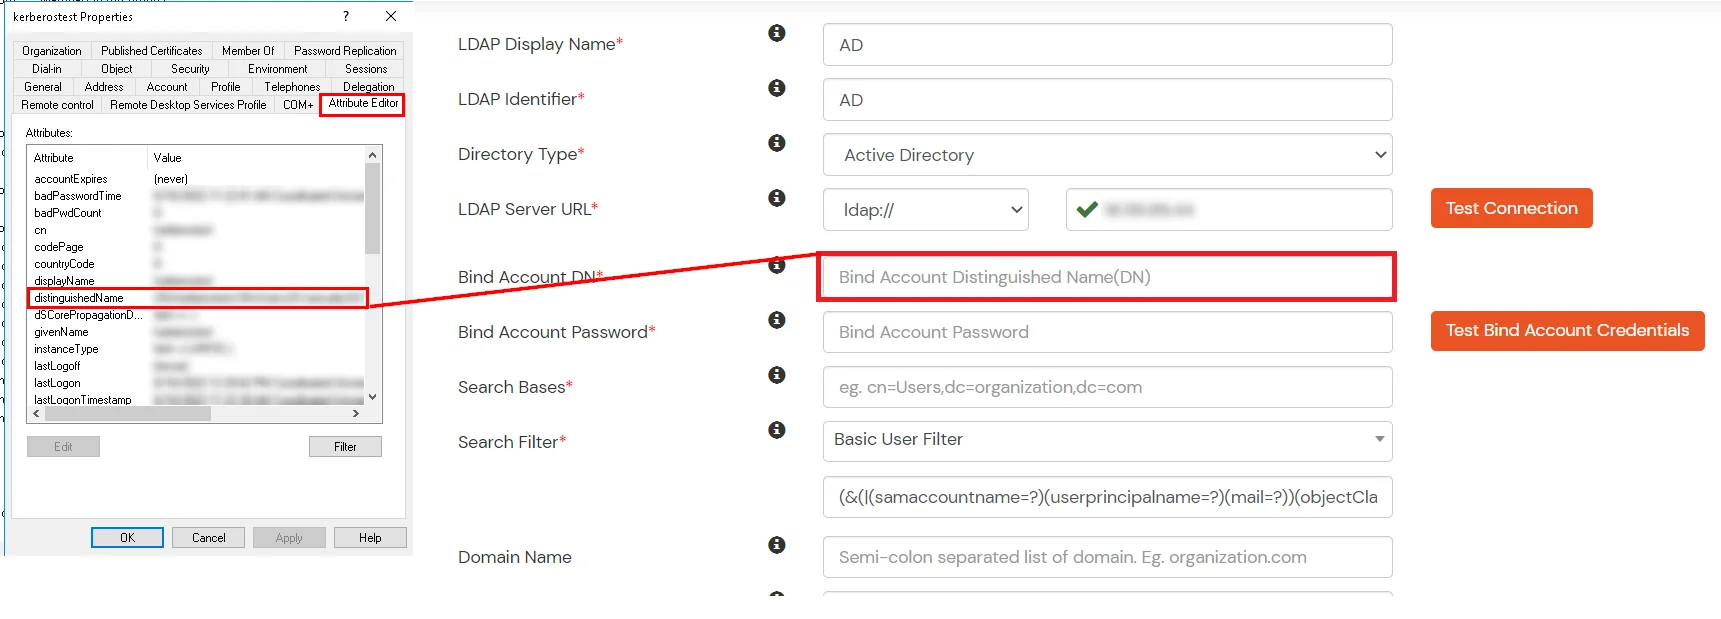
- Enter the valid Bind account Password.
- Click on the Test Bind Account Credentials button to verify your LDAP Bind credentials for LDAP connection.
- Search Base is the location in the directory where the search for a user begins. You will get this from the same place you got your Distinguished name.
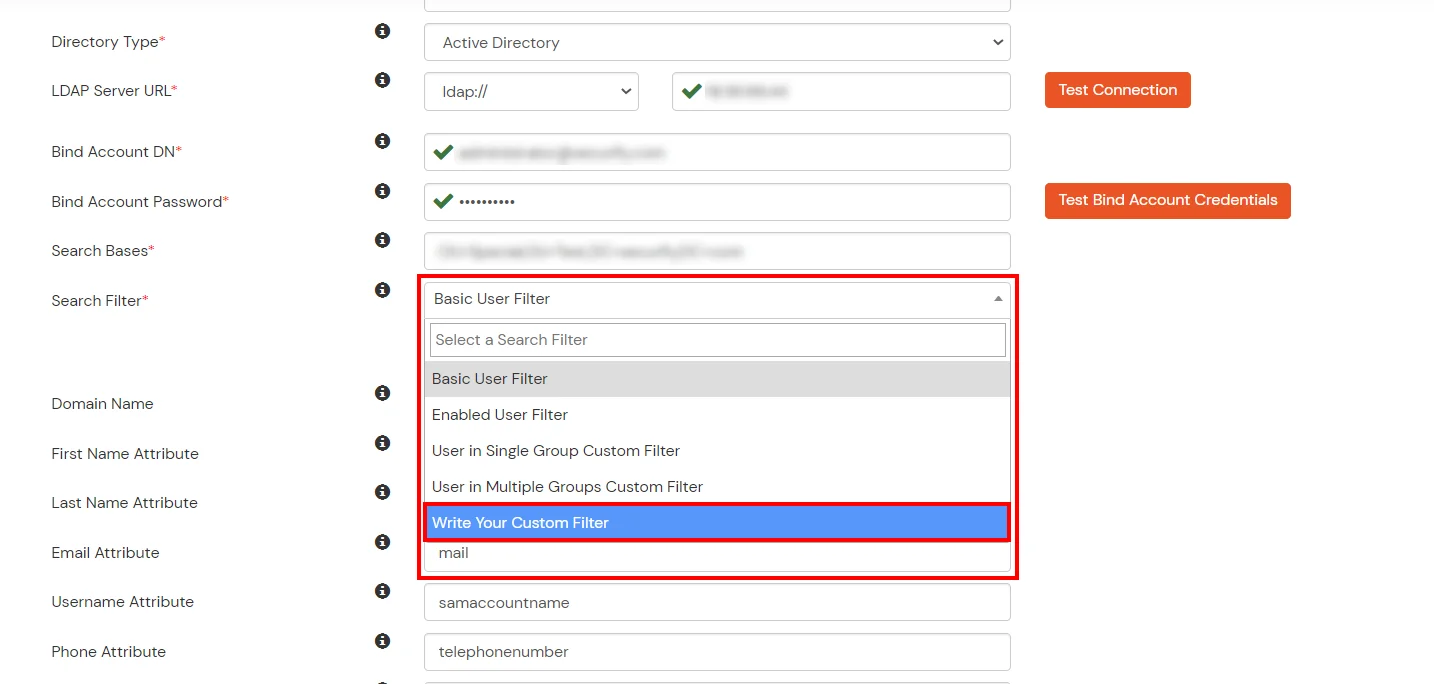
- Select a suitable Search filter from the drop-down menu. If you use User in Single Group Filter or User in Multiple Group Filter, replace the <group-dn> in the search filter with the distinguished name of the group in which your users are present. To use custom Search Filter select "Write your Custom Filter" option and customize it accordingly.
- Click on the Next button, or go to the Login Options tab.
- You can also configure following options while setting up AD. Enable Activate LDAP in order to authenticate users from AD/LDAP. Click on the Next button to add user store.
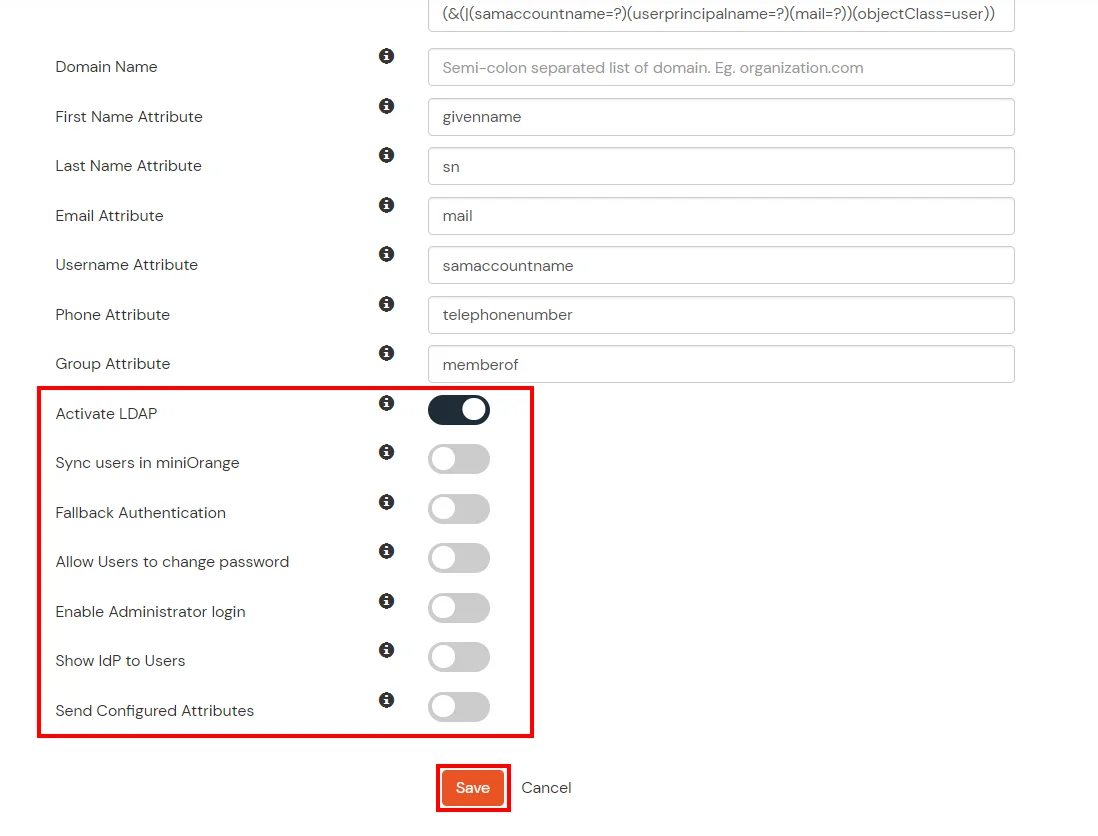
Here's the list of the attributes and what it does when we enable it. You can enable/disable accordingly.
| Attribute |
Description |
| Activate LDAP |
All user authentications will be done with LDAP credentials if you Activate it |
| Fallback Authentication |
If LDAP credentials fail then user will be authenticated through miniOrange |
| Enable administrator login |
On enabling this, your miniOrange Administrator login authenticates using your LDAP server |
| Show IdP to users |
If you enable this option, this IdP will be visible to users |
| Sync users in miniOrange |
Users will be created in miniOrange after authentication with LDAP |
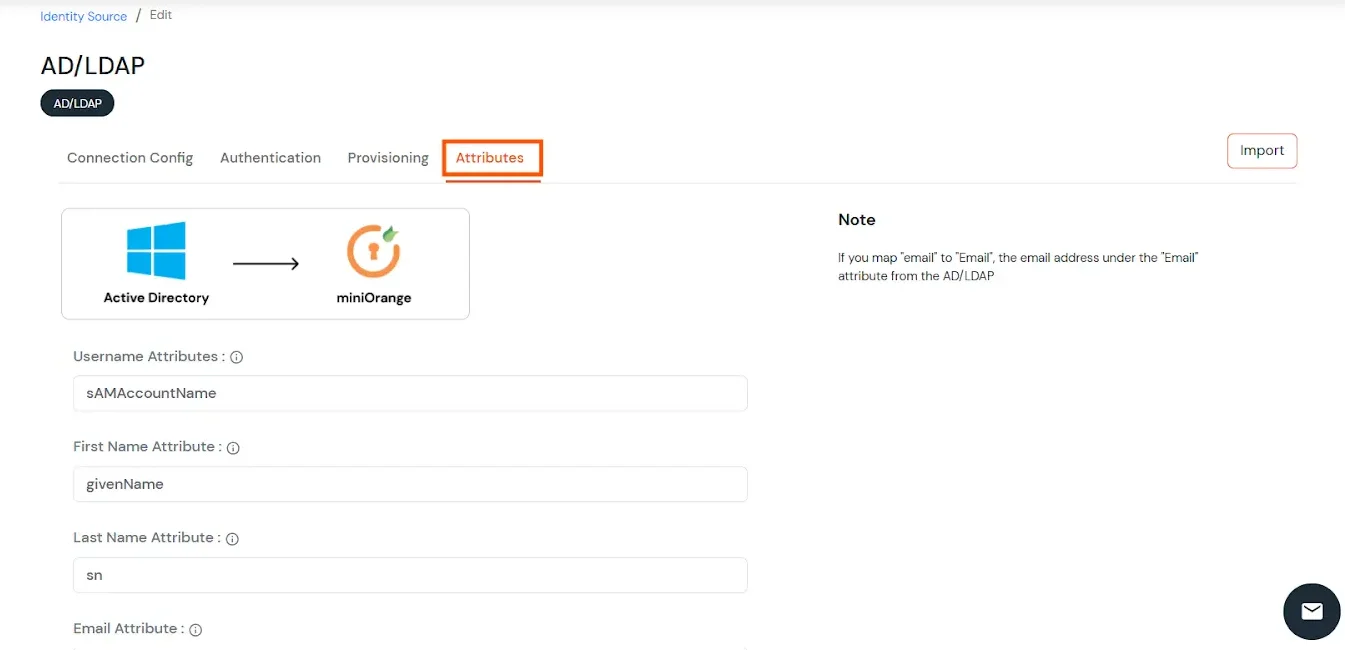
- Click on the Next button, or go to the Attributes tab.
Attributes Mapping from AD
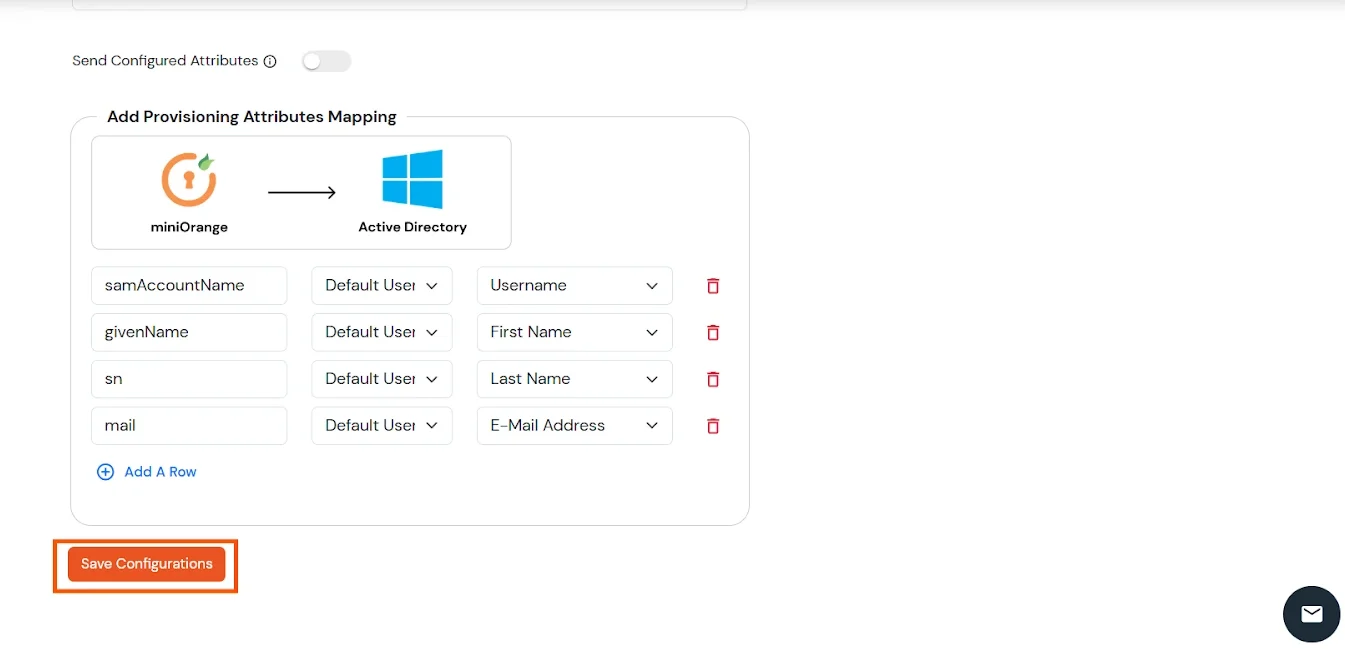
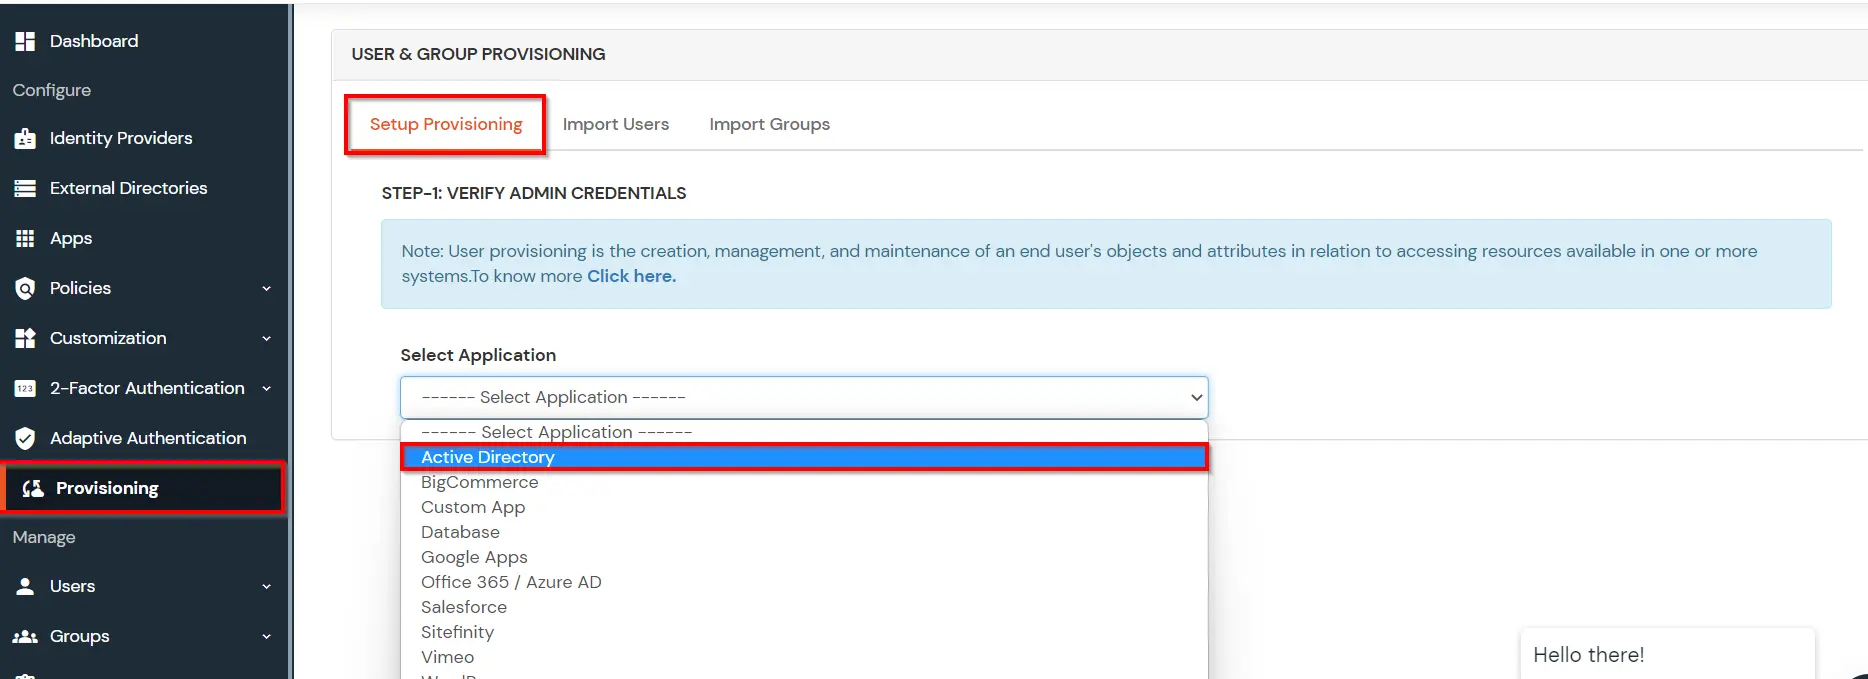
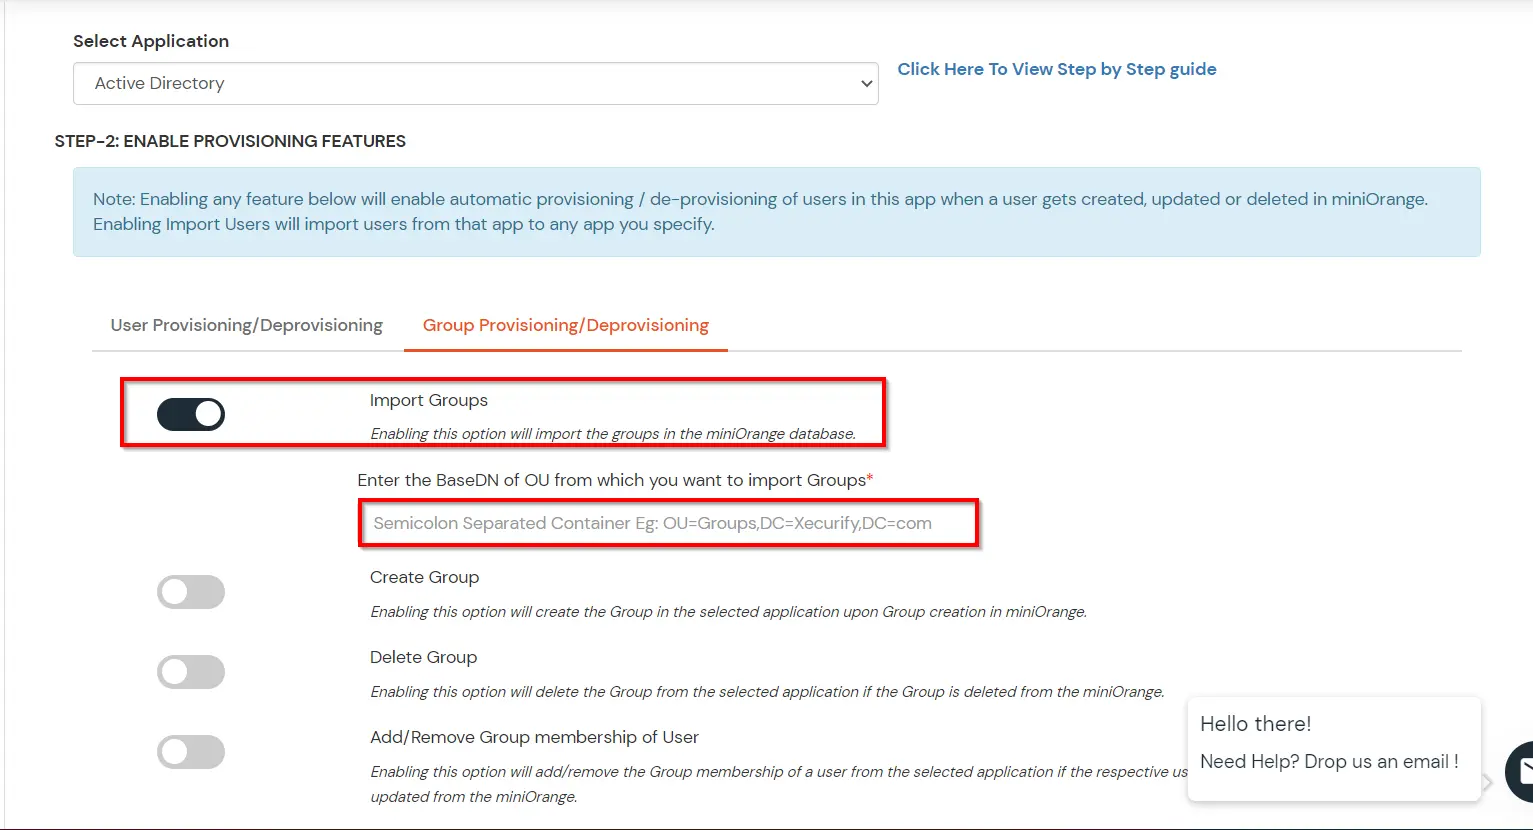
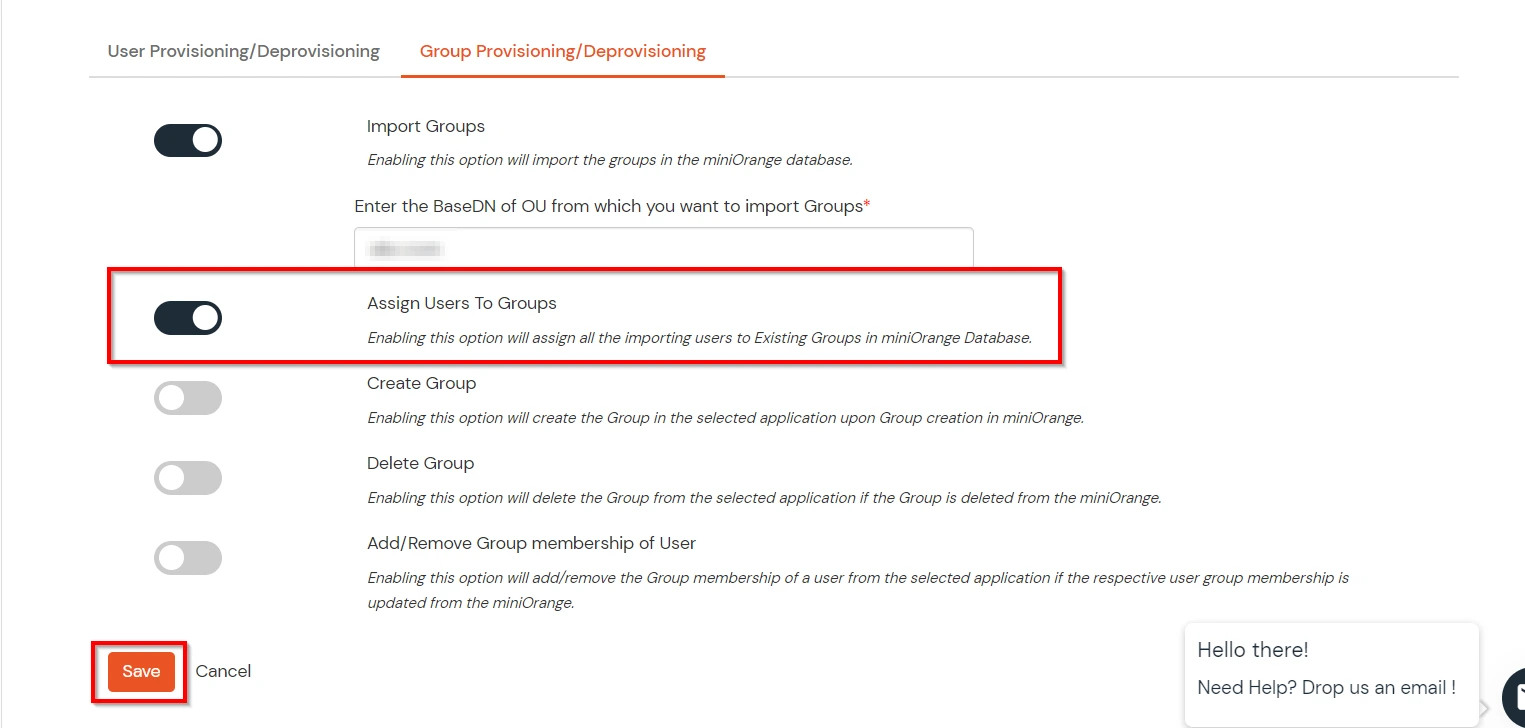
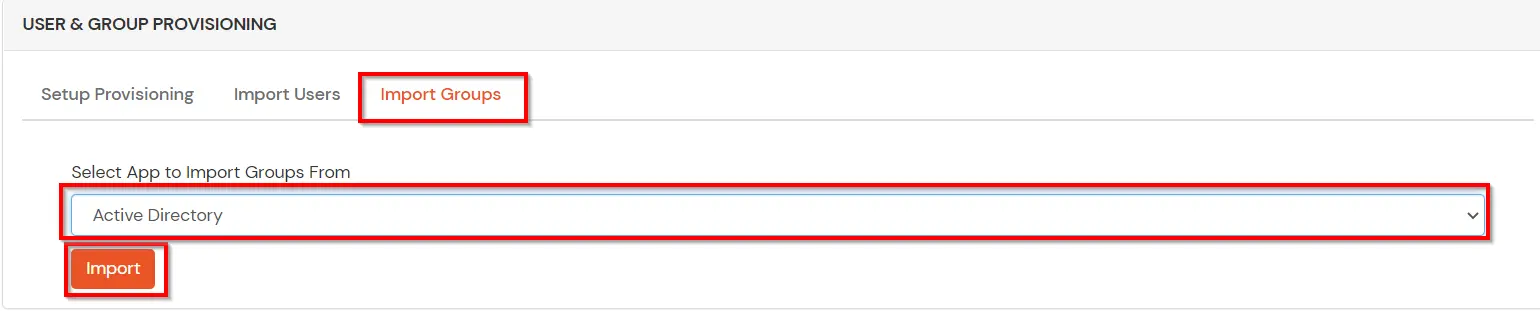
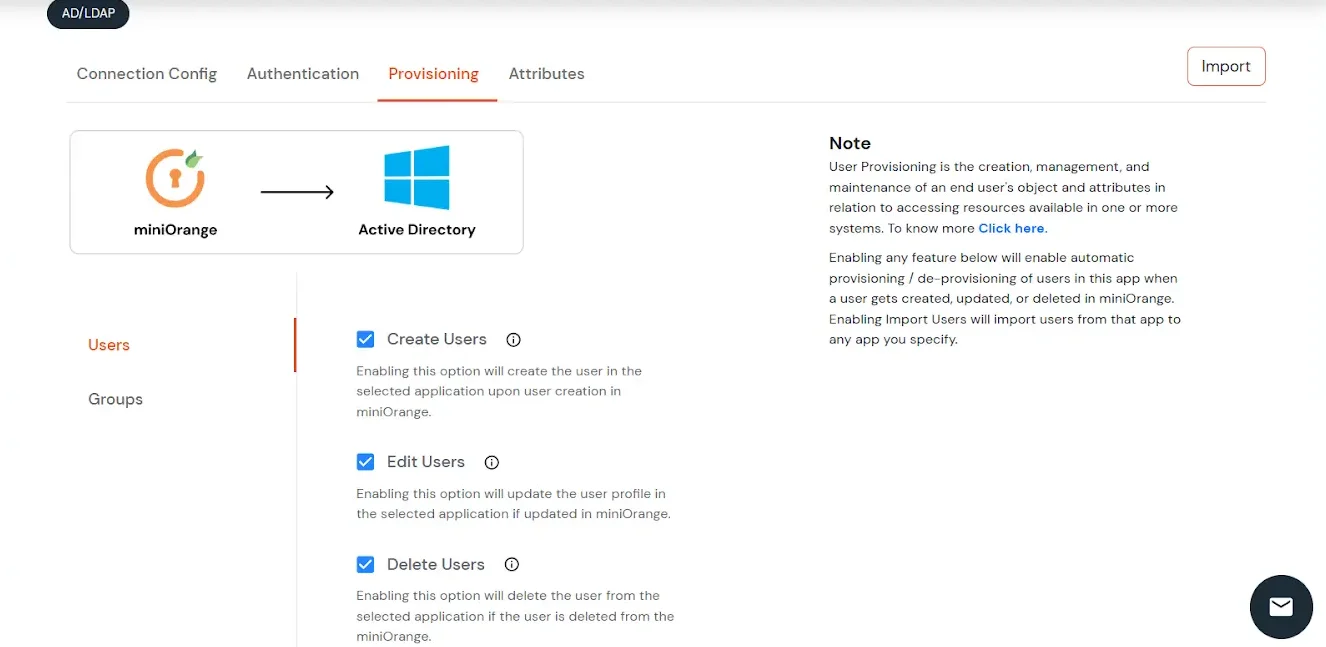
User Import and Provisioning from AD
- If you want to set up provisioning, click here for detailed information. We will skip this step for now.
Import Password Policy from AD
- If you want to import your Active Directory password policy into miniOrange, click here for detailed information. We will skip this step for now.
Test Connections
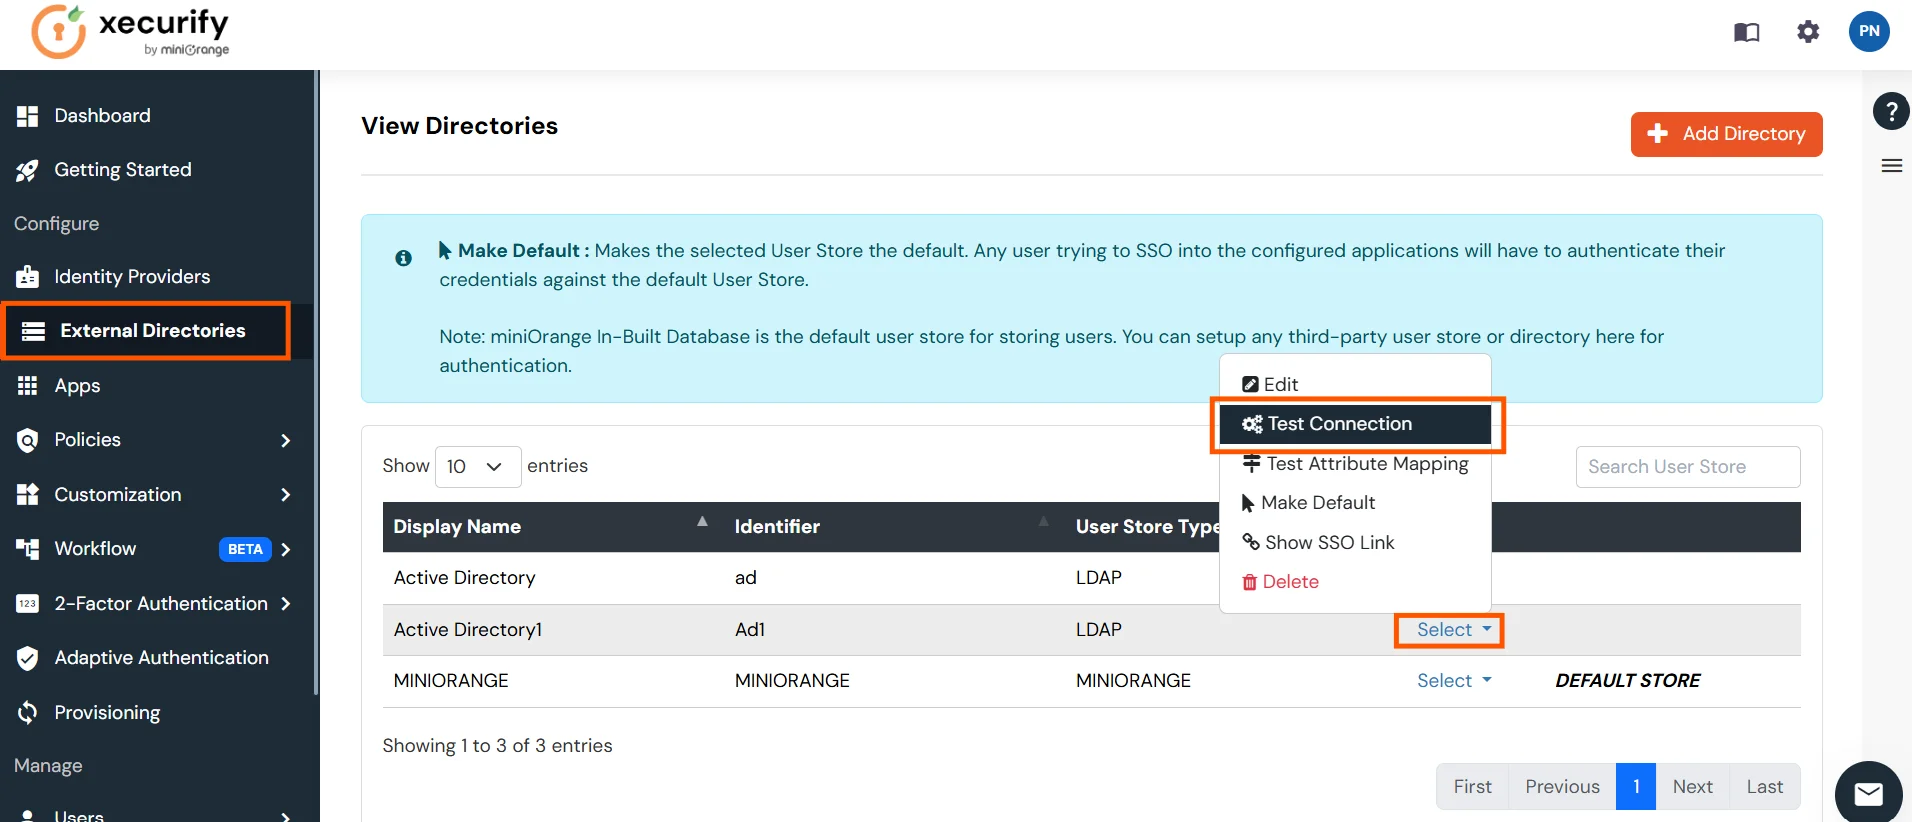
- You will see a list of directories under Identity Providers. From the dropdown, select AD/LDAP Directories, search for your configured directory, click the three dots next to it, and select Test Connection.
- A pop-up appears prompting you to enter a username and password to verify your LDAP configuration.
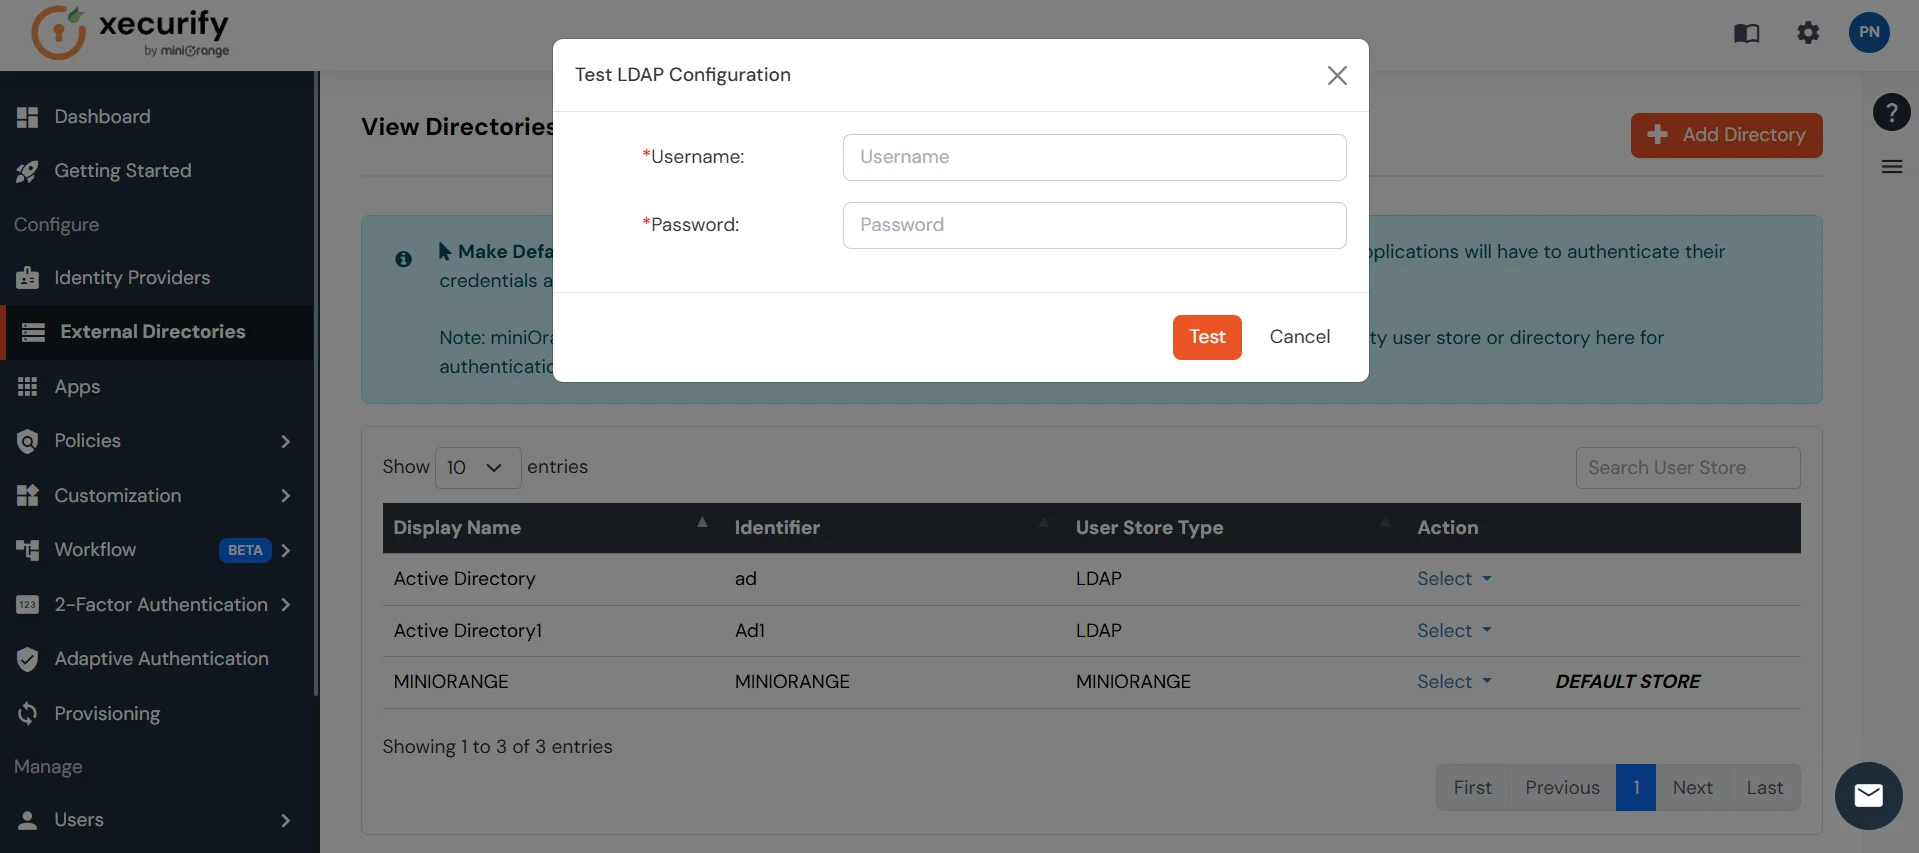
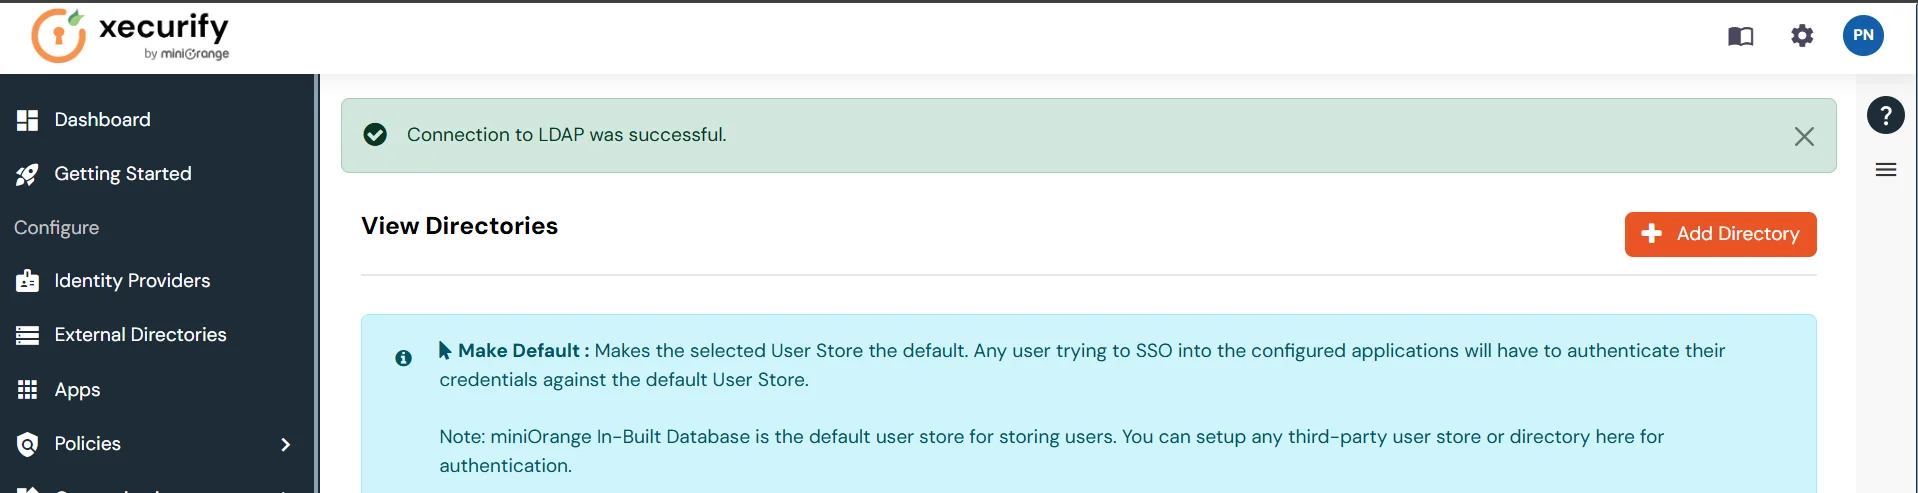
- On Successful connection with LDAP Server, a success message is shown.
Test Attribute Mapping
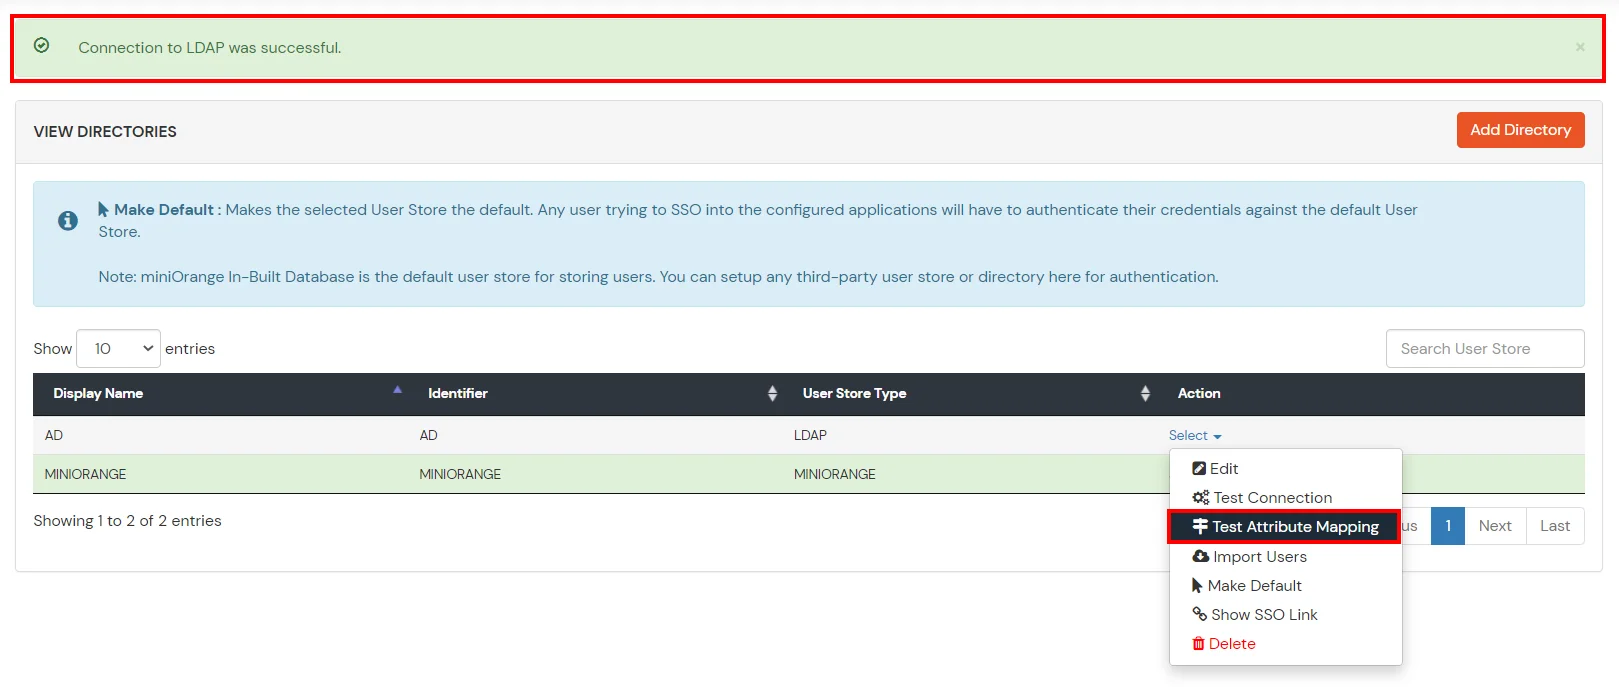
- You will see a list of directories under Identity Providers. From the dropdown, select AD/LDAP Directories, search for your configured directory, click the three dots next to it, and select Test Attribute Mapping.
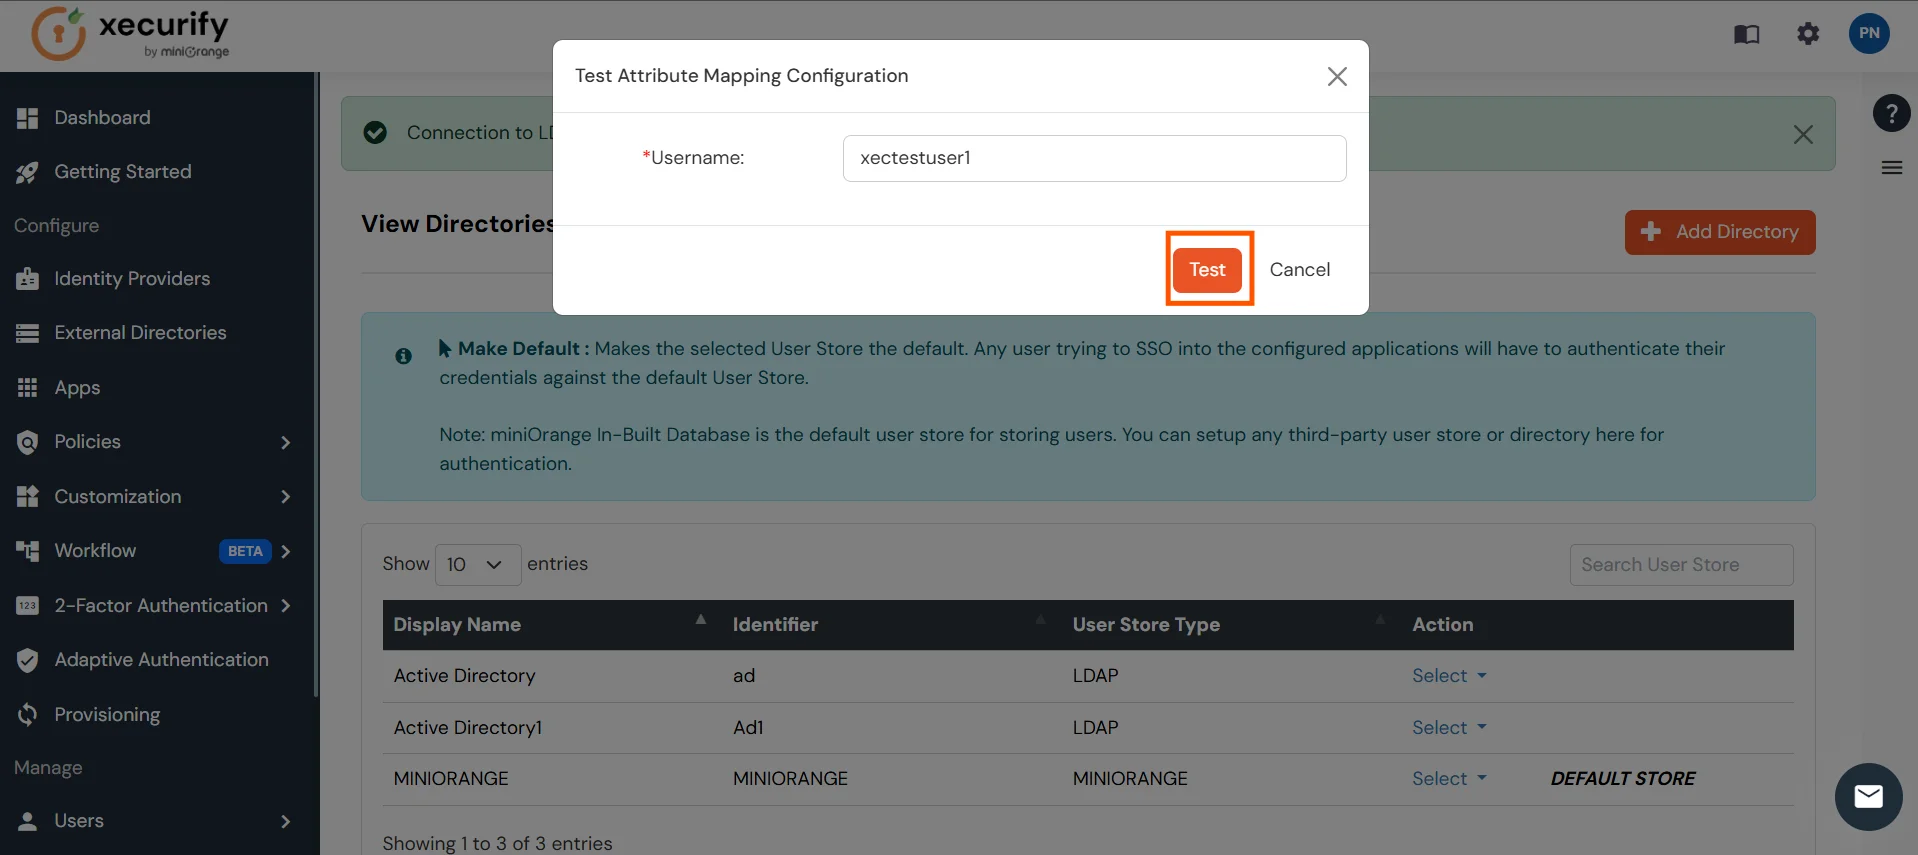
- A pop‑up appears to enter a username and click Test.
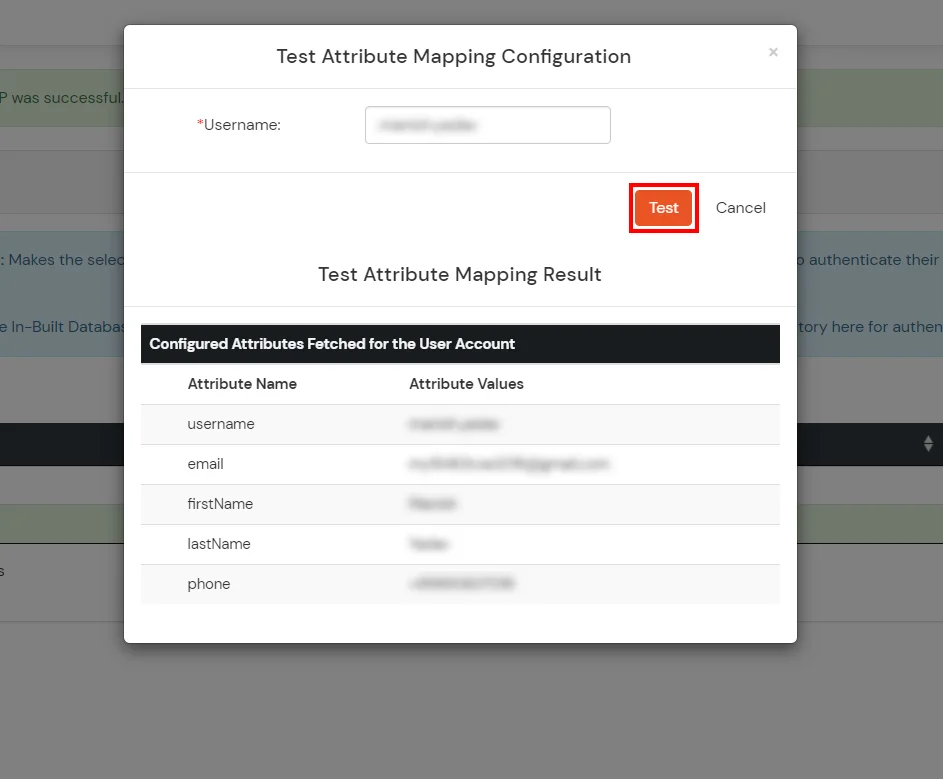
- The Test Attribute Mapping Result will be displayed.
Set up AD as External Directory configuration is complete.
Note: Refer our guide to setup LDAP on windows server.
Creating User Groups (Recommended)
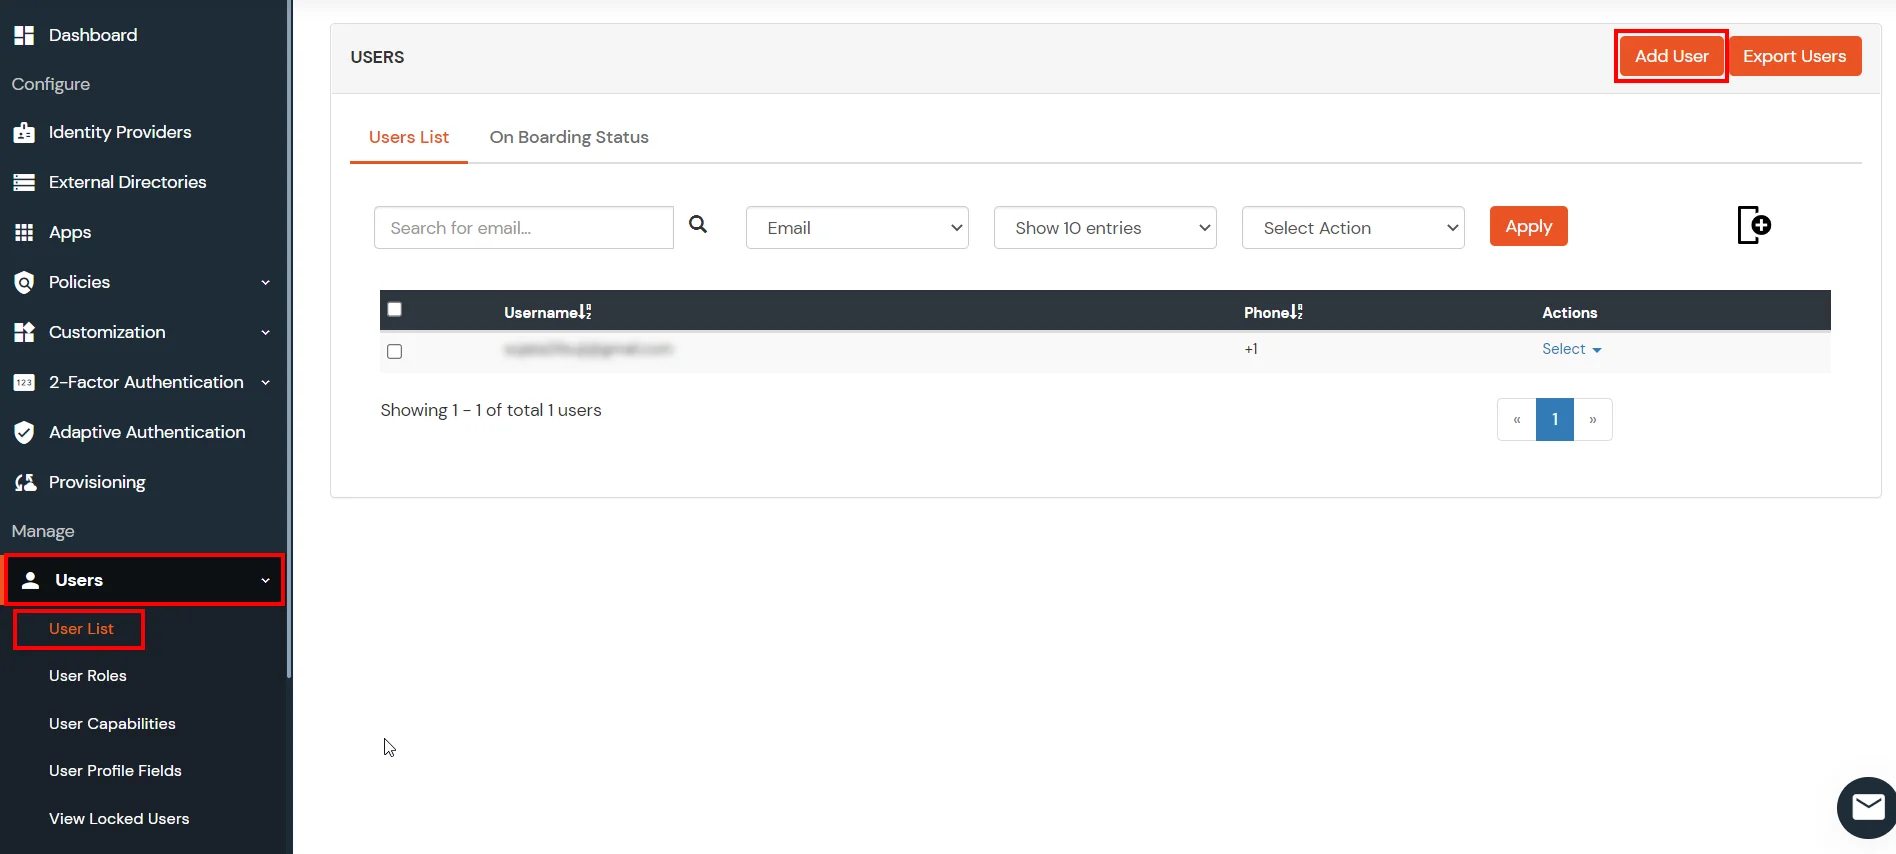
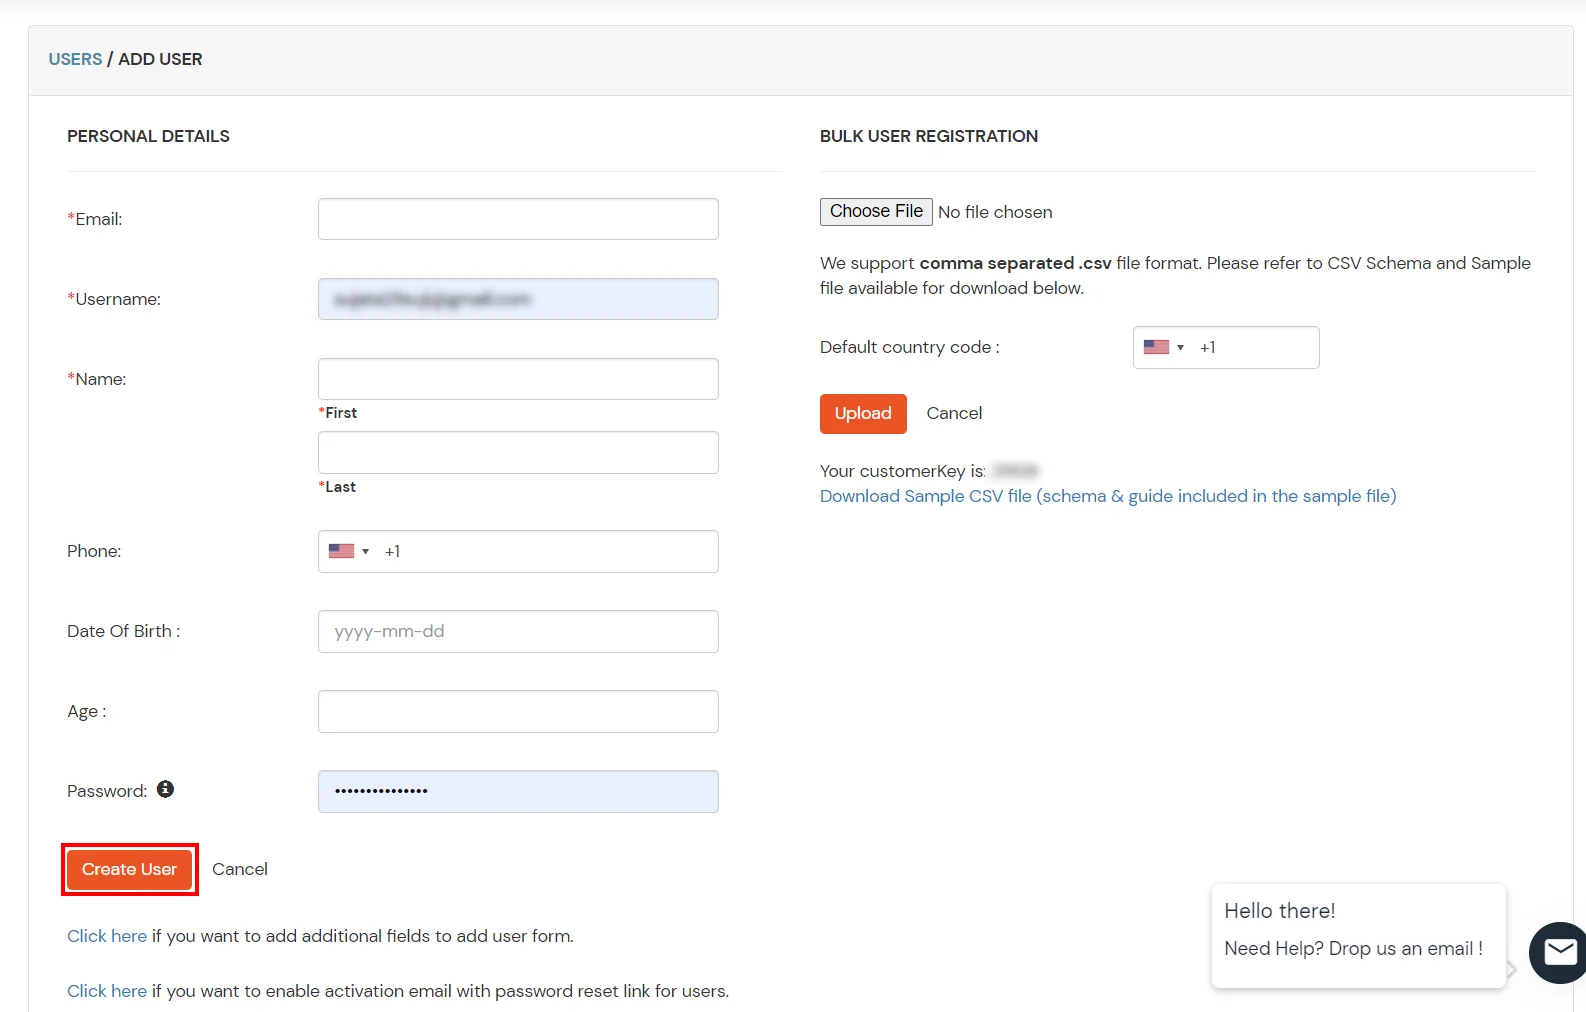
- Select Groups >> Manage Groups from left panel.
- Click on the Create Group button on the top.
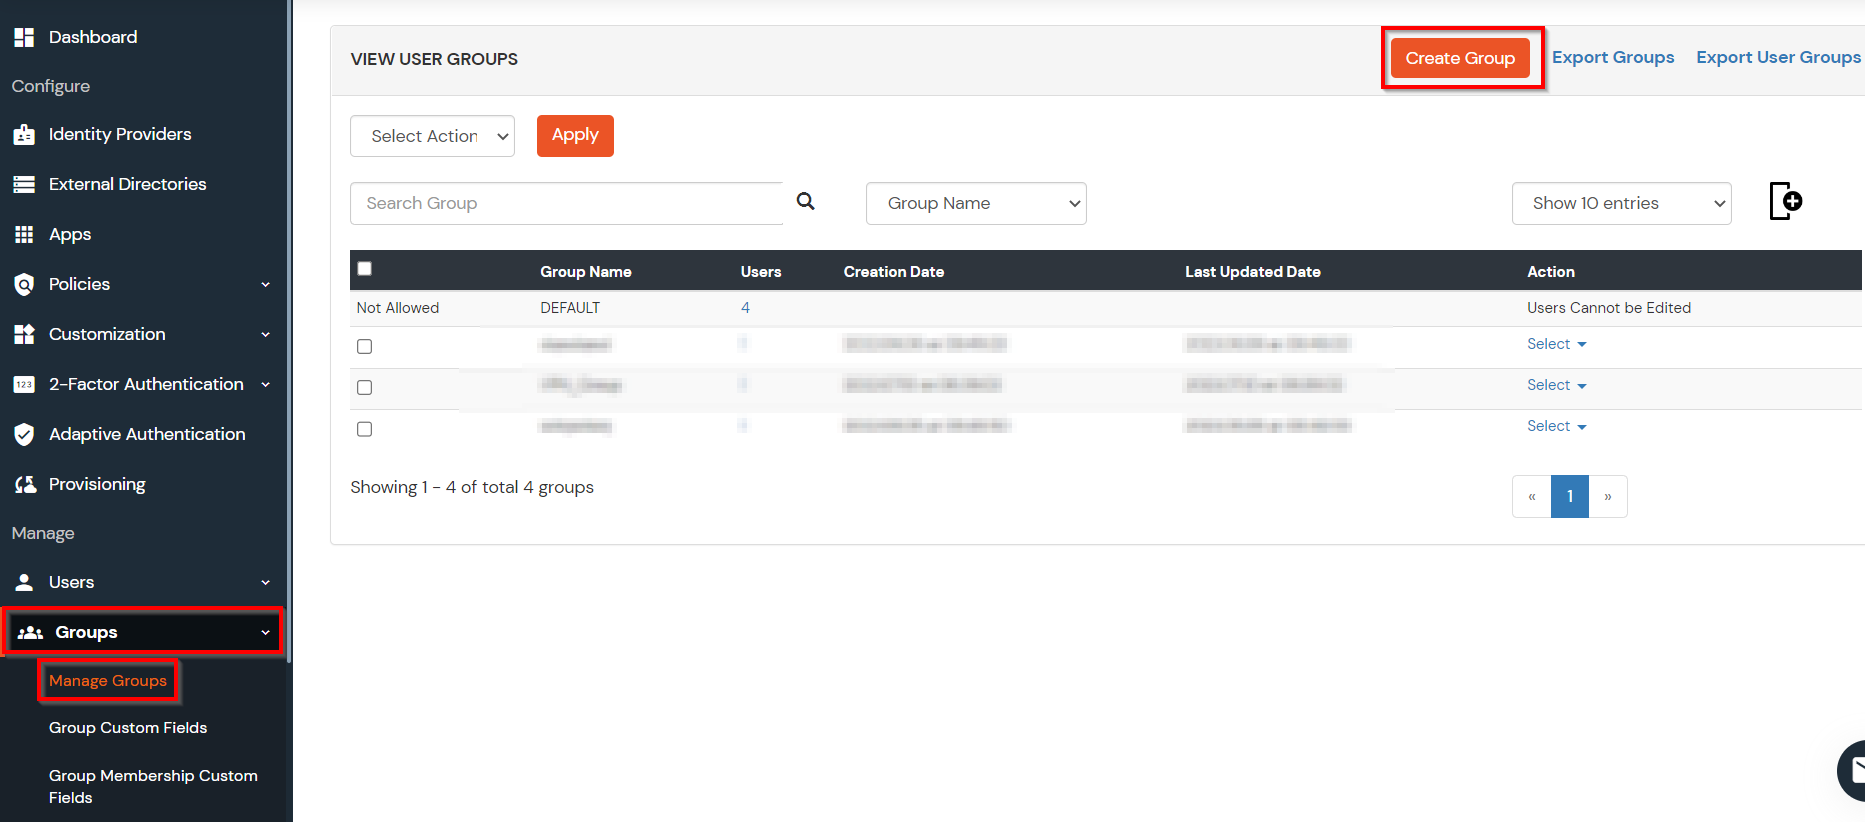
- Enter an appropriate Group Name and click on Create Group.
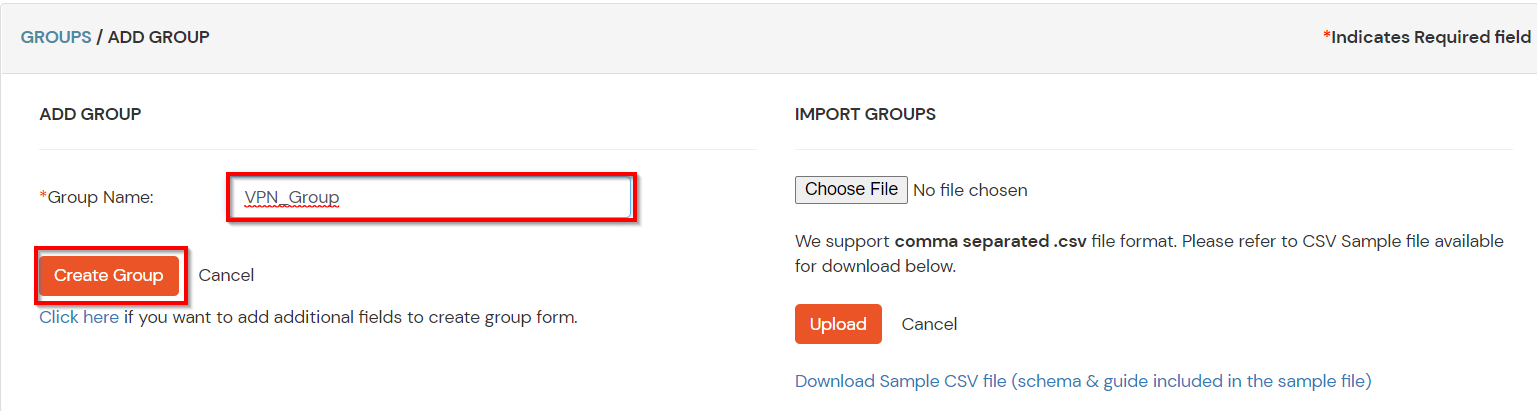
- In this guide we have created a Group by name VPN_Group.
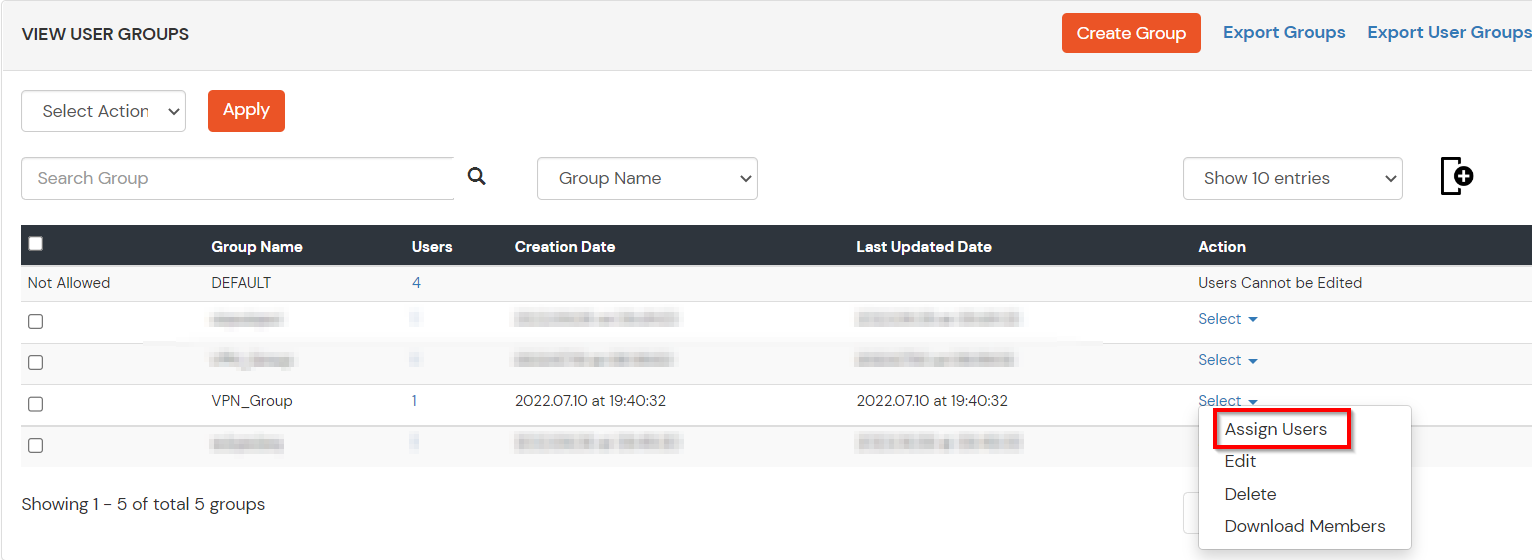
- Assign various members to the group using the Assign User option associated with the group in the groups list.
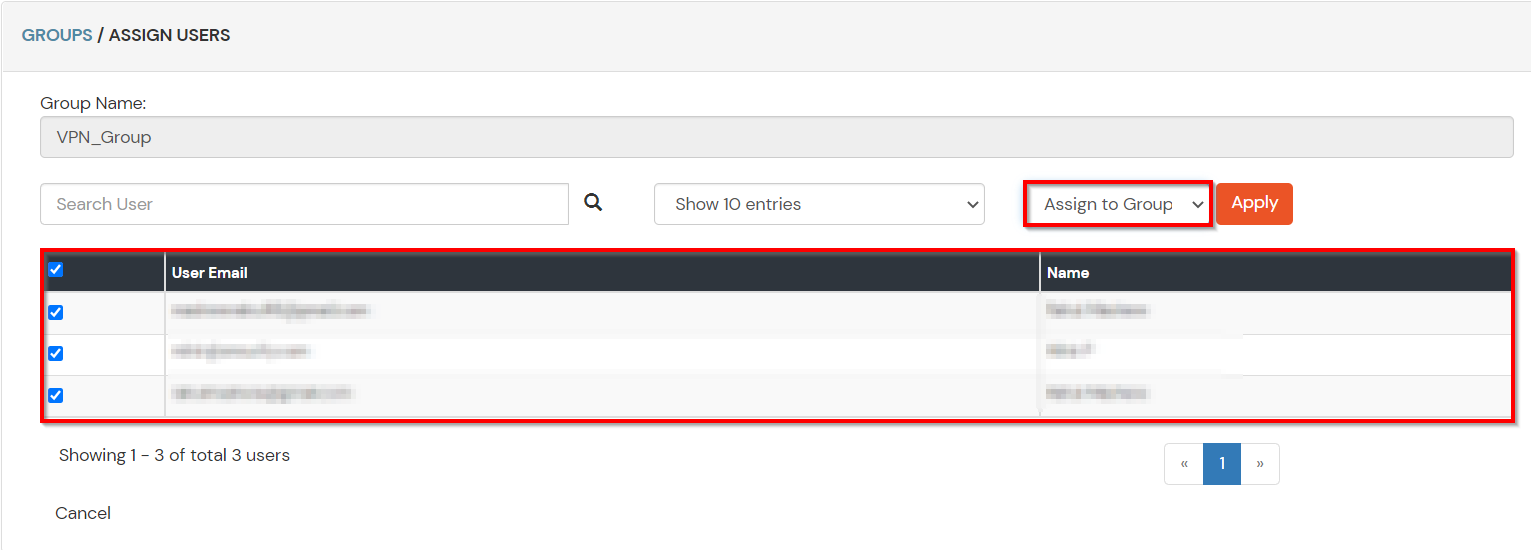
- Select the Users that are required to be assigned to this group. Then Select Assign to Group in Select Action Dropdown and click on Apply button.
- These groups will be helpful in adding multiple 2FA policies on the applications.
4. Setup MFA for PostgreSQL
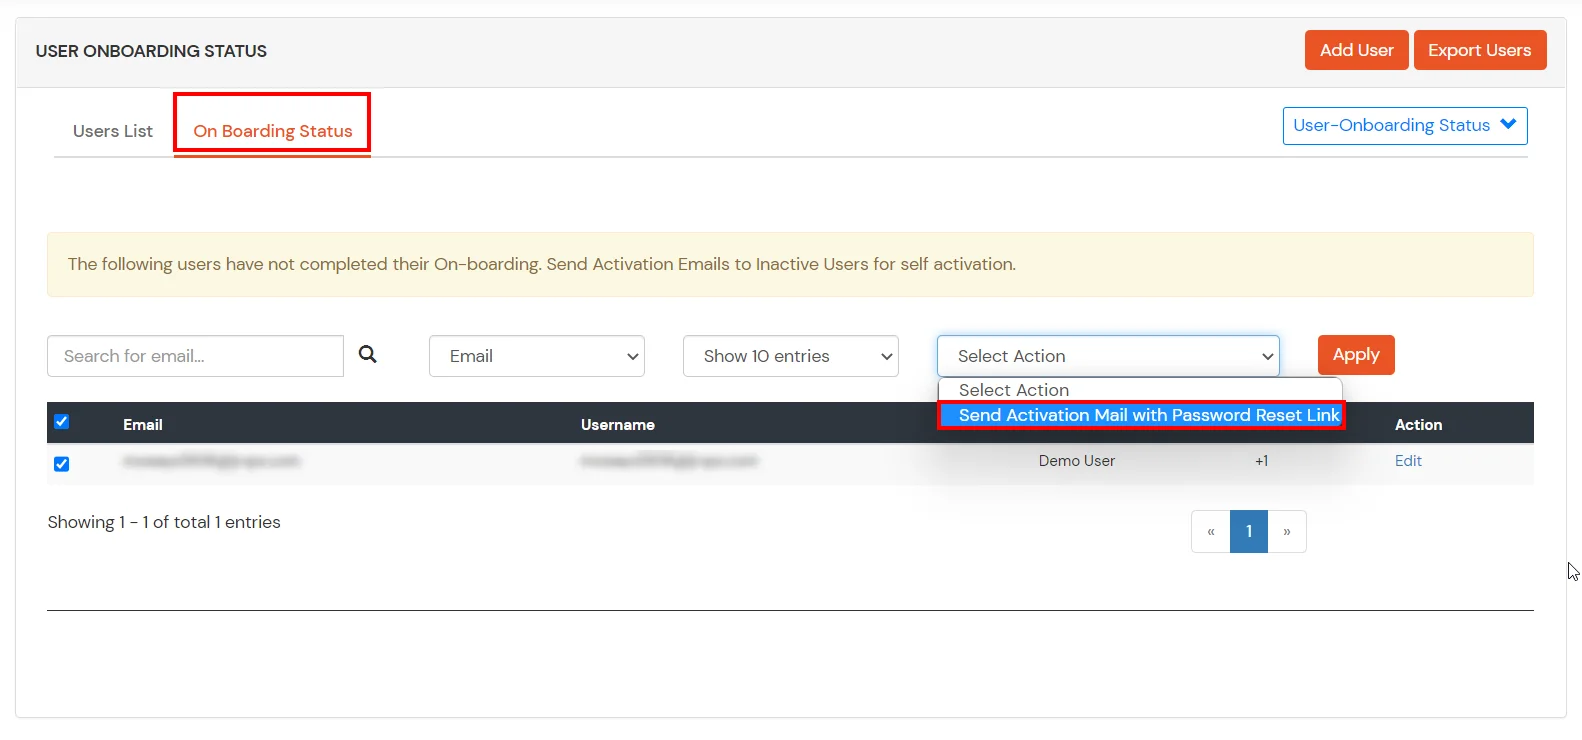
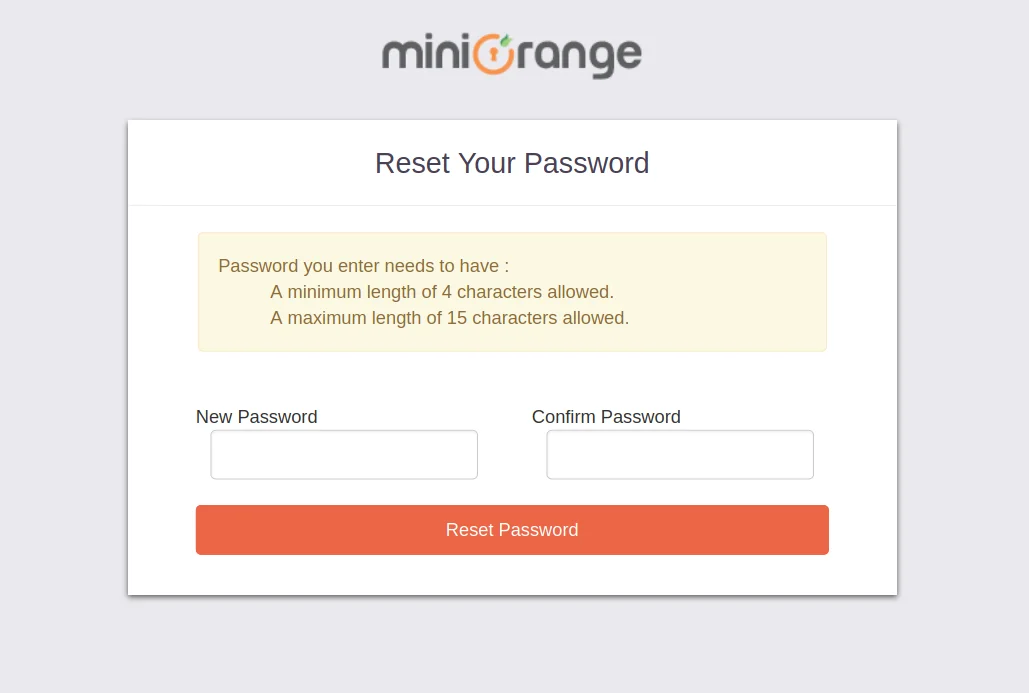
Note: You can follow this guide, if you want to customize and enroll MFA for end users.
- Here, we will configure a policy for the User Group that we created in this step and associate it with the PostgreSQL VPN Application.
- Click on Policies >> App Login Policy.
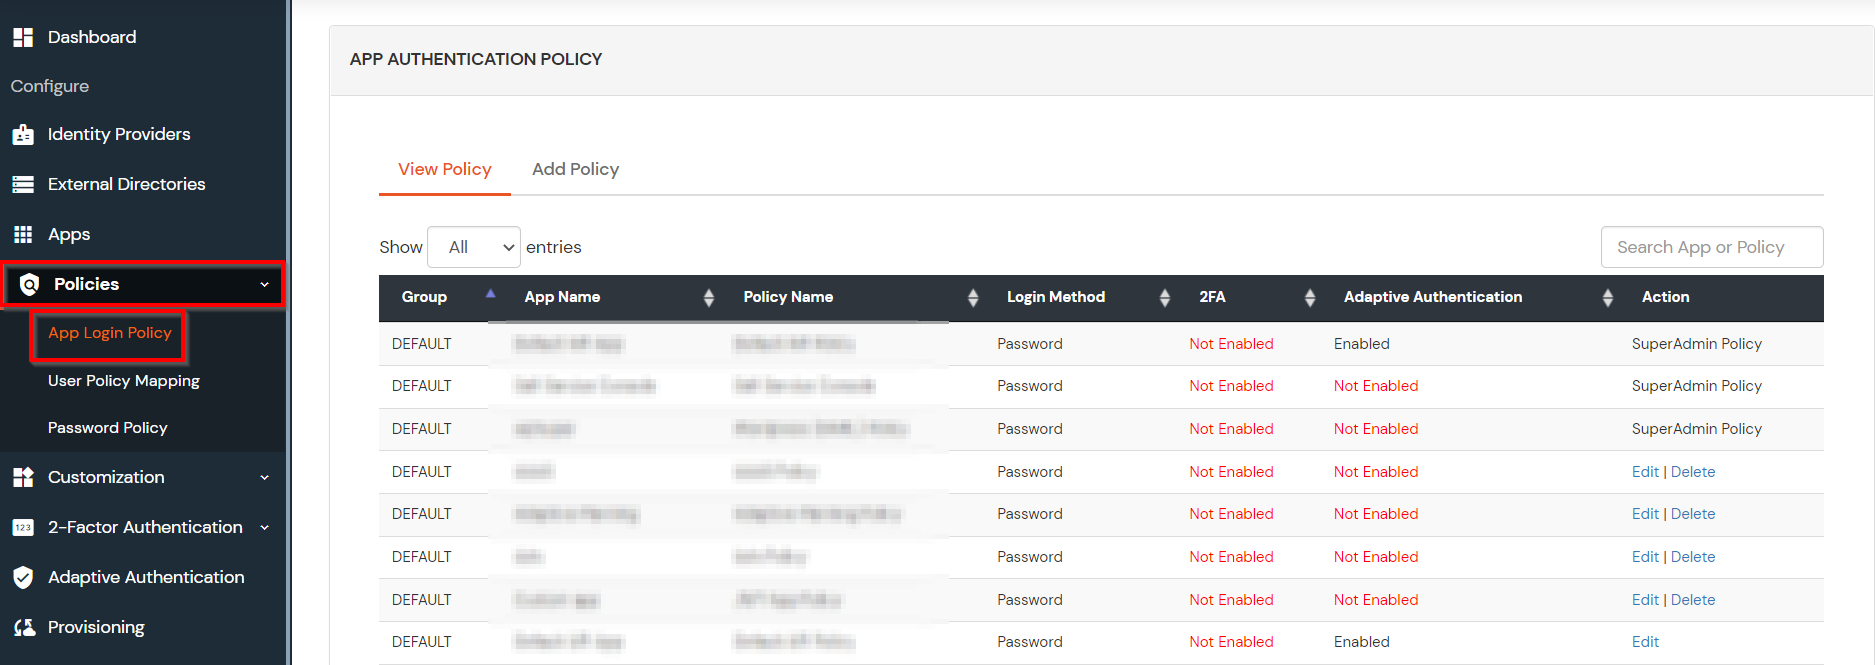
- Click on Add Policy button.
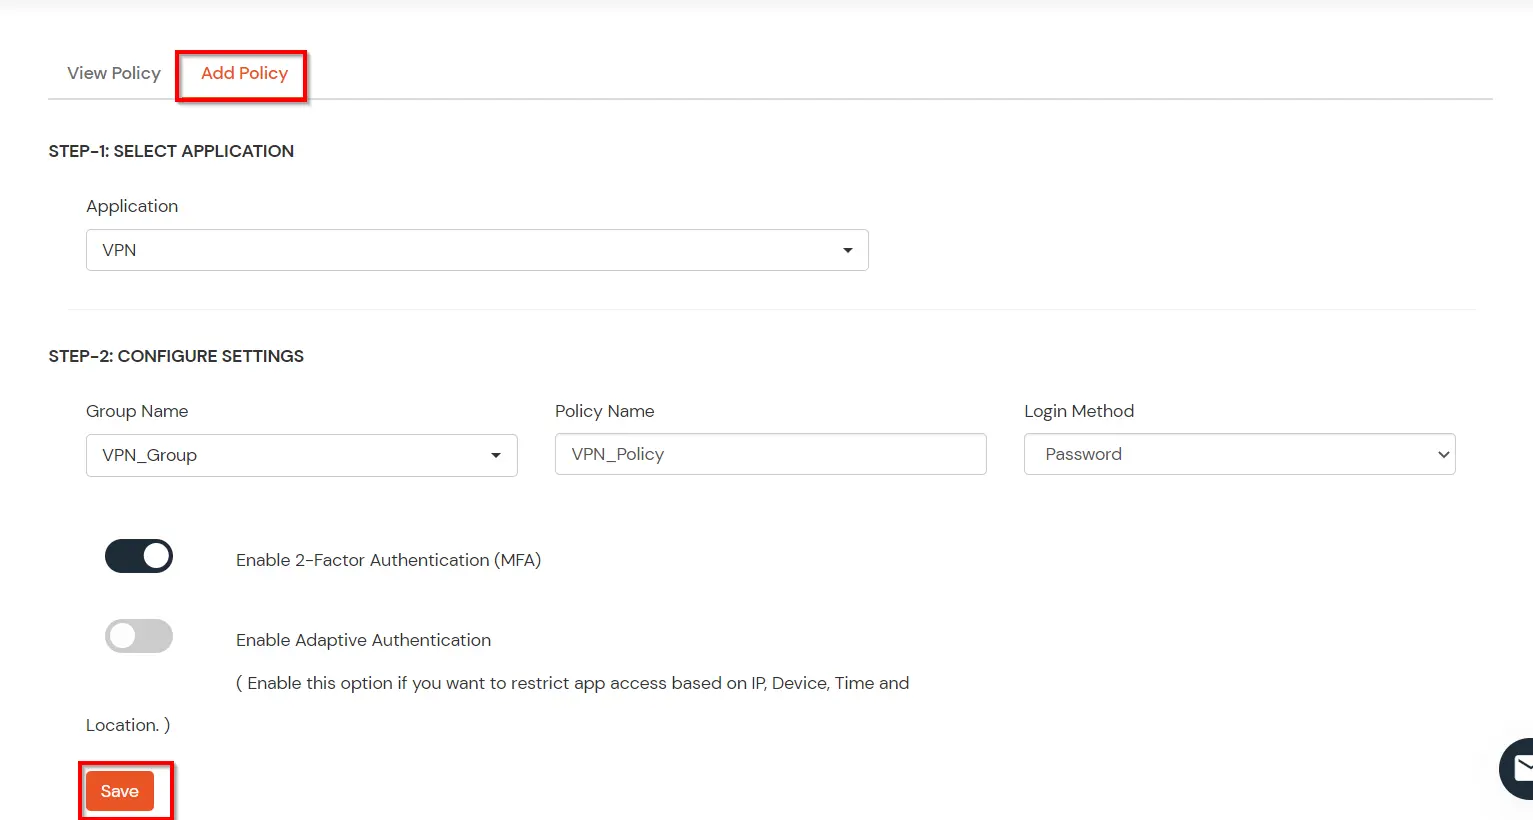
- In Application section, select the RADIUS App that we configured earlier in Step 1.
- Select the required User Group in Group Name and enter the Policy name.
- In this guide, we will configure a Password Only policy for "VPN_Group", so that only the VPN_Group members can access VPN Services without a Second Factor.
- Once done with the policy settings, click on Submit to Add Policy.
5. Test 2FA for PostgreSQL Login
- Connect to your Postgres database using either the CLI or pgAdmin.
- Enter your username.
- When prompted for your password, enter your password with the 2-Factor Authentication code appended to it. For e.g., if your password is 'password', and the 2FA code is 412324, then enter this when prompted for the password - 'password412324'
- After successful authentication, you'll be connected to your Postgres database.
Further References