- Home
- UEM
- Enroll Android Devices into MDM
How to Enroll Android Devices into Mobile Device Management (MDM)
Mobile Device Management (MDM) enables organizations to securely enroll, manage, and control Android devices from a central platform. This step-by-step guide explains how to set up miniOrange Mobile Device Management (MDM) for Android devices and apply essential device policy restrictionsto ensure security and compliance.
To learn more about MDM, visit the miniOrange Android Mobile Device Management (MDM) Solution page.
Follow the Step-by-Step Guide given below for Enroll Android Devices for MDM
Step 1: Sign in with miniOrange
Step 2: Setup Android Enterprise Registration
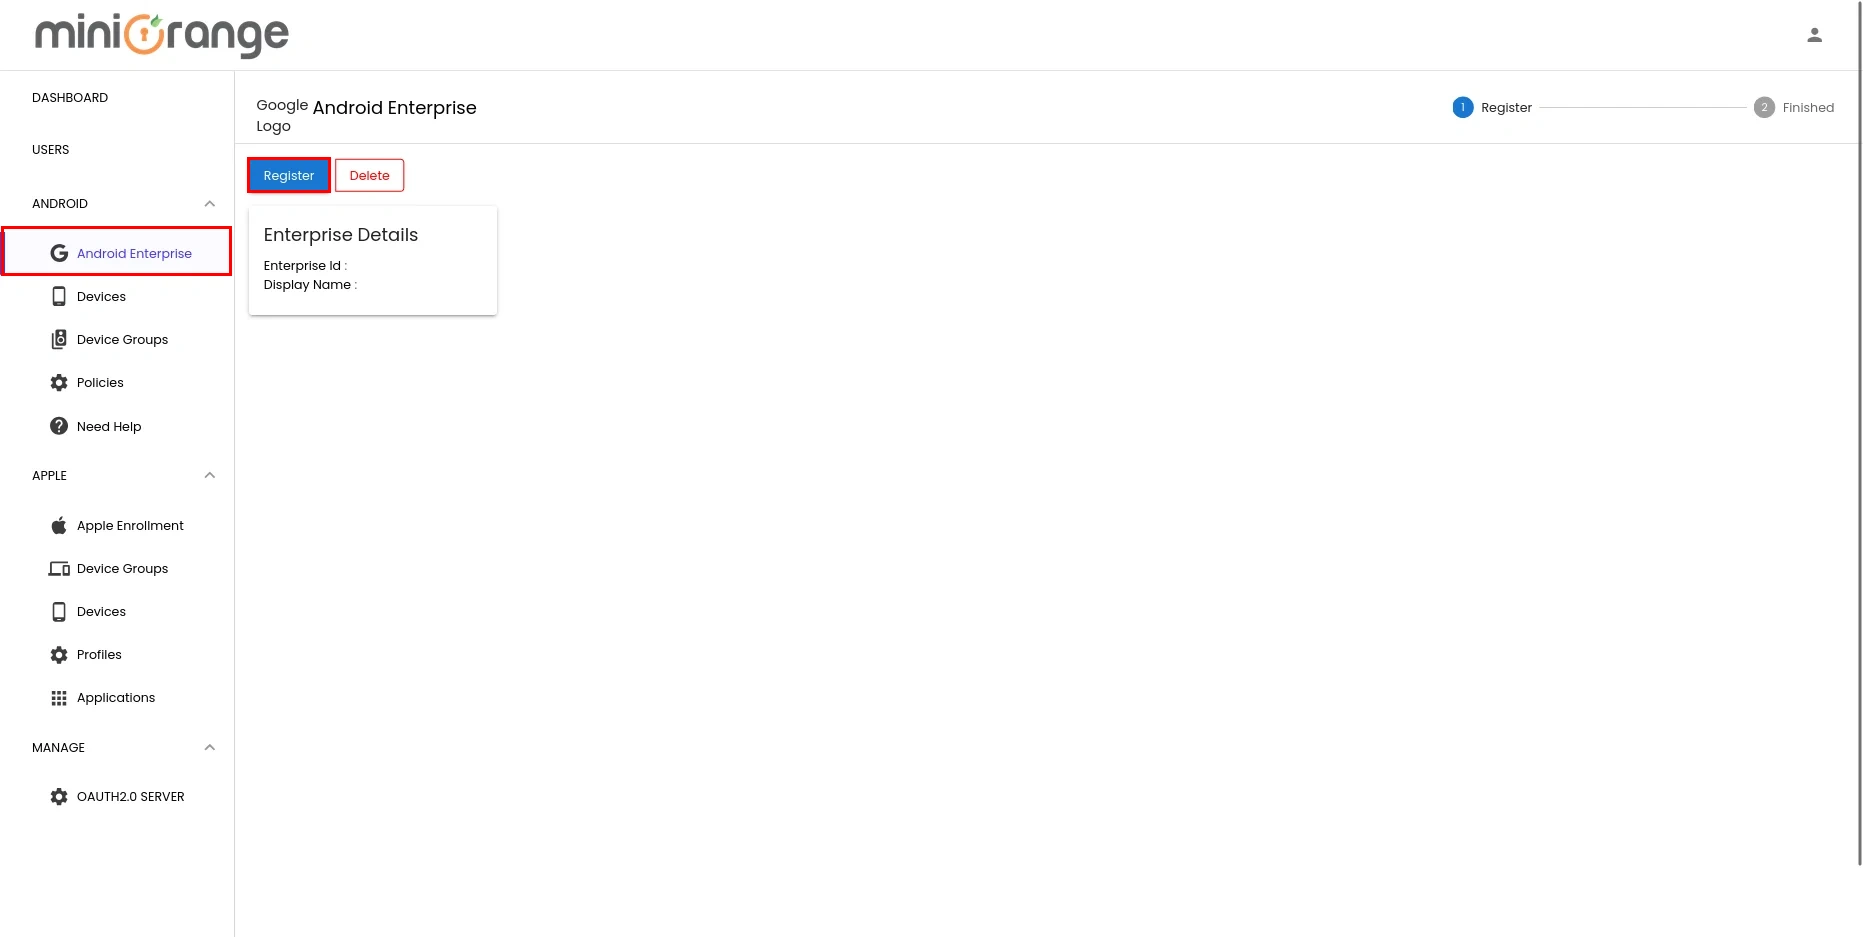
- Once logged in, navigate to Getting Started → Android and click the Enterprise Registration button. You will need to register your organization with Android Enterprise, which is a one-time setup process.
- A new window will open, taking you to the Google Enterprise registration page.
- Choose the email type you want to use for Android Enterprise registration:
-
Personal Email
-
Corporate Email
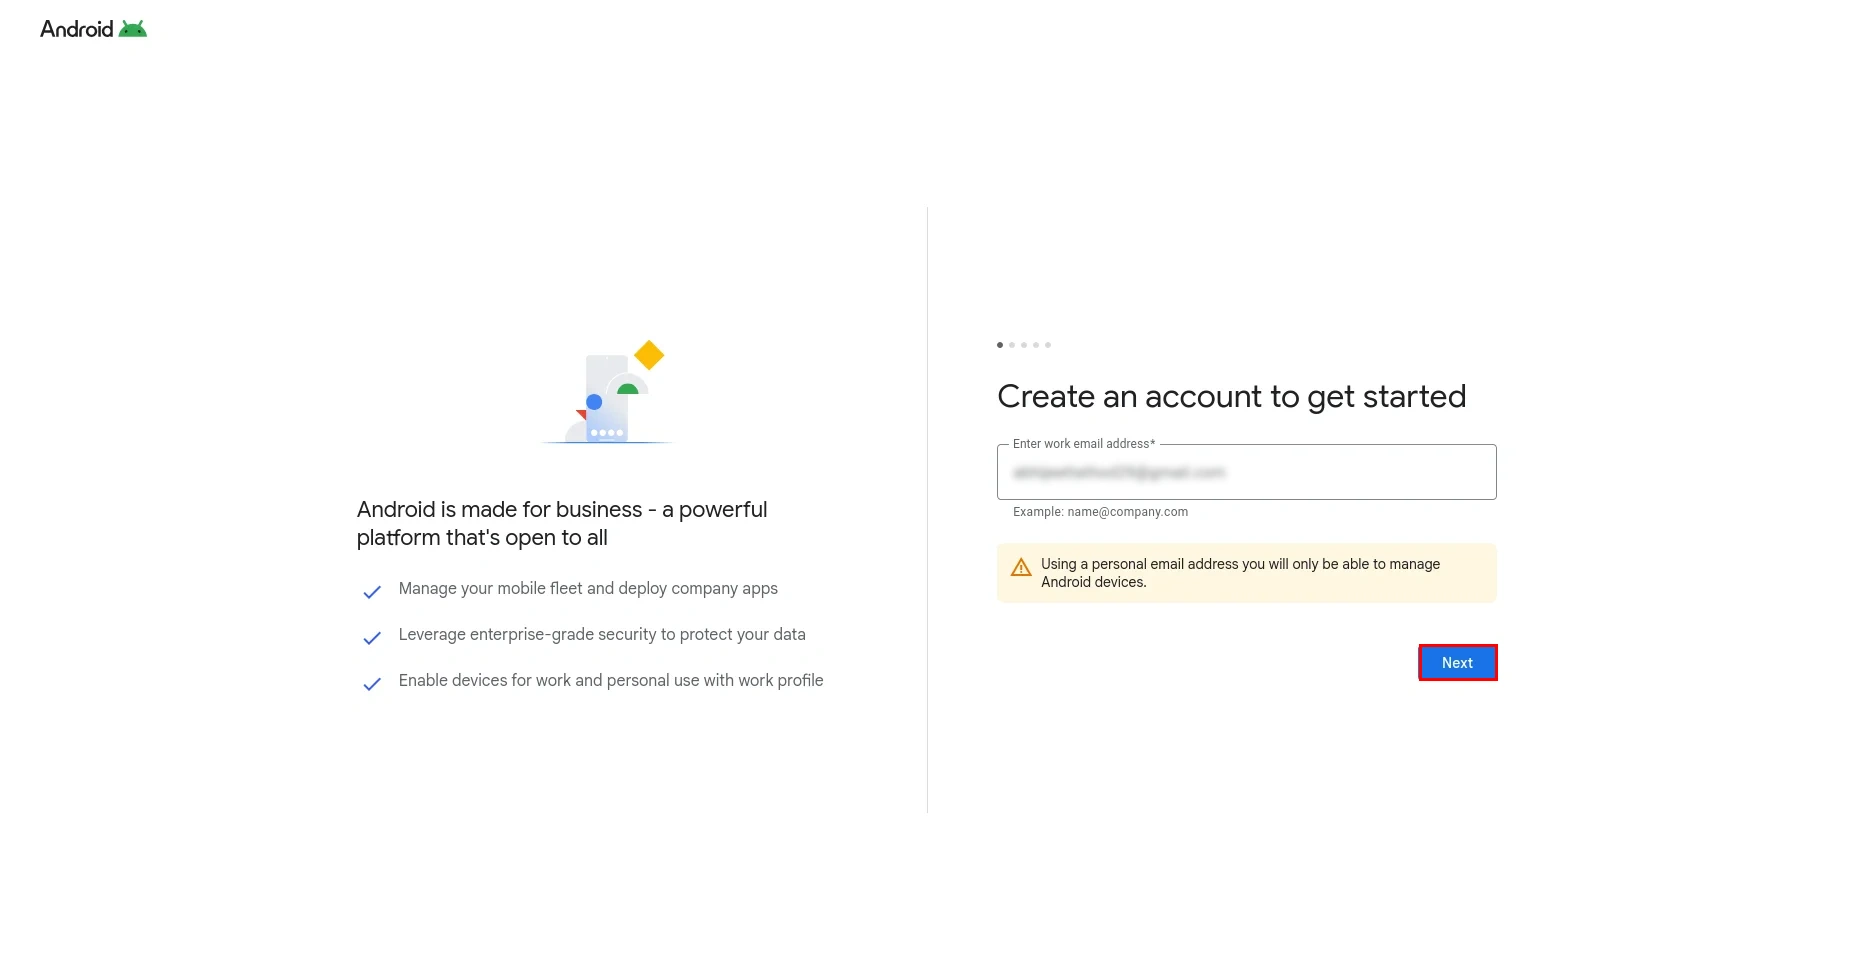
- Enter the personal email address you'd like to link to your Android Enterprise account, then click Next.
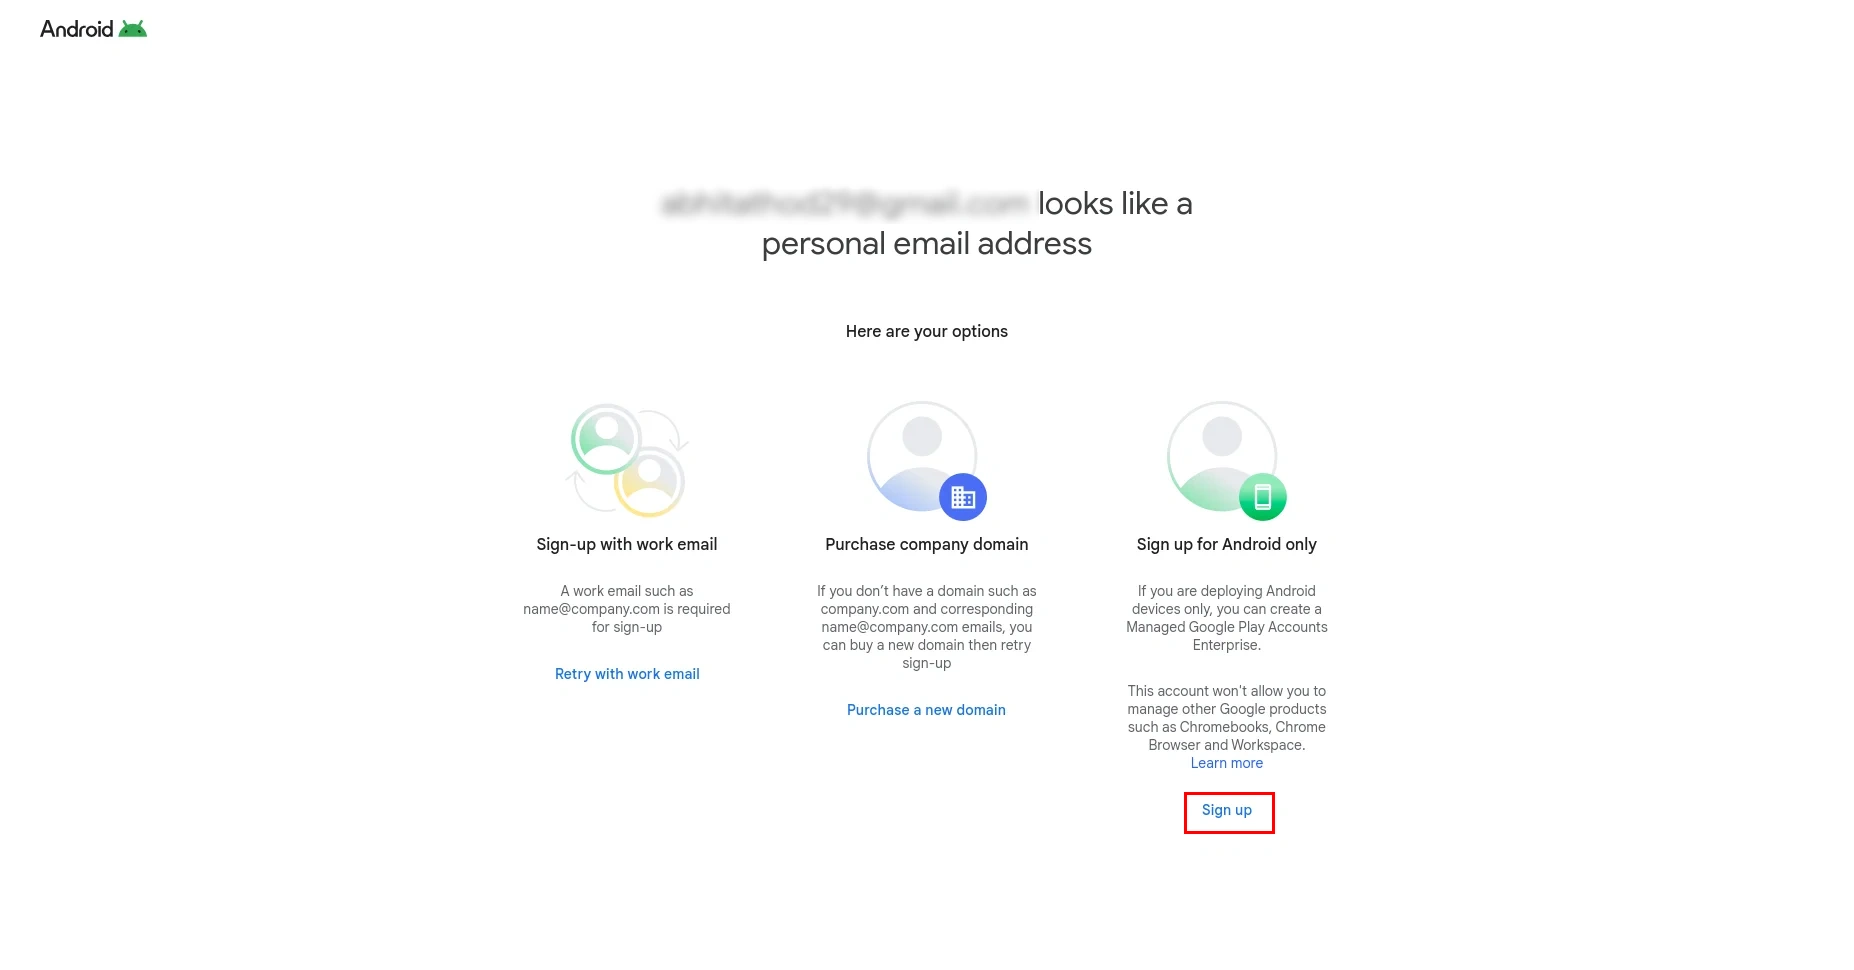
- Now, you will be redirected to the next page where you need to click on Sign Up.
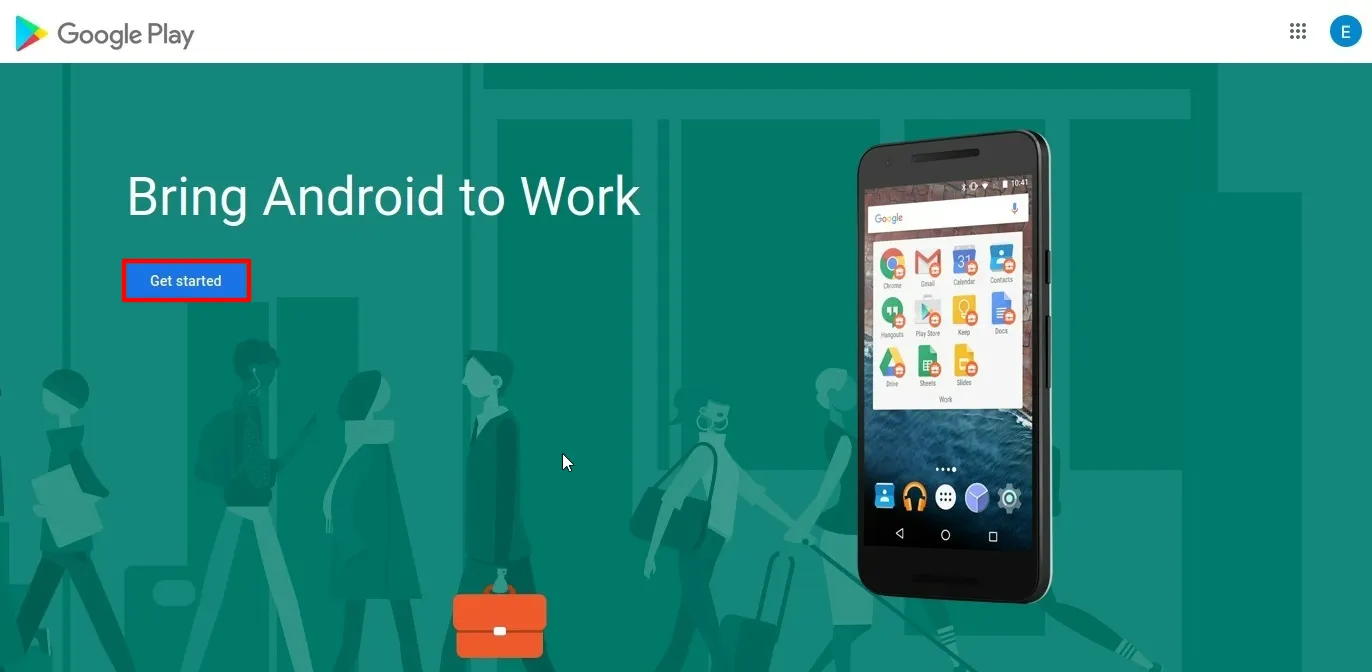
- On the Google Play Admin sign-up page, click the Get Started button to continue with the setup.
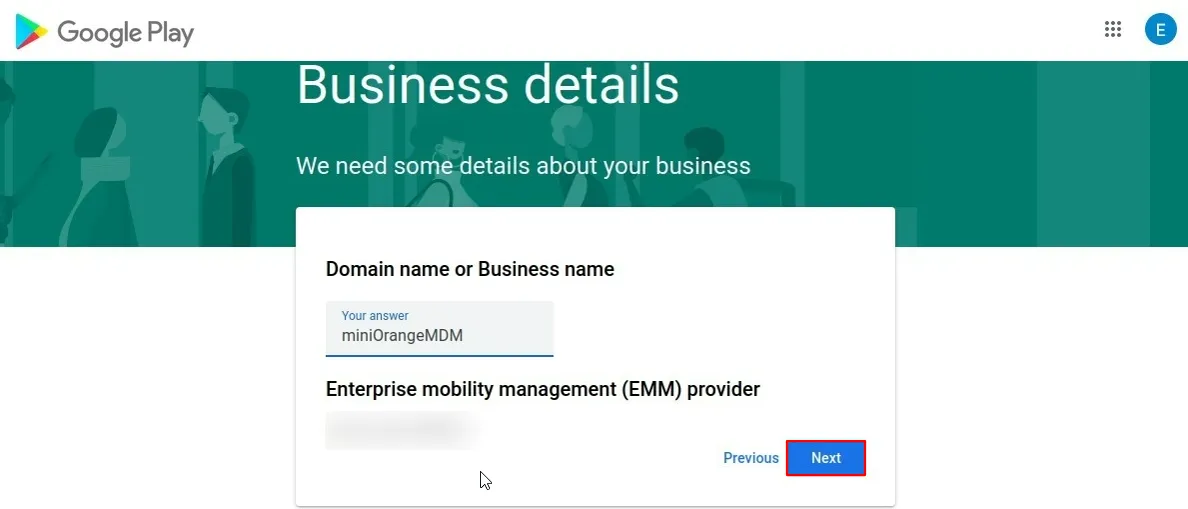
- Enter your Domain Name or Business Name as per your choice.
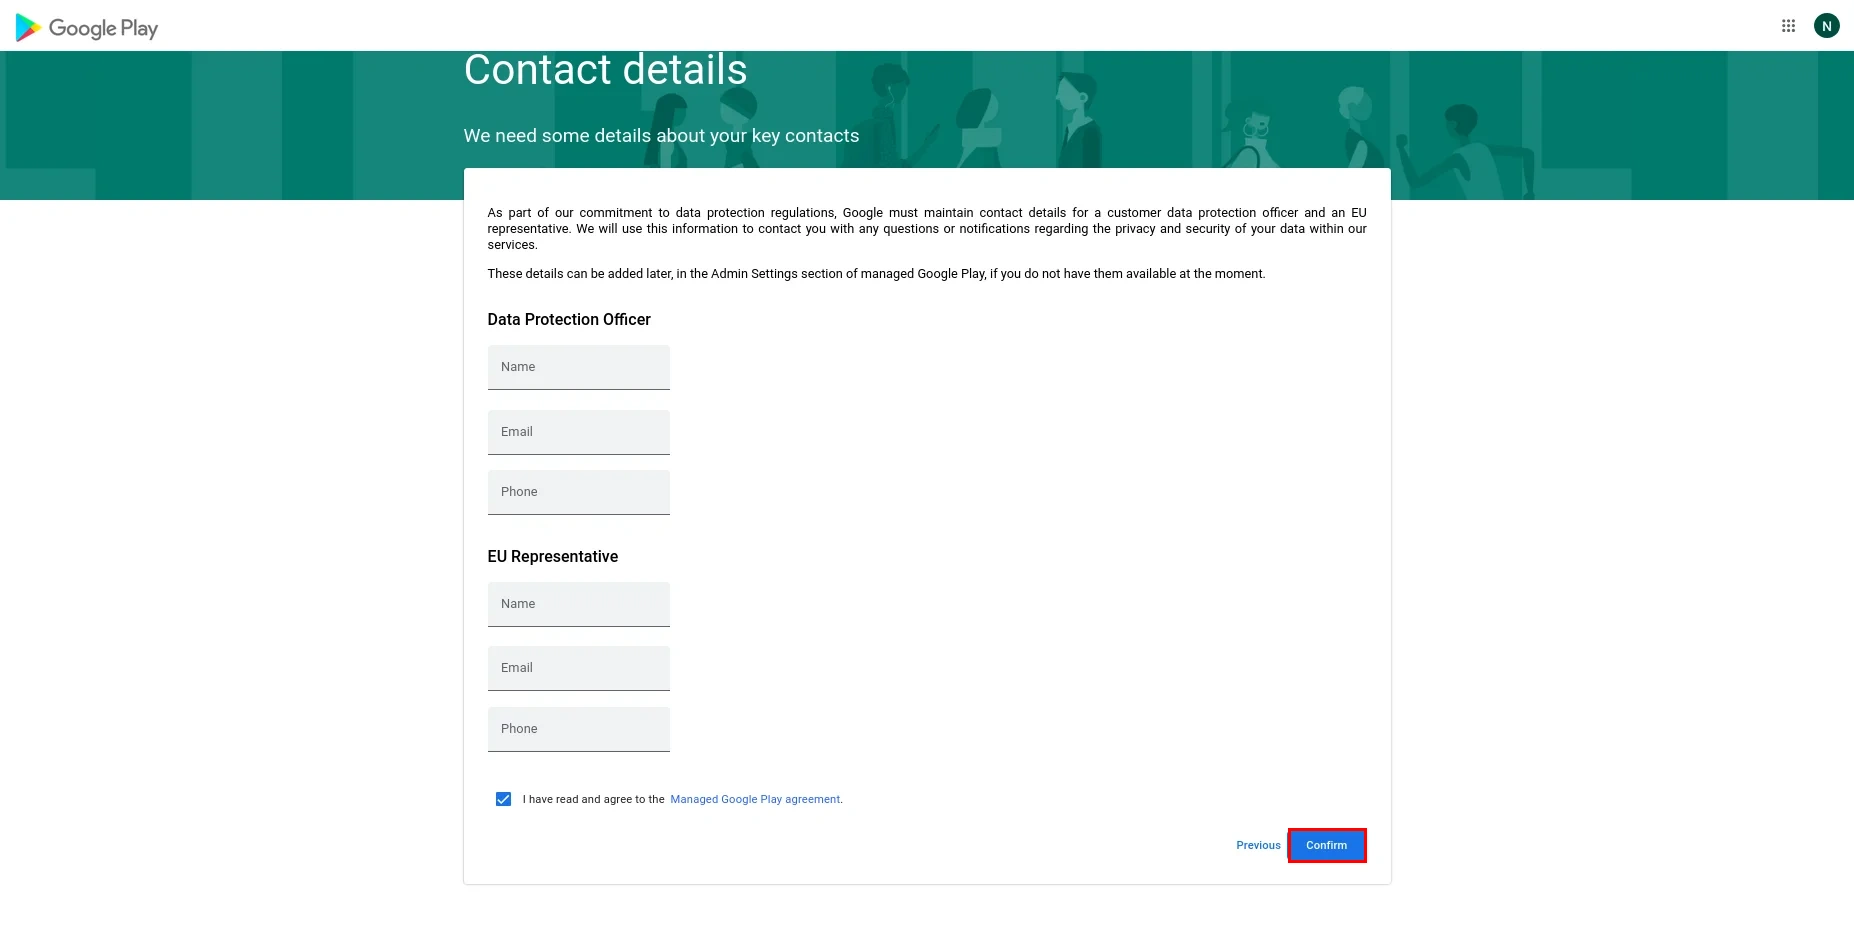
- In the Contact Details section, providing information is optional — you can either skip this step or fill in your contact details.
- Once done, check the box to confirm the accuracy of the information provided, then click the Confirm button to proceed.
- Now, click on Complete Registration button to complete the process of Android Enterprise registration.

- Enter the corporate email address you'd like to link to your Android Enterprise account, then click Next.
- Here, some details are prefilled based on your account. Enter the remaining information and click Continue.

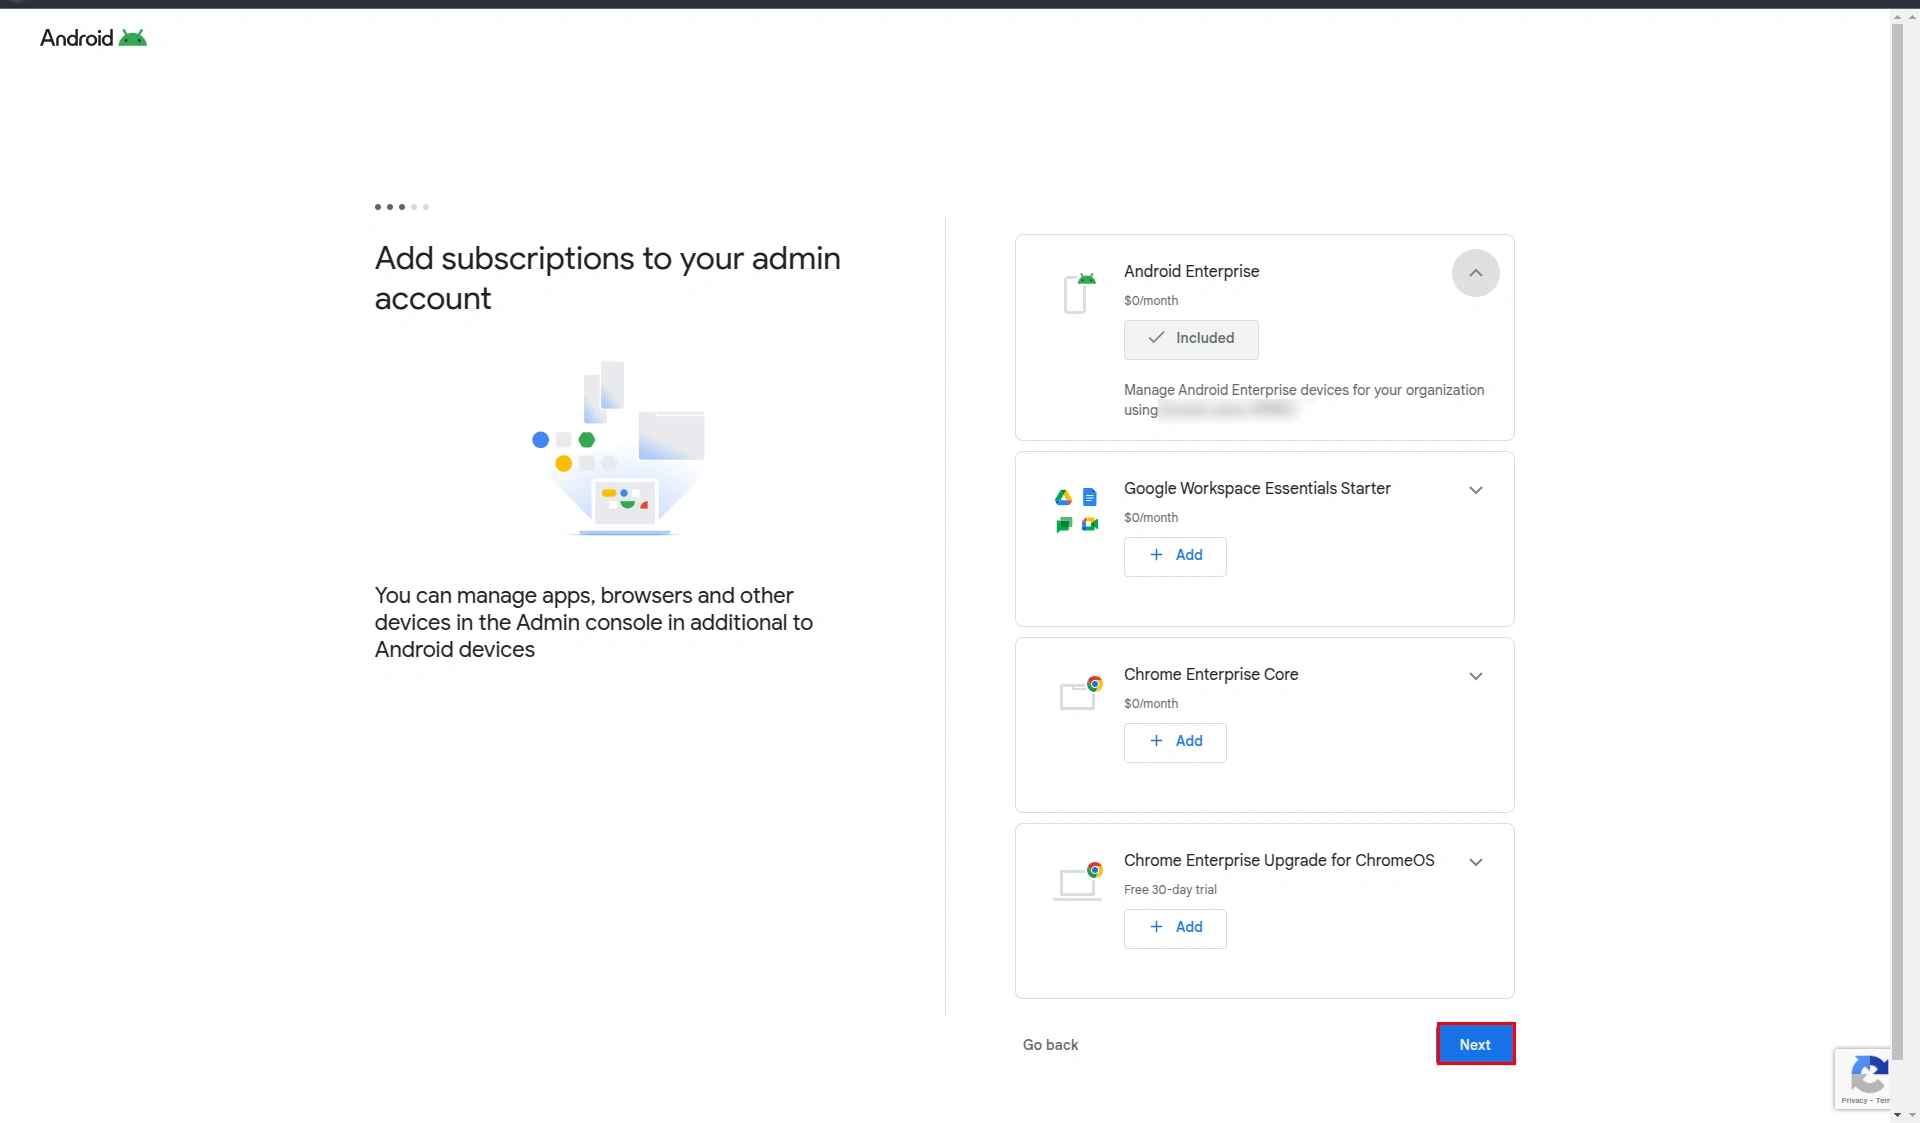
- In the next step, ensure the Android Enterprise option is selected as Included, then click Next.
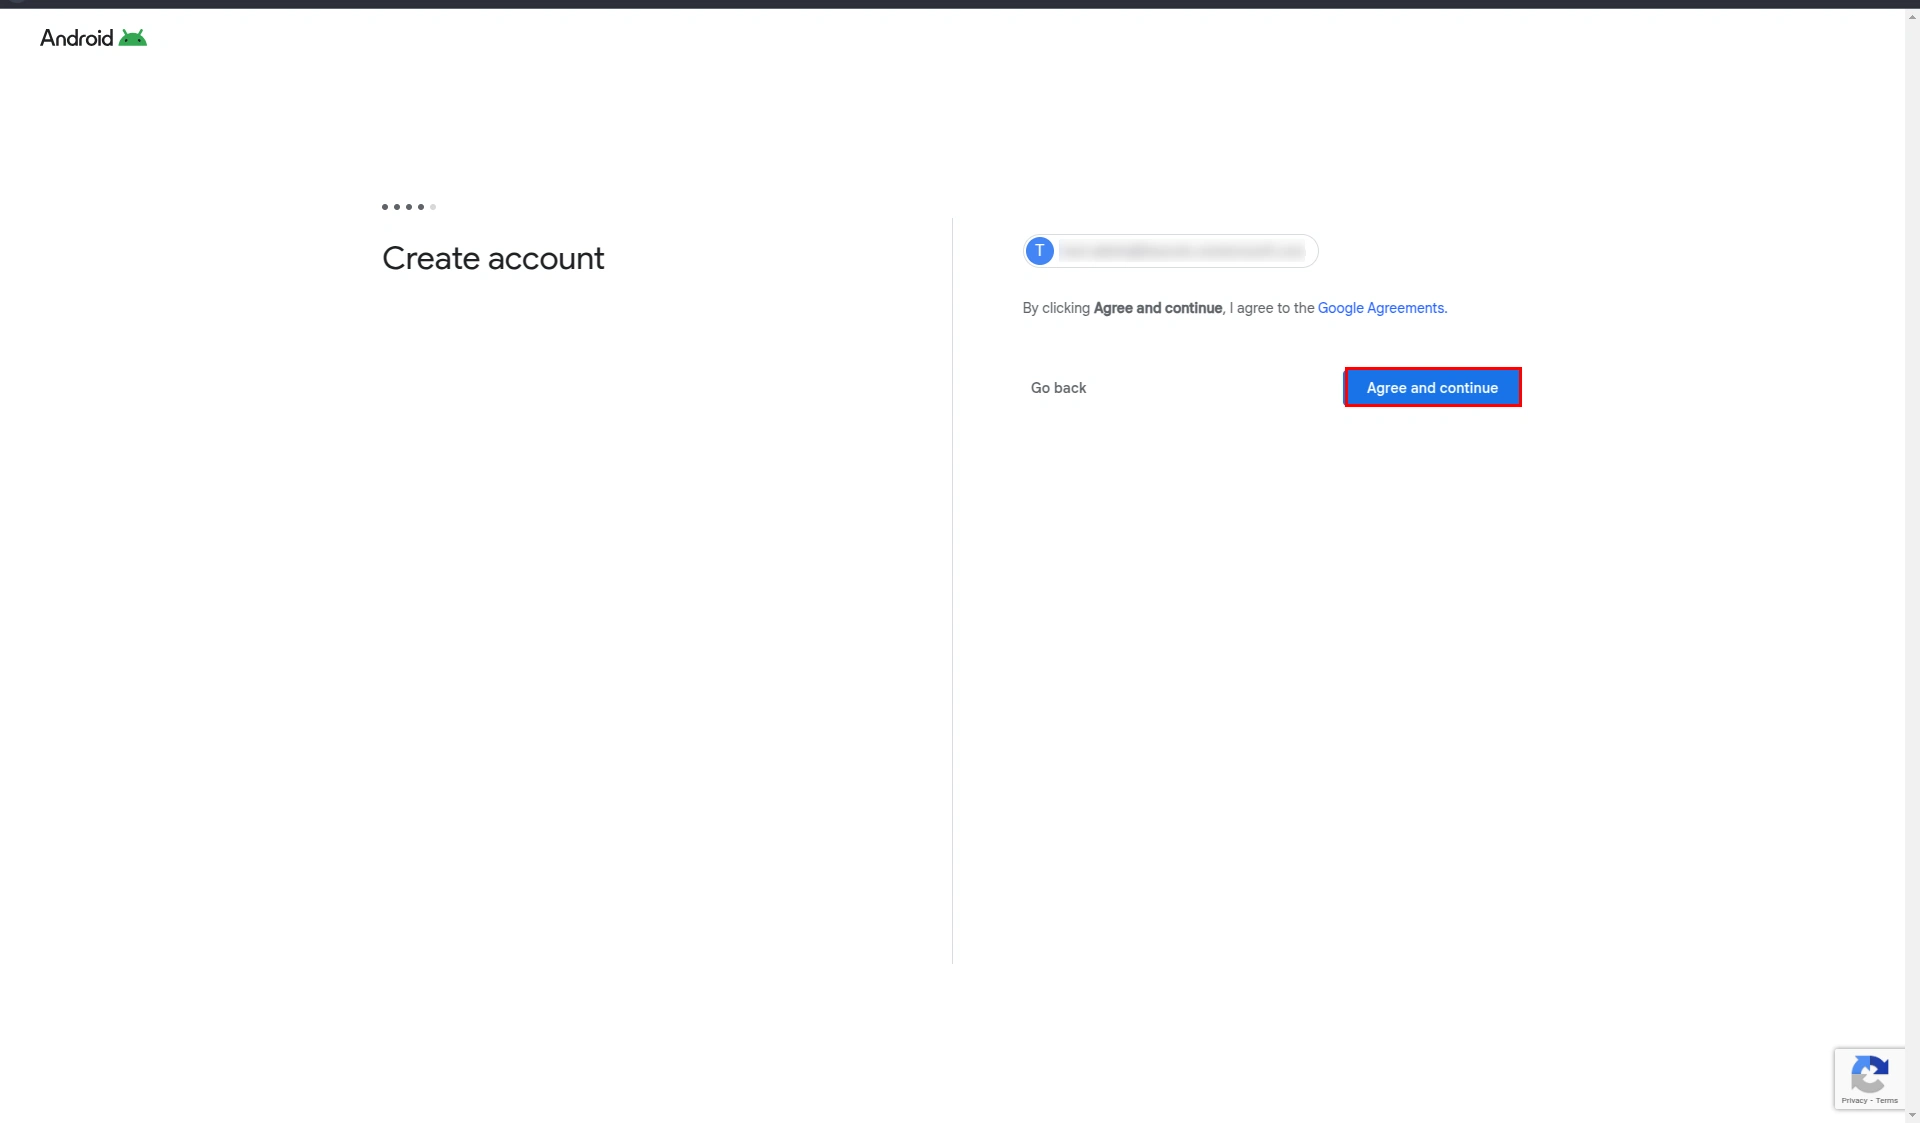
- Click on Agree and Continue.
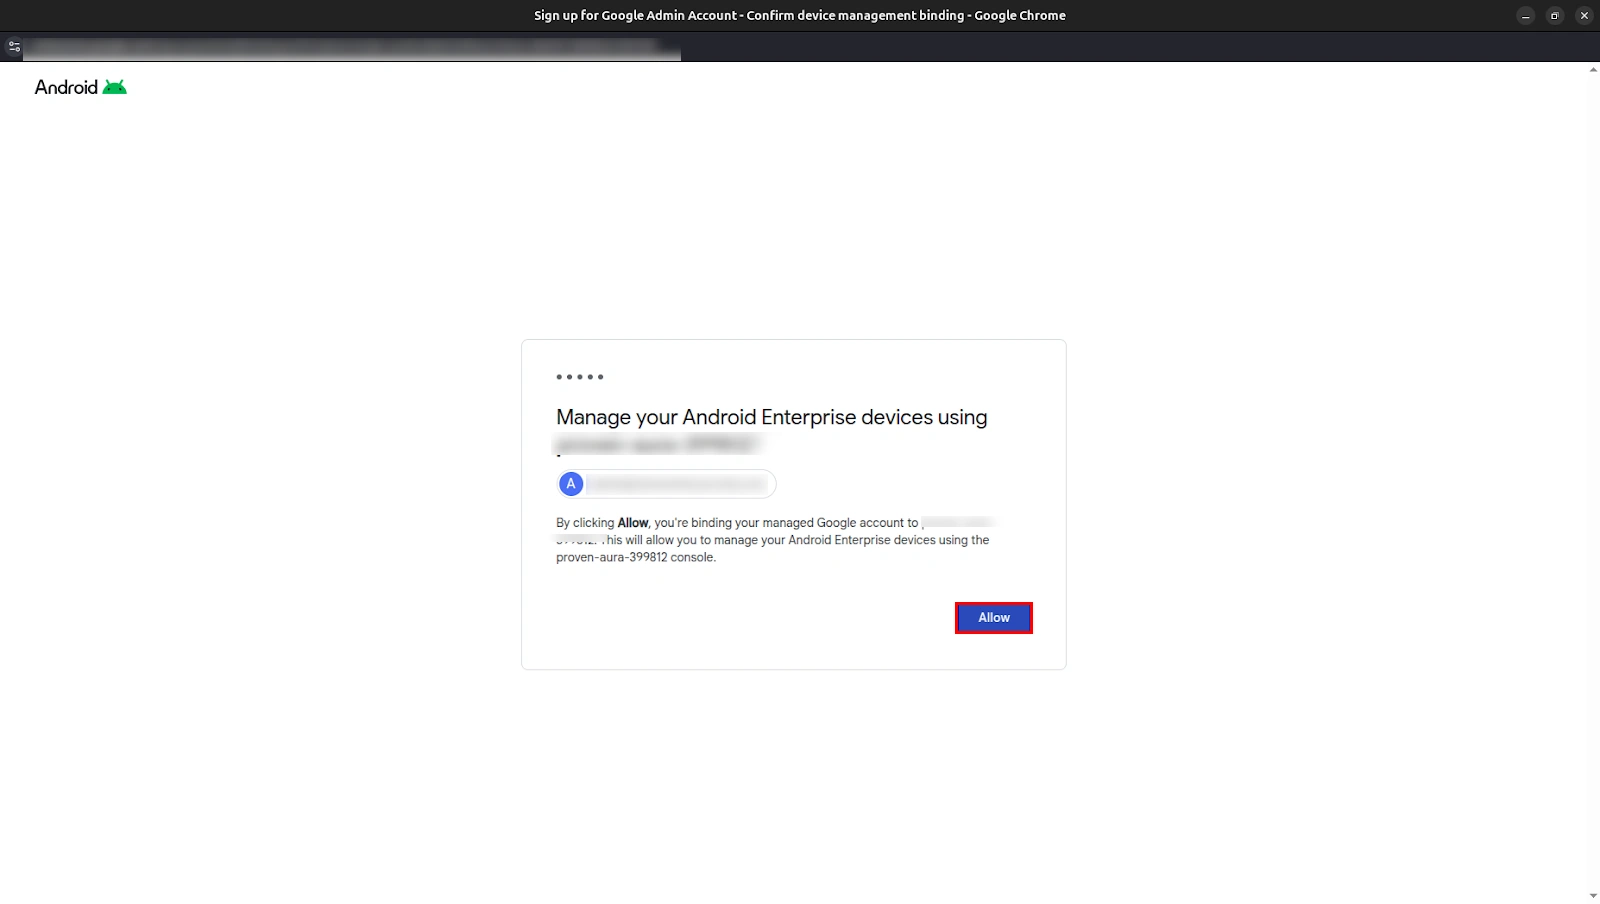
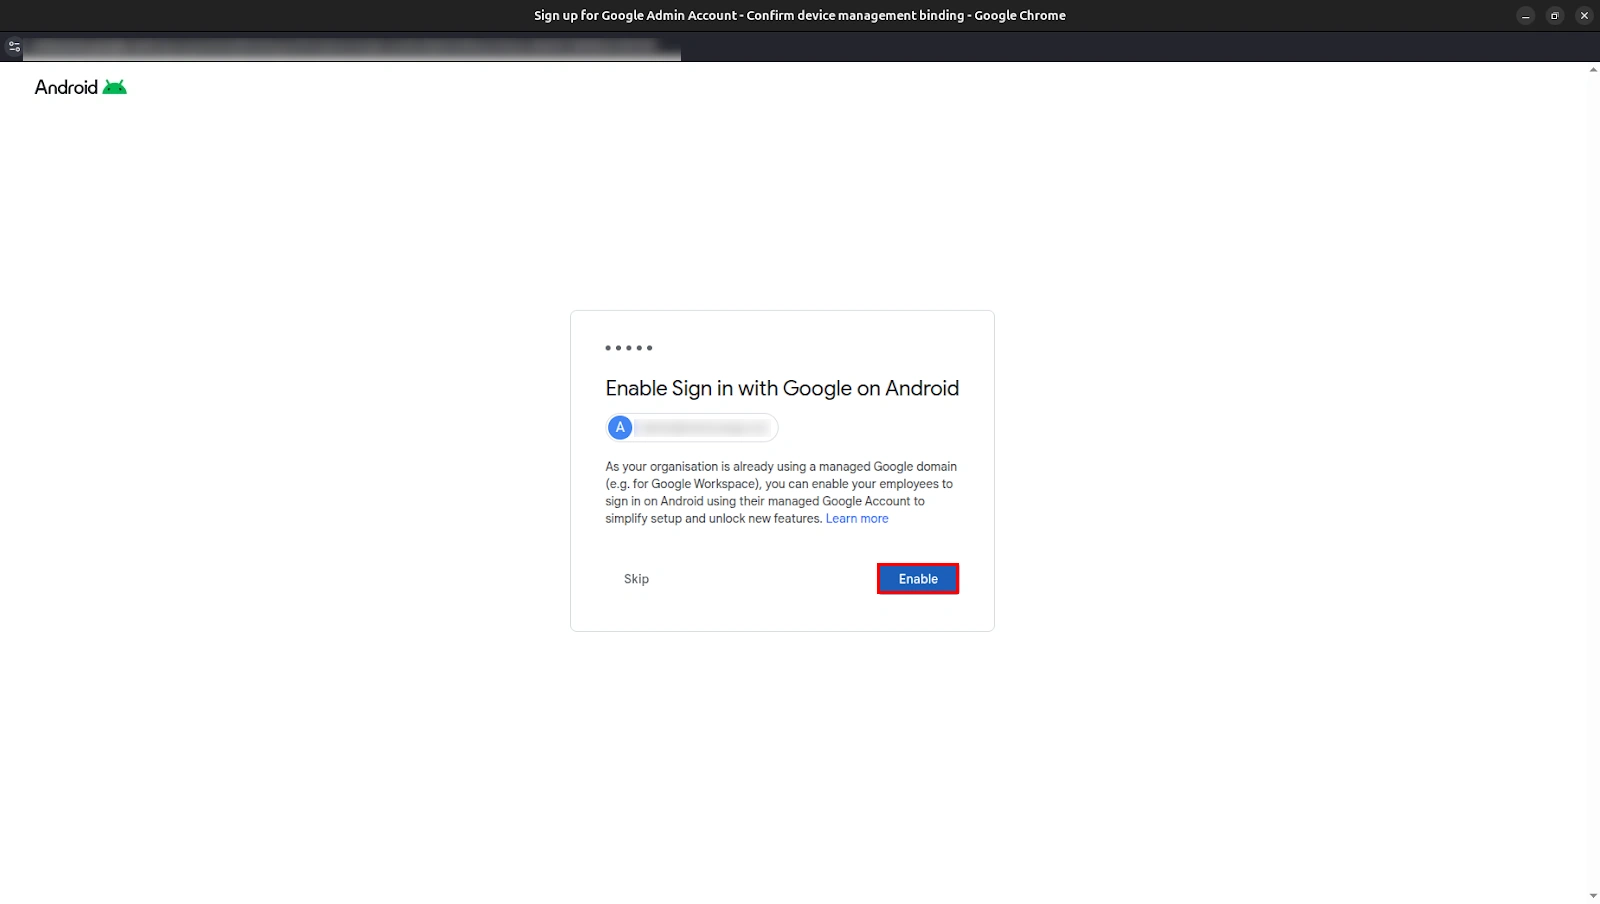
- Click on Allow, then Enable.
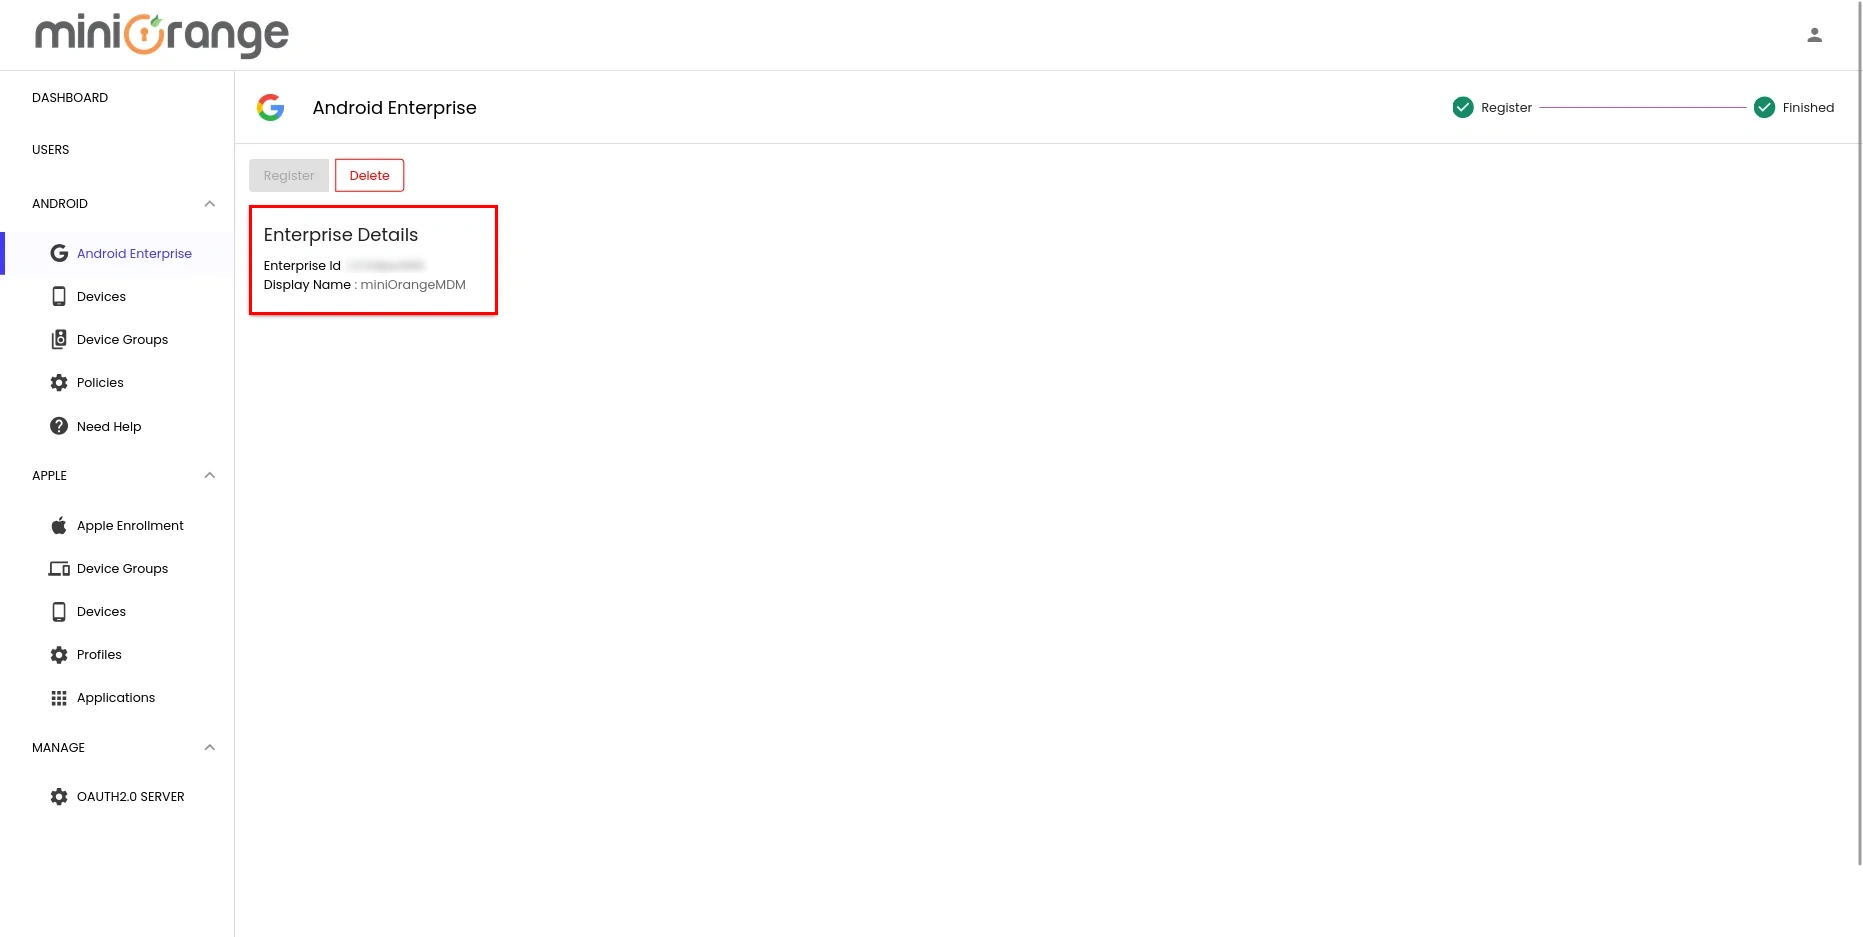
- You’ll be redirected back to the miniOrange UEM dashboard, where your enterprise details will be displayed.
Step 3: Configure Device Policies
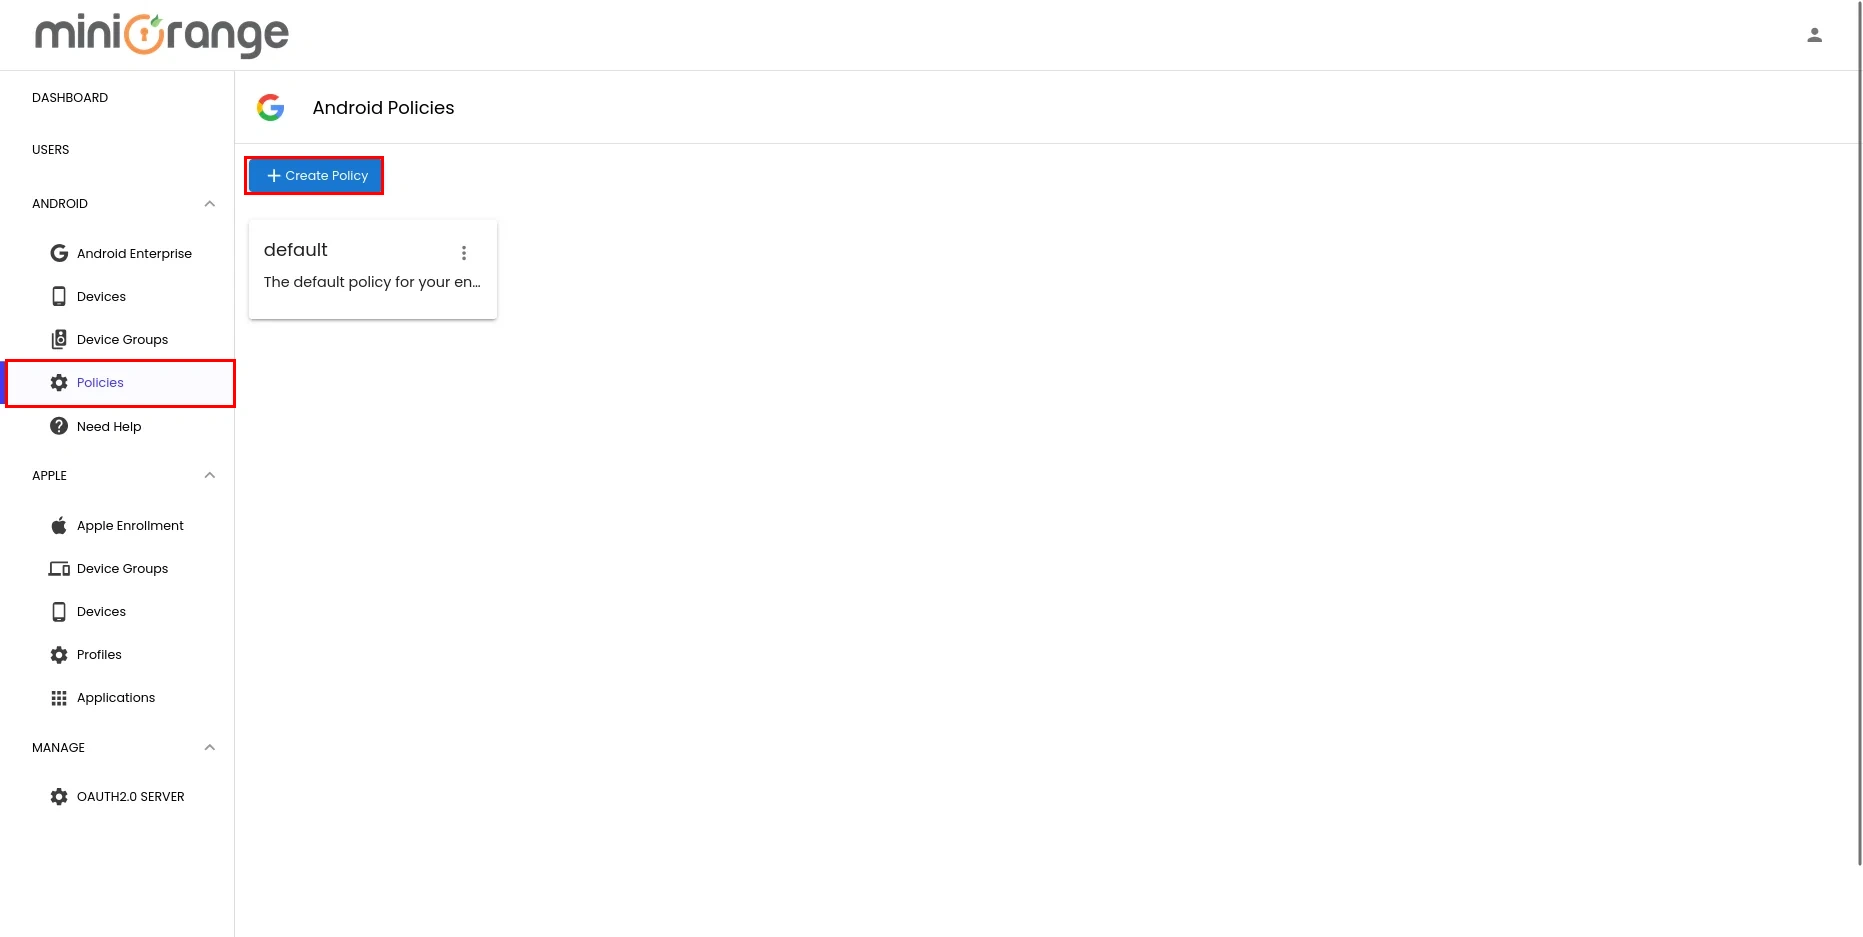
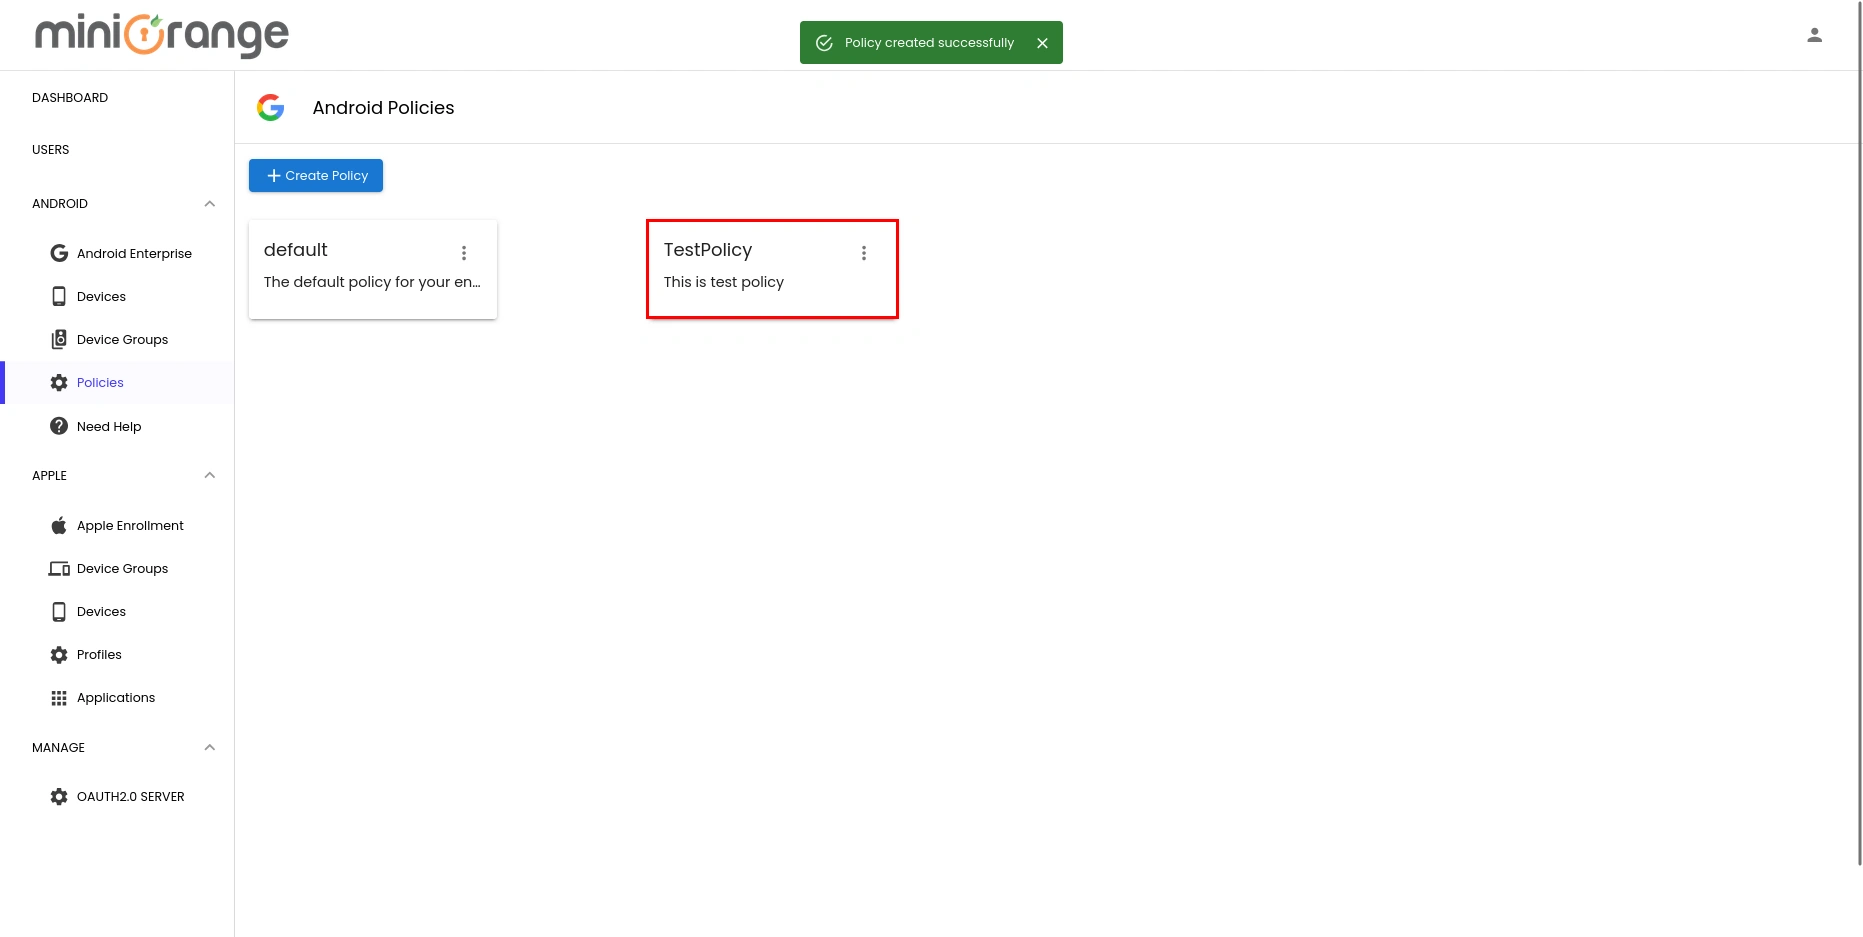
- Go to Device Policies -> Android –> Policies and click on Create Policy to create the policy.
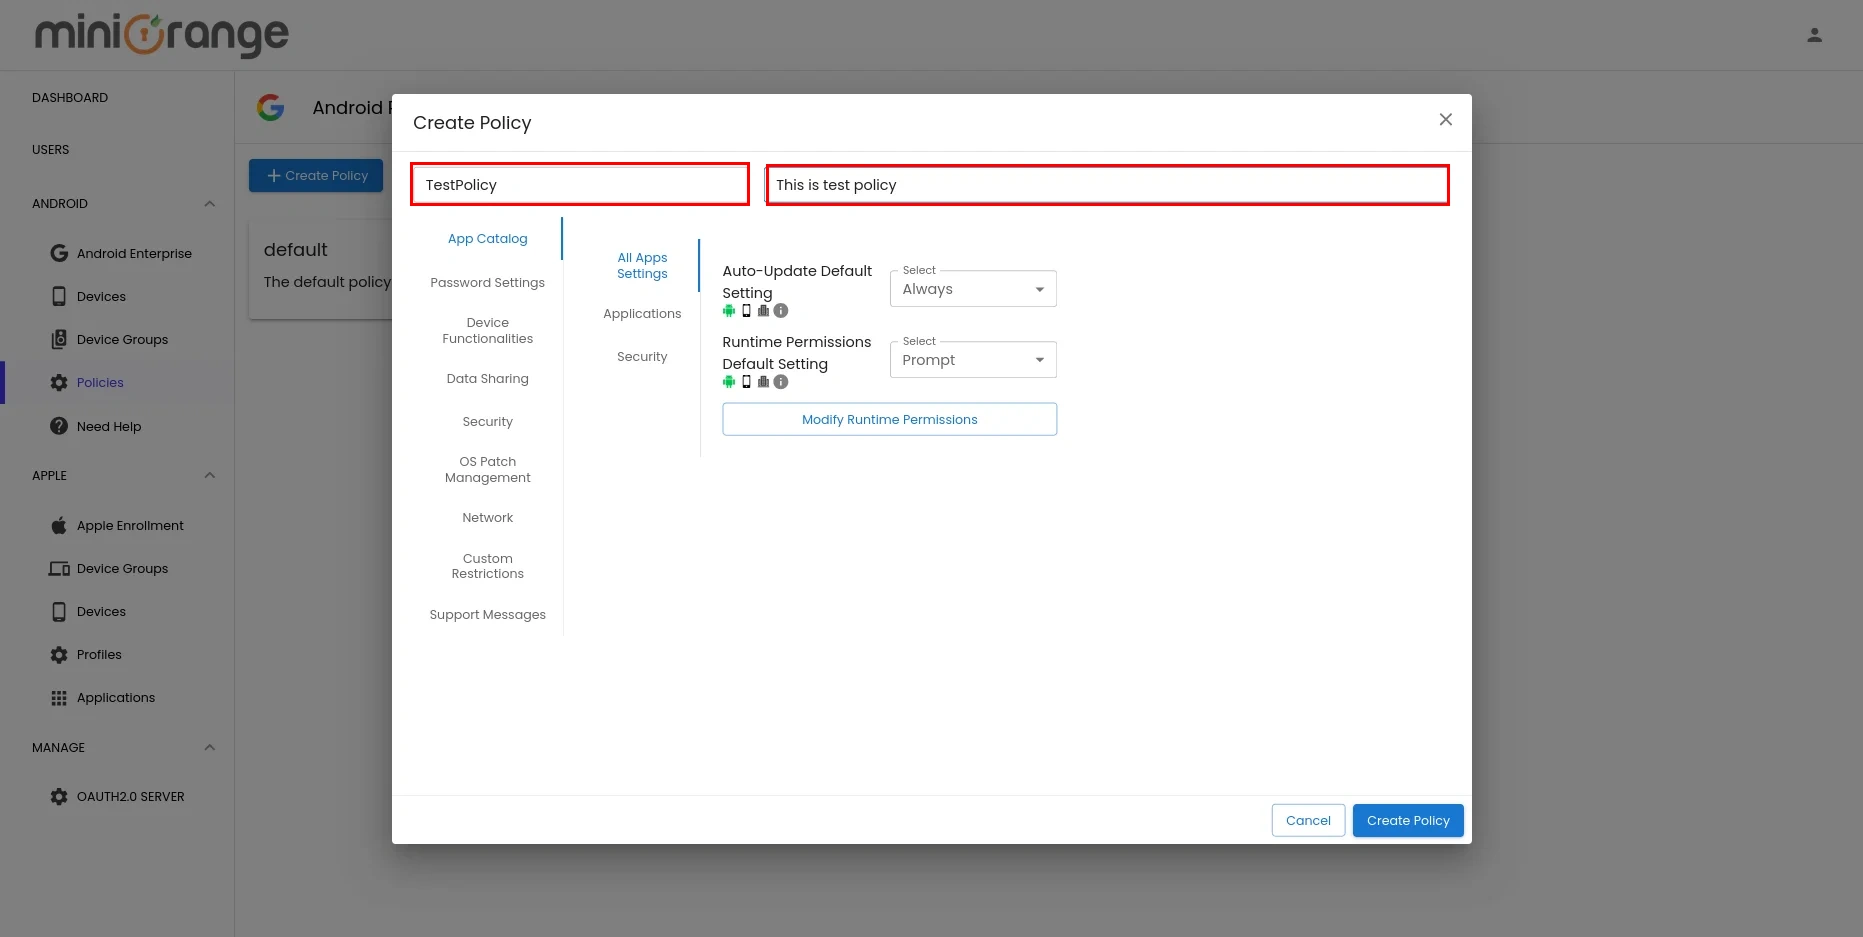
- Enter a name and description for your policy. You can then configure different policy settings such as App Settings, Password Settings, Security, etc.
- Once done, click on Next button.
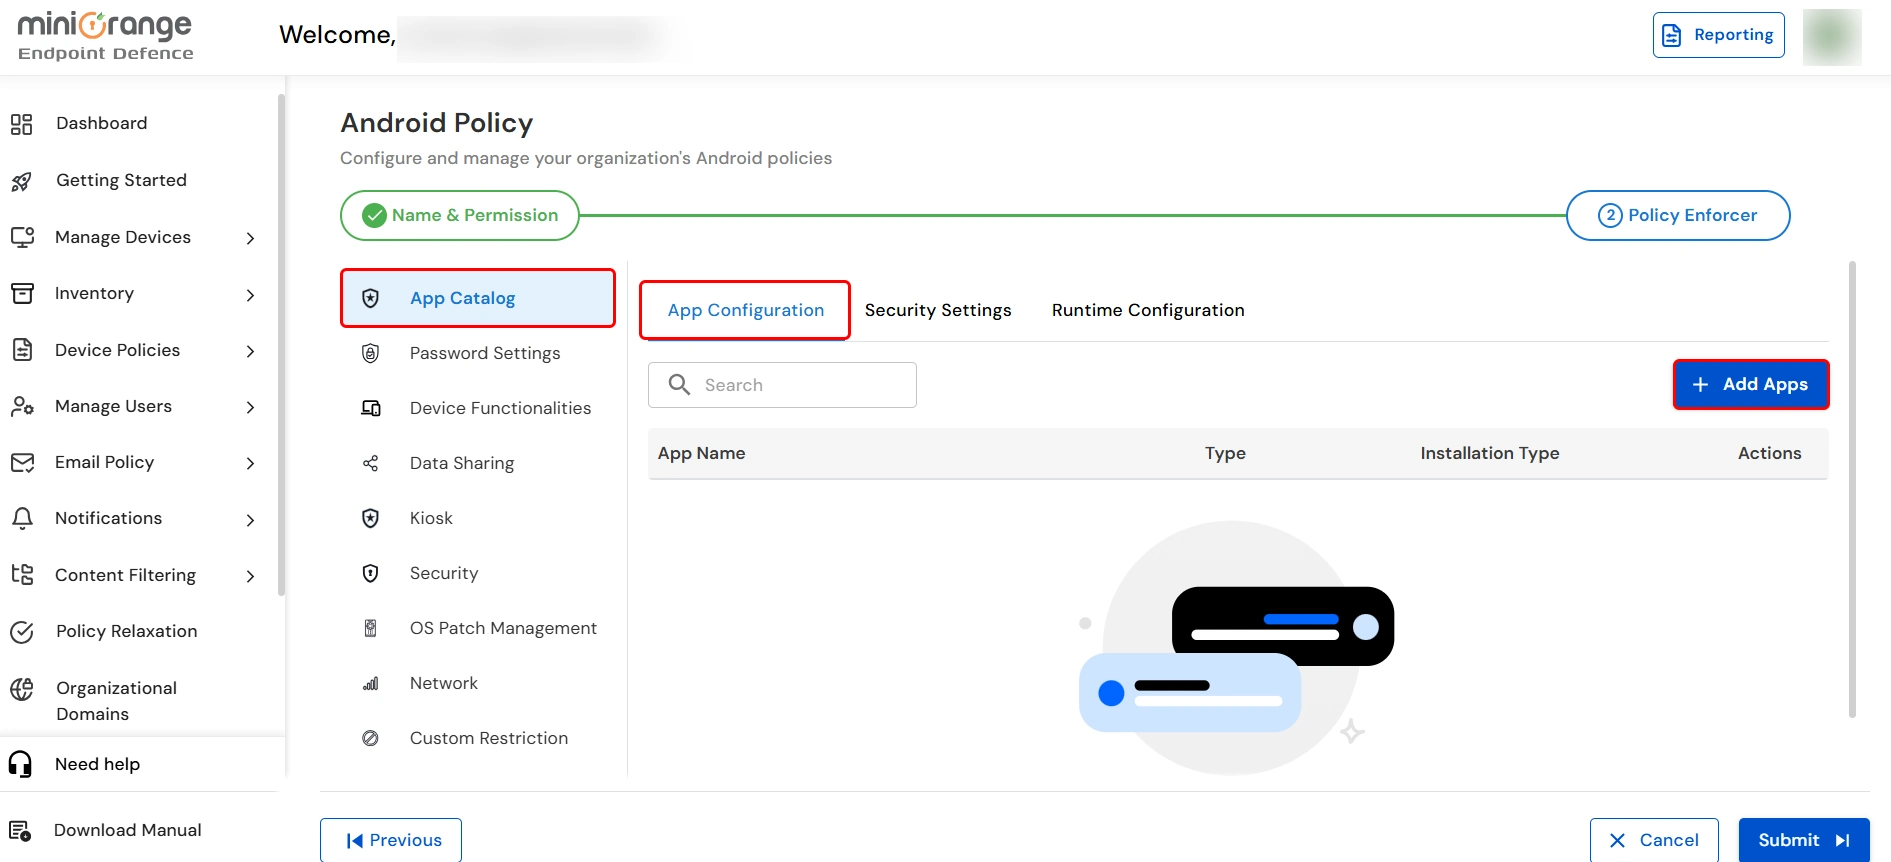
- In App Catalog, click on App Configuration → Add Apps to add all the work apps that you want to be installed on the enrolled devices.
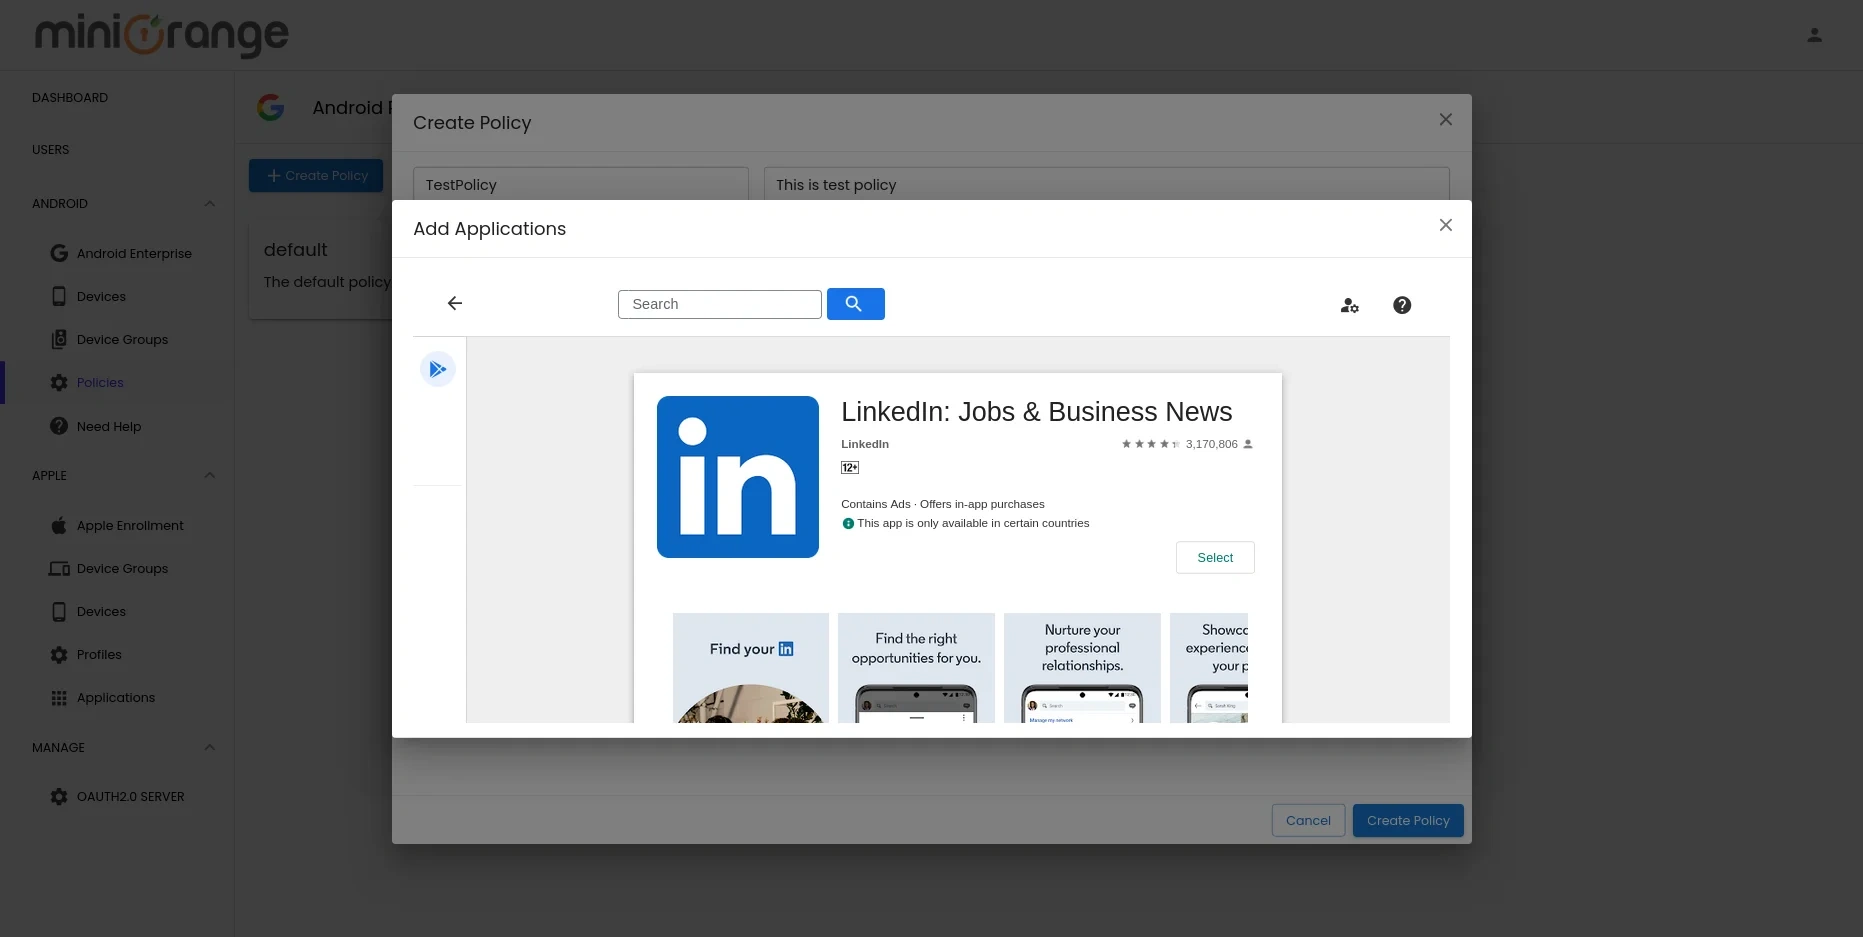
- A pop-up will open the Google Managed Play Store, where you can search for the required application. After selecting the app, click the Select button to add it to your policy configuration. Close the popup.
- Once you close the Play Store, you can see the list of all selected applications. You can set the installation type of apps on this screen.
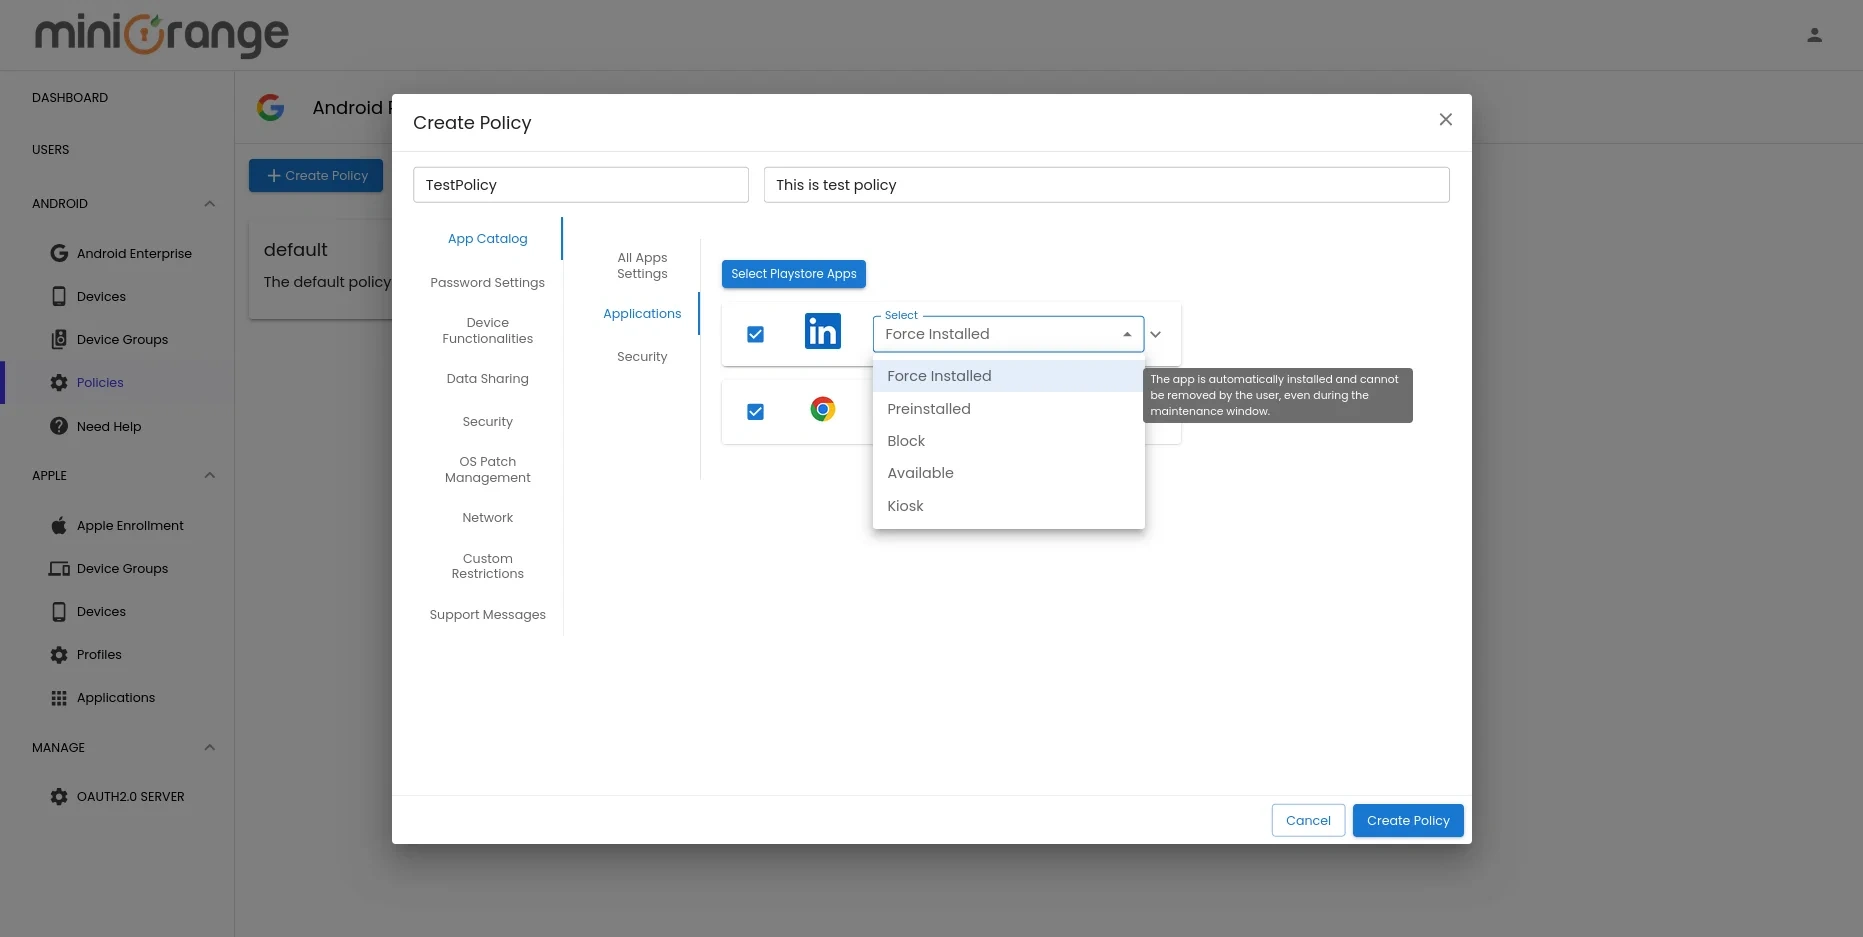
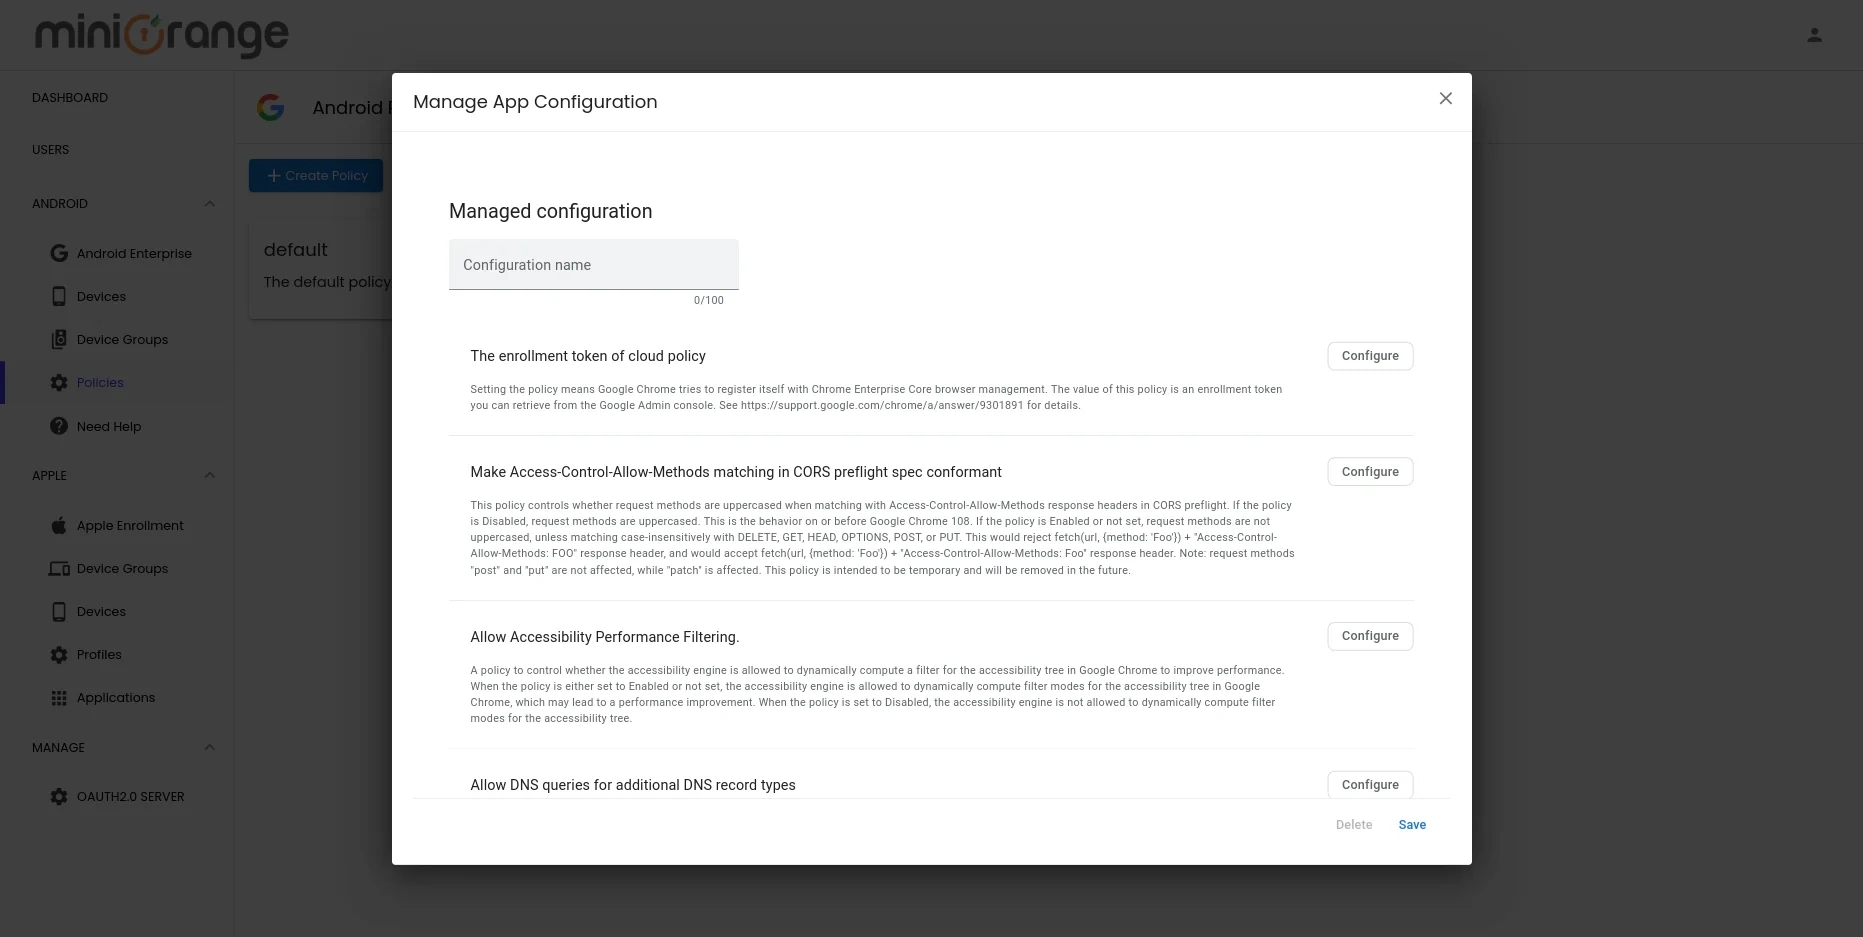
- For each added app, you can configure extended settings. If the app supports managed configurations, click the three-dot menu next to the app and select Manage Configurations to apply the required settings.
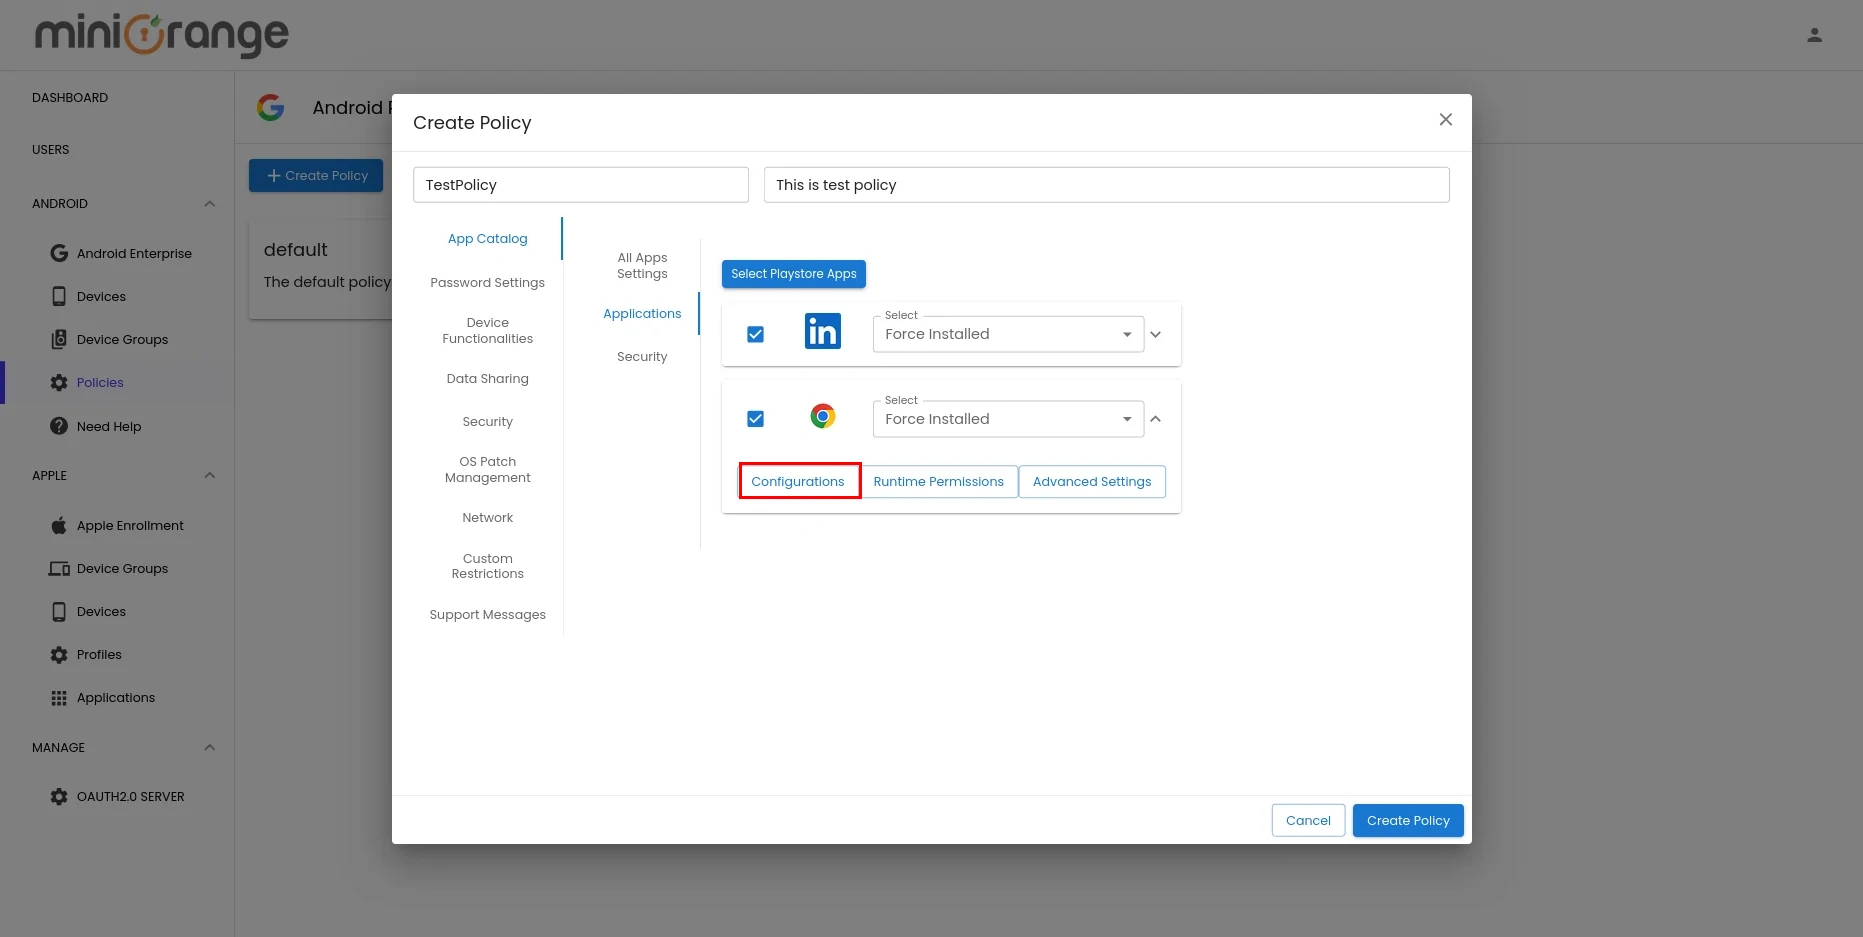
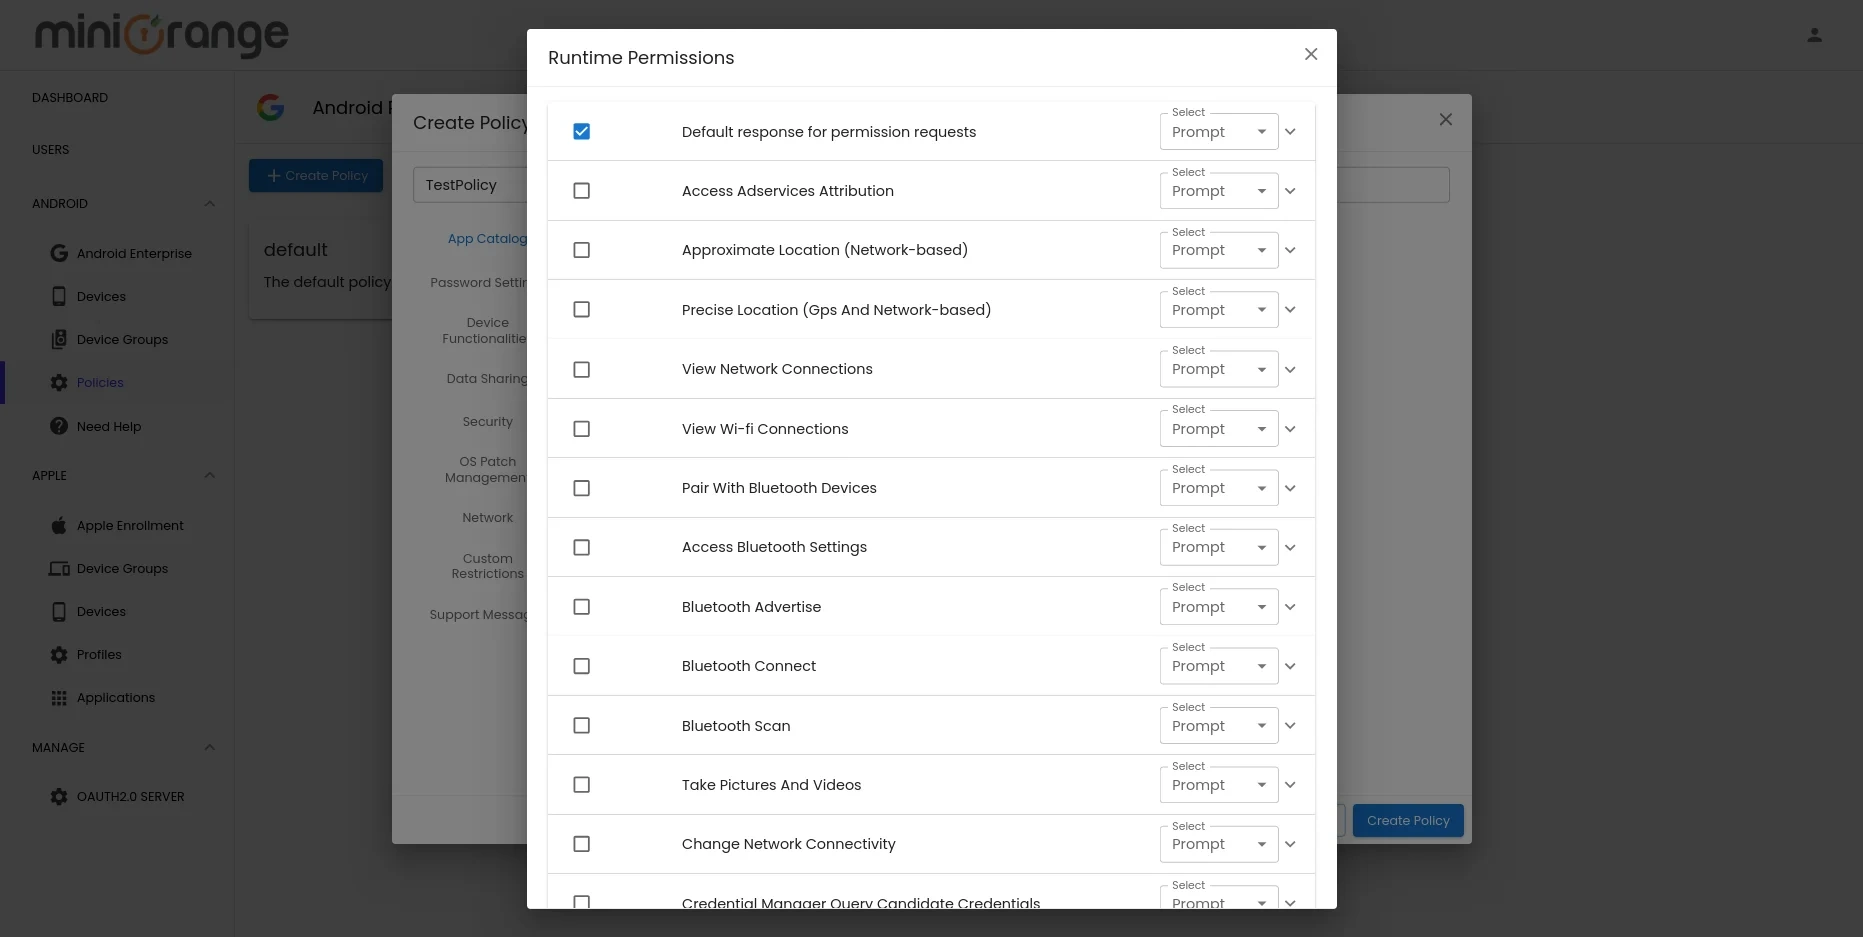
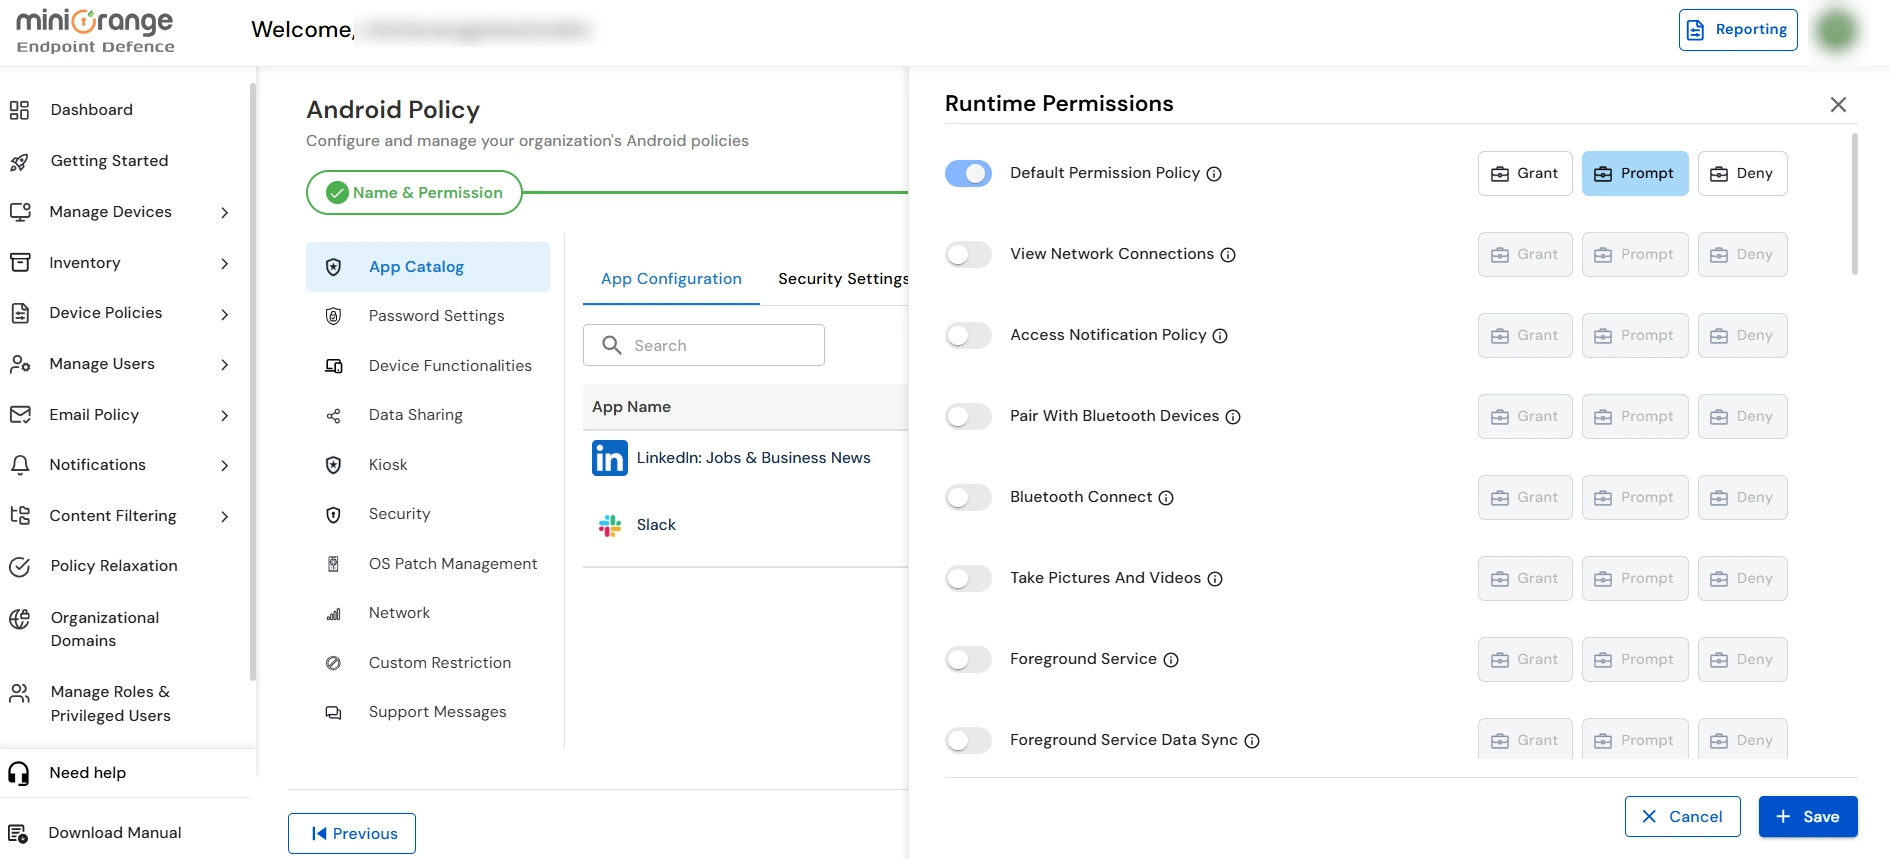
- Clicking on Runtime Permission for any app will open the following configuration that specifies the runtime permissions requested that are specific to each app.
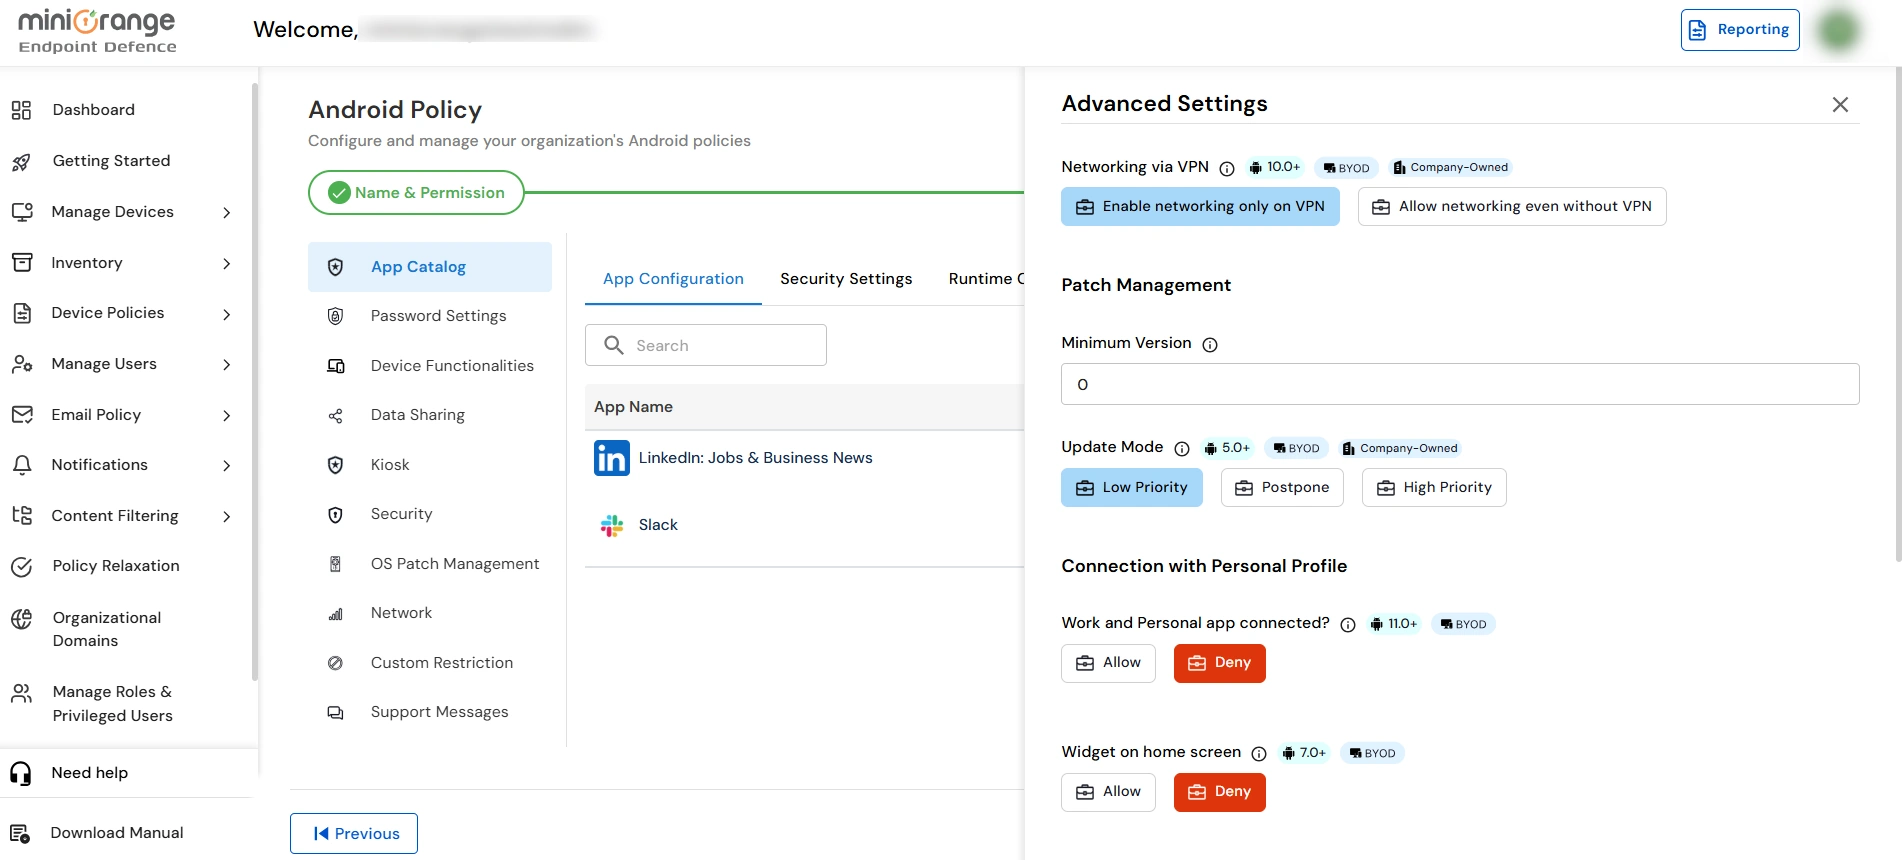
- Clicking on Advanced Settings will open the following configurations that include settings such as Update Mode, Patch Management, Widgets, etc.

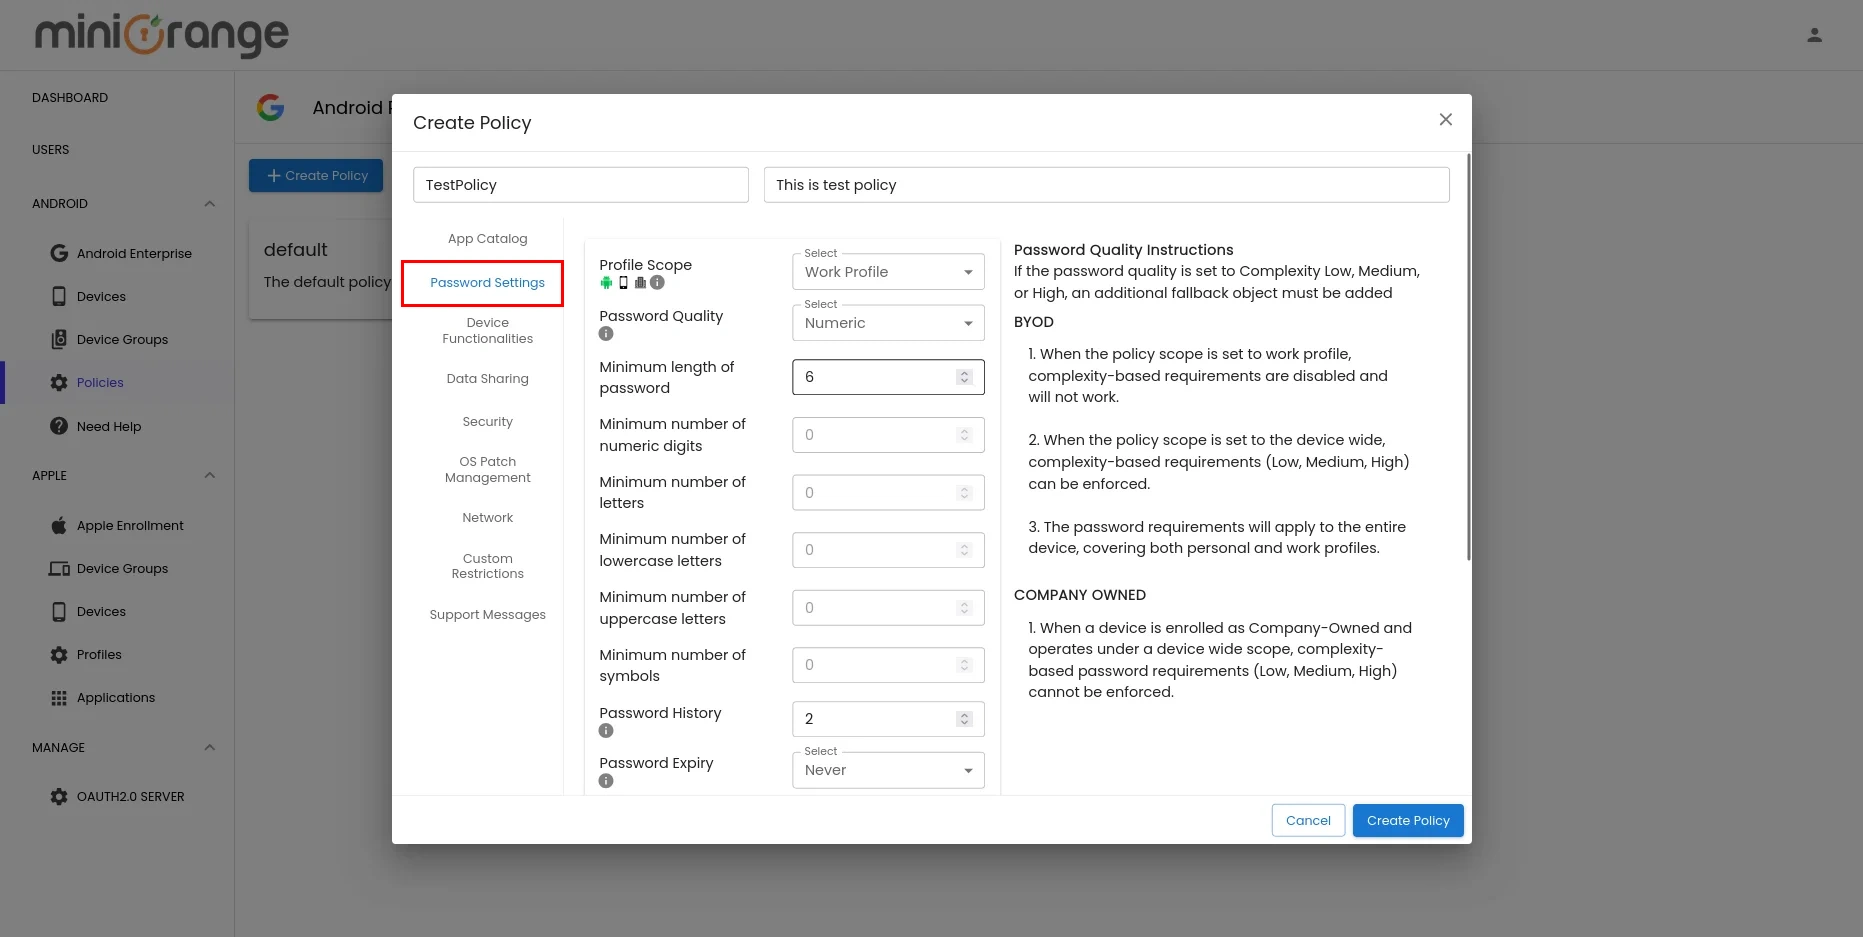
- In Password Settings, you can set the password for Work Profile and specify the password quality, password history, etc.
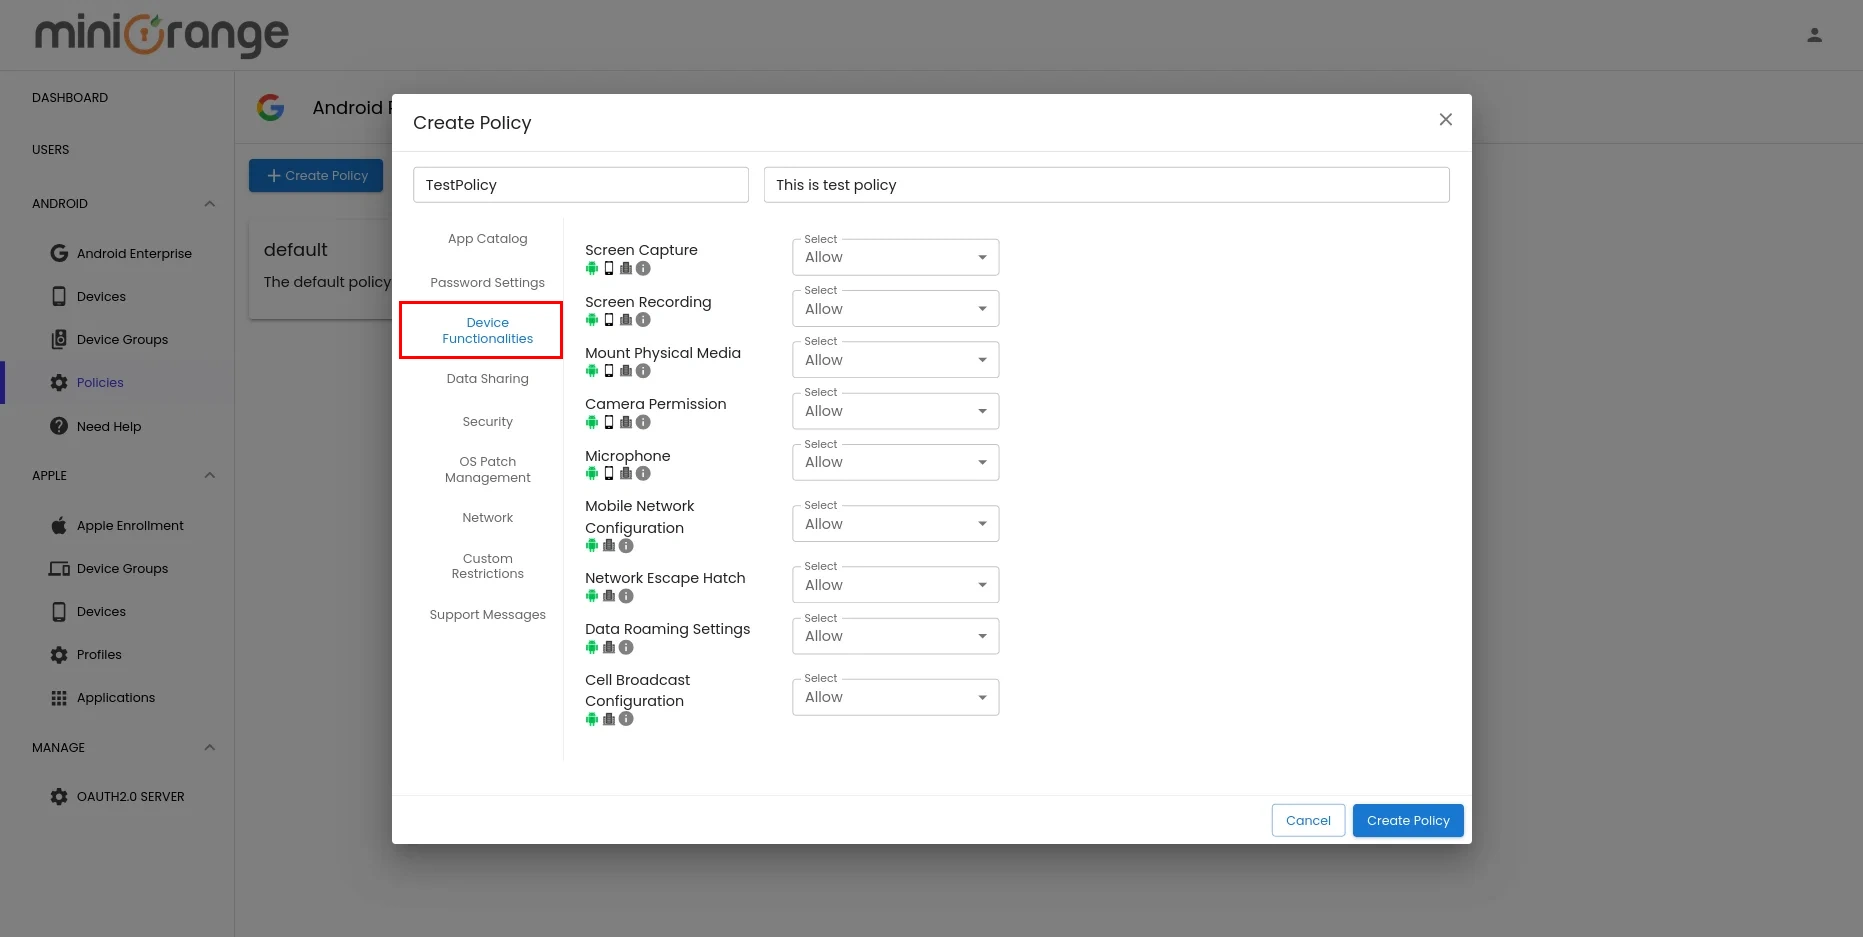
- There are Device functionality settings such as configuring the Camera permissions, Screen recording permissions, etc.
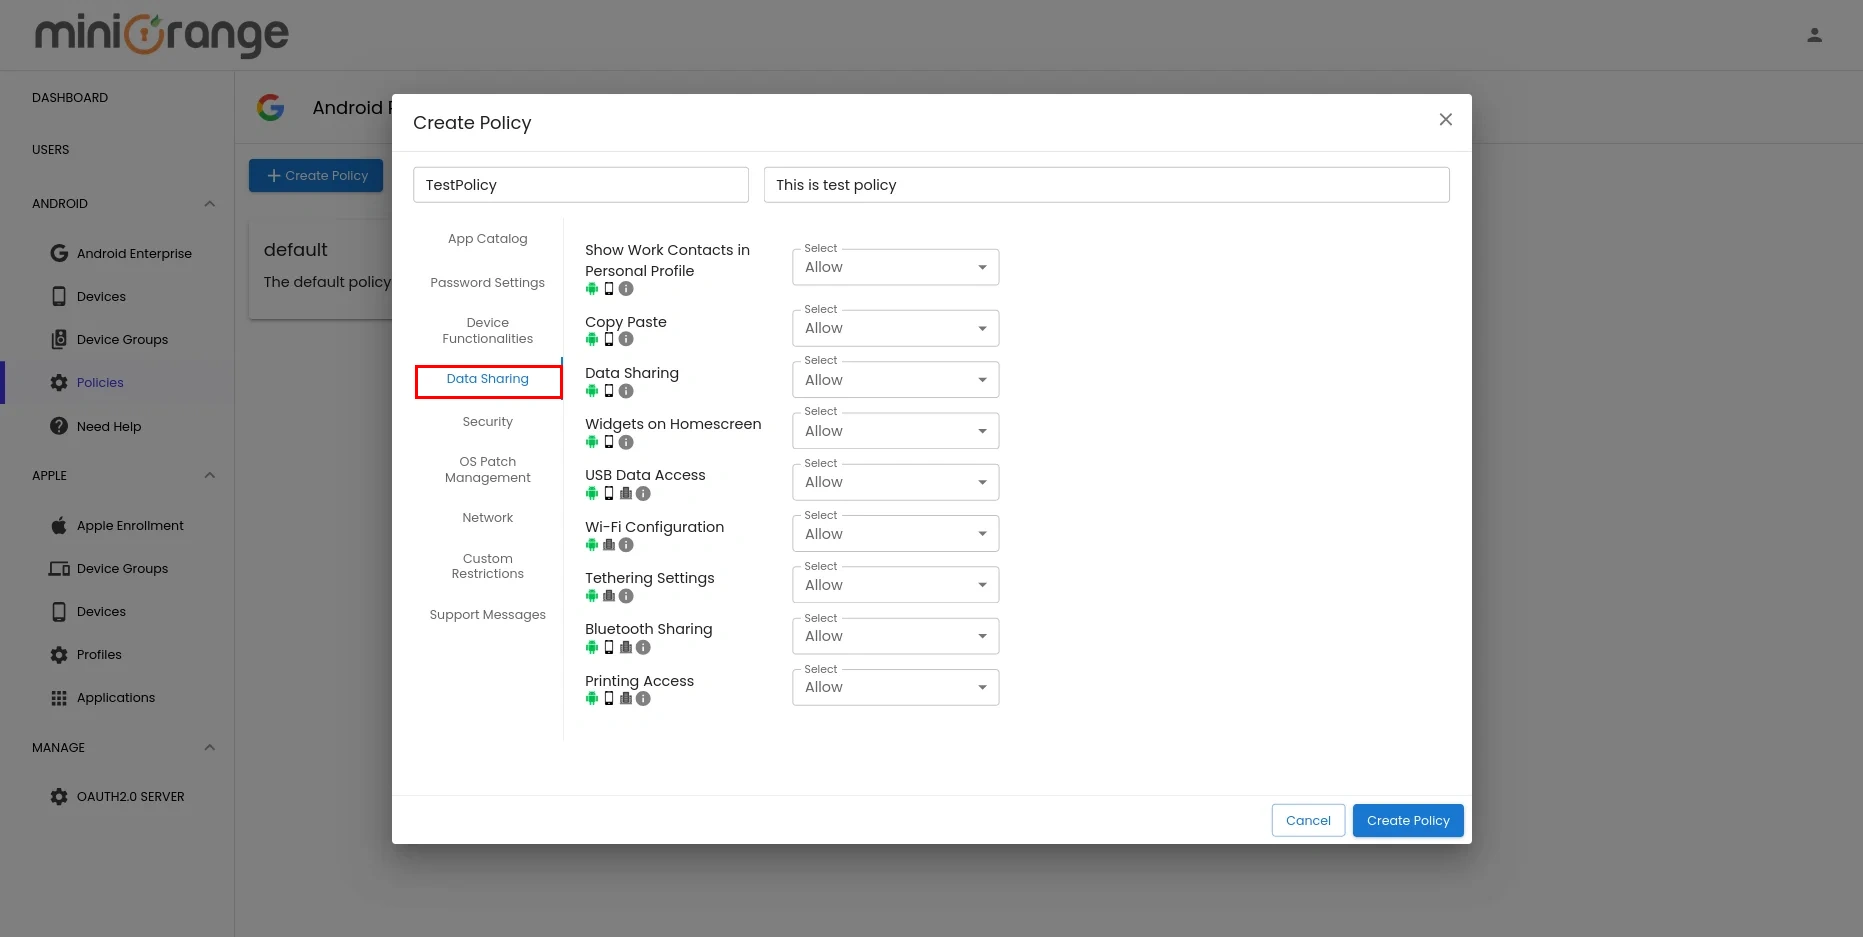
- Data sharing settings provide configurations for cross-profile data sharing such as copy-paste, Data access, etc.
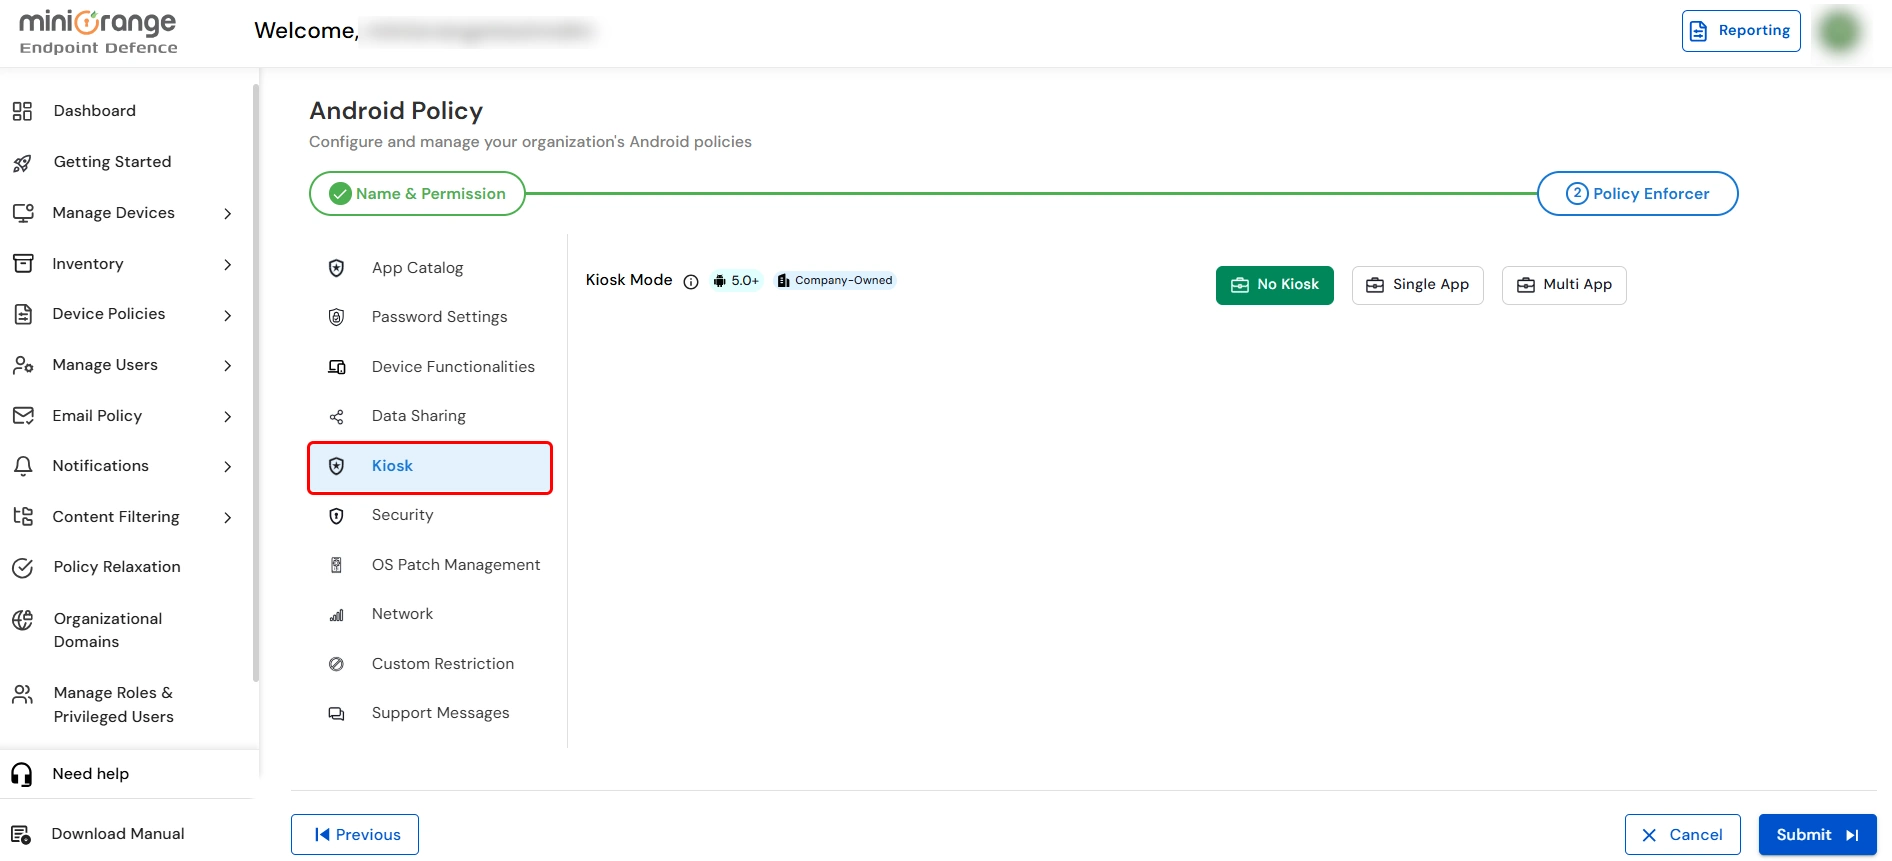
- In the Kiosk tab, you can configure Single App or Multi App mode to restrict the device to specific applications.
- In single-app kiosk mode, set the app's installation type to Kiosk to display the apps added for kiosk use.
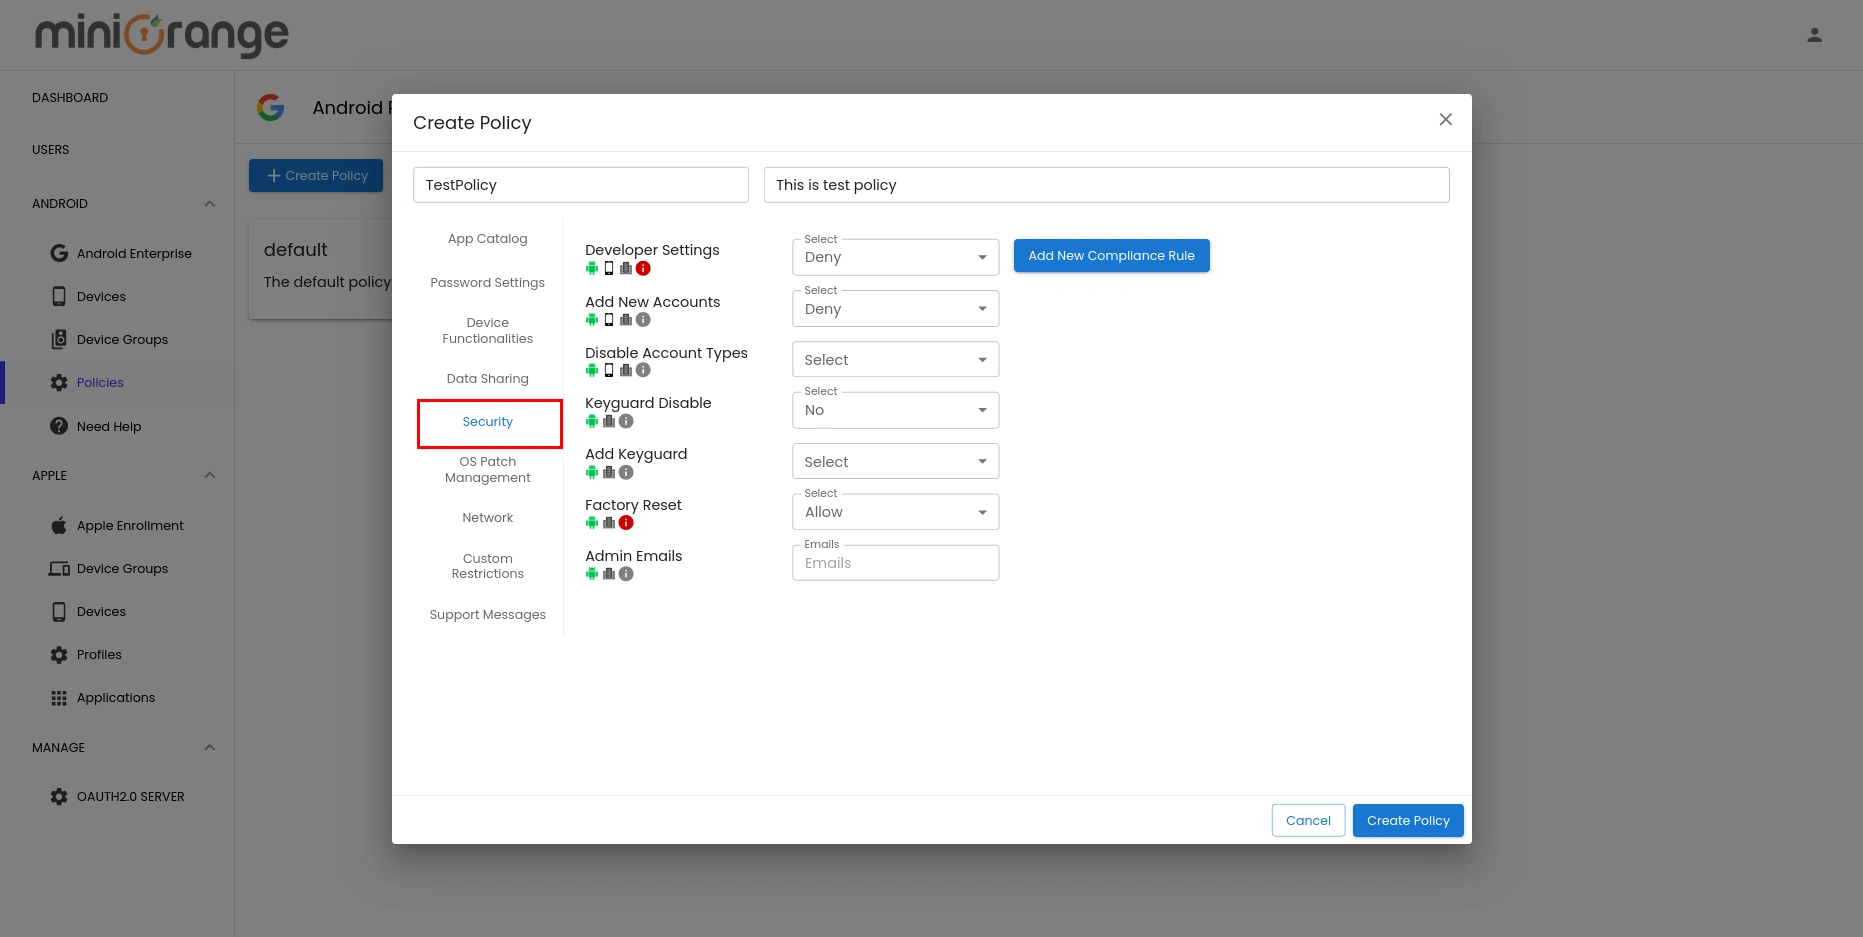
- In the Security Settings, you can set Compliance Rules for actions like Factory Reset, Developer Settings, and other security requirements for Work Profiles.
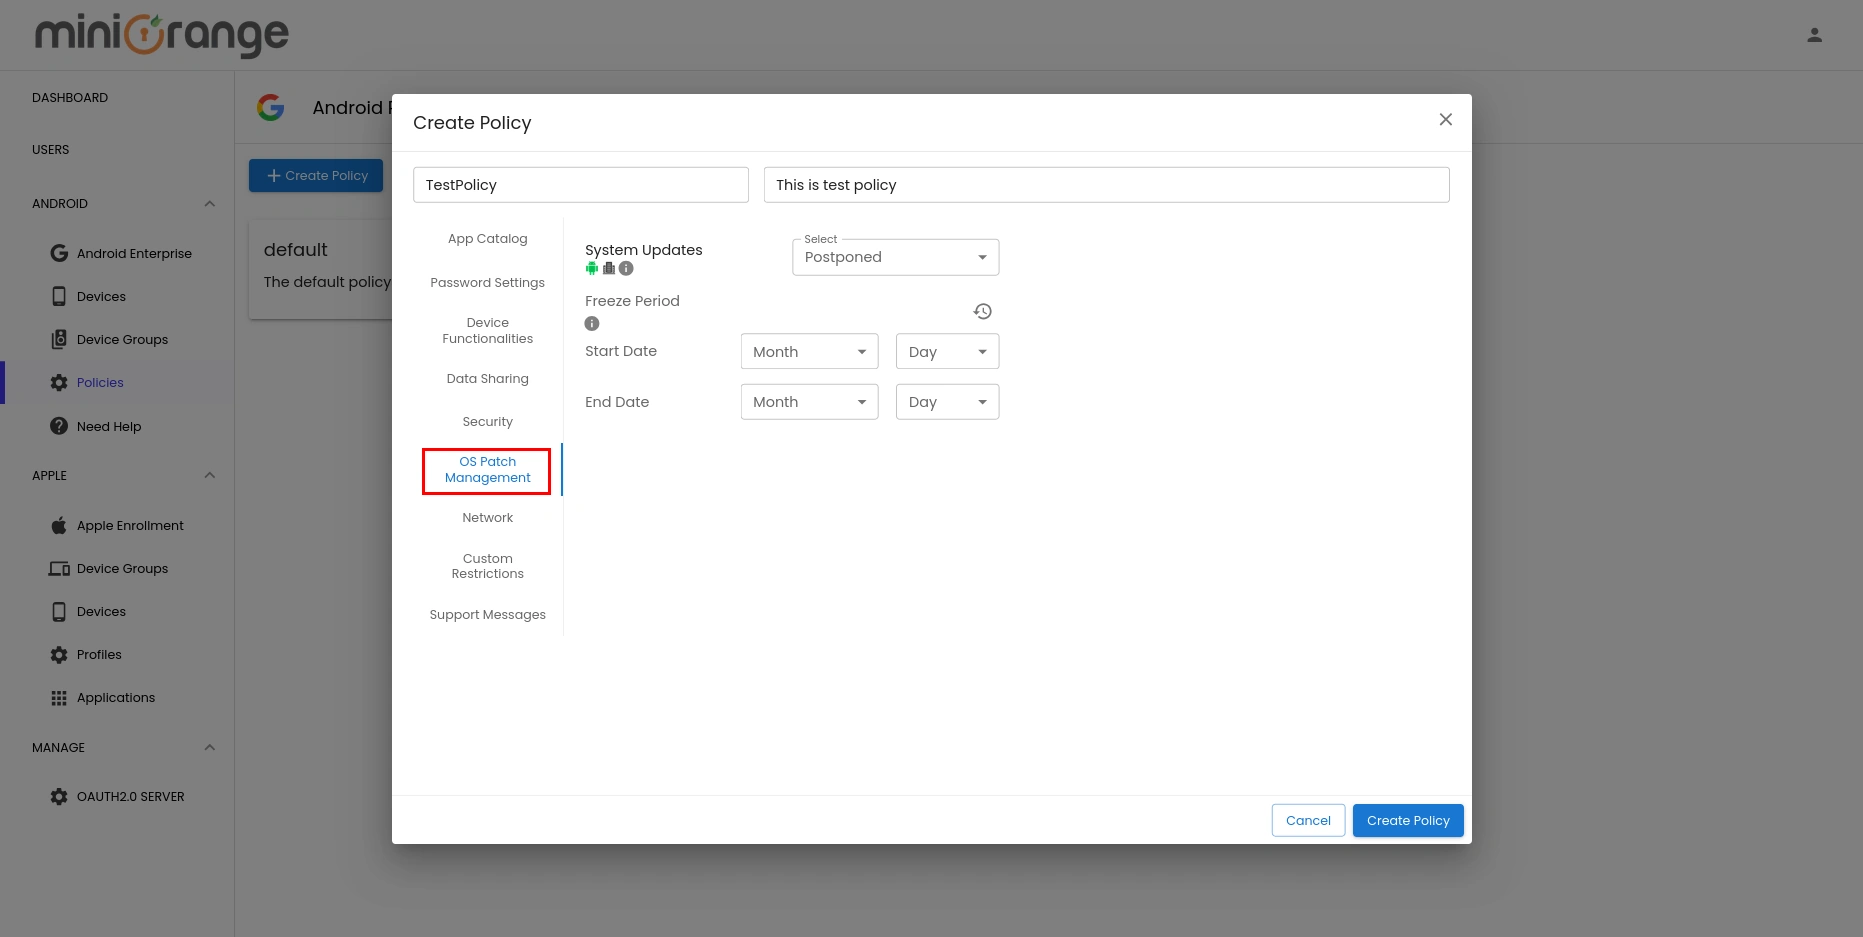
- In the OS Patch Management, you can set the System Update Priority, choosing from options like Automatic, Postponed, or Windowed updates to manage when and how updates are applied.
- In the Network Settings, you can configure VPN, WiFi, and Proxy settings to ensure secure and optimized network connectivity for devices.

- Once you have configured all details, click on Submit and your new policy will be listed as shown in the image below.
Step 4: Create Device Groups
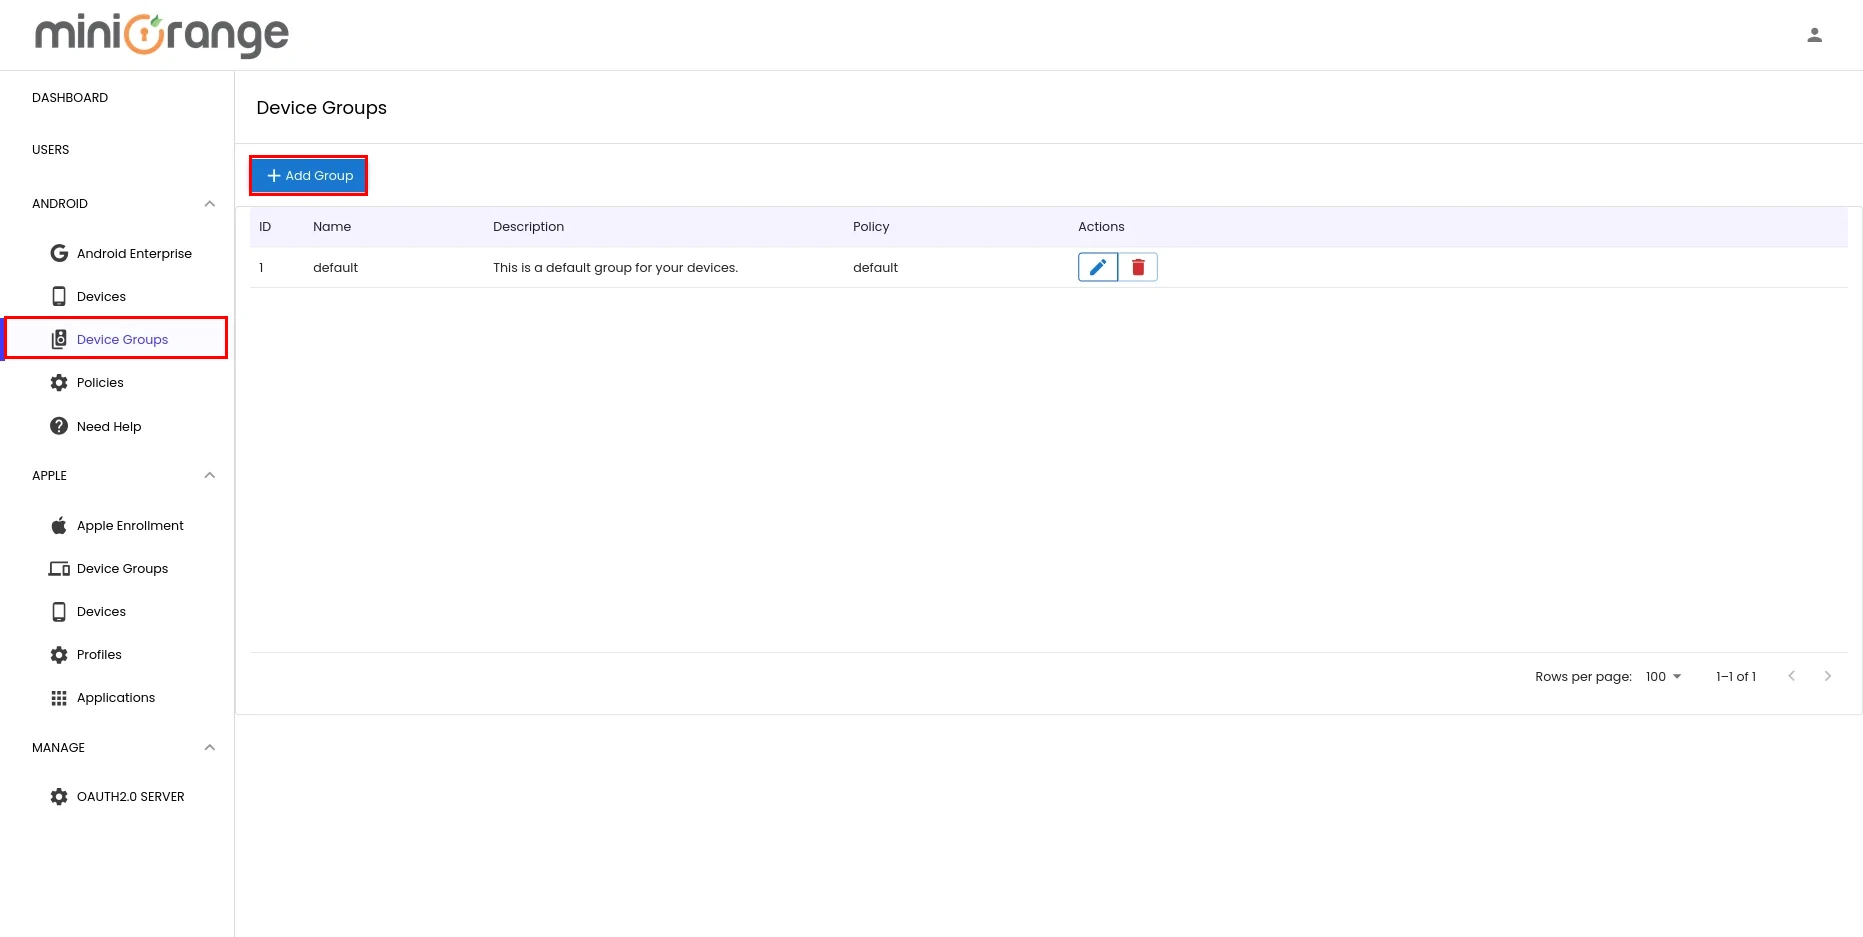
- Now, we will create a device group to apply the configured policies to the devices. To do this, go to Manage Devices → Device Groups → Android and click the Add Device Group button.
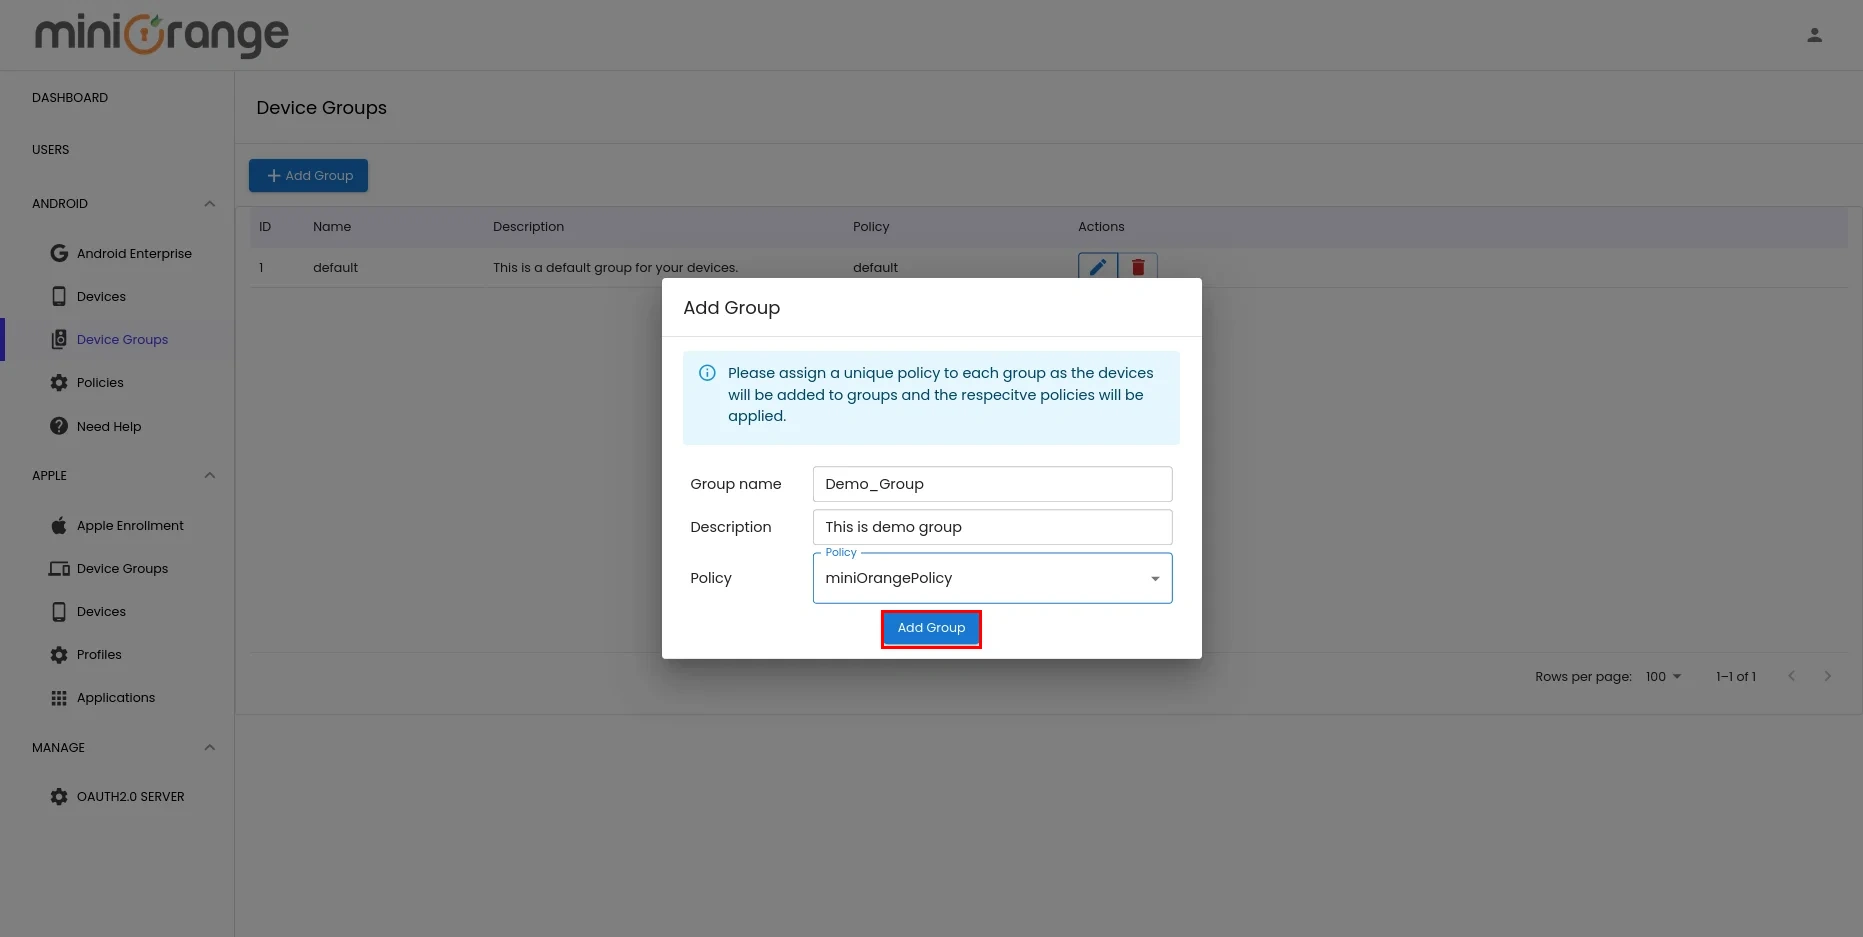
- A form will appear prompting you to enter a name for the new device group, assign a policy, and optionally add a description to provide more context about the group.
- Once done, click on Next button.
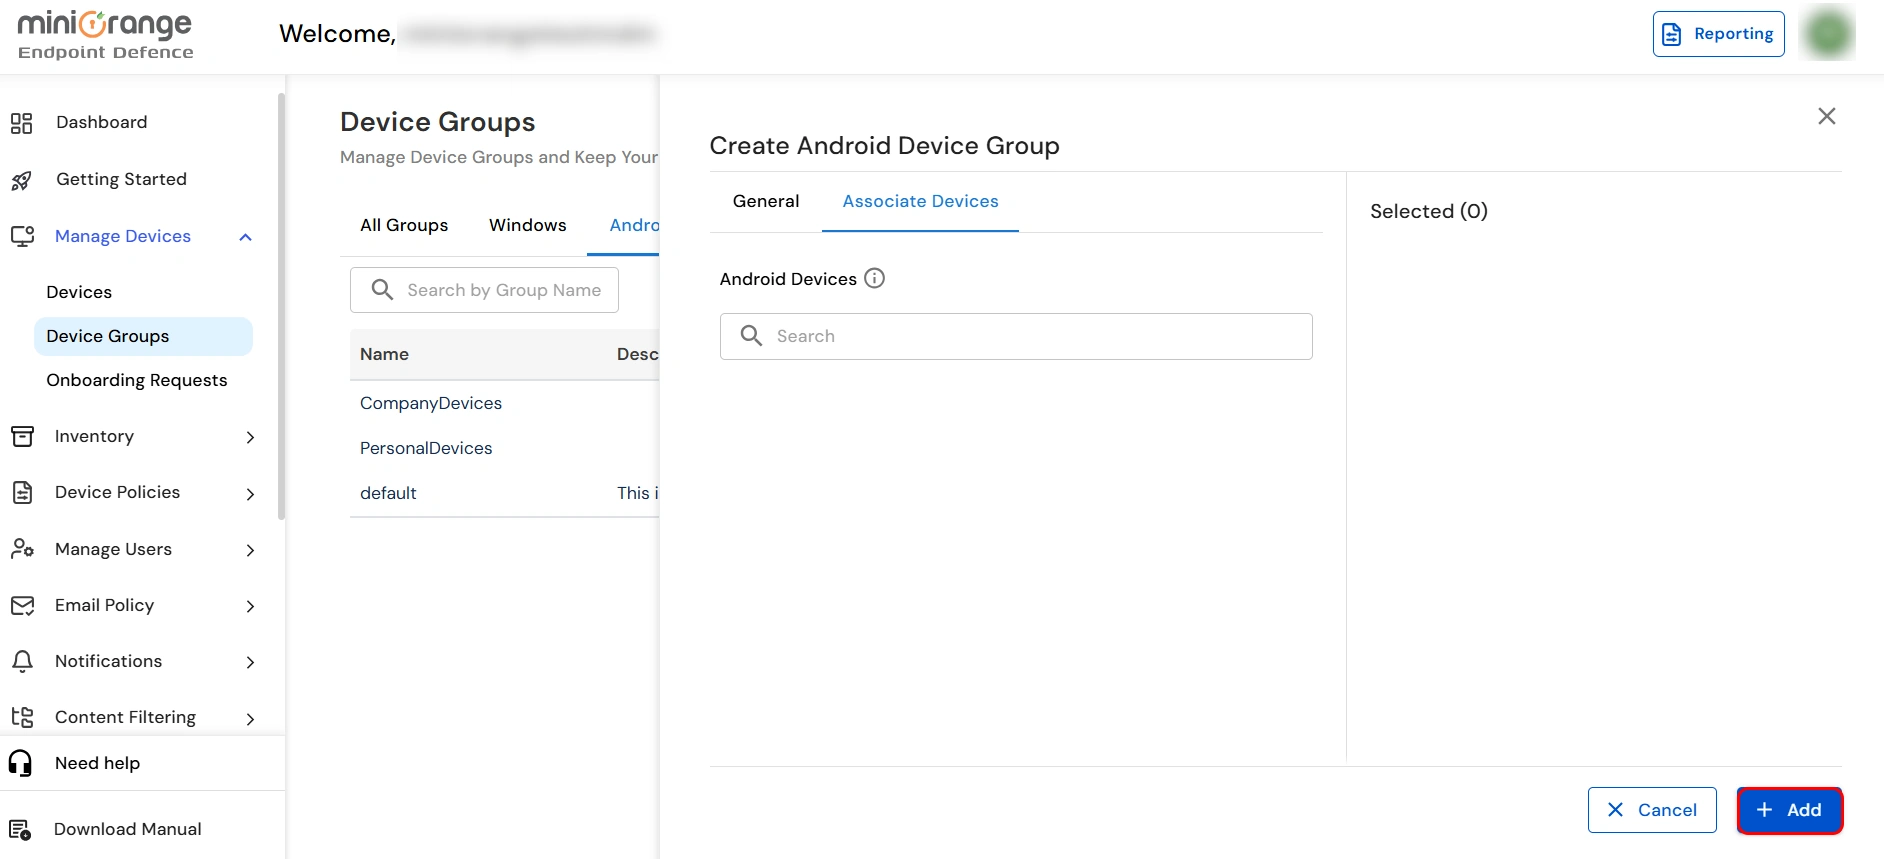
- If you want to assign the devices to the new device group, select them from the Associated Devices list.
- If you don’t have any existing devices, just click Add to continue.
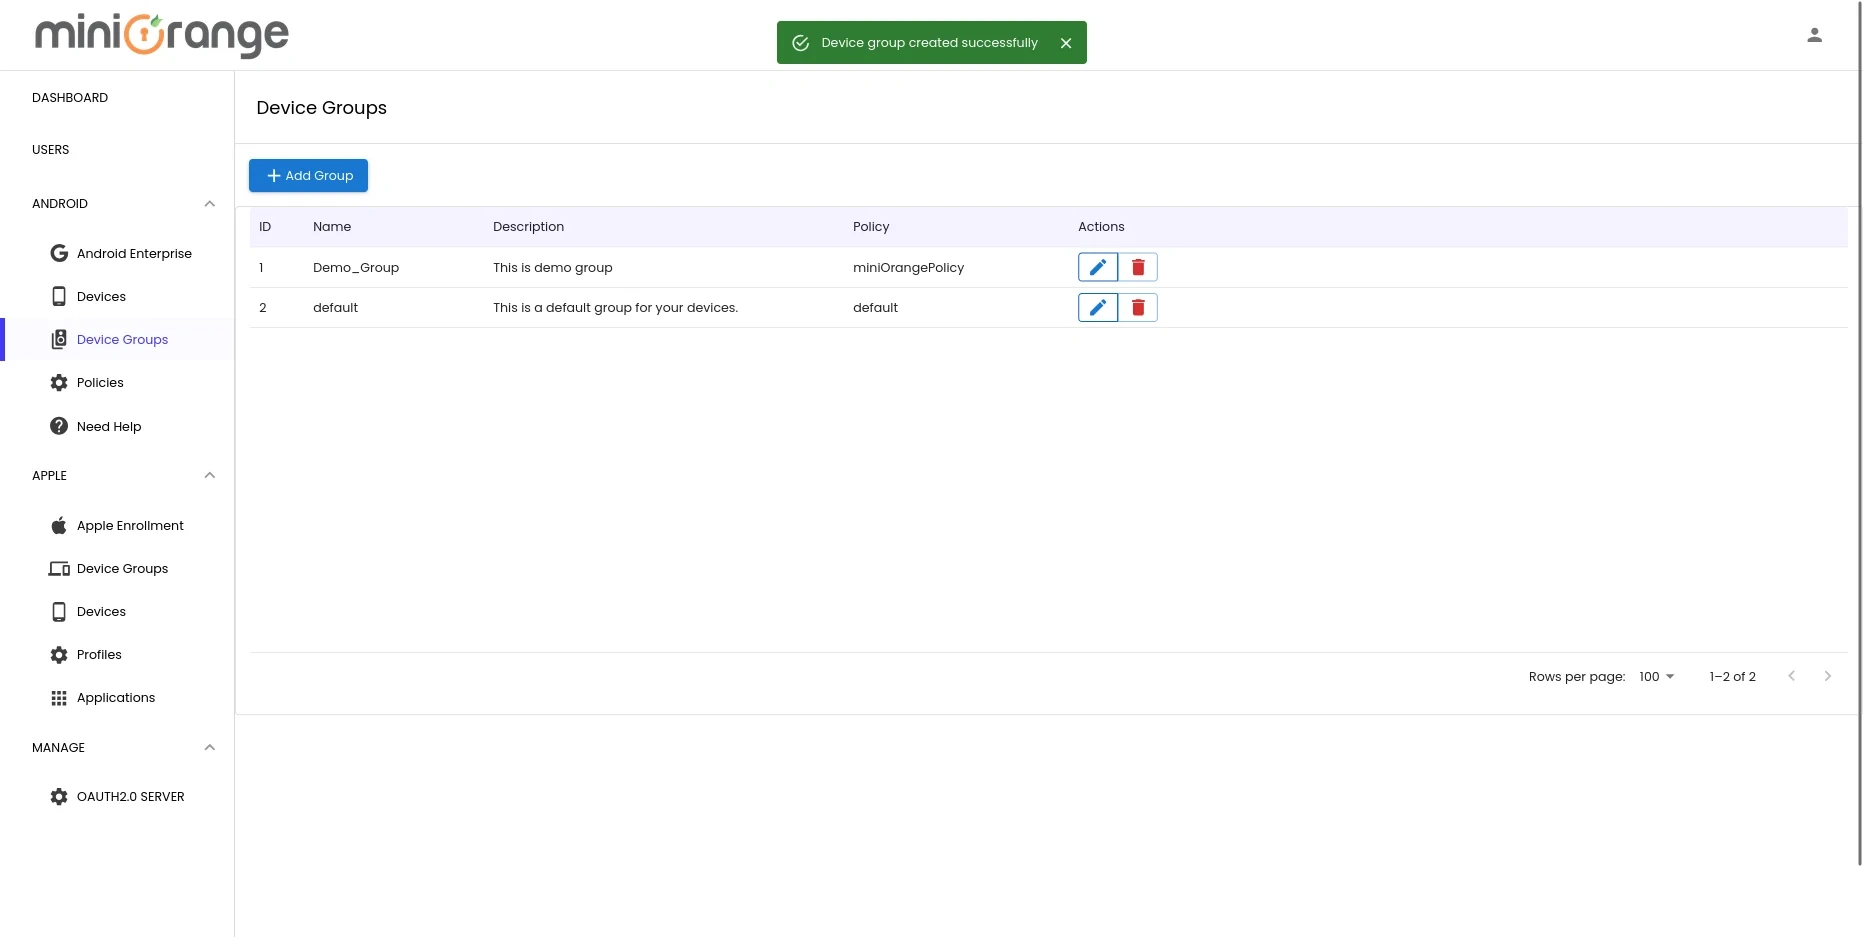
- The device group has now been successfully created.
Step 5: Create Users
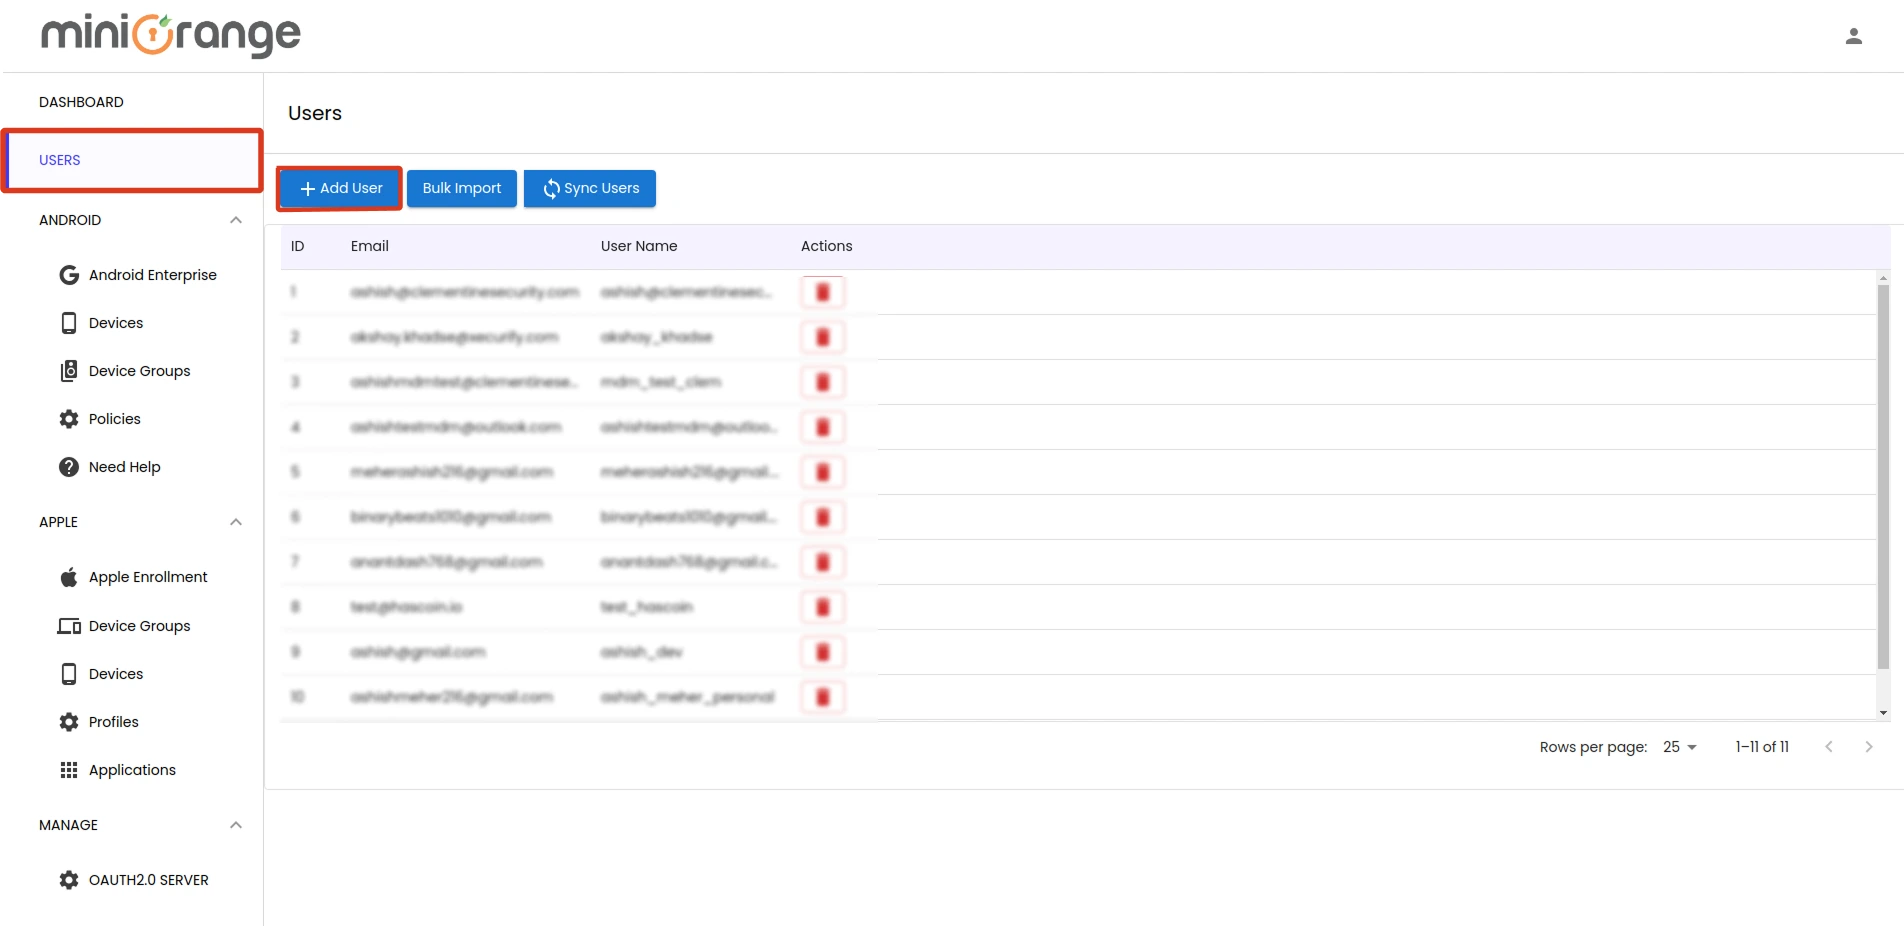
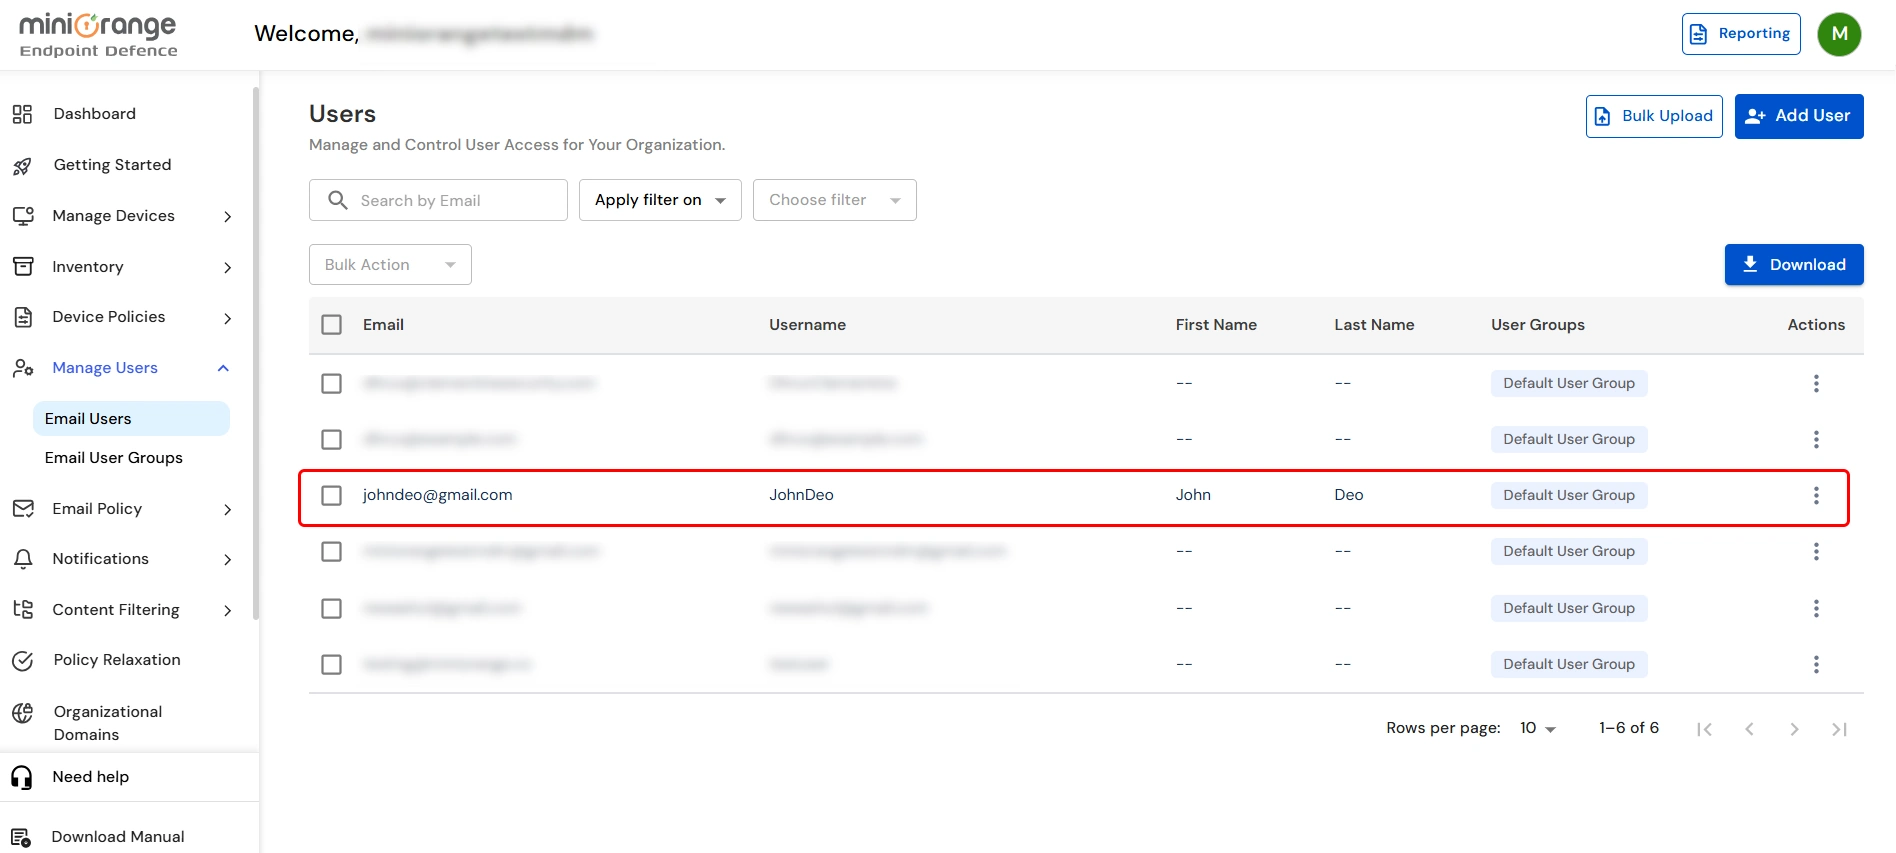
- Now, Go to the Manage Users -> Email Users tab and click on Add User to create a new user.
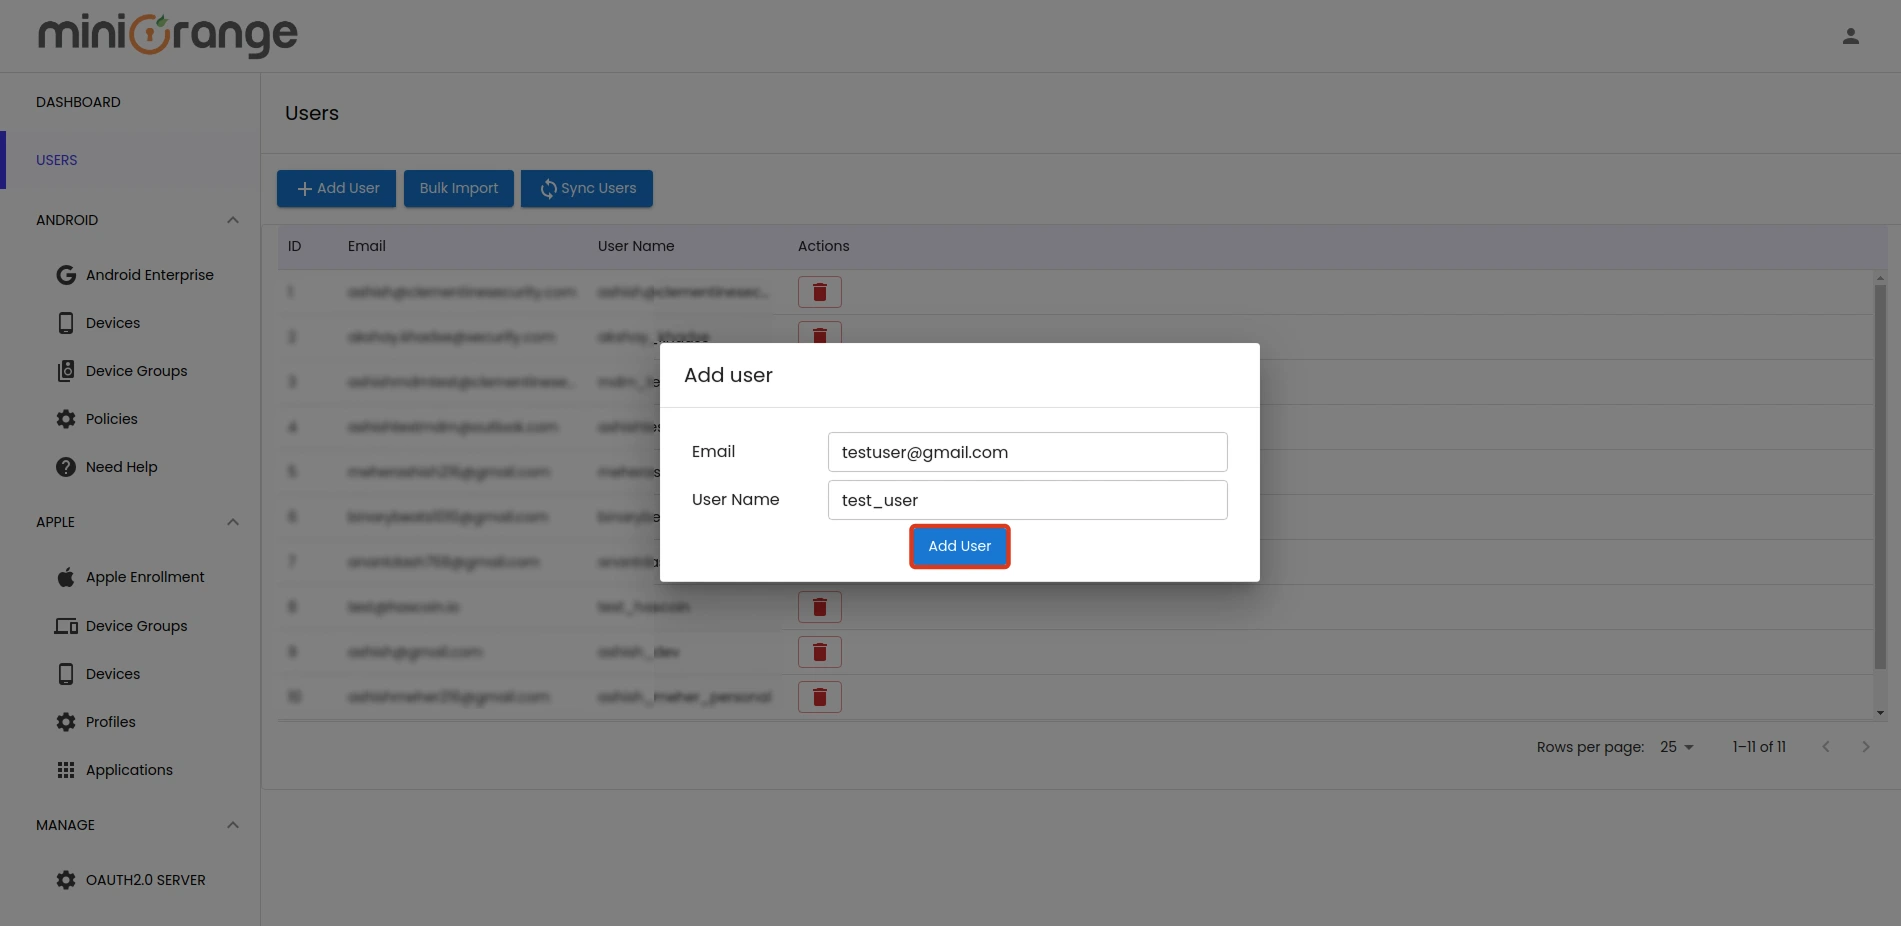
- A form will appear prompting you to enter the first name, last name, email, and username. After filling in the required details, click Add to create the user.
- Bulk Import Users
- For adding multiple users at once, click on the Bulk Upload button.
- Prepare a CSV file with “Email” and “Username” columns. (Click Download Sample File for the correct format.) Then, upload the CSV using the Choose File option and click Upload.
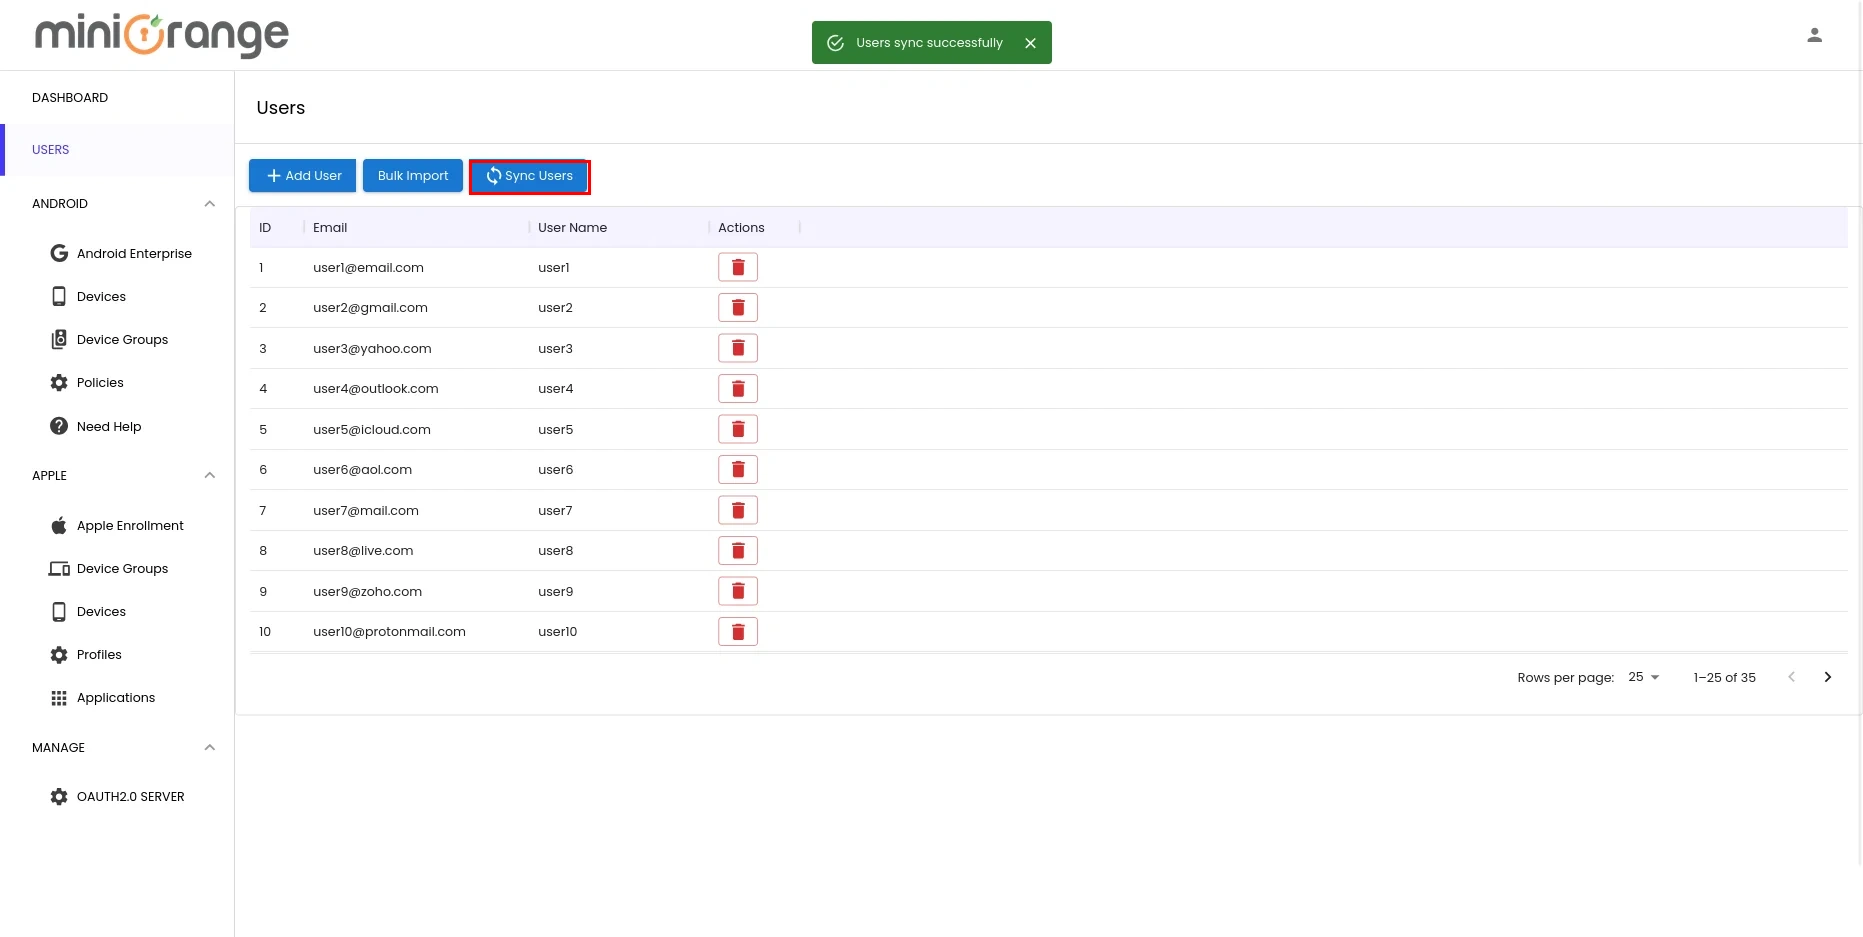
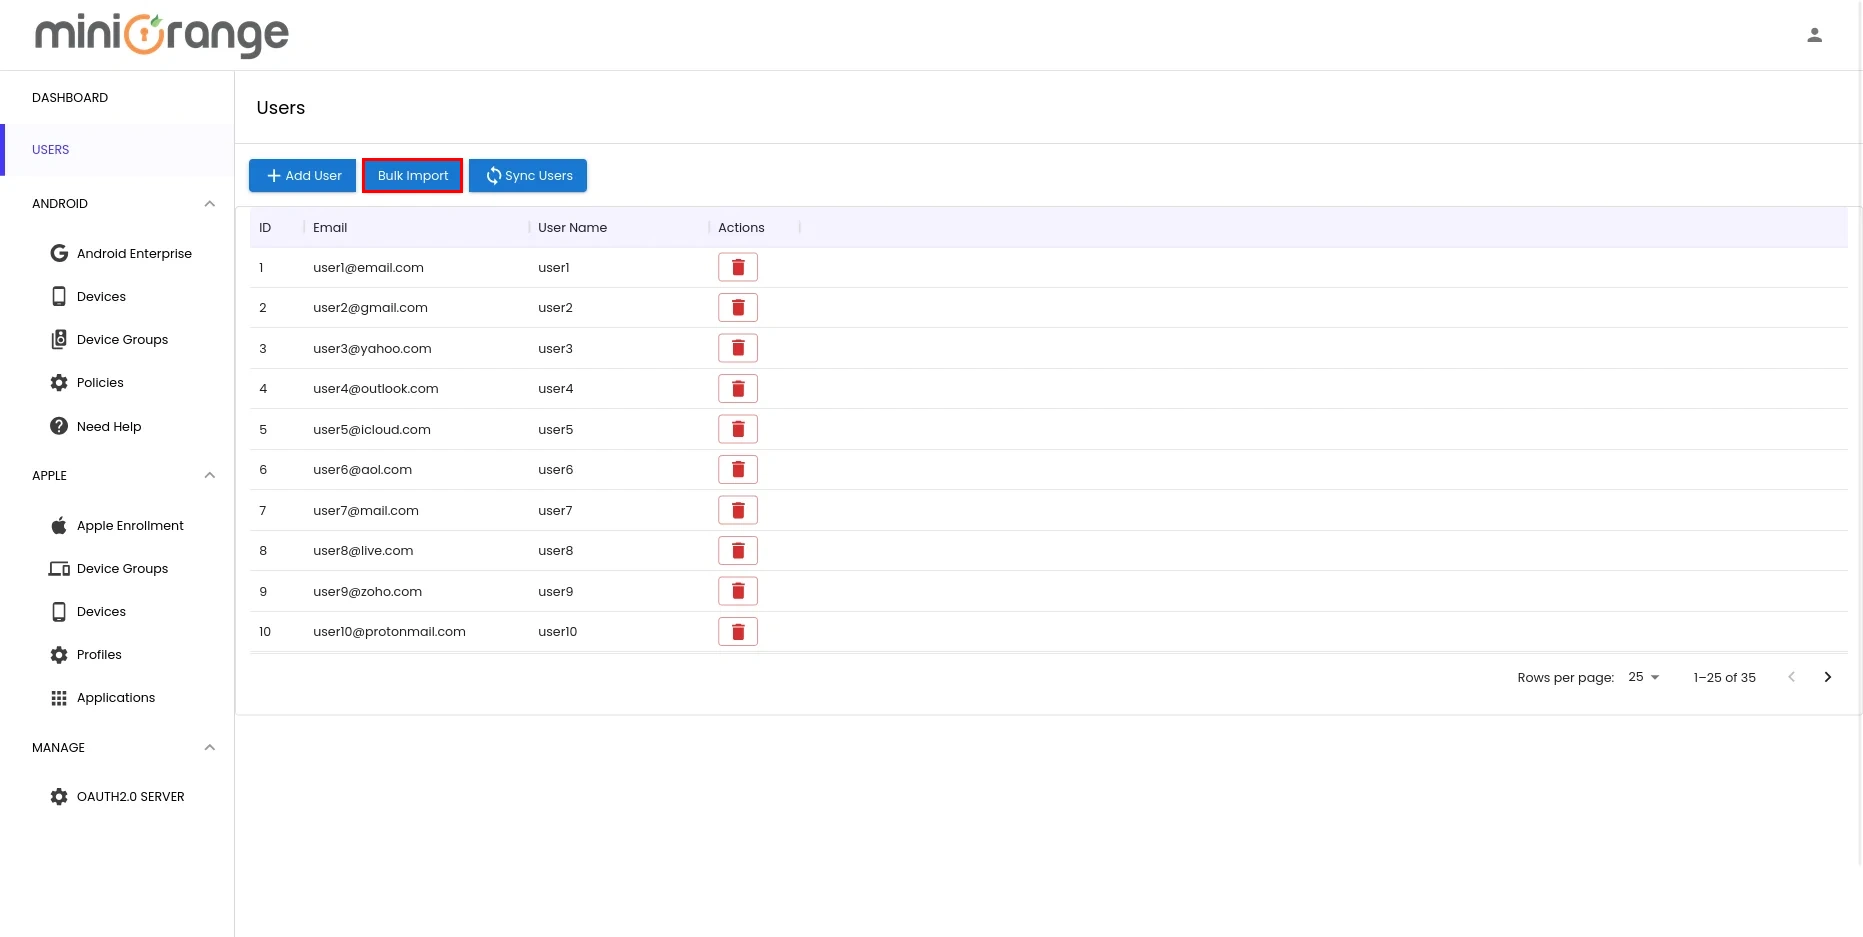
- You can now see that the user has been created successfully.
Step 6: Device Enrollment
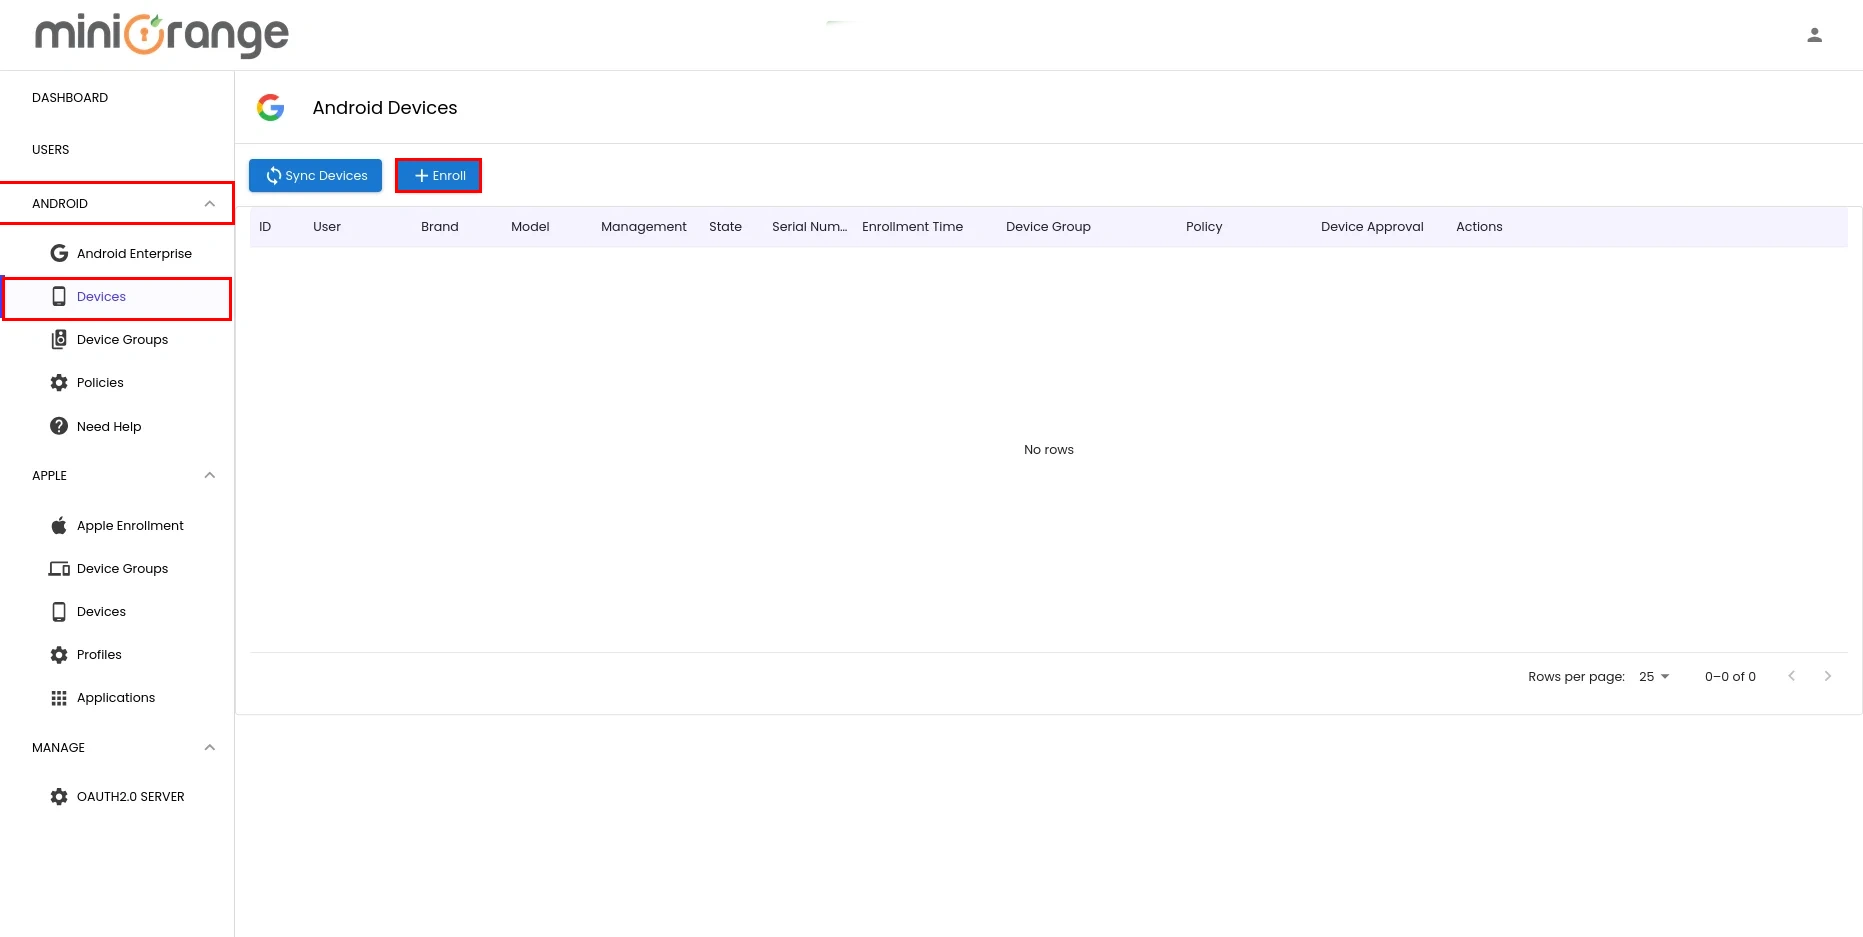
- To enroll devices, go to Manage Devices → Devices → Android and click Enroll Android Devices. You can also use the Bulk Device Enrollment button to enroll multiple devices at once.
- Select the user from the dropdown which you want to send email and Choose device type "Personal" or "Corporate".
- Assign the device to a group from group dropdown.
- Choose enrollment type "By User Invite" or "By Myself".
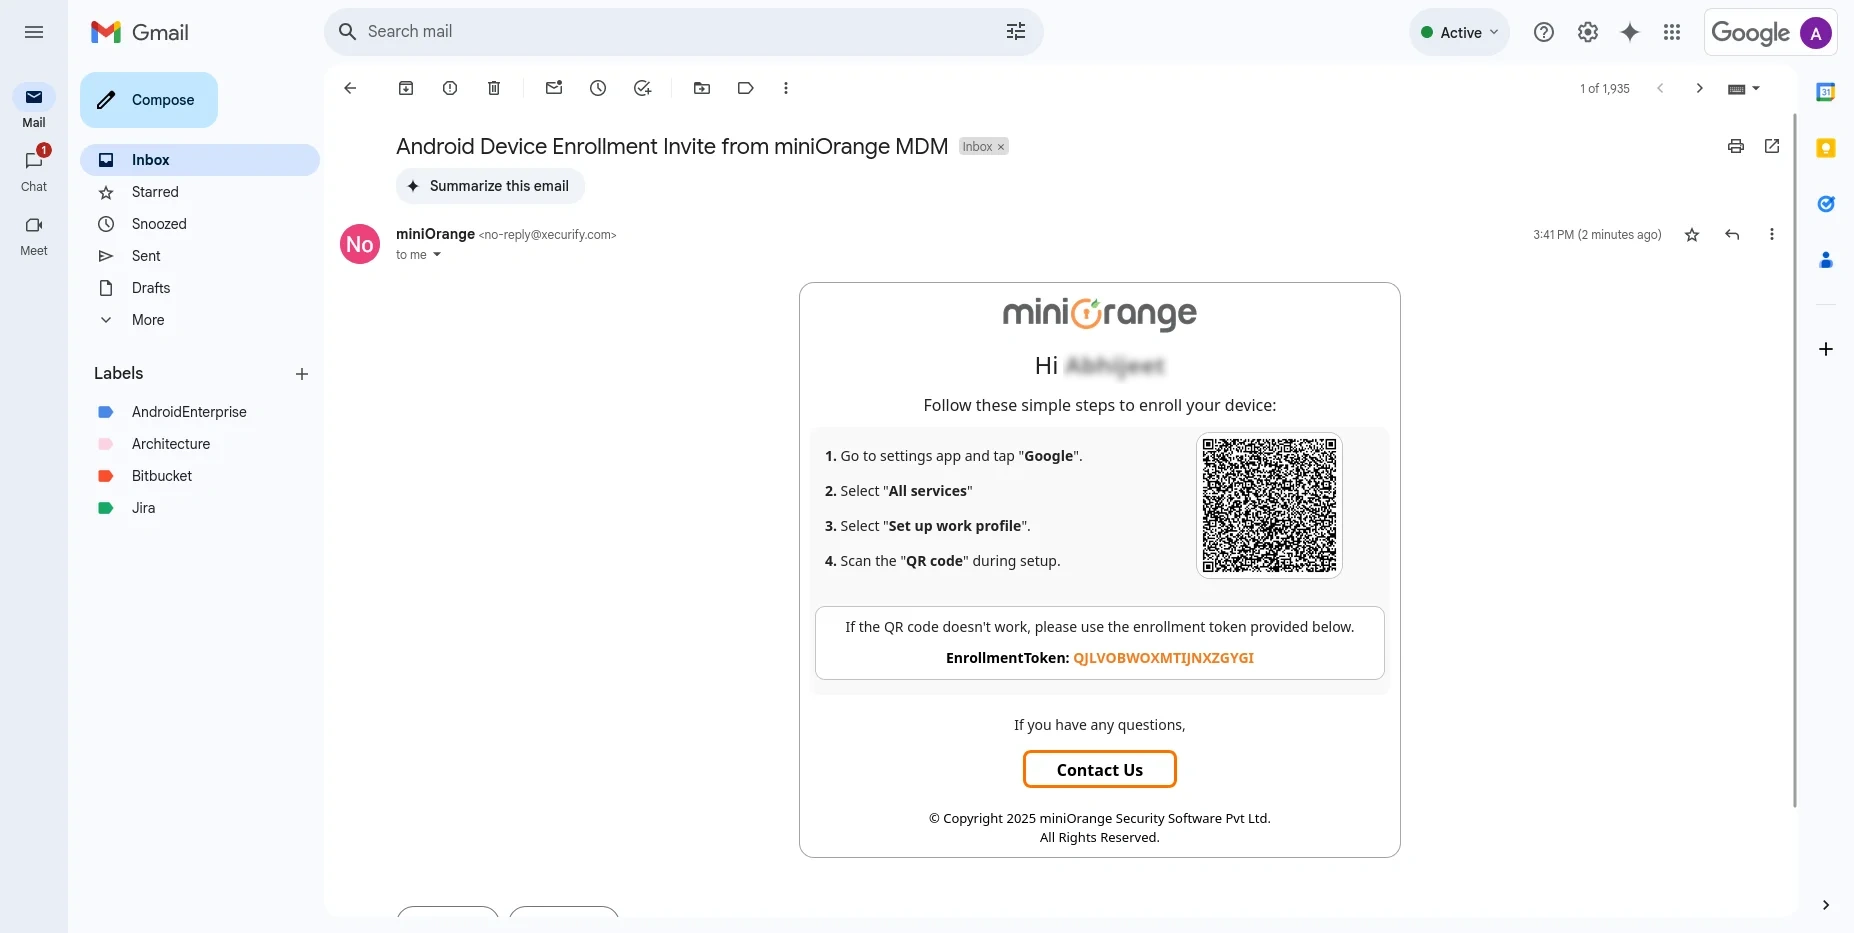
- By User Invite - Send an email with a QR code and an enrollment token with necessary steps to enroll the device.
- By Myself (IT Admin) - IT admin can enroll the device by himself/herself. Details are shown on the screen along with the steps to enroll.
- Click the Send Enrollment Email button.

- The user will get the enrollment email with a QR code, enrollment link in the following format.
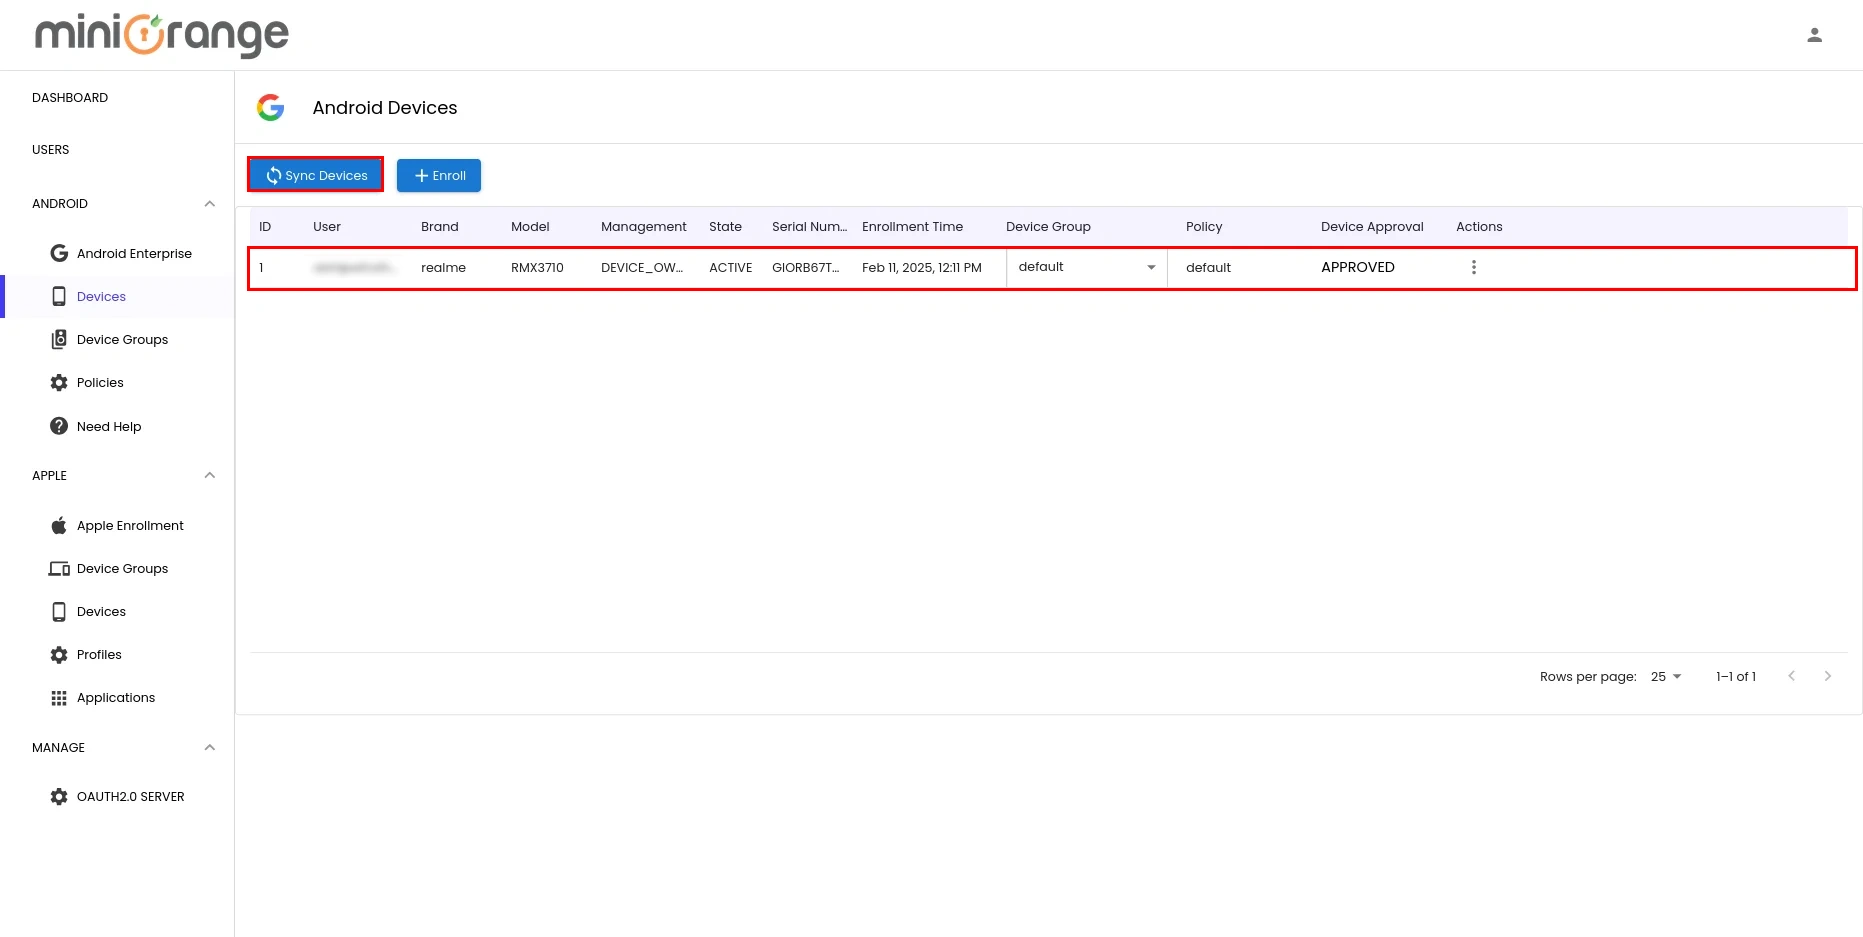
- Click on the sync devices button. The list of enrolled devices will appear in the same tab, as shown below.
Step 7: Enroll the Mobile Device
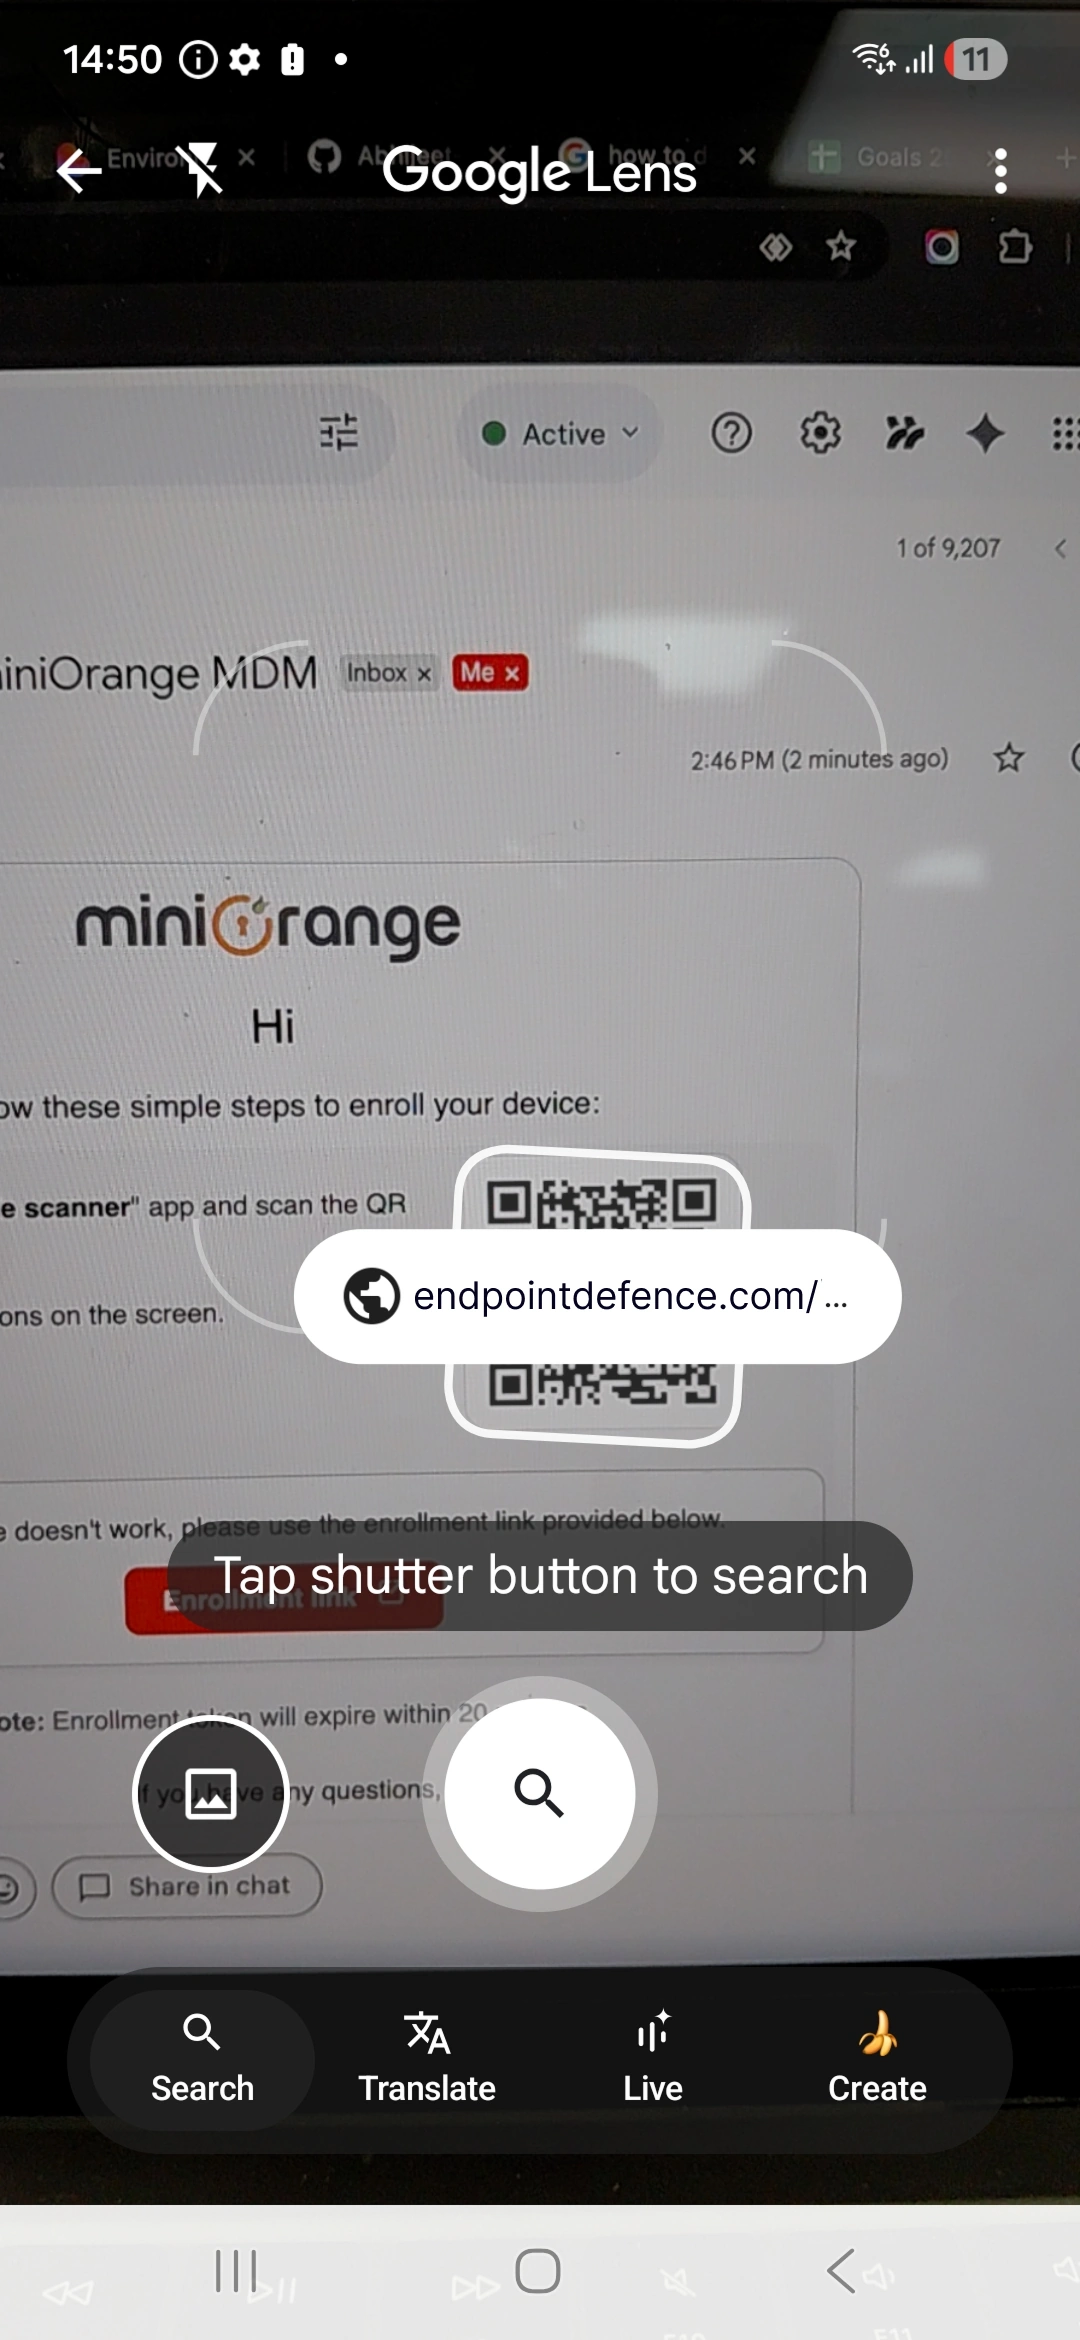
- On your mobile device, open any QR code scanner app and scan the QR code. After scanning, tap the link that appears to proceed. (If the QR code does not work, use the “Enrollment link” provided in the email.)
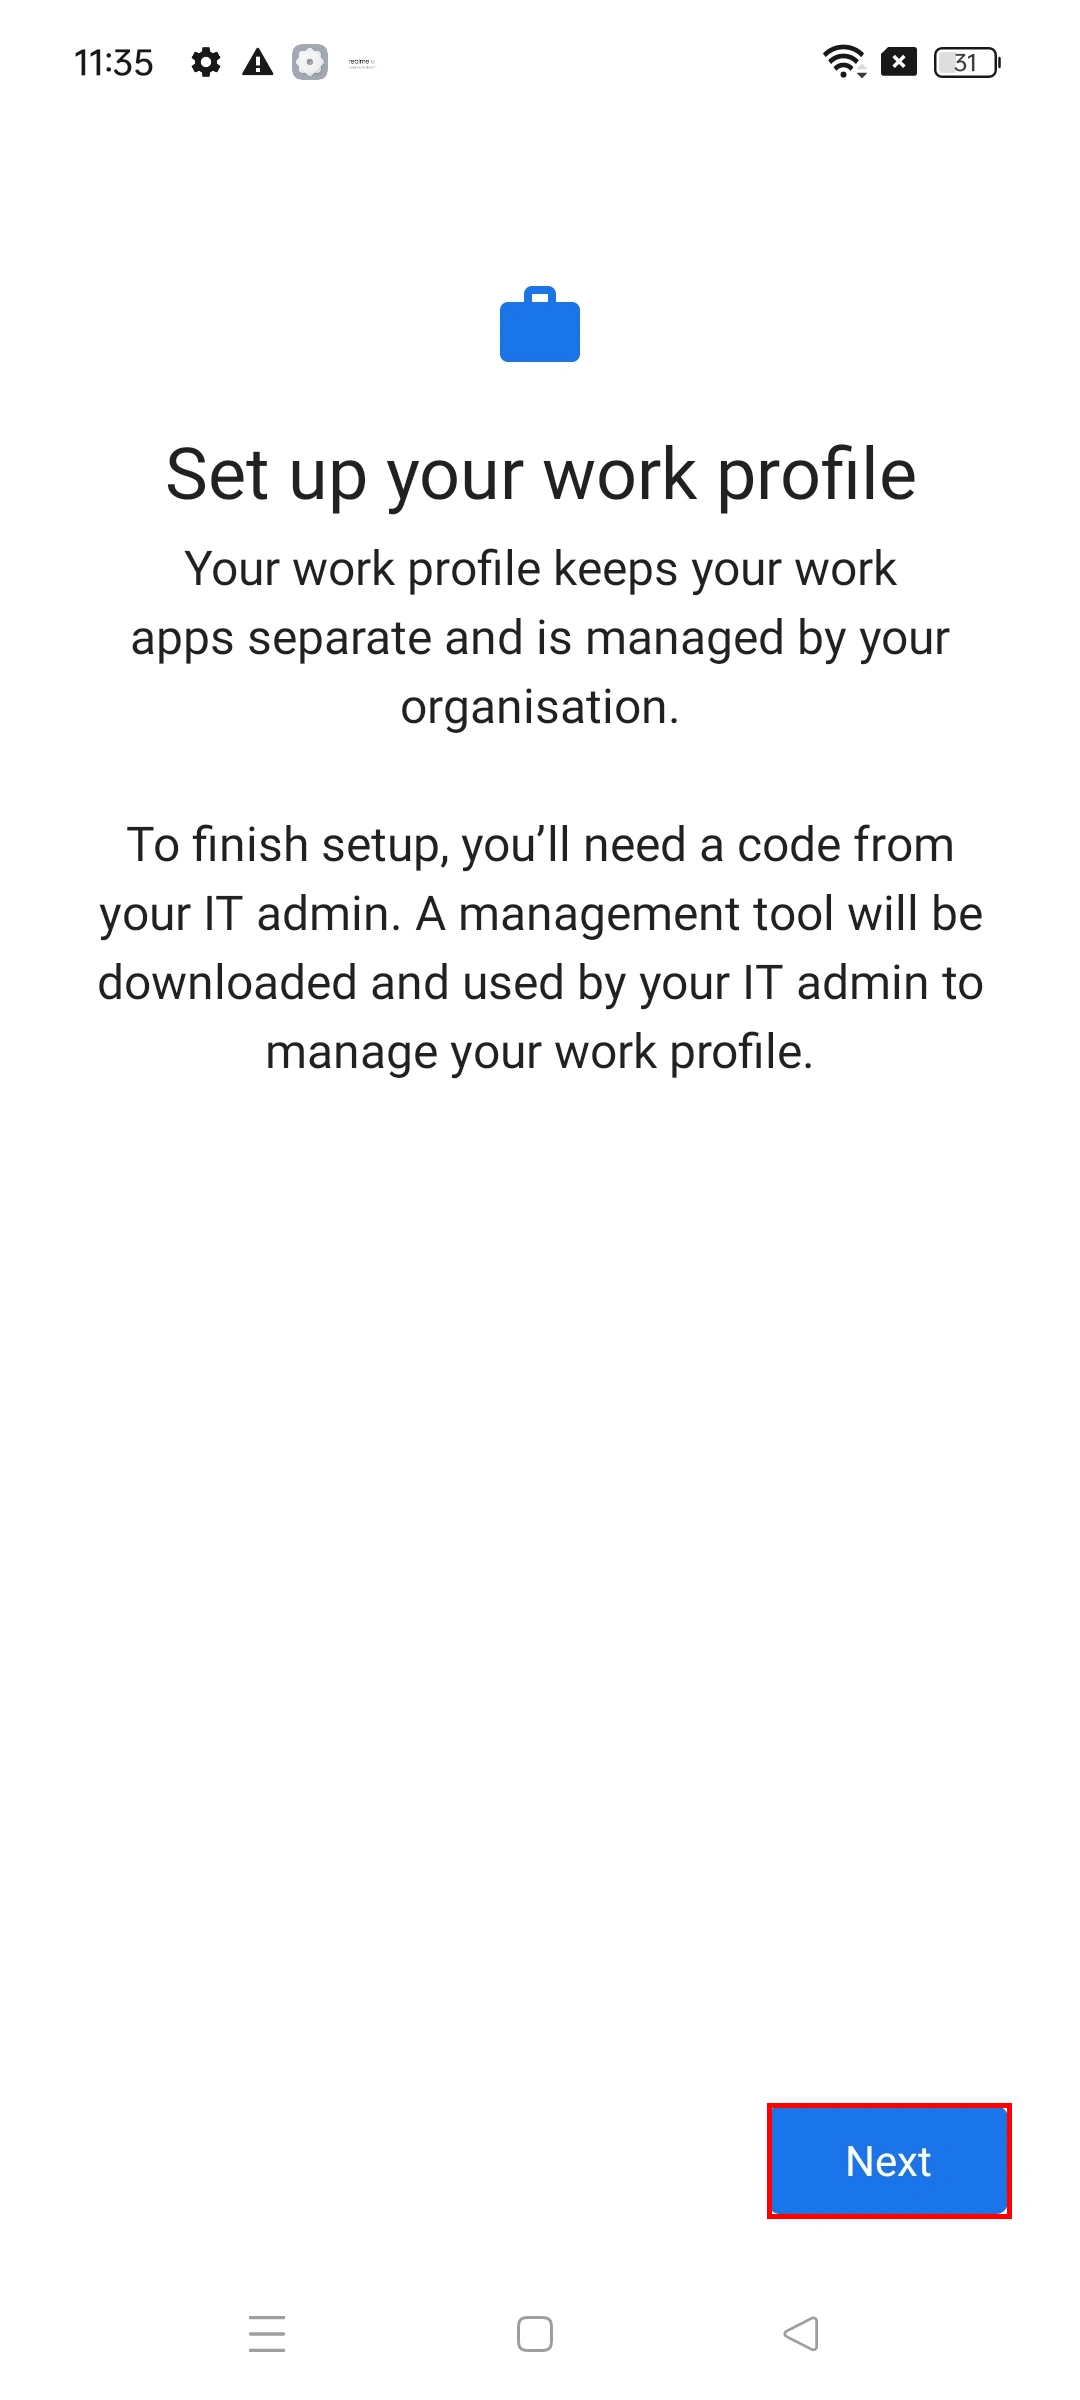
- You will see the screen below. Click Next to continue.
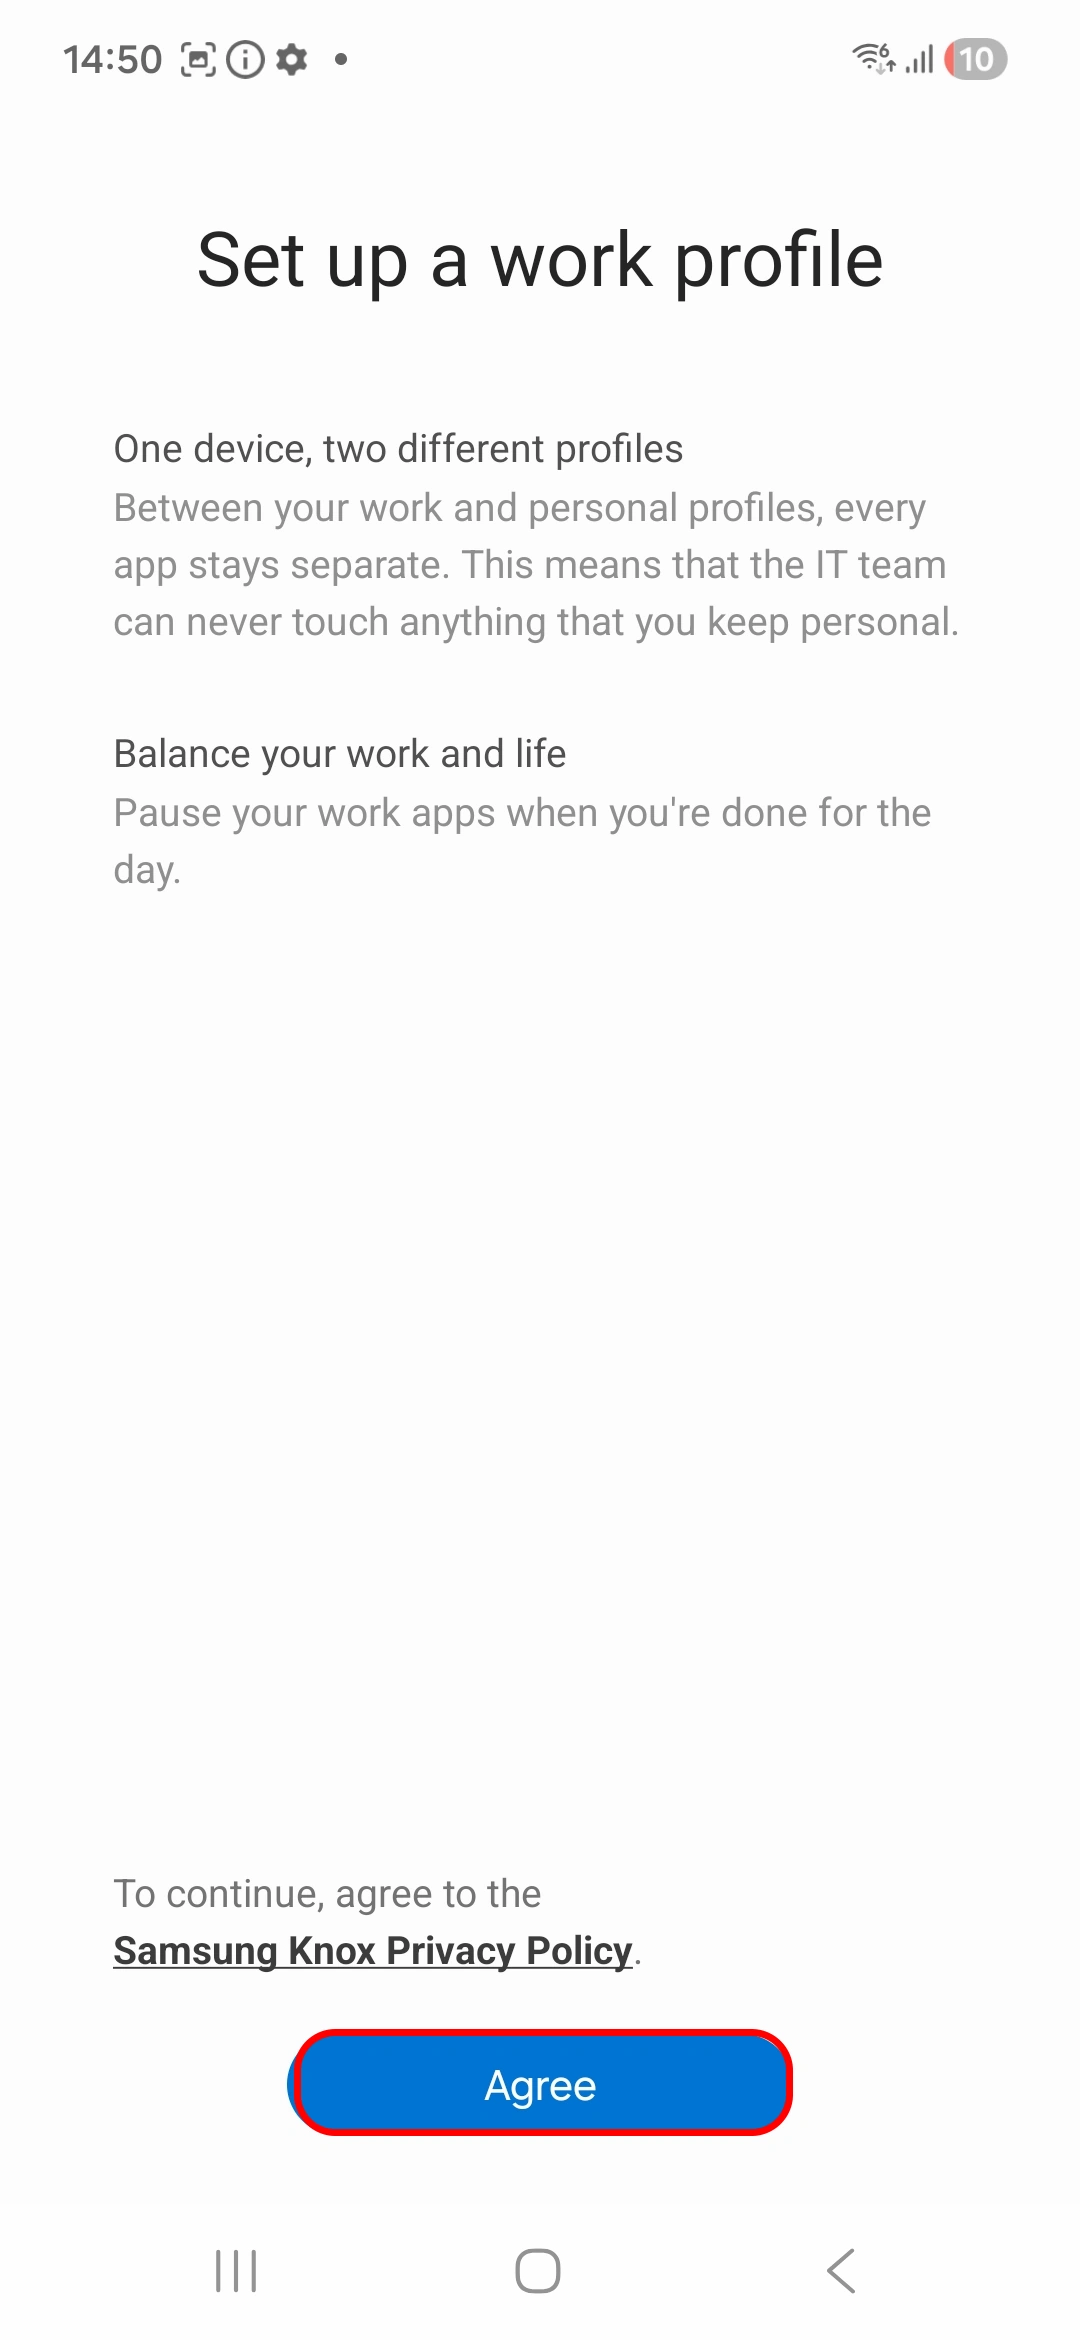
- Click on Agree.
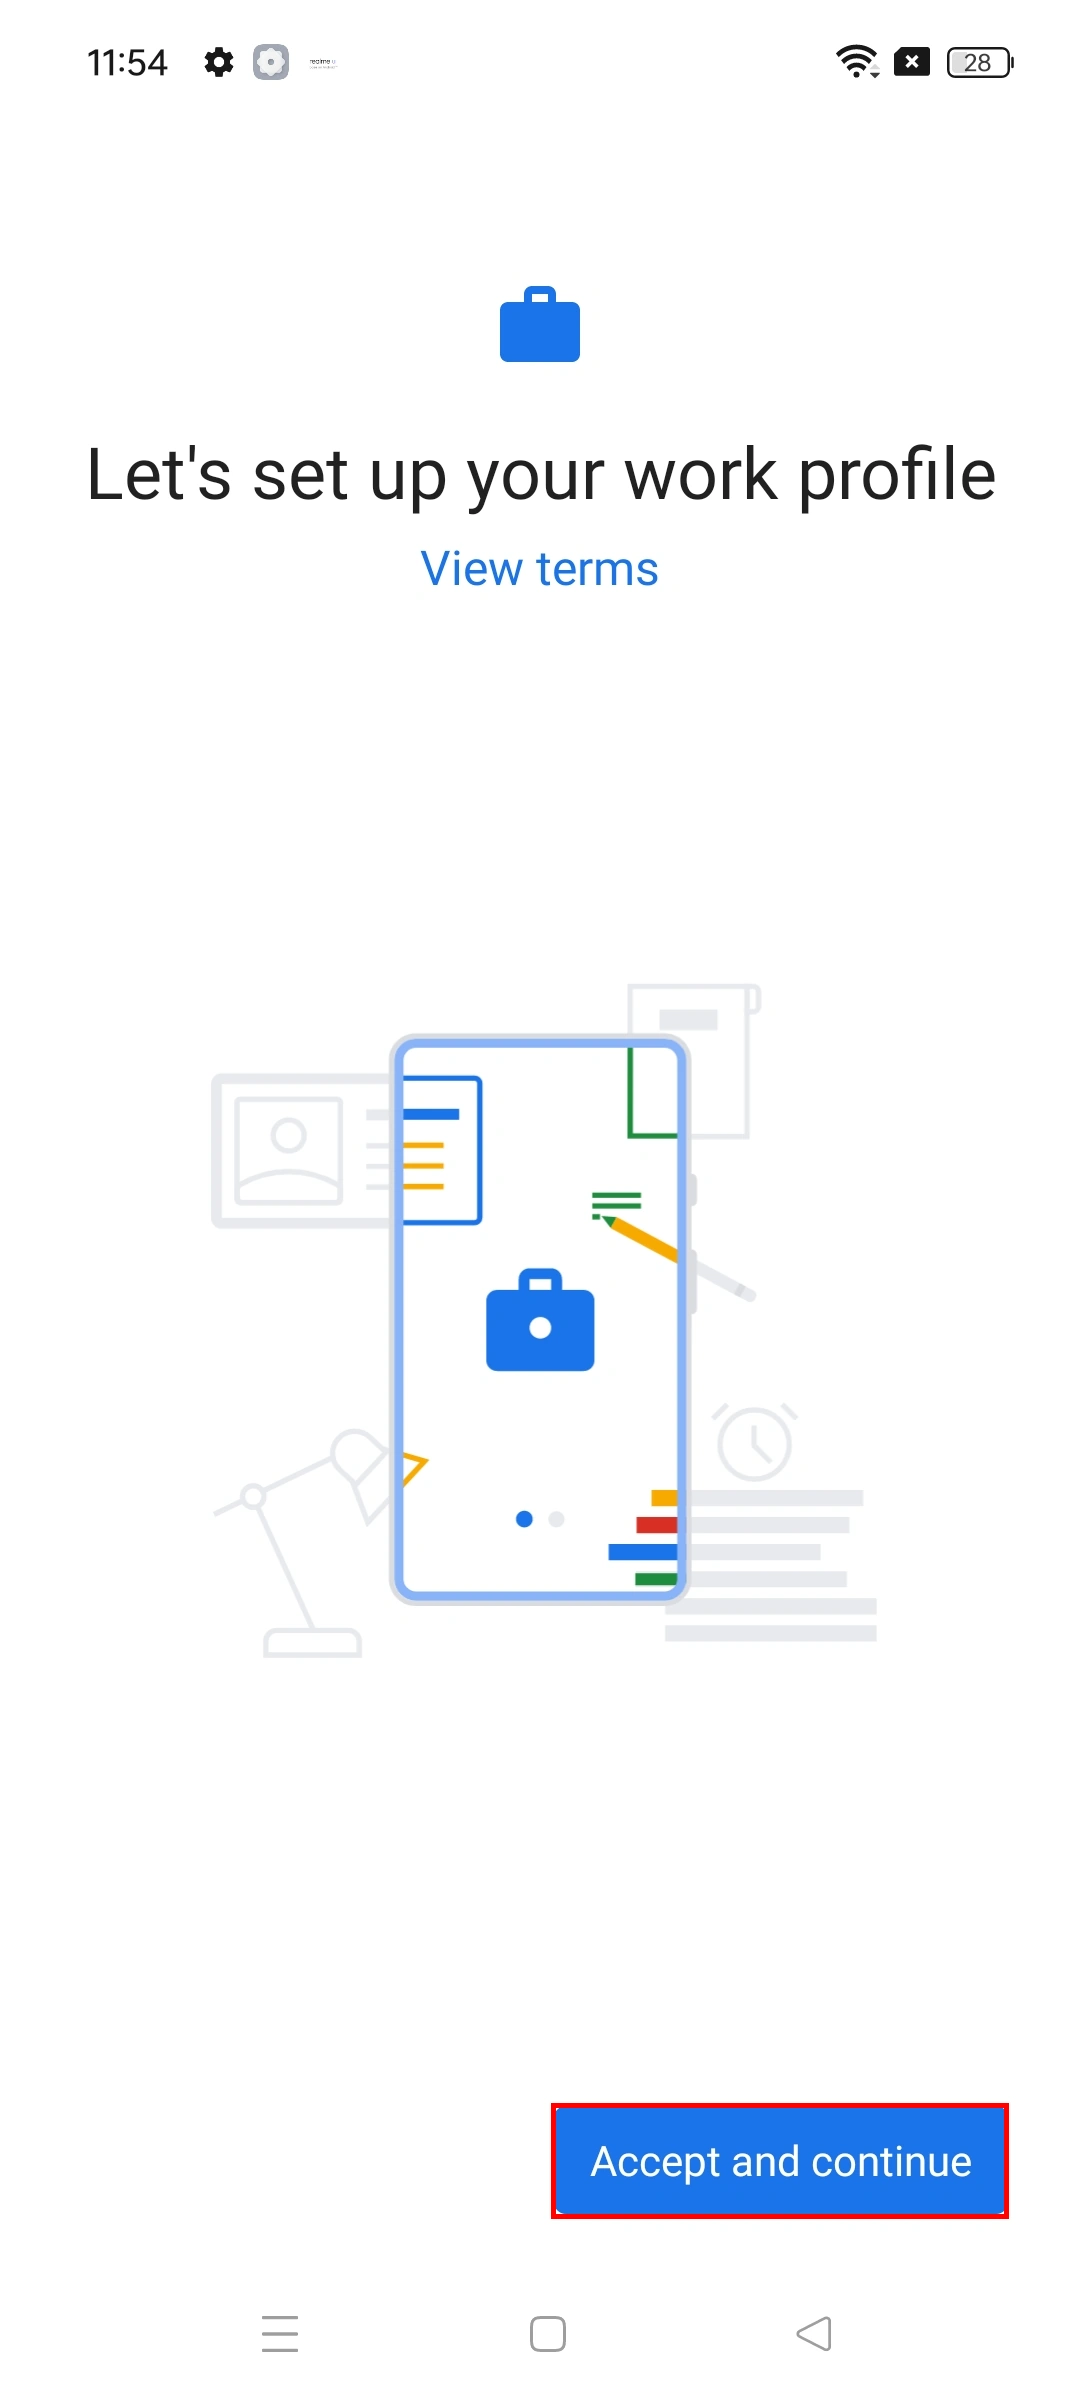
- Click on Accept and continue after scanning the QR code.
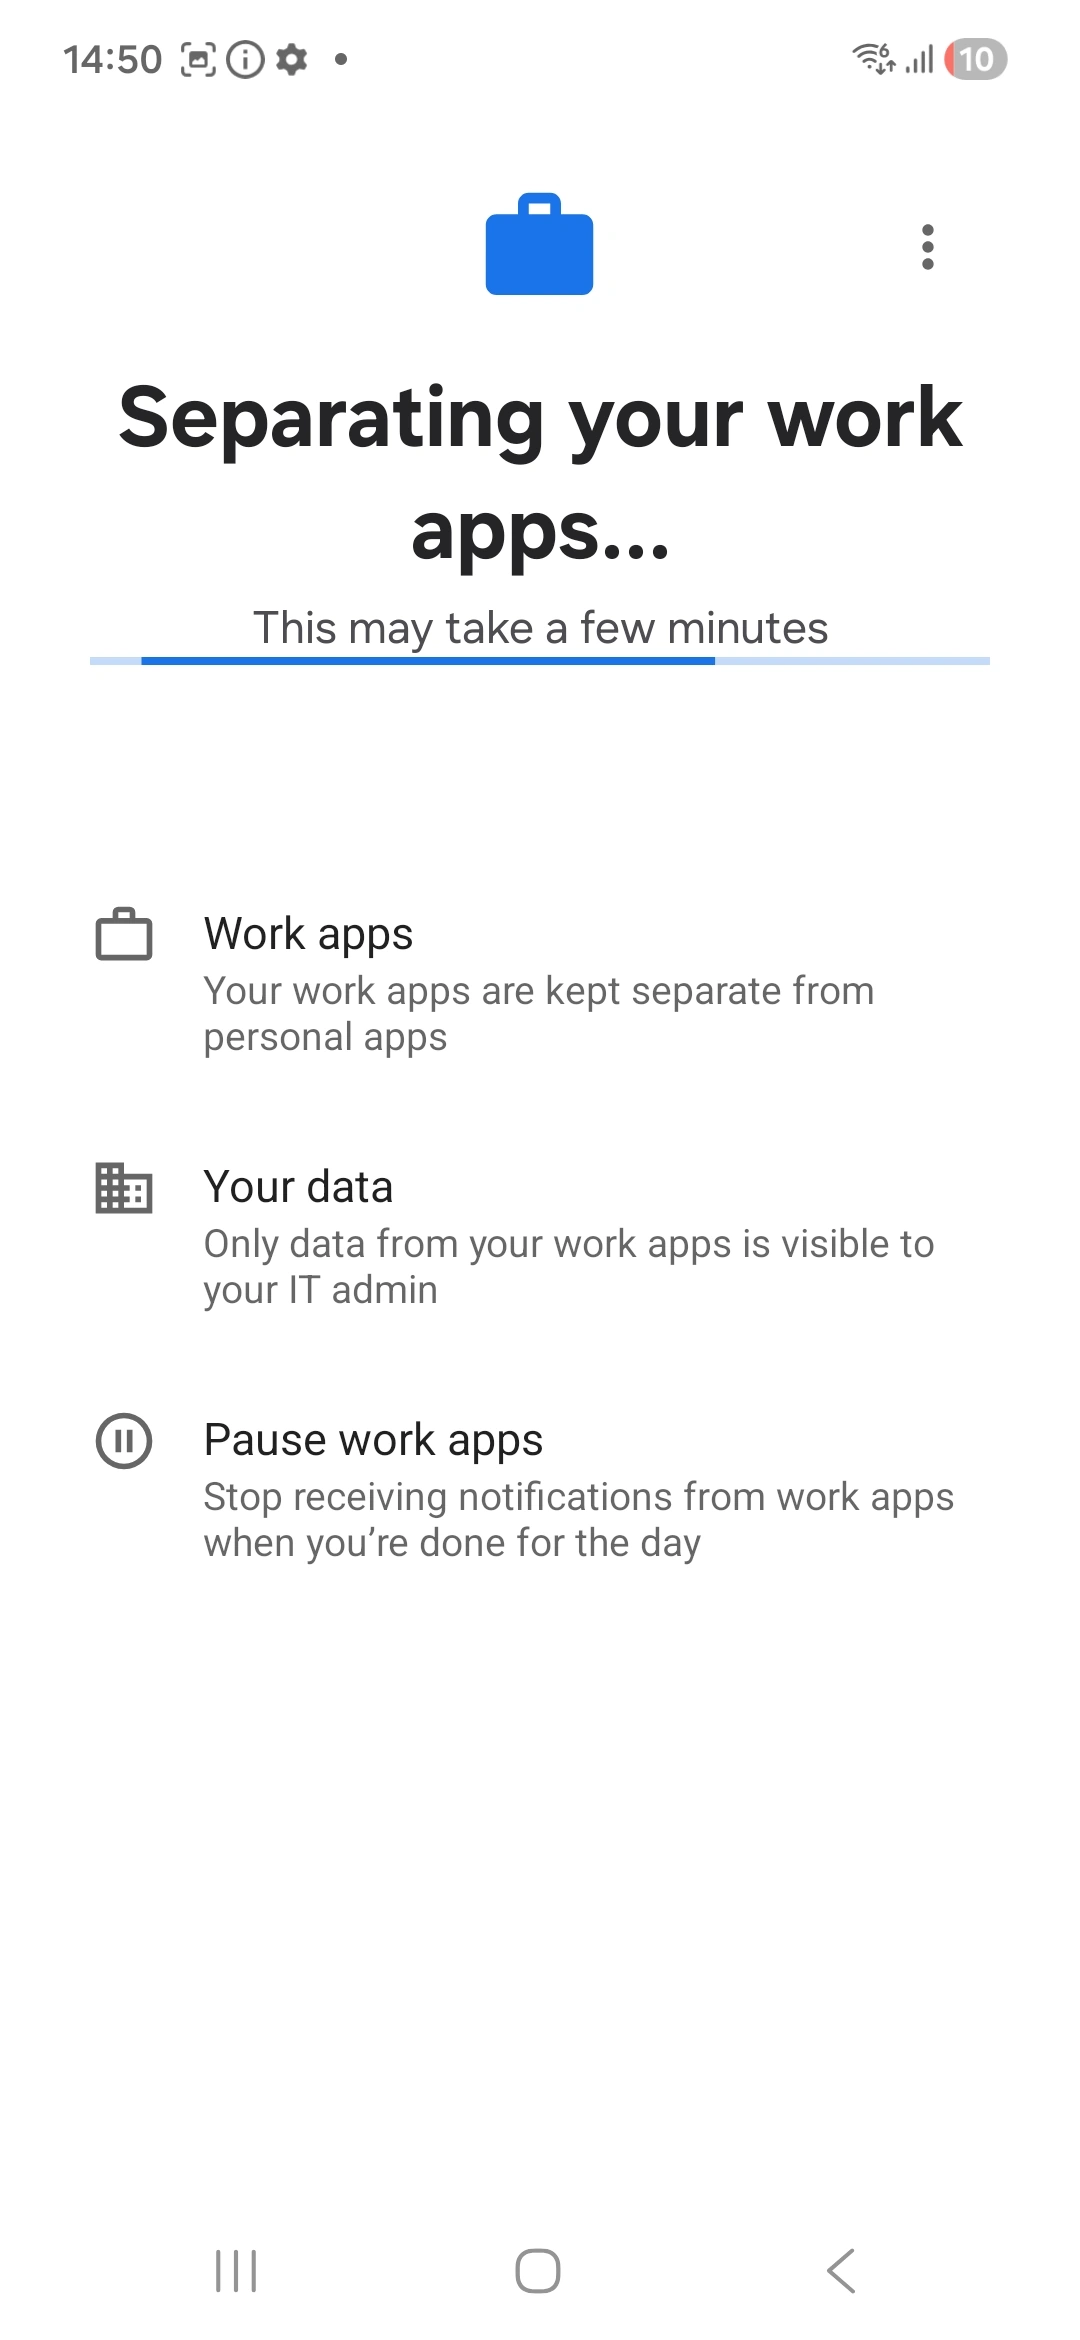
- Once accepted, a work profile will be created on your device, and your work apps will begin installing within the work profile. This process may take a few minutes.
- You will now see a separate work container on your device for your work apps and data.
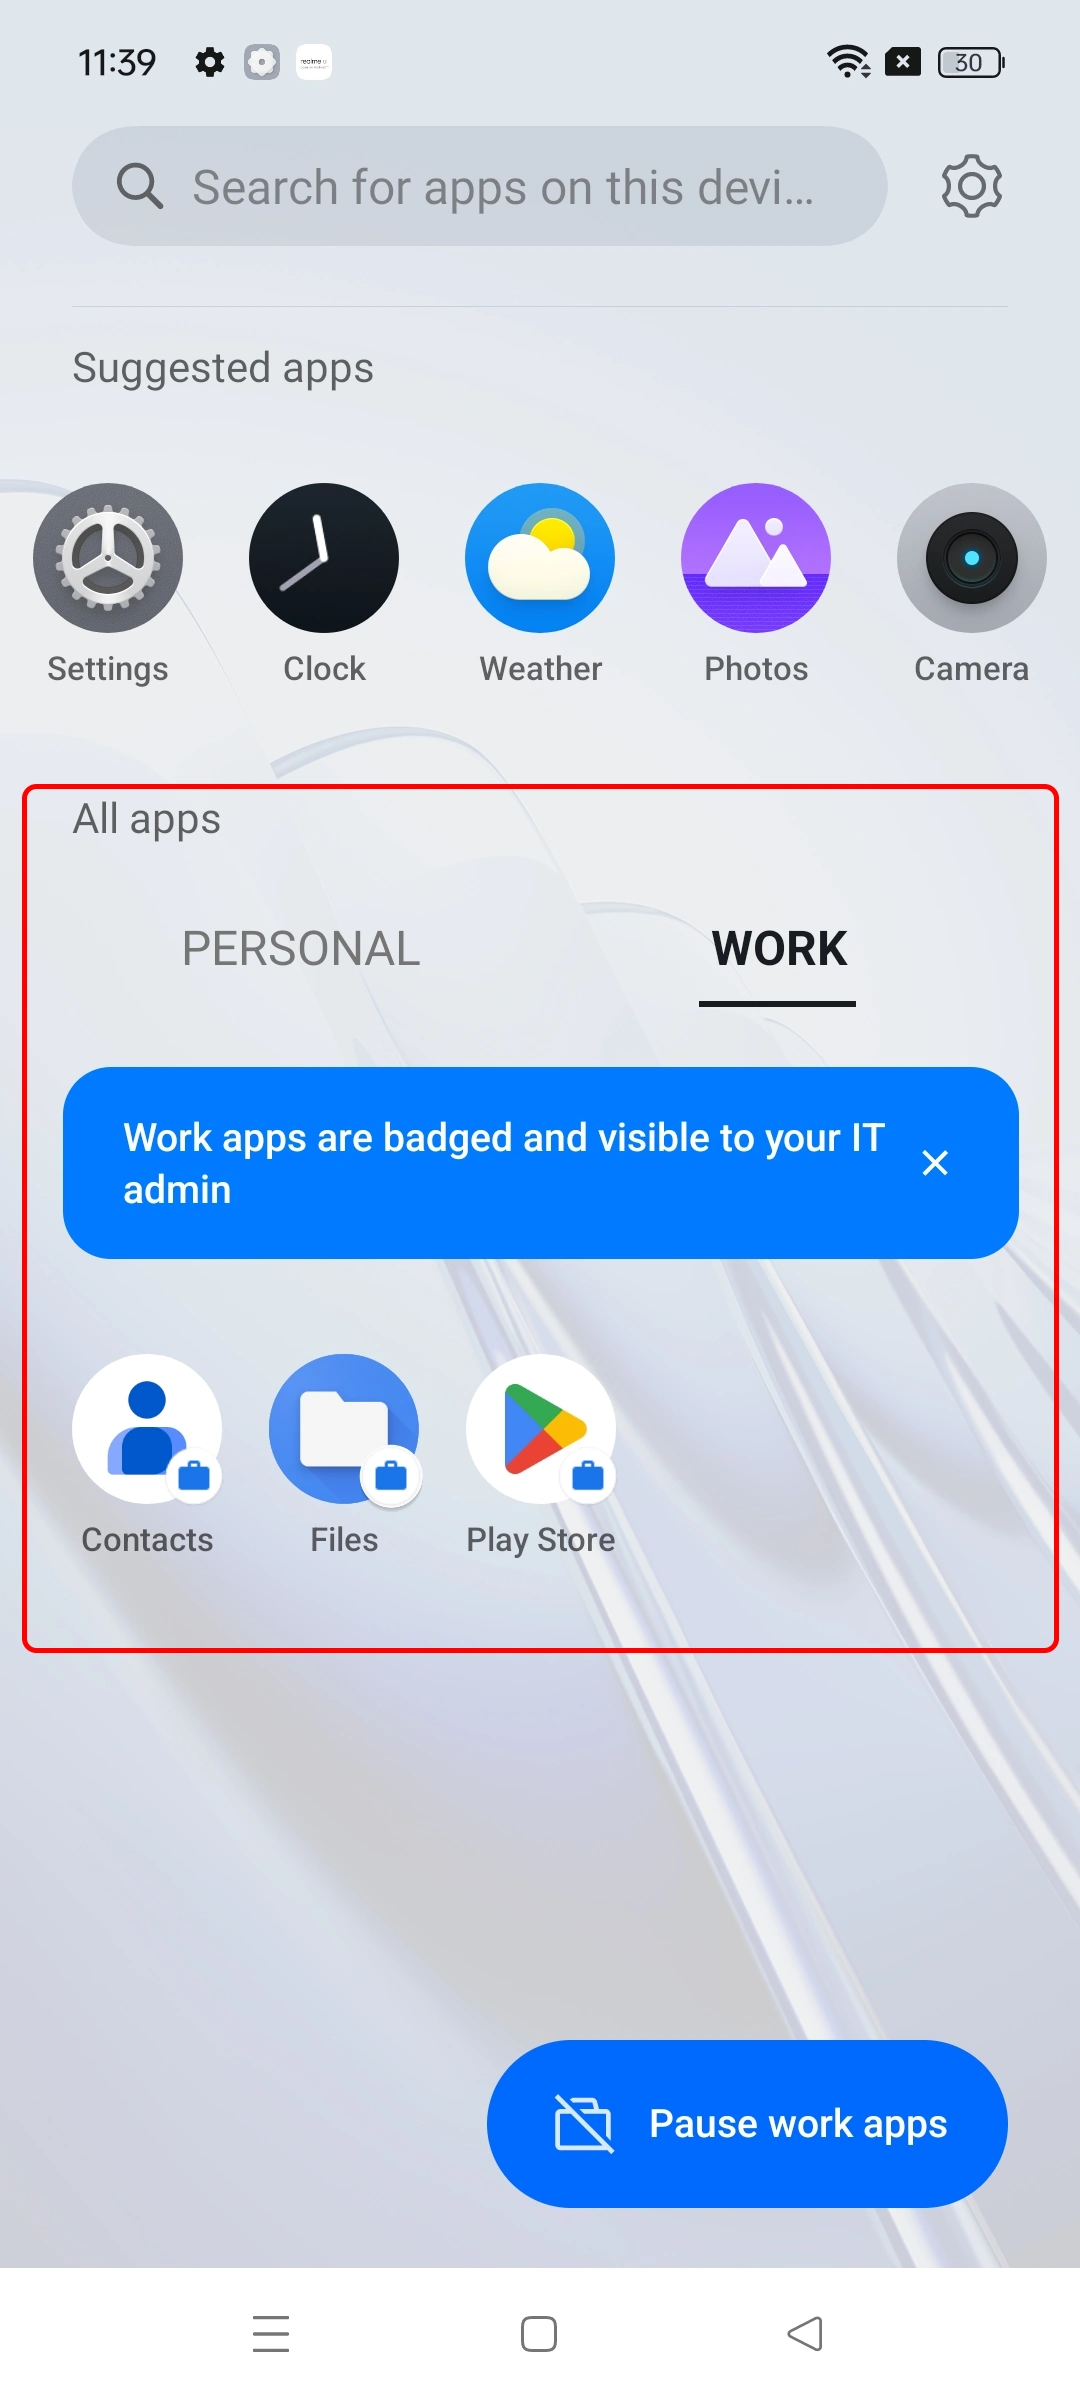
- Your Android device has been successfully configured with the MDM solution.
Note:
If you are getting the “Can’t Add Work Profile” issue, please follow the steps in this
FAQ to resolve the problem or
you can also reach out to us at
uemsupport@xecurify.com for quick assistance.
External References
miniOrange unified endpoint management offers a wide variety of security features with flexible scalability, all available at the most affordable price to all types of businesses. Start by signing up now!