- Home
- DLP
- Guide for Configuring website Policy
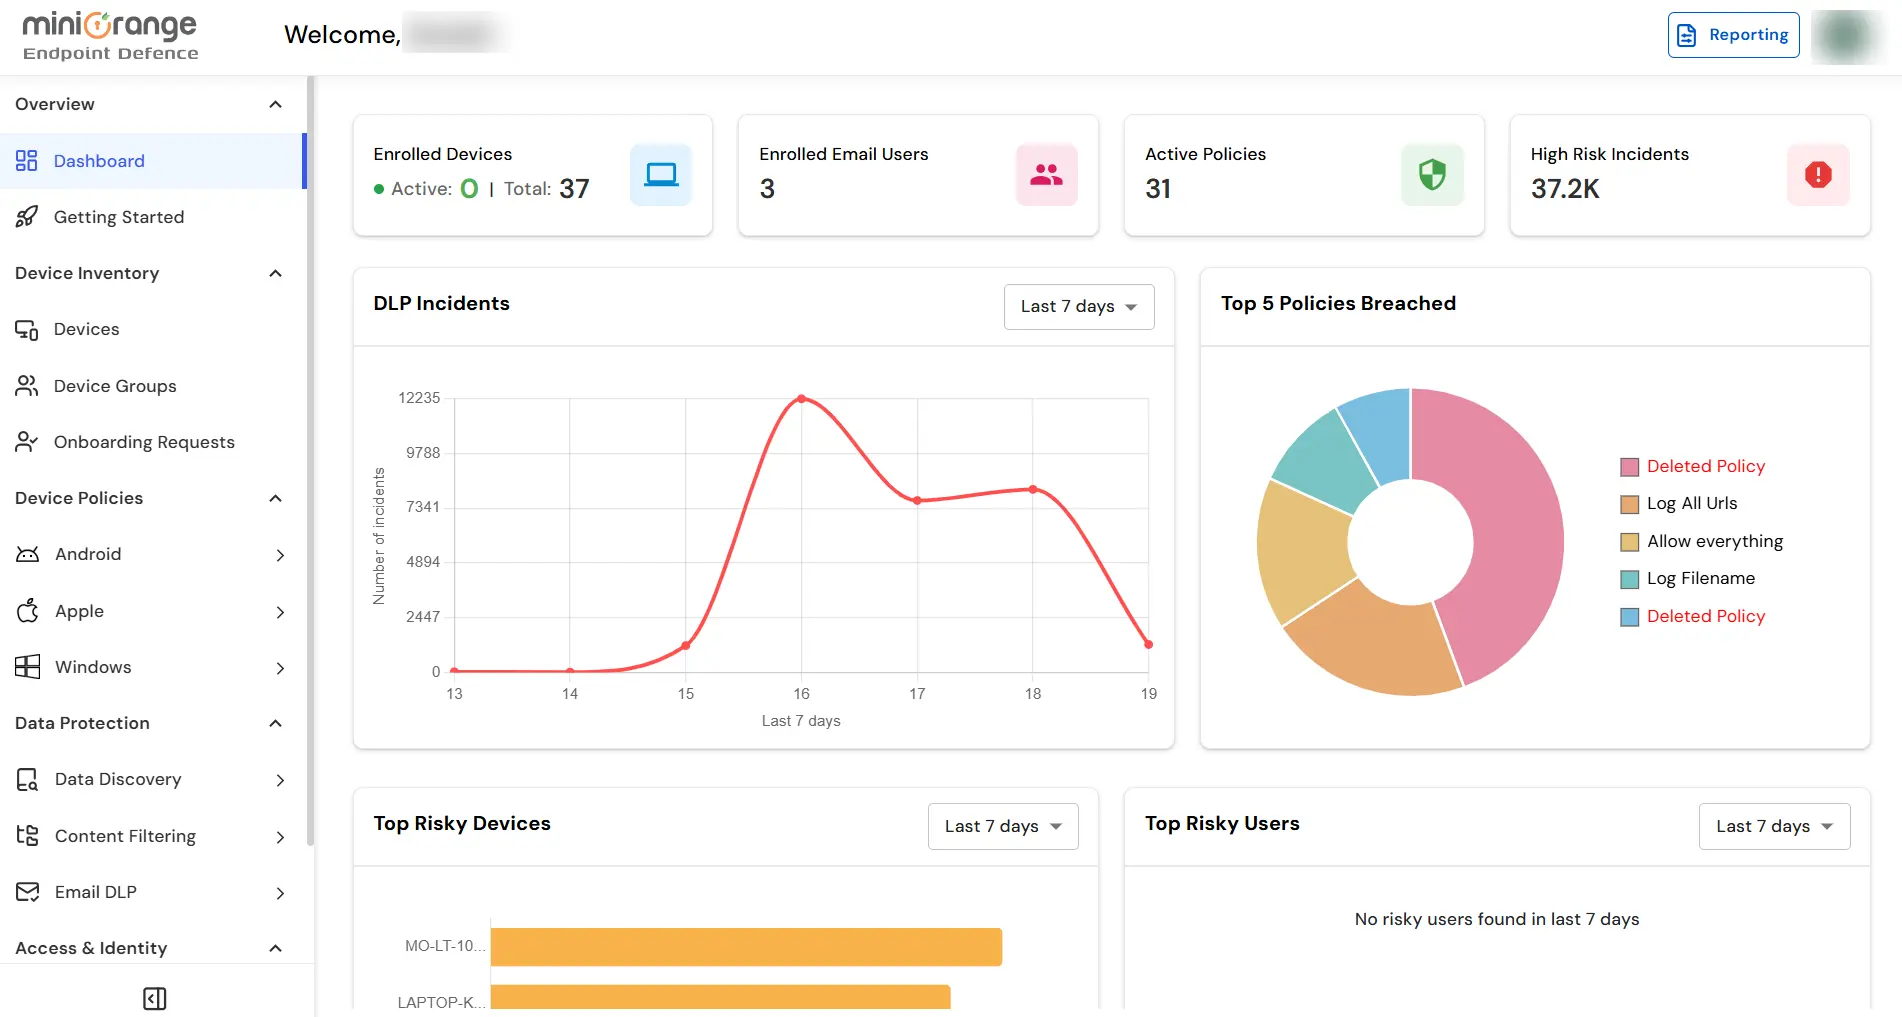
Configure DLP solution for Domain Blocking and Data Protection
This guide explains how to configure the DLP solution for domain blocking and website policy creation to prevent data breaches. The Categories and Domains tab enables restricting access to approved websites, reducing exposure to malicious sites. Admins can set up policies to block the upload of sensitive data, minimizing breach risks. These policies can be tailored by website type or data category, ensuring they meet security standards while allowing flexibility. This approach strengthens data protection and compliance through controlled web access and sensitive data handling.
Prerequisites
Step 1: Steps to configure Website Policy
- Sign in to your DLP dashboard.
- On the dashboard, navigate to the left menu panel and then click on Windows Tab → Websites tab. Then click on Add Policy button.
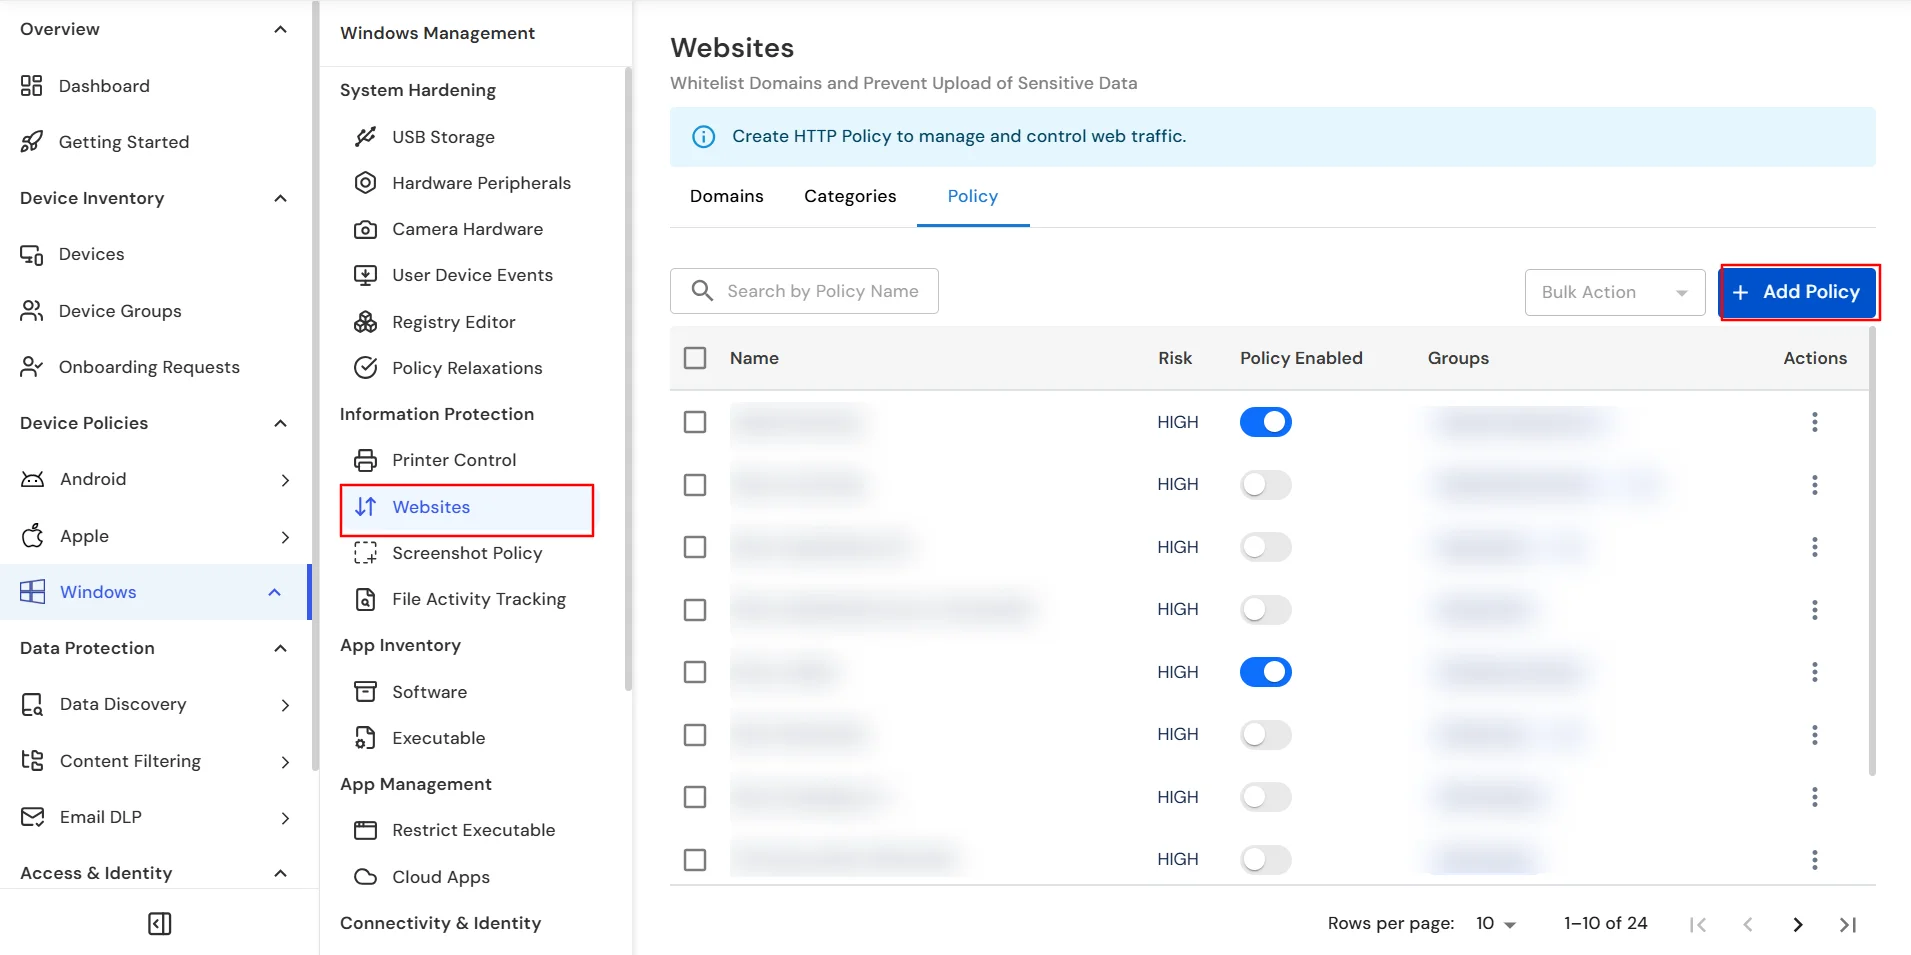
- Click on the General tab.
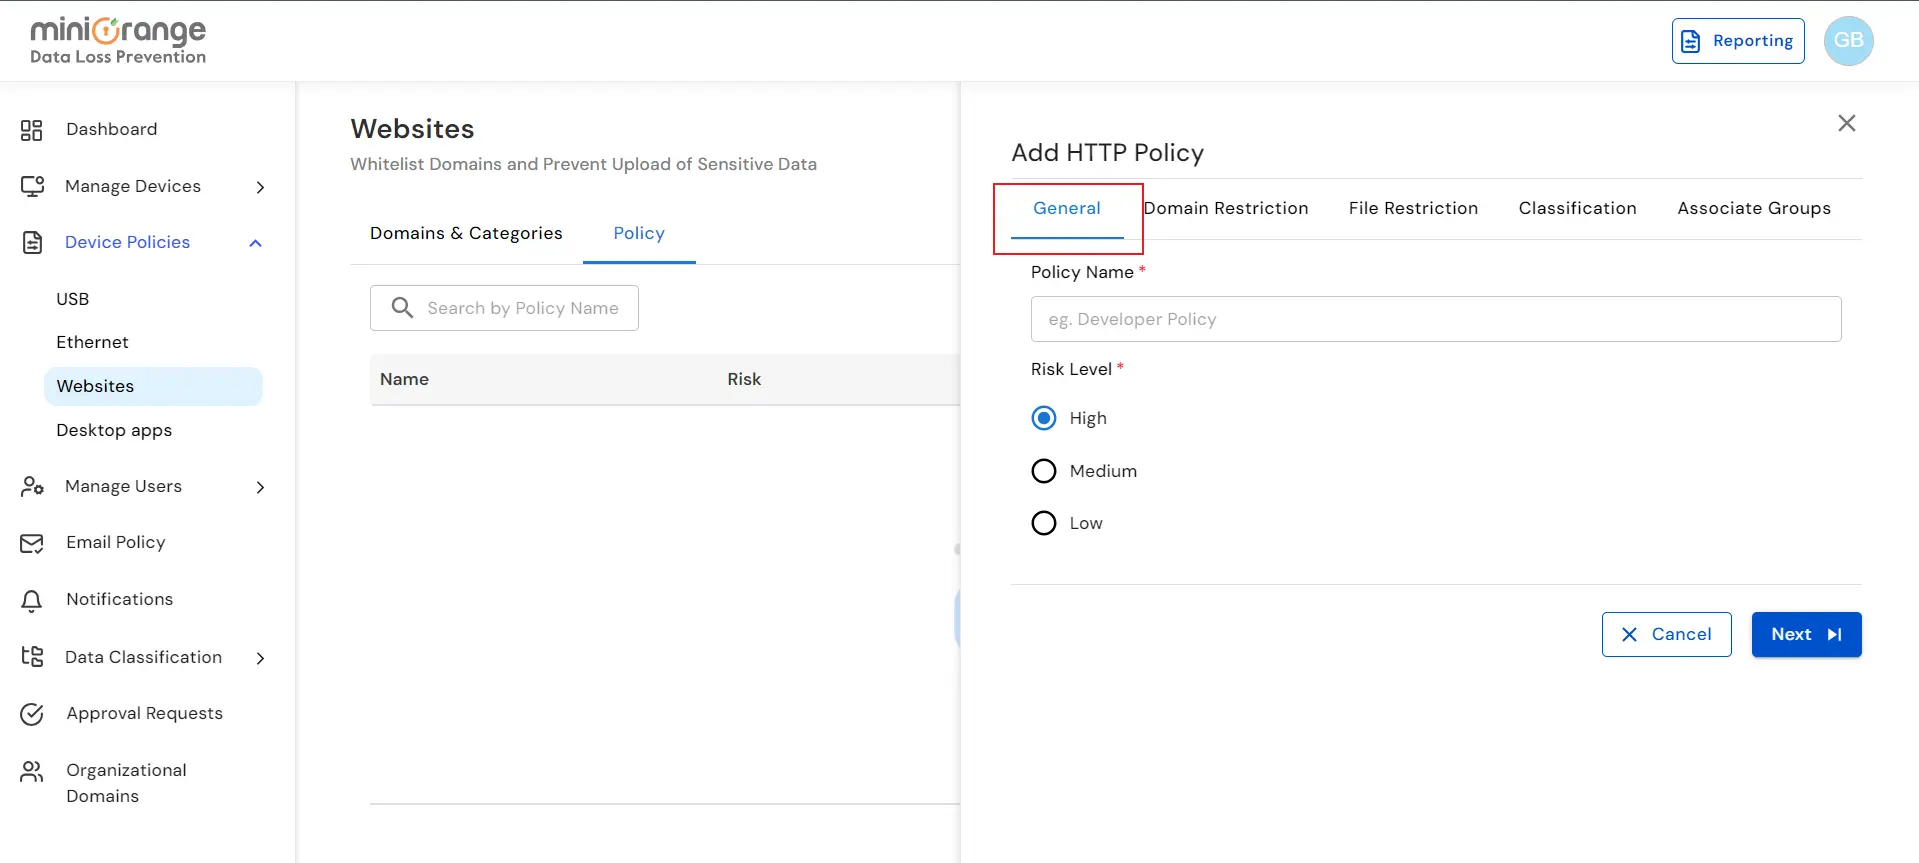
- In the General tab, provide a meaningful name for the policy and choose a appropriate risk level.
Note: (The risk level indicates the severity of the policy.)
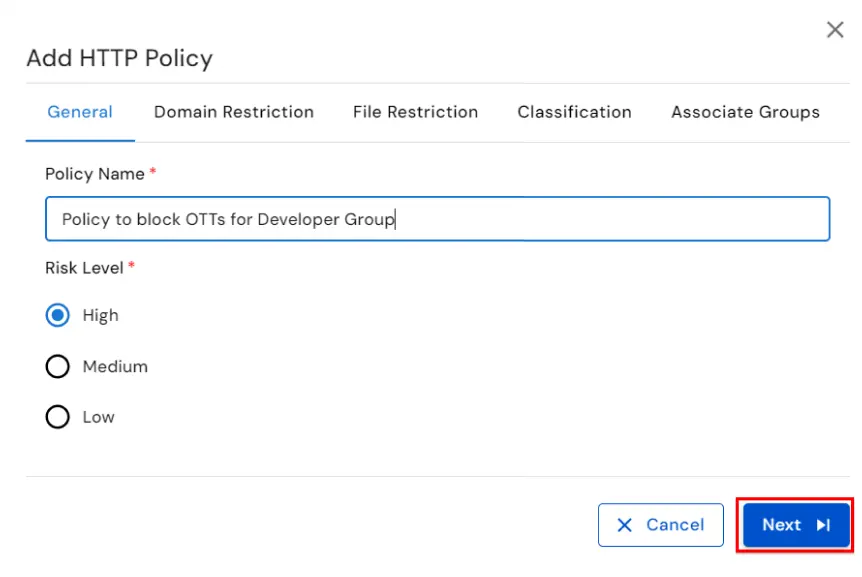
- Now click on the Next Button.
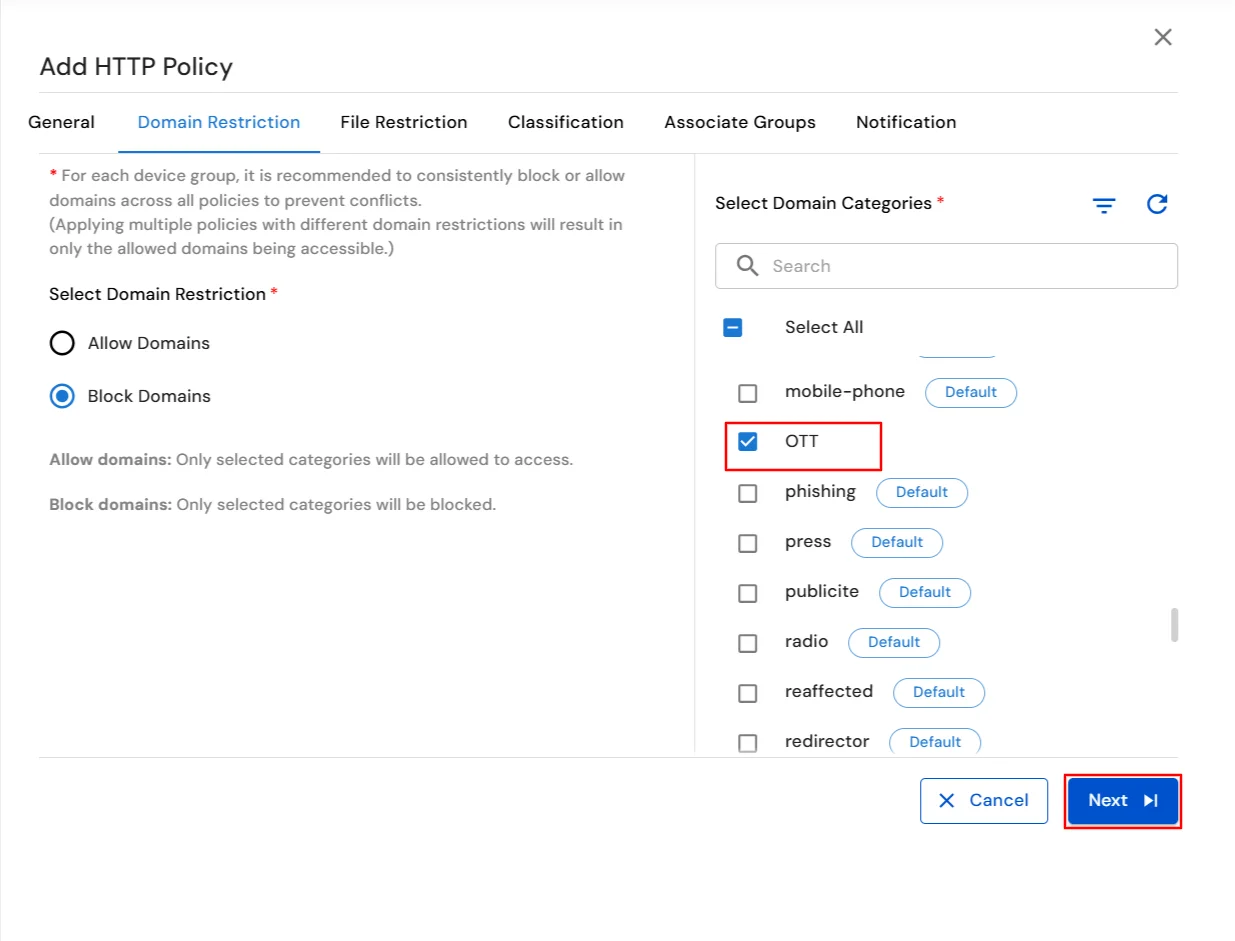
- In the Domain Restriction tab, select the Block Domains restriction and choose the category you want to block. For example: We've selected the "OTT" category.
Note: ( Domain Categories are groups of domains that you can manage collectively. To create a category, please refer to this section → Domains & Categories )
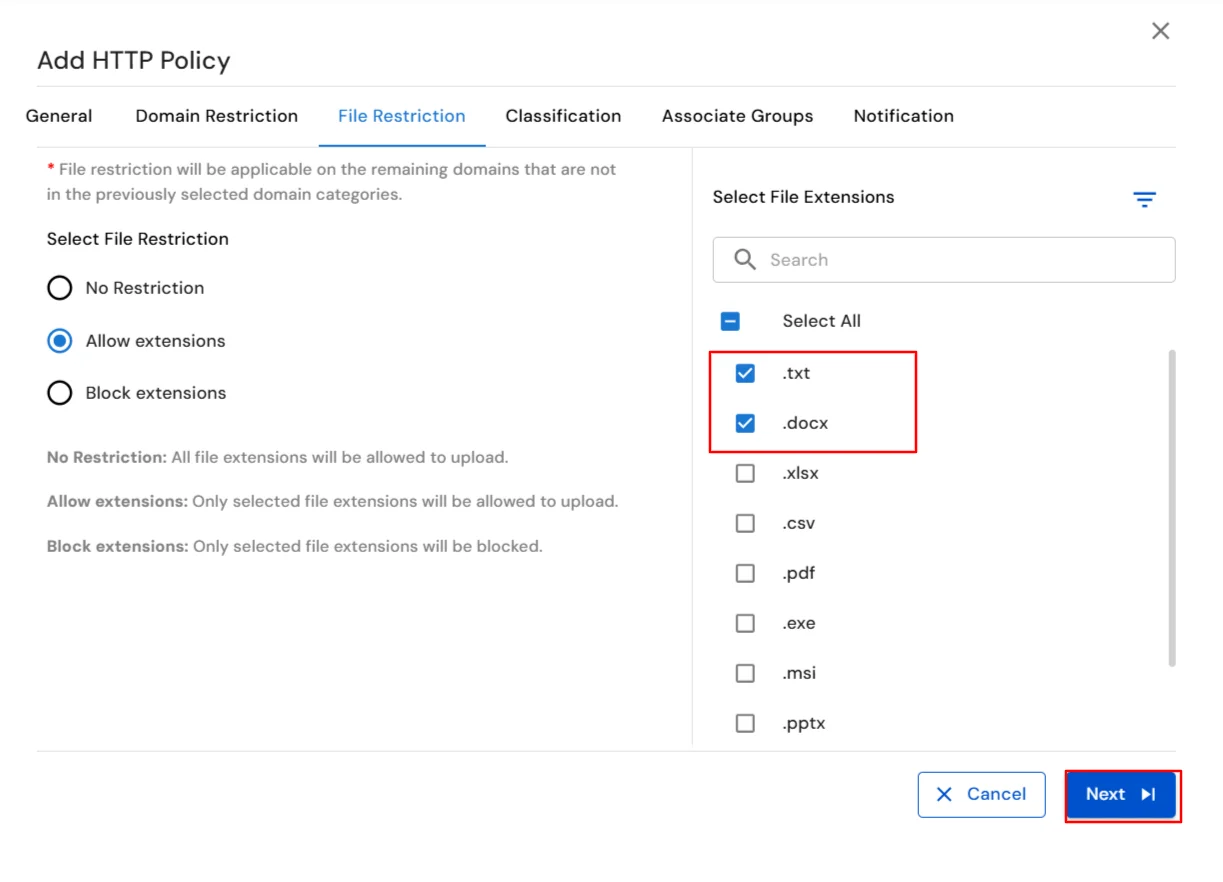
- In the File Restriction tab, you can set restrictions on file uploads based on their extensions. For example: we're allowing only “.txt” and “.docx” files.
- Click on the Next button and then proceed to the Classification step.
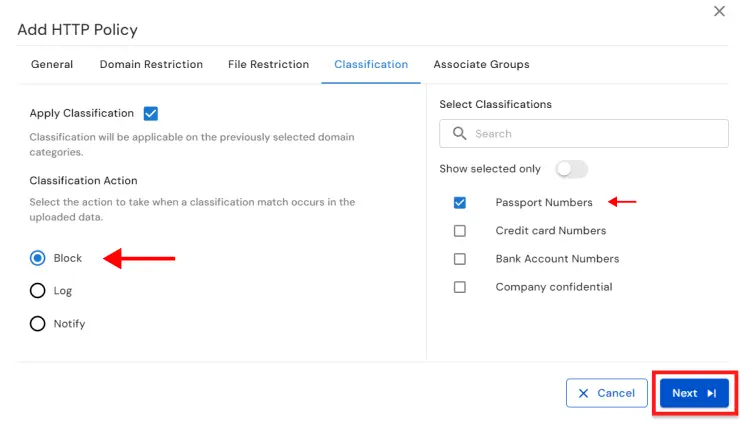
- To enable Classification, check the Apply classification box. If you prefer not to apply classification, leave the box unchecked and skip this step.
- For example: If you enable the Classification then you can set the action to "Block" and then choose the "PII" as classification. This classification contains predefined rules to identify passport numbers. When our Agent detects a match in any HTTP request, it will block the request automatically.
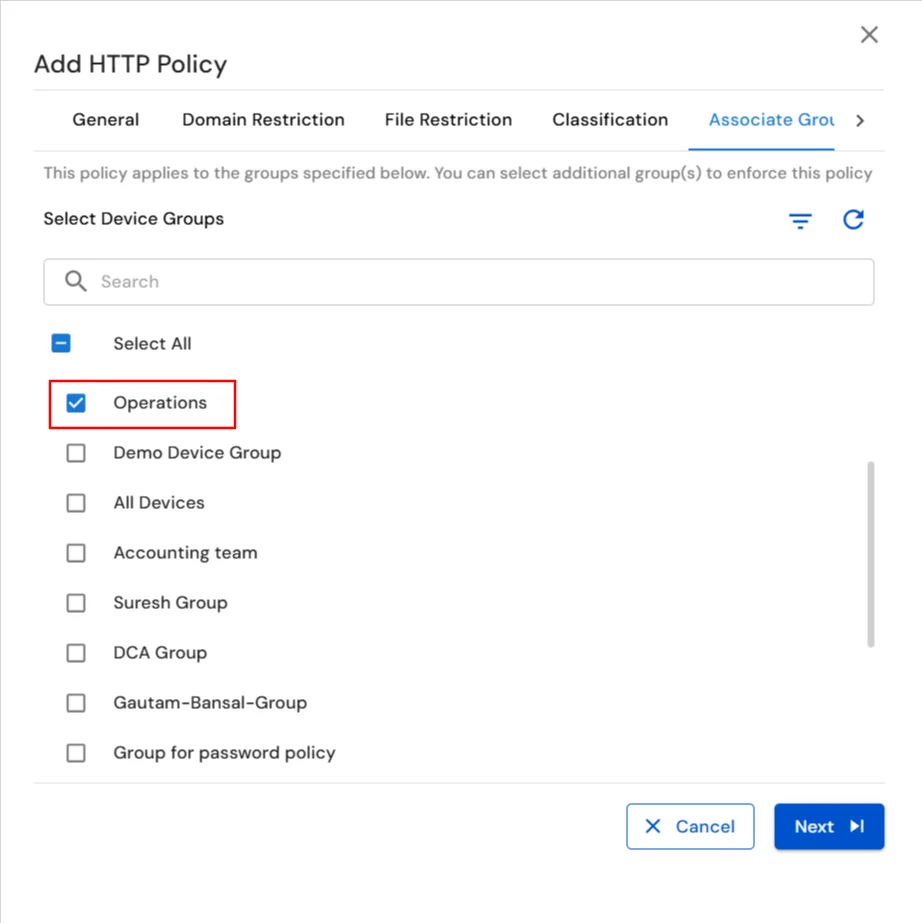
- In the next step, you'll Associate Groups to the policy. Start by searching for the Operations Group and selecting it. If you want to apply the same policy to multiple groups, you can select additional groups as well.
- Finally, click on Add button to save the policy.
Step 2: Steps to configure Domains & Categories
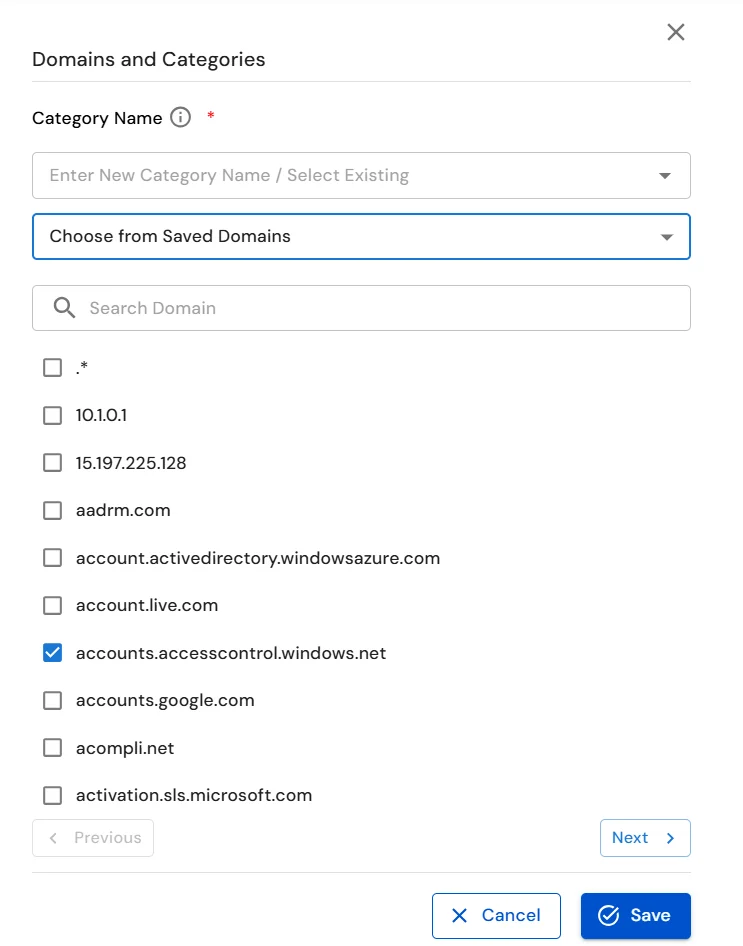
- Under the Websites tab navigate to the Domains tab. Then click on Add Domain button.

- After clicking the Add Domain button, a category form will open.
- You can either enter the domain name manually or you can choose the domain name from the saved domains list.
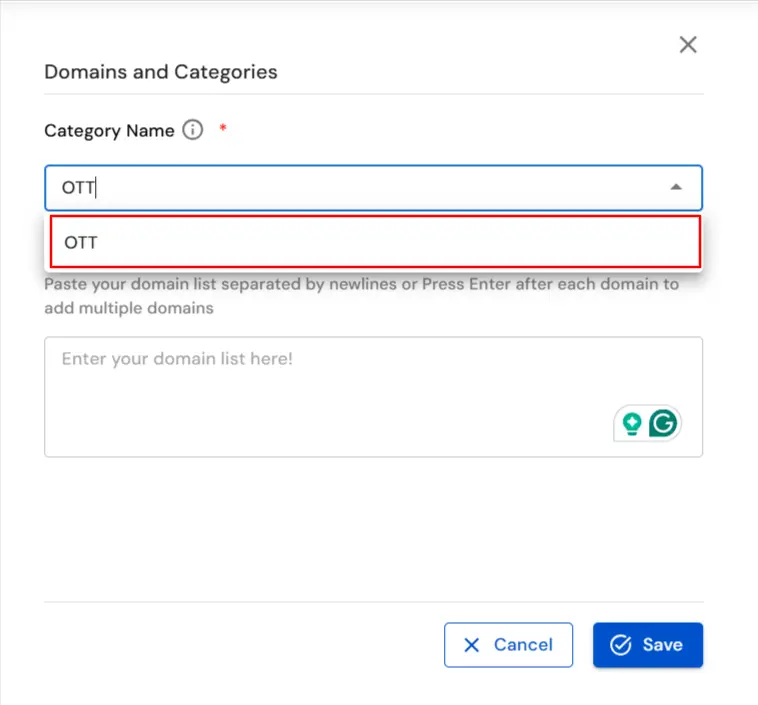
- Here we will create a new category. Then choose a suitable Category Name. For instance, in this example, we’re naming the category OTT. To proceed, click OTT (New Category) to assign this name.
- Now we will enter domains in this category.
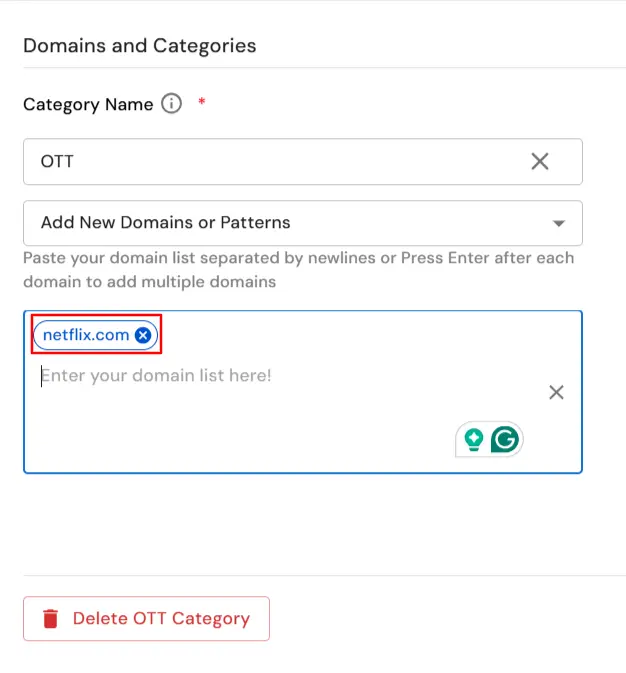
- You can add multiple domains in the category as shown in the below image.

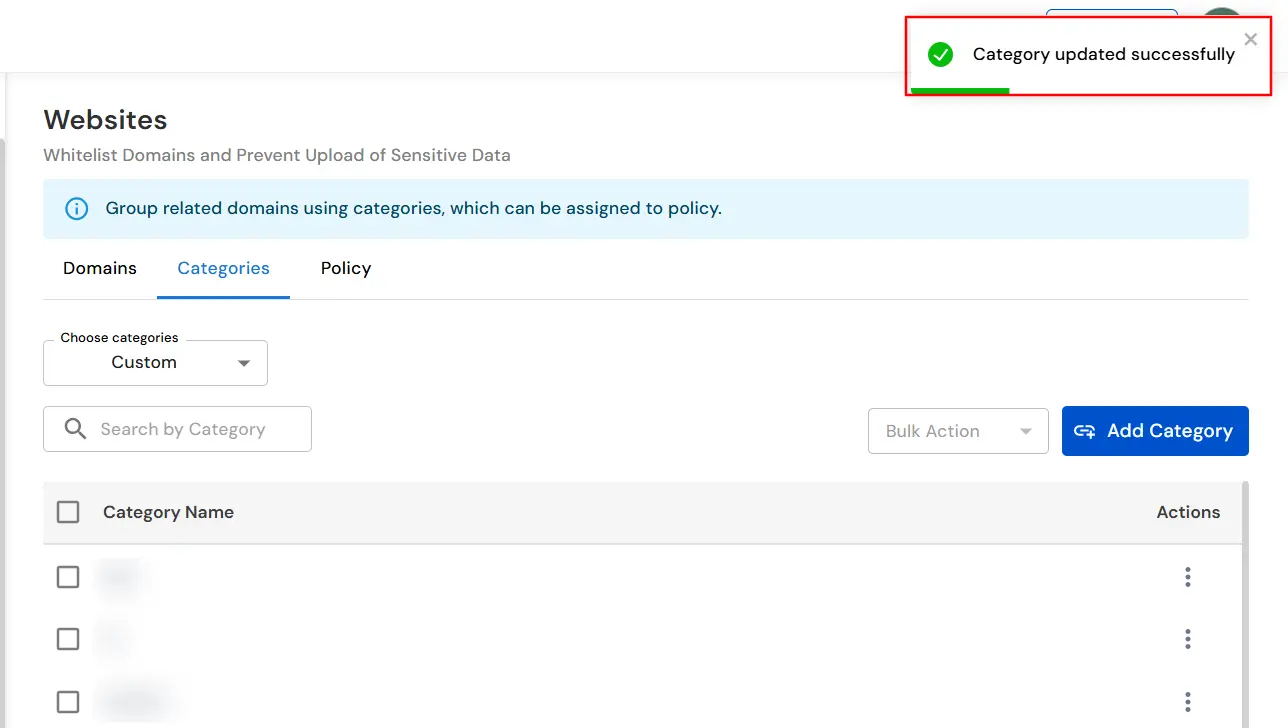
- Now click on Save button to save the configurations.
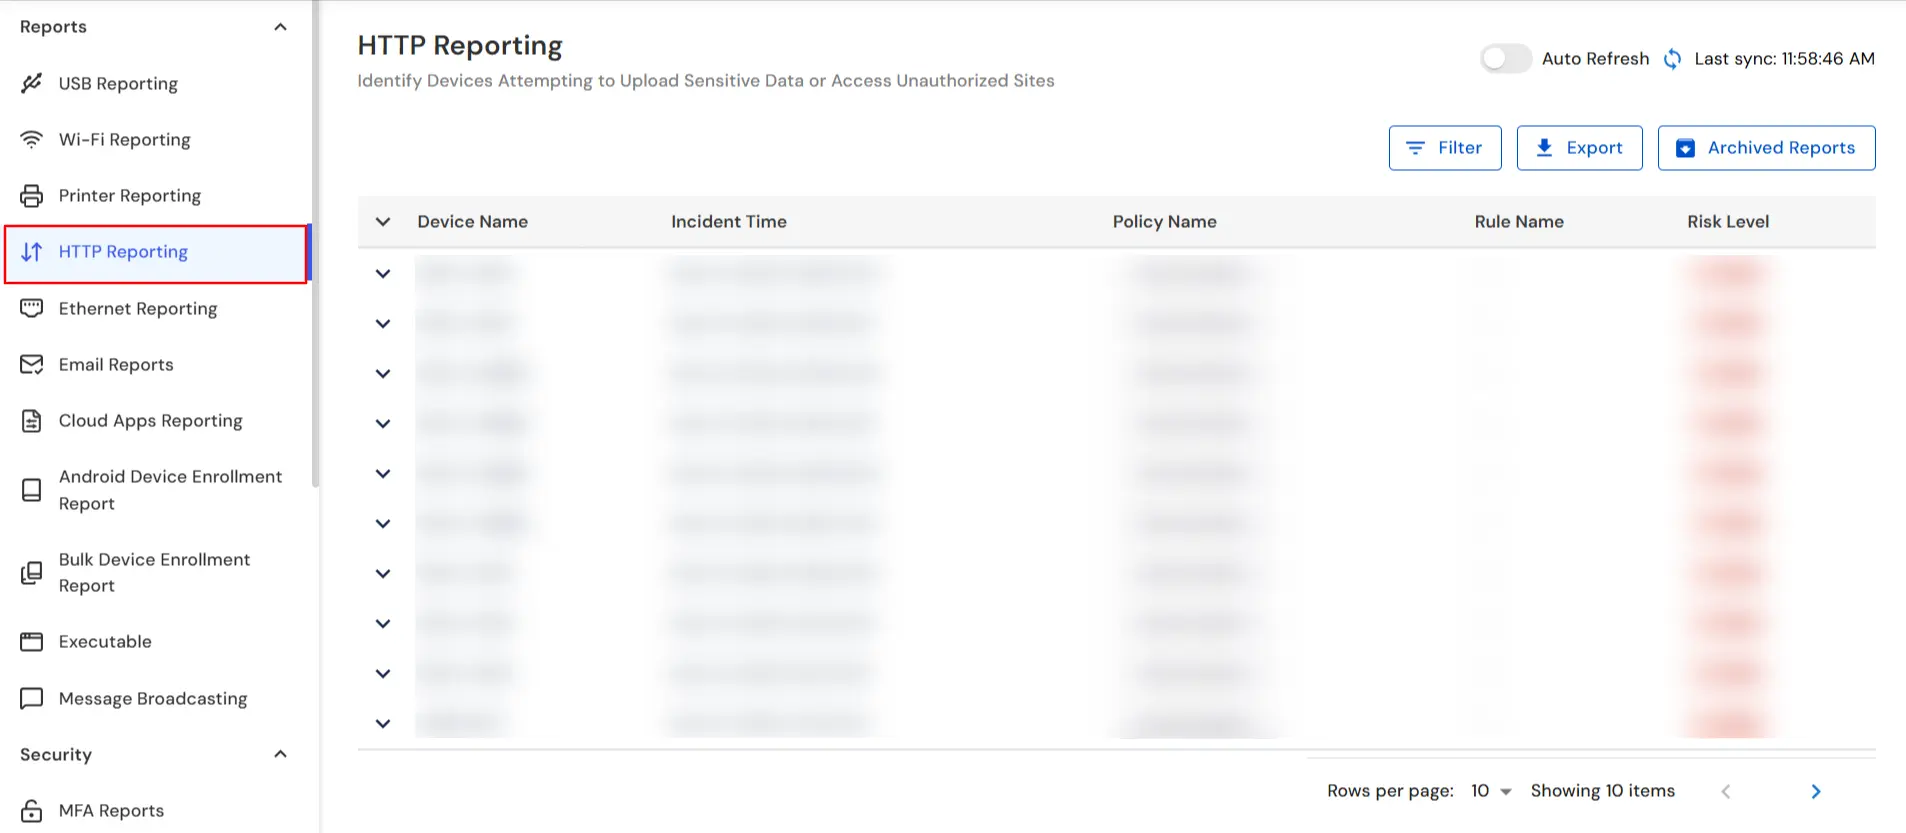
Step 3: Website Reports
- To verify the newly created Website policy, visit an Unauthorized Website and try to upload a sensitive file.
- Check if the policy blocks unauthorized actions and triggers alerts.
- Navigate to Reporting in the top-right corner of the dashboard to track all the Website policy breaches.

- Now under the HTTP Reporting tab you can check all the Website policy breach reports.
In this way you have succesfully setup the Website Policy and Categories by using the our DLP Software. Also if you are facing any issues that you are not able to resolve please feel to reach out us uemsupport@xecurify.com
