Google Workspace/G Suite Provisioning & Deprovisioning
Google Workspace User Provisioning by miniOrange enables you to provision all user identities and groups from miniOrange automatically in the Google Admin console. While initial setup requires a few manual steps, this service automates the ongoing user and group lifecycle management, which saves time, boosts productivity, and improves security by managing access privileges. This automation helps you streamline the process of creating, modifying, and removing user accounts and groups, ensuring that everyone in your organization has the right level of access to the tools they need to succeed.
miniOrange supports importing users and groups from Google Workspace (Inbound Provisioning). Once in miniOrange, these users and groups can be seamlessly provisioned (synced) to various other external applications using miniOrange's provisioning services. This makes miniOrange a central identity hub, ensuring consistent user and group data across all applications.
Prerequisites
Follow the Step-by-Step Guide given below to setup Google Workspace Provisioning
Step 1: Setup Provisioning Application in miniOrange
- Log in to the miniOrange Admin Console.
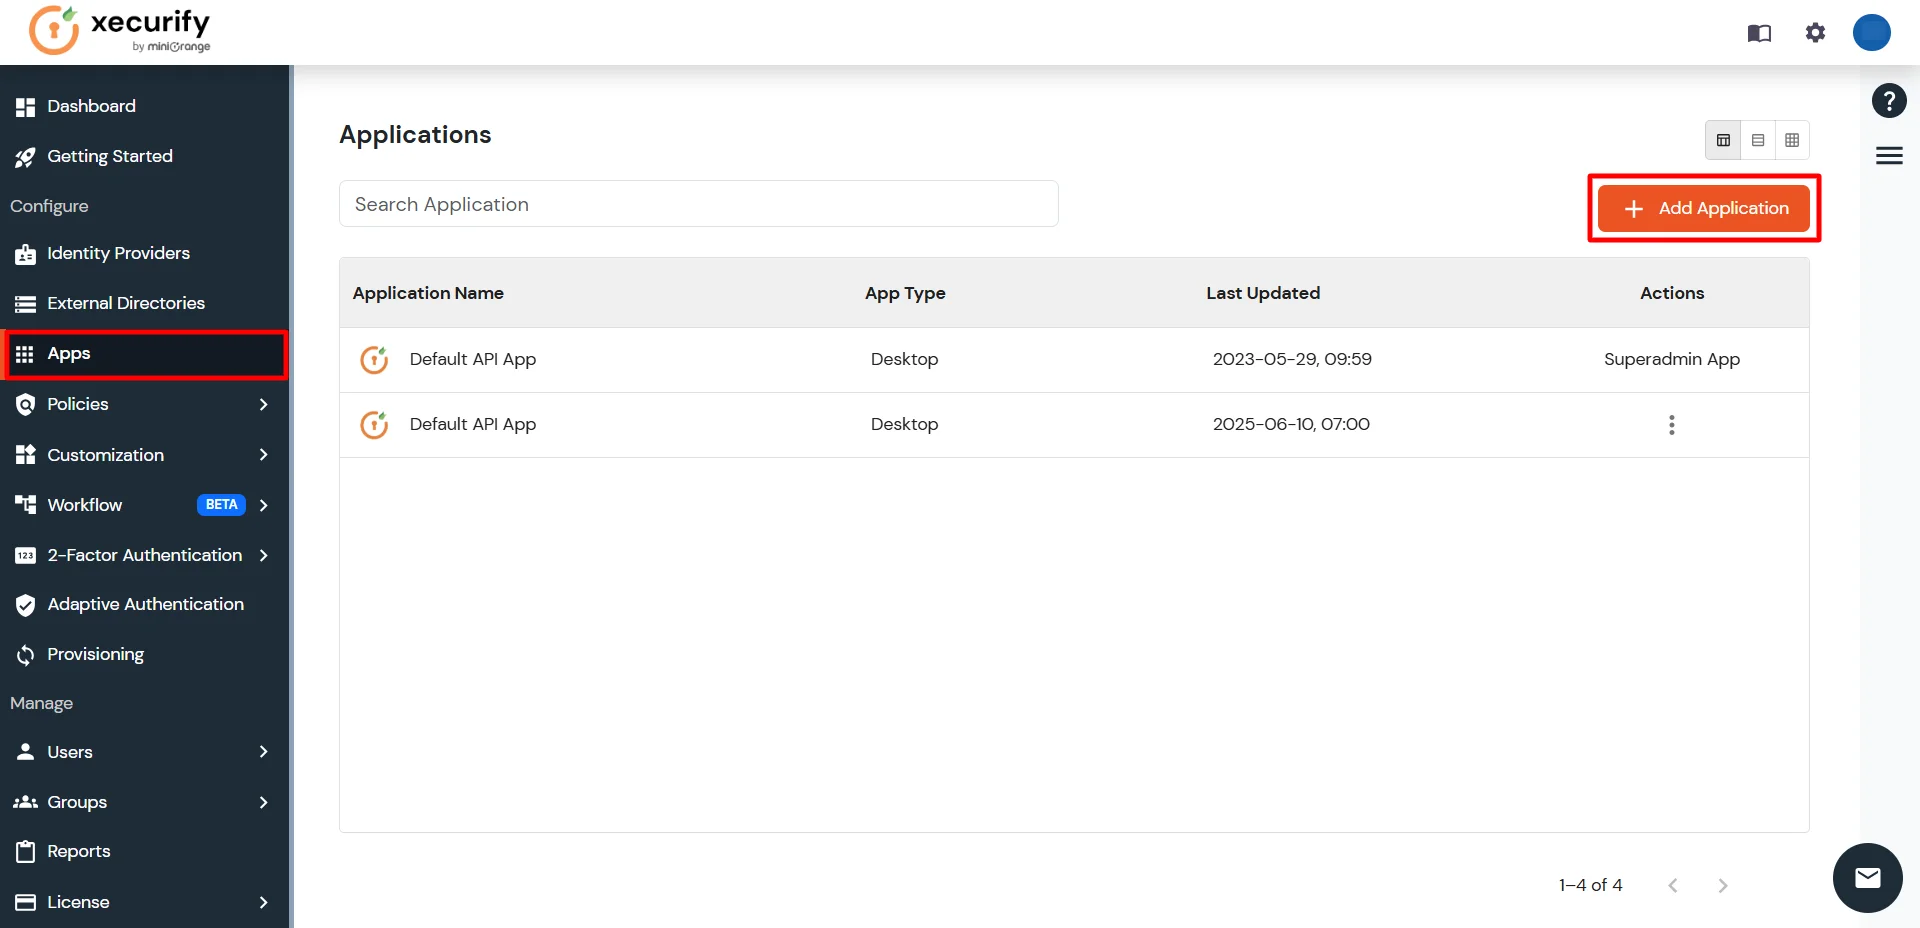
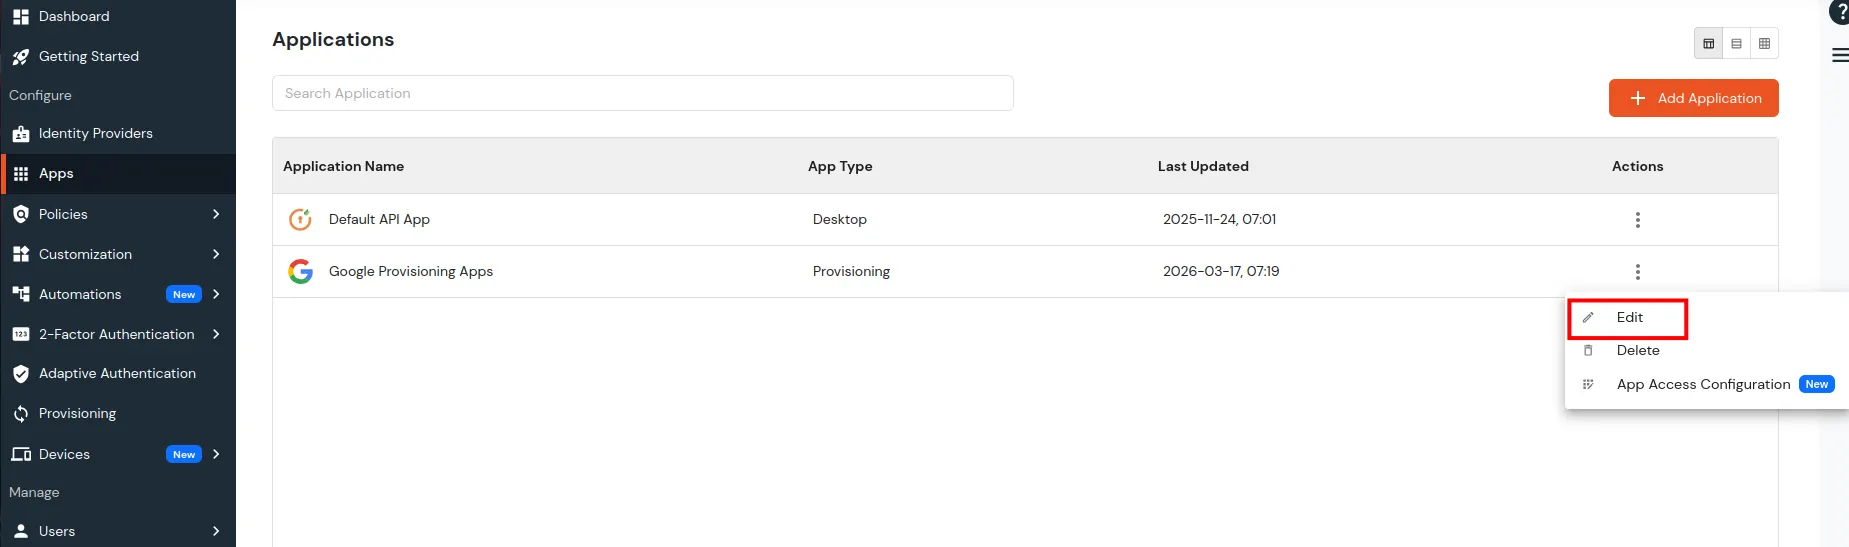
- Click on Apps. It shows a list of all configured applications and option to modify them. Click on Add Application.
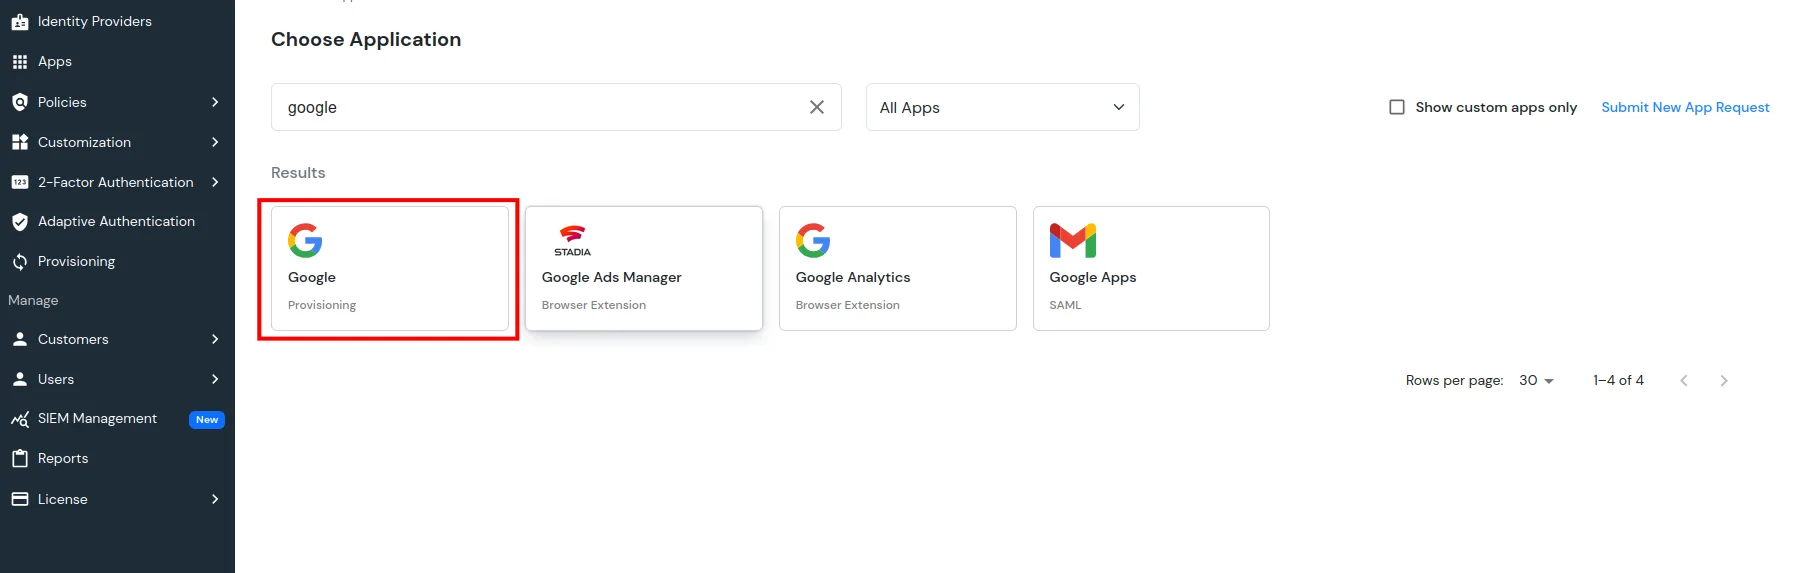
- Search for Google and select Google Provisioning App.
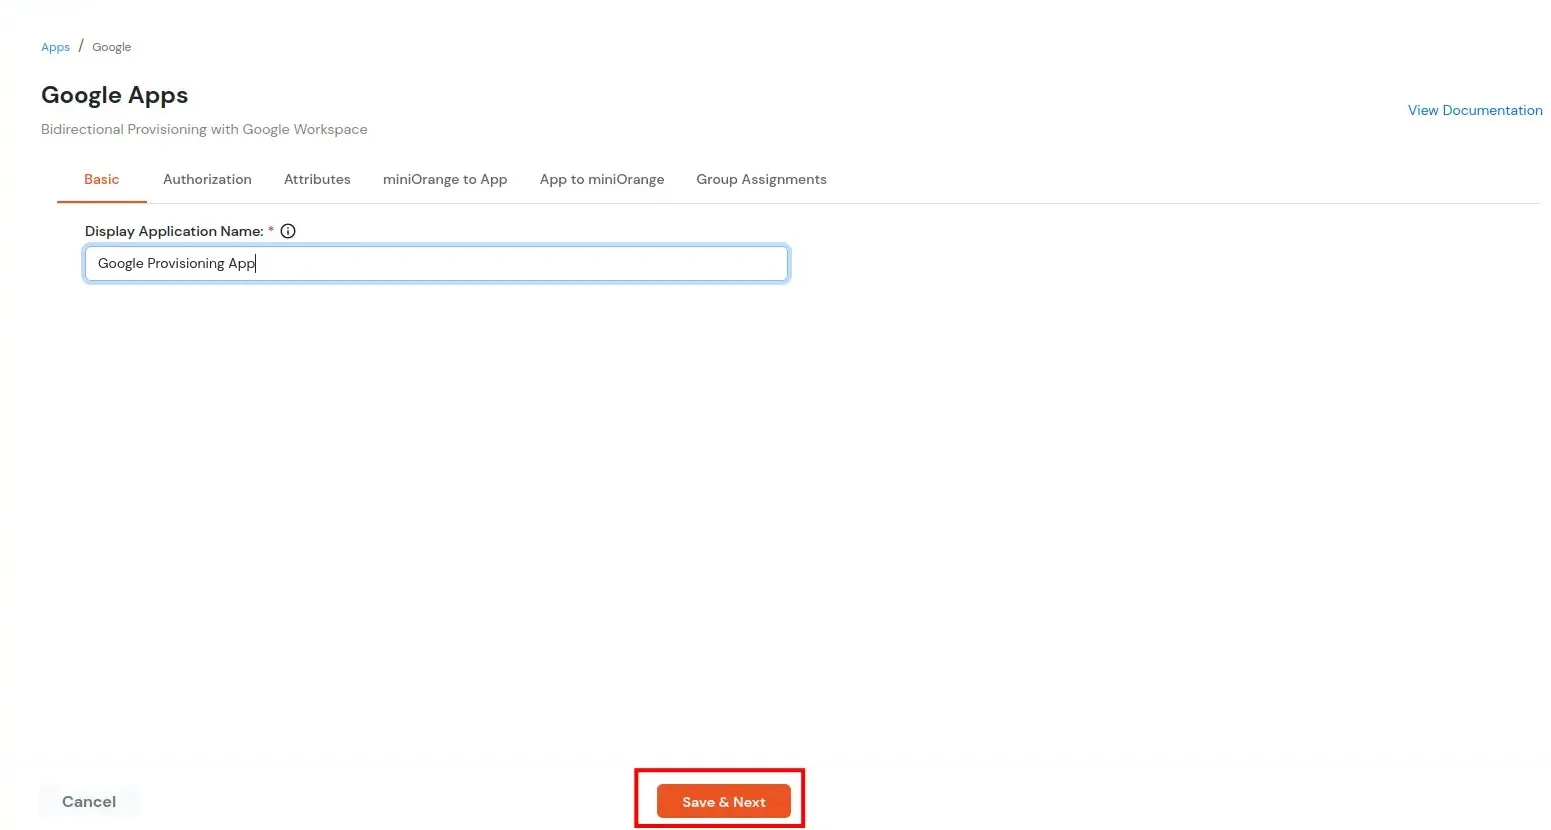
- Enter a display name for the app and click Save.
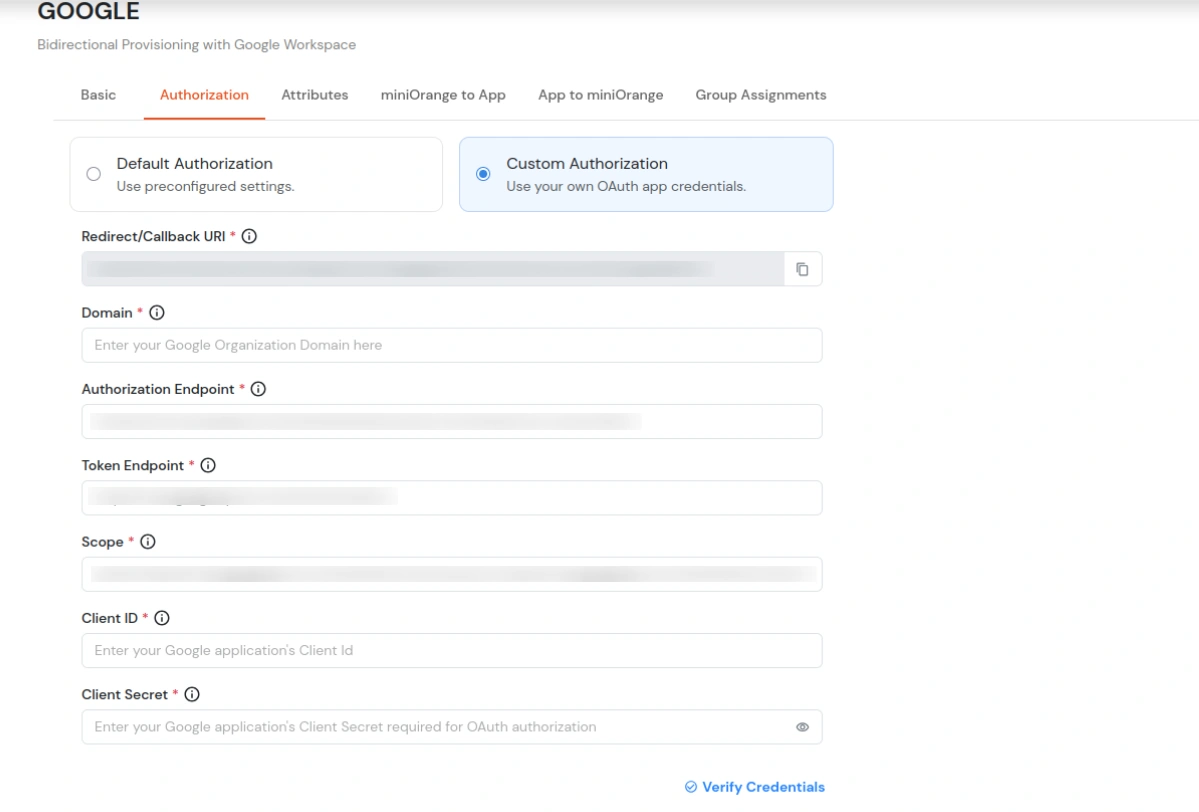
- On the Authorization tab, choose one of the following options based on your setup:
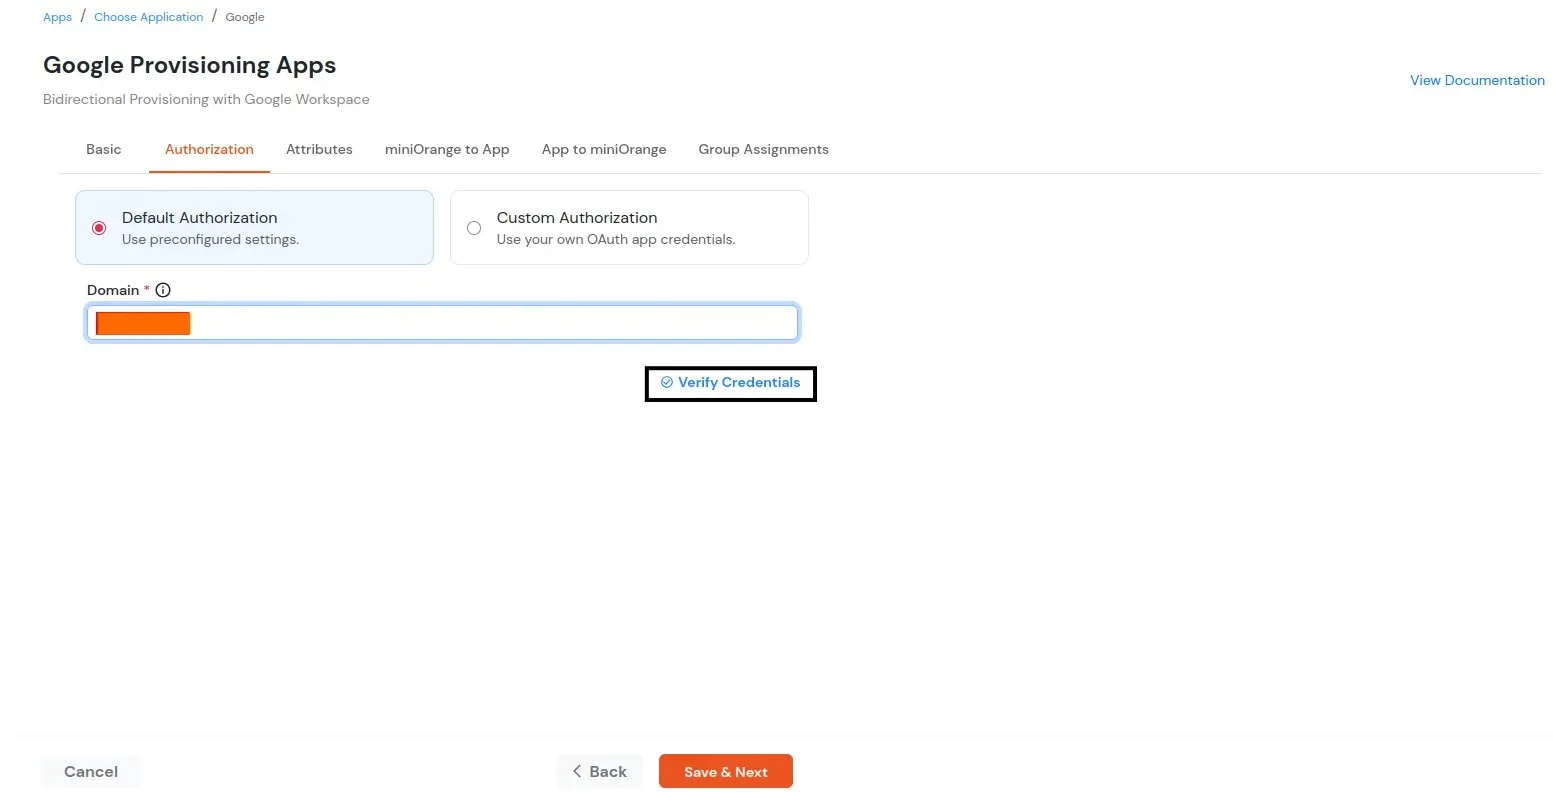
Note: This guide covers the Default Authorization flow for configuring Google Workspace Provisioning. If your application requires Custom Authorization, please navigate to the Custom Authorization tab and follow the step-by-step instructions provided there to complete the authorization setup.
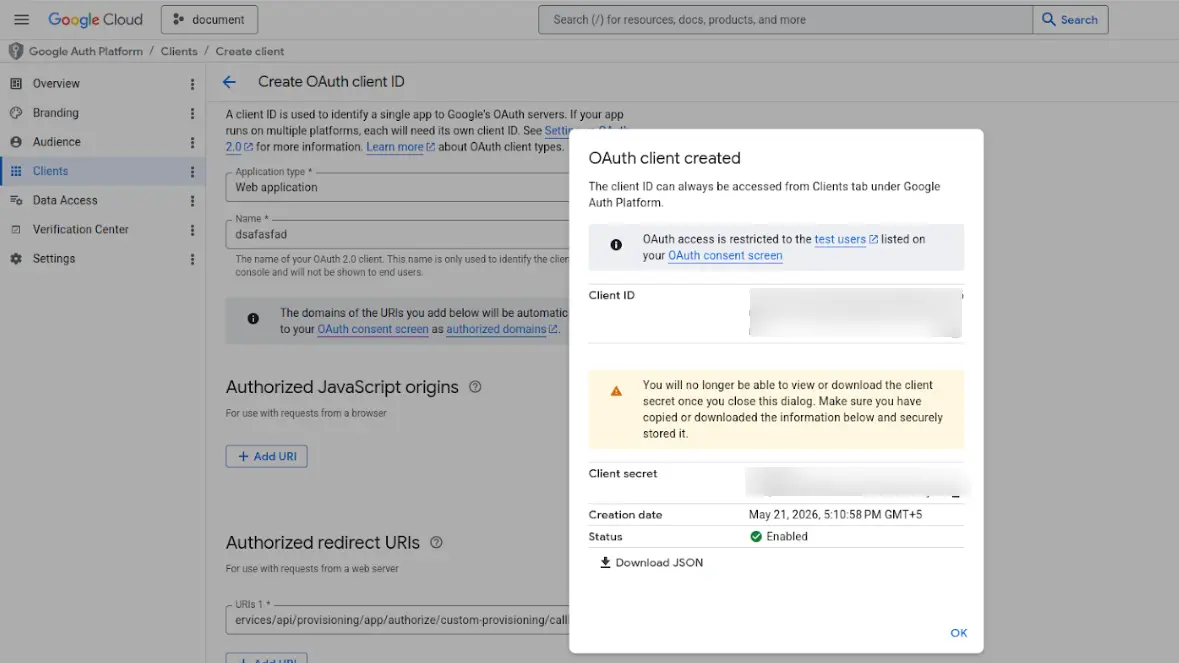
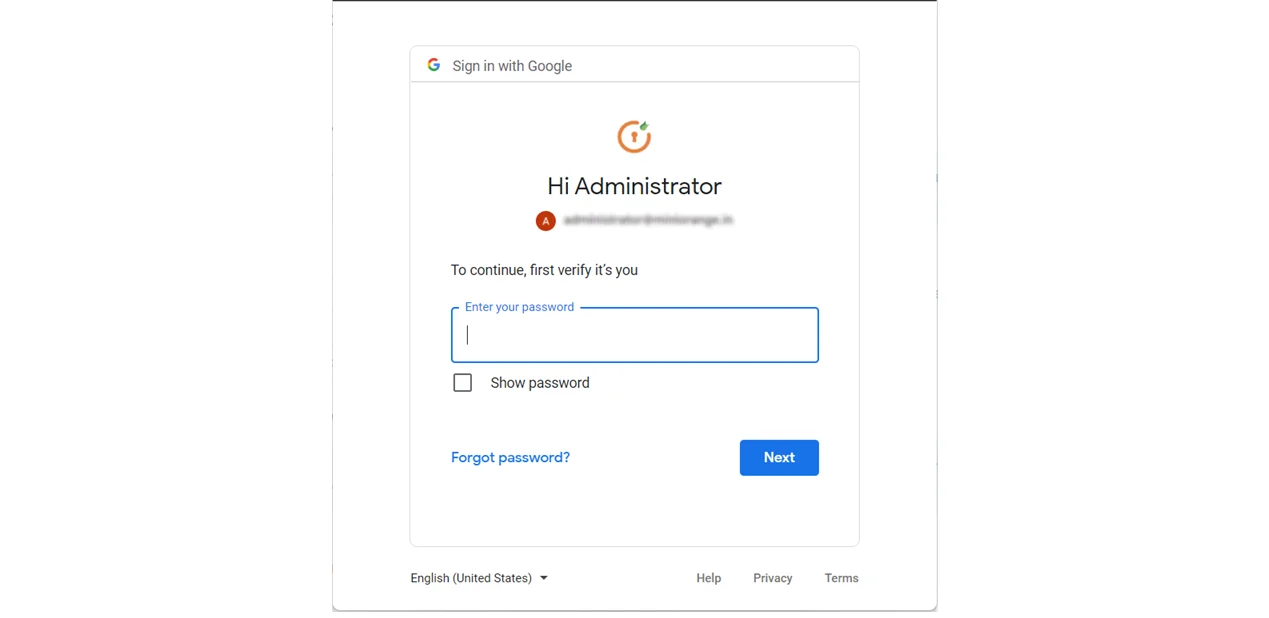
- Log in with your Google Admin Account.
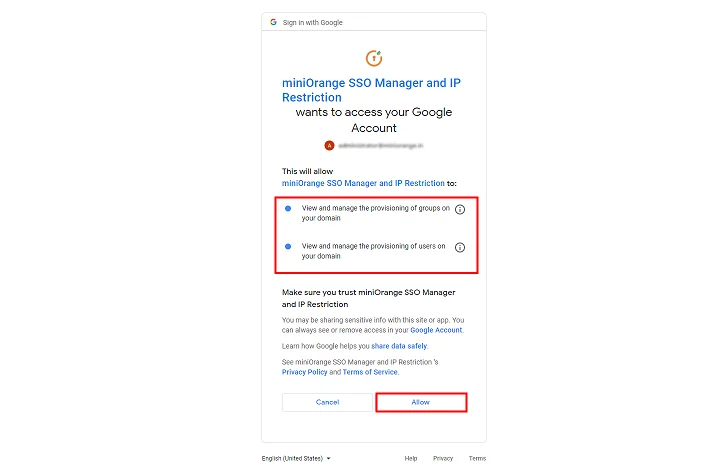
- Once logged in successfully, click the Allow button to authorize miniOrange to view and manage the provisioning of users on your domain.
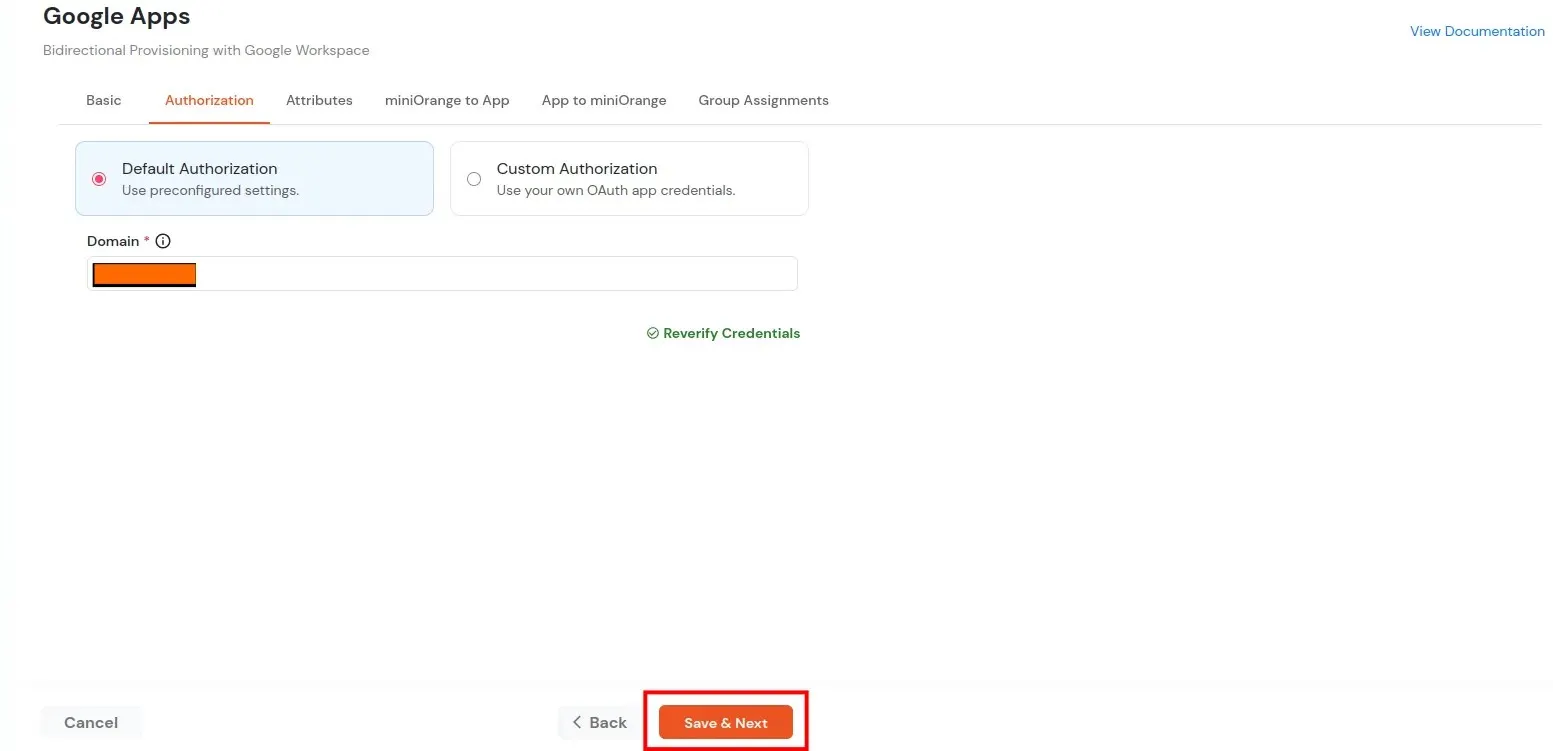
- Once verification is complete, the Verify Credential button will change to Reverify Credentials.
Implementing Identity Synchronization via miniOrange
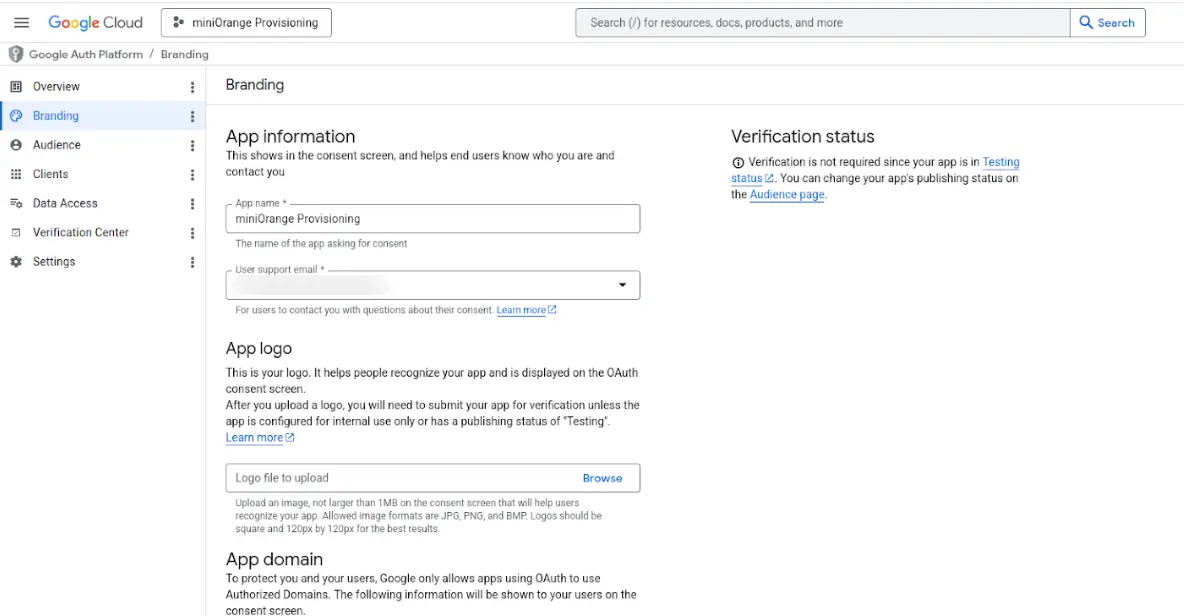
Purpose and Document Overview
This standard operating procedure (SOP) defines the authoritative, generalized workflow for establishing automated user synchronization from the miniOrange identity platform to a target Google Workspace organization.
Following this structured architecture ensures robust data handshakes and seamless identity verification across directory ecosystems.
Environmental and System Requirements
Before beginning configuration, ensure the following parameters are established:
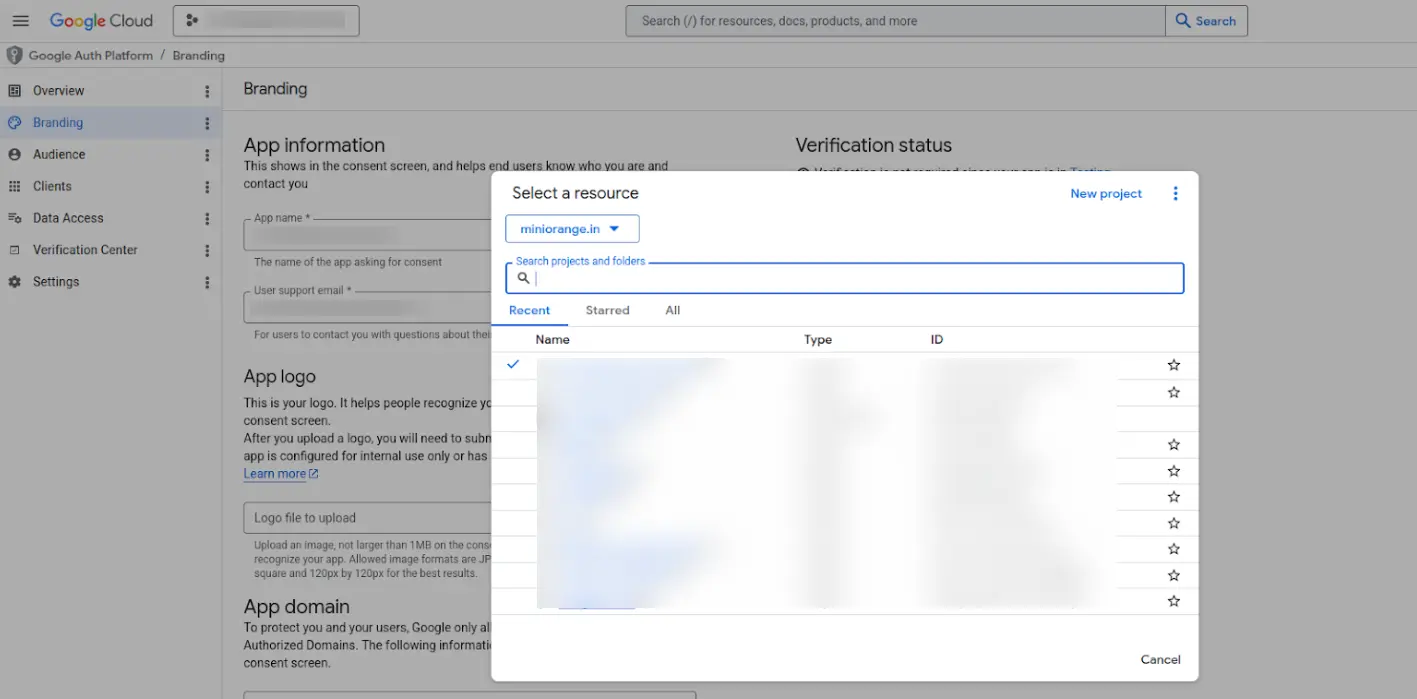
- Administrative access to both the target Google Workspace Admin Console and the Google Cloud Console.
- Primary administrative clearance within the miniOrange Admin Dashboard.
- An allocated or active Google Cloud project allocated for identity management services.
Configuration Action Plan
Implementation Quality Checklist
The following matrix serves as the deployment validation baseline prior to promoting the integration to production status:
| Integration Checkpoint |
Target Configuration Metric |
Expected Verification Status |
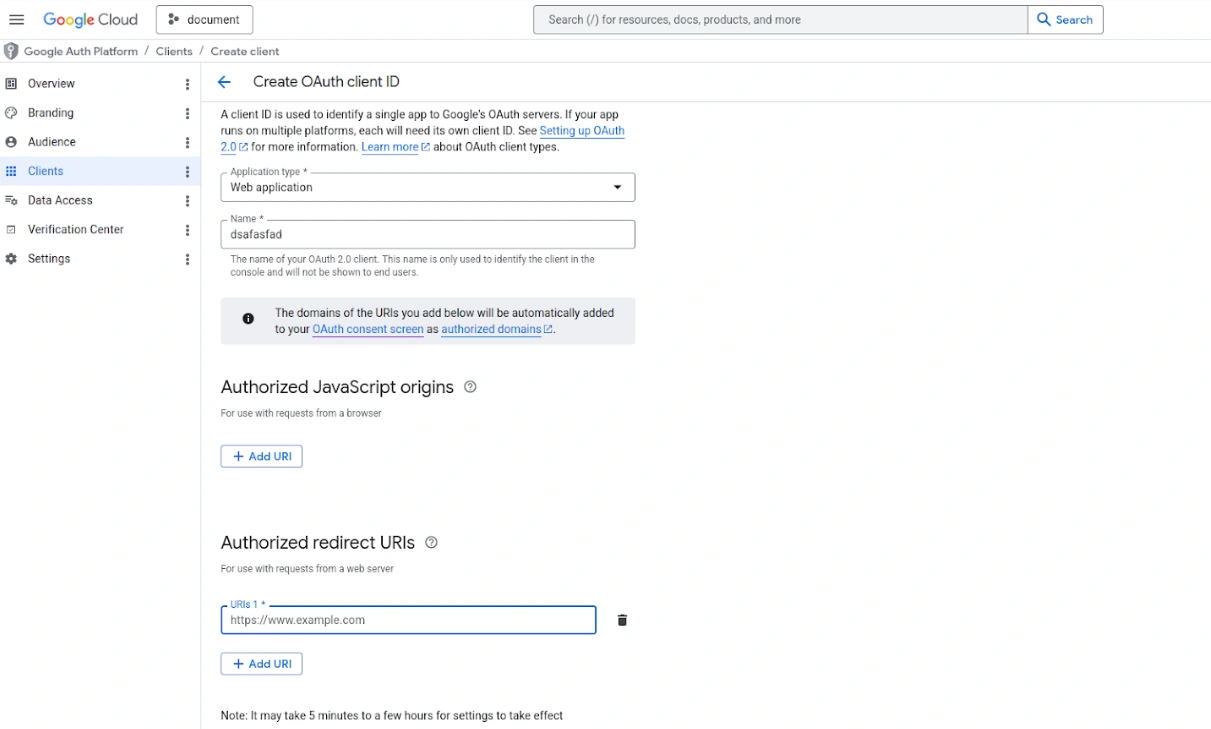
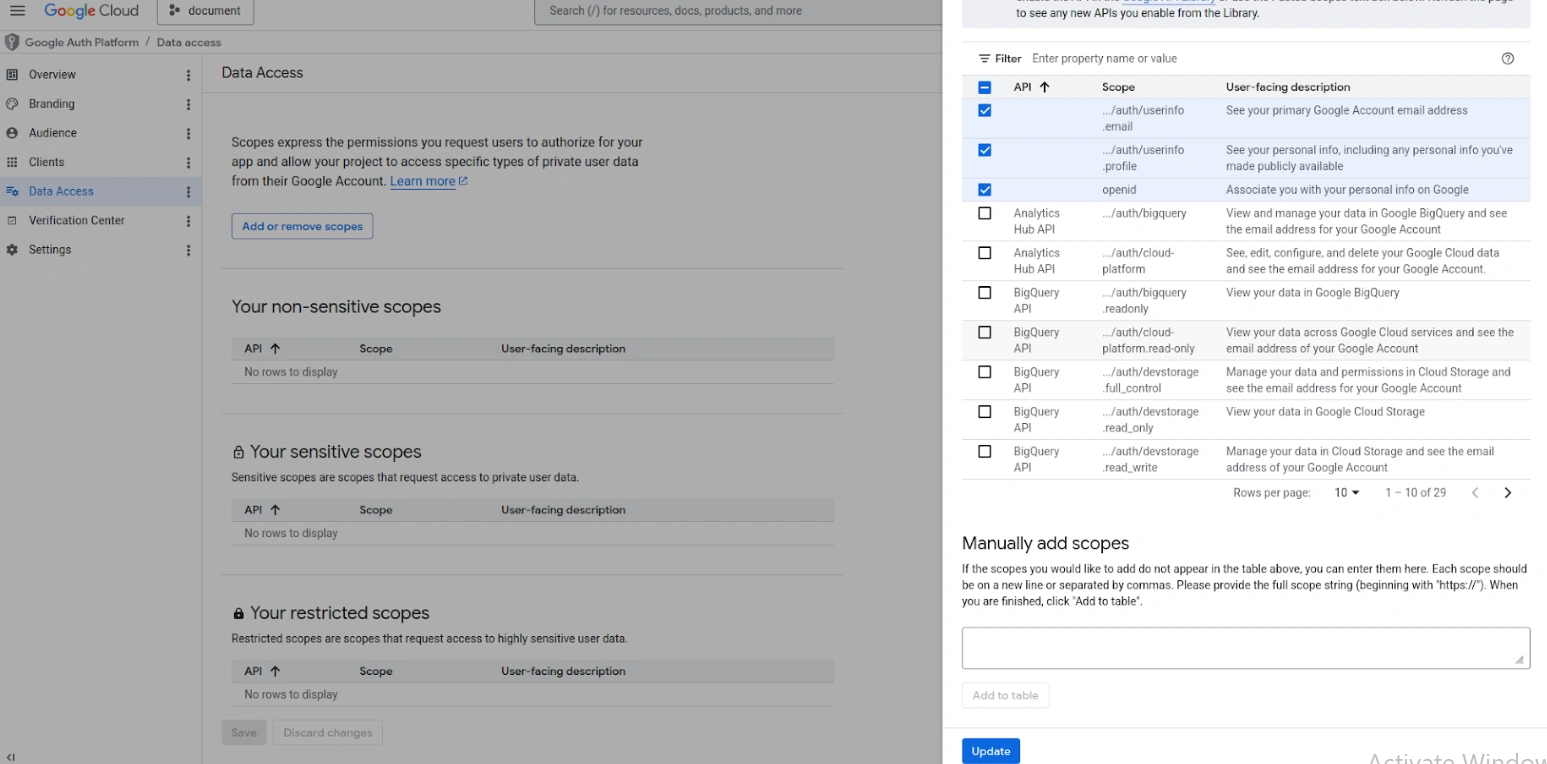
| Identity Data Scopes |
Verified scopes userinfo.email, userinfo.profile, and openid correctly bound. |
Verified Success |
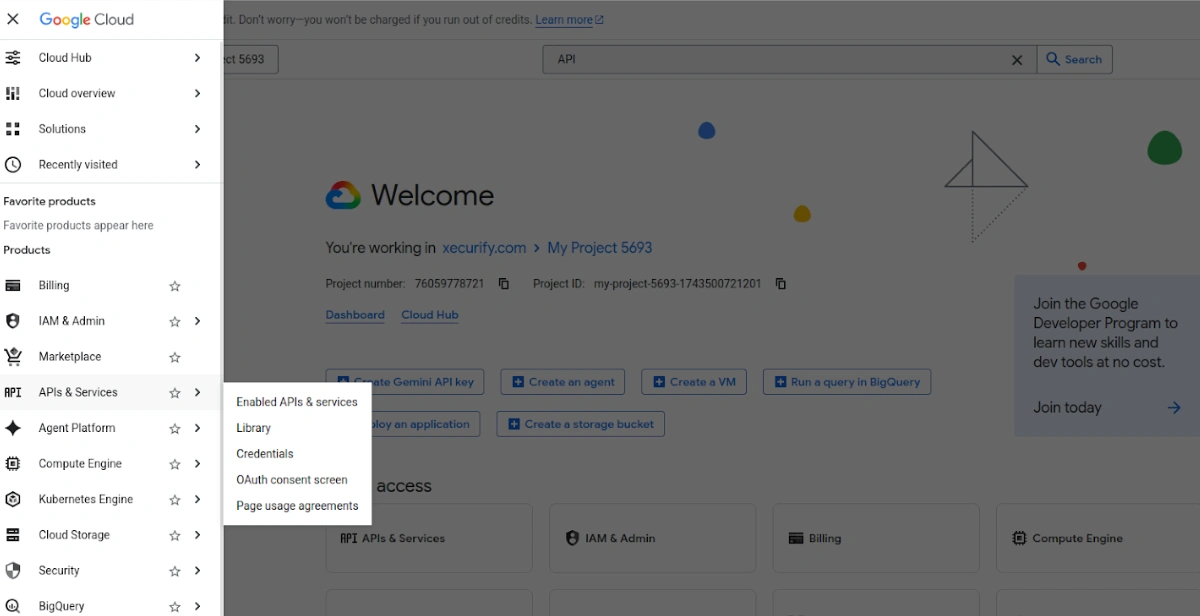
| Google SDK APIs |
Admin SDK API validated as active within the Google Cloud project. |
Verified Success |
| Synchronization Vector |
Configured to push identities downward from miniOrange into Google Workspace. |
Verified Success |
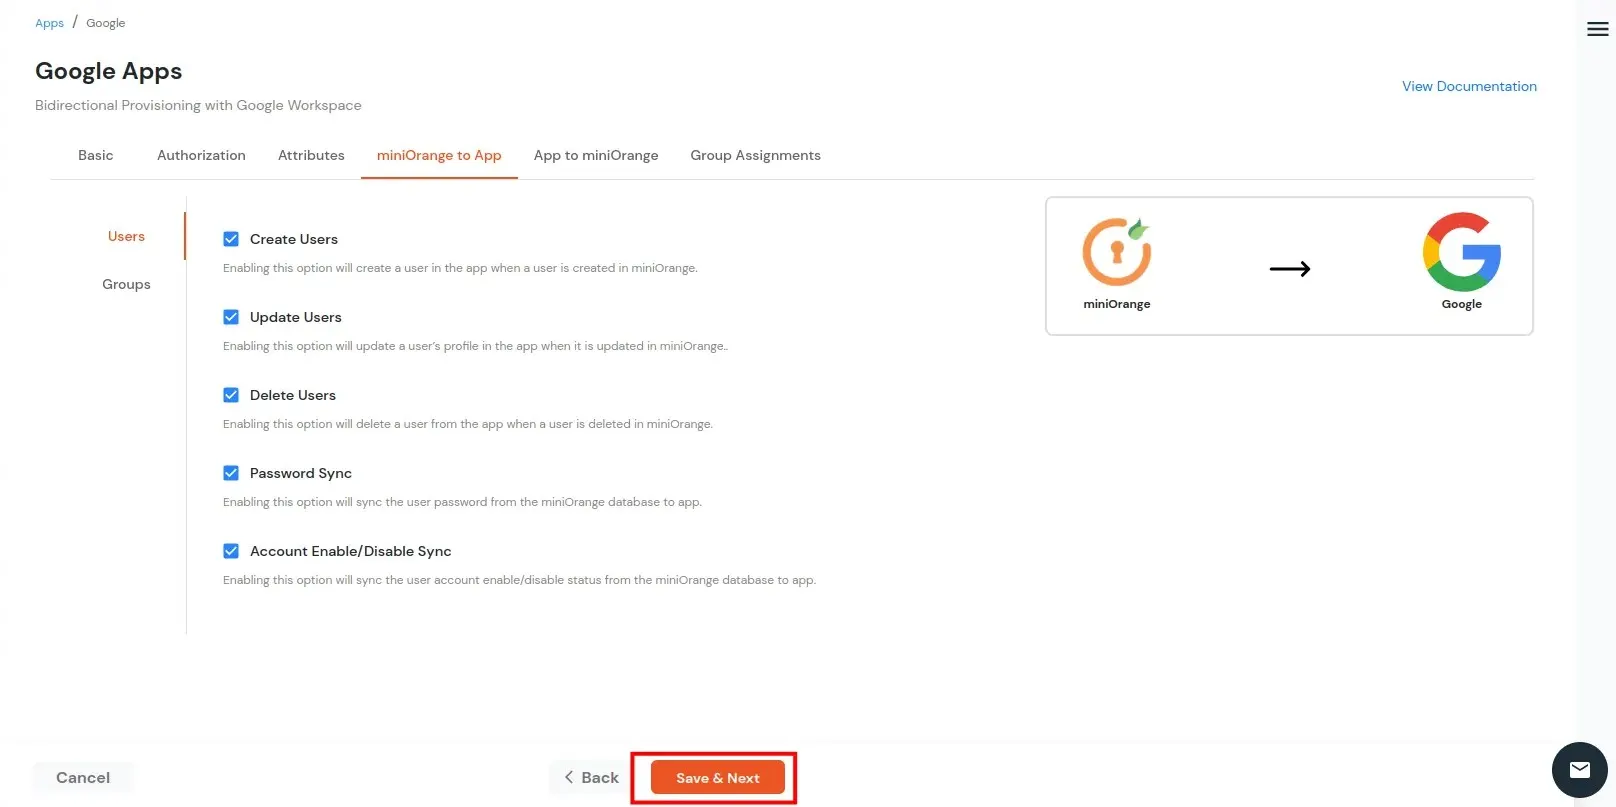
| Action Policies |
Create Users permission enabled. Updates and Deletes are optional. |
Verified Success |
Operational Safety Guidelines
- Identity Conflict Prevention: Prior to executing an initial batch synchronization, audit the target directory to verify that test identities do not conflict with pre-existing structural records inside Google Workspace, minimizing early push duplication errors.
- System State: Once this precise workflow sequence is completed, Google Single Sign-On (SSO) and Automated User Provisioning functions will run in a fully unified state across platforms.
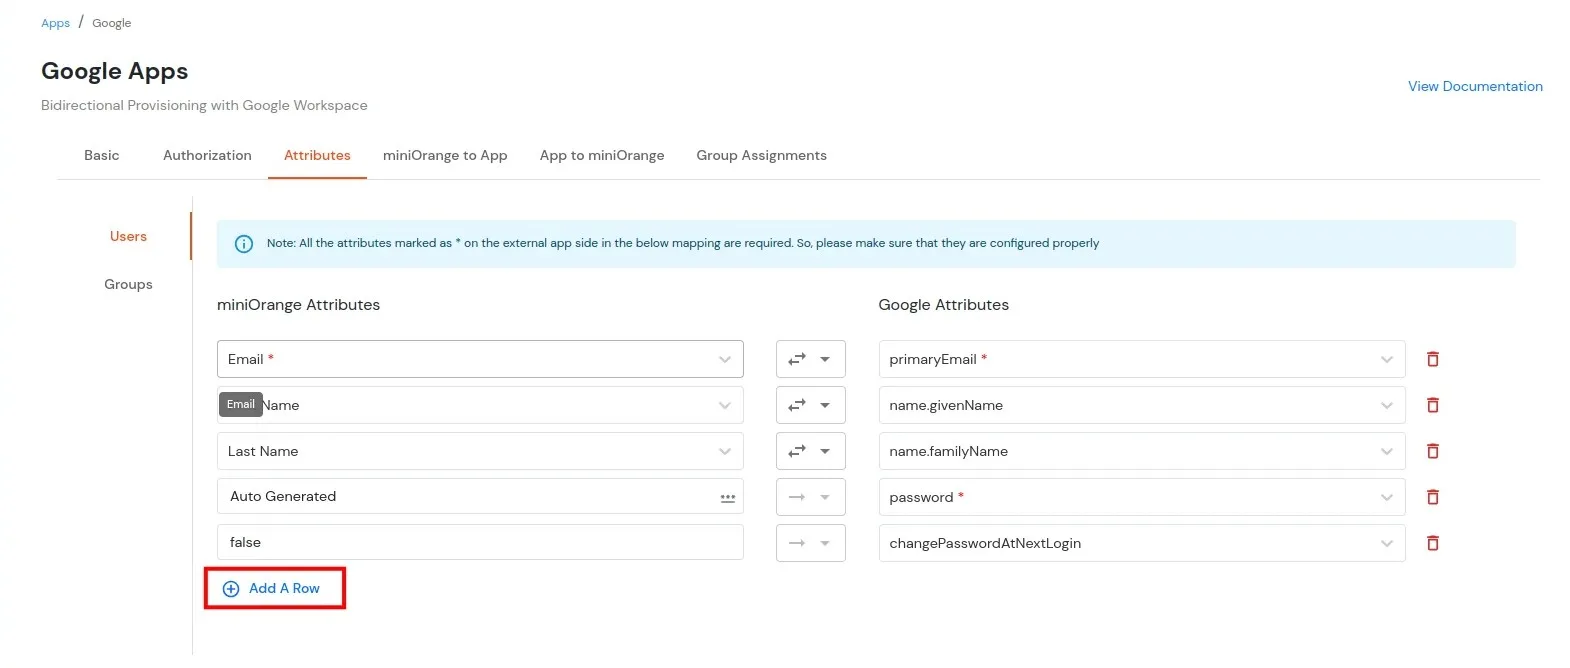
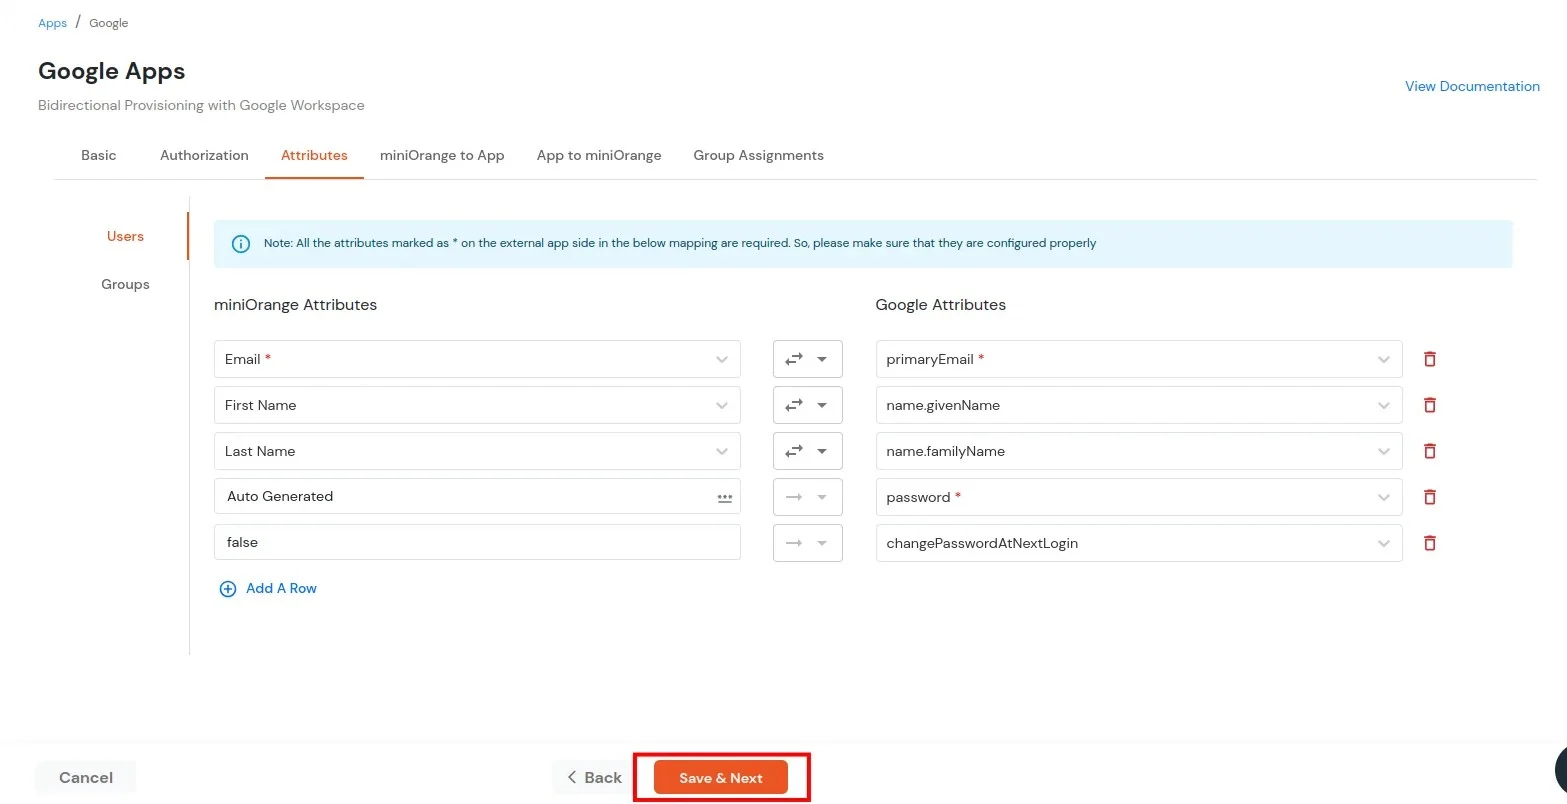
Attribute Mapping
- Map the user Attributes between miniOrange and Google Workspace.
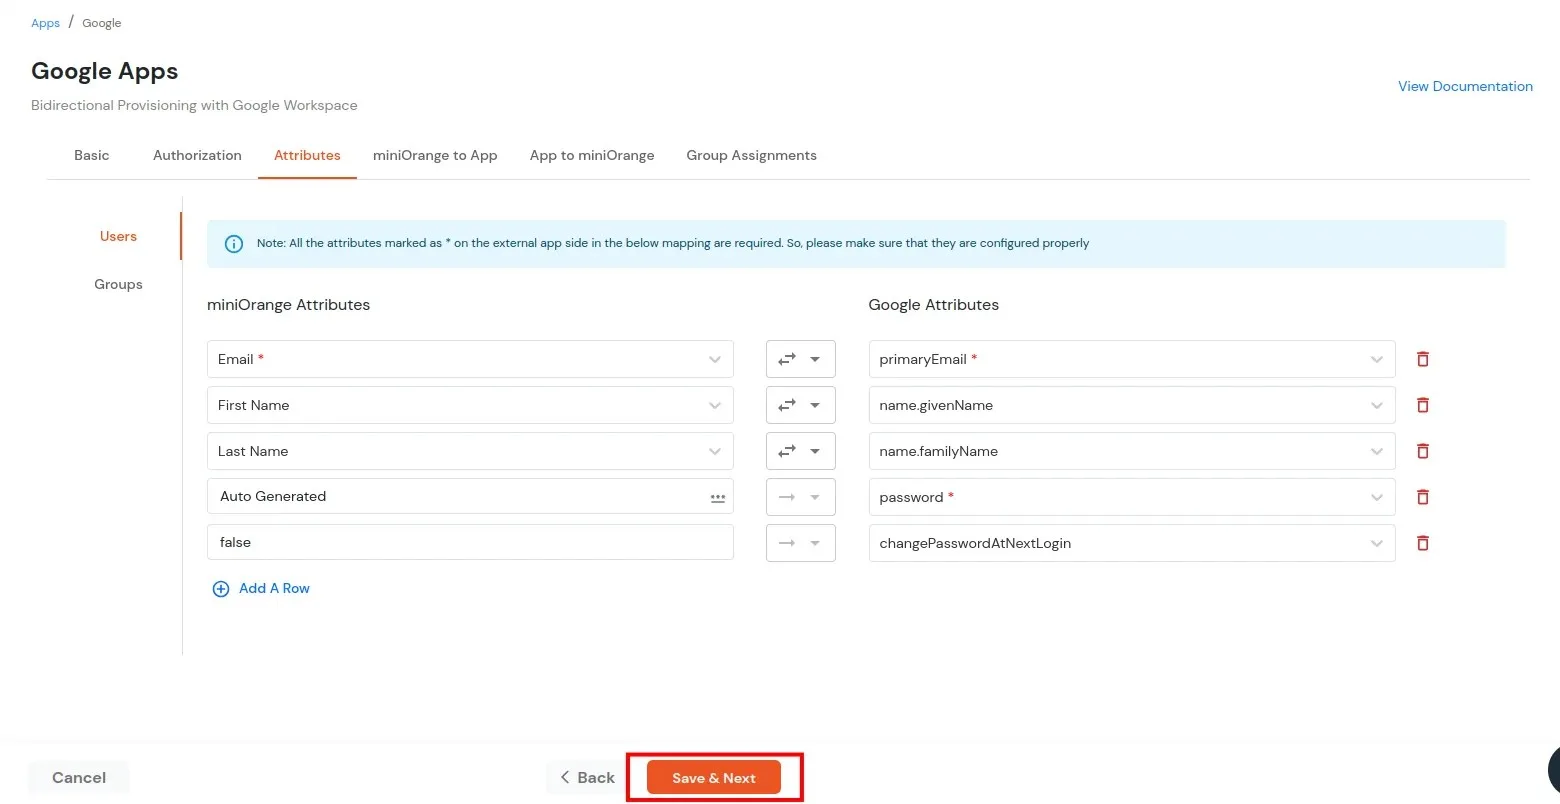
- Add custom attributes by clicking on Add a Row if necessary.
- For custom attributes, verify the Category and Field names from Google Admin Console:
(Directory >> Users >> Manage Custom Attributes)
Refer to the screenshot below to identify the Category and Field names.
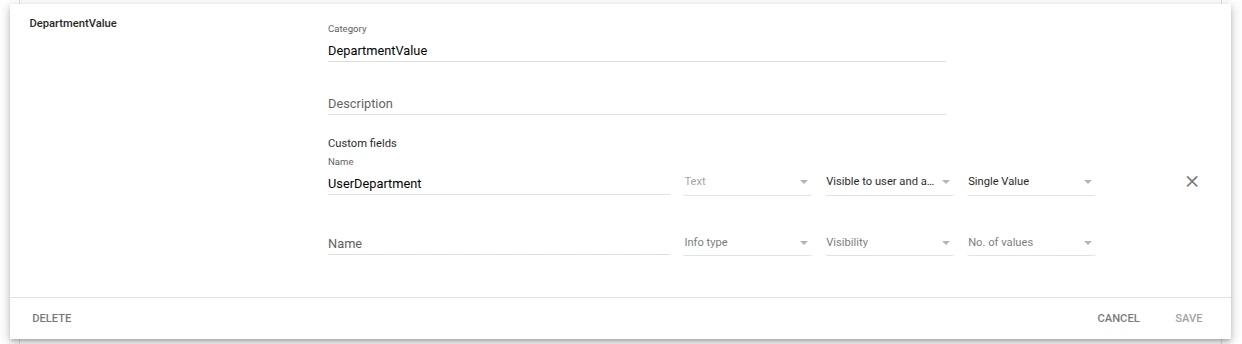
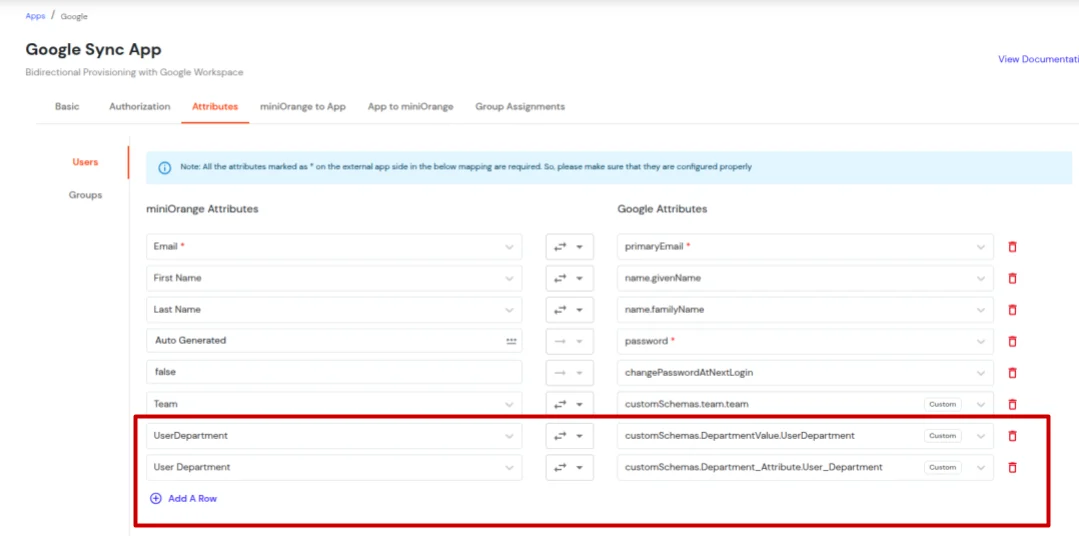
and use them in the format: customSchemas.<Category>.<Field>.
Example: customSchemas.DepartmentValue.UserDepartment
Note: If the Category or Field name contains spaces, replace them with underscores (_).
Example: customSchemas.Department_Attribute.User_Department
Note: Google Workspace supports multiple custom attribute types such as Text, Number, Boolean, Date, and Multi-value fields. While configuring these in miniOrange, ensure the corresponding attribute type is selected appropriately:
- Text / String → TextBox
- Number / Decimal → TextBox (handled as string in miniOrange)
- Boolean → Toggle (true/false)
- Date → Date Picker (MM/DD/YYYY format)
- Multi-value → Checkbox (values separated by semicolon)
- Click on Save >> Next.
Step 2: Importing Users from Google to miniOrange (Inbound)
- Choose the objects you want to import from Google Workspace.
- Check the required options and click on Import.
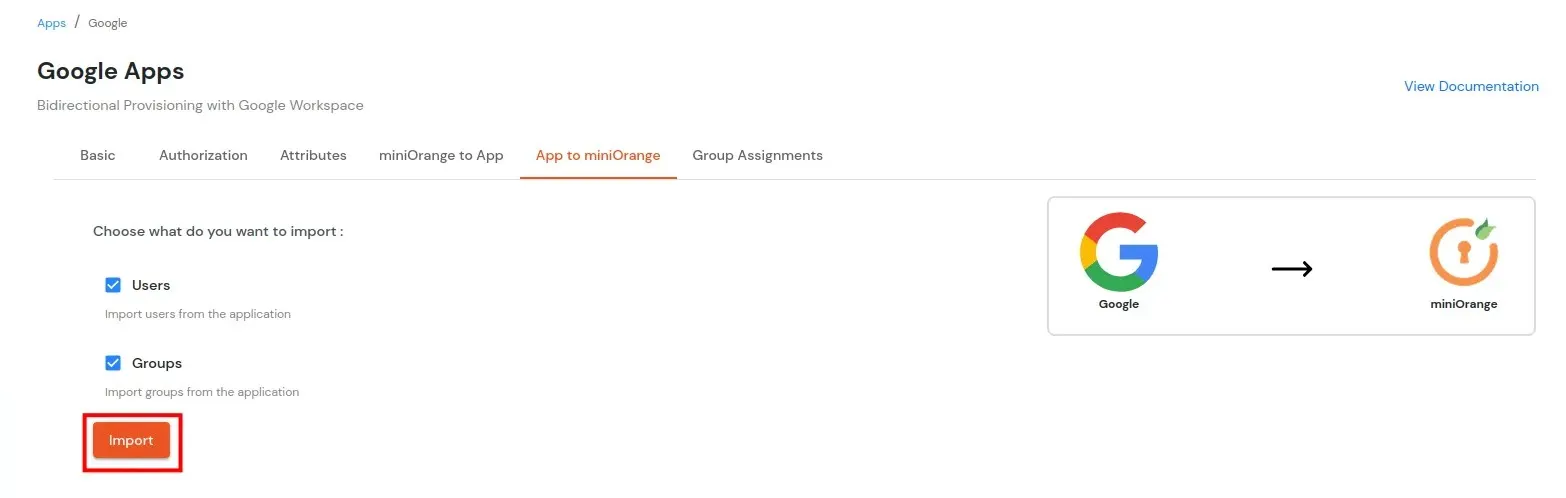
- Now users and groups are successfully imported to miniOrange.
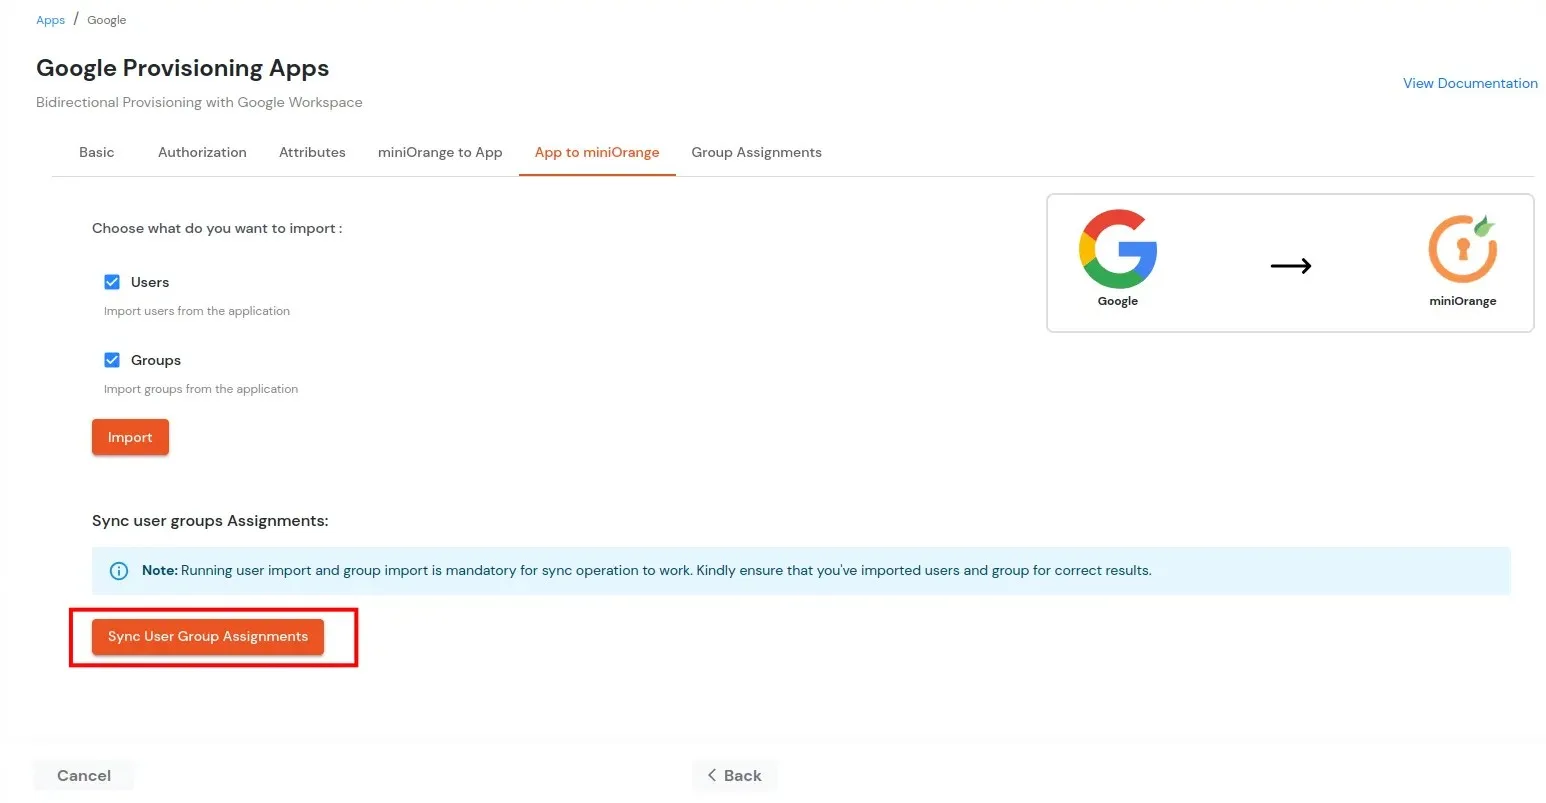
- If you want to import users from groups, you can click on Sync User Group Assignments. Before doing this, make sure that the groups have already been imported.
Step 3: Provisioning Users from miniOrange to Google (Outbound)
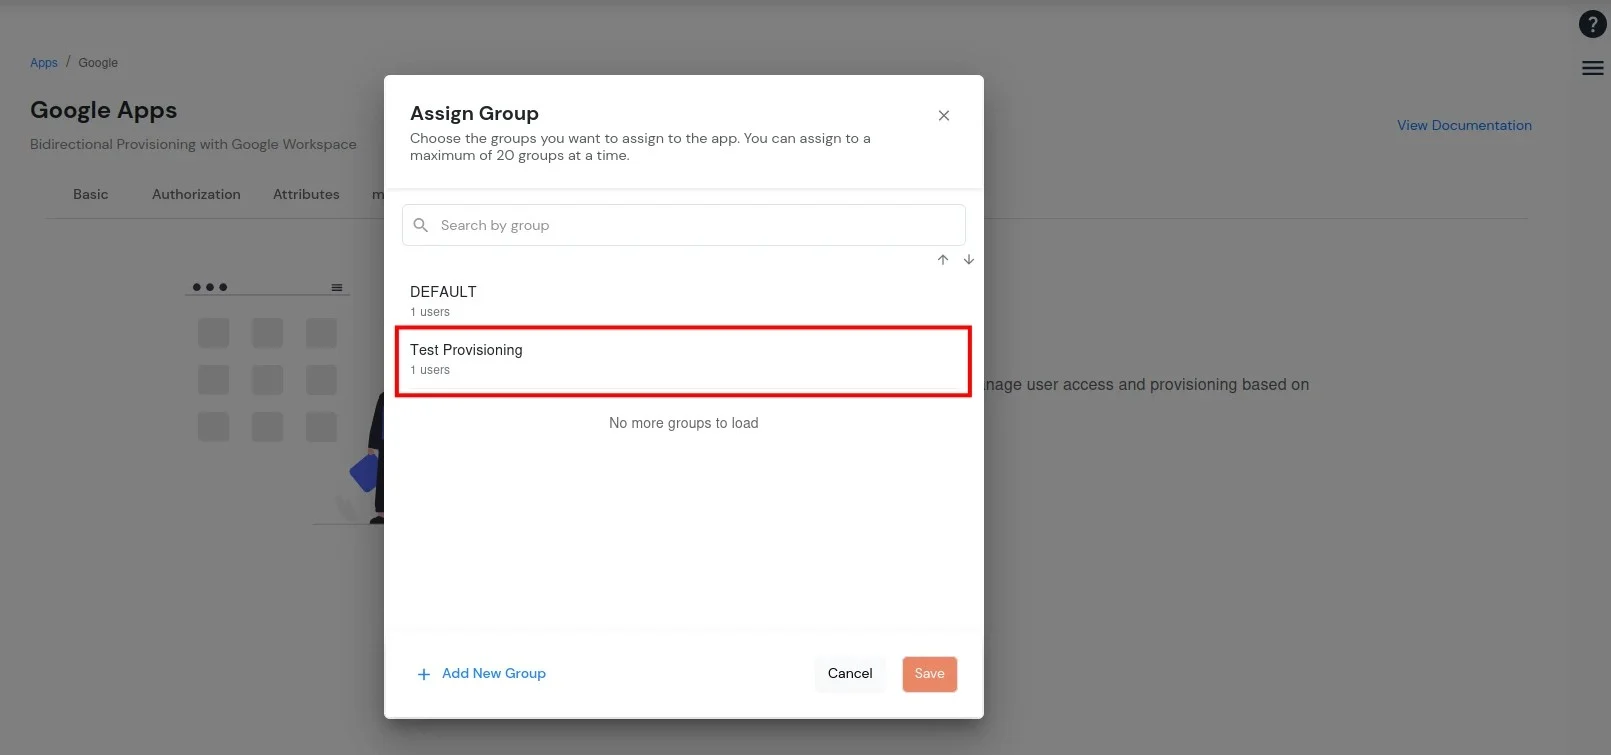
Group Assignments
- Assign the Groups here that you want to provision to Google. Only users belonging to these assigned groups will be provisioned from miniOrange to Google Workspace.
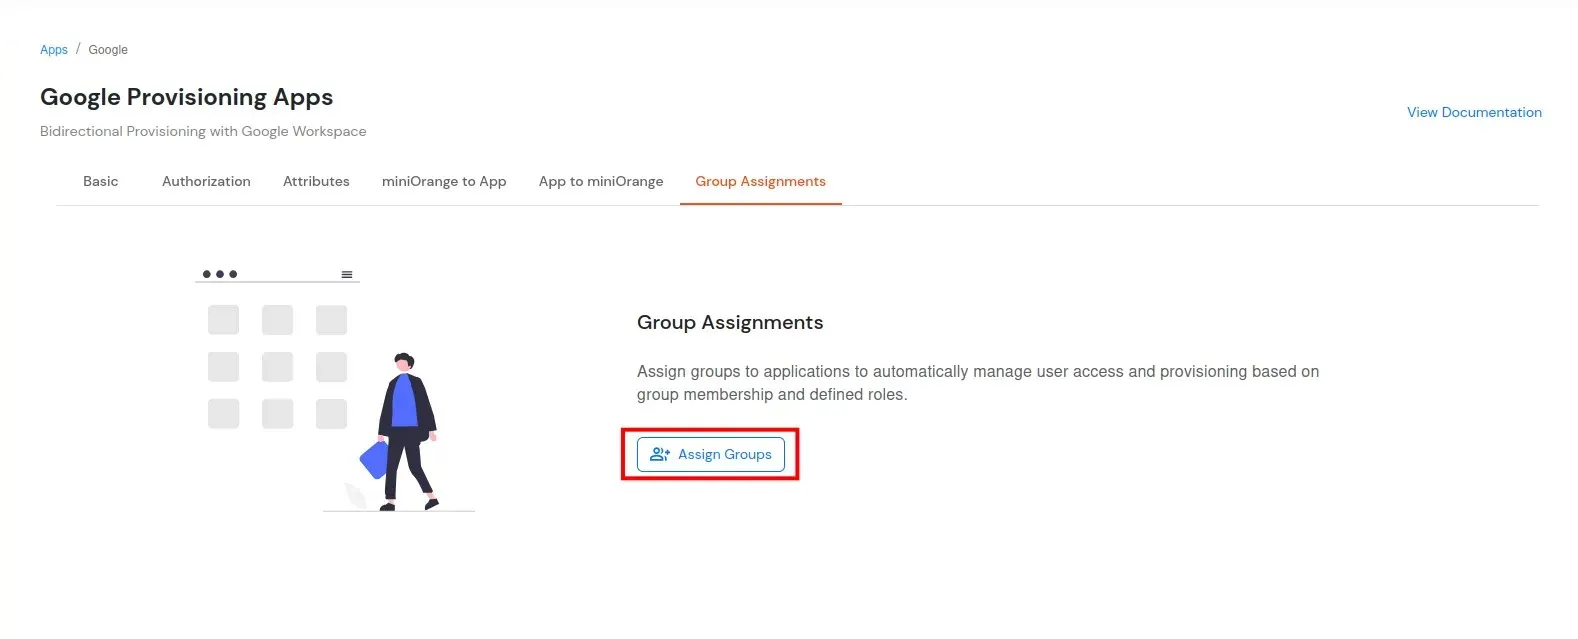
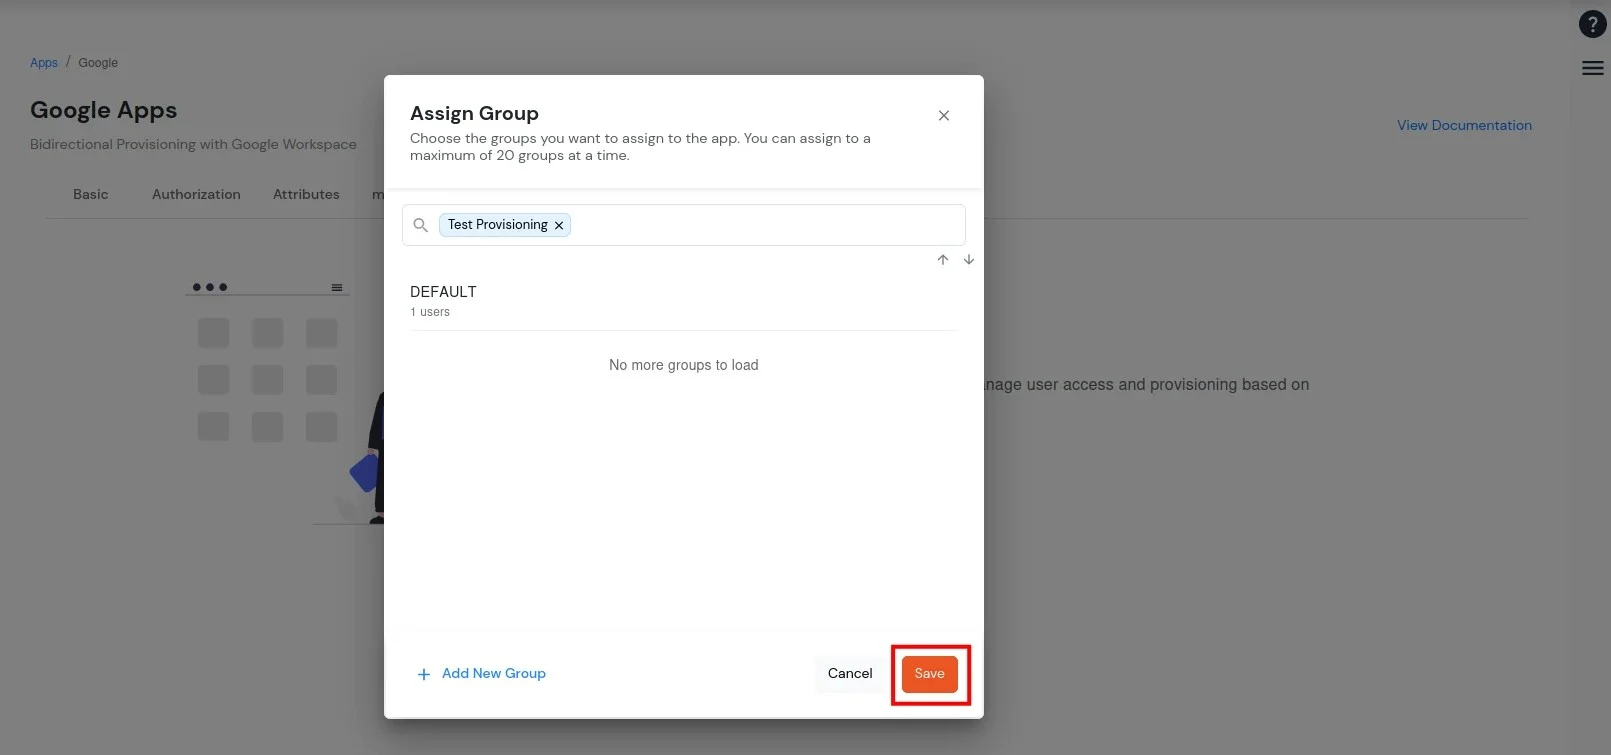
- Select groups that you want to provision and click on Save.
Create Users
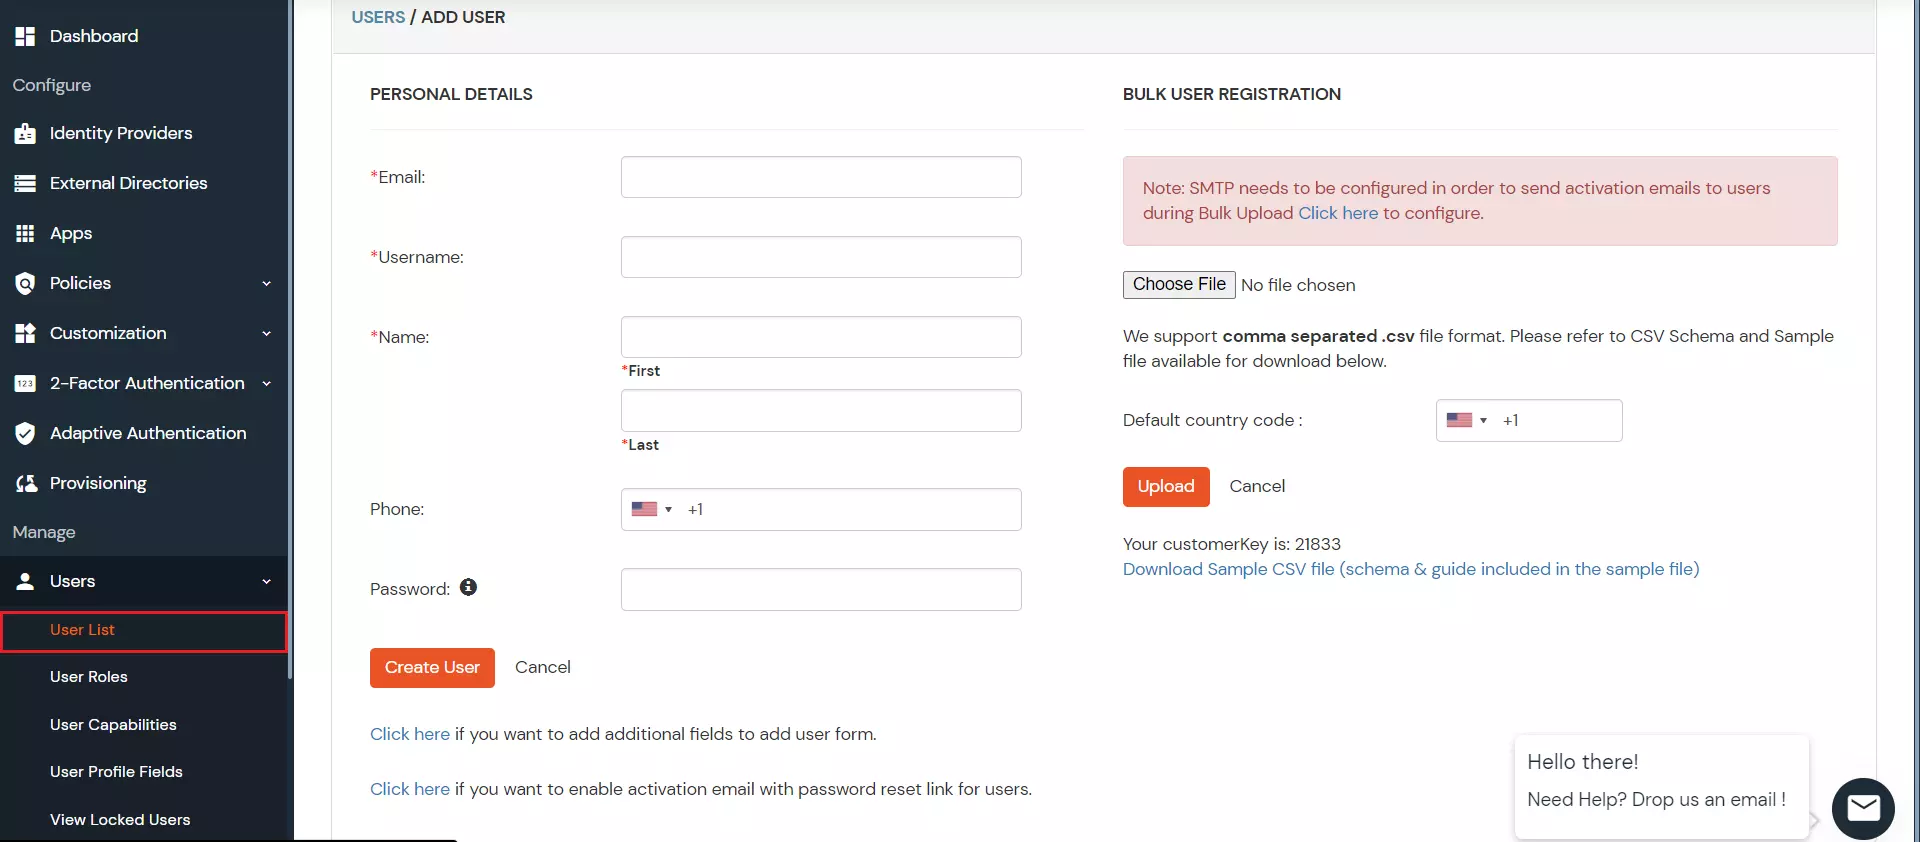
- To create a user in miniOrange, Go to Users >> User List >> click on the Add User button.
- Fill out the user basic information and click on the Create User button.
- After creating a user, Go to Groups >> Manage Groups
- Select a group that you have added in Group Assignment and assign users to it.
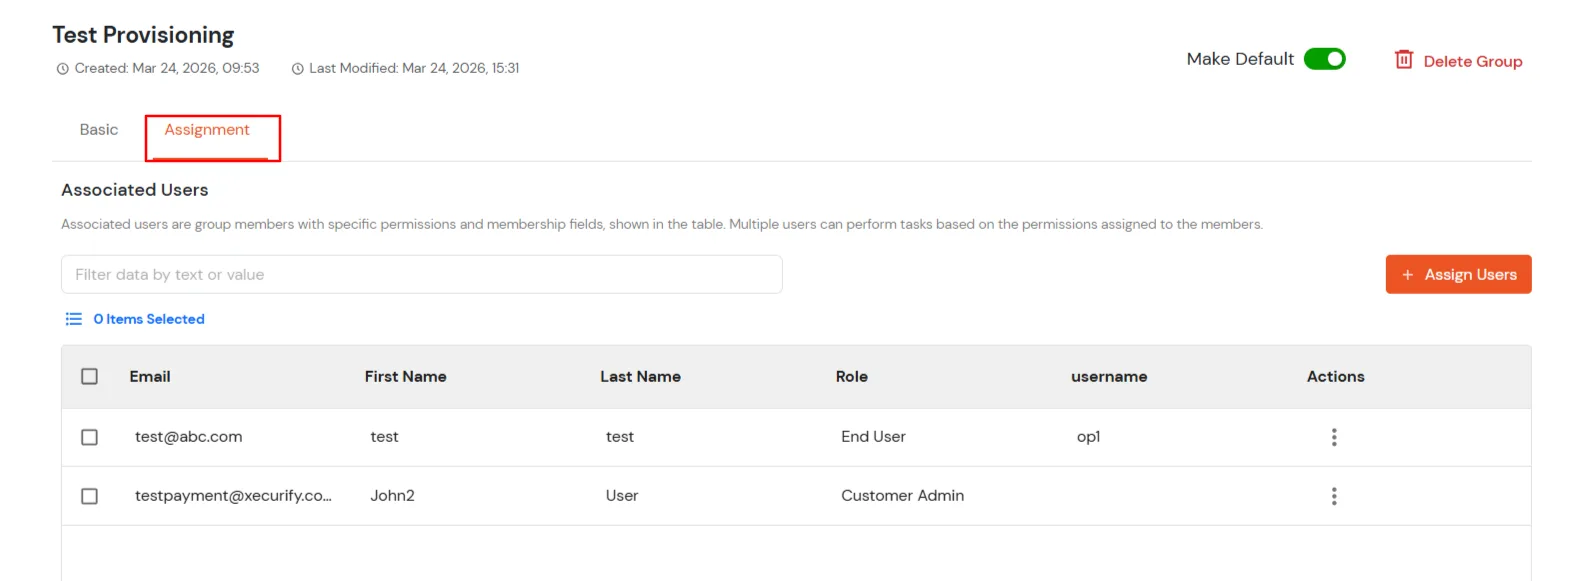
- After assigning a user into a group it will automatically create the same user in Google Workspace.
Edit Users
- To update the user profile, Go to Users >> User List.
- Select a particular user and in Actions dropdown select Edit.
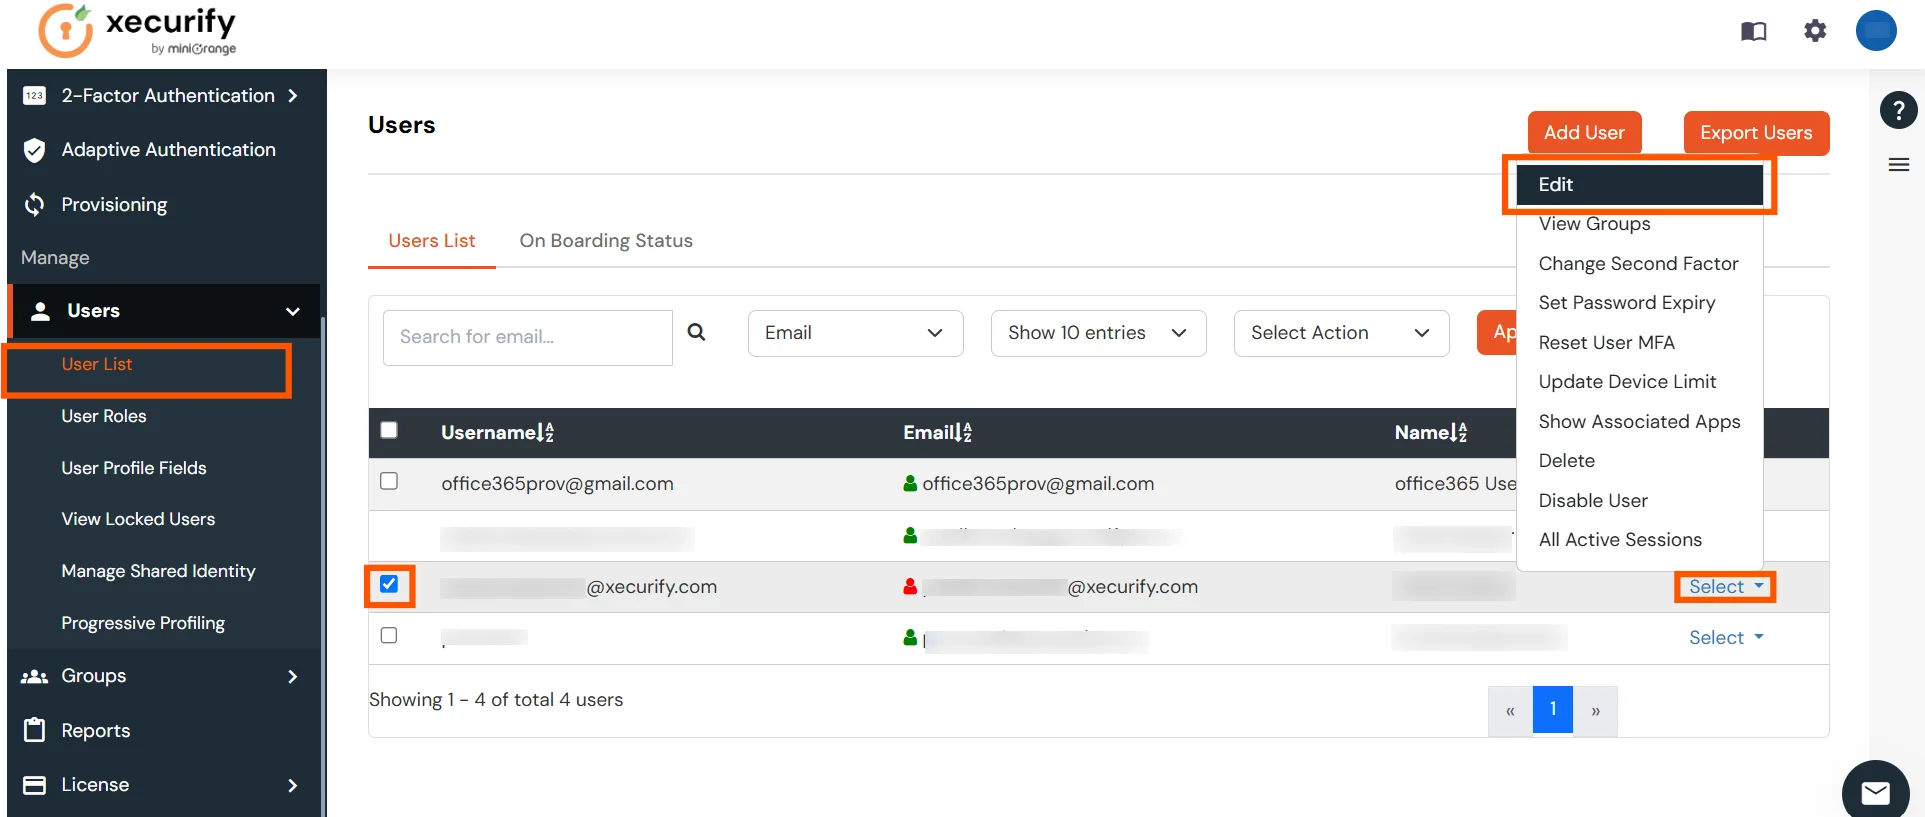
- Fill out user updated information and click on Save button.

- Once the user profile is updated in miniOrange, the changes will be automatically reflected in Google Workspace.
Delete Users
- To delete users, Go to Users >> User List.
- Select a particular user and in Actions dropdown select Delete.
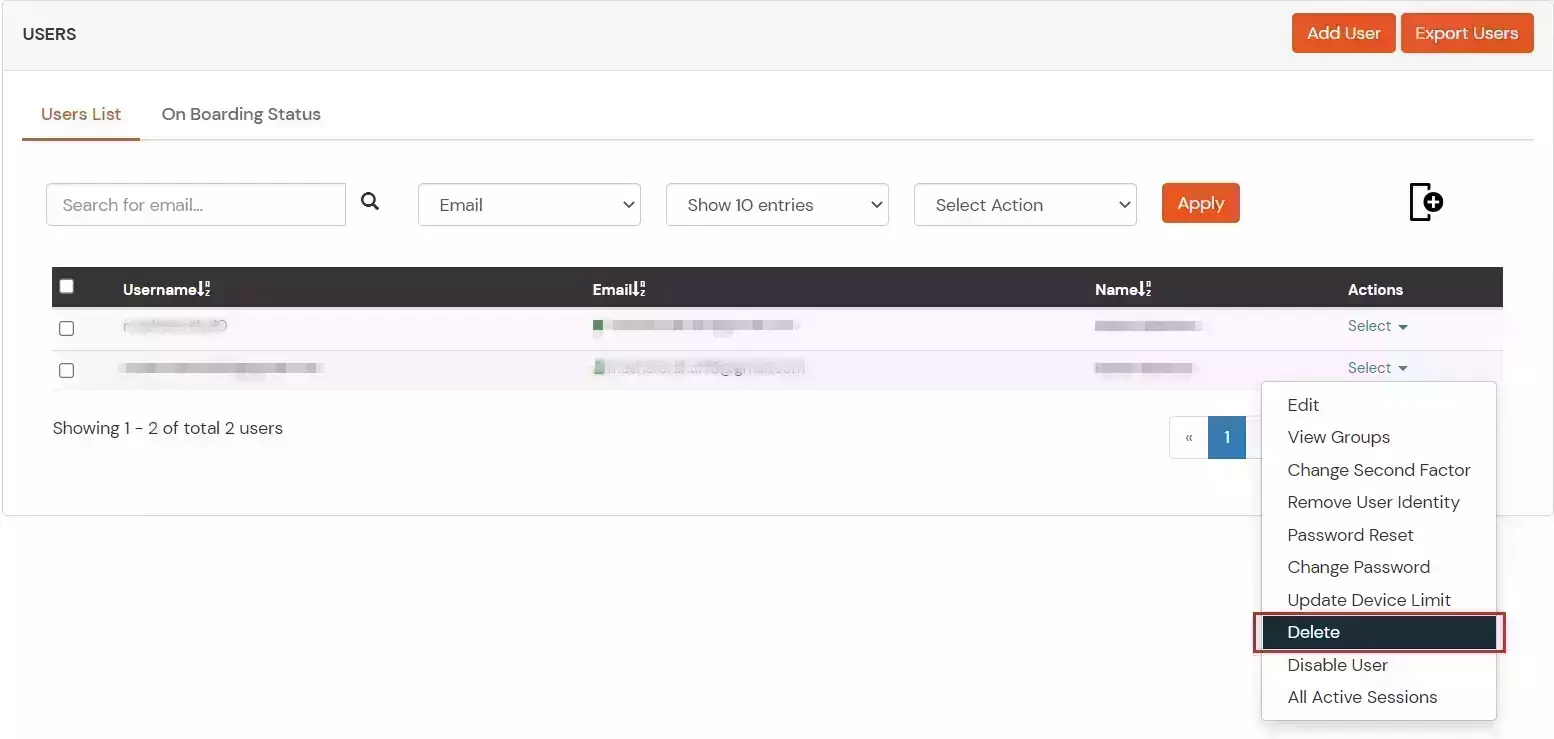
- A pop up will appear when you click on the Yes button.

- Once the user is deleted in miniOrange, it will be automatically deleted from Google Workspace.
Password Sync
- On the miniOrange side, whenever a user resets their password (via reset password link or any other flow), the updated password is automatically synced to Google Workspace.
- Any password change performed within miniOrange is reflected in Google Workspace in real-time.
Create Group
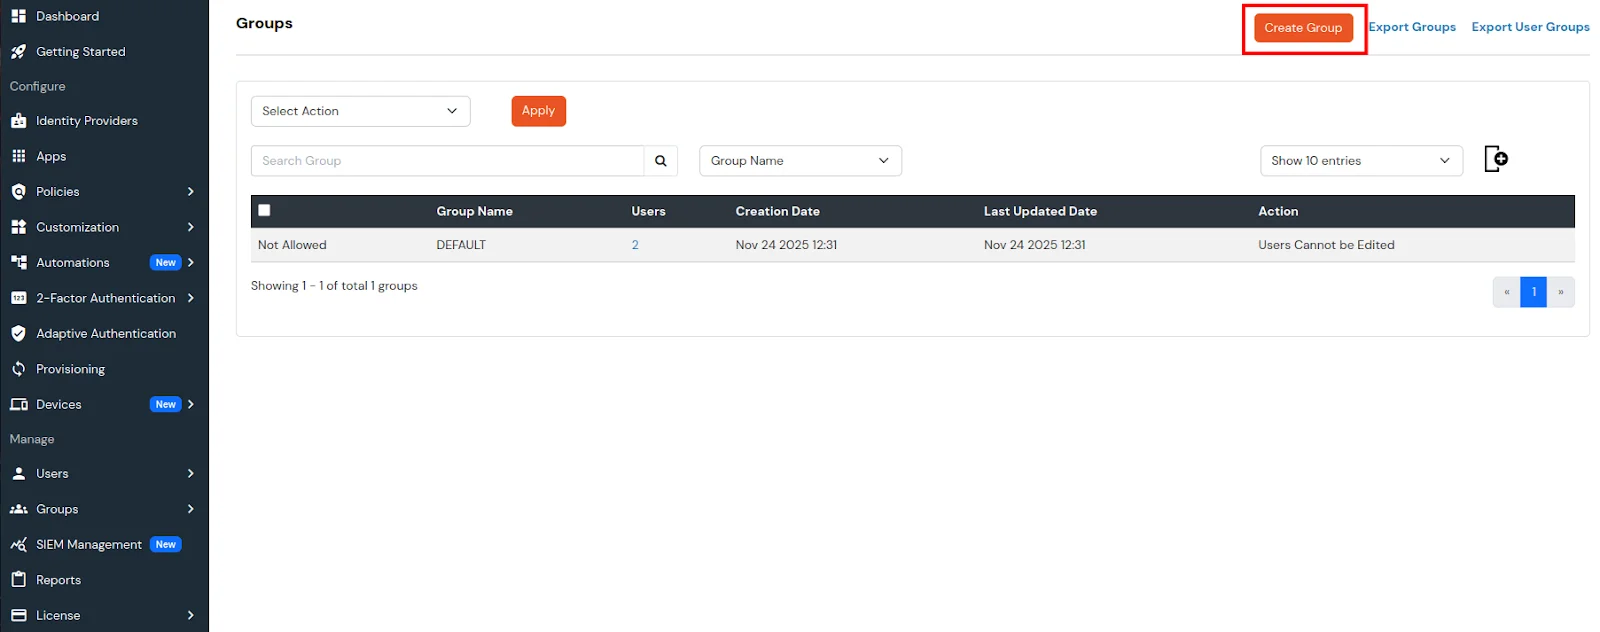
- To create a group, Go to Groups >> Manage Groups.
- Click on Create Group
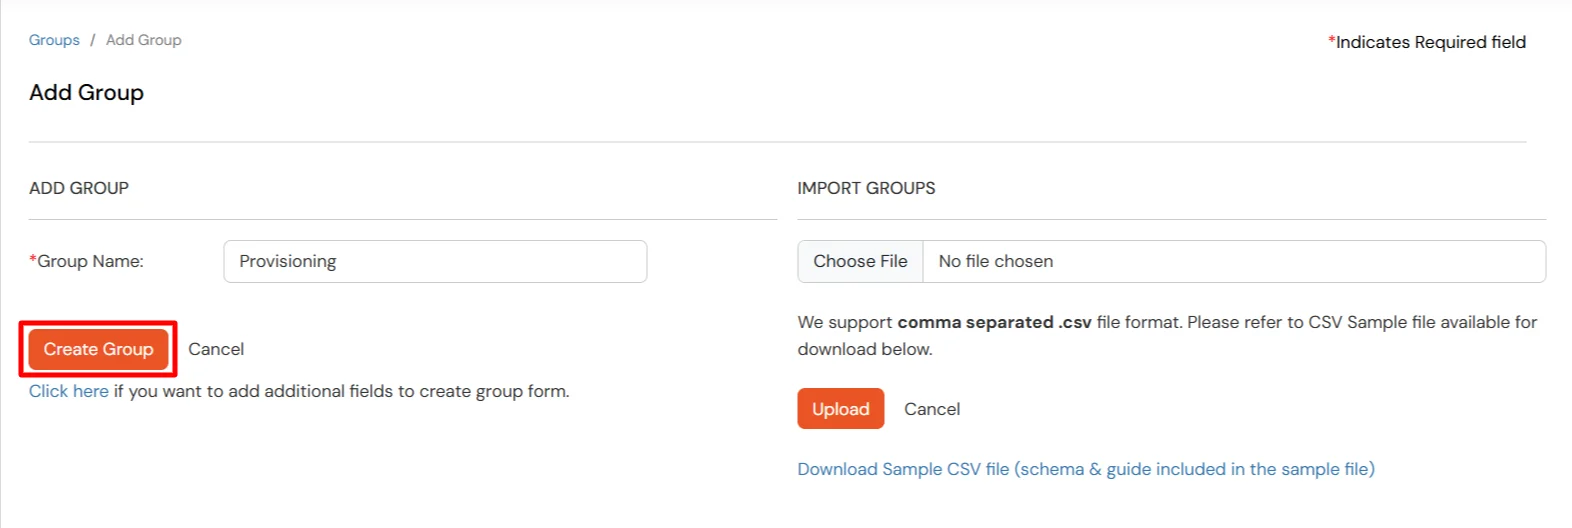
- Enter the group name and click on Create Group.
- Now go to Apps >> Select Google Provisioning App Under action click on edit.
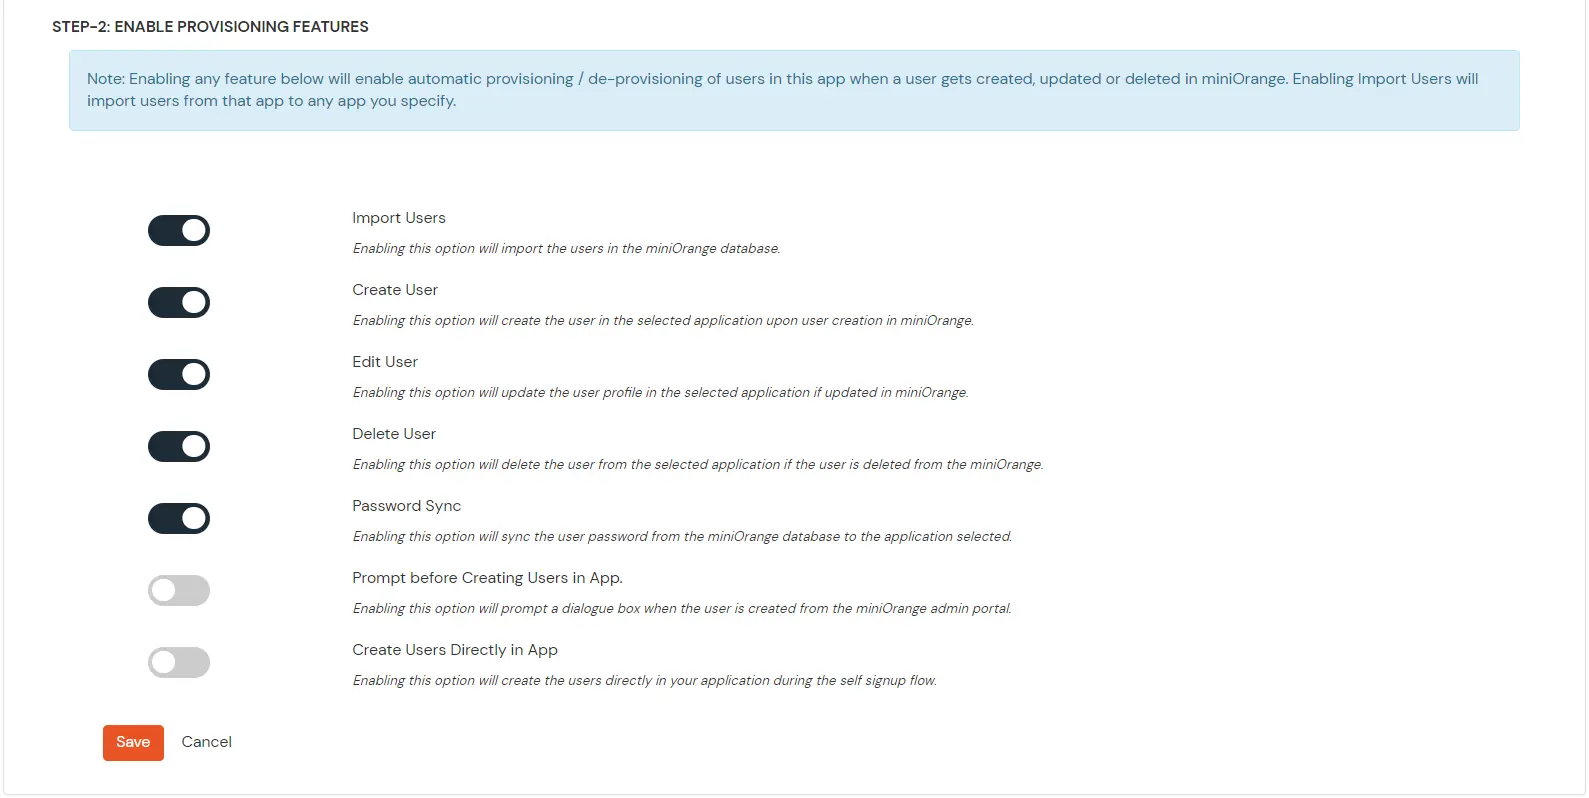
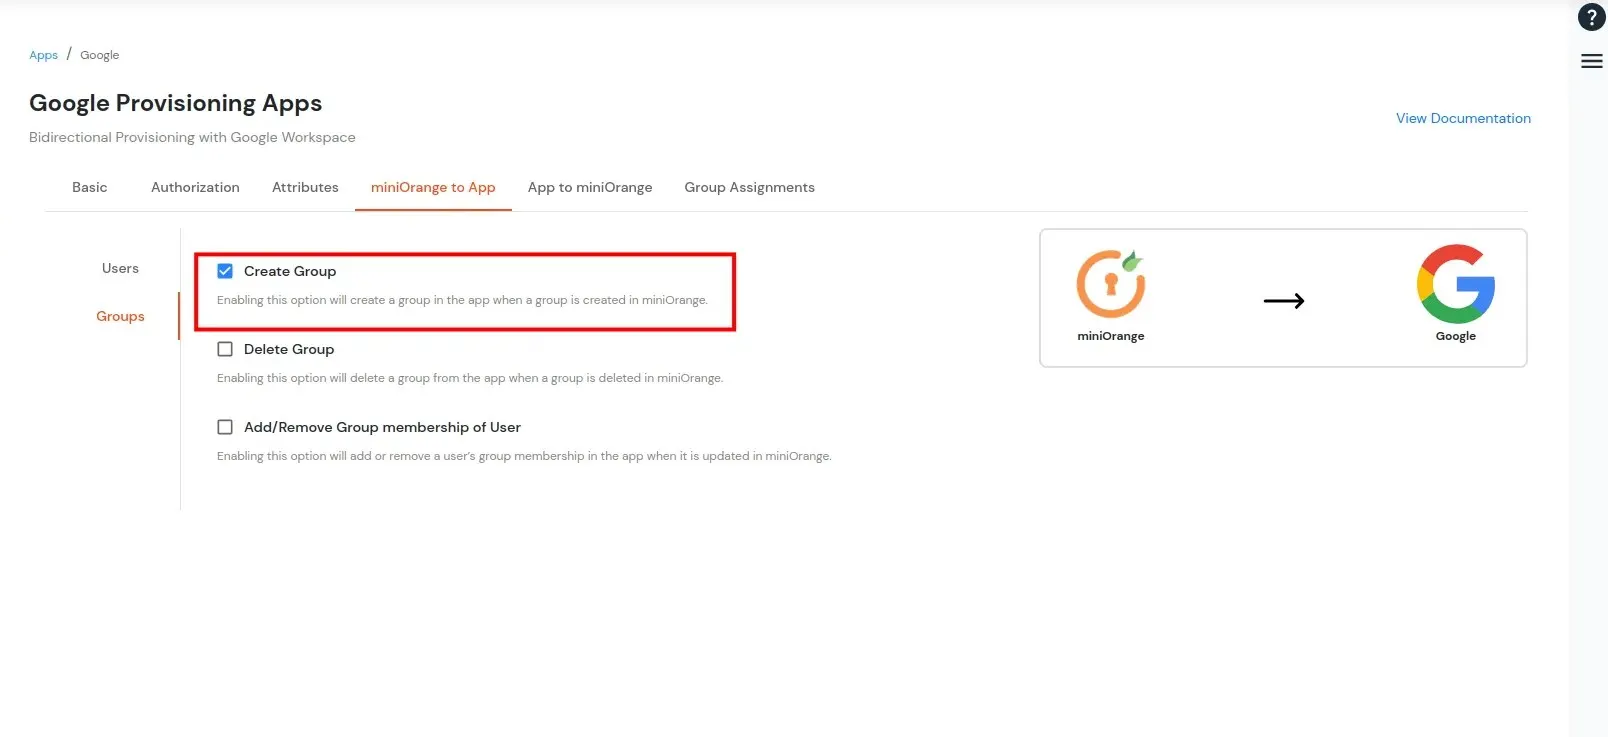
- Make sure you have enabled this Create Group Option
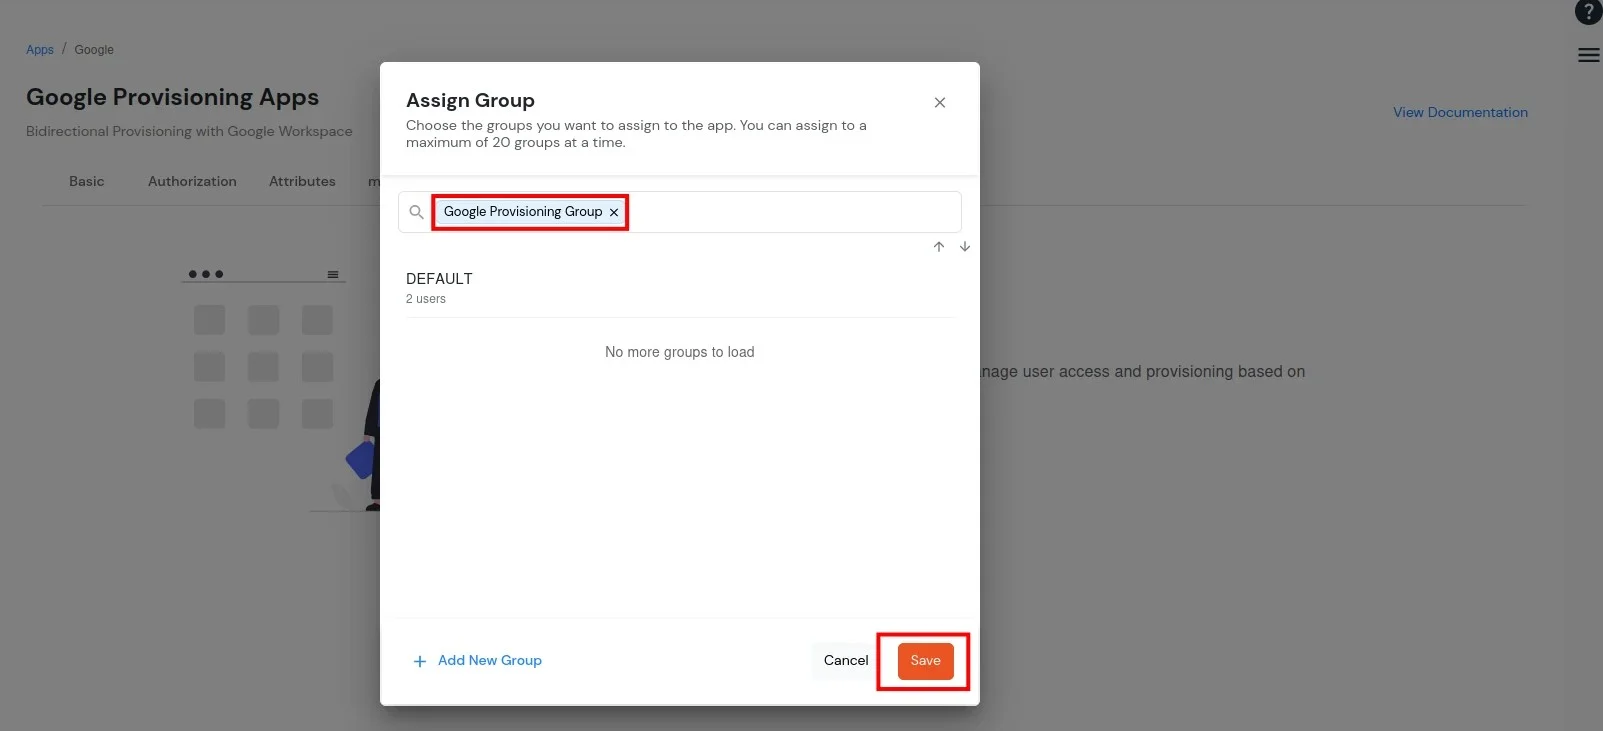
- Go to Group Assignments under that click on Assign Groups
- Assign groups that you want to provision to google workspace and click on Save.
- Now your group has been successfully provisioned to Google Workspace.
Delete Group
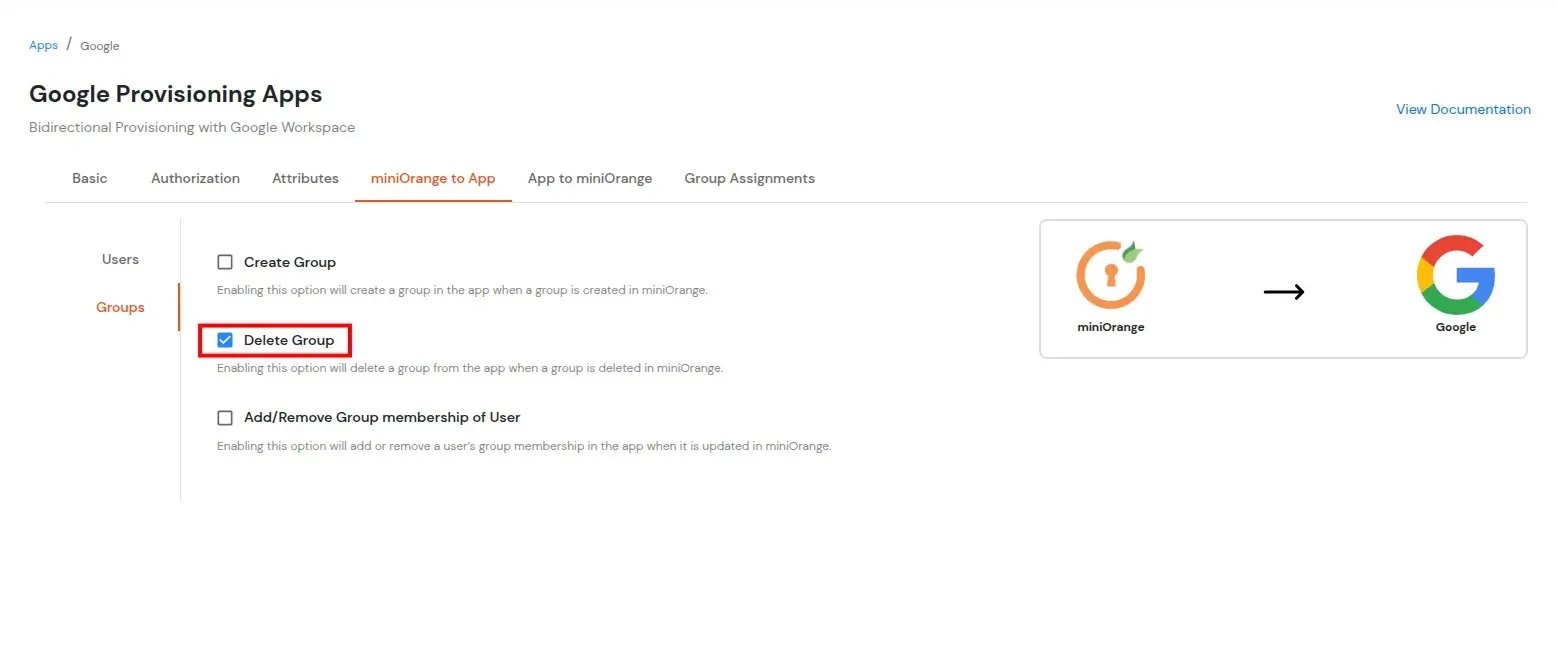
- Make sure that you have enabled Delete Groups options in Google Provisioning Apps
- Go to Groups >> Manage Groups
- Delete the group that you want to delete from Google Workspace.
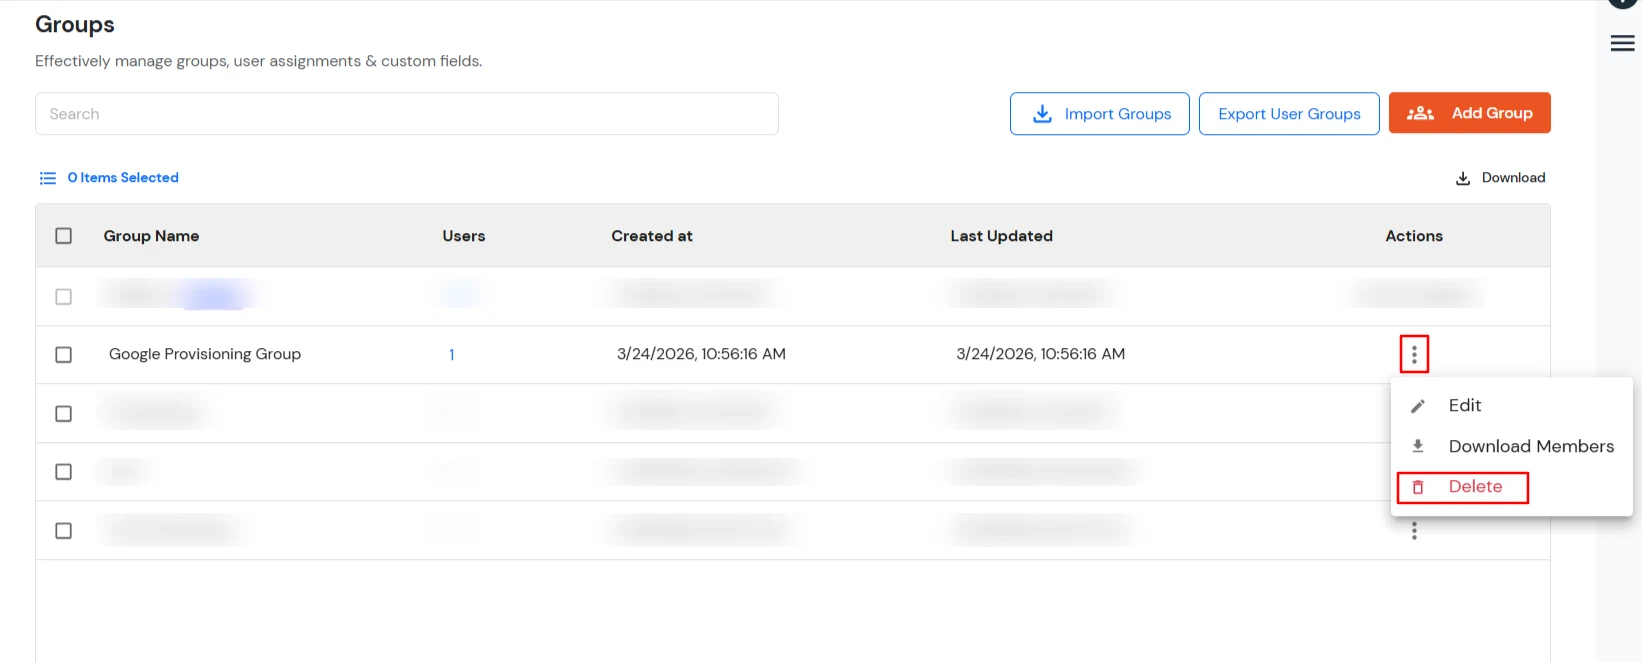
- Now your group has been successfully deleted from Google Workspace.
4. Automatic Scheduled-Based Import
- Navigate to the Automations tab and open the Schedulers section.
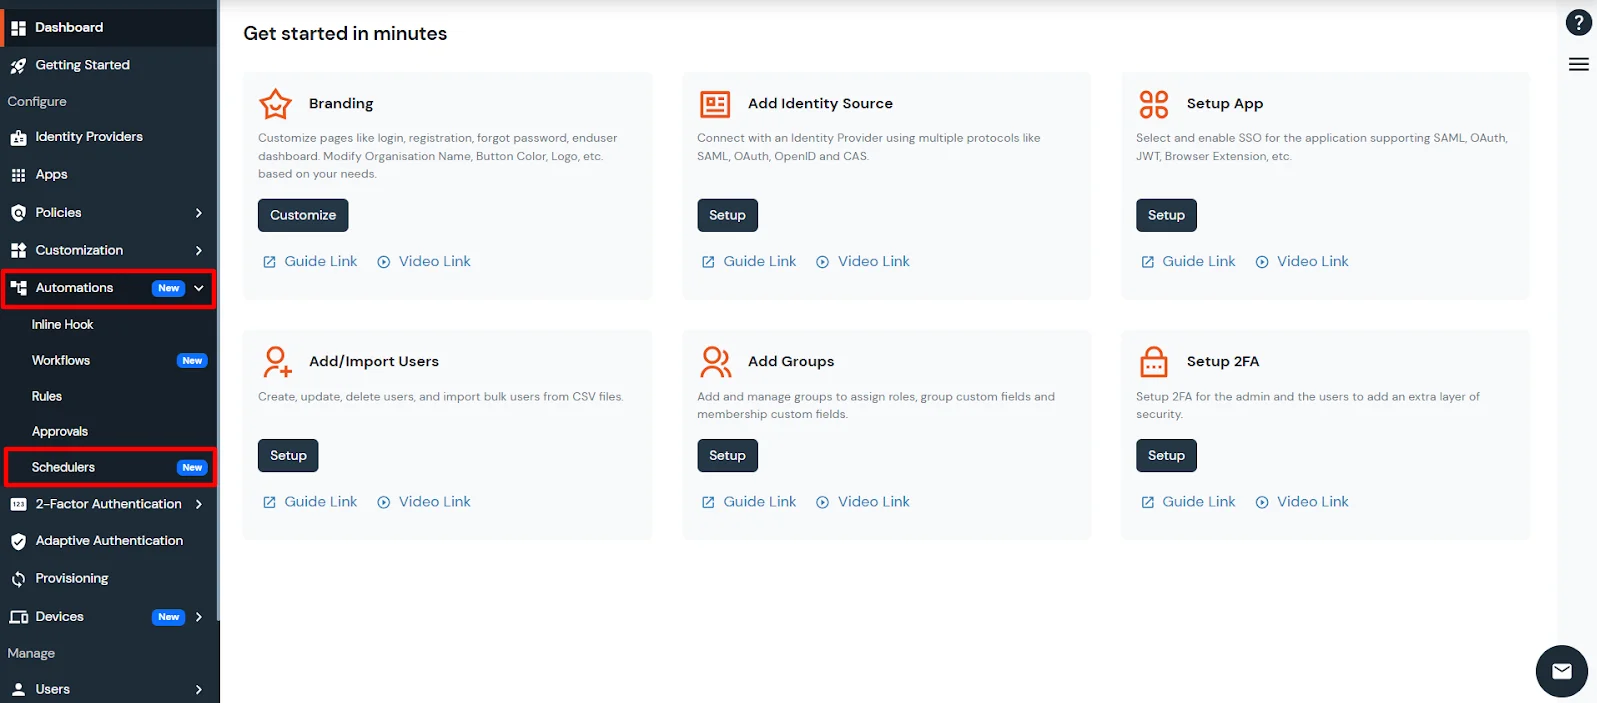
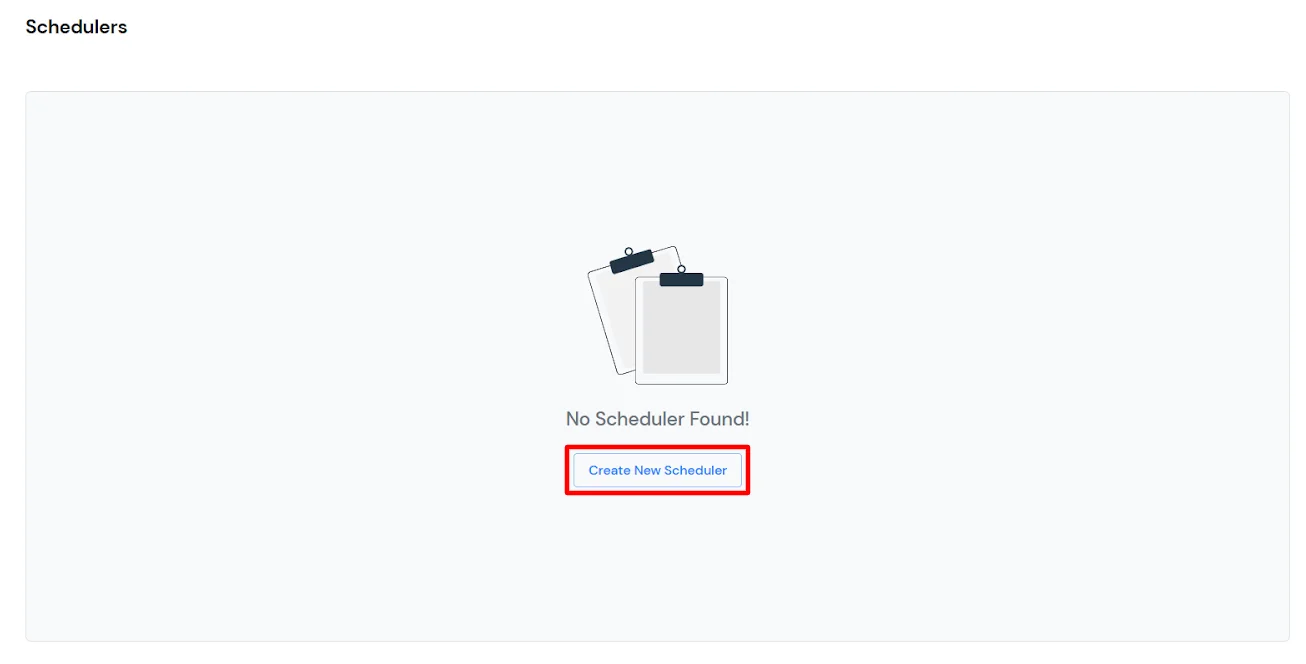
- To create a new scheduler, click on the Create New Scheduler button.
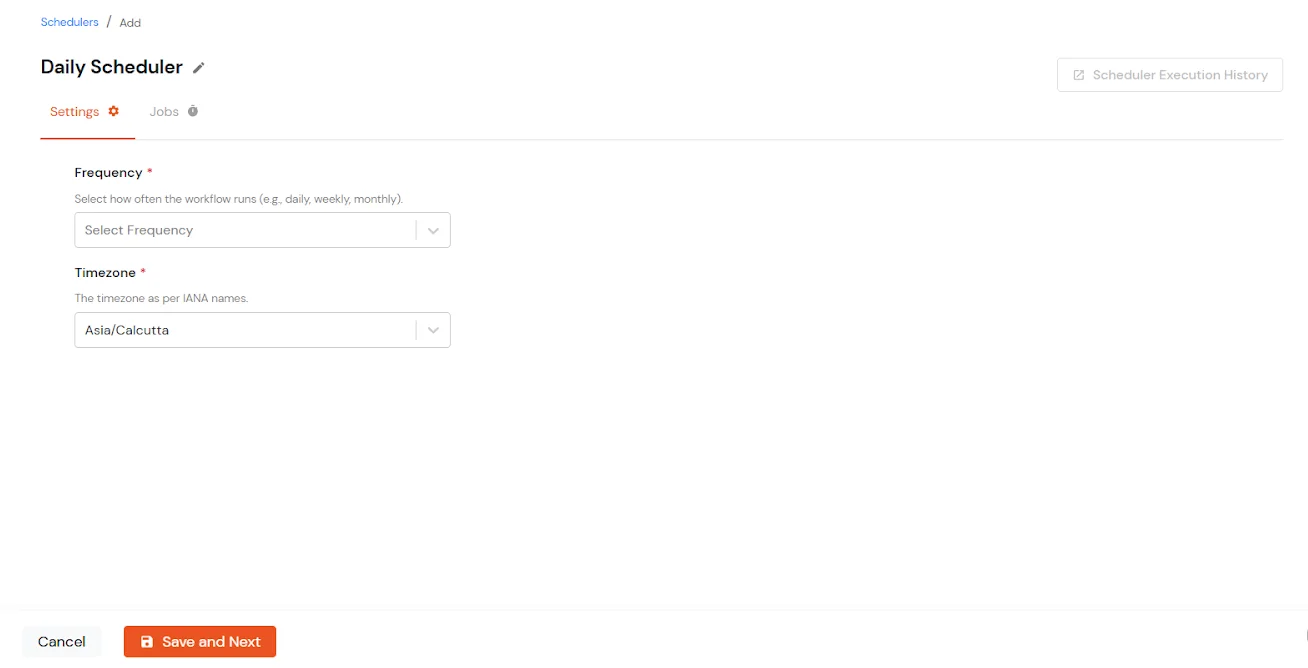
- Configure the Scheduler Settings by choosing the frequency (Once, Hourly, Daily, Weekly, Monthly).
- Specify the associated scheduling details and select the Timezone in which the scheduler should run.
- Once configured, click Save and Next.
- The next step is to configure the Job and assign it to the scheduler that was created by clicking on the Assign New Job button.
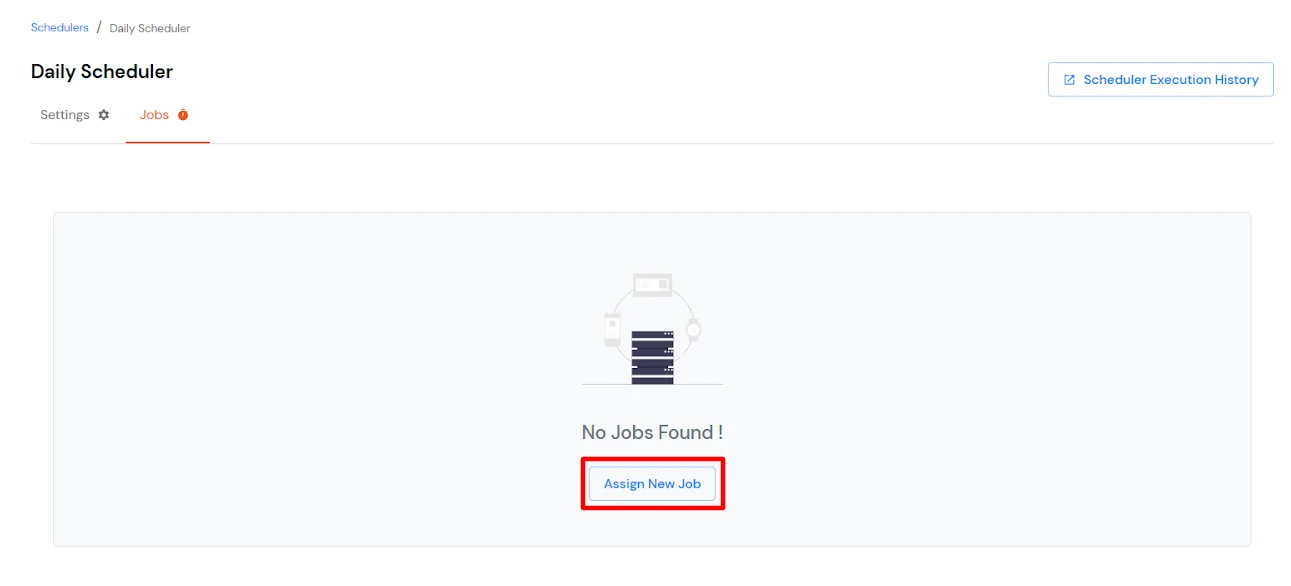
- Choose the application from which the import needs to be performed, along with the job task required (Import the users, groups or user group assignments).
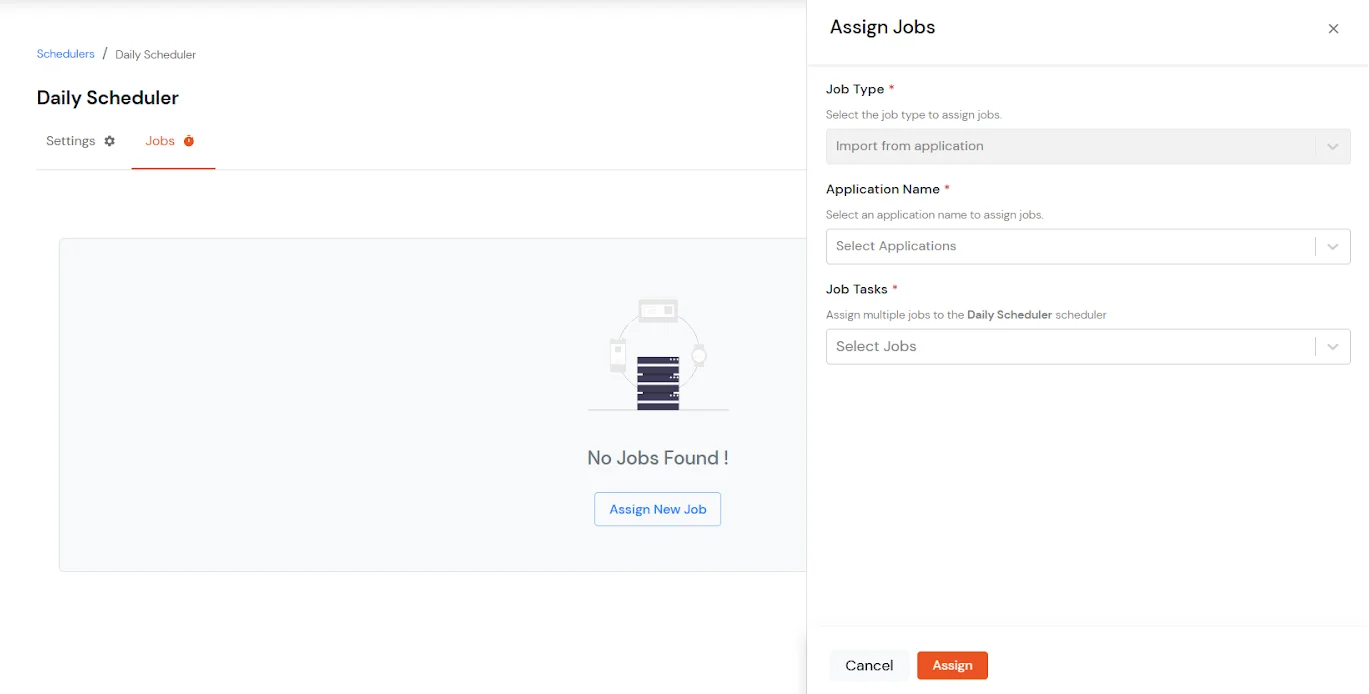
- Then click on the Assign button.
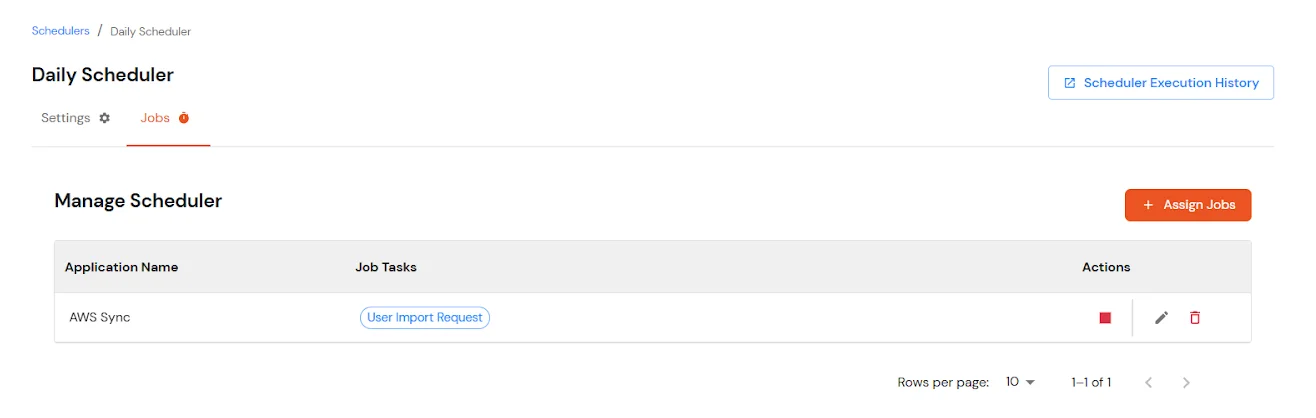
Note: If you want to import data from multiple applications, you can assign multiple jobs to the same scheduler.
- Once the configuration is complete, automated scheduled imports will run based on the defined schedule.
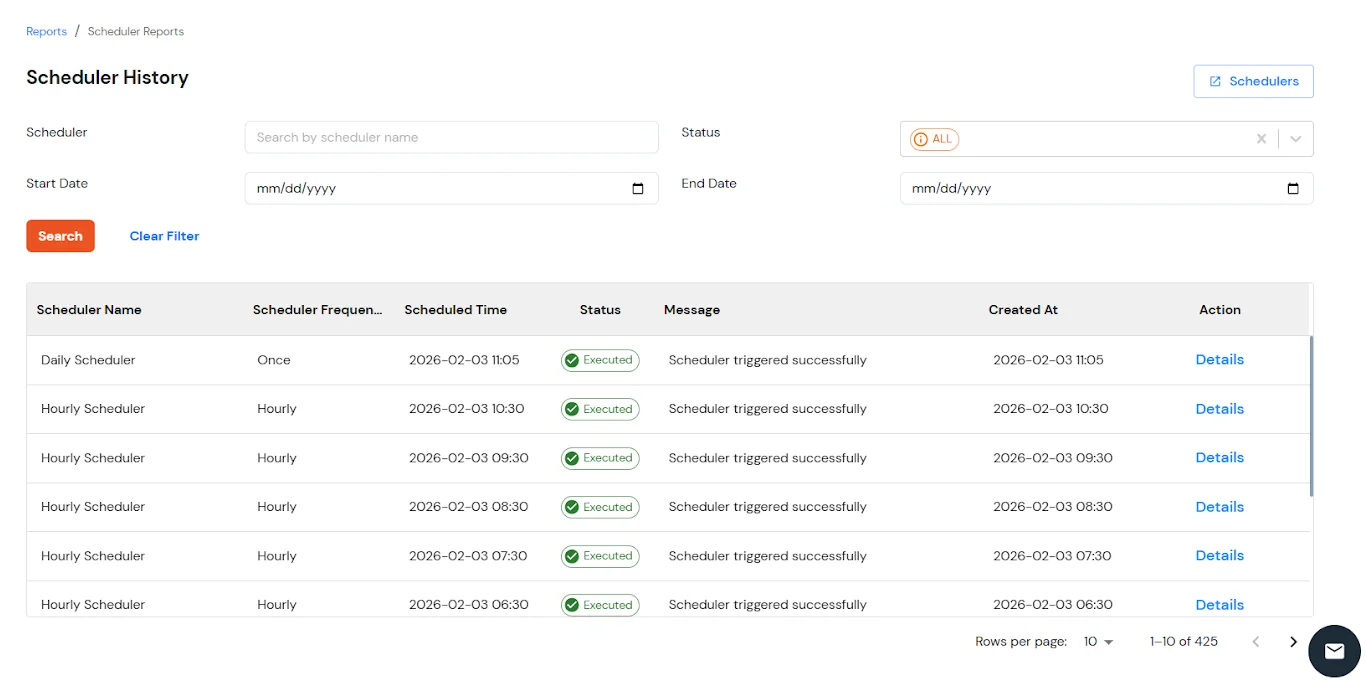
- To view scheduler execution details, navigate to Reports from the left menu and scroll down to check the Scheduler History.
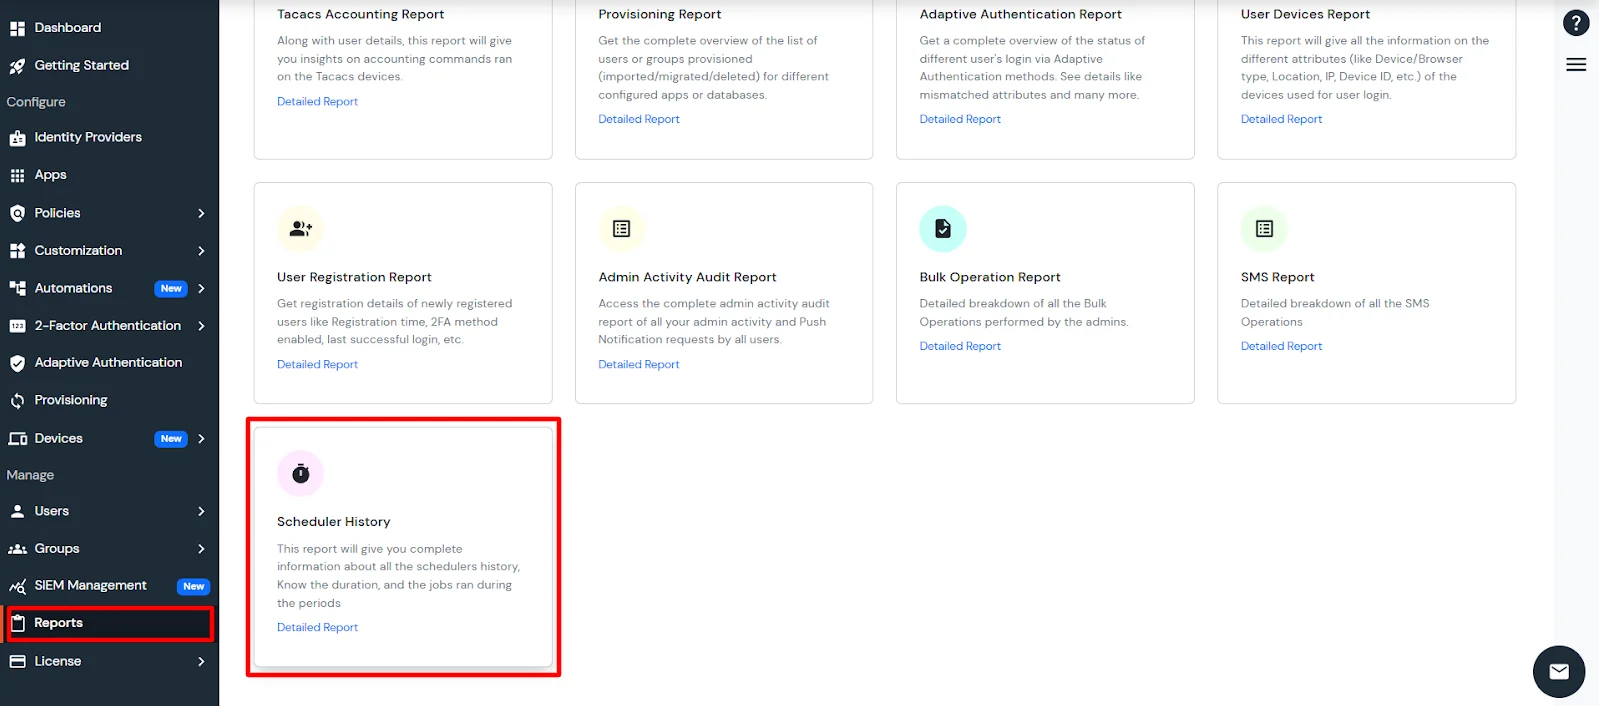
- This report will give you complete information about all the scheduler's history. Know the duration and the jobs that ran during the periods:
View Provisioning Reports
How to access Provisioning Reports?
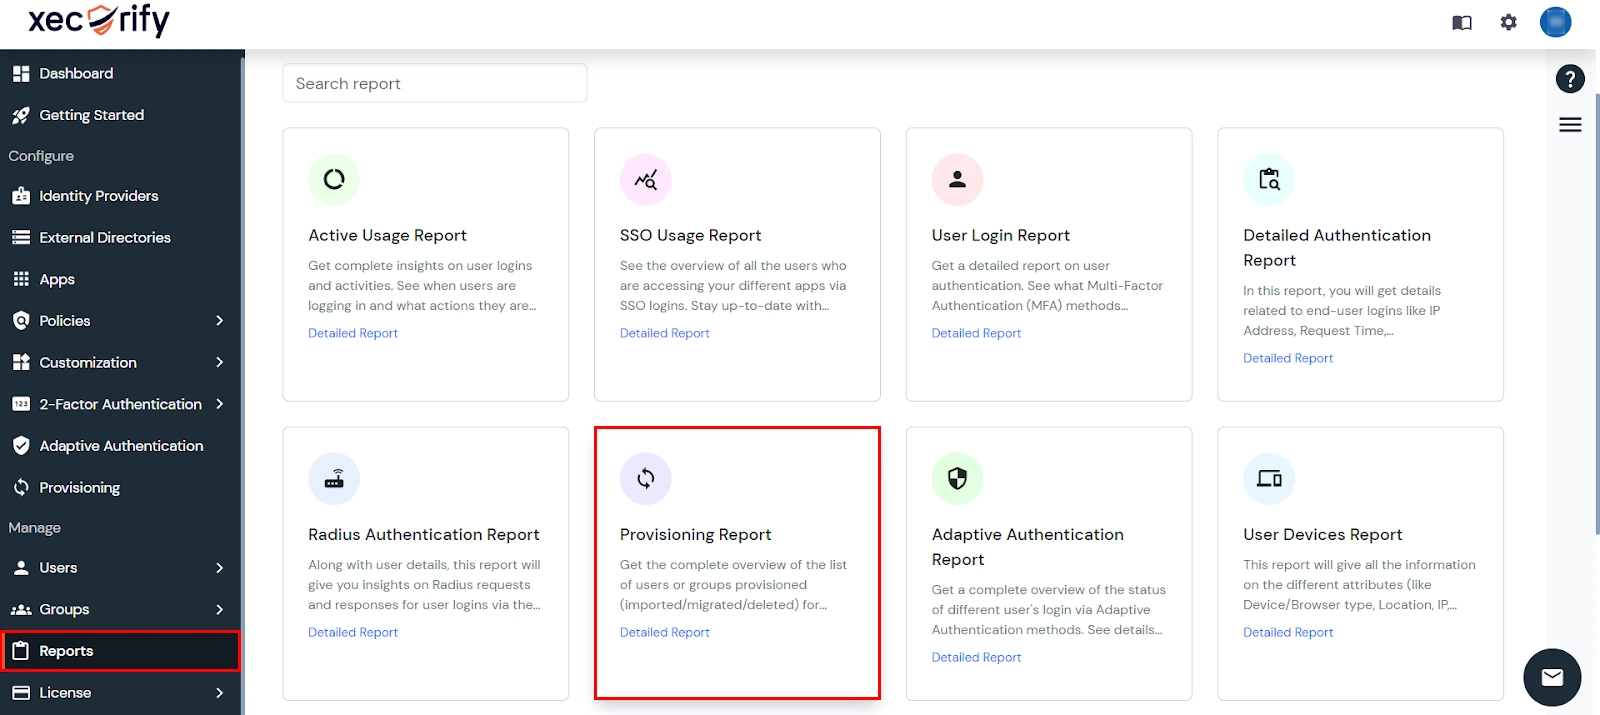
- Navigate to Reports in the left-hand navigation pane, search for Provisioning, and select Provisioning Report.
- Filter the reports by specifying Enduser Identifier and Application Name criteria. Additionally, choose the desired timespan for the reports. Once done, click on the Search.
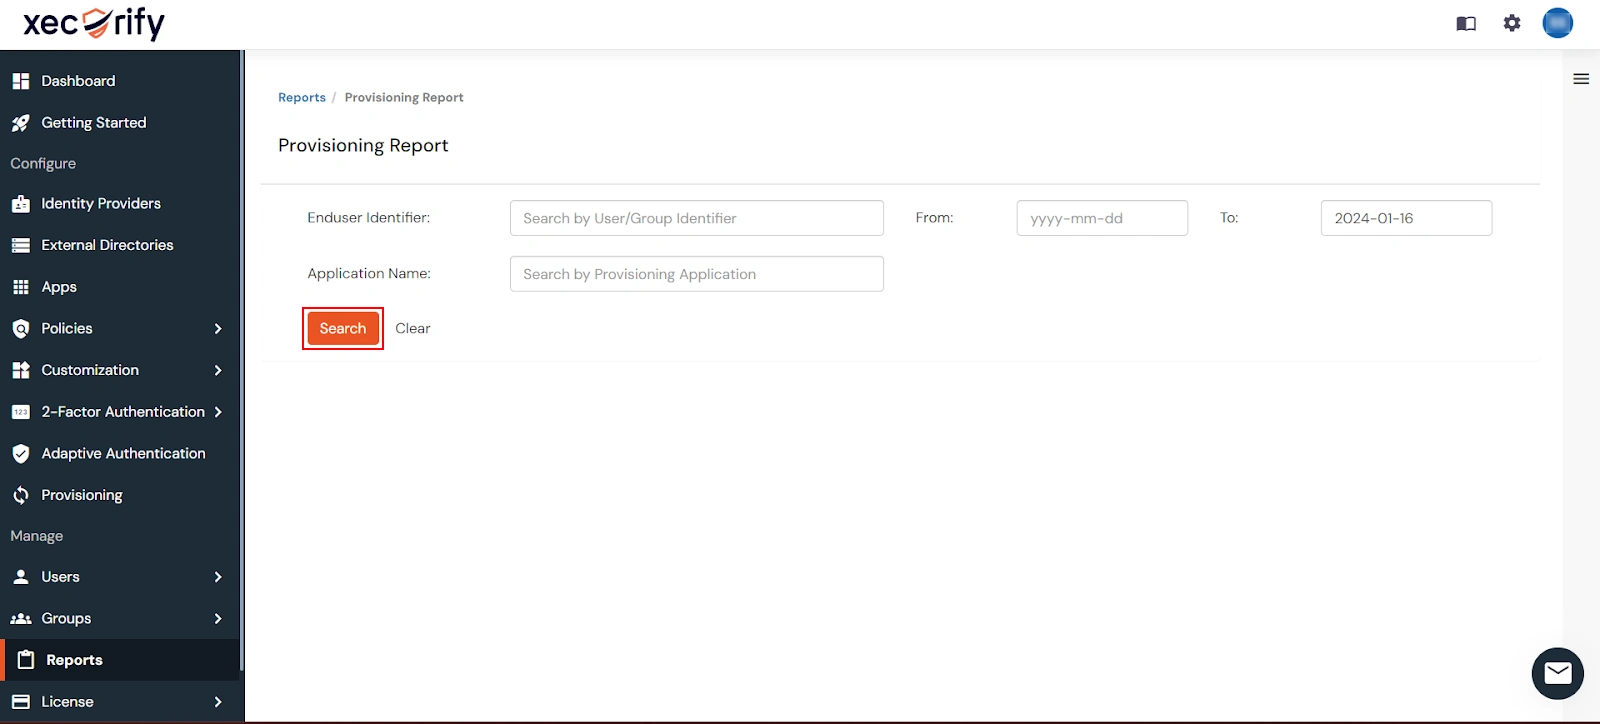
- Alternatively, you can directly click on Search to retrieve all provisioning reports based on time without applying any specific filters.
External References