How to add a SCIM Client App
miniOrange SCIM Client application is used for inbound provisioning using SCIM protocol. In inbound provisioning, A user gets provisioned from their application to miniOrange using SCIM protocol.
Steps to setup provisioning from SCIM supported app to miniOrange
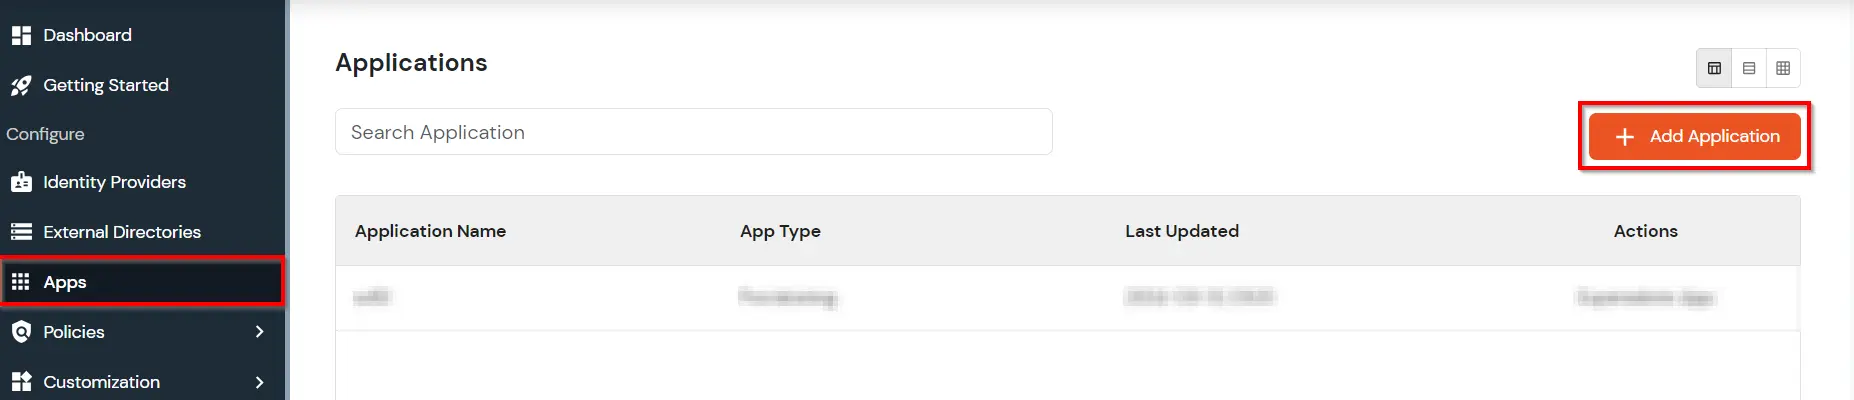
- Login into miniOrange Partner Portal Console.
- Click on Apps. It shows a list of all configured applications and option to modify them. Click on Add Application.
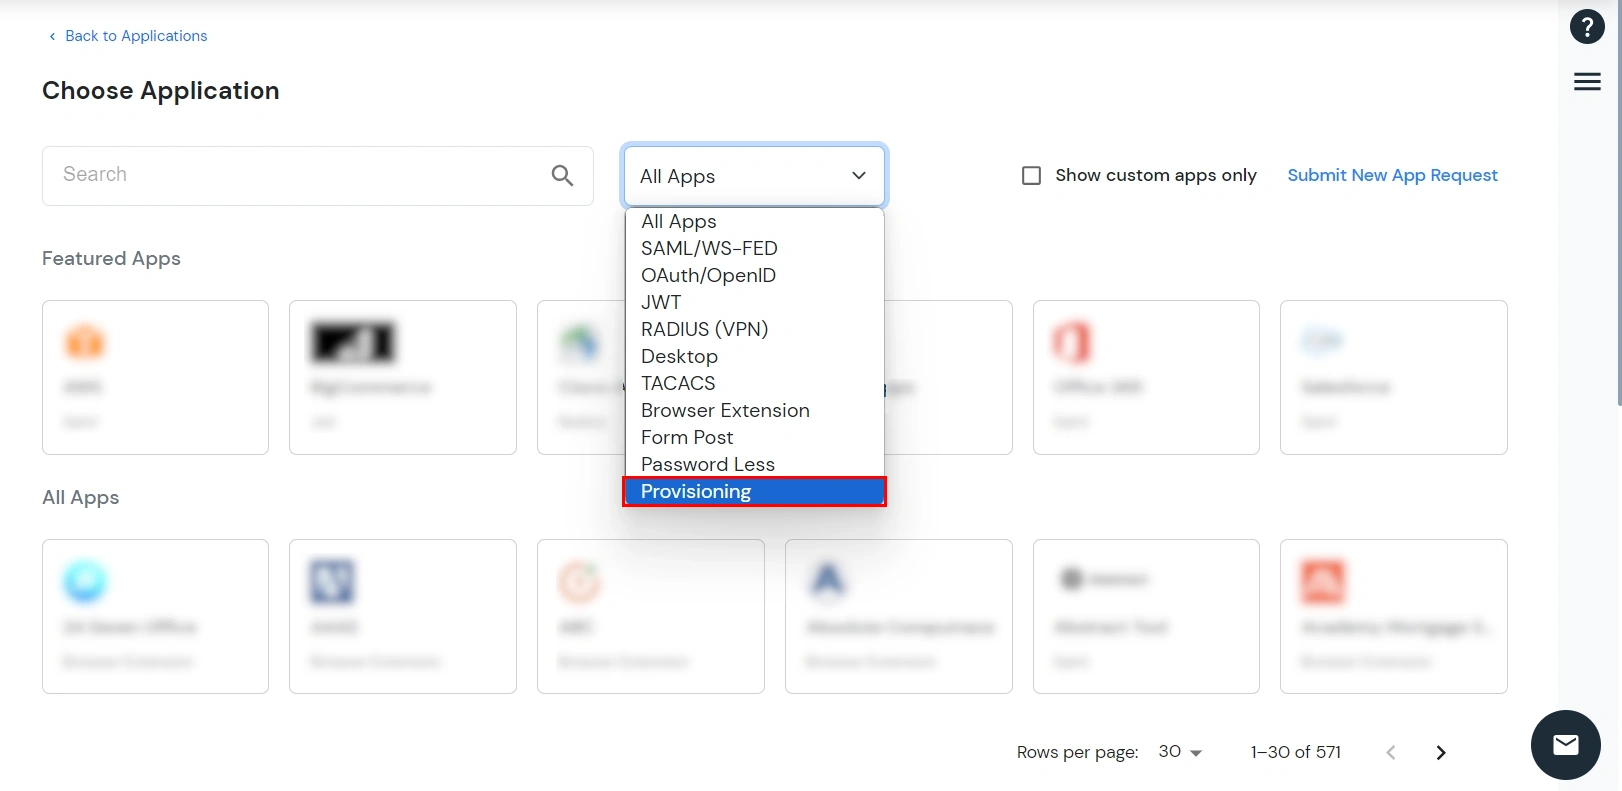
- Under Choose Application, select Provisioning from the All Apps dropdown.
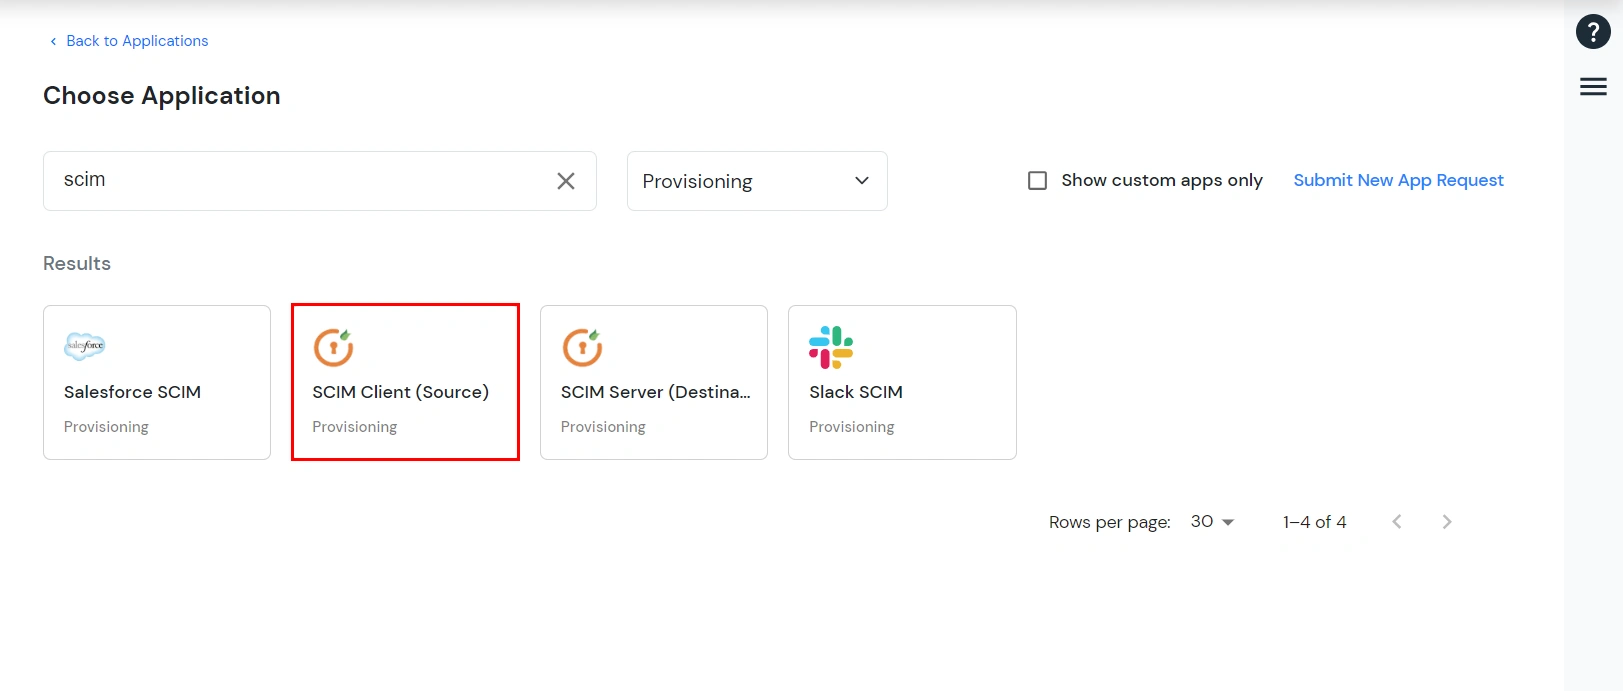
- Search for your application from the list, if your application is not found. Search for SCIM Client and you can set up your app via SCIM Client (Source).
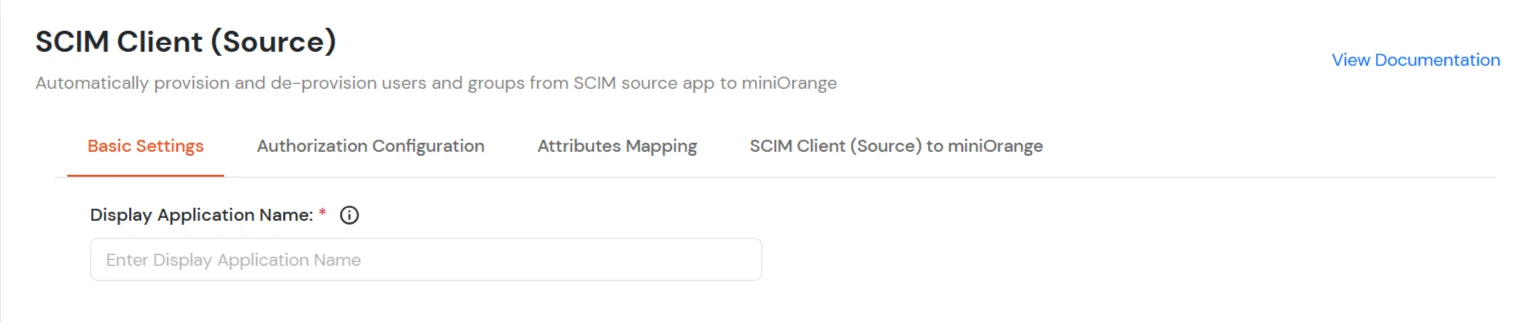
- Under Basic Settings, enter Display Application Name and click the Save button to add the app.
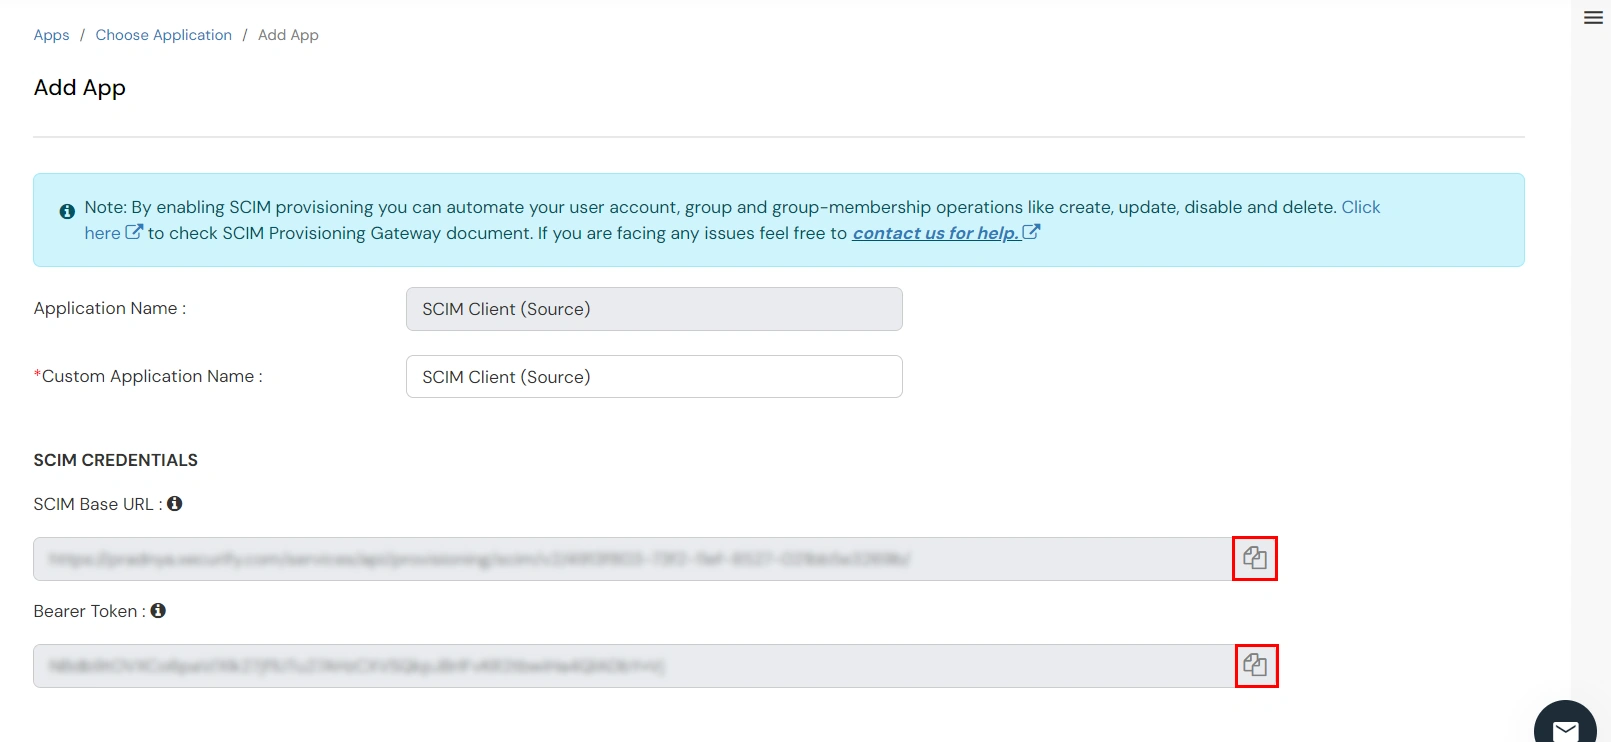
- In the Authorization Configuration section, keep the SCIM Base URL and Bearer Token of the SCIM Client app as shown below. Save this for further configuration in your Application.
- Click the Save & Next button.
- Navigate to the Attributes Mapping.
- Under this tab, you'll find two sections: Users and Groups, where you can map miniOrange attributes to SCIM Client attributes for synchronization.
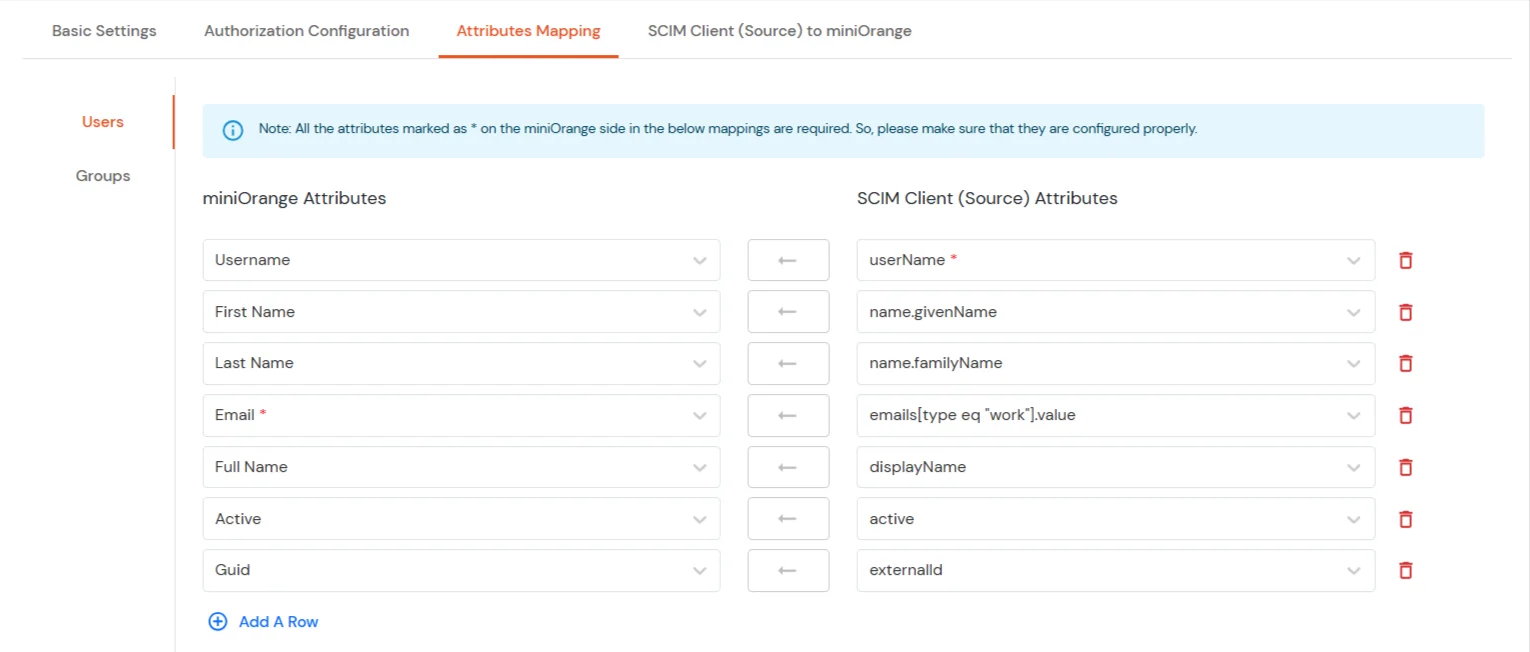
Users Mapping:
Note: The userName, name.givenName, name.familyName, emails[type eq \"work\"].value, displayName and active fields are required.
- In the Users section, map the attributes from miniOrange Attributes to the corresponding SCIM Client Attributes.
- Once all required mappings are configured, click the Save & Next button to proceed.
Groups Mapping:
- Click on the Groups section.
- Click Add A Row to add a new mapping.
- From the miniOrange Attributes dropdown, choose an attribute (like Group Name).
- In the SCIM Client Attributes field, type the attribute (like displayName).
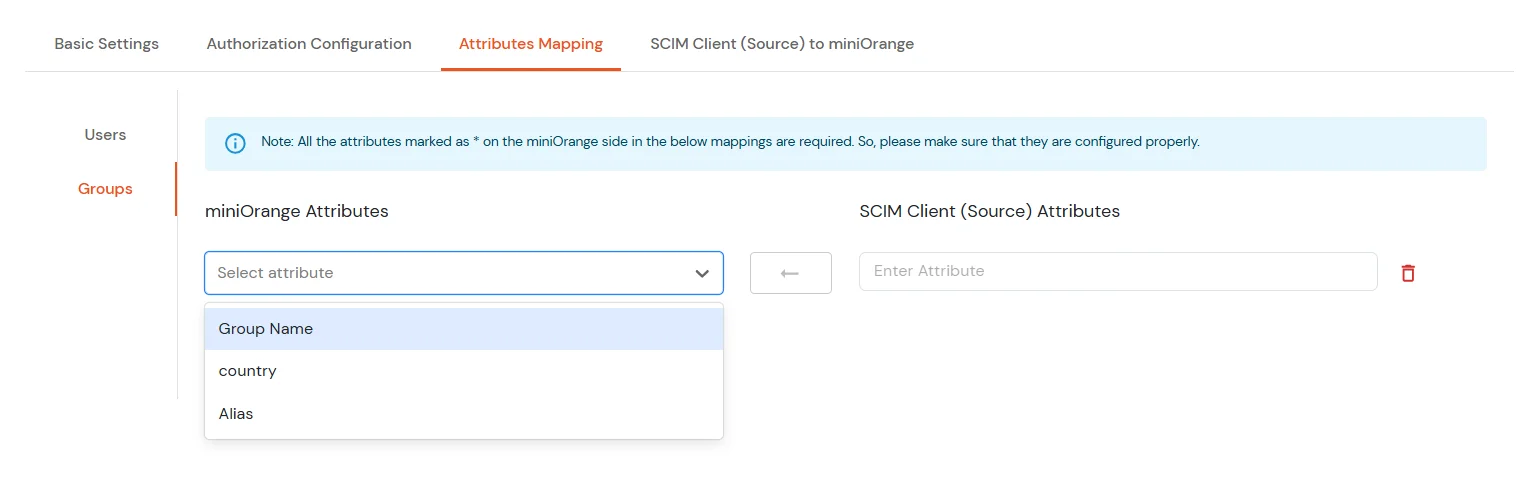
- Click Save & Next when done.
- Now, go to SCIM Client (Source) to miniOrange tab.
- In the Users section, enabling this option will delete the user if the user is deactivated/suspended/inactive in source system.

- Click on Save.