Zoho Personal Single Sign-On (SSO)
In Zoho Personal you can create only Personal groups and it is only for personal use, whereas Zoho Business is for Organization use(hosting organization mails, group aliases for the groups, Org Forums and much more org centric features)
For web applications that do not provide support for federated single sign-on, we have miniOrange Secure Single Sign-On browser plugins for SSO. Here, it is enabled on an application, where end users see an icon on their home pages and browsers, through this users can set and update their credentials. ( In the secure store for that application only).
miniOrange Supports all Browser Extension
- miniOrange Secure Single Sign-On Plugins for SSO support all popular web browsers like Chrome, Firefox, Safari, Internet Explorer and Microsoft Edge.
- Browser plugin a secure driven post to the application login page, signing in the user automatically on their behalf. - The plug-in does not store the credentials anywhere and they are discarded once the user has signed into the application.
- Users credentials are stored in an encrypted format by using AES encryption with the combination of a customer-specific private key. When a user clicks the application icon, miniOrange securely posts the username/password to the app login page over SSL and the user is automatically logged in.
Connect with External Source of Users
miniOrange provides user authentication from various external sources, which can be Directories (like ADFS, Microsoft Active Directory, OpenLDAP, AWS etc), Identity Providers (like Microsoft Entra ID, Okta, AWS), and many more. You can configure your existing directory/user store or add users in miniOrange.
Get Free Installation Help - Book a Slot
miniOrange offers free help through a consultation call with our System Engineers to Install or Setup Zoho Personal SSO solution in your environment with 30 days trial.
For this, you need to just send us an email at idpsupport@xecurify.com to book a slot and we'll help you setting it up in no time.
Get Help
Follow the Step-by-Step Guide given below for Zoho Personal Single Sign-On (SSO)
1. Configure Zoho Personal in miniOrange
- Log into miniOrange Admin Console.
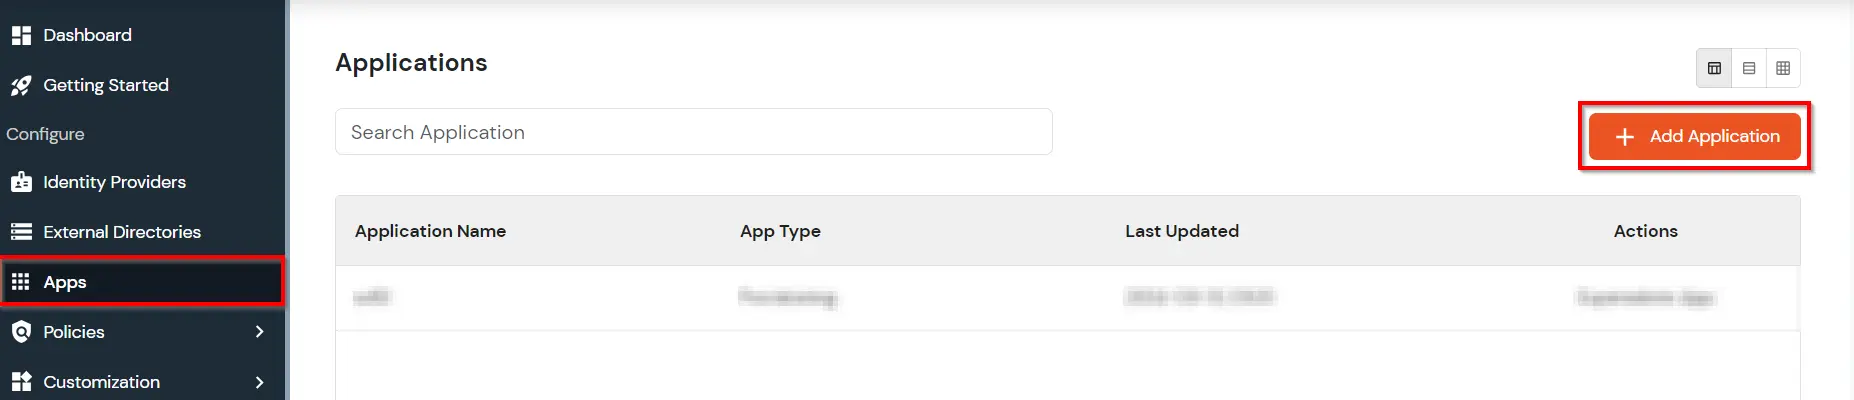
- Go to Apps >> click Add Application button.
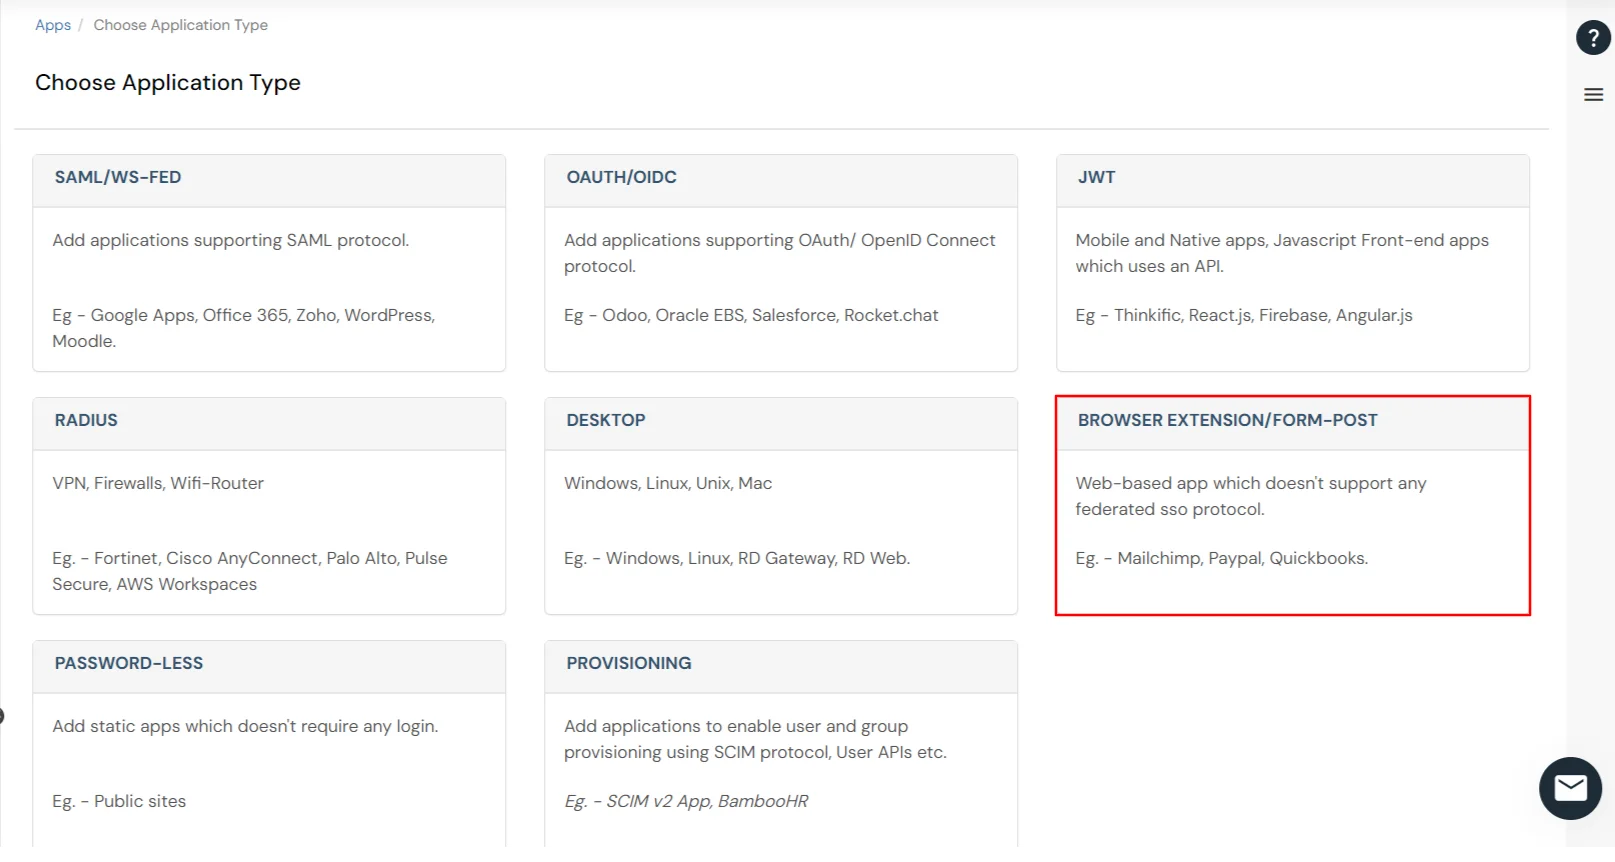
- In Choose Application Type click on BROWSER EXTENSION/FORM-POST as application type.
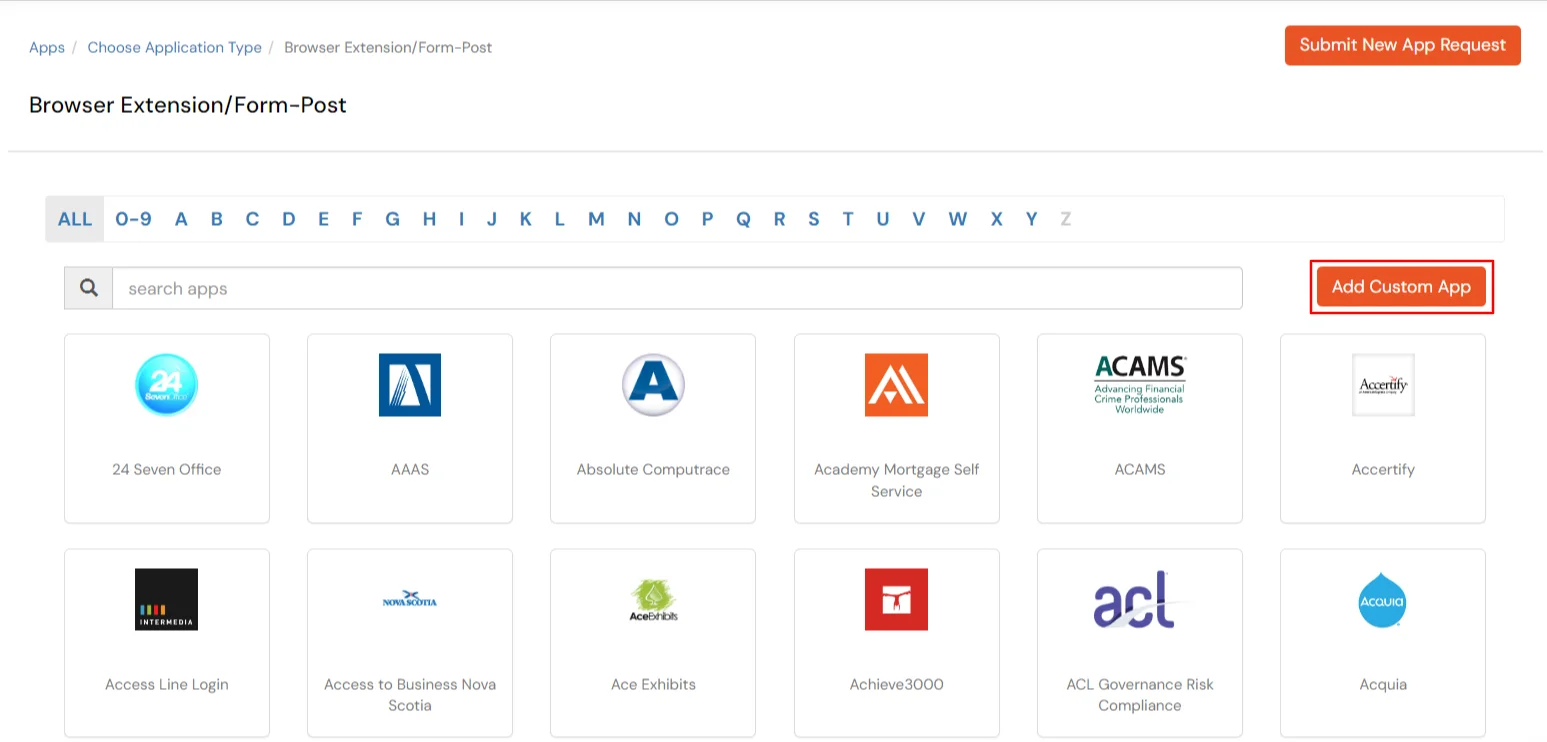
- Search for Zoho Personal in the list, if you don't find Zoho Personal in the list then, click on Add Custom App button.
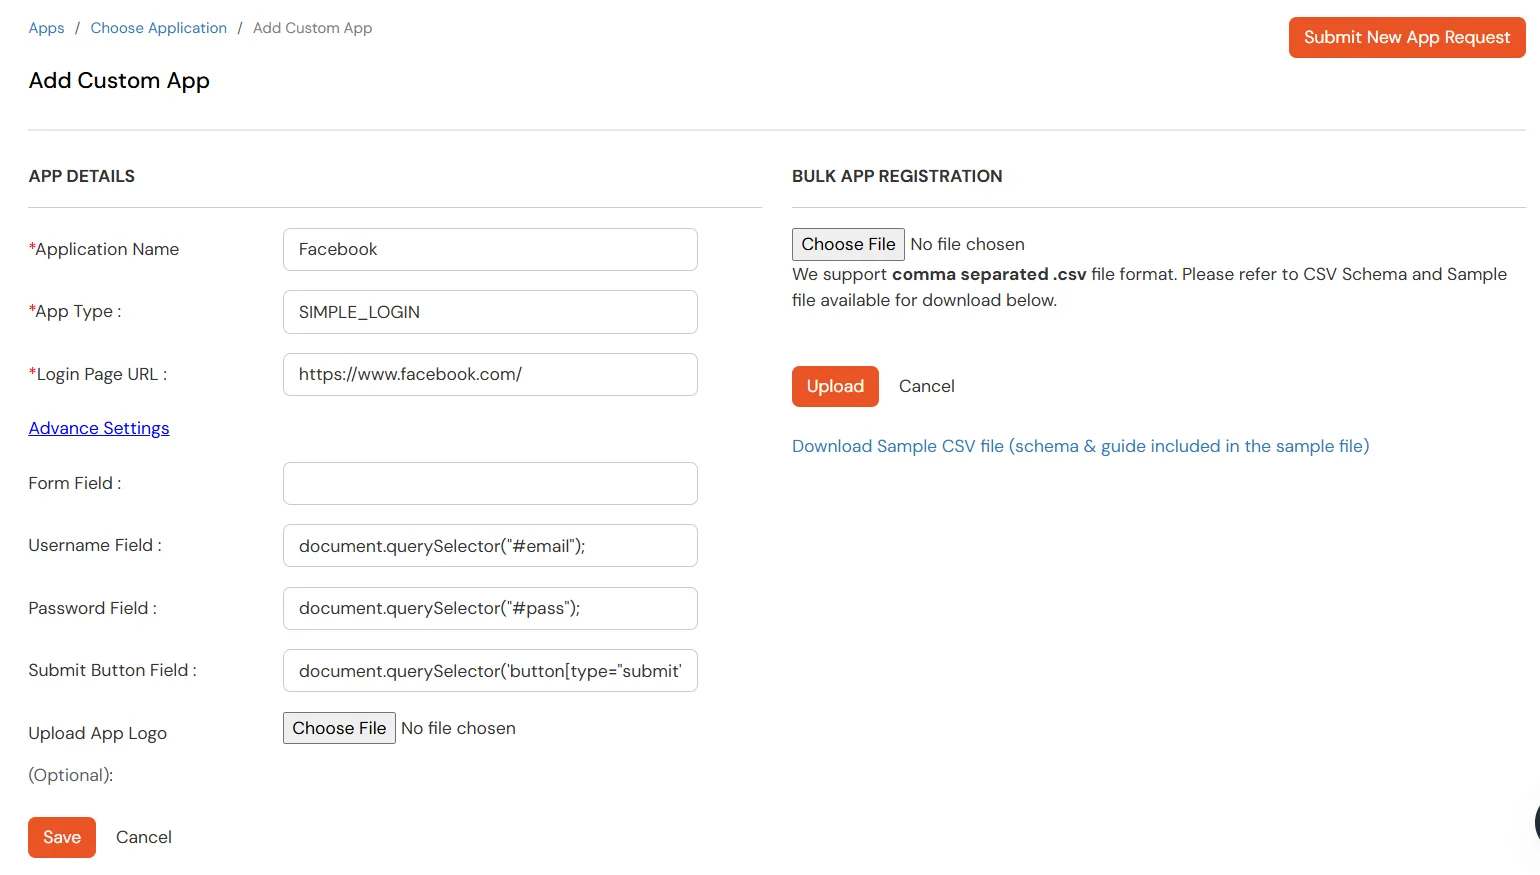
- Enter the following details in the fields below:
| App Field |
Description |
| Display Name |
Enter your application name |
| Login Page URL |
Login URL of your application |
| Login Account Type |
- Shared Login: If multiple users are allowed to access the app via the same credentials assigned by admin, admin should choose shared Login Account option.
- Individual Login: If each user has a different username and password for the app, admin should choose an Individual Login Account option, so that users can save their username and password from the user portal themselves.
|
| Upload App Logo |
Choose a file to upload the app logo. |
- Click on Next to proceed.
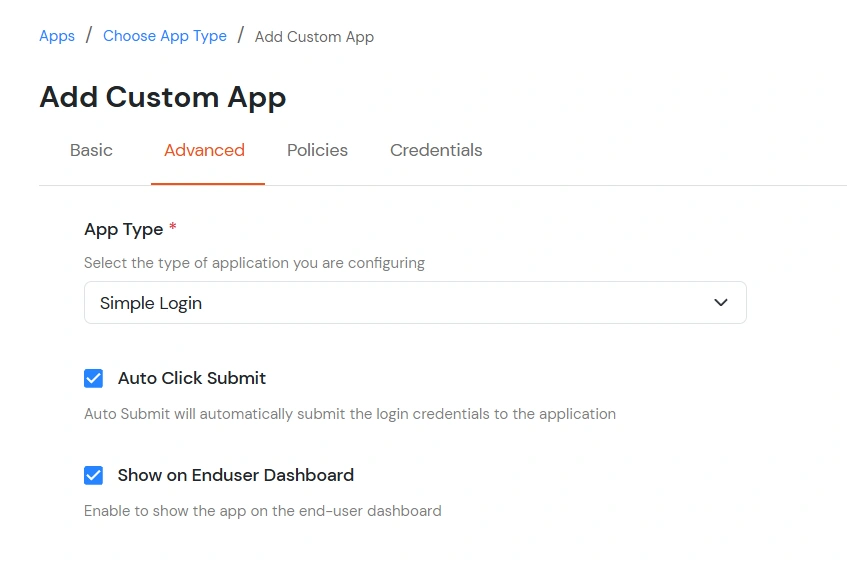
- Enter the following details in the fields below:
| App Field |
Description |
| App Type: |
- Simple Login: Select Simple Login for applications that use a standard login form with a username field, password field, and a login button.
- Login with Domain: Select Login with Domain for applications that require an additional input field, such as a domain name, account ID, tenant ID, or other constant value, along with the username and password.
- Login with Pre-Click: Select Login with Pre-Click for applications that require a user action, such as clicking a button, checkbox, or link, before the login credentials can be submitted.
|
| Auto Click Submit: |
Enable this toggle to automatically submit the login form after the extension fills in the user's credentials. Disable this option if users need to manually complete additional verification steps, such as entering a CAPTCHA, answering a security question, or providing other required information before signing in. |
| Show on Enduser Dashboard: |
Enable this toggle to make the application visible on the end-user dashboard. If the application is configured as a Shared Account and the shared credentials have not been configured, the application will not be displayed on the end-user dashboard even if this option is enabled. |
- Click on Next to continue.
- You need to Save the Application first to configure the policy for the application.
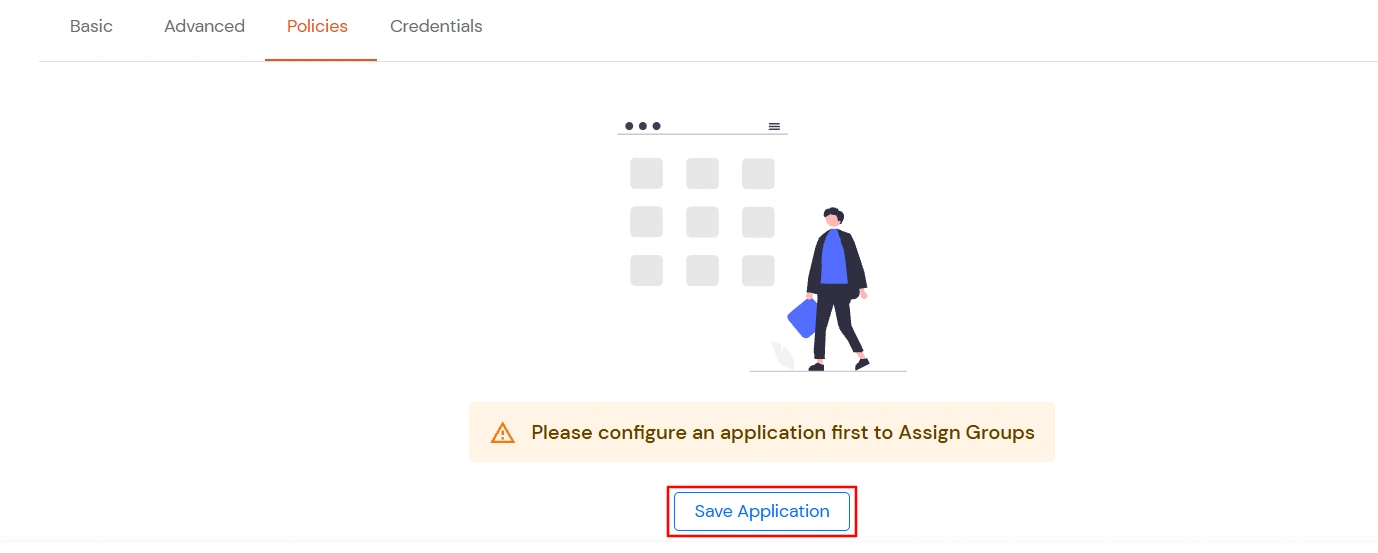
- Click on Assign group to configure the policy for that application.
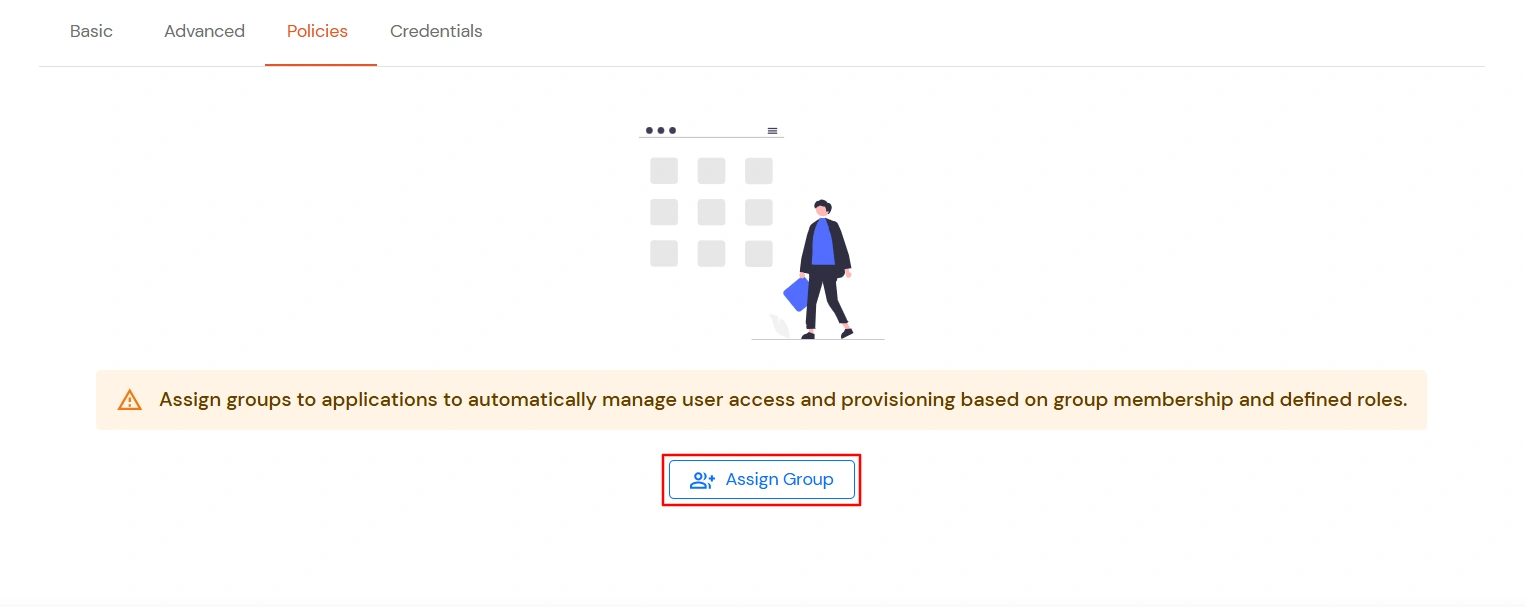
- A new Configure Group Assignment Modal tab will open. Fill in the details in the fields below.
- Assign Group: Select the groups you want to link with the application. You can select up to 20 groups at a time.
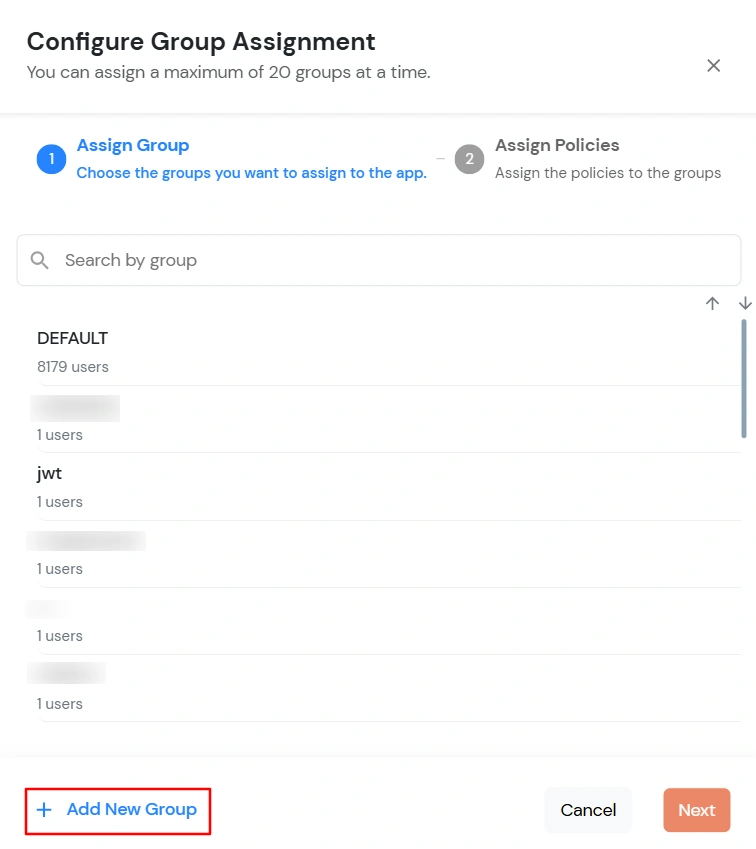
- If you need to create new group. Click on Add New Group button.
- Enter the Group name and click on Create Group.
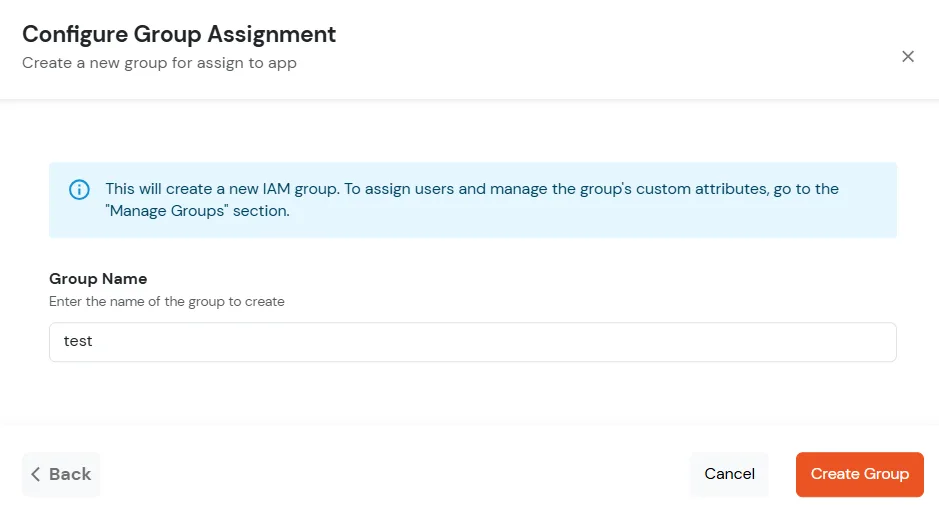
- Click on Next.
- Assign Policies: Add the required policies to the selected groups. Enter the following details:
- First Factor: Select the login method from the dropdown.
- If you select Password as the login method, you can enable 2-Factor Authentication (MFA) and Adaptive Authentication, if needed.
- If you select Password-less as login method, you can enable 2-Factor Authentication (MFA) if needed.
- If you select Magic Link as the login method, the following options appear:
- Enable sign-in from other IPs: When enabled, users can open the Magic Link from a different IP address than the one from which it was requested.
- Enable sign-in from other devices: When enabled, users can open the Magic Link on a different device than the one used to request it.
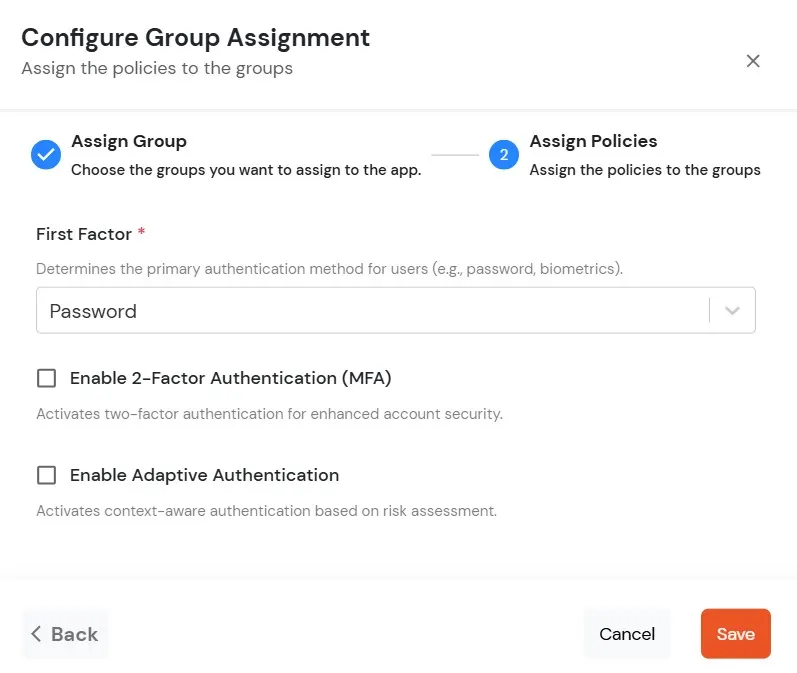
- Click on Save. Policies will be created for all the selected groups.
- You will see the policy listed once it’s successfully added.
- Click on Next to continue.
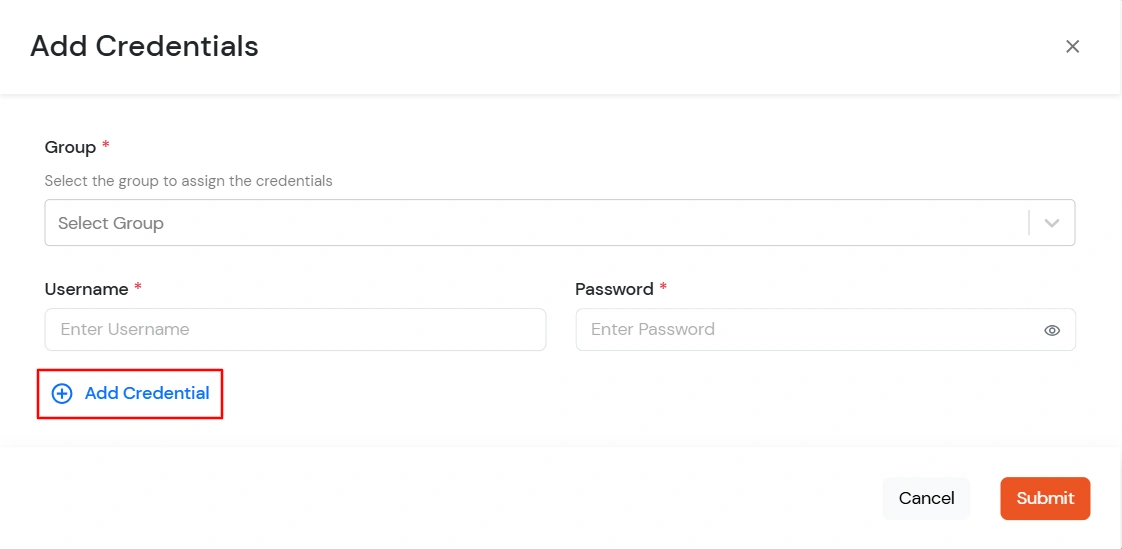
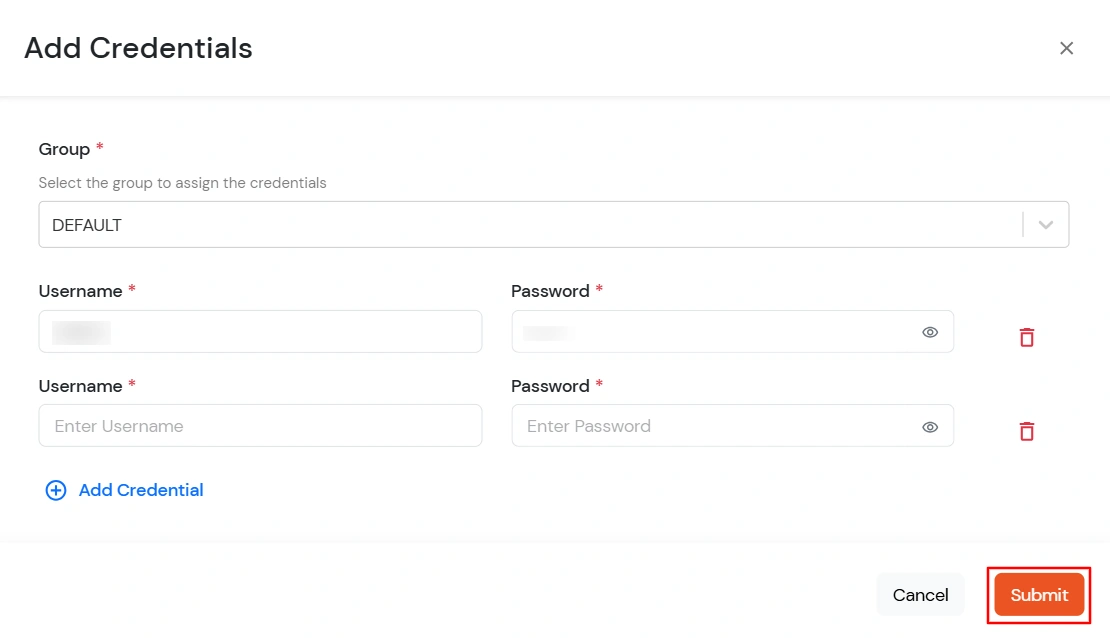
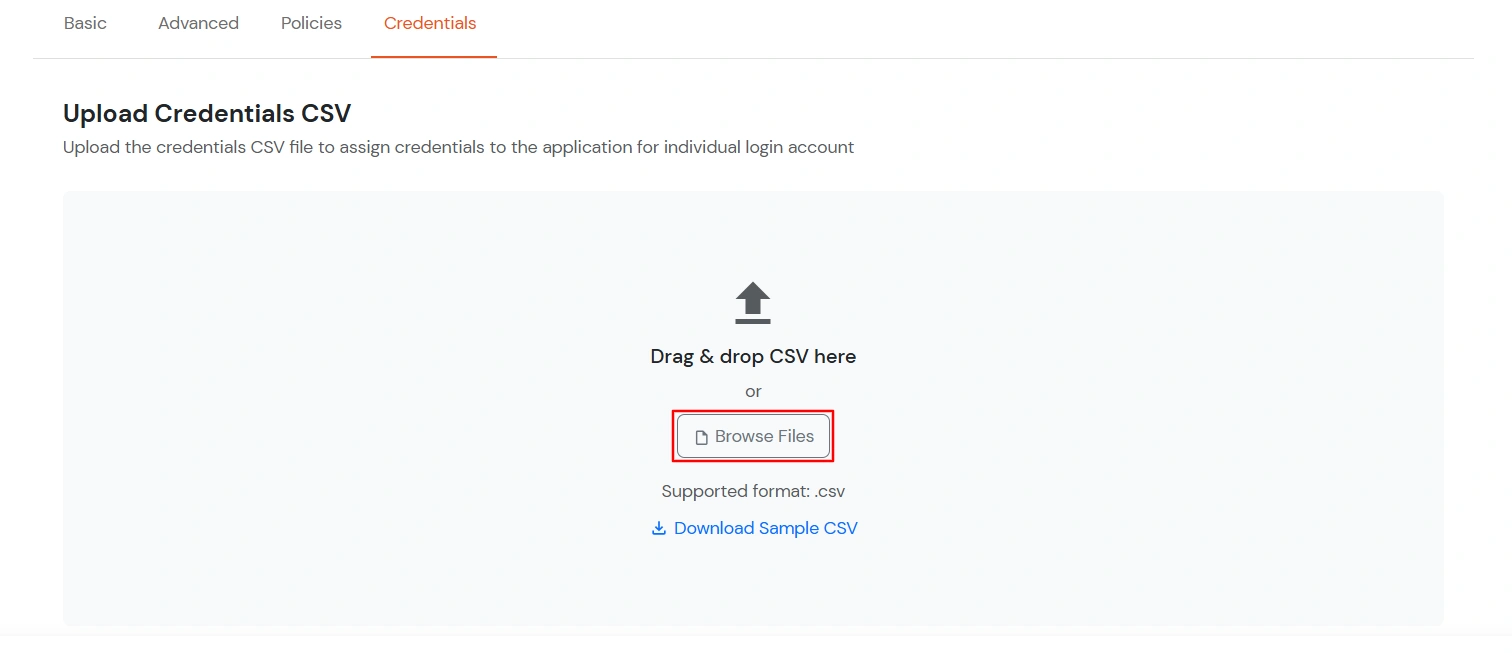
- To configure the Login Credentials for your app:
Use this option to assign individual login credentials to users by uploading a CSV file.
- Click Browse Files and select the CSV file containing the user credentials.
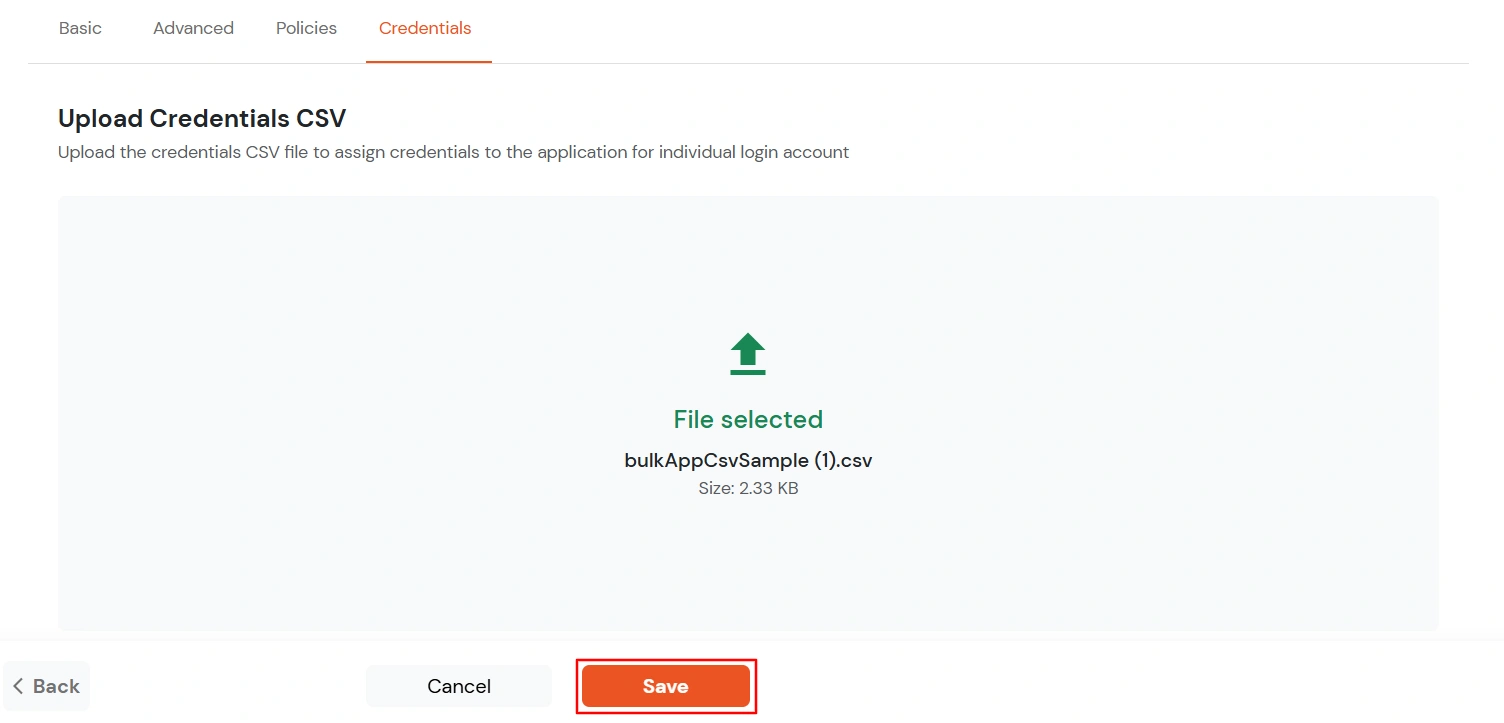
- Click Save to upload the credentials.
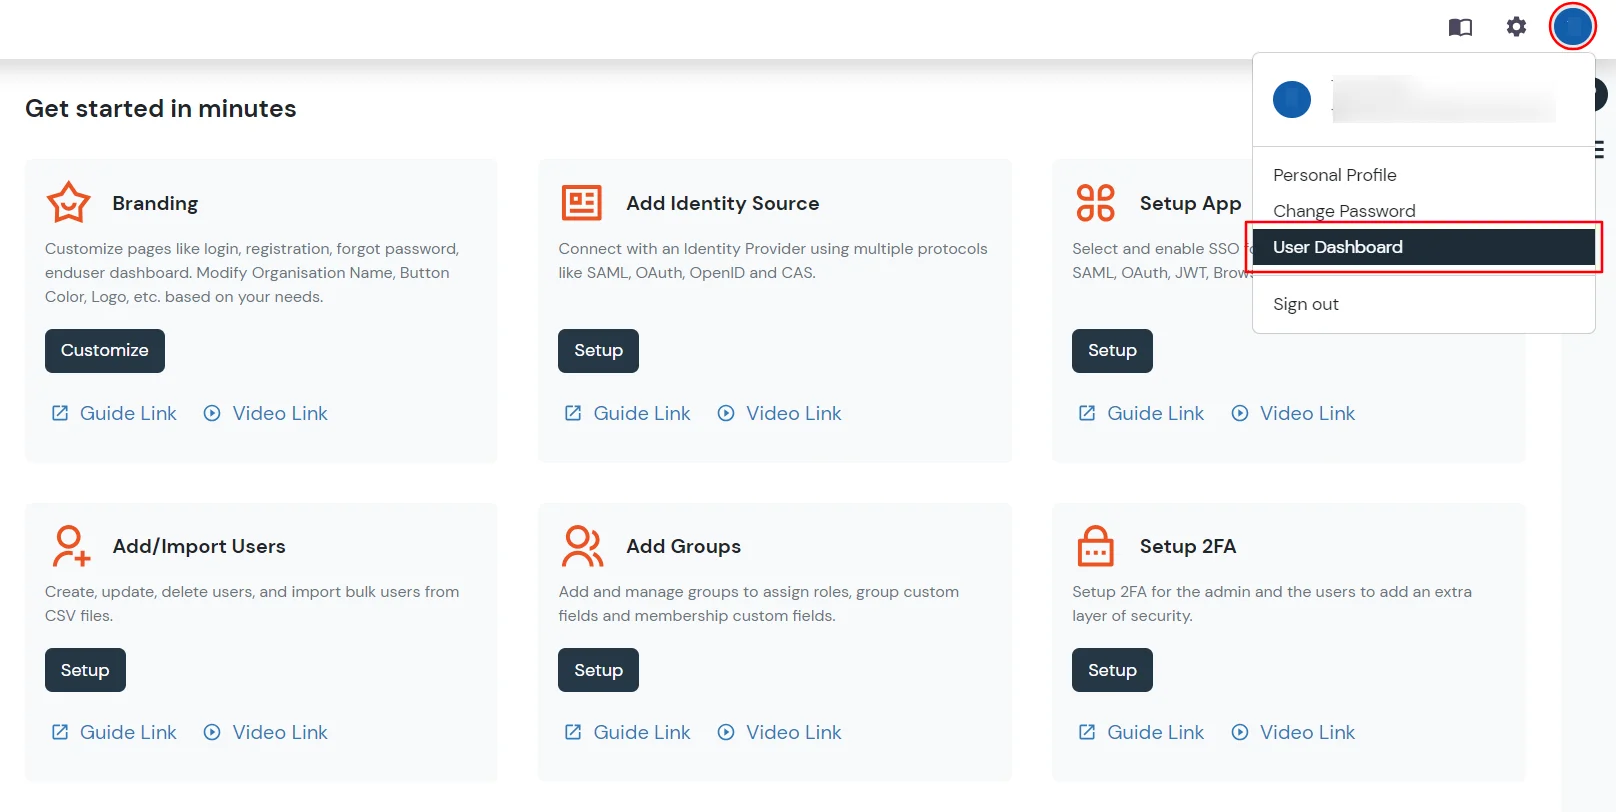
- From the top right side click Profile >> and then User Dashboard.
- Under the "SIGN-IN TO YOUR FAVOURITE CLOUD APPS" section search for Zoho Personal app. Click on Zoho Personal app icon then, click Download symbol.
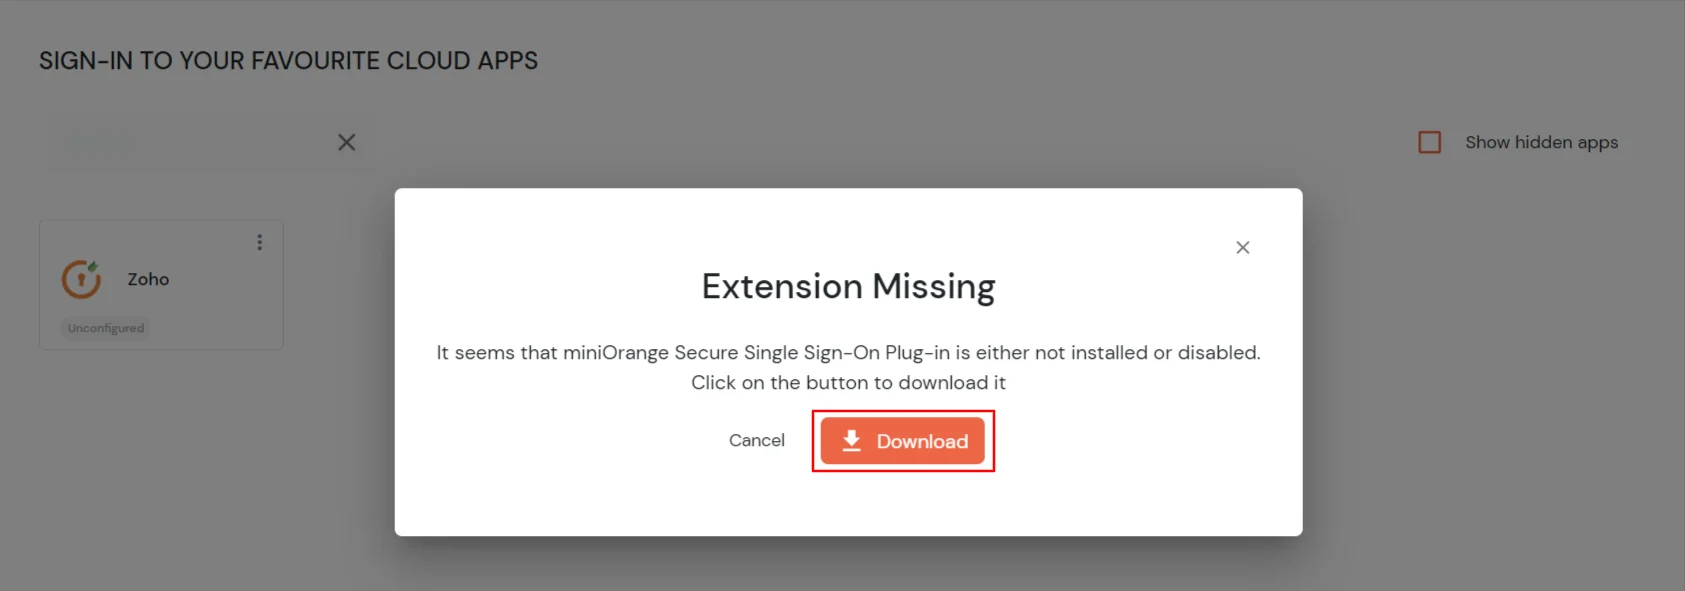
- It will redirect you to add extension page. Now, click on the Add to Chrome.

- Click on Add extension.
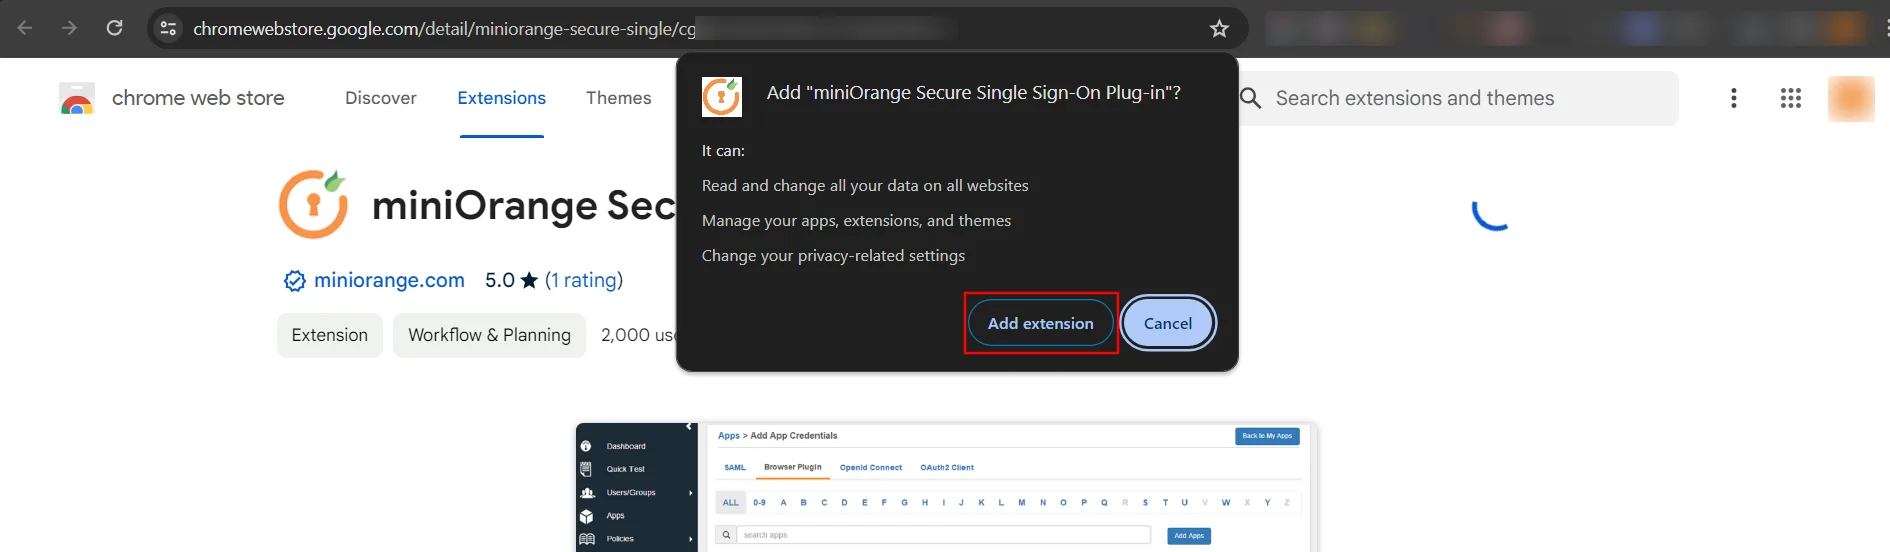
- Now, miniOrange extension is added in your extension
- Click on the app icon from miniOrange user portal, you will be redirected to Zoho Personal login page.
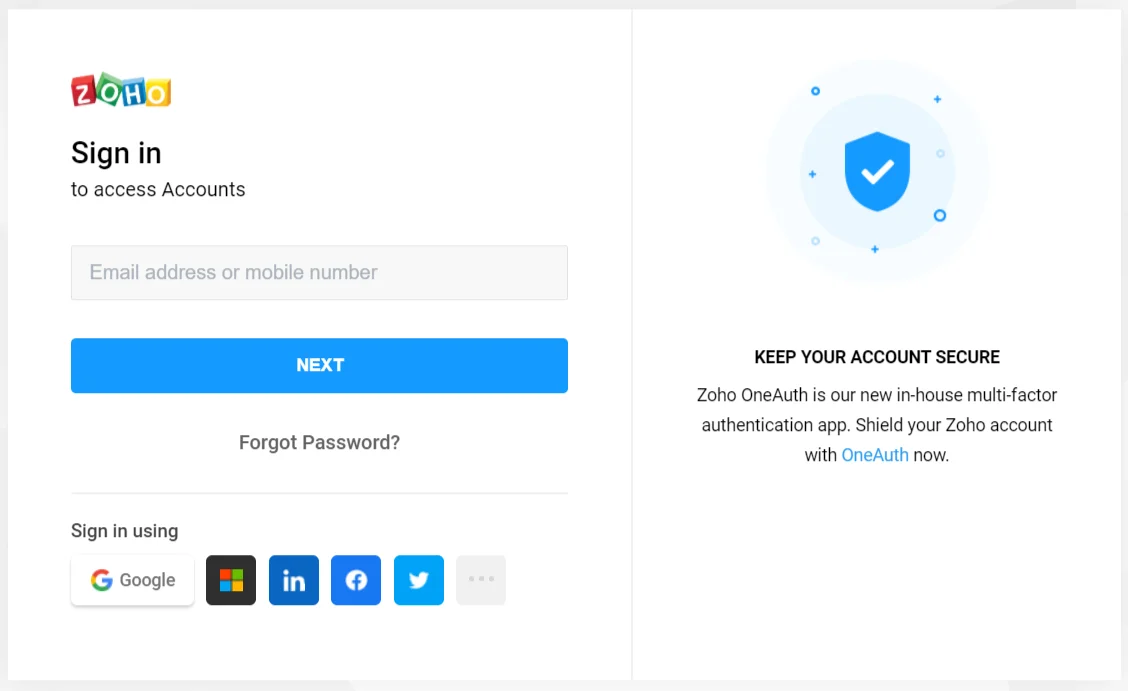
- Now browser extension will fill the username and password credentials automatically. Once enabled, end users can see an icon on their browser which auto-fills username and password on the application login page and submit the page automatically to let user access the app.
- Now, you can see the homepage of Zoho Personal.
2. Embed Zoho Personal application link in your Website/User Portal
- Go to Admin Dashboard >> Apps >> search for Zoho Personal app.
- Click on Select in Action menu against Zoho Personal app. Select Show SSO link option from dropdown.
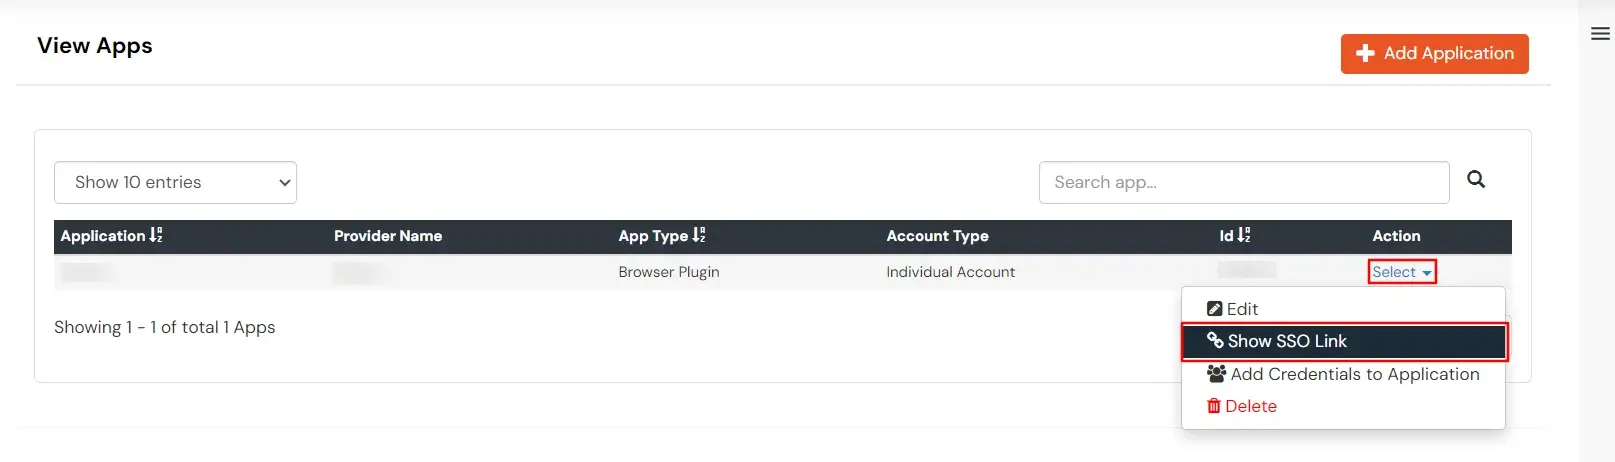
- Copy the app link and paste it anywhere on your website - User portal/ Apps Dashboard /Menu, etc.

3. Configure Your User Directory (Optional)
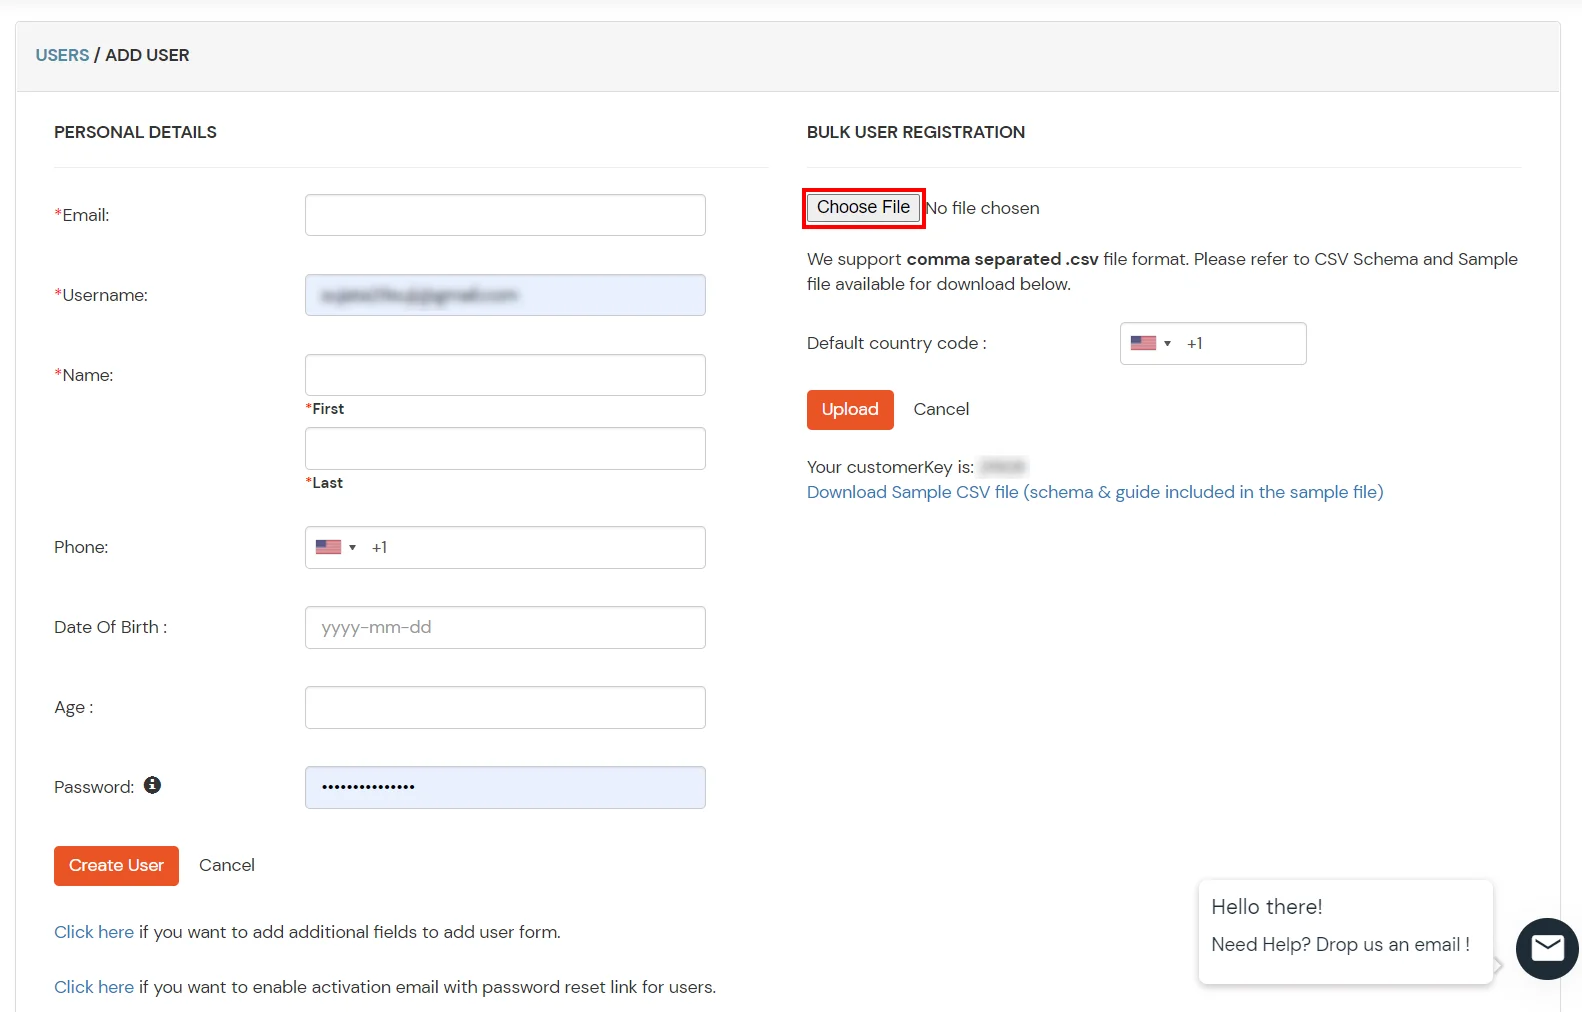
miniOrange provides user authentication from various external sources, which can be Directories (like ADFS, Microsoft Active Directory, Microsoft Entra ID, OpenLDAP, Google, AWS Cognito etc), Identity Providers (like Okta, Shibboleth, Ping, OneLogin, KeyCloak), Databases (like MySQL, Maria DB, PostgreSQL) and many more. You can configure your existing directory/user store or add users in miniOrange.
- Click on Identity Providers >> Add Identity Provider in the left menu of the dashboard
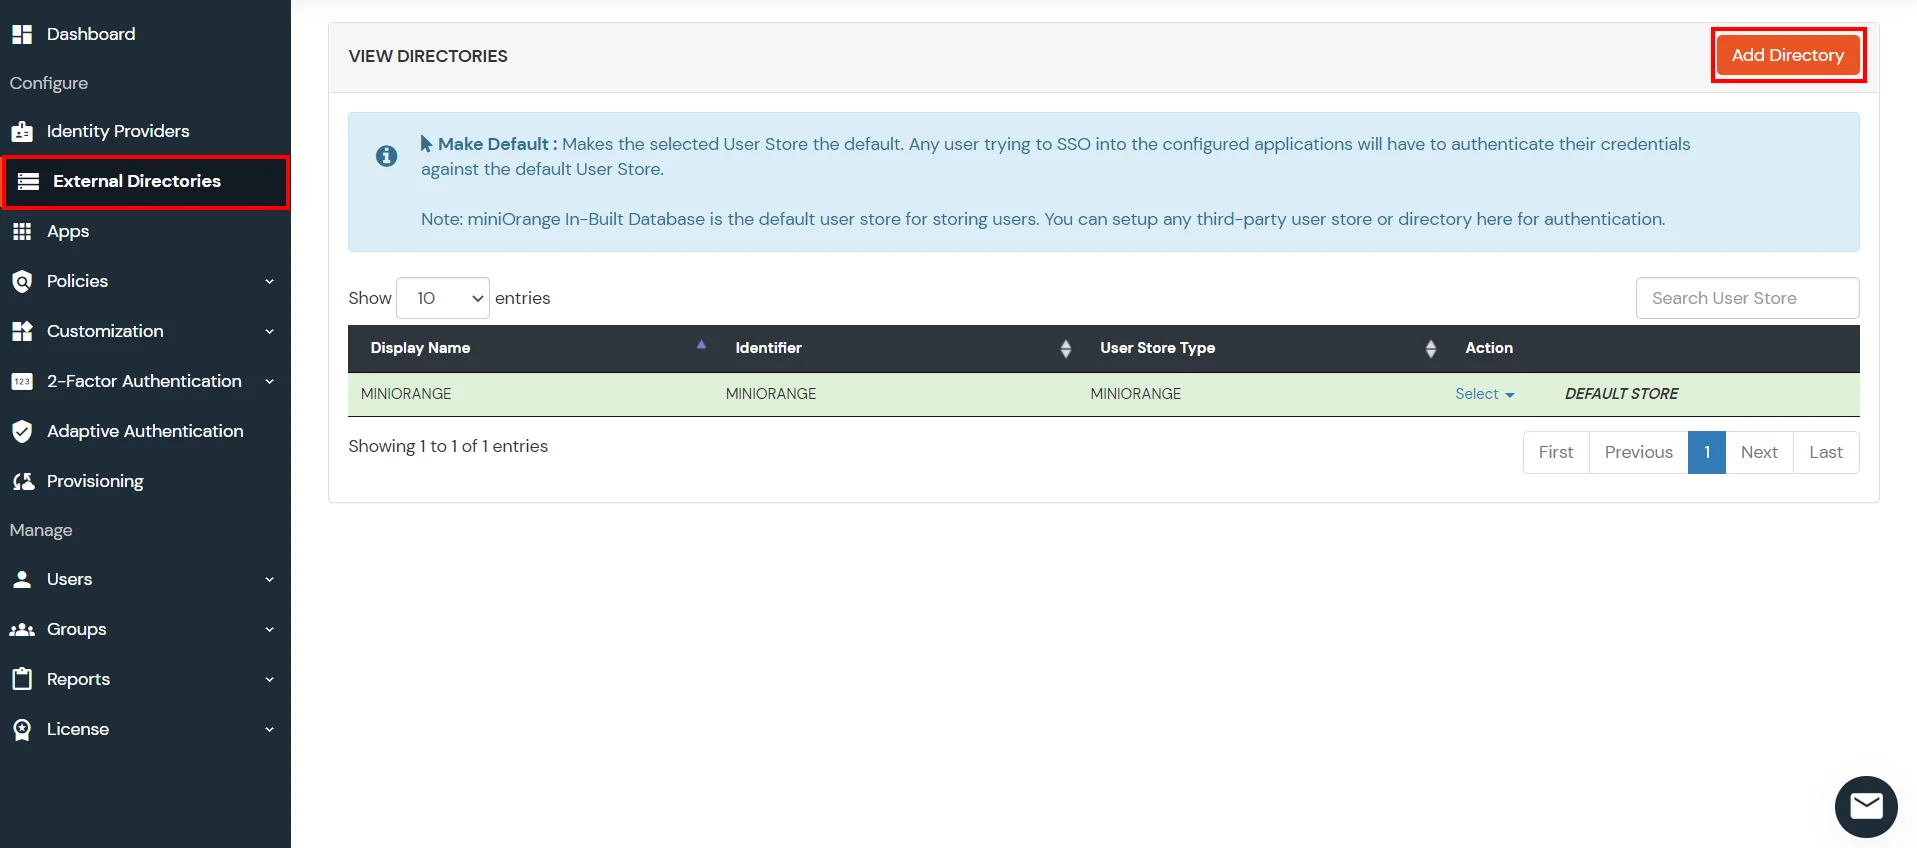
- In Choose Identity Provider, select AD/LDAP Directories from the dropdown.
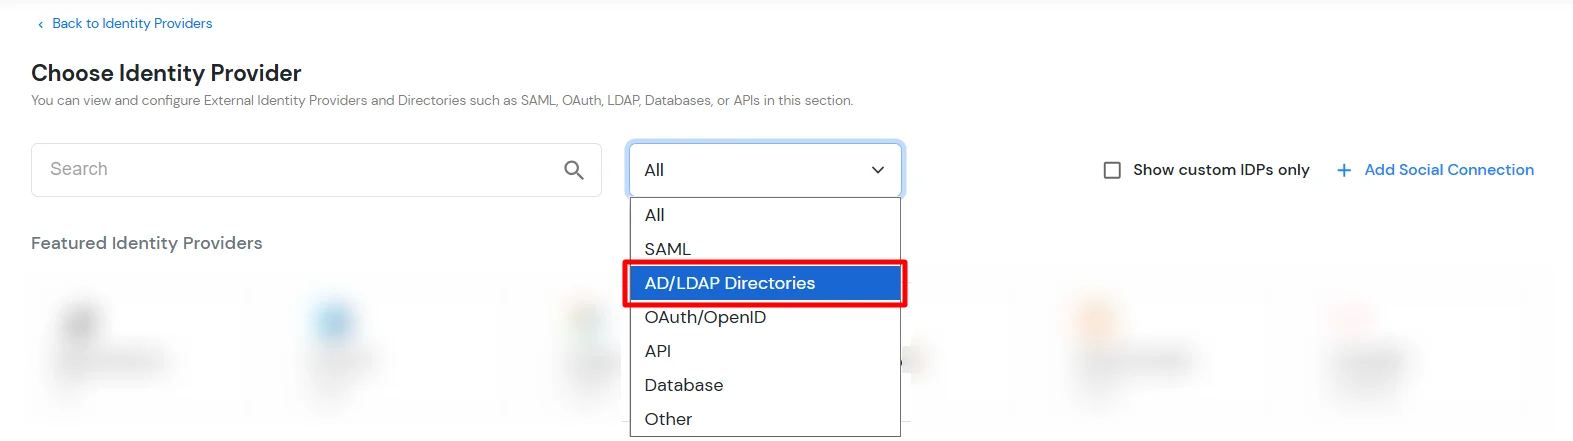
- Then search for AD/LDAP and click it.
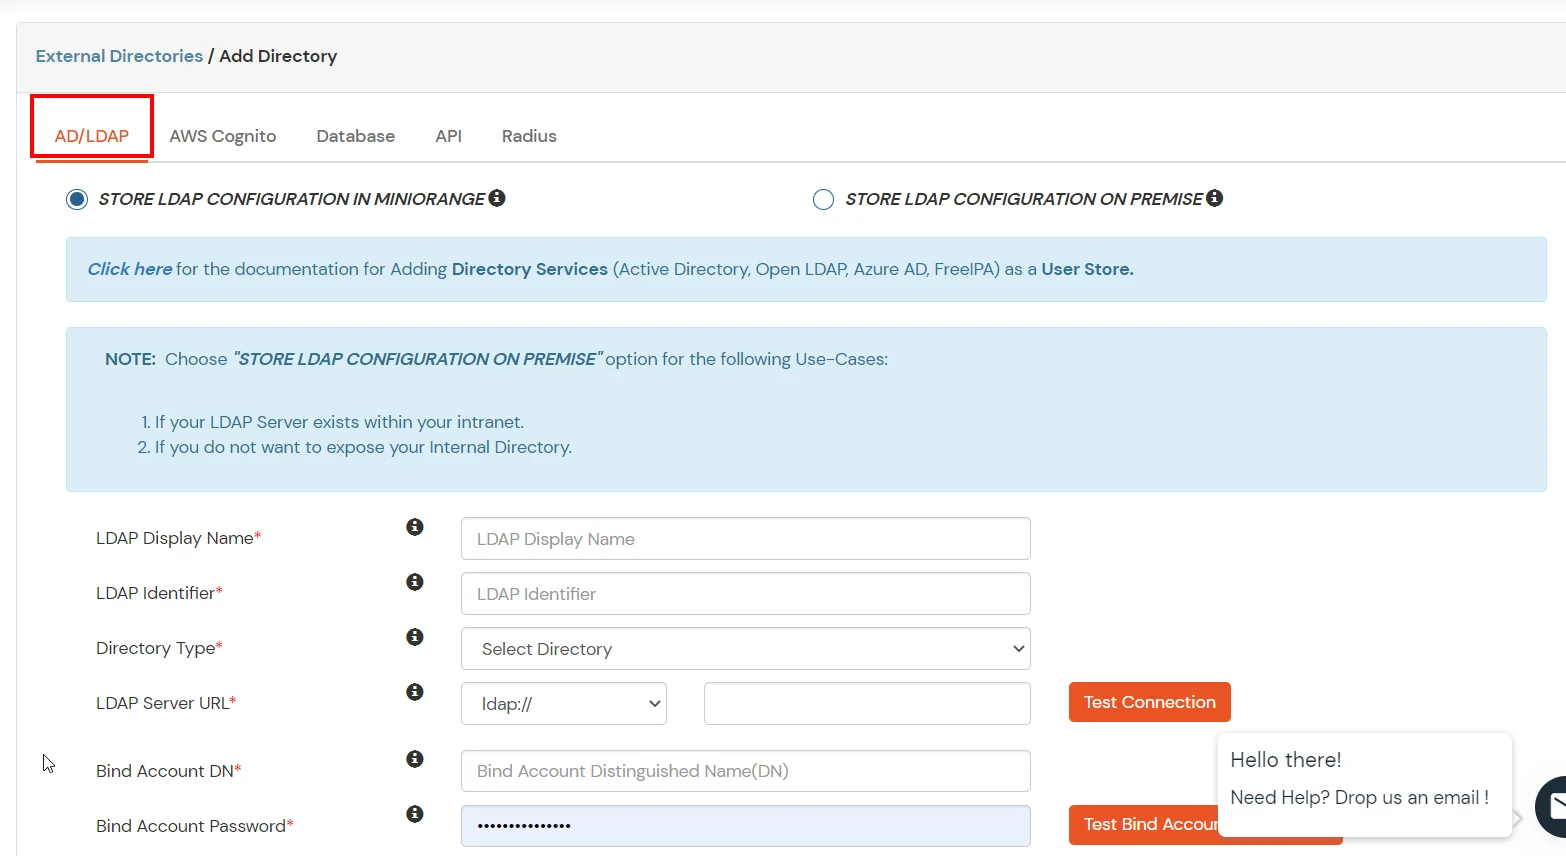
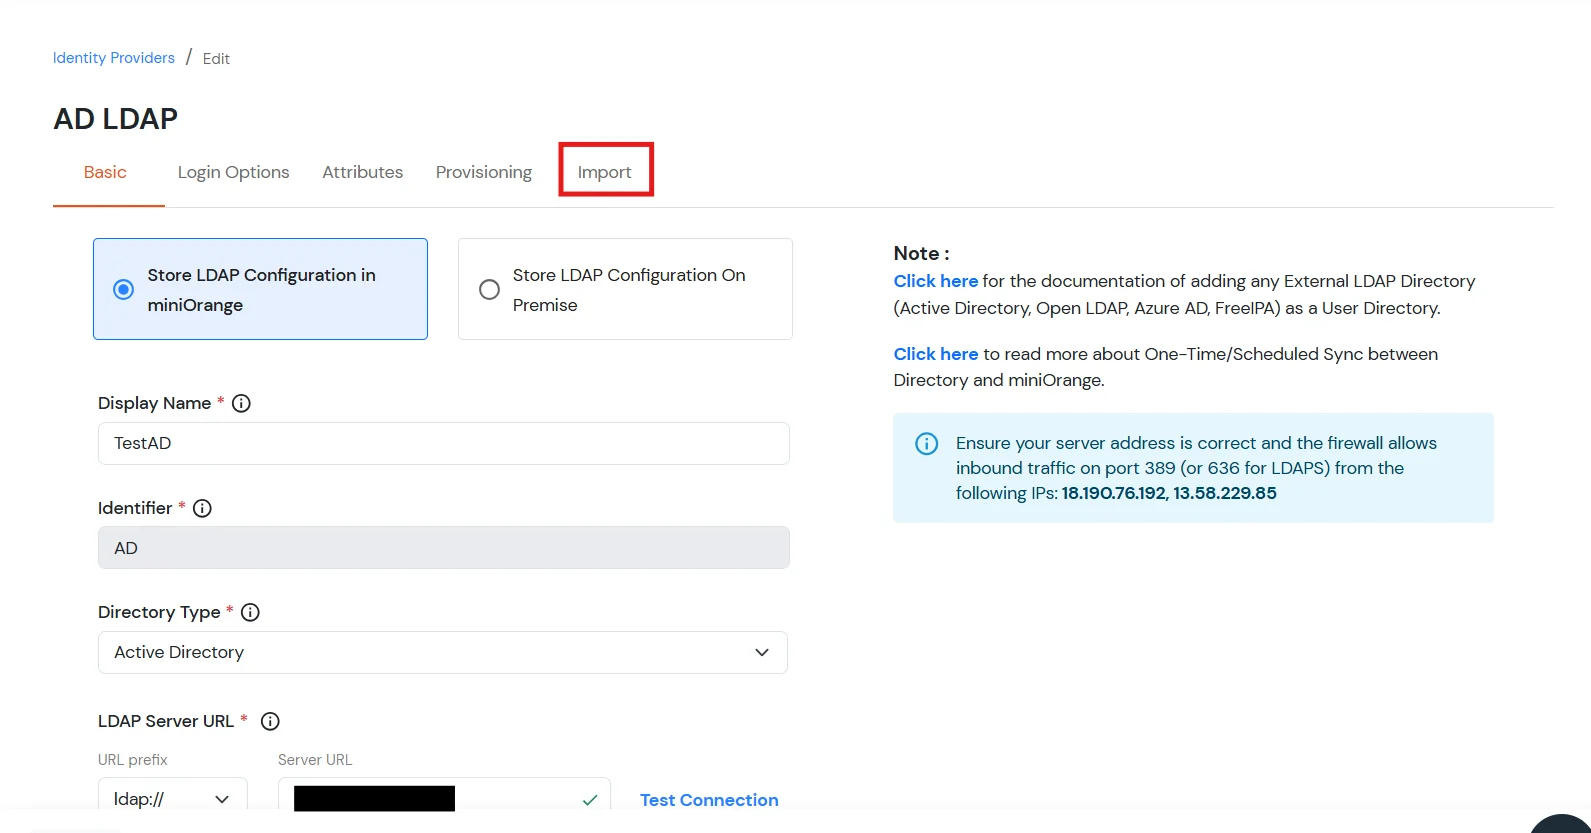
- STORE LDAP CONFIGURATION IN MINIORANGE: Choose this option if you want to keep your configuration in miniOrange. If the active directory is behind a firewall, you will need to open the firewall to allow incoming requests to your AD.
- STORE LDAP CONFIGURATION ON PREMISE: Choose this option if you want to keep your configuration in your premise and only allow access to AD inside premises. You will have to download and install miniOrange gateway on your premise.
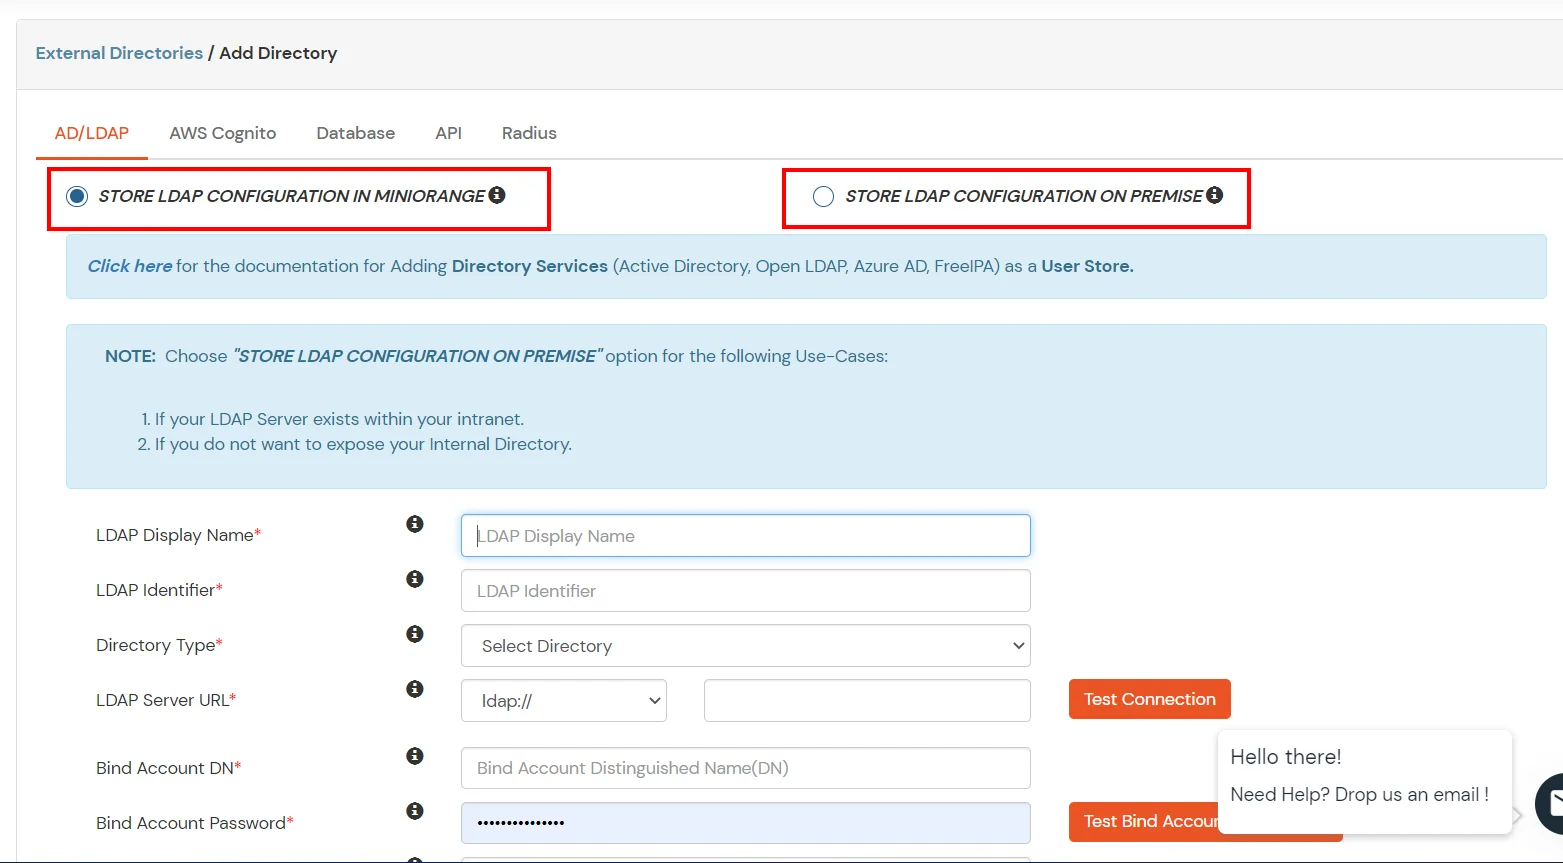
- Enter AD/LDAP Display Name and Identifier name.
- Select Directory Type as Active Directory.
- Enter the LDAP Server URL or IP Address against the LDAP Server URL field.
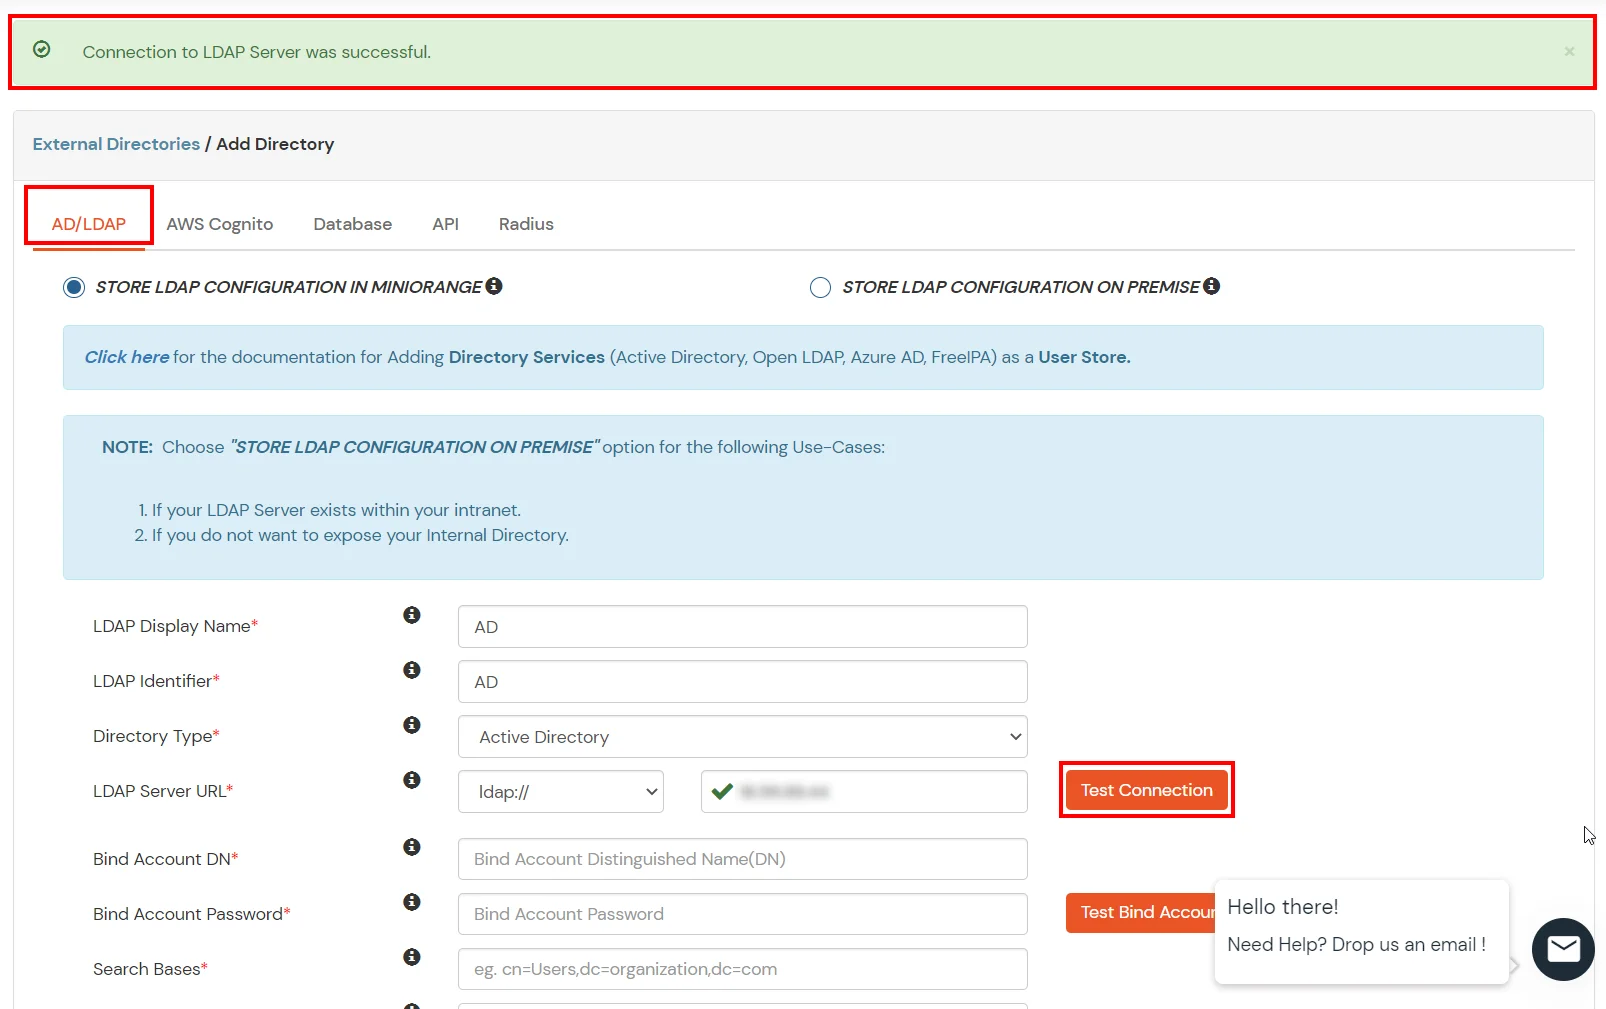
- Click on the Test Connection button to verify if you have made a successful connection with your LDAP server.
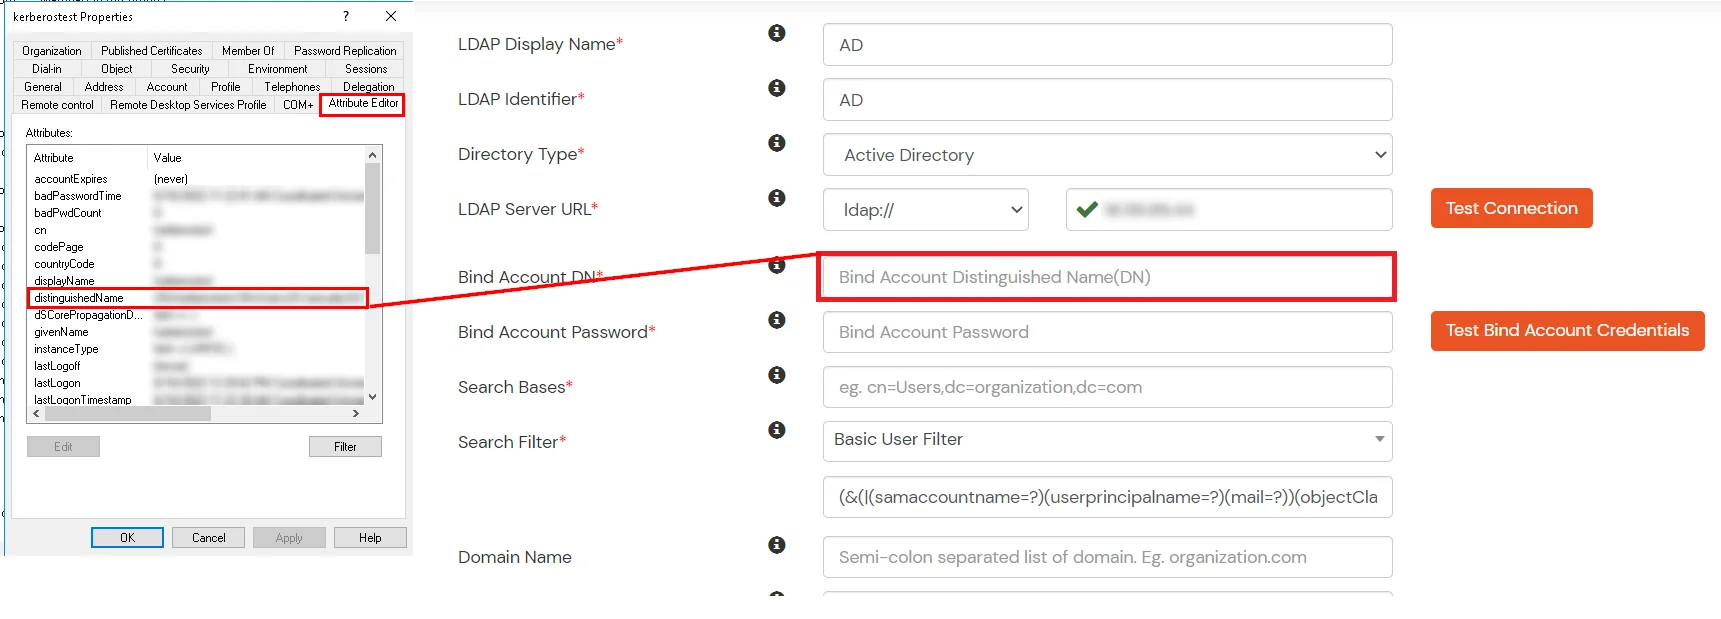
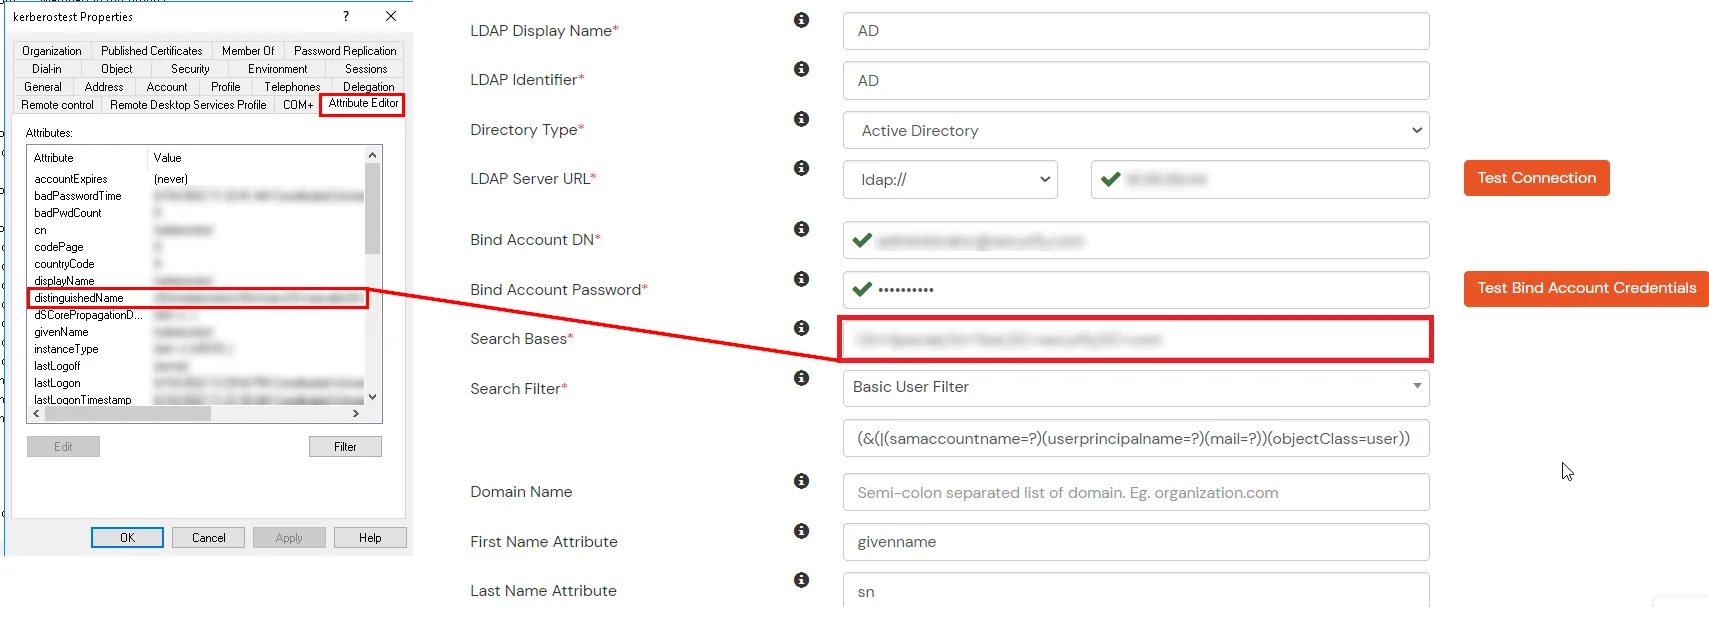
- In Active Directory, go to the properties of user containers/OU's and search for the Distinguished Name attribute. The bind account should have minimum required read privileges in Active Directory to allow directory lookups. If the use case involves provisioning (such as creating, updating, or deleting users or groups), the account must also be granted appropriate write permissions.
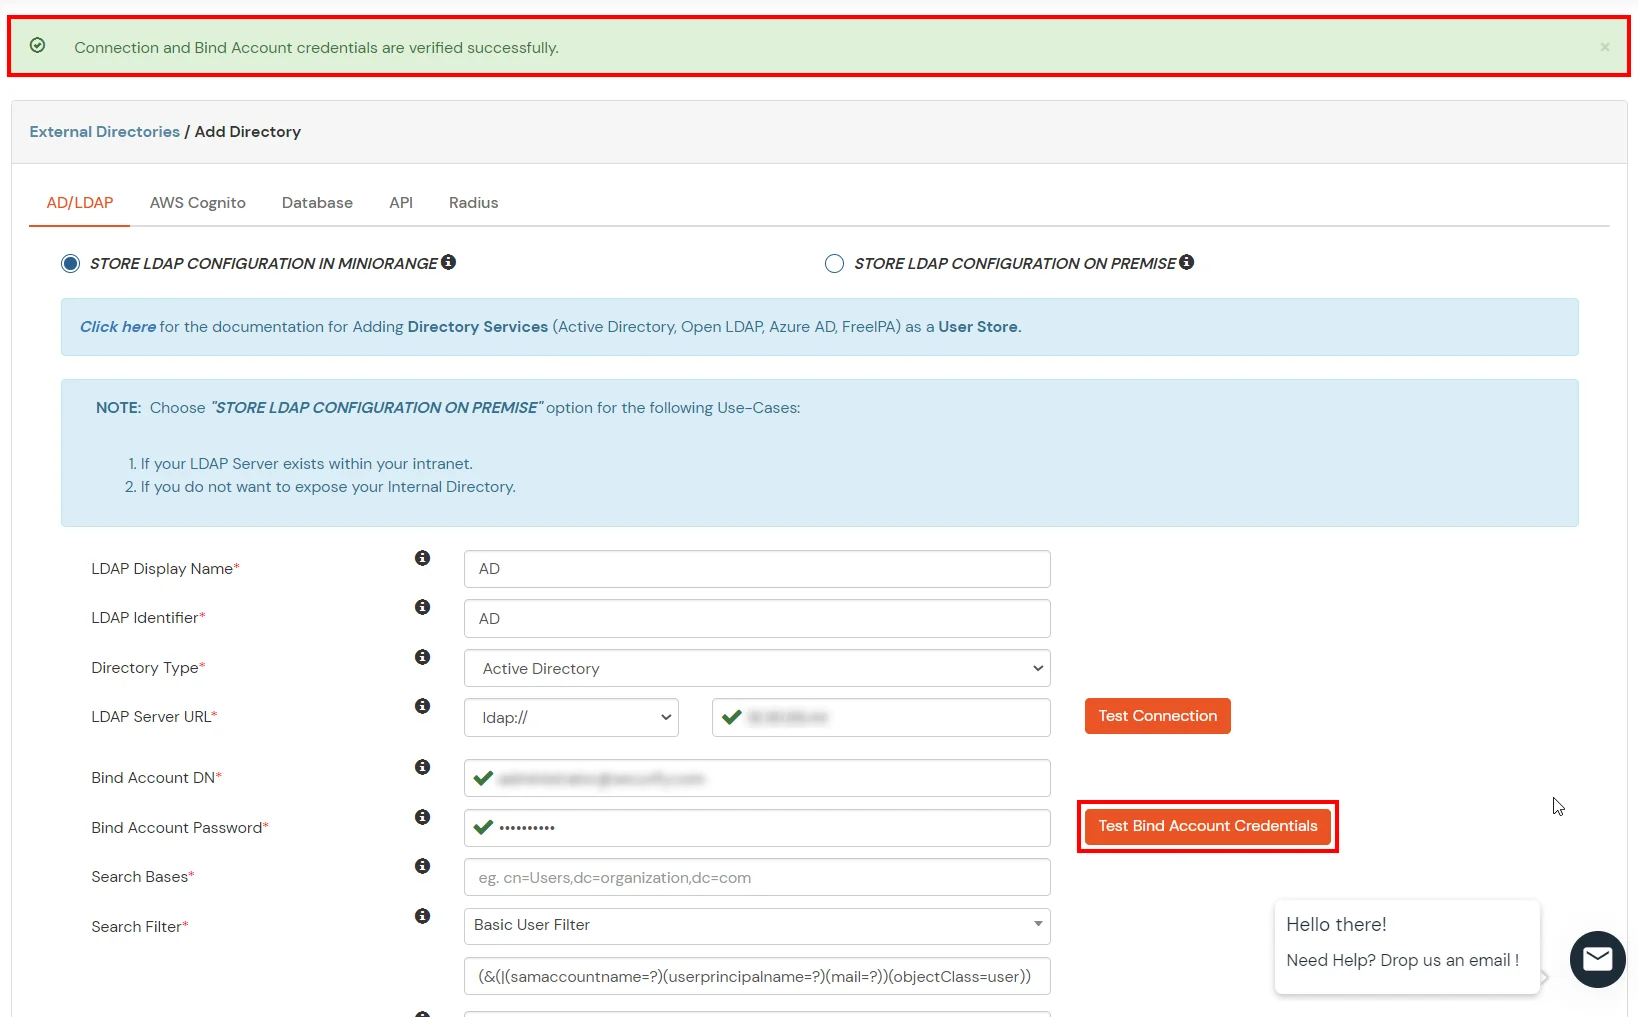
- Enter the valid Bind account Password.
- Click on the Test Bind Account Credentials button to verify your LDAP Bind credentials for LDAP connection.
- Search Base is the location in the directory where the search for a user begins. You will get this from the same place you got your Distinguished name.
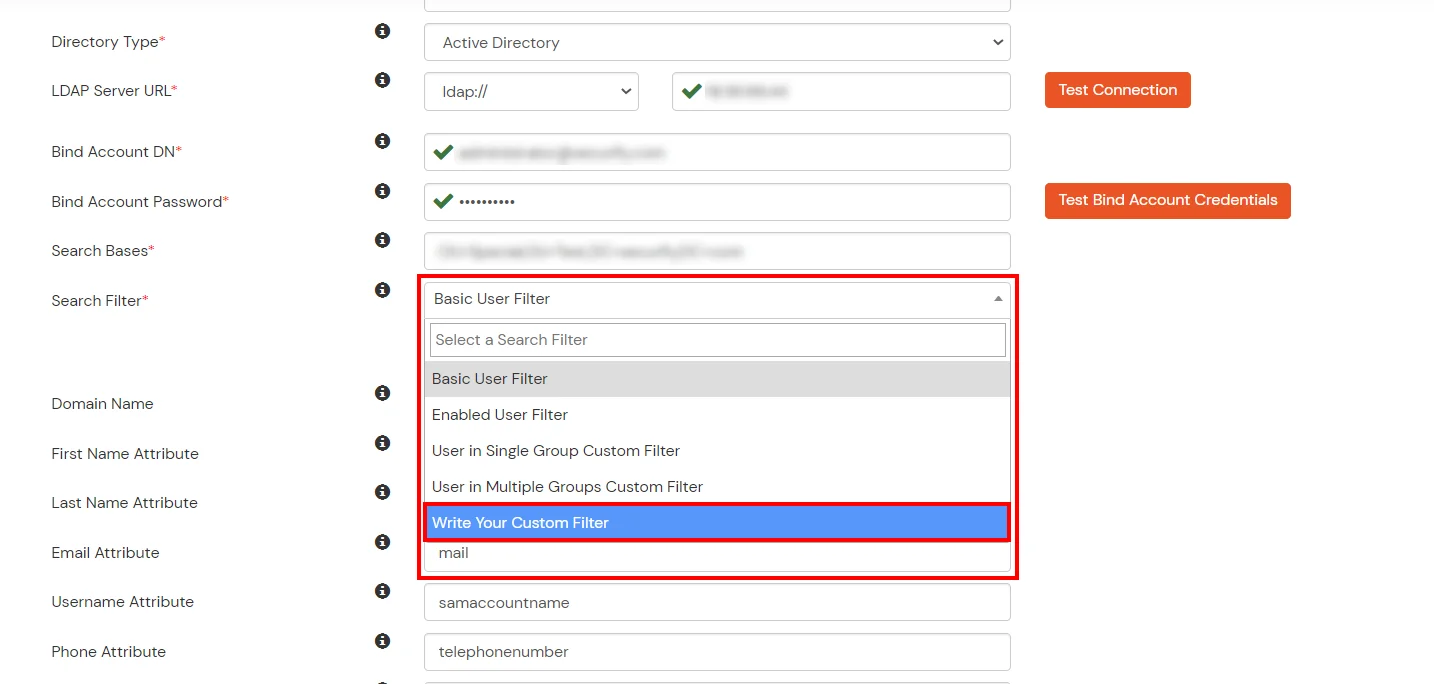
- Select a suitable Search filter from the drop-down menu. If you use User in Single Group Filter or User in Multiple Group Filter, replace the <group-dn> in the search filter with the distinguished name of the group in which your users are present. To use custom Search Filter select "Write your Custom Filter" option and customize it accordingly.
- Click on the Next button, or go to the Login Options tab.
- You can also configure following options while setting up AD. Enable Activate LDAP in order to authenticate users from AD/LDAP. Click on the Next button to add user store.
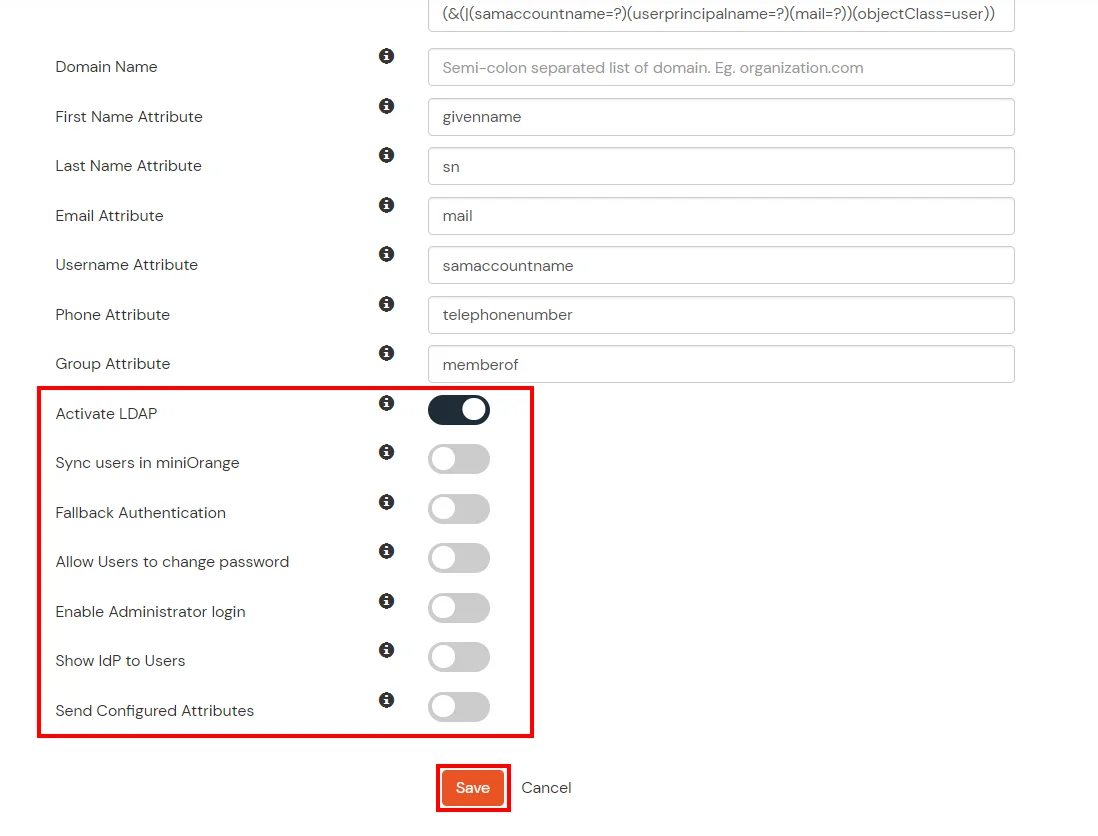
Here's the list of the attributes and what it does when we enable it. You can enable/disable accordingly.
| Attribute |
Description |
| Activate LDAP |
All user authentications will be done with LDAP credentials if you Activate it |
| Fallback Authentication |
If LDAP credentials fail then user will be authenticated through miniOrange |
| Enable administrator login |
On enabling this, your miniOrange Administrator login authenticates using your LDAP server |
| Show IdP to users |
If you enable this option, this IdP will be visible to users |
| Sync users in miniOrange |
Users will be created in miniOrange after authentication with LDAP |
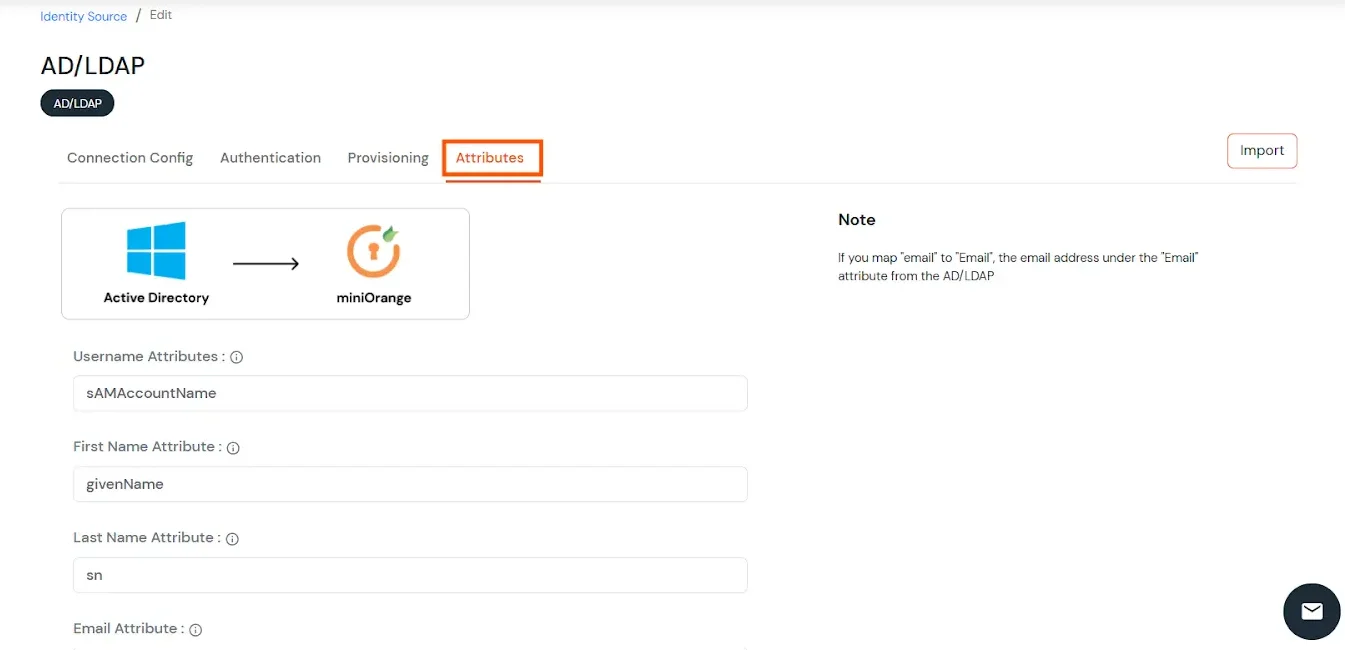
- Click on the Next button, or go to the Attributes tab.
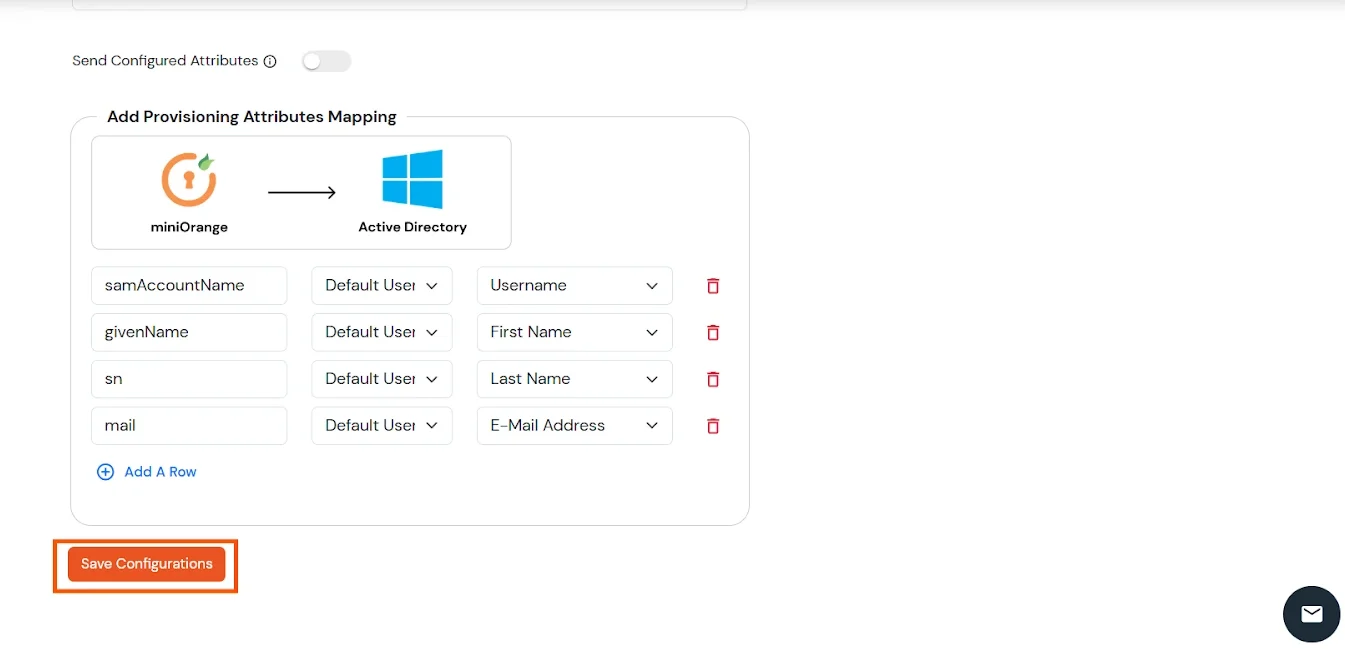
Attributes Mapping from AD
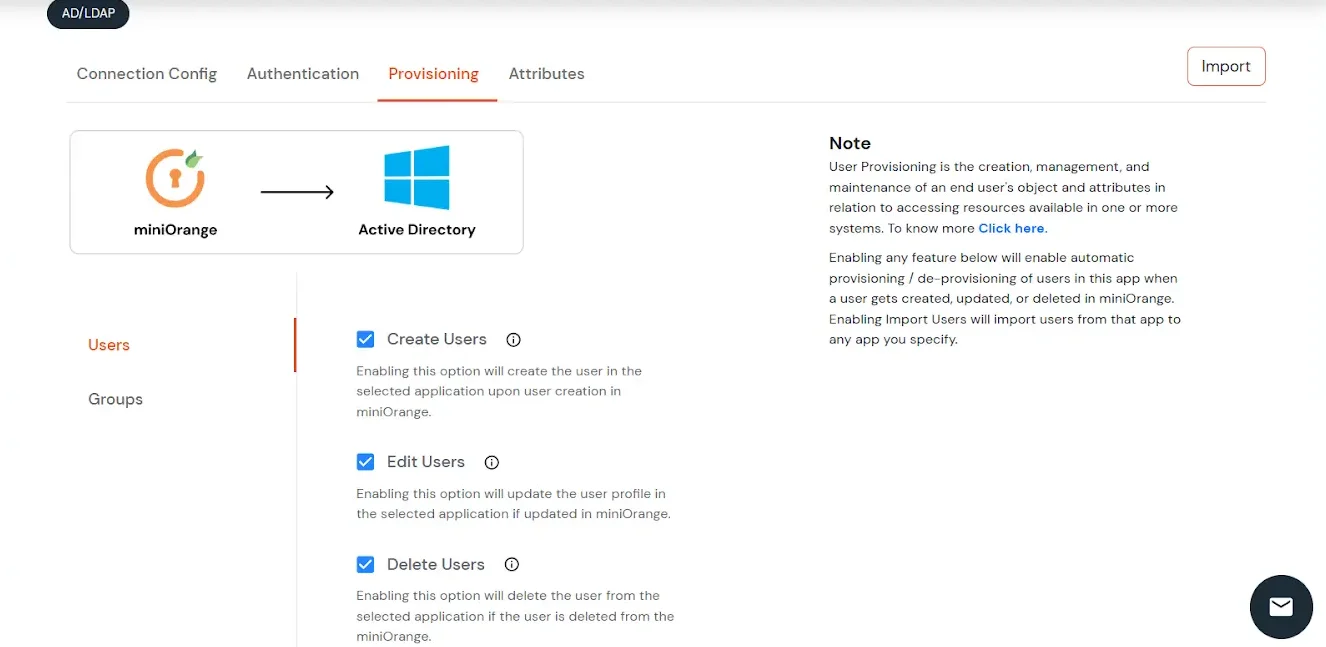
User Import and Provisioning from AD
- If you want to set up provisioning, click here for detailed information. We will skip this step for now.
Import Password Policy from AD
- If you want to import your Active Directory password policy into miniOrange, click here for detailed information. We will skip this step for now.
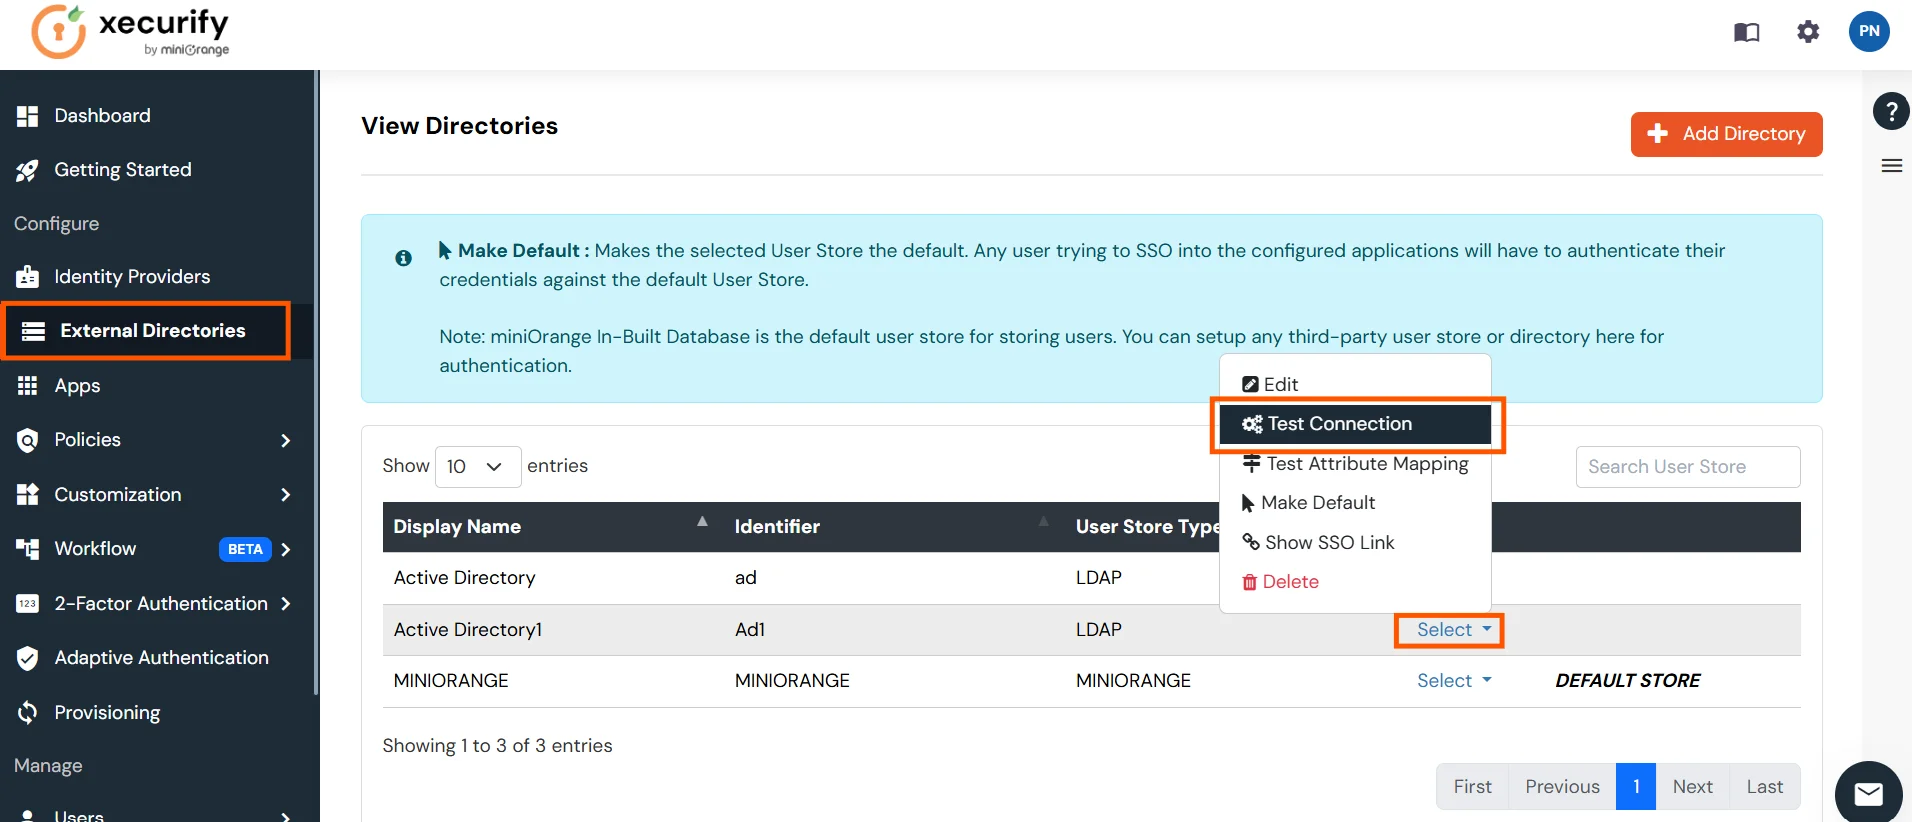
Test Connections
- You will see a list of directories under Identity Providers. From the dropdown, select AD/LDAP Directories, search for your configured directory, click the three dots next to it, and select Test Connection.
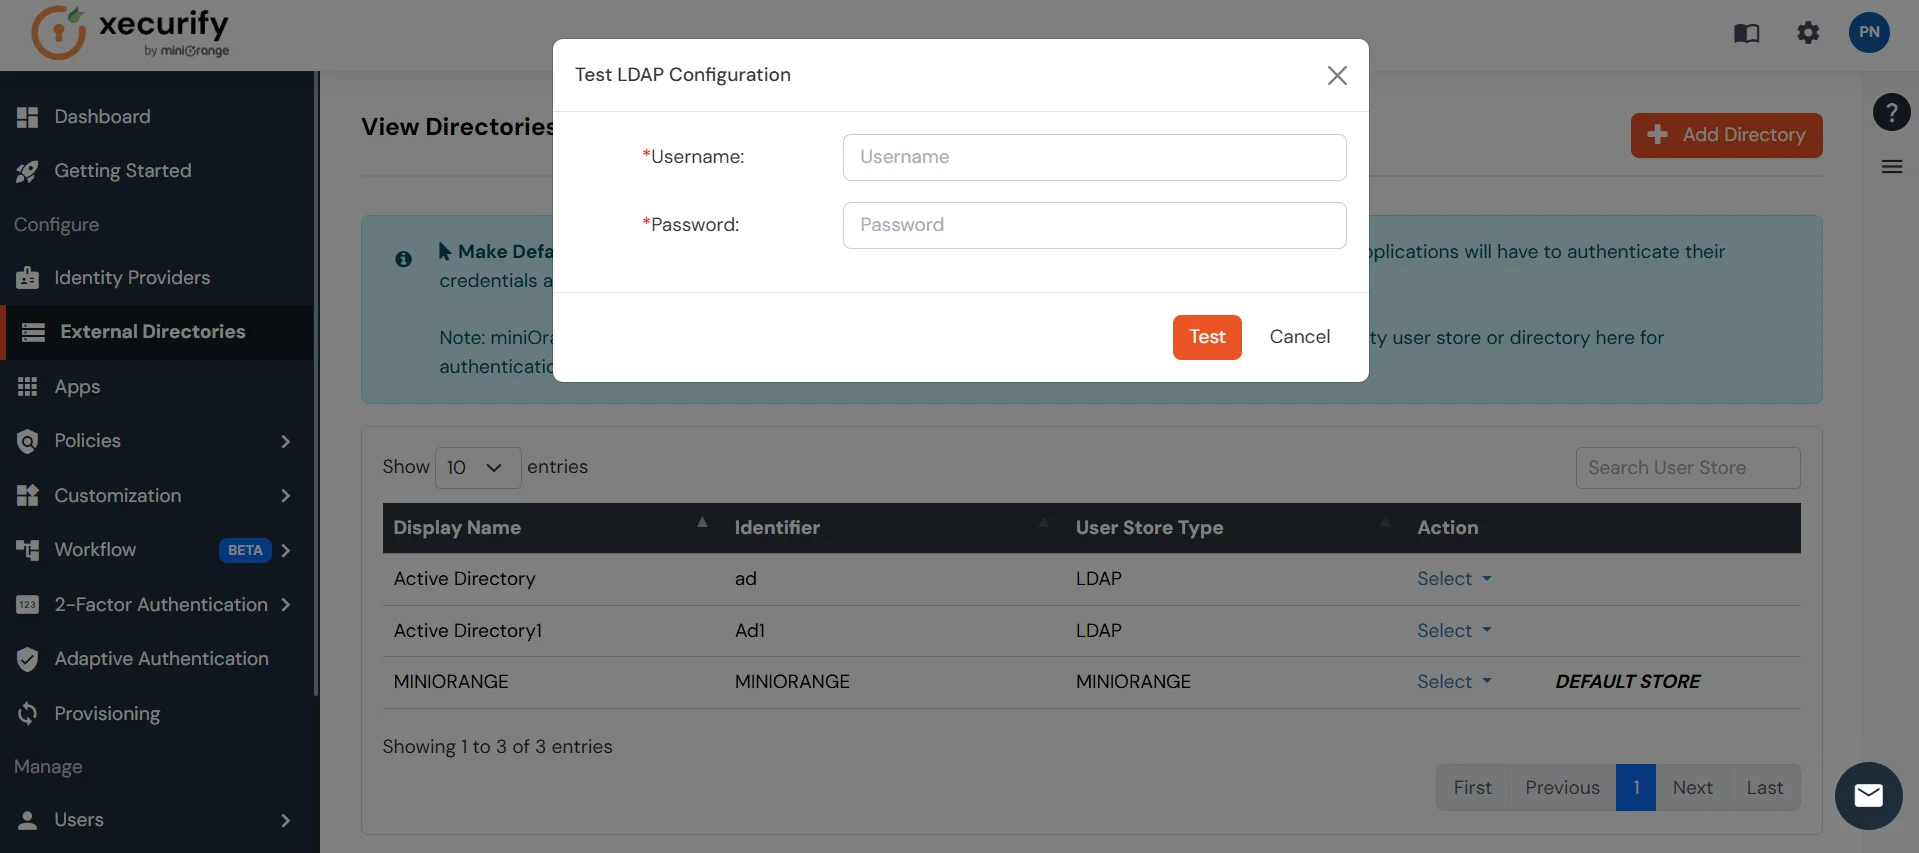
- A pop-up appears prompting you to enter a username and password to verify your LDAP configuration.
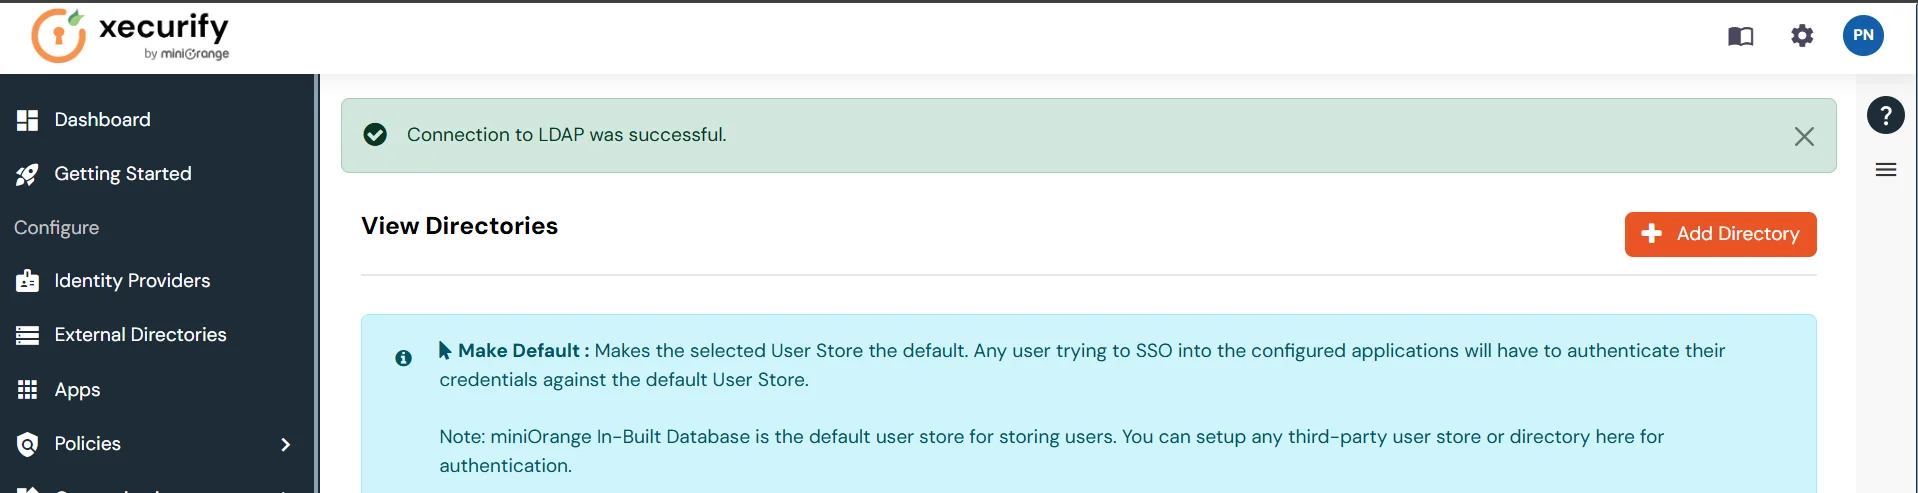
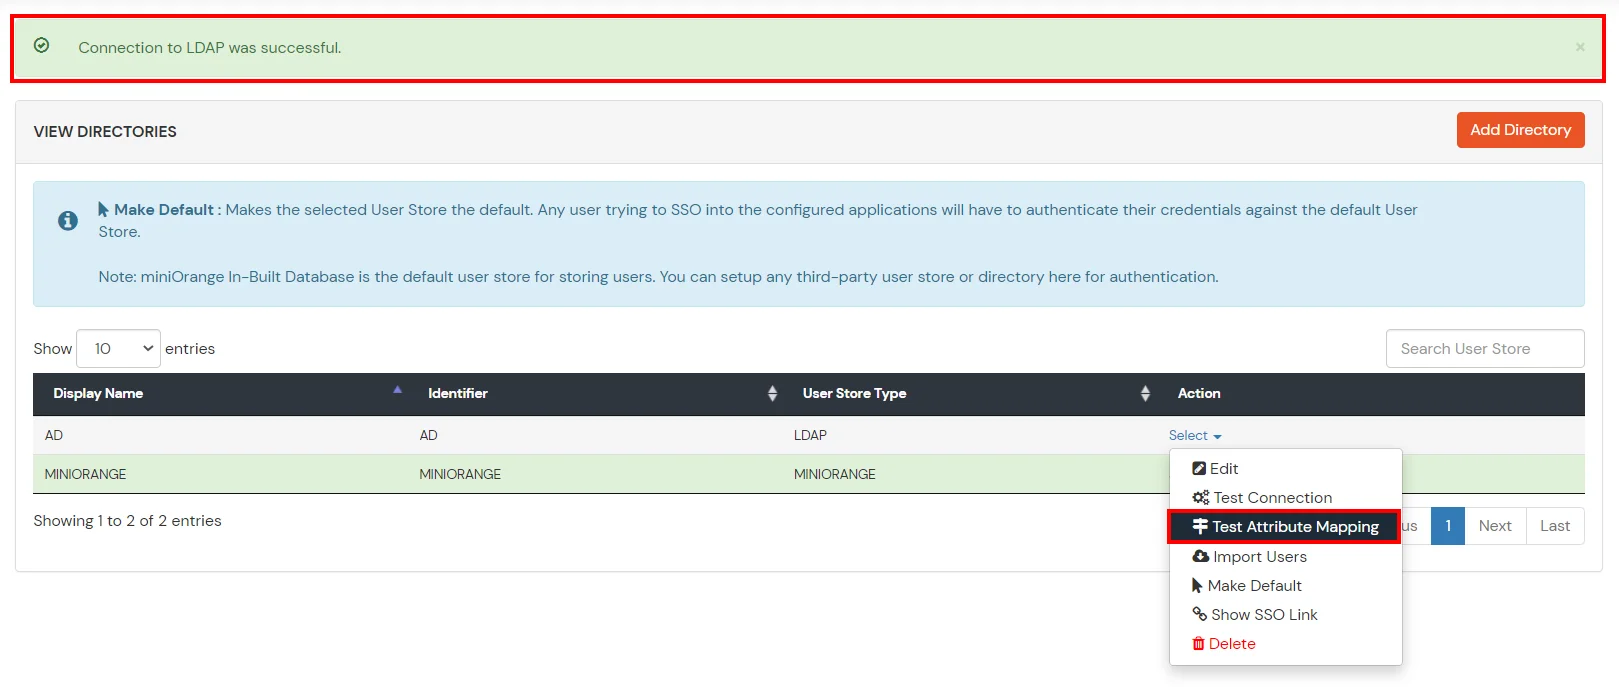
- On Successful connection with LDAP Server, a success message is shown.
Test Attribute Mapping
- You will see a list of directories under Identity Providers. From the dropdown, select AD/LDAP Directories, search for your configured directory, click the three dots next to it, and select Test Attribute Mapping.
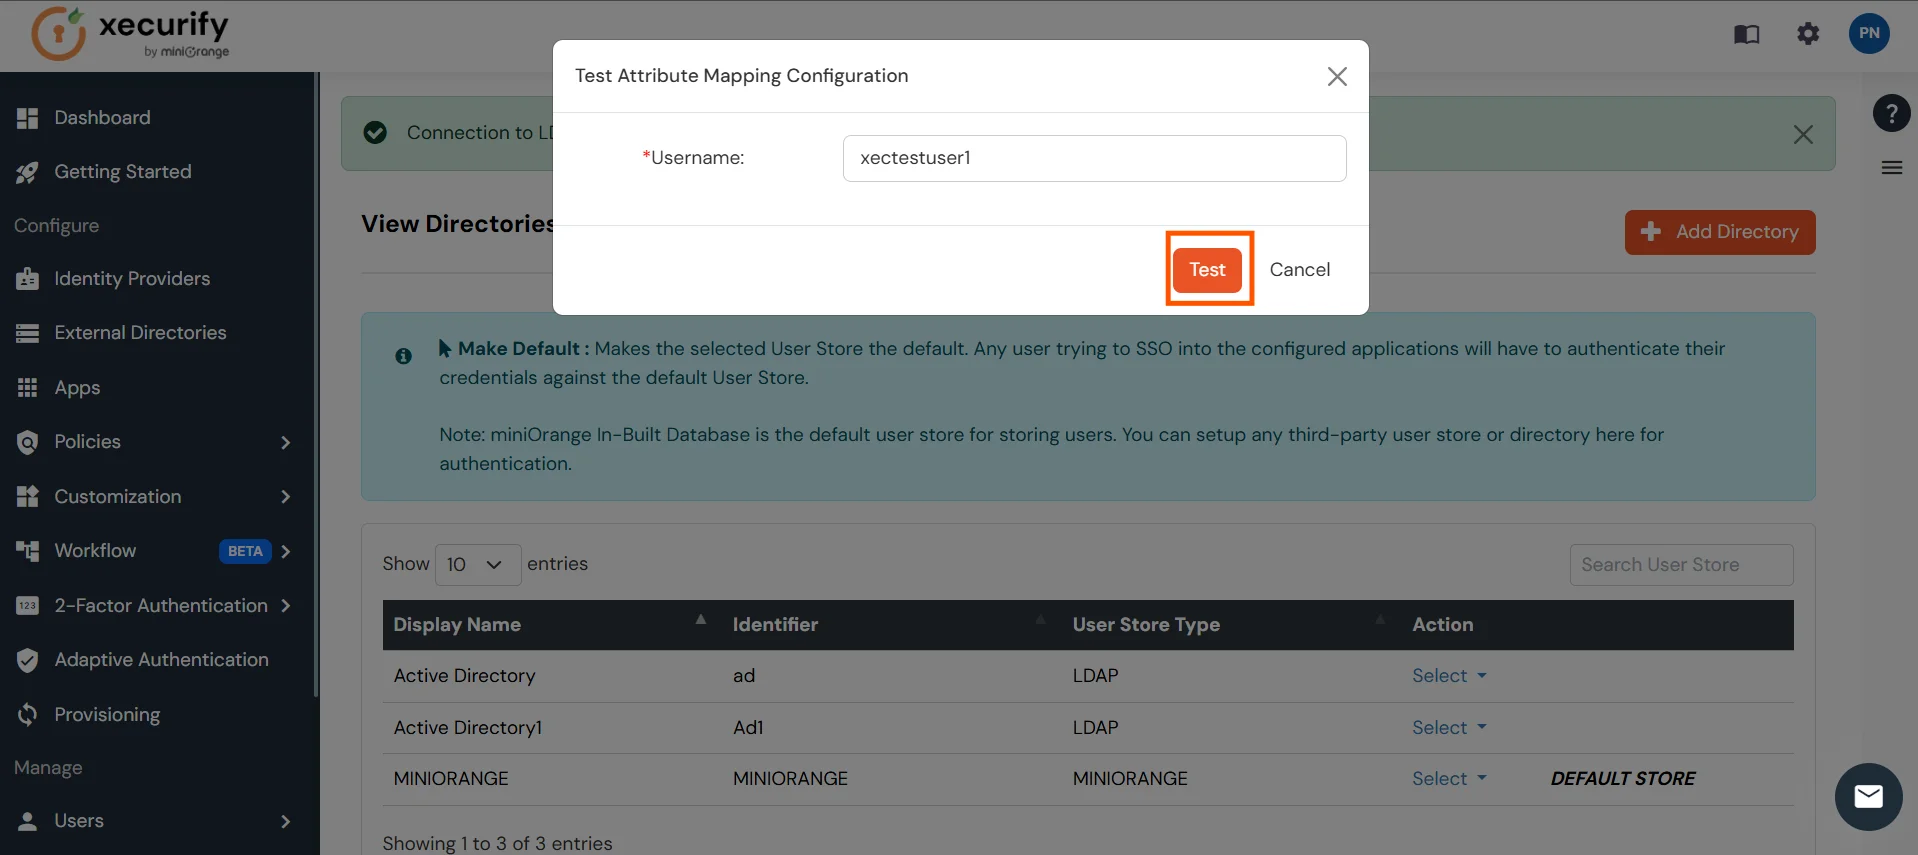
- A pop‑up appears to enter a username and click Test.
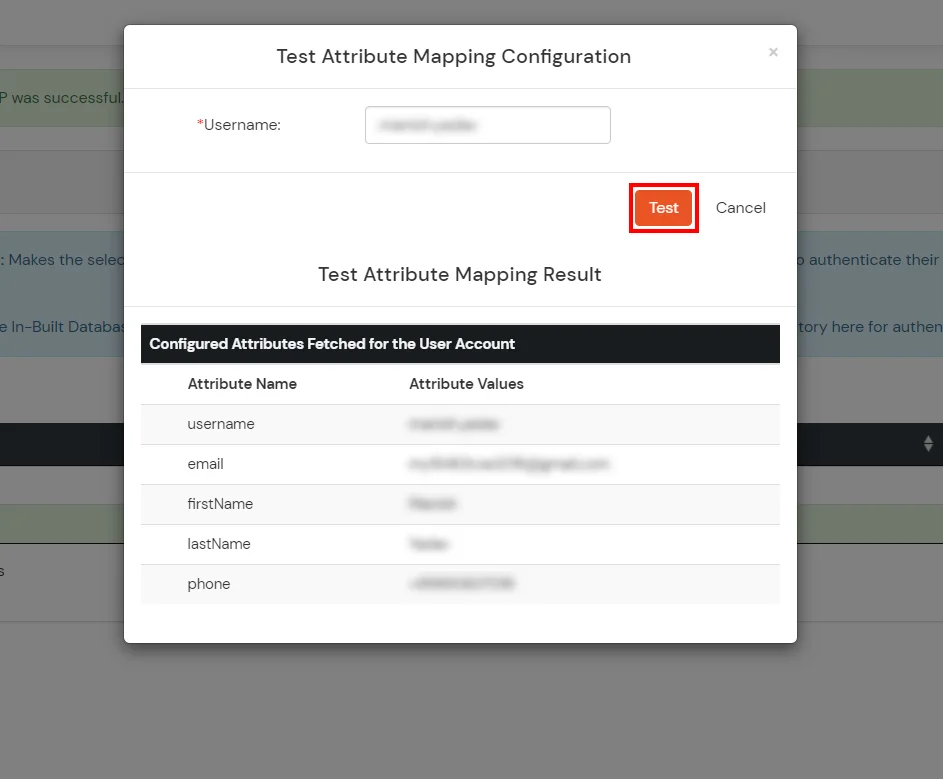
- The Test Attribute Mapping Result will be displayed.
Set up AD as External Directory configuration is complete.
Note: Refer our guide to setup LDAP on windows server.
miniOrange integrates with various external user sources such as directories, identity providers, and etc.
External References