Hello there!
Need Help? We are right here!
Need Help? We are right here!
Search Results:
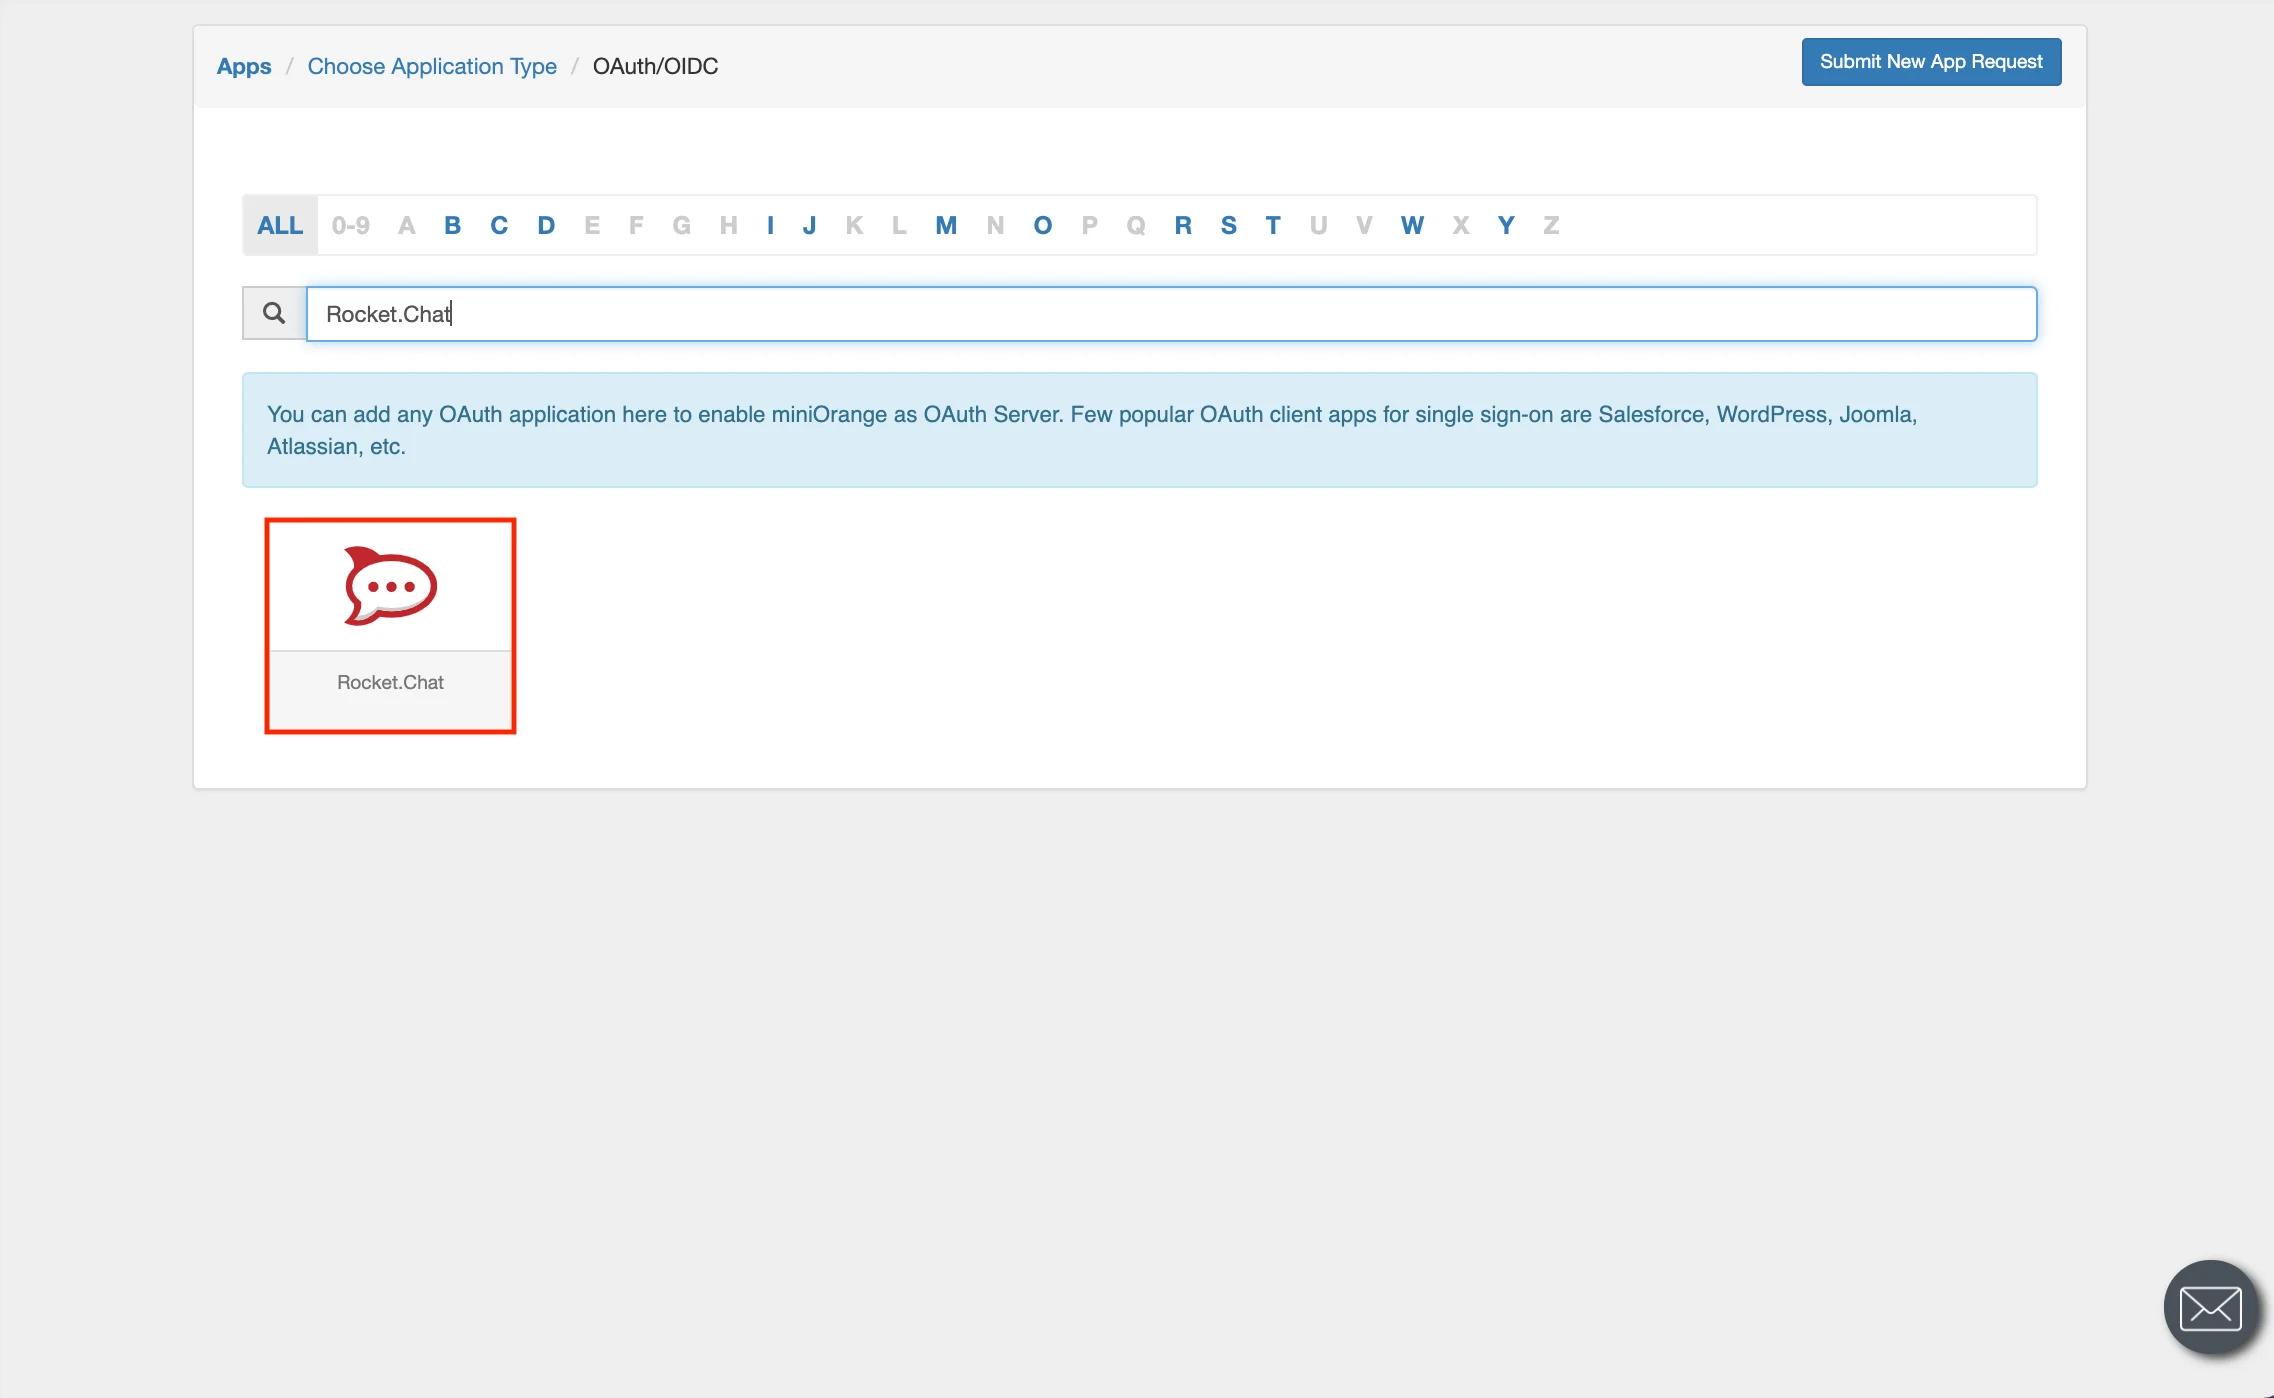
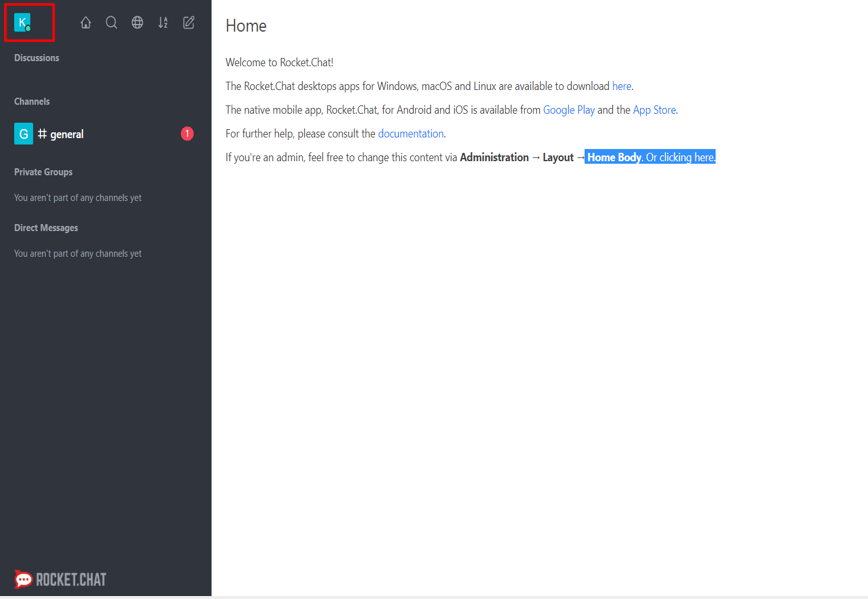
×Rocket.Chat is an OAuth supported open source communication hub. Rocket.Chat helps organizations to have their own chat tool,media sharing, screen sharing, and video/audio calling support. Users of Rocket.Chat can customize its look and feel, choose their users, and securely manage data. Along with this,Users can set up Rocket.Chat on cloud or by hosting their own servers on-premises.Rocket.Chat’s long-term vision is to replace email with a real-time federated communications platform and offer services to enable businesses to be built using Rocket.Chat
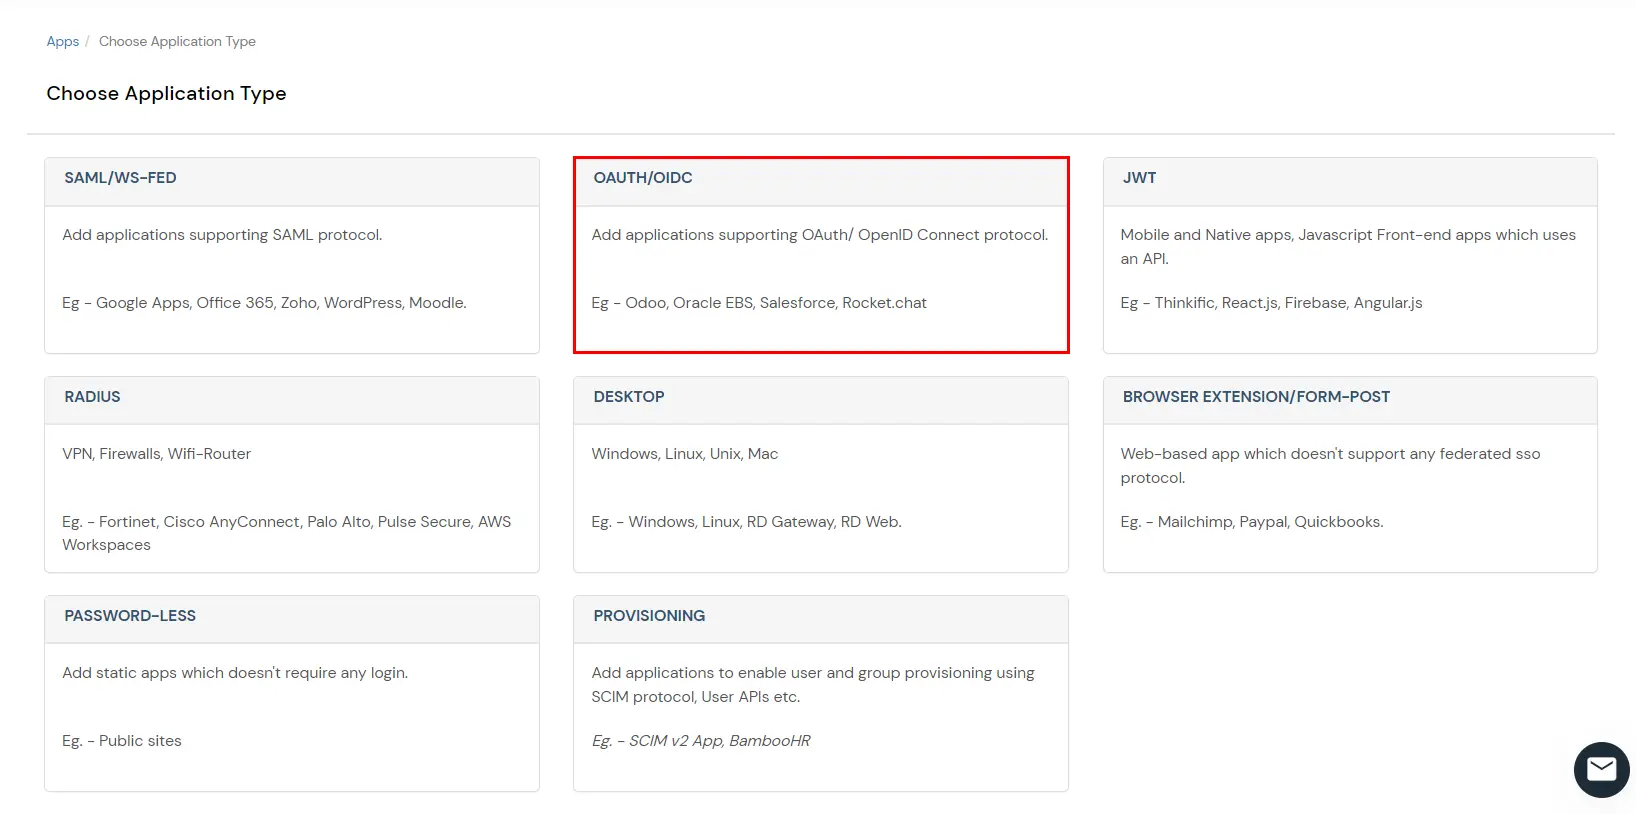
OAuth (Open Authorization) is an open standard for token-based authentication and
authorization which is used to provide single sign-on (SSO).
OAuth doesn’t share password data but instead uses authorization tokens to prove an identity between
consumers and service providers. OAuth
is an authentication protocol that allows you to approve one application interacting with another on
your behalf without giving away your password.
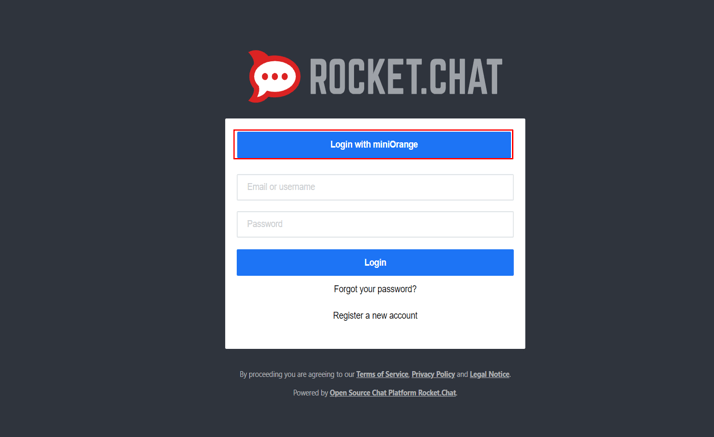
Applications that support login using third party services generally prompt the user to authenticate
themselves by giving options like “Login With Facebook” or “Login With Google” etc.
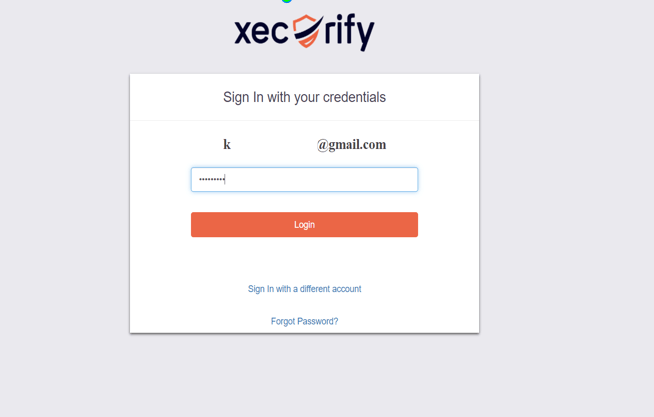
thus, allowing the user to use their credentials to login with the third party service. In response,
the service sends the access token to the requesting application which proves the authenticity
of the user who is requesting access. The token is then used for making requests to resources
required by the end-user.OAuth is suitable for both browser and mobile applications and it is widely
used for customer application and API access. Baically, OAuth uses JSON to transfer messages between
applications & uses HTTP for requesting and receiving tokens.
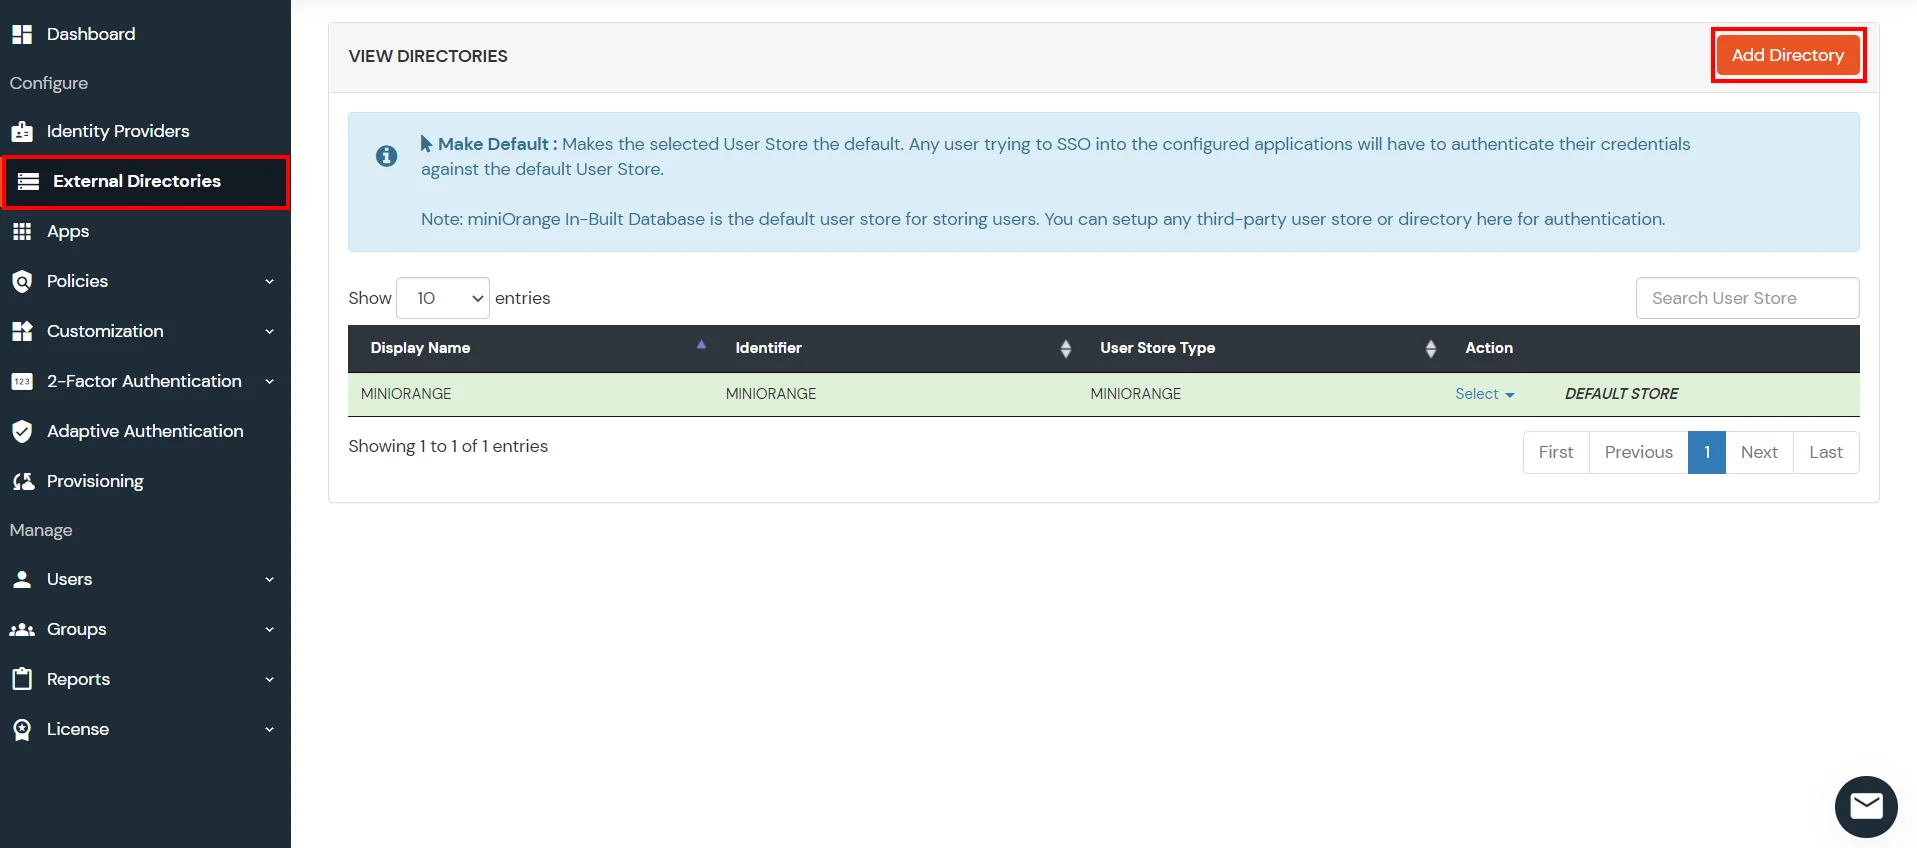
miniOrange provides user authentication from external directories like ADFS, Microsoft Active Directory, Microsoft Entra ID, OpenLDAP, Google, AWS Cognito etc. It also provides user authentication with other IDPs like Shibboleth, PING, Okta, OneLogin, KeyCloak and many more.
Can't find your IDP ? Contact us on idpsupport@xecurify.com. We'll help you set it up in no time.
Authorization
Grant

Password
Grant
Implicit
Grant

Refresh Token
Grant

Client Credentials
Grant
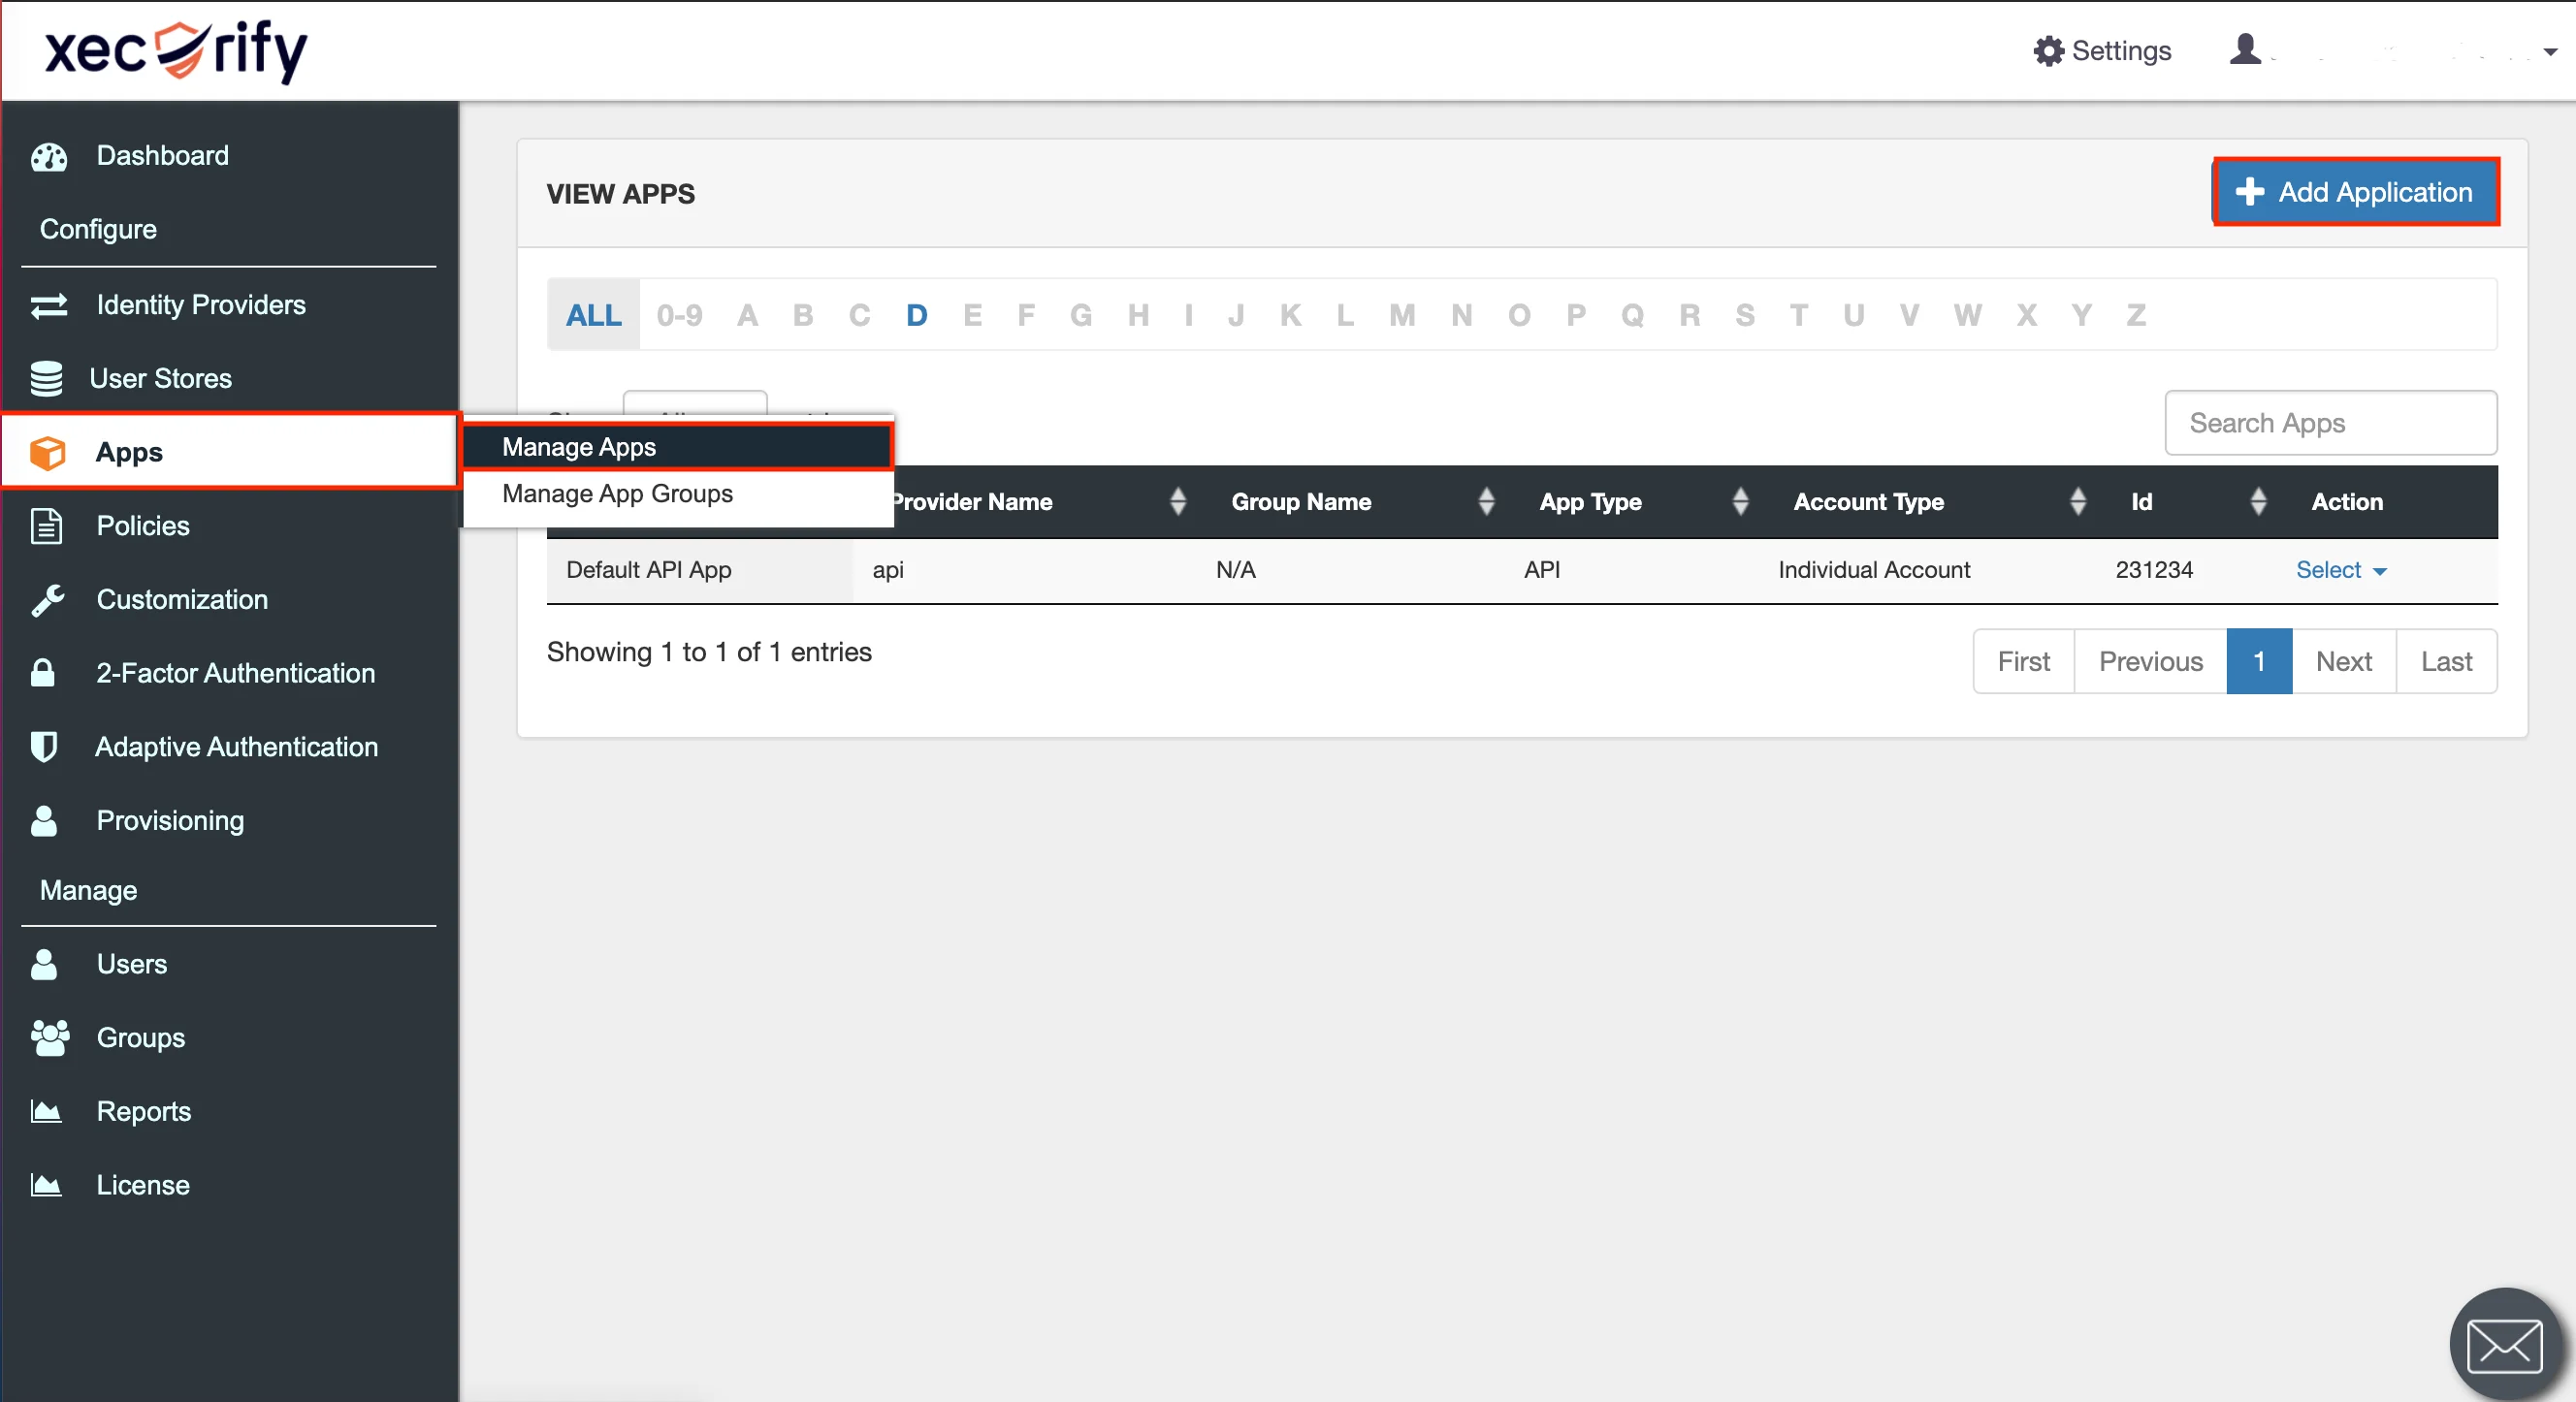
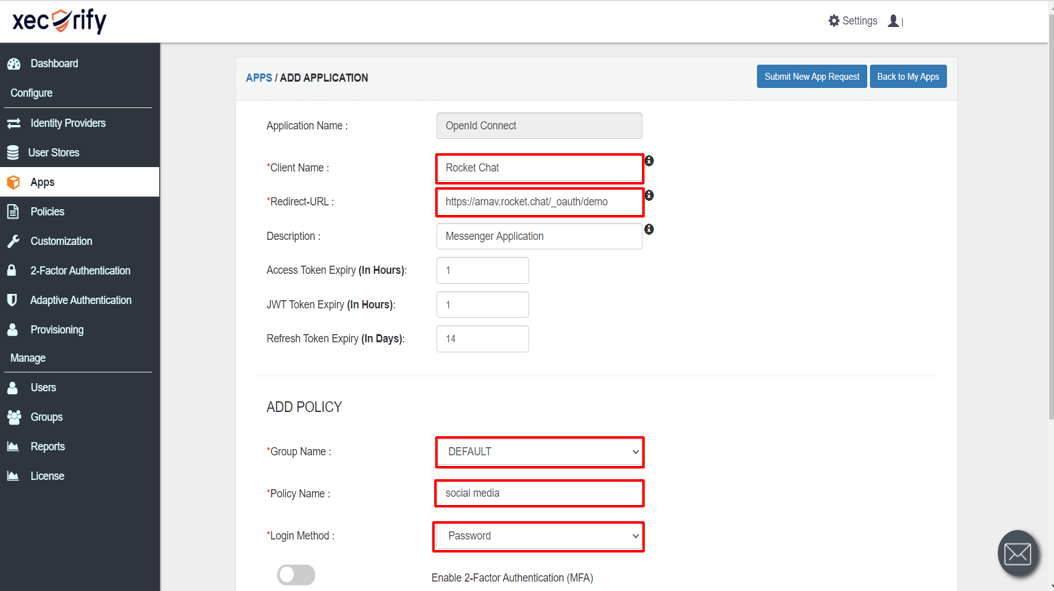
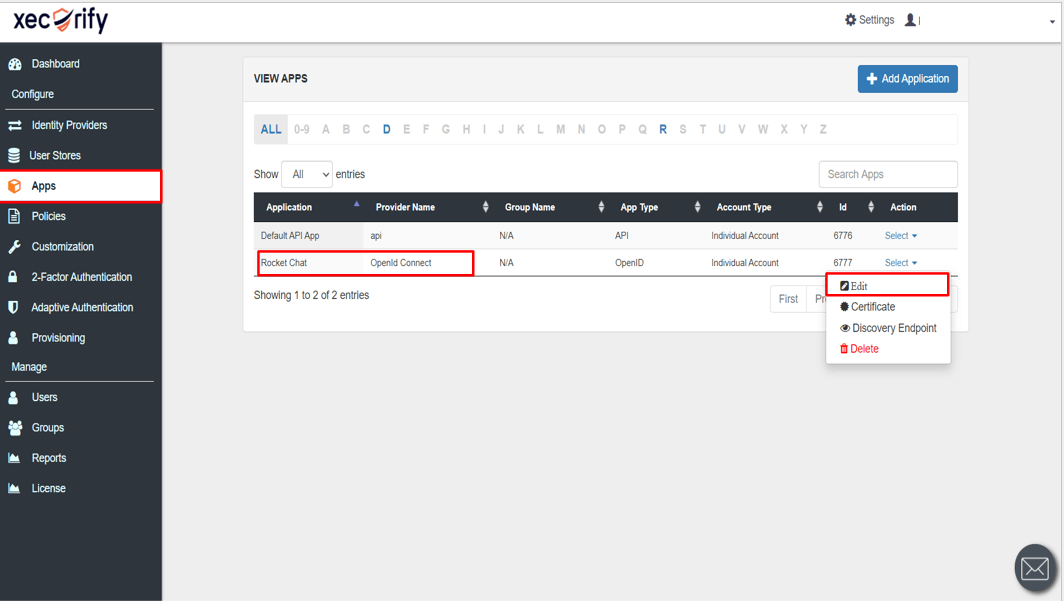
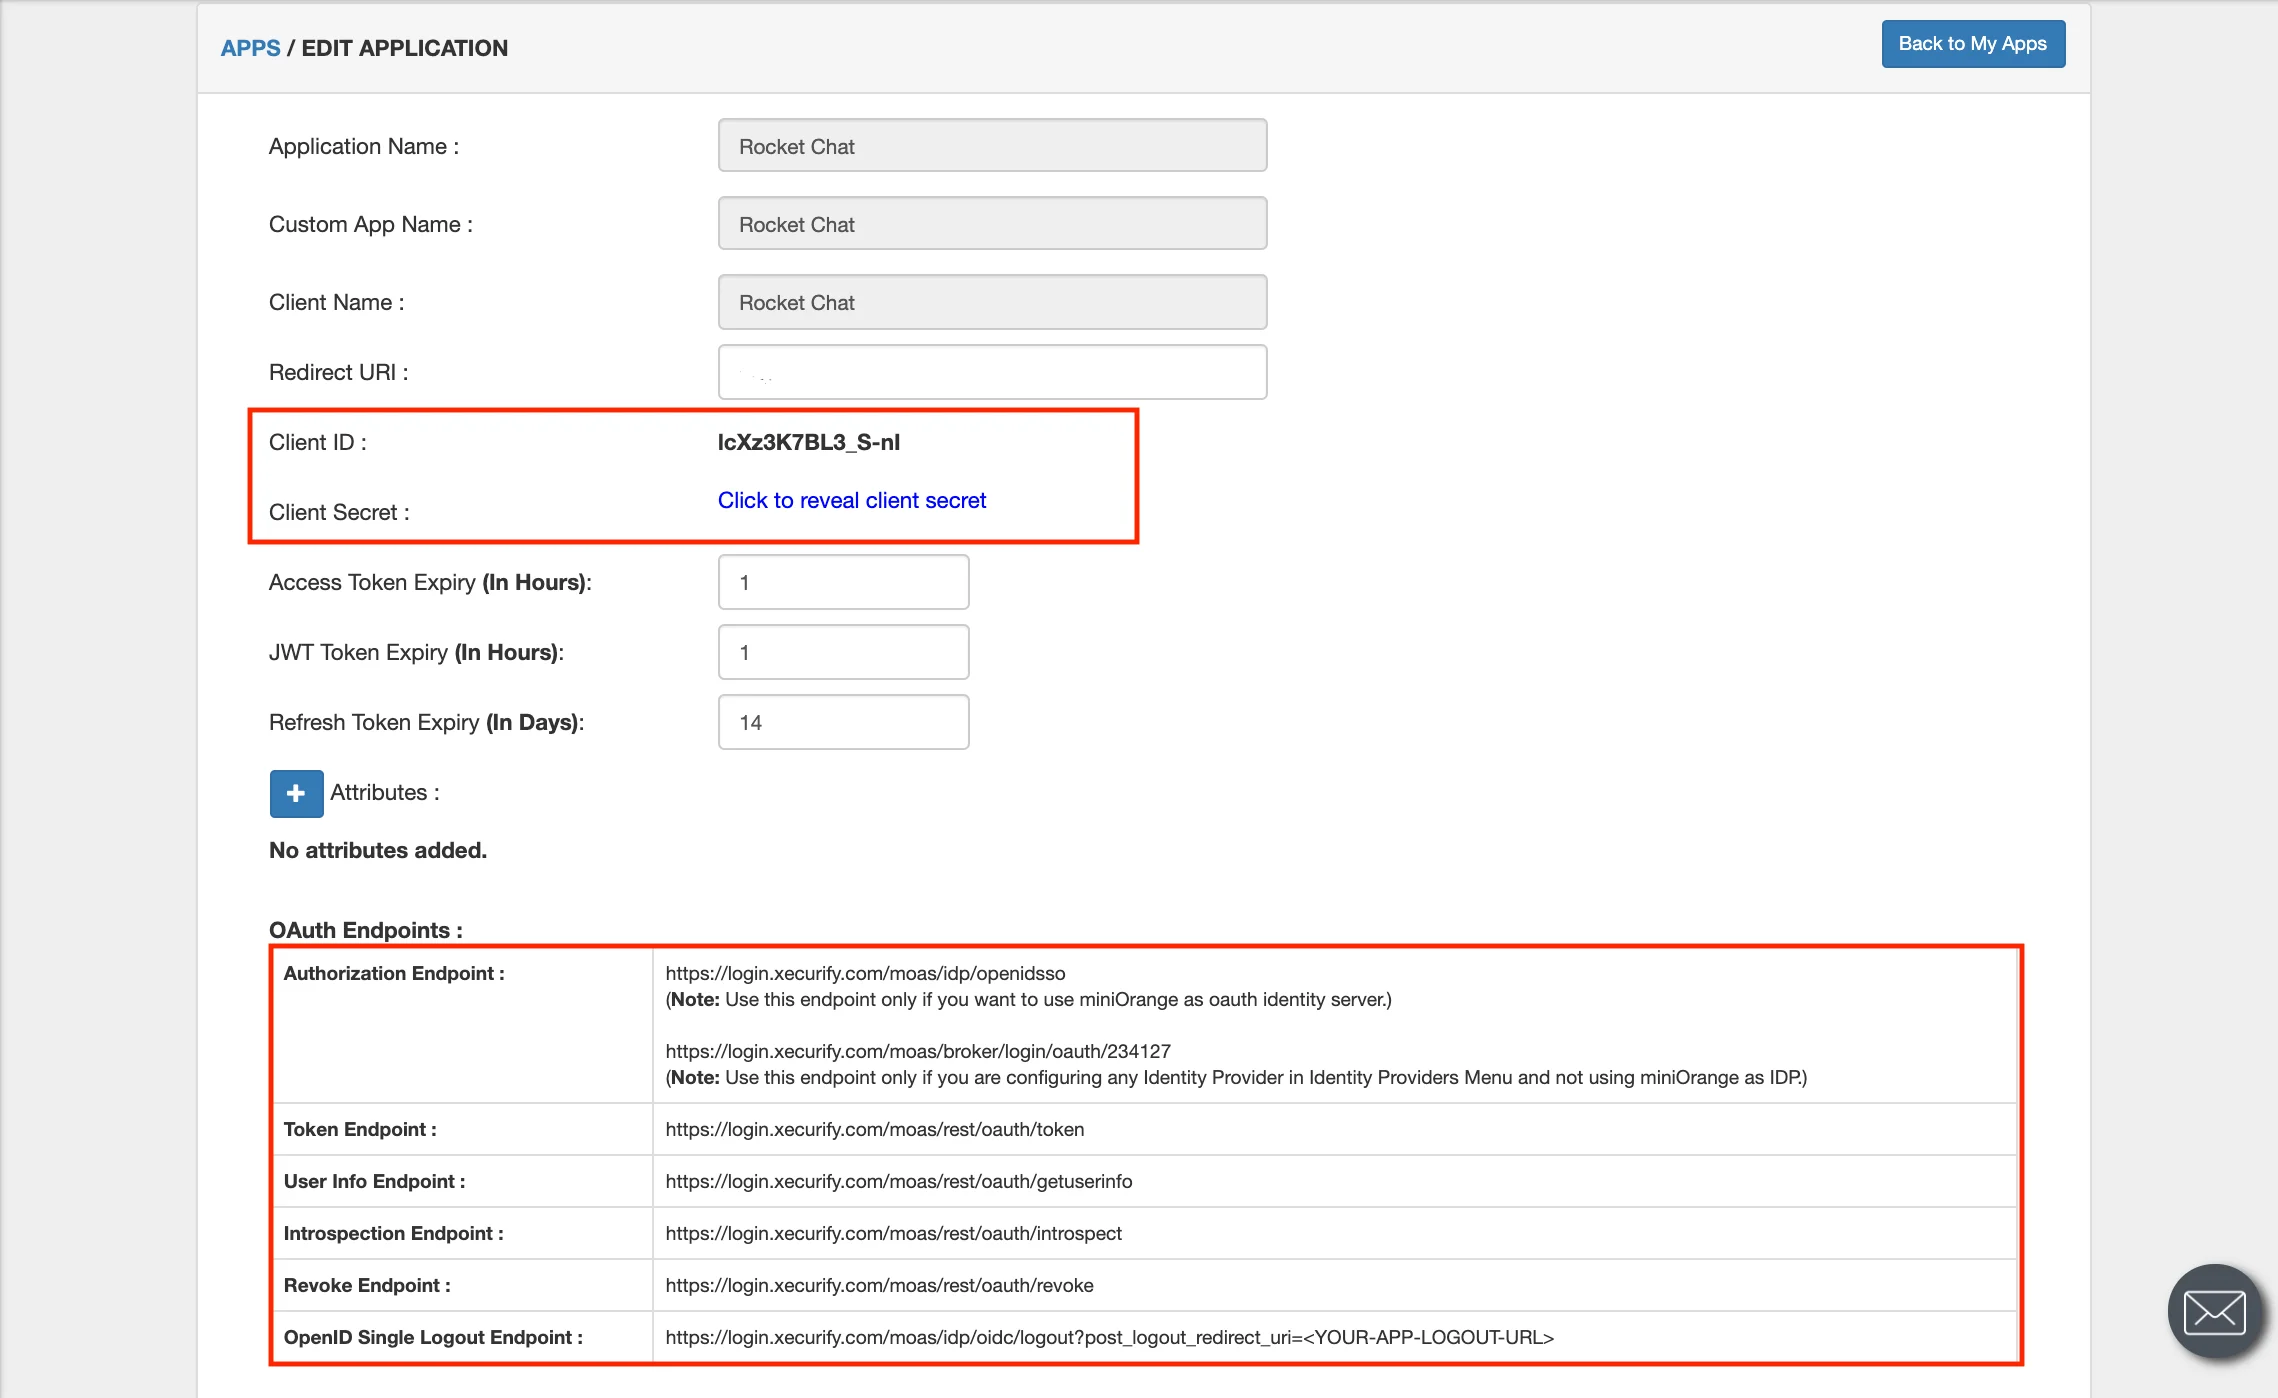
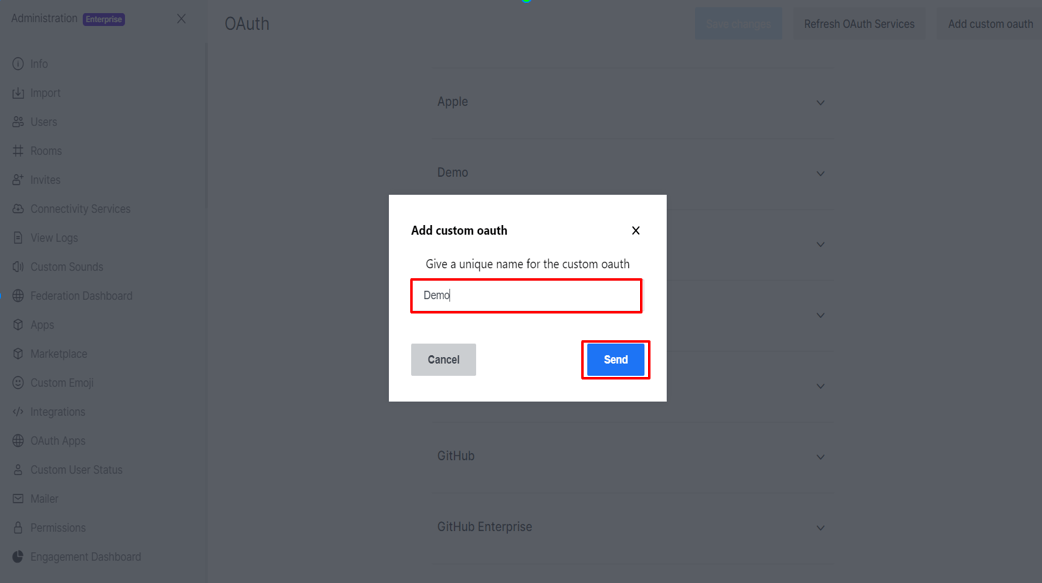
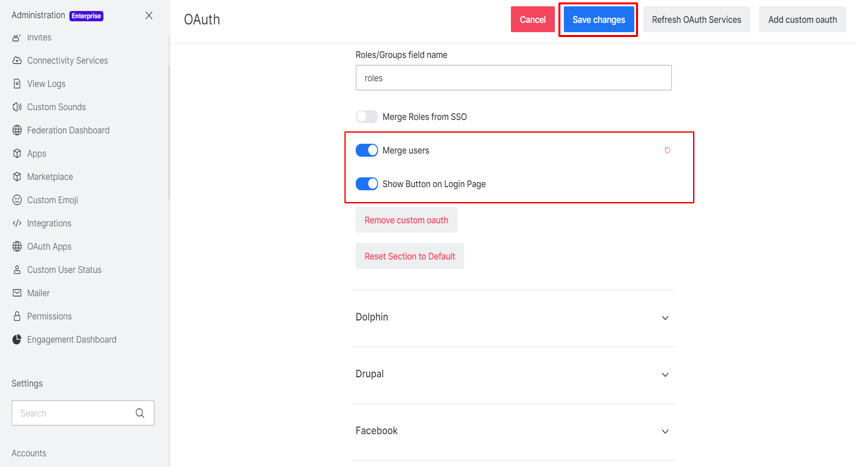
You can edit Application by using the following steps:
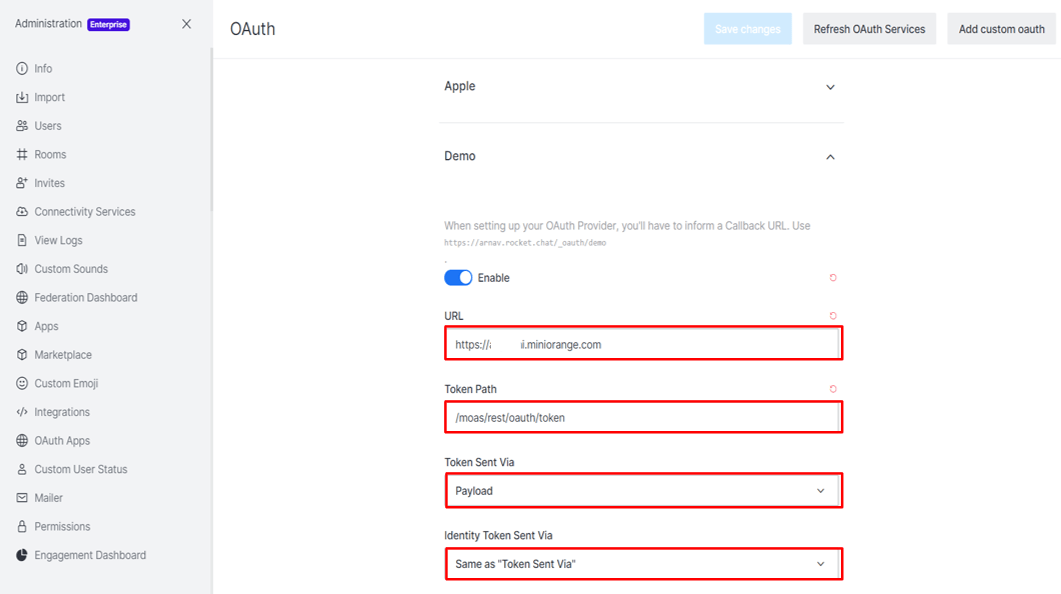
| Authorization Endpoint: | https://demo.miniorange.in/moas/idp/openidsso
(Note: Use this enpoint only if you want to use miniorange as oauth identity server.) https://demo.miniorange.in/moas/broker/login/oauth/19509 (Note: Use this enpoint only if you are configuring any Identity Provider in Identity Providers Menu and not using miniorange as IDP.) |
| Token Endpoint: | https://demo.miniorange.in/moas/rest/oauth/token |
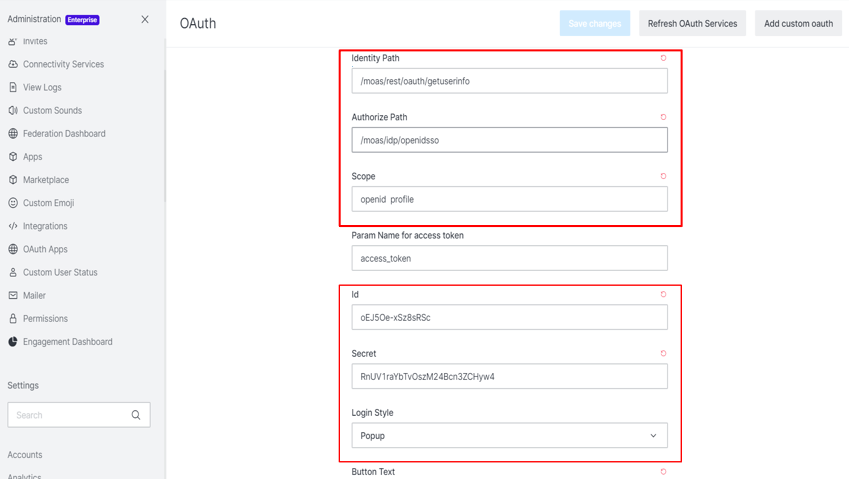
| User Info Endpoint: | https://demo.miniorange.in/moas/rest/oauth/getuserinfo |
| Introspection Endpoint: | https://demo.miniorange.in/moas/rest/oauth/introspect |
| Revoke Endpoint: | https://demo.miniorange.in/moas/rest/oauth/revoke |
| OpenID Single Logout Endpoint: | https://demo.miniorange.in/moas/idp/oidc/logout?post_logout_redirect_uri=
|
| email : | View email address of the user |
| profile : | View profile attributes of the user account |
| openid : | Retrieve JWT token for OpenID Connect |
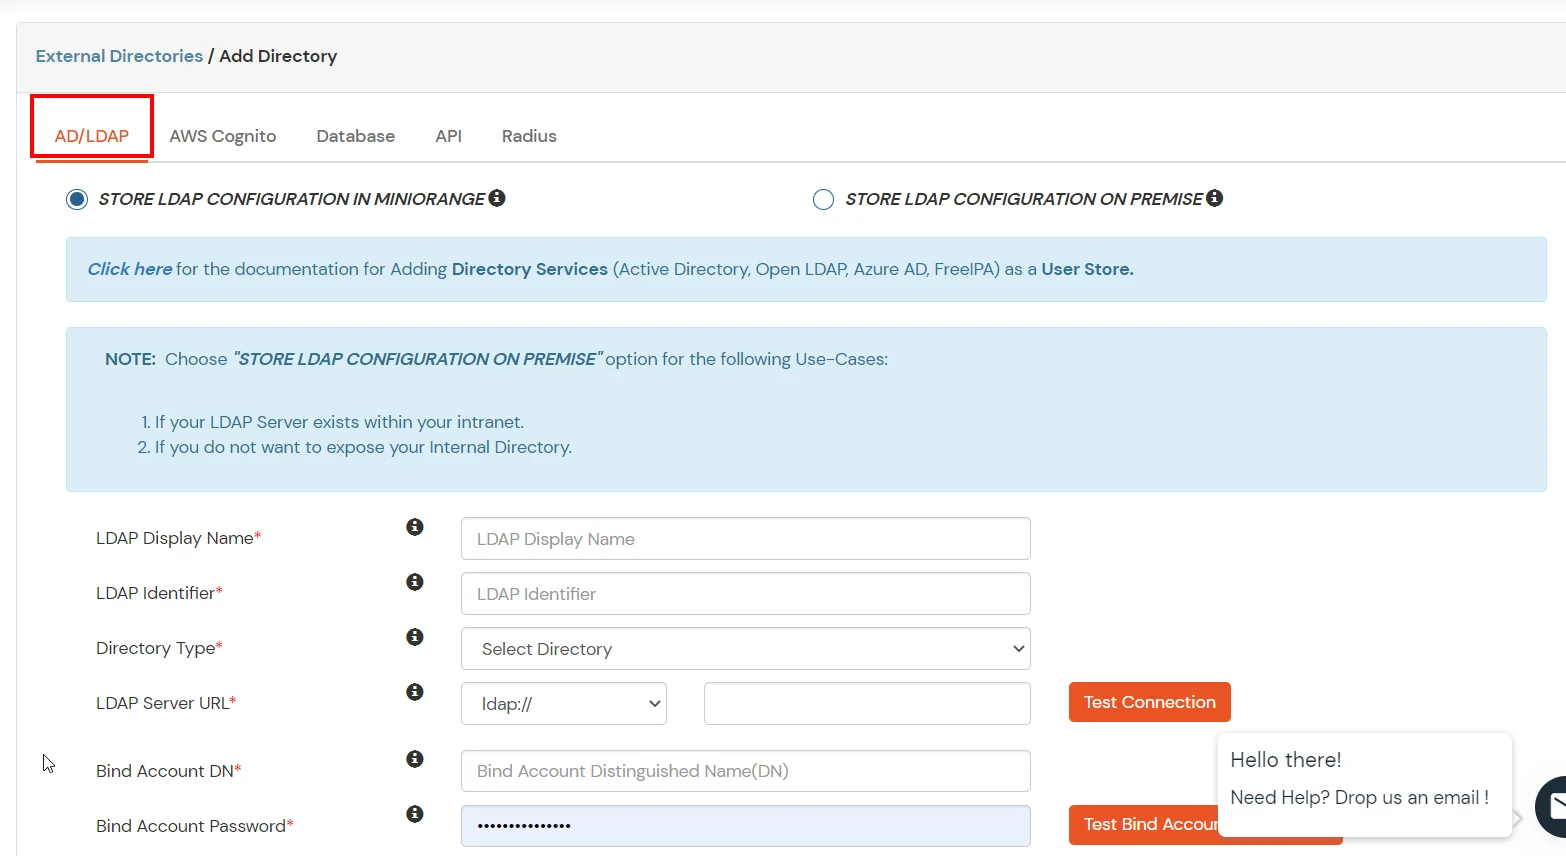
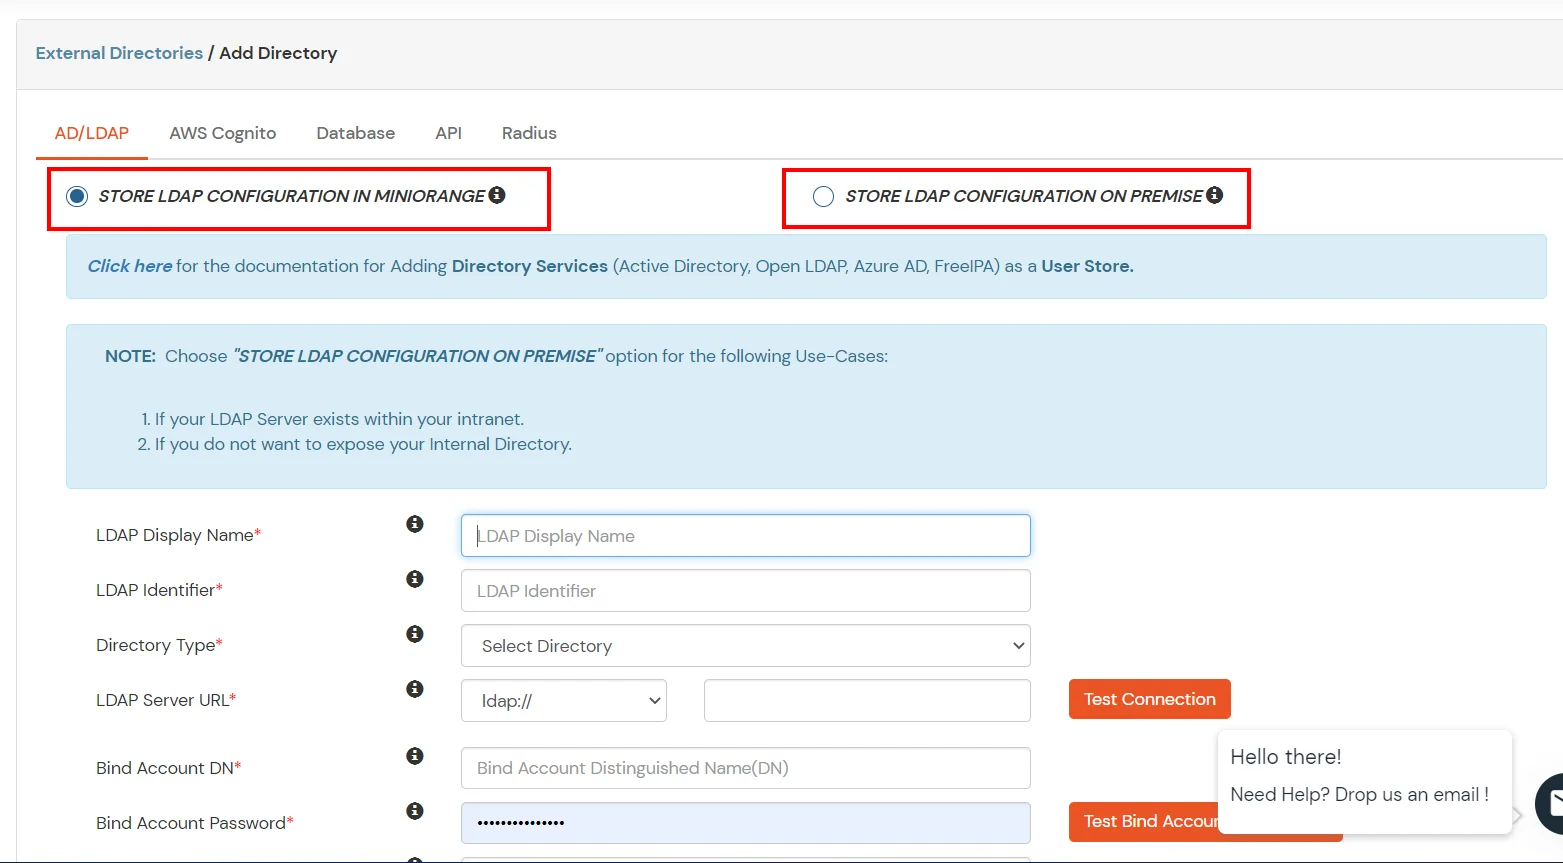
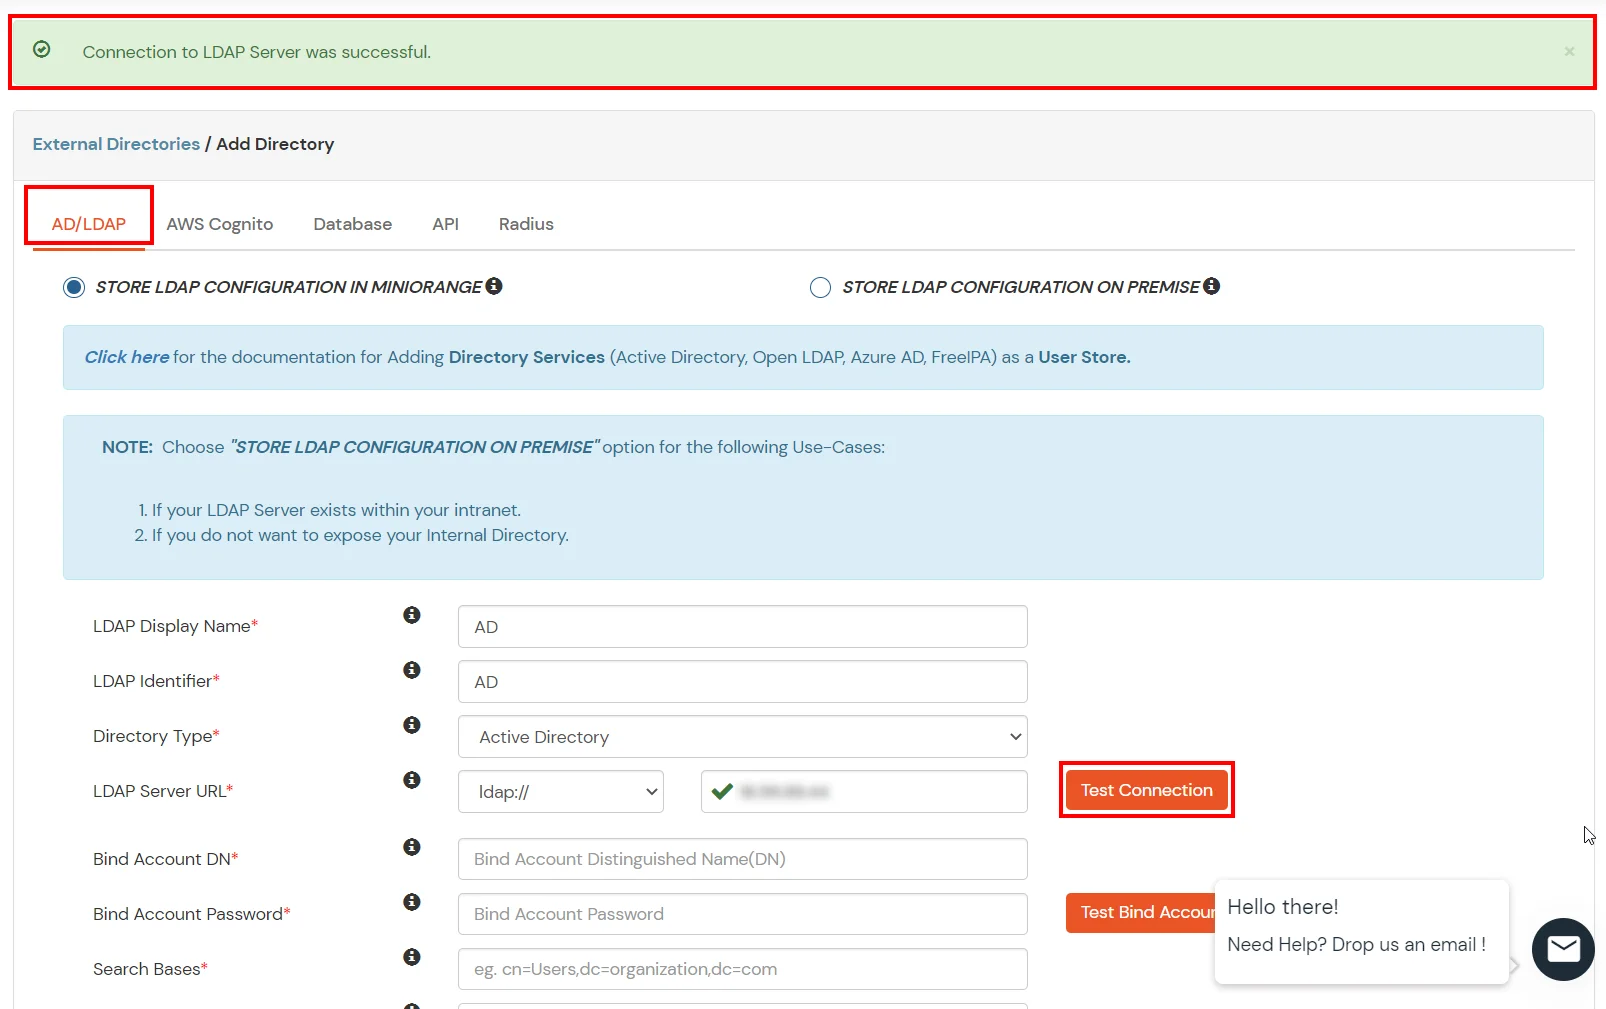
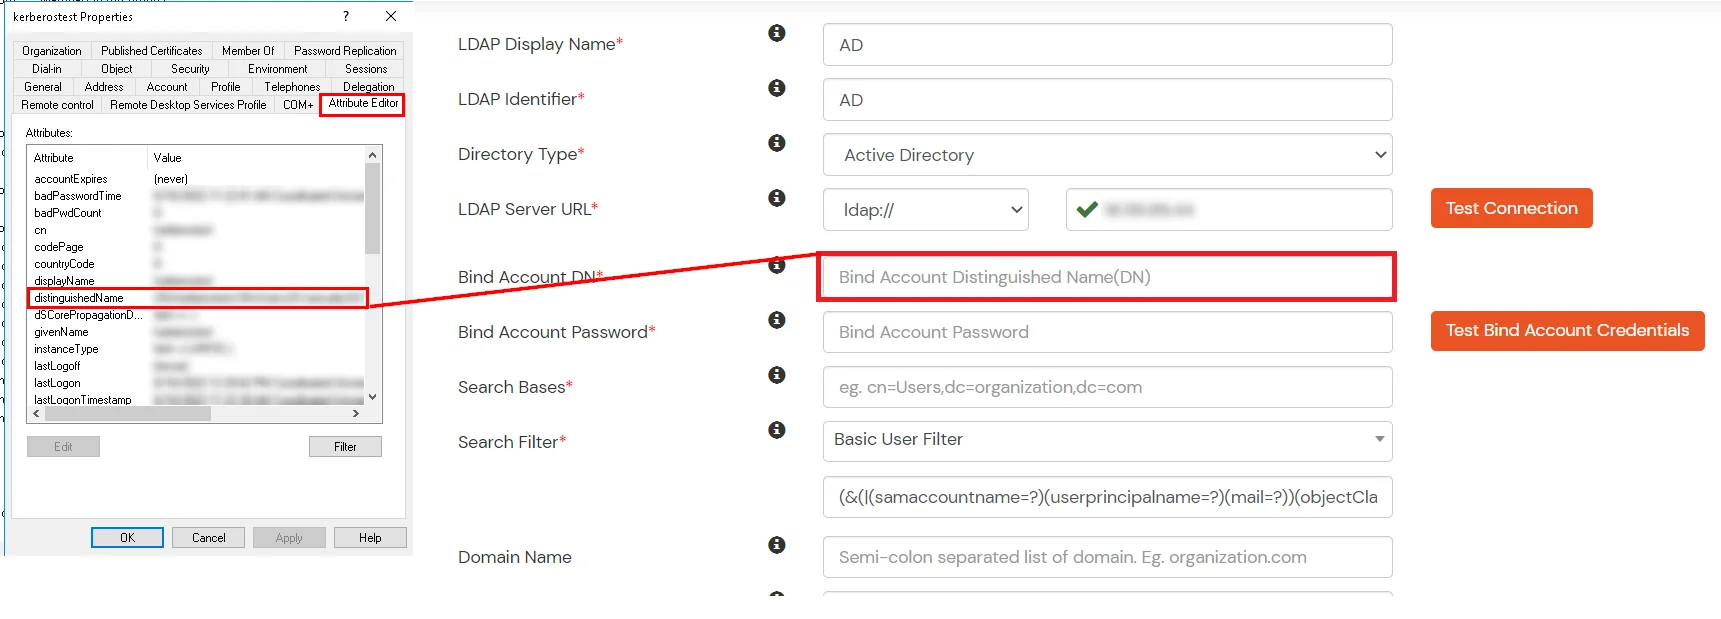
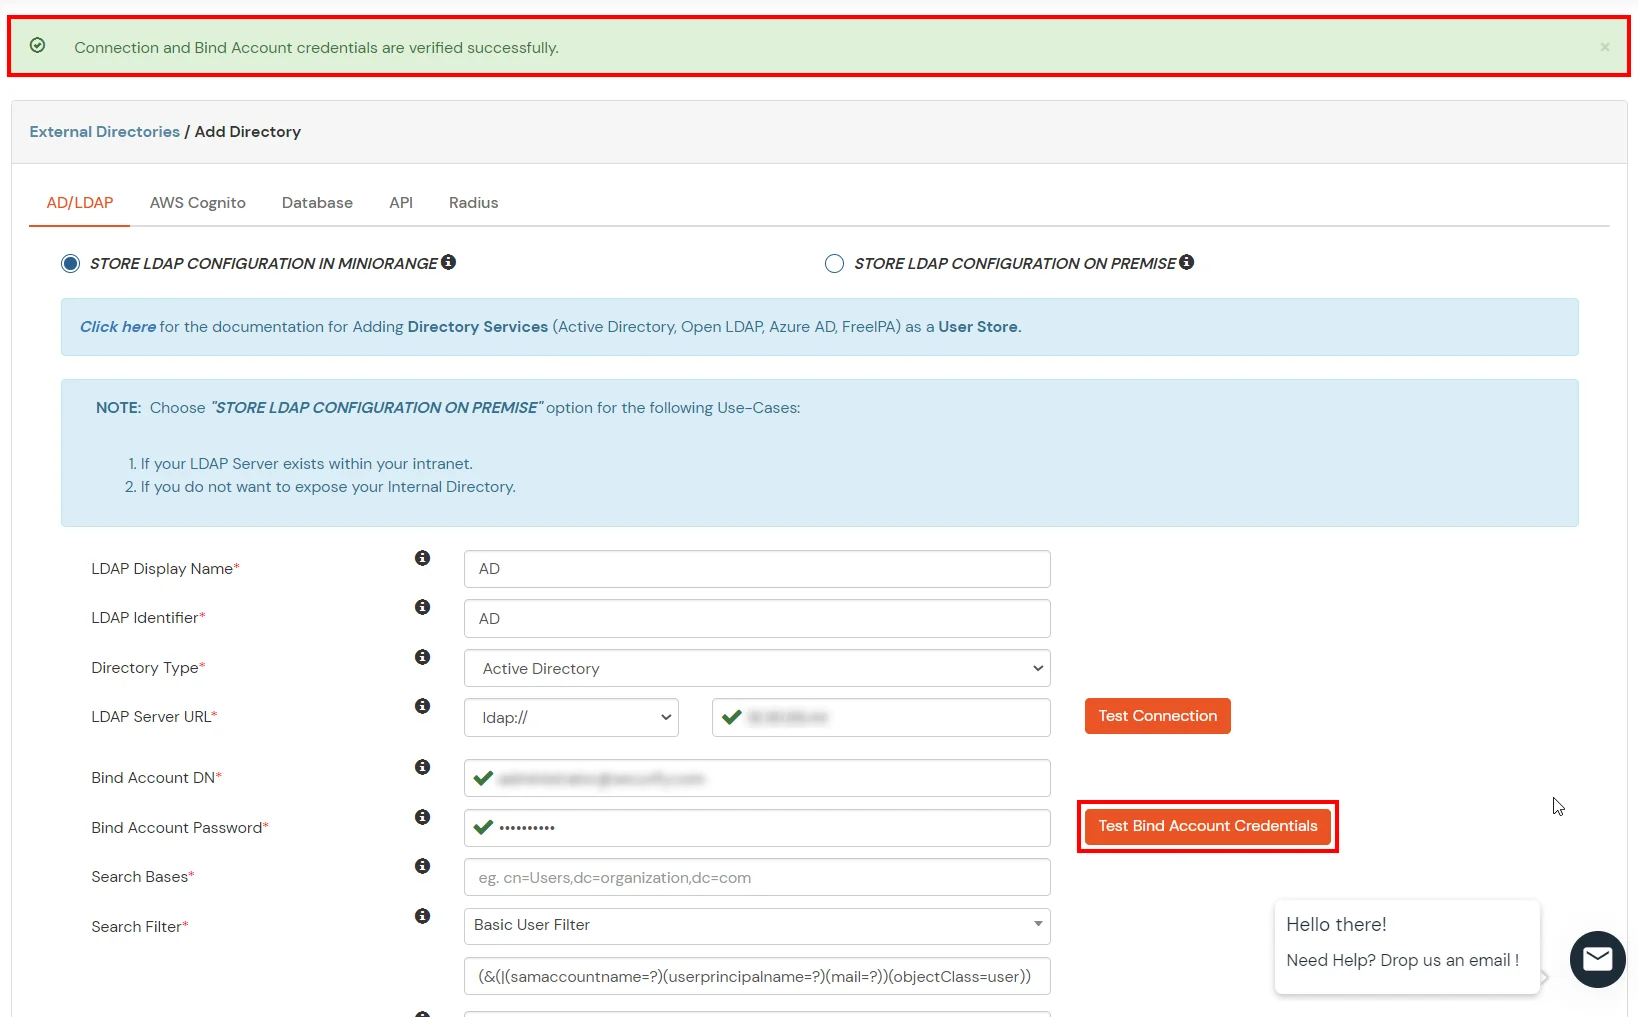
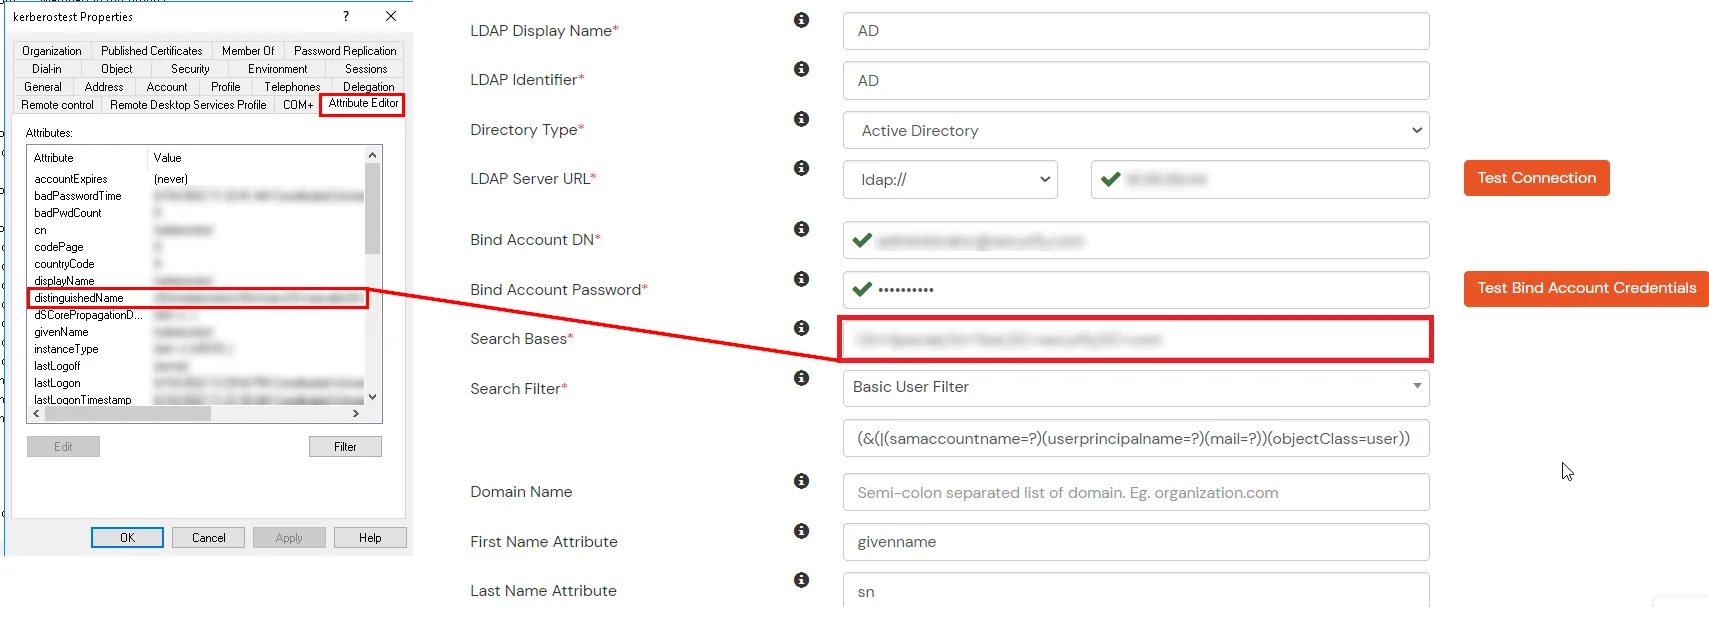
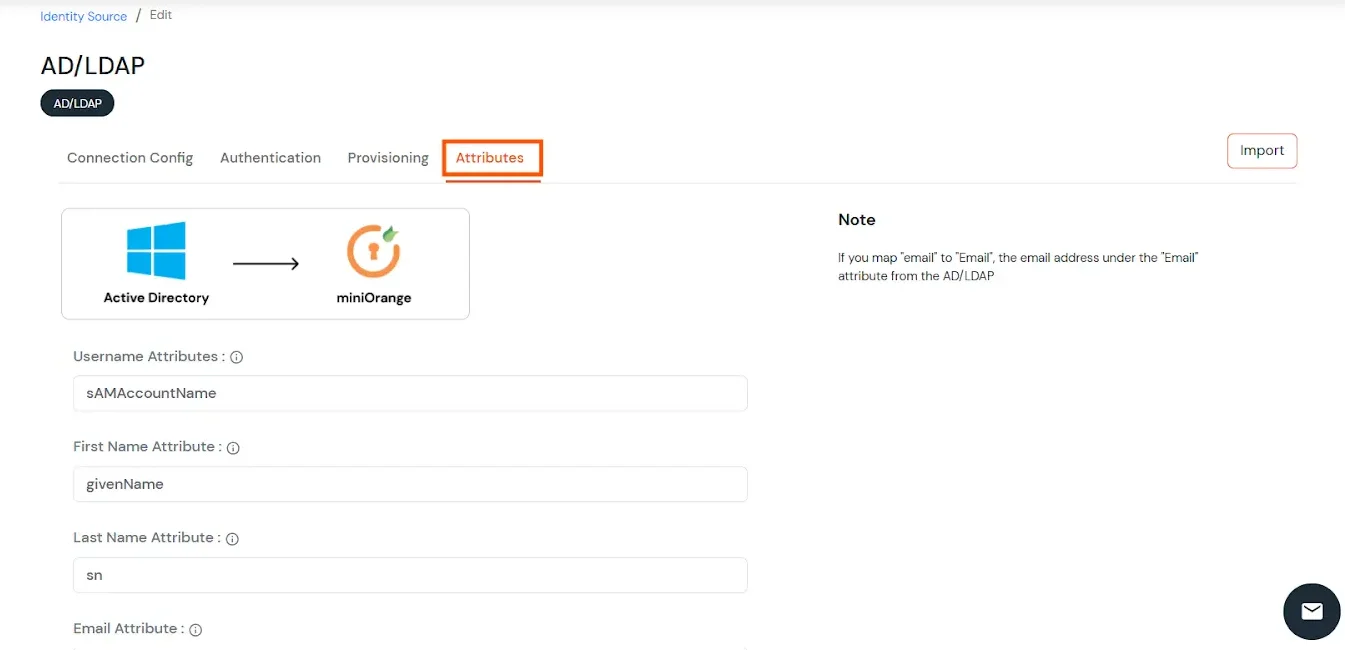
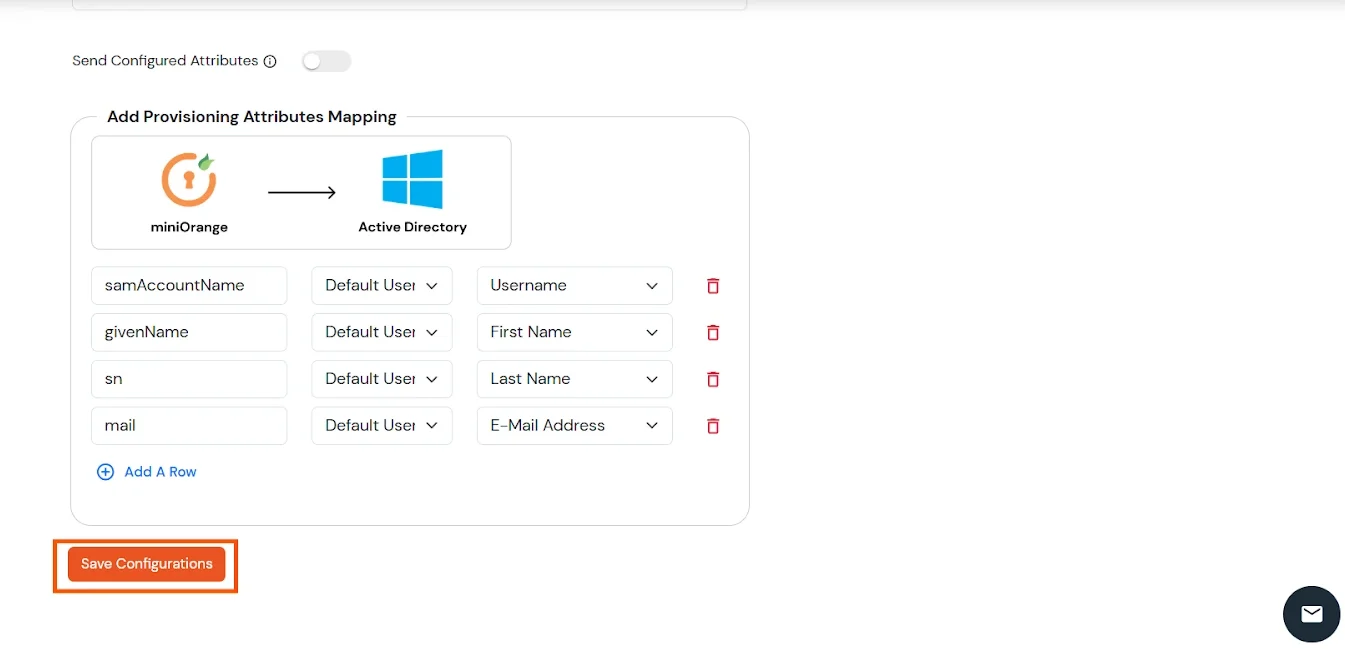
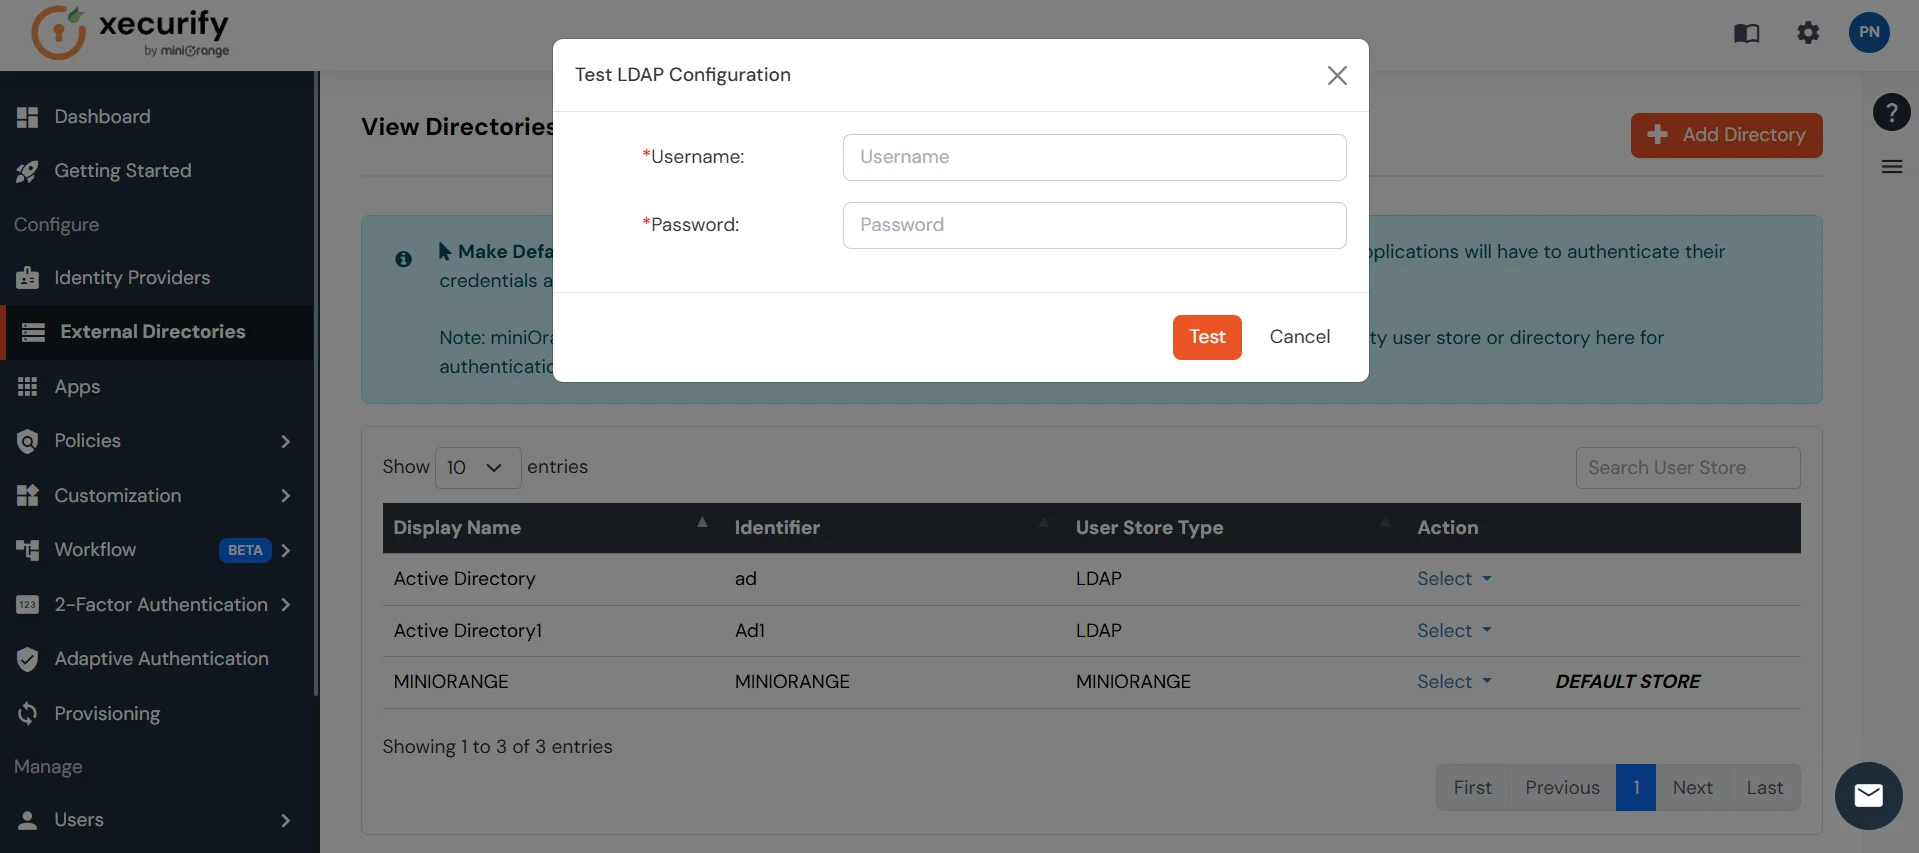
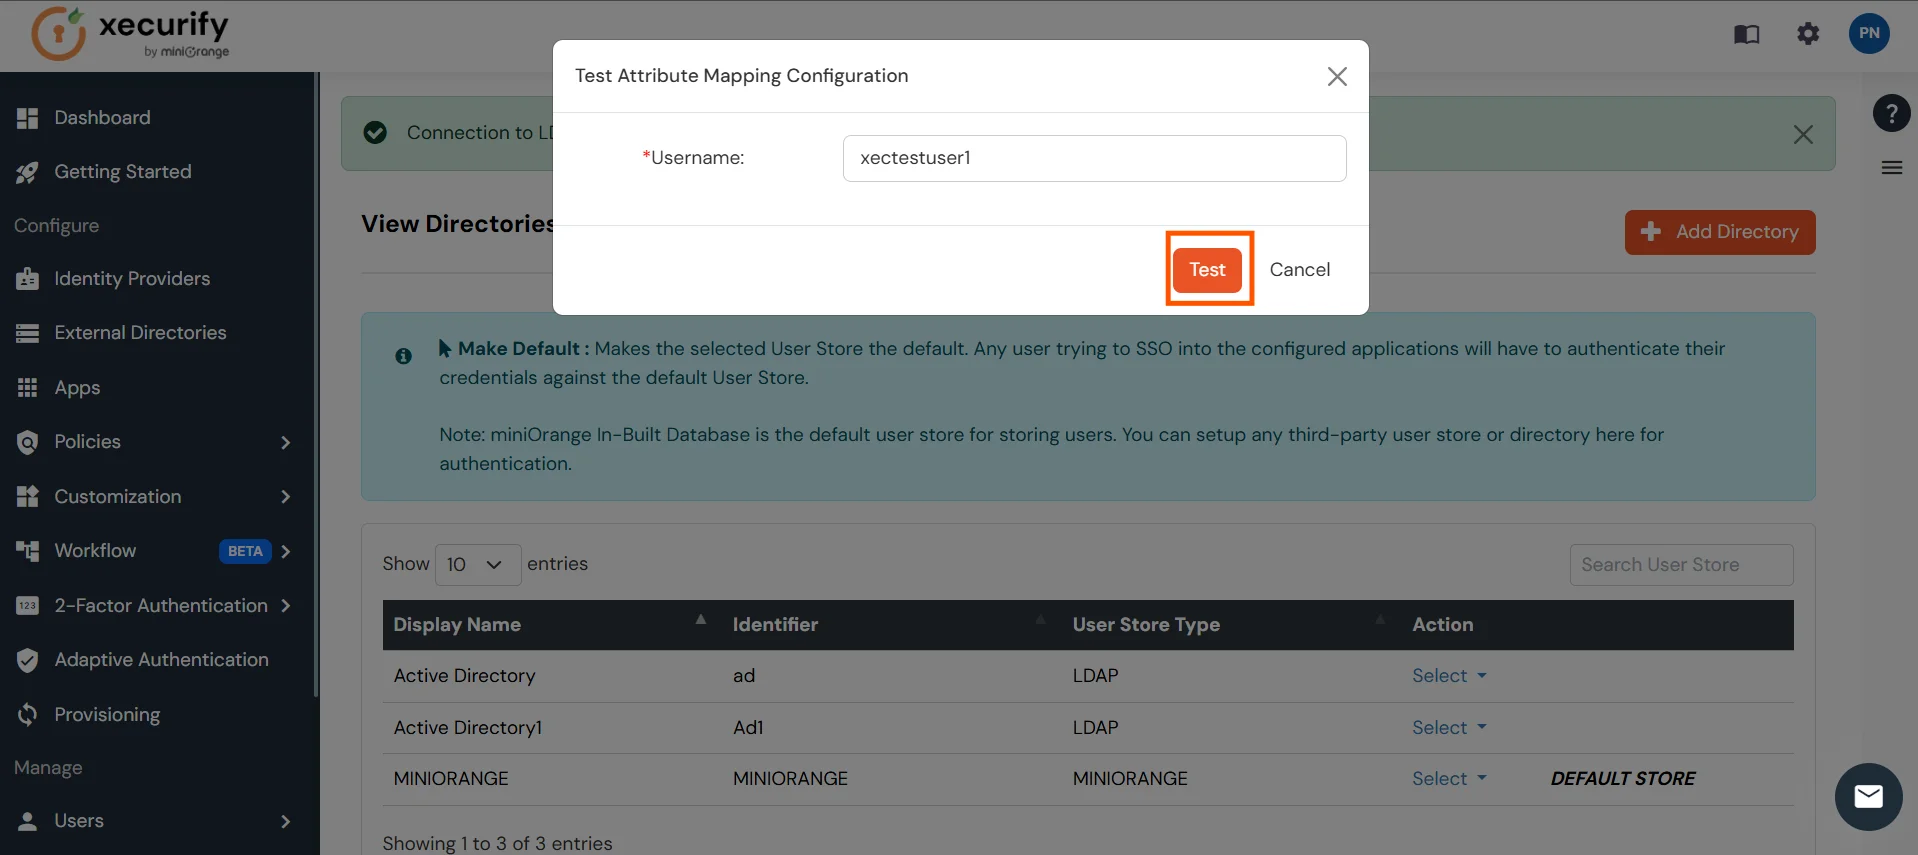
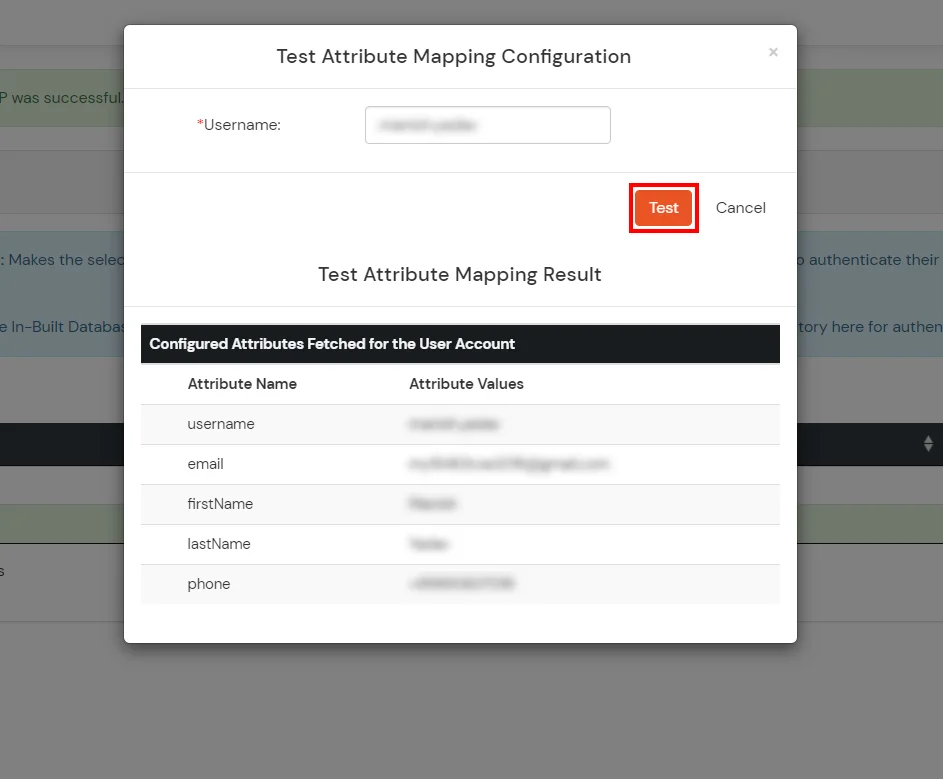
2.1: Setup AD as User Directory

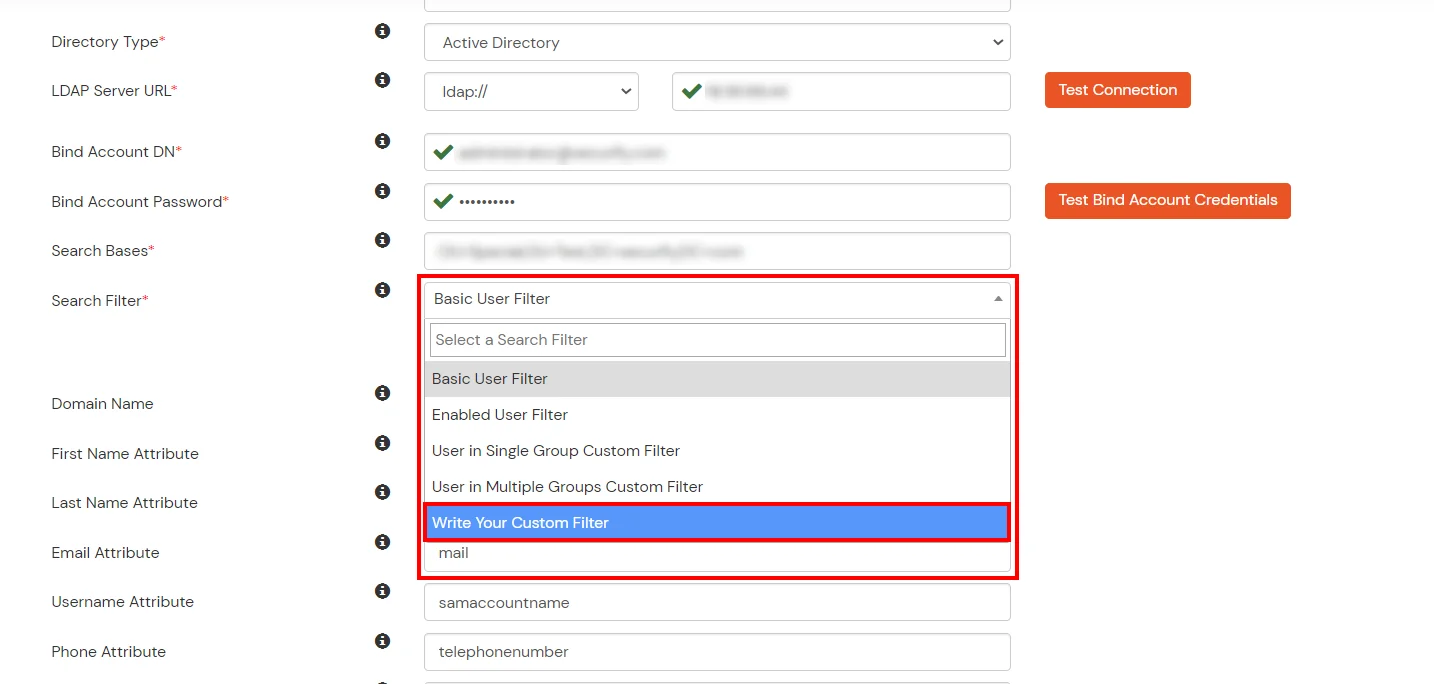
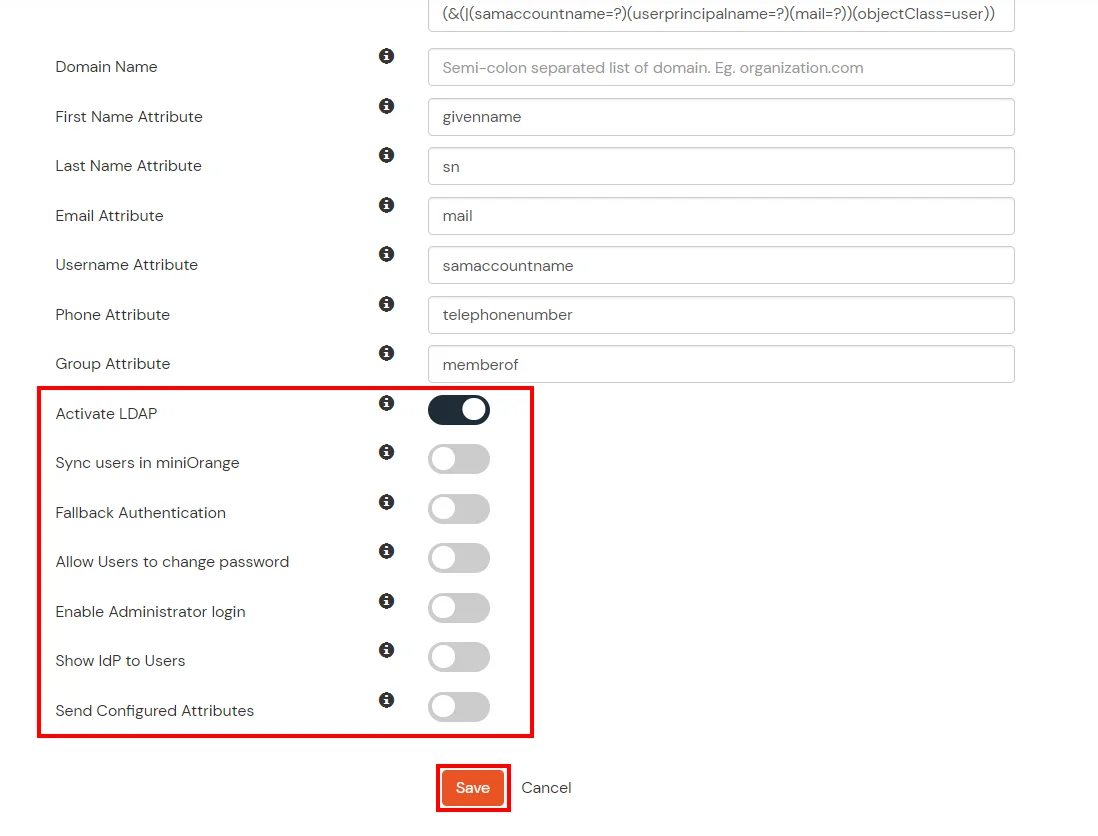
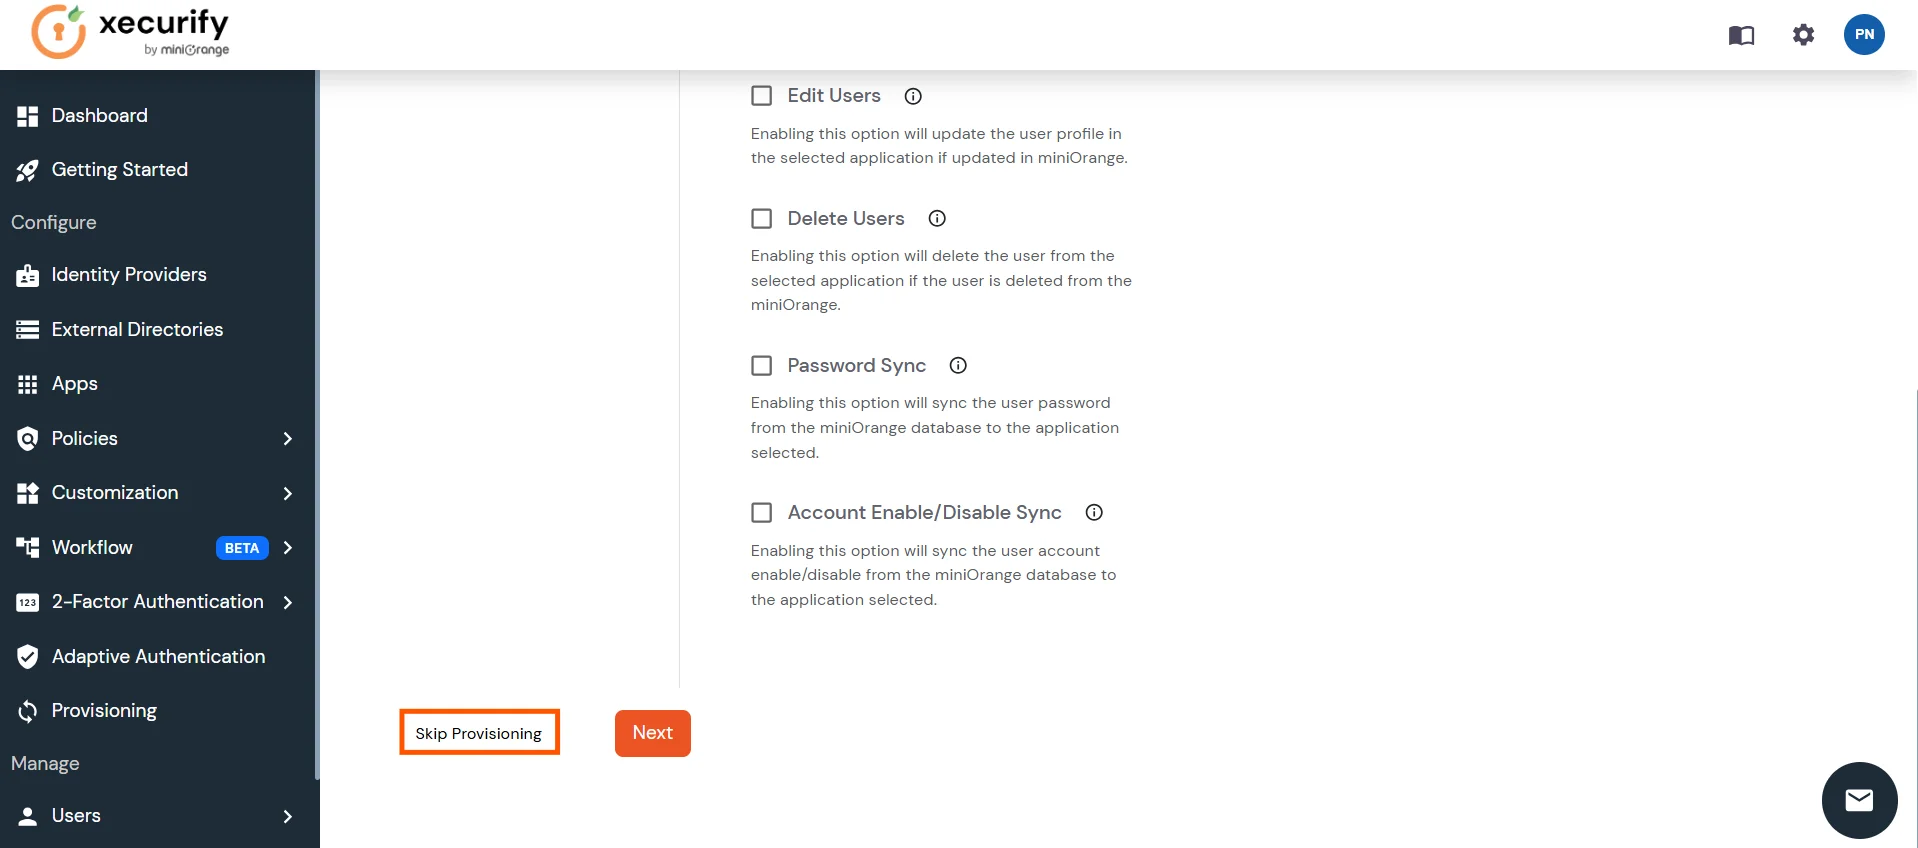
Here's the list of the attributes and what it does when we enable it. You can enable/disable accordingly.
| Attribute | Description |
|---|---|
| Activate LDAP | All user authentications will be done with LDAP credentials if you Activate it |
| Fallback Authentication | If LDAP credentials fail then user will be authenticated through miniOrange |
| Enable administrator login | On enabling this, your miniOrange Administrator login authenticates using your LDAP server |
| Show IdP to users | If you enable this option, this IdP will be visible to users |
| Sync users in miniOrange | Users will be created in miniOrange after authentication with LDAP |
Attribute Name sent to SP = organization
Attribute Name from IDP = company
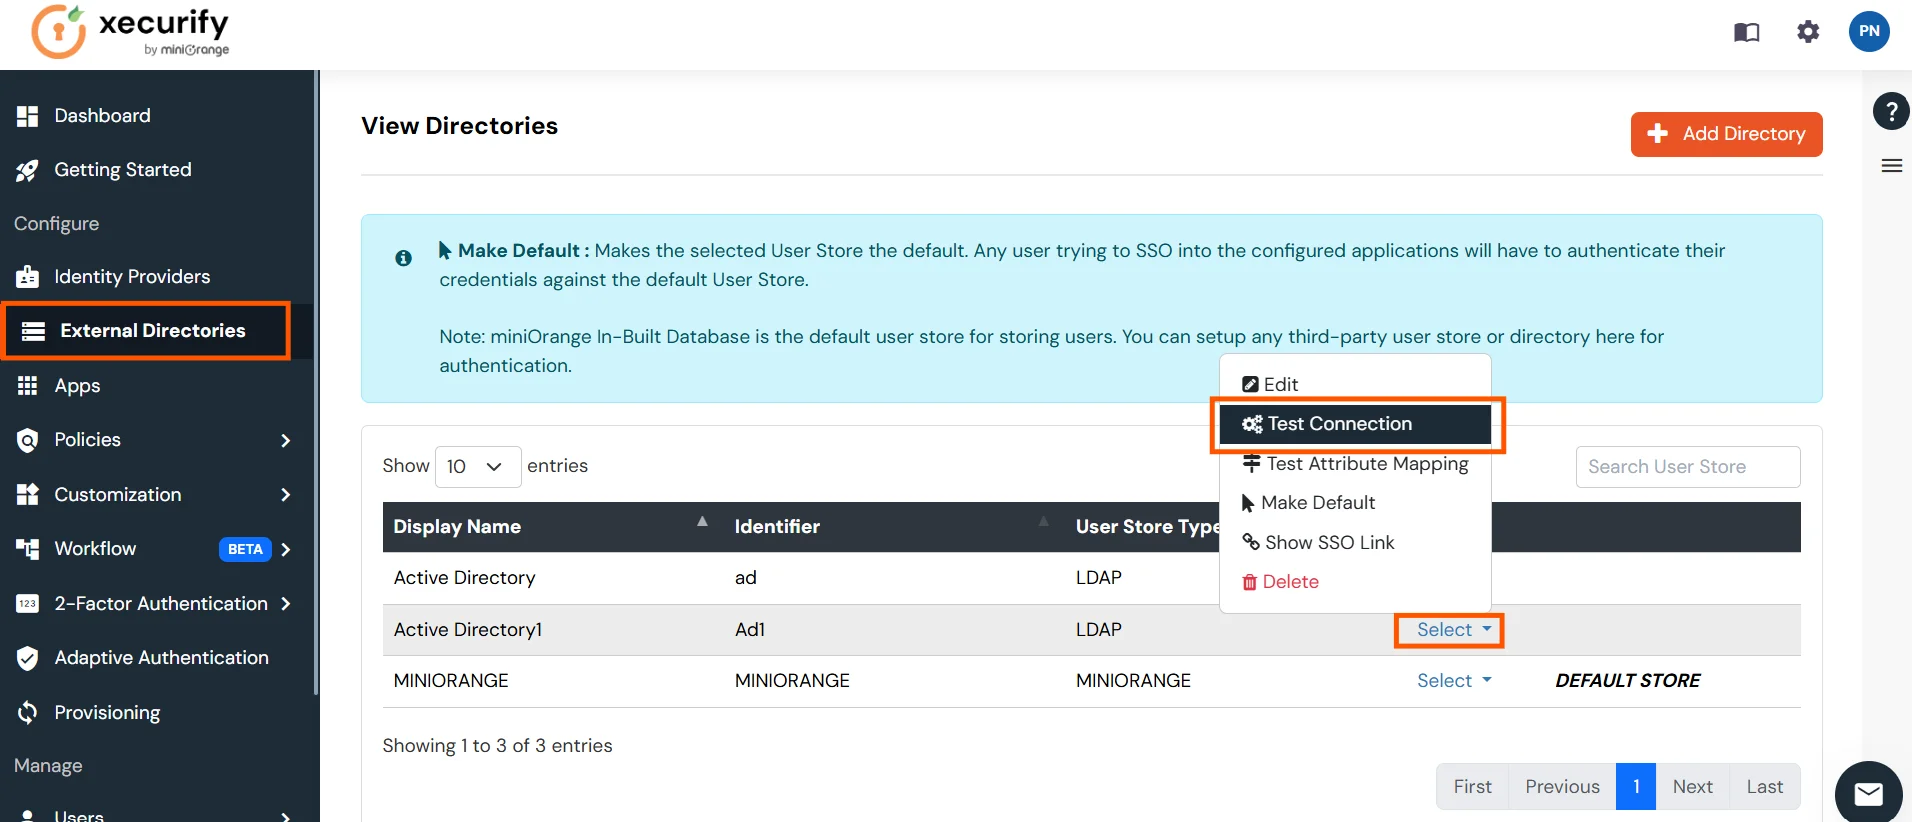
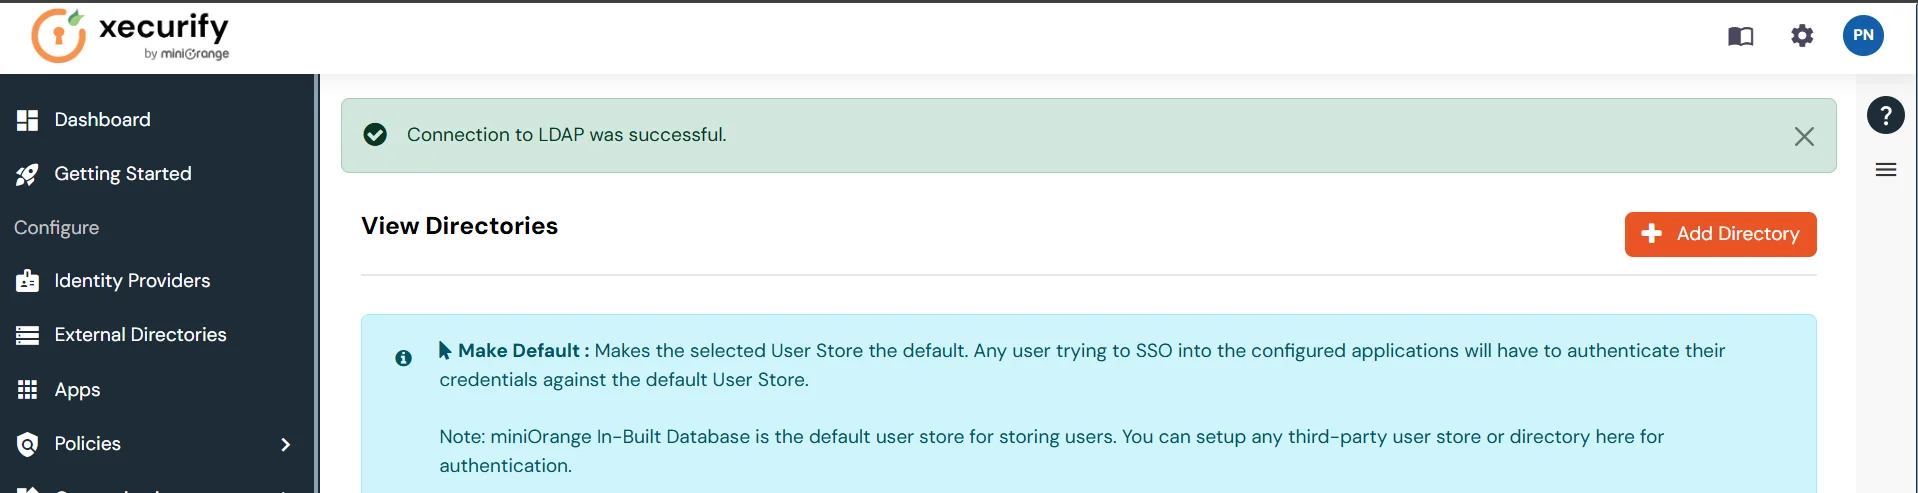
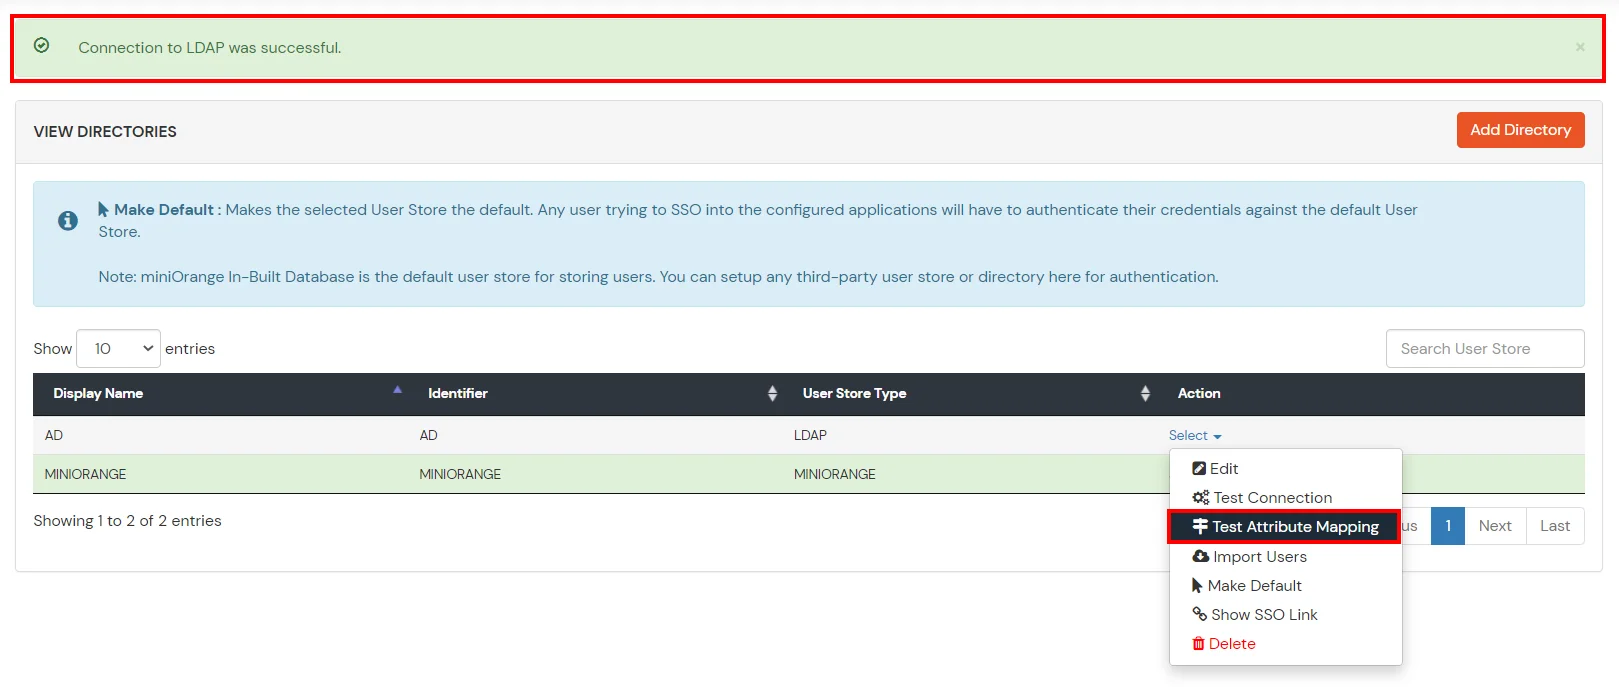
Set up AD as External Directory configuration is complete.
Note: Refer our guide to setup LDAP on windows server.
2.2: Setup miniOrange as a User Store
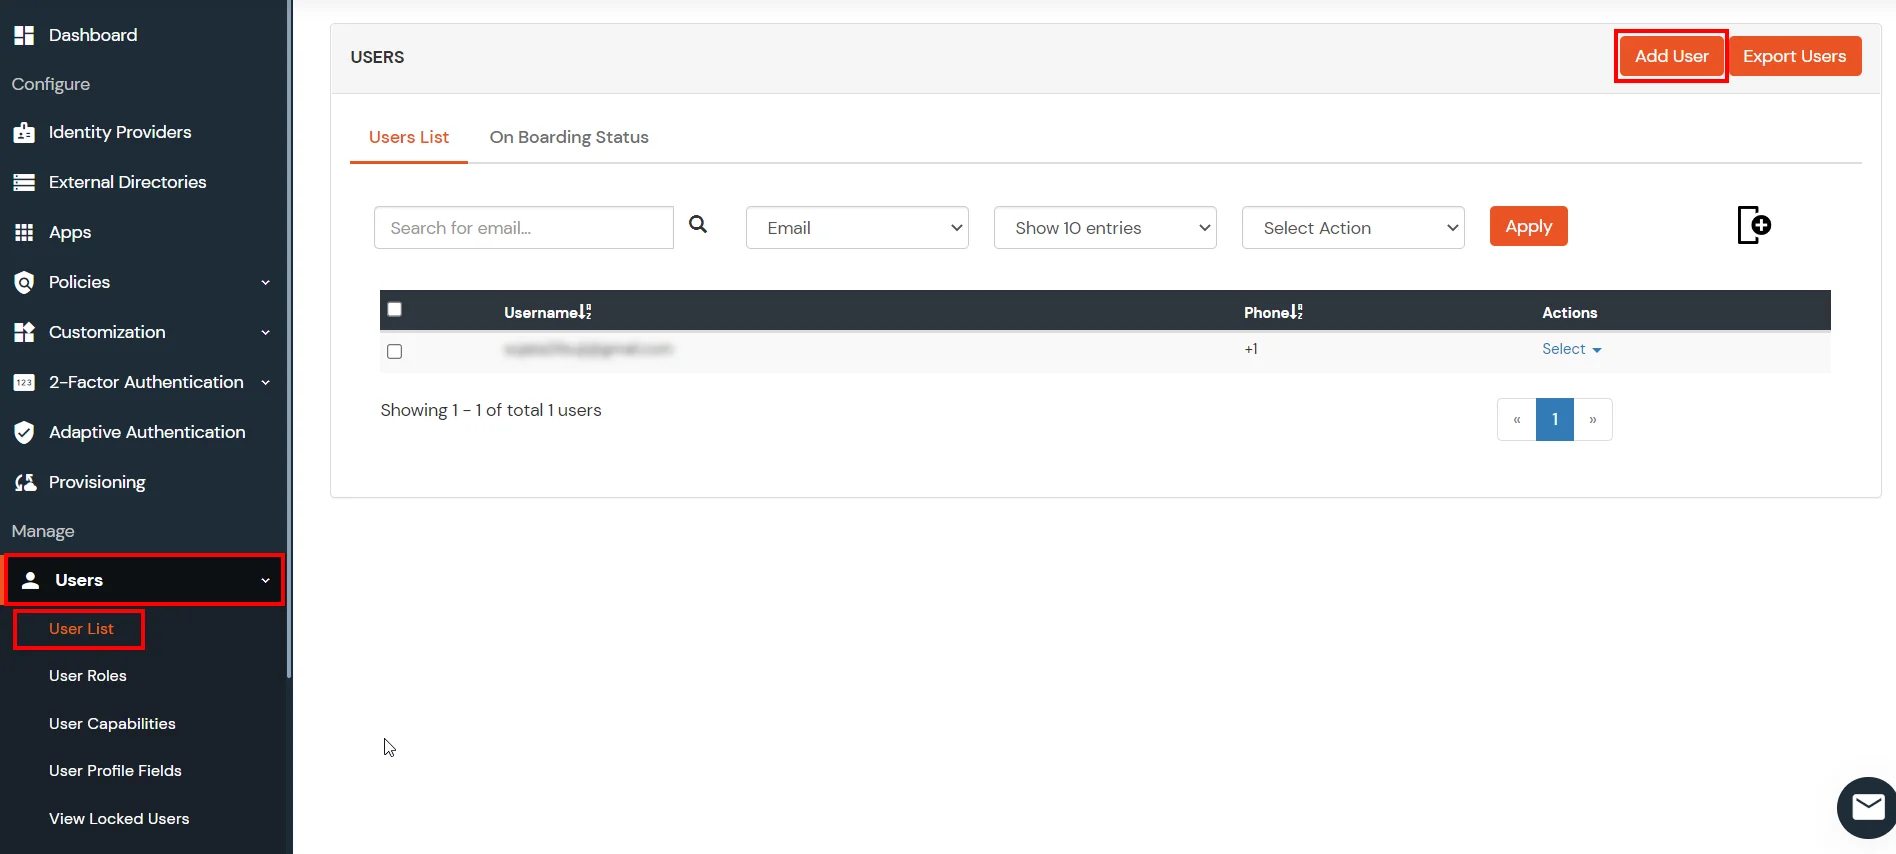
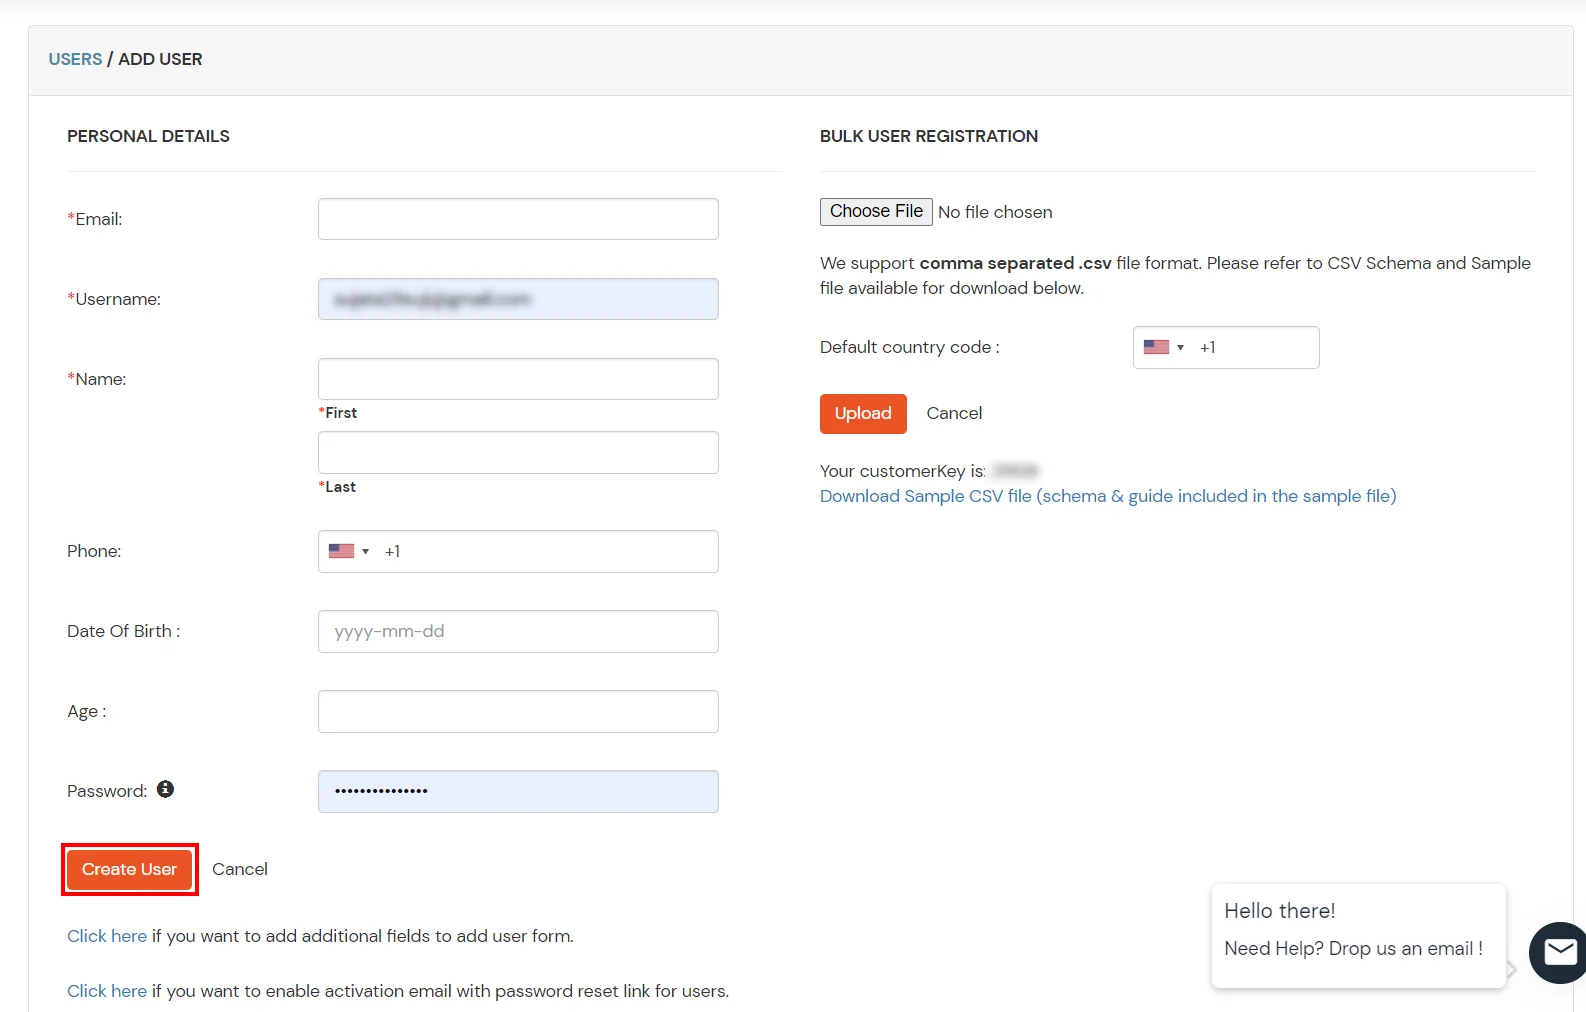
2.2.1 Create User in miniOrange
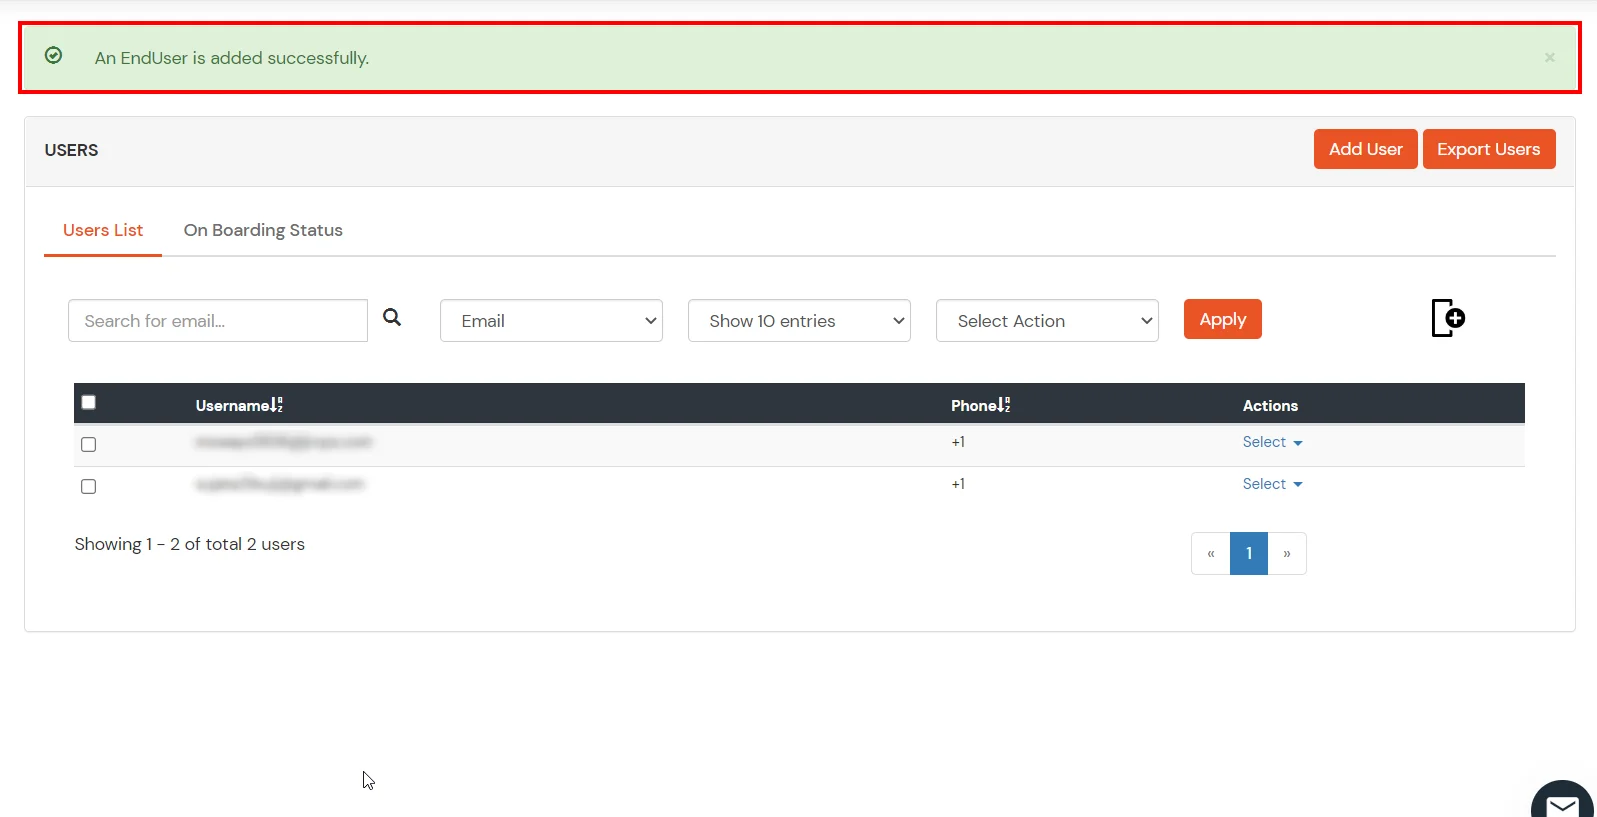
2.2.2 Bulk Upload Users in miniOrange via Uploading CSV File.
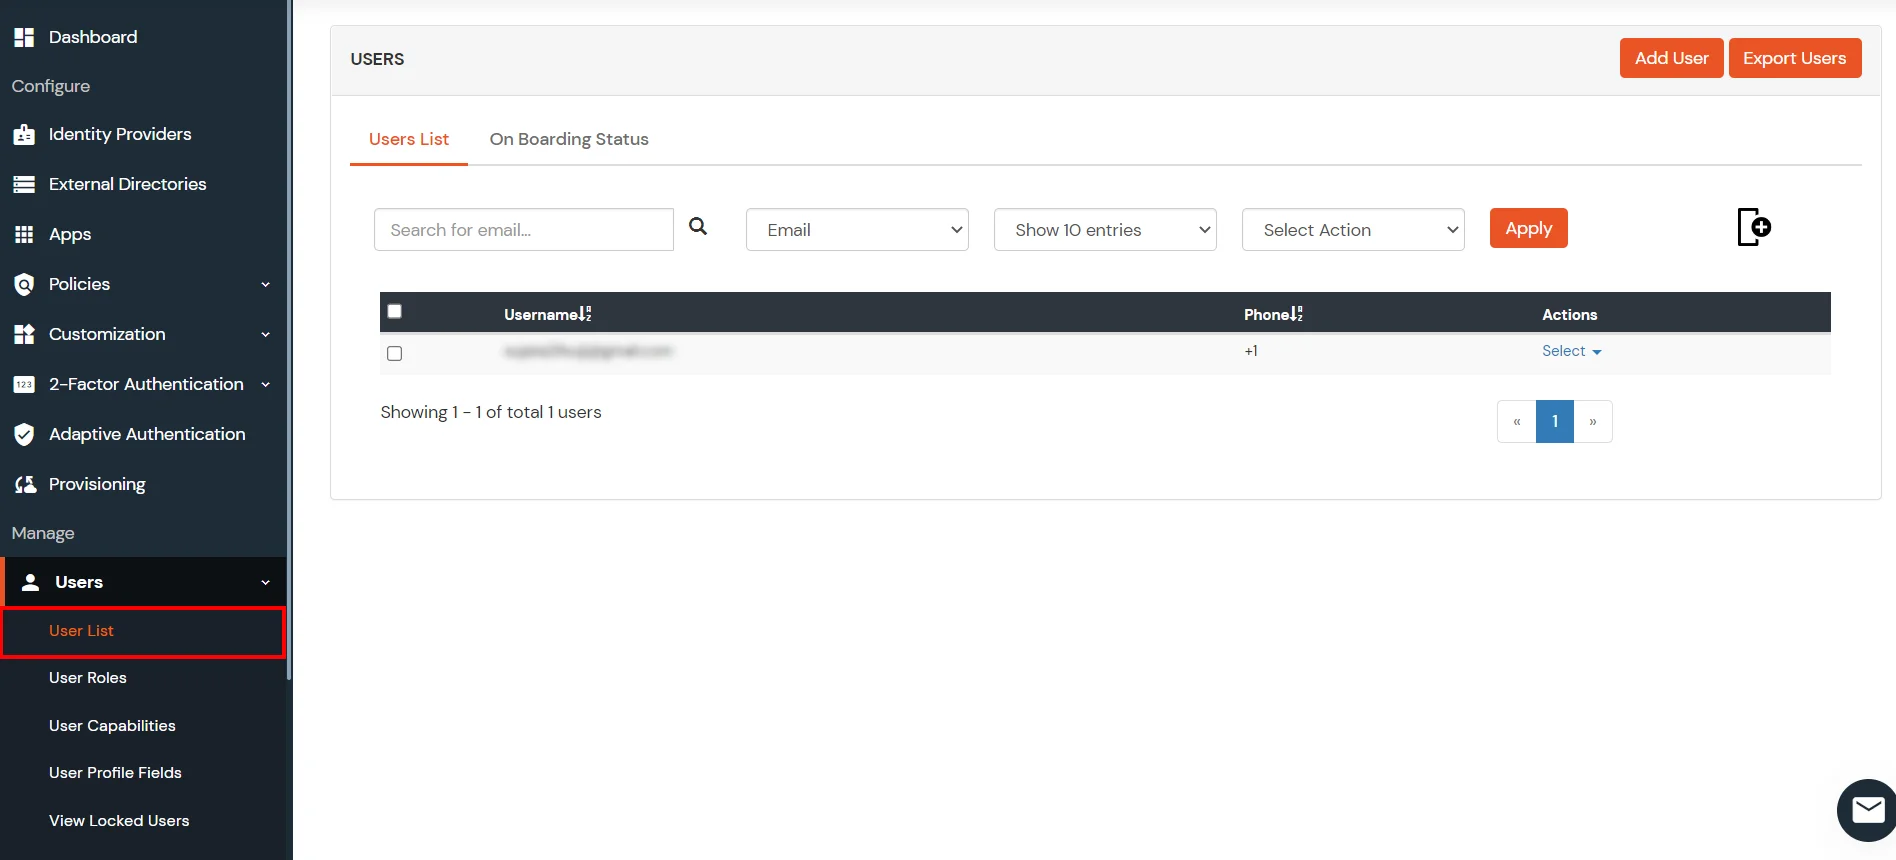
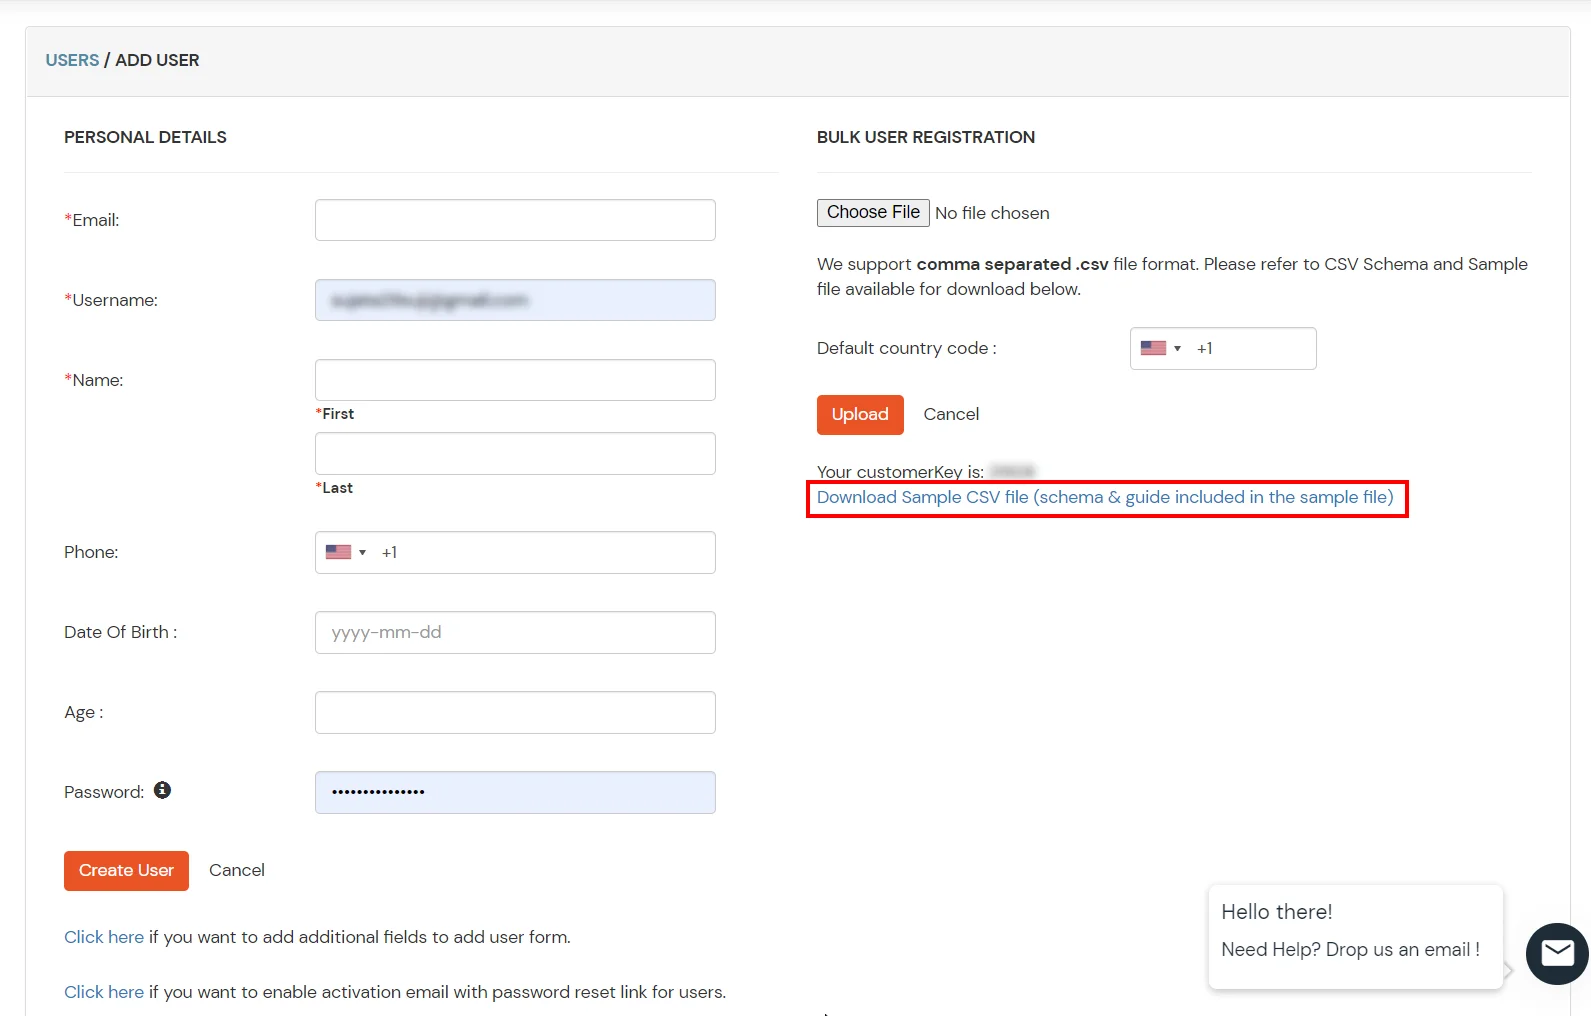
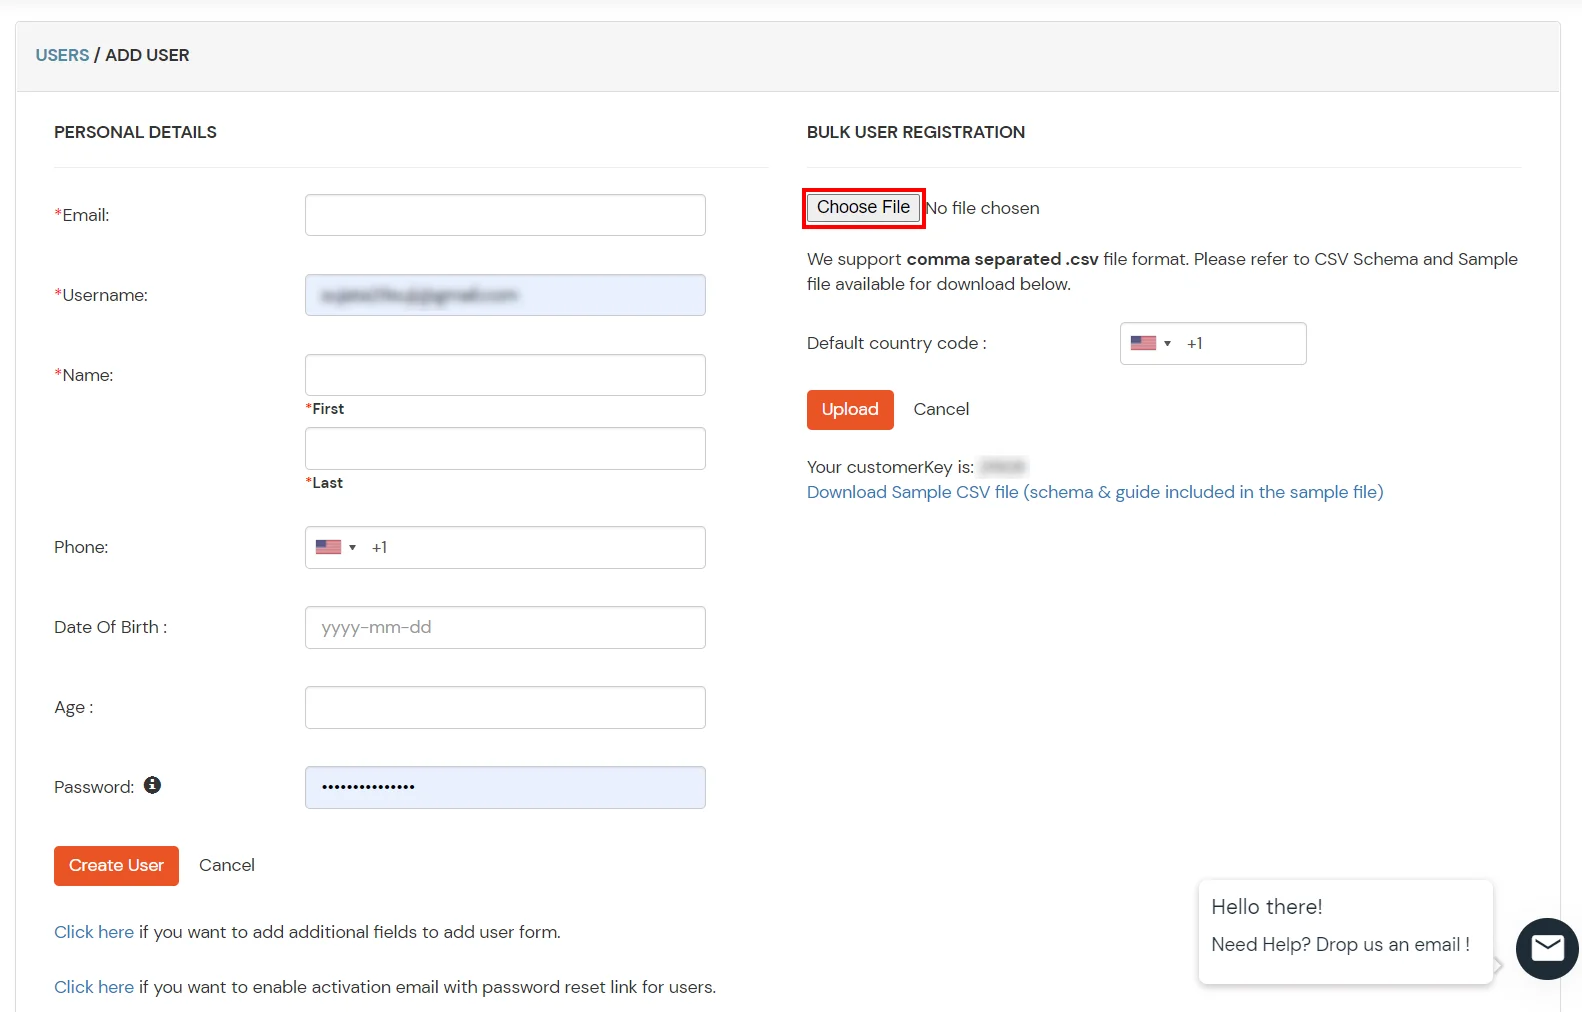
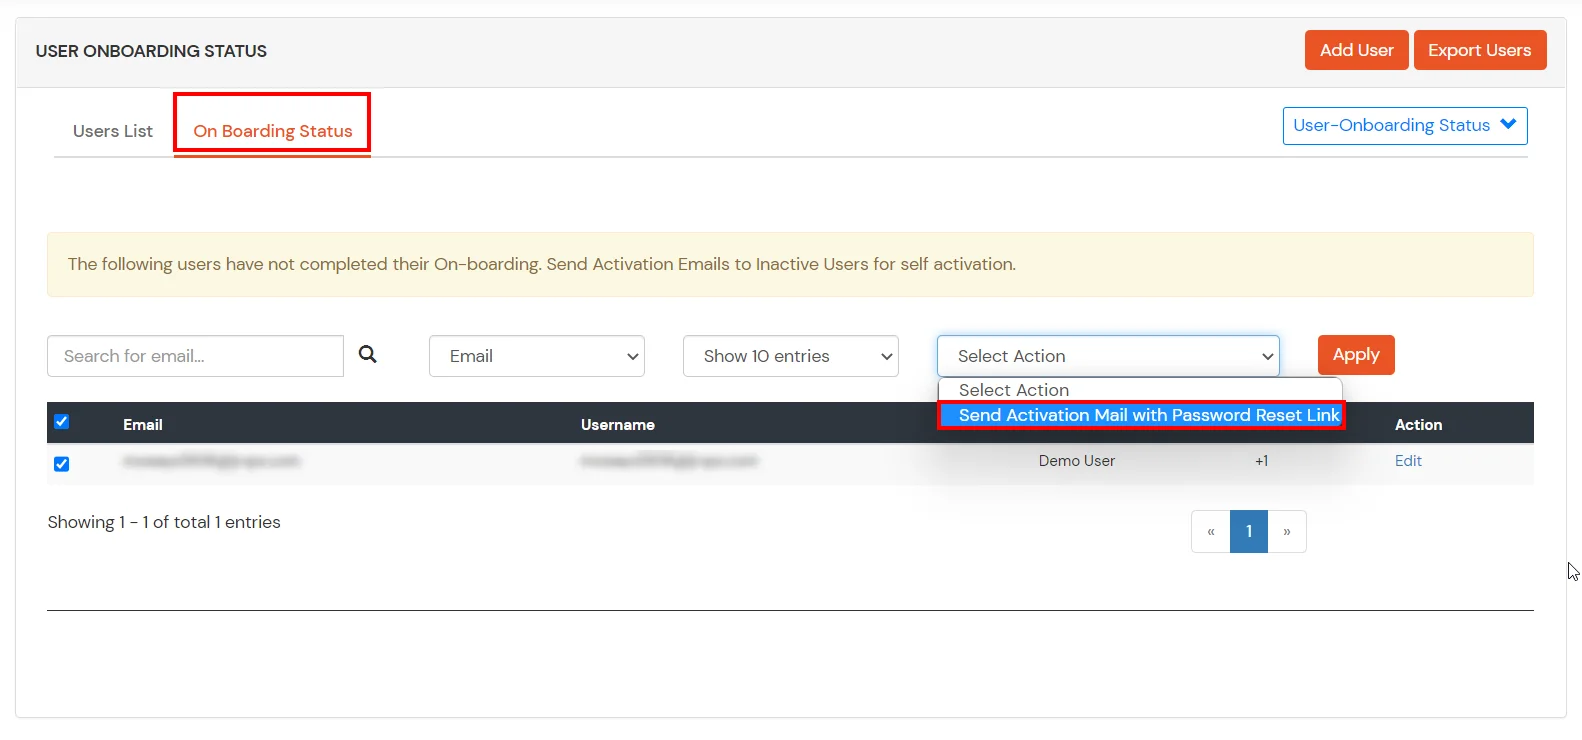
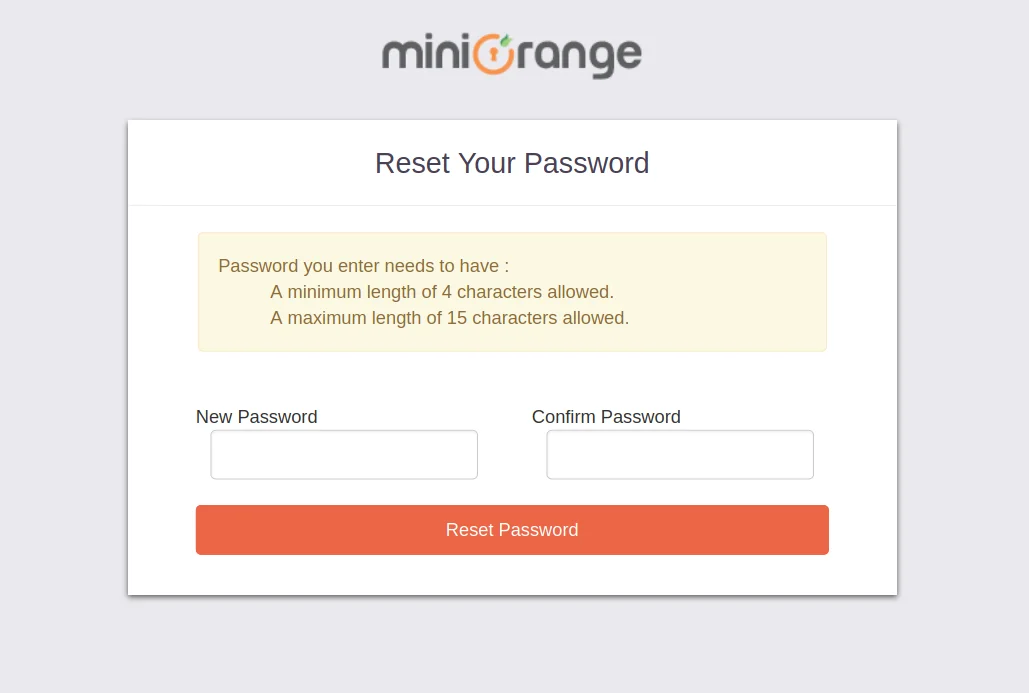
2.2.3 Self User Registration
(Go to Step 1 to get this data)
(Go to Step 1 to get this data)
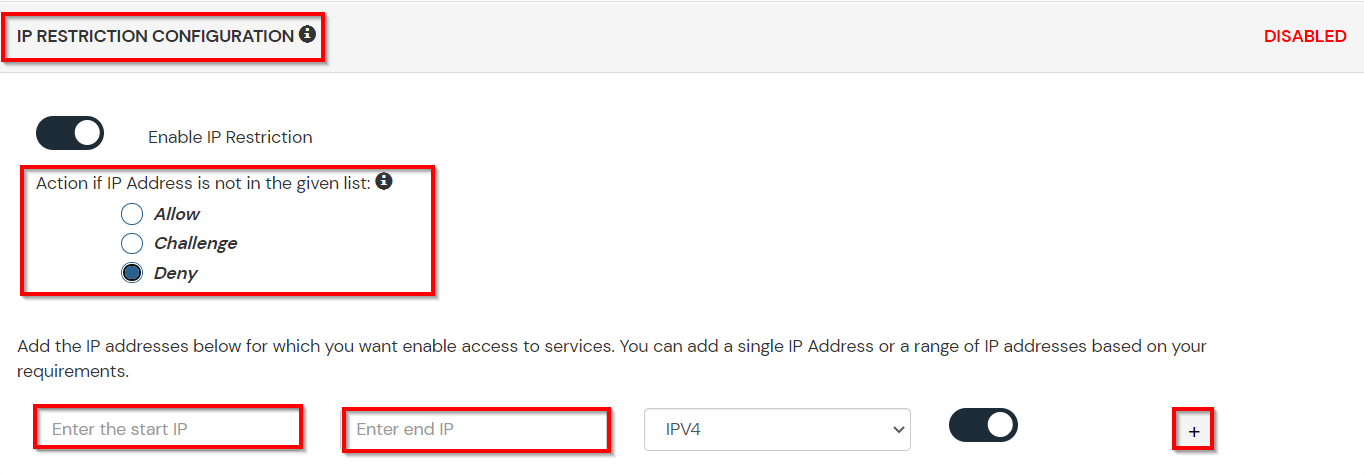
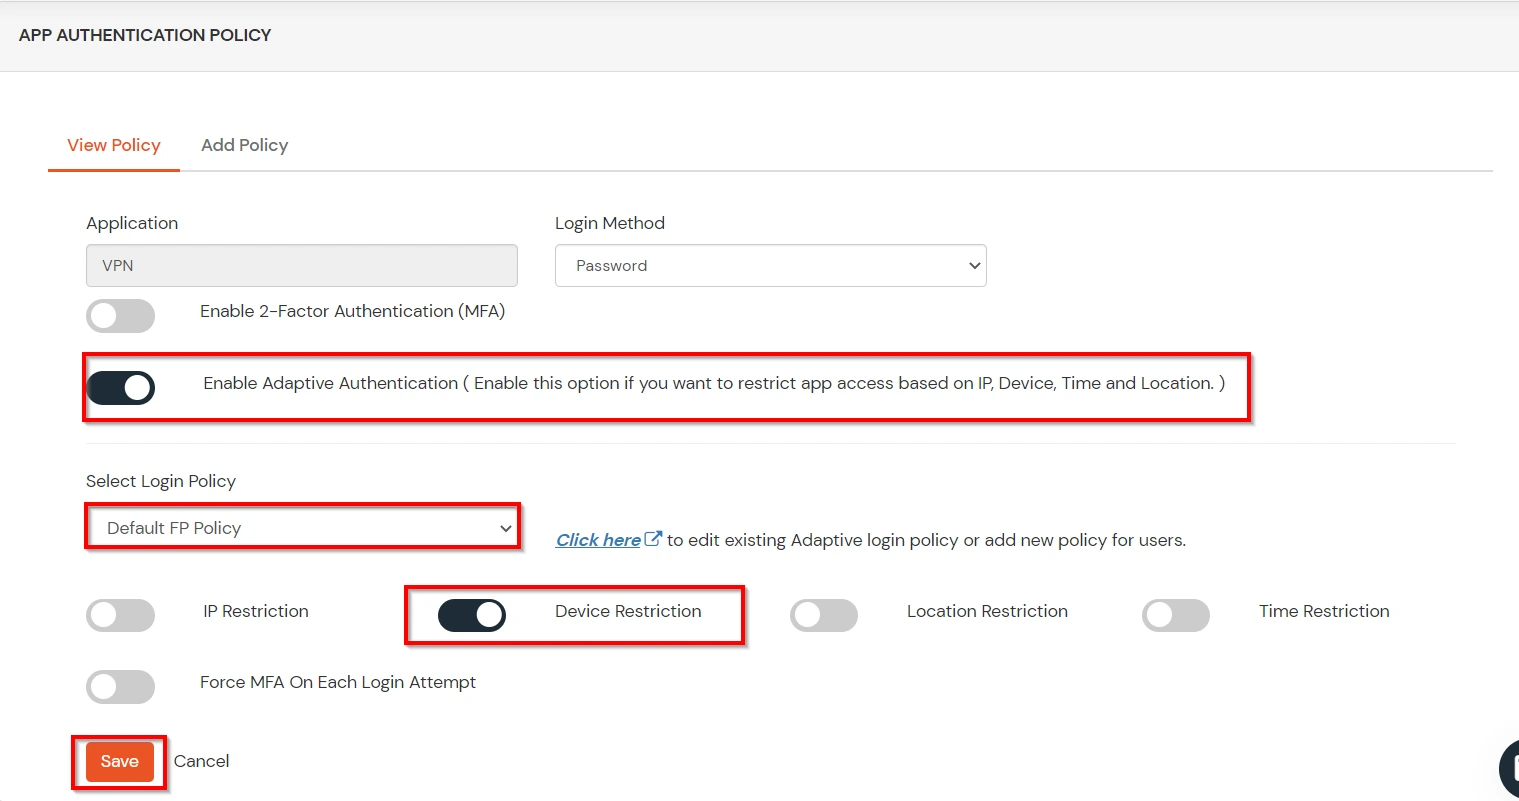
5.1: Restricting access to Rocket.Chat with IP Blocking
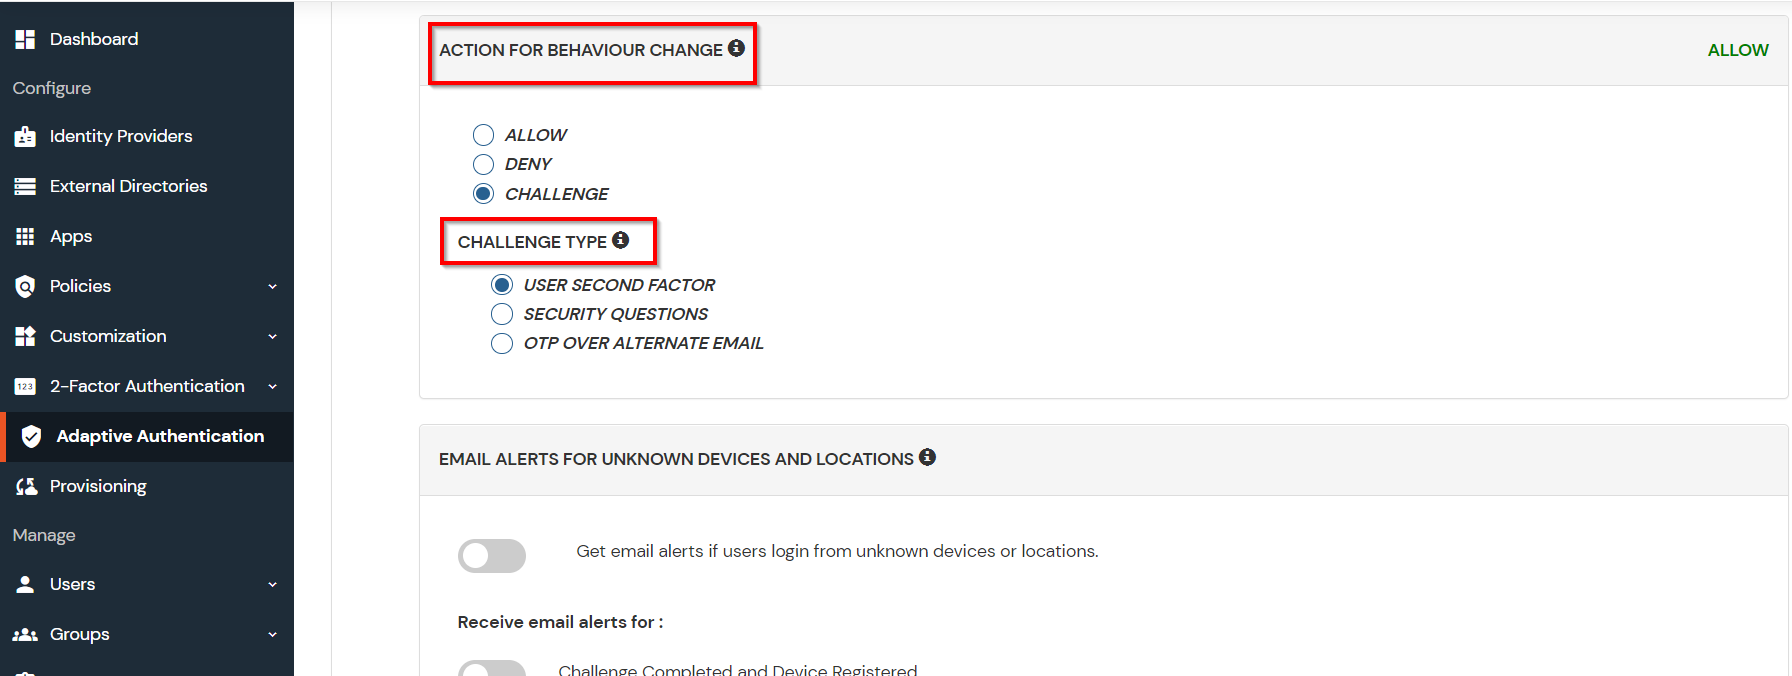
You can use adaptive authentication with Rocket.Chat Single Sign-On (SSO) to improve the security and functionality of Single Sign-On. You can allow a IP Address in certain range for SSO or you can deny it based your requirements and you can also challenge the user to verify his authenticity. Adaptive authentication manages the user authentication bases on different factors such as Device ID, Location, Time of Access, IP Address and many more.
You can configure Adaptive Authentication with IP Blocking in following way: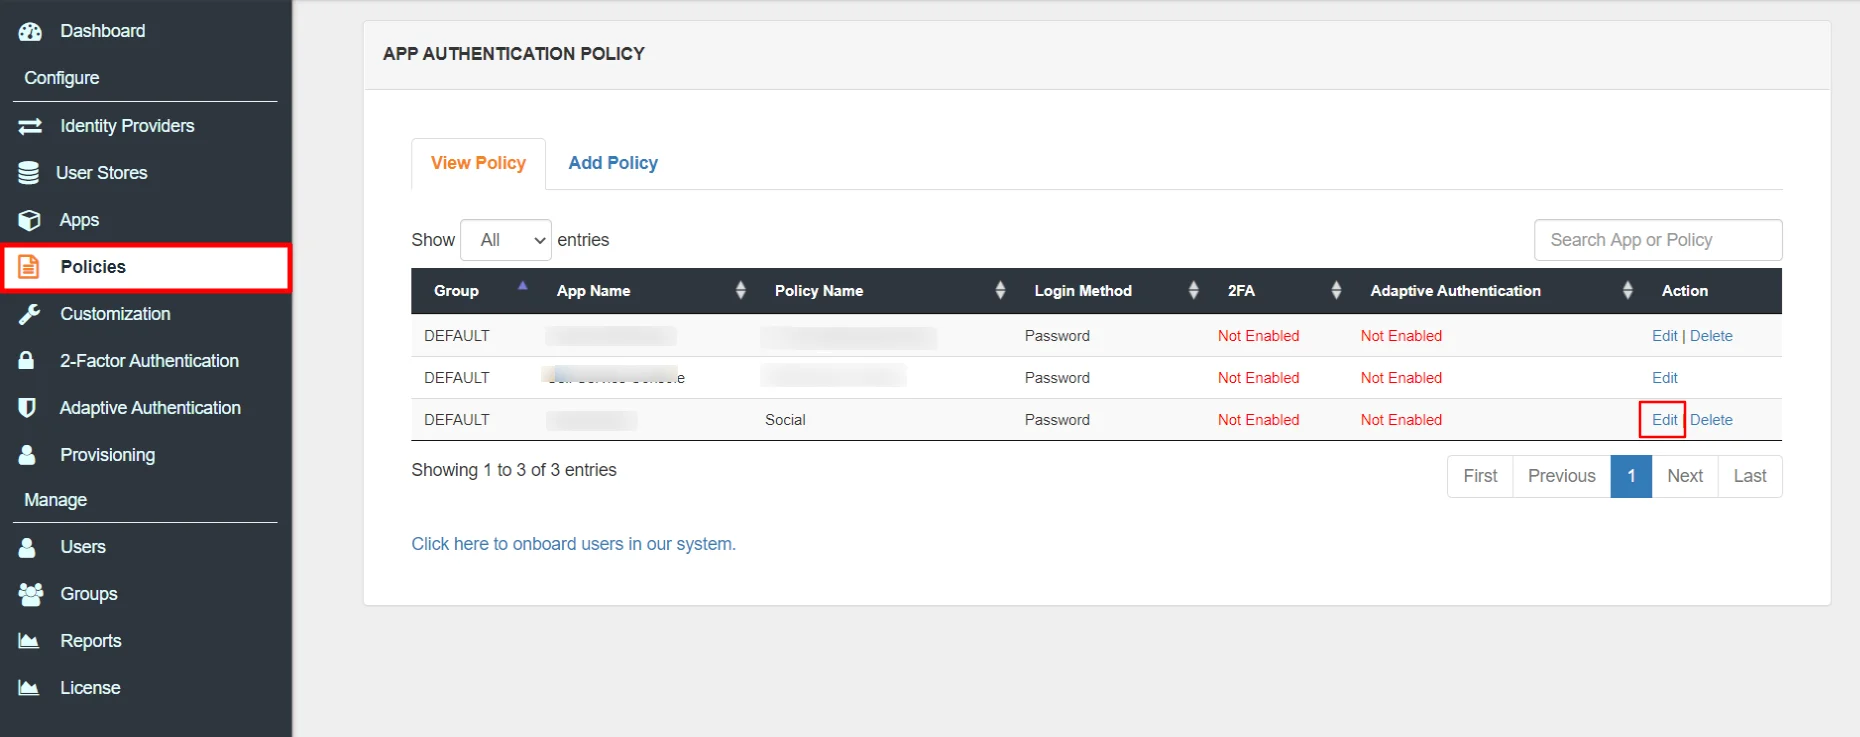
| Attribute | Description |
|---|---|
| Allow | Allow user to authenticate and use services if Adaptive authentication condition is true. |
| Challenge | Challenge users with one of the three methods mentioned below for verifying user authenticity. |
| Deny | Deny user authentications and access to services if Adaptive authentication condition is true. |
| Attribute | Description |
|---|---|
| User second Factor | The User needs to authenticate using the second factor he has opted or assigned for such as |
| KBA (Knowledge-based authentication) | The System will ask user for 2 of 3 questions he has configured in his Self Service Console. Only after right answer to both questions user is allowed to proceed further. |
| OTP over Alternate Email | User will receive a OTP on the alternate email he has configured threw Self Service Conolse. Once user provides the correct OTP he is allowed to proceed further. |
5.2: Adaptive Authentication with Limiting number of devices.
Using Adaptive Authentication you can also restrict the number of devices the end user can access the Services on. You can allow end users to access services on a fixed no. of devices. The end users wii be able to access services provided by us on this fixed no. of devices.
You can configure Adaptive Authentication with Device Restriction in follwing way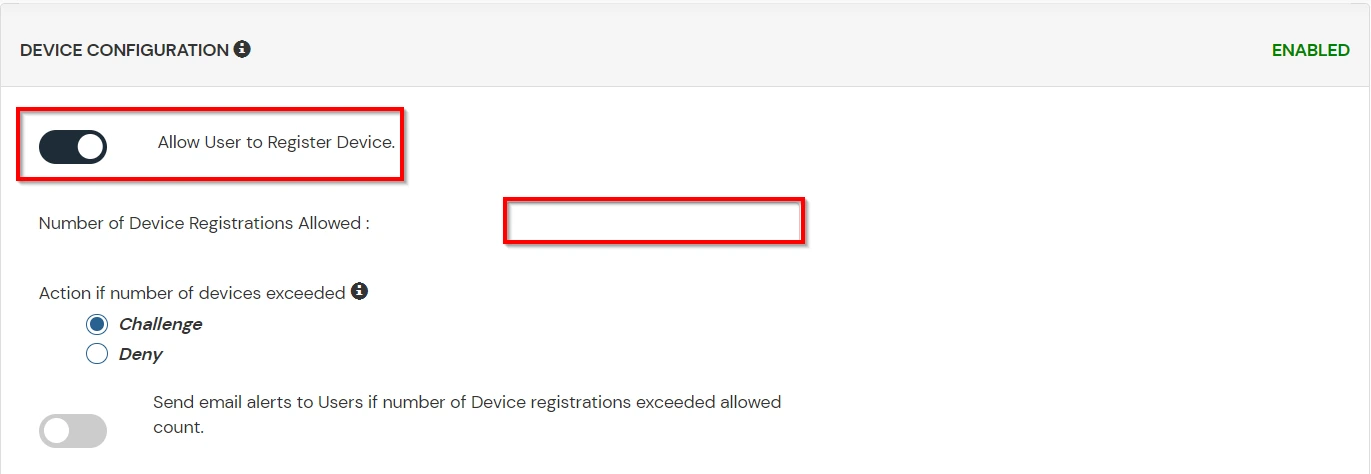
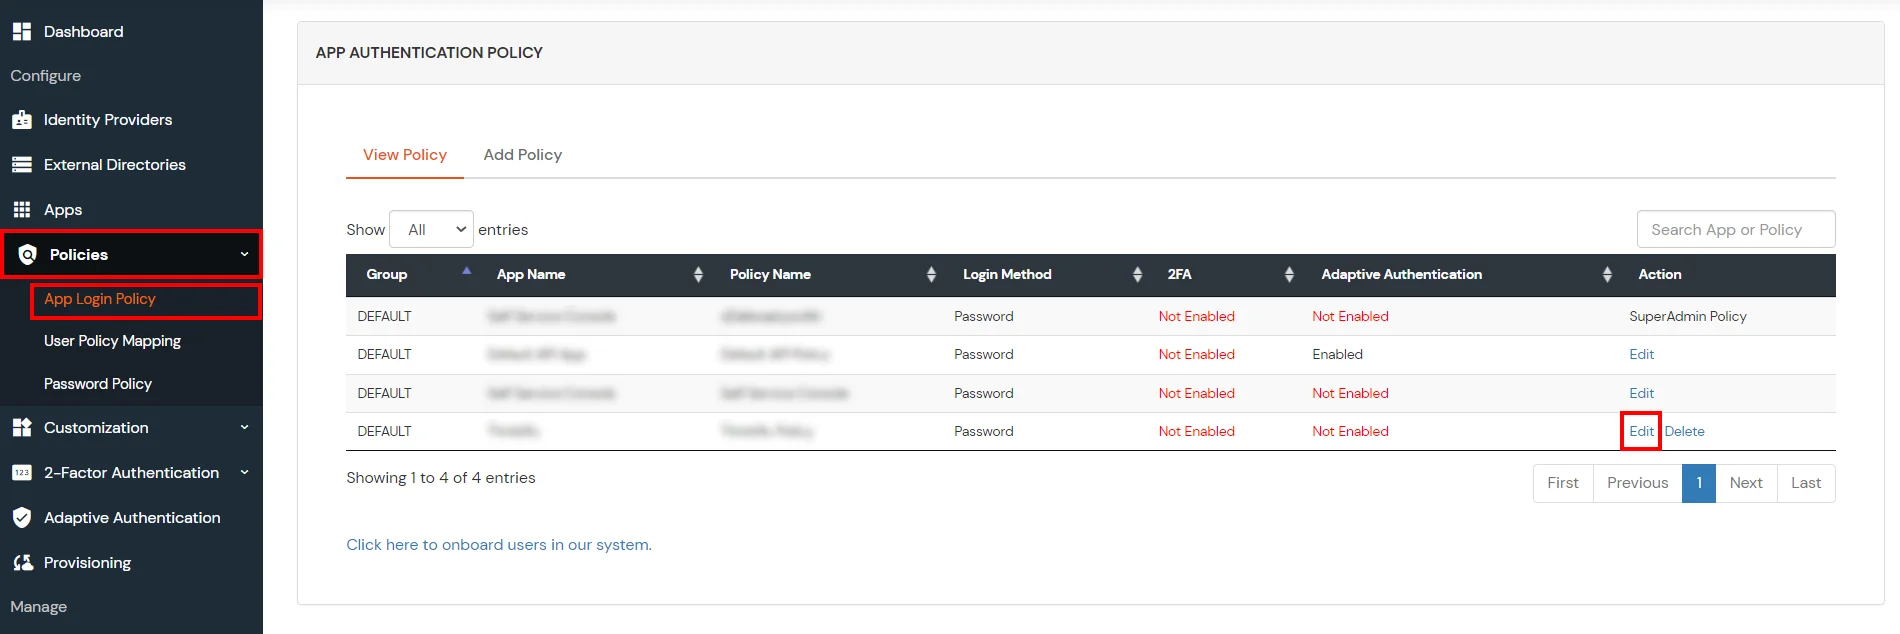
5.3: Add Adaptive Authentication policy to Rocket.Chat.
The most practical way to strengthen authentication is to require a second factor after the username/password stage. Since a password is something that a user knows, ensuring that the user also has something or using biometrics thwarts attackers that steal or gain access to passwords.
Traditional two-factor authentication solutions use hardware tokens (or "fobs") that users carry on their keychains. These tokens generate one-time passwords for the second stage of the login process. However, hardware tokens can cost up to $40 each. It takes time and effort to distribute them, tracks who has which one, and replace them when they break. They're easy to lose, hard to use, and users consistently report high levels of frustration with token-based systems.
miniOrange authentication service has 15+ authentication methods.
You can choose from any of the above authentication methods to augment your password based authentication. miniOrange authentication service works with all phone types, from landlines to smart-phone platforms. In the simplest case, users just answer a phone call and press a button to authenticate. miniOrange authentication service works internationally and has customers authenticating from many countries around the world.
miniOrange provides 24/7 support for all the Secure Identity Solutions. We ensure high quality support to meet your satisfaction.
Try Nowminiorange provides most affordable Secure Identity Solutions for all type of use cases and offers different packages based on customer's requirement.
Request A QuoteWe offer Secure Identity Solutions for Single Sign-On, Two Factor Authentication, Adaptive MFA, Provisioning, and much more. Please contact us at -
+1 978 658 9387 (US) , +91 97178 45846 (India) | info@xecurify.com