Hello there!
Need Help? We are right here!
Need Help? We are right here!
Search Results:
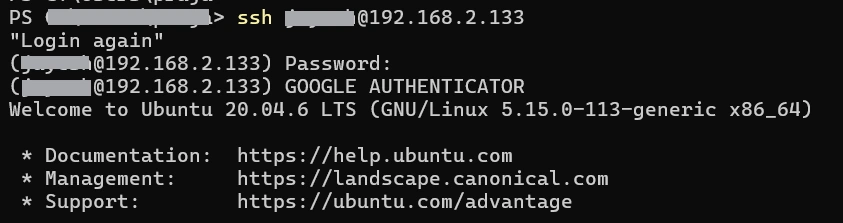
×Ubuntu SSH Two-factor Authentication solution offers a secure way to log into Ubuntu desktops, making it harder for attackers to guess passwords. Two-Factor Authentication (2FA/MFA) adds an extra layer of security, it also lowers the risks for company servers or Ubuntu (Linux) systems. You'll start by entering your usual username and password, and then you'll be asked for a second type of authentication to prove your identity.
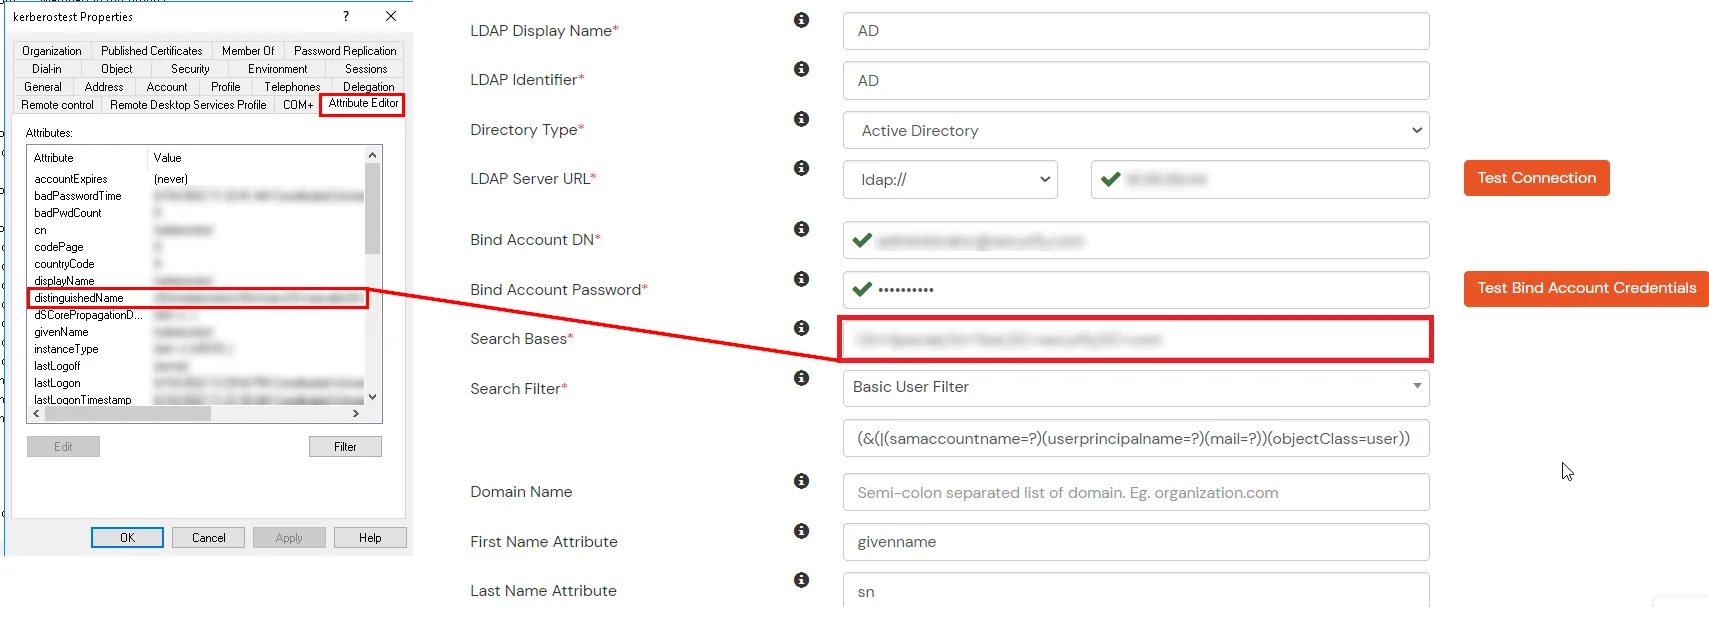
miniOrange can connect to the on-premise AD (Active Directory) so that user will use their AD credentials to authenticate themselves. miniOrange Ubuntu Two-Factor Authentication (2FA) module can be installed on Linux operating systems to add Two-Factor or Multi-Factor authentication on the top of local and Remote SSH access.
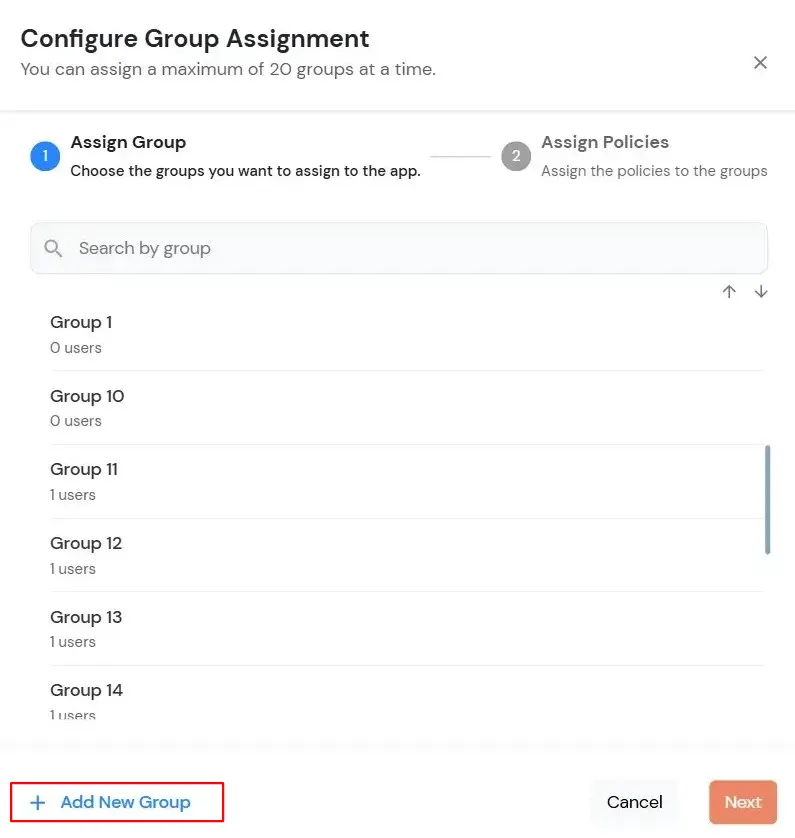
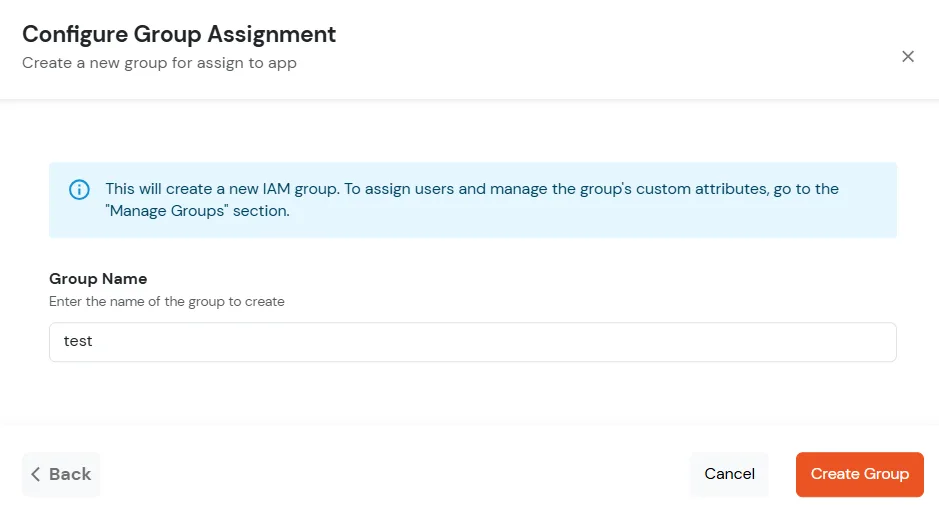
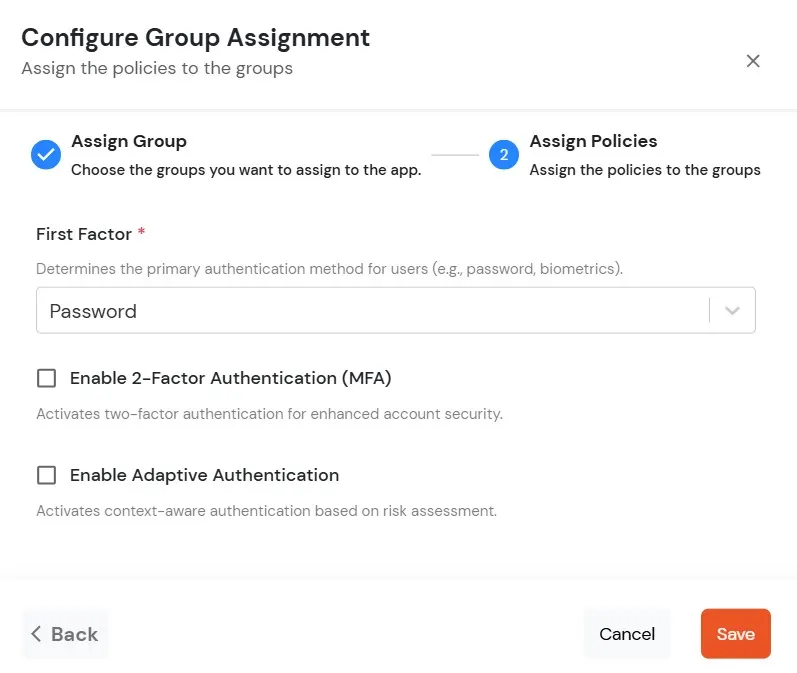
miniOrange provides 15+ MFA methods for implementing 2FA for various use cases like Ubuntu. It allows IAM users and organizations to set up certain authentication and settings which includes password restrictions, restricting sign-in methods, Google or Microsoft Authenticator, Authy 2-Factor authentication app & miniOrange Authenticator app. You can follow this detailed guide to setup 2FA over Ubuntu.
Checkout details of Linux SSH and local login MFA solution and it's features.
Be Cyber Insurance compliant with miniOrange MFA solution. Read More
miniOrange offers free help through a consultation call with our System Engineers to Install or Setup linux Ubuntu MFA / 2FA (Two-Factor Authentication) in your environment with 30 days Free trial.
For this, you need to just send us an email at idpsupport@xecurify.com to book a slot and we'll help you setting it up in no time.


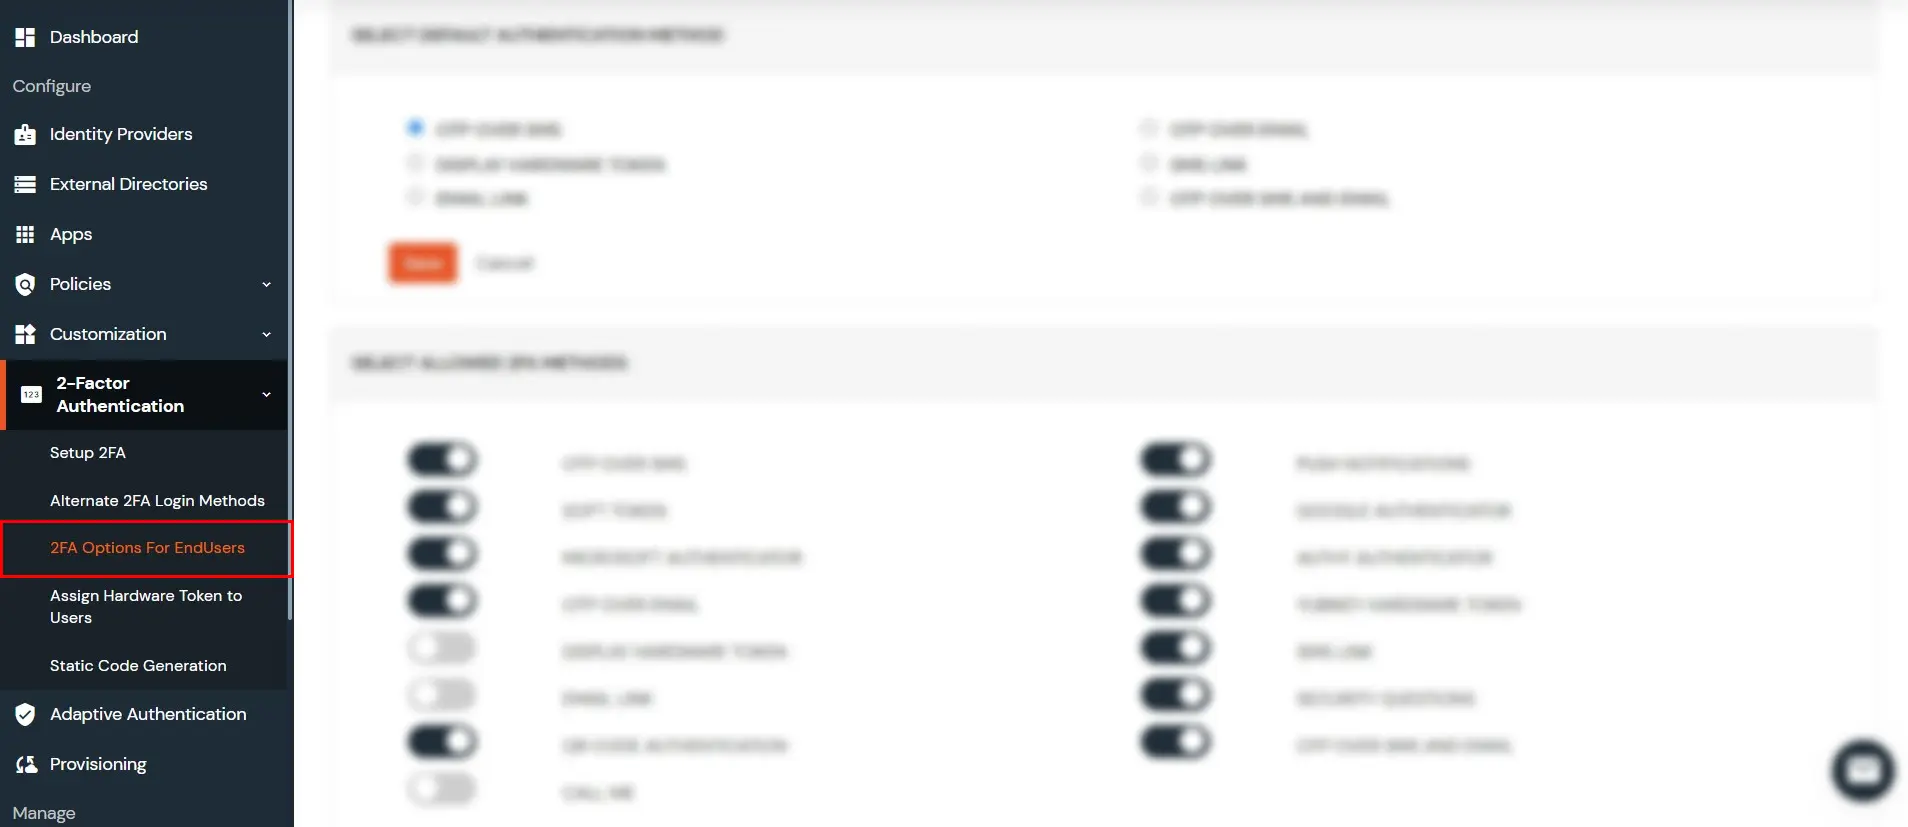
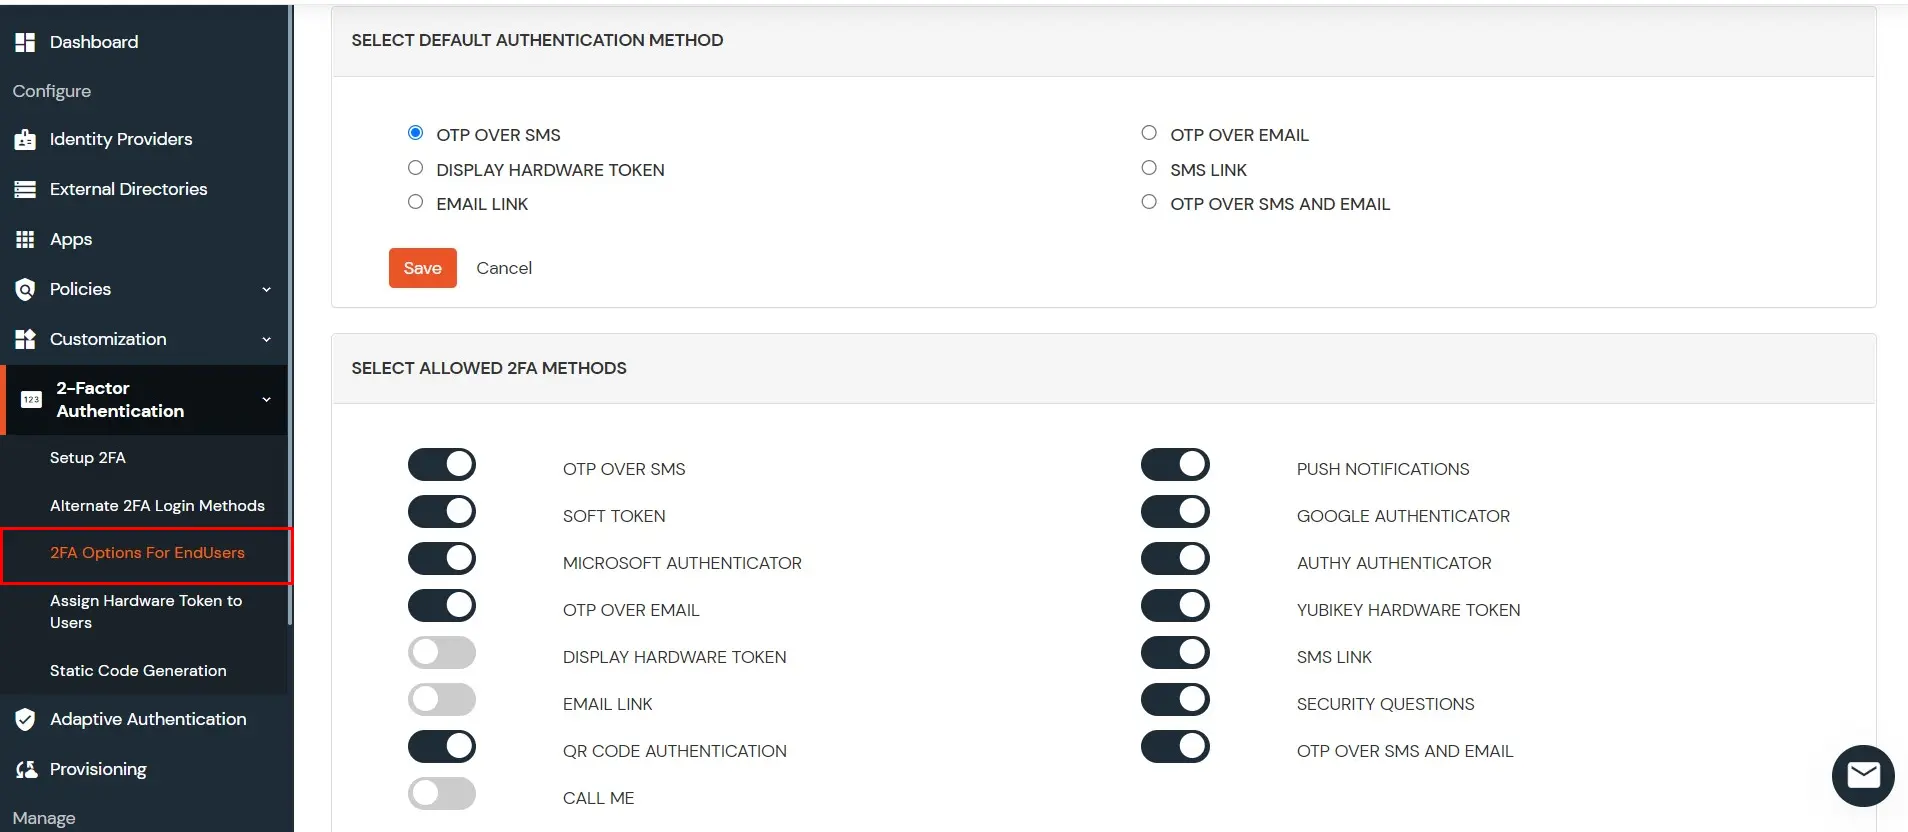
Note: Currently miniOrange only supports TOTP Methods (OTP OVER SMS, OTP OVER EMAIL, GOOGLE AUTHENTICATOR, MICROSOFT AUTHENTICATOR, AUTHY AUTHENTICATOR, MINIORANGE OTP , YUBIKEY HARDWARE TOKEN, DISPLAY HARDWARE TOKEN ) for linux MFA.
chmod a+x miniorange-mfa.deb 
sudo dpkg -i miniorange-mfa.deb 
| Option | Description |
| --install | Install miniorange mfa module on the machine |
| --uninstall | Uninstall miniorange mfa module from the machine |
| -e | Edit miniorange configuration file |
| -d | Display the content of miniorange configuration file |
| --enable_ssh | Enable miniOrange MFA for SSH login |
| --disable_ssh | Disable miniOrange MFA for SSH login |
| -e | Edit miniorange configuration file |
| -d | Display the content of miniorange configuration file |
| --test <gdm-password|sshd|> <username> | Test miniOrange mfa |
| --enable_ssh | Enable miniOrange mfa for specified service |
| --disable_ssh | Disable miniOrange mfa for specified service |
| --enable_pl | Enable Passwordless Authentication for service |
| --disable_pl | Disable Passwordless Authentication for service |
| --check | Troubleshoot |
| --use-alias <yes/no> | Use GCEOS field for miniOrange mfa |
| --use-proxy <yes/no> | Use Proxy URL |
| --change-auth-source | Change authentication source (cloud/local) |
| --upgrade | Check for updates for miniOrange MFA |
| --set-tmp-dir <path> | Set MO_TEMP_DIR for build directory |
| -v, --verbose | Print logs to terminal instead of file |
sudo miniorange-mfa --install 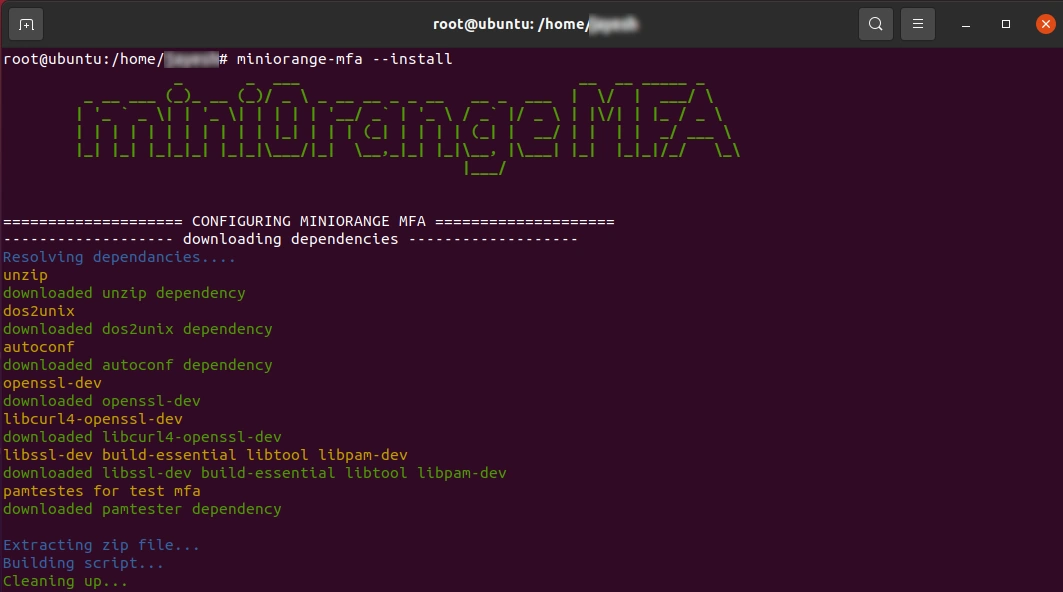


miniorange-mfa --test login <username> 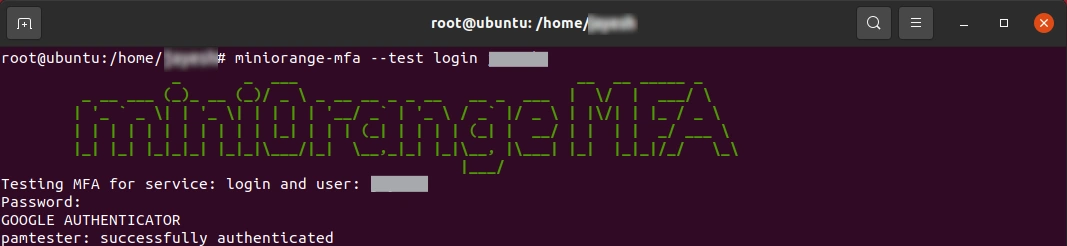
miniorange-mfa --test sshd <username> 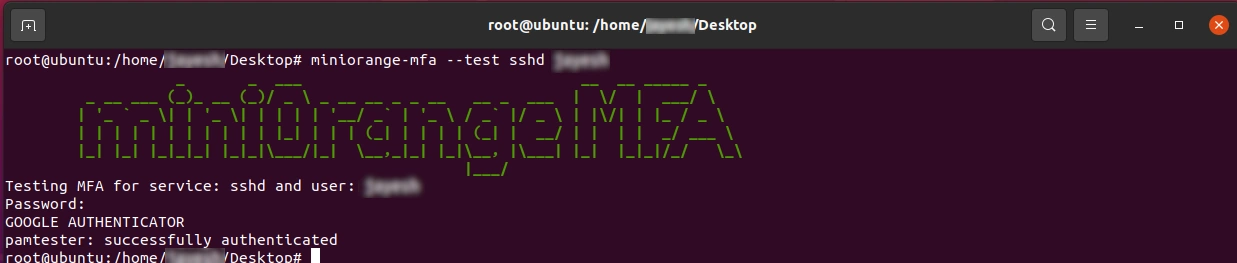
miniorange-mfa --check 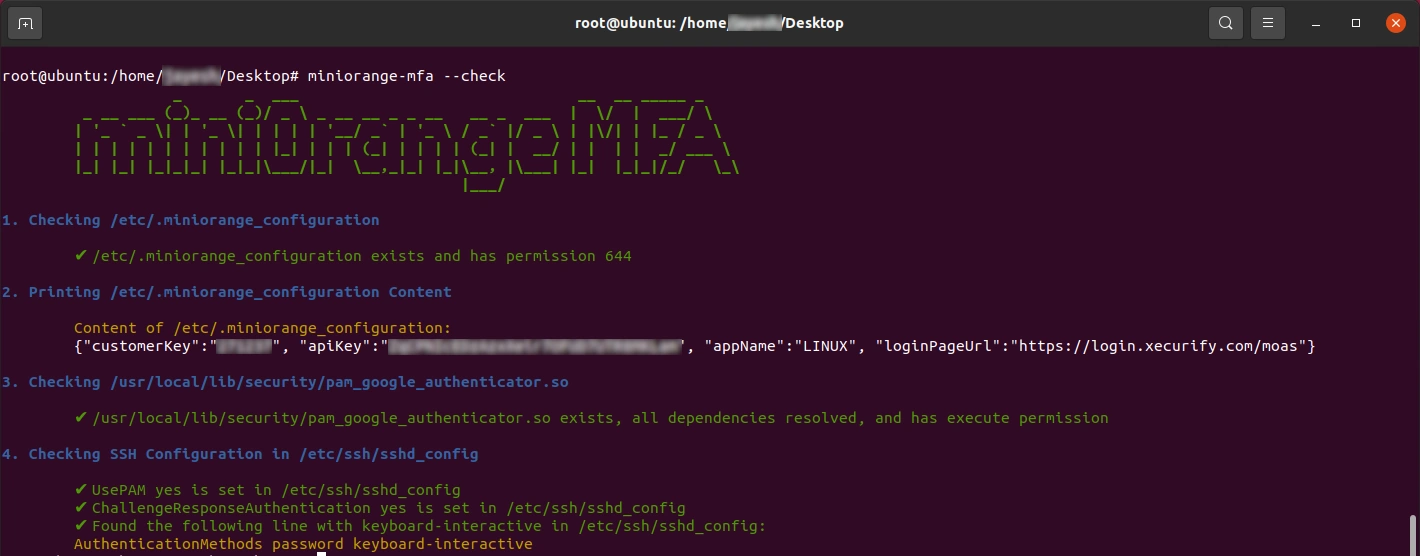

miniorange-mfa --enable_pl <service_name>
miniorange-mfa --disable_pl <service_name>
Allows switching between miniOrange cloud authentication and local system authentication for user login.
miniorange-mfa --change-auth-source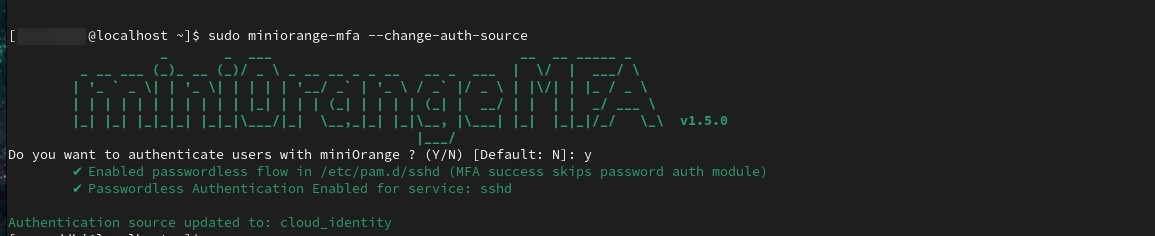
miniorange-mfa --install -v
OR
miniorange-mfa --install --verboseDisplays the manual page for all available miniOrange MFA commands and options.
man miniorange-mfa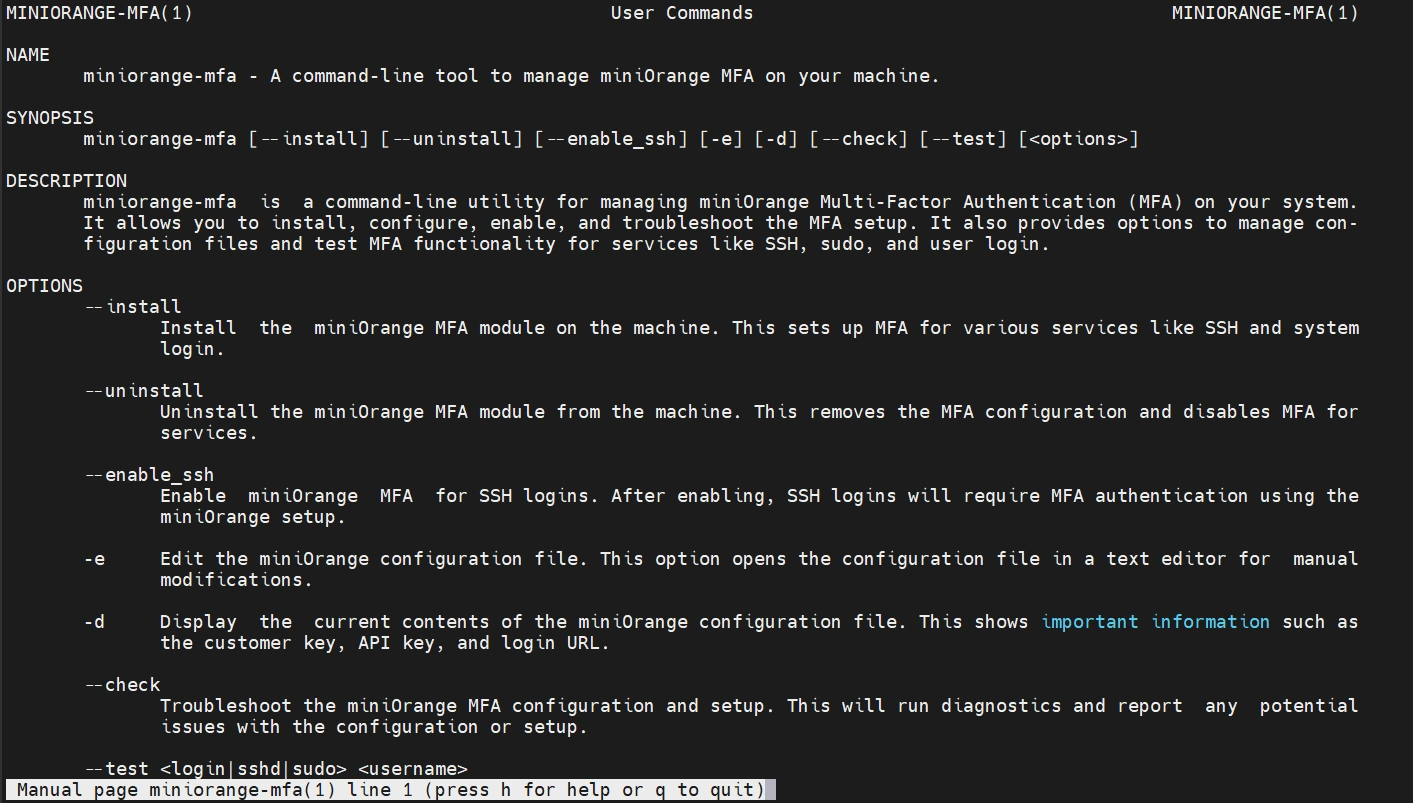
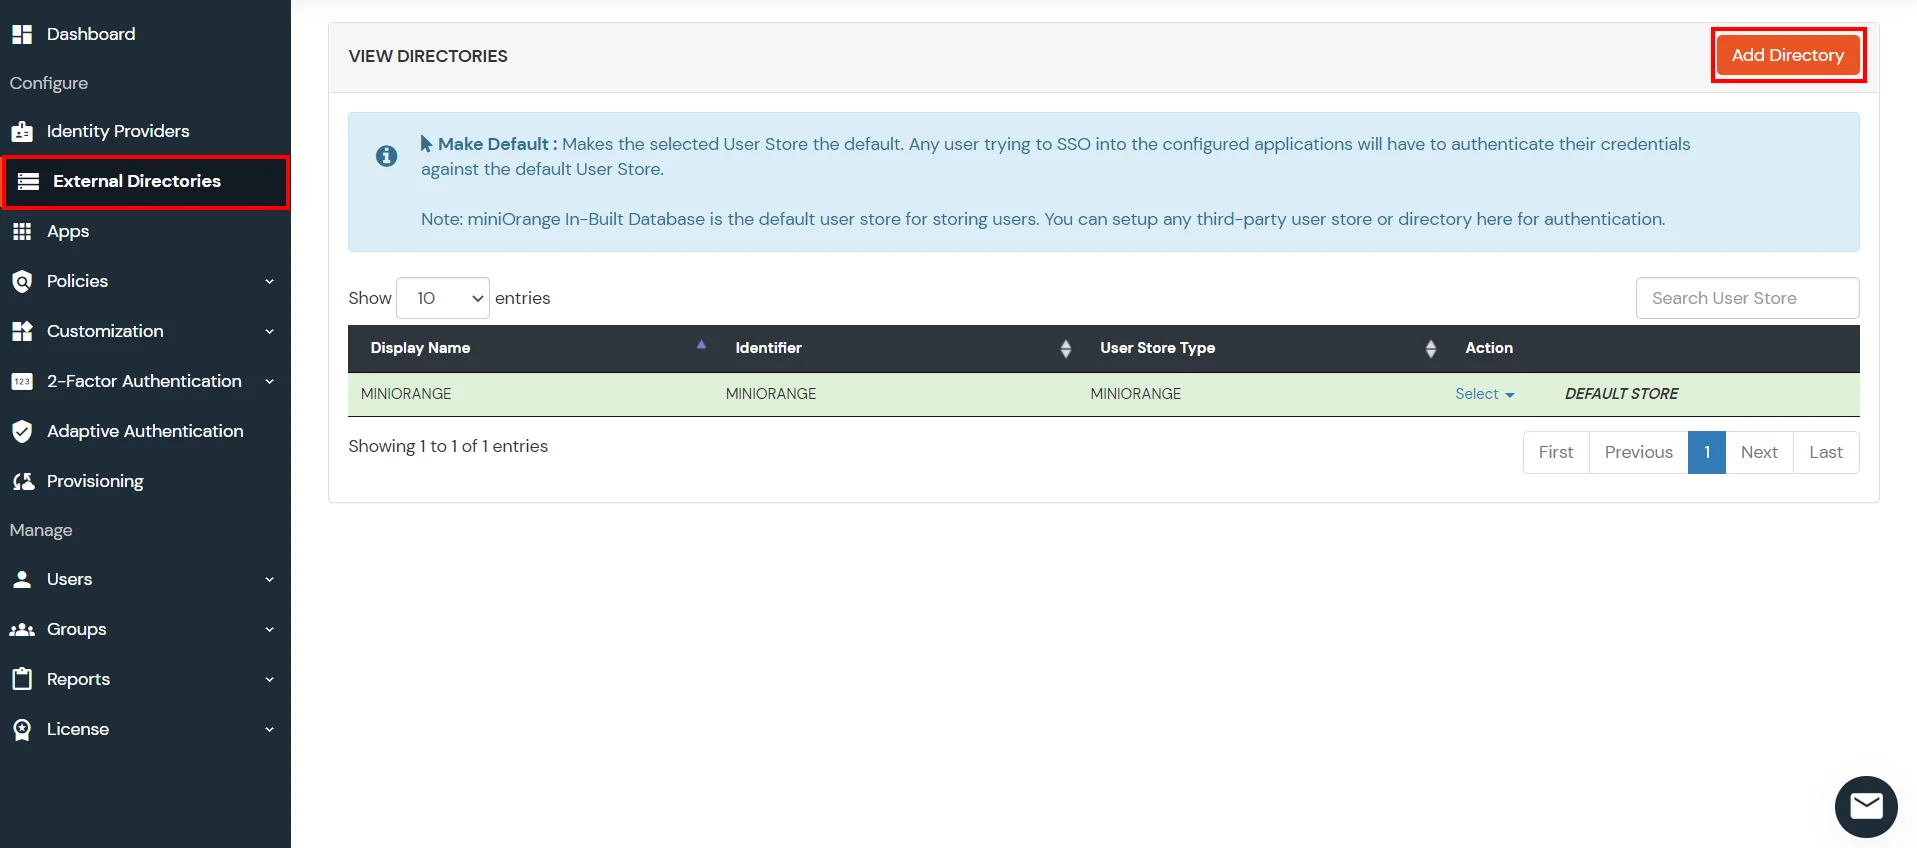
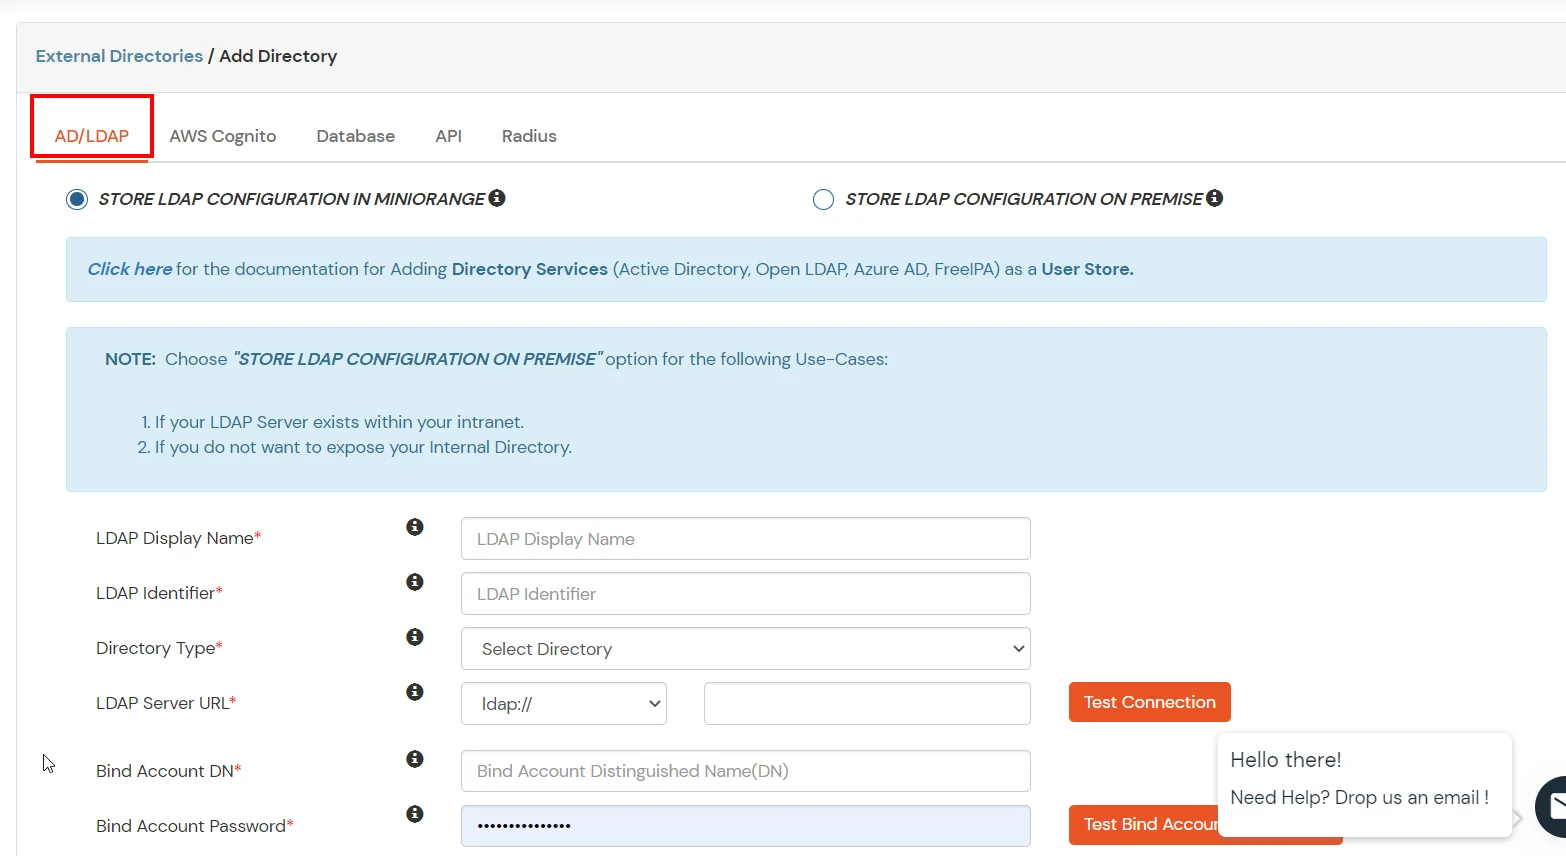
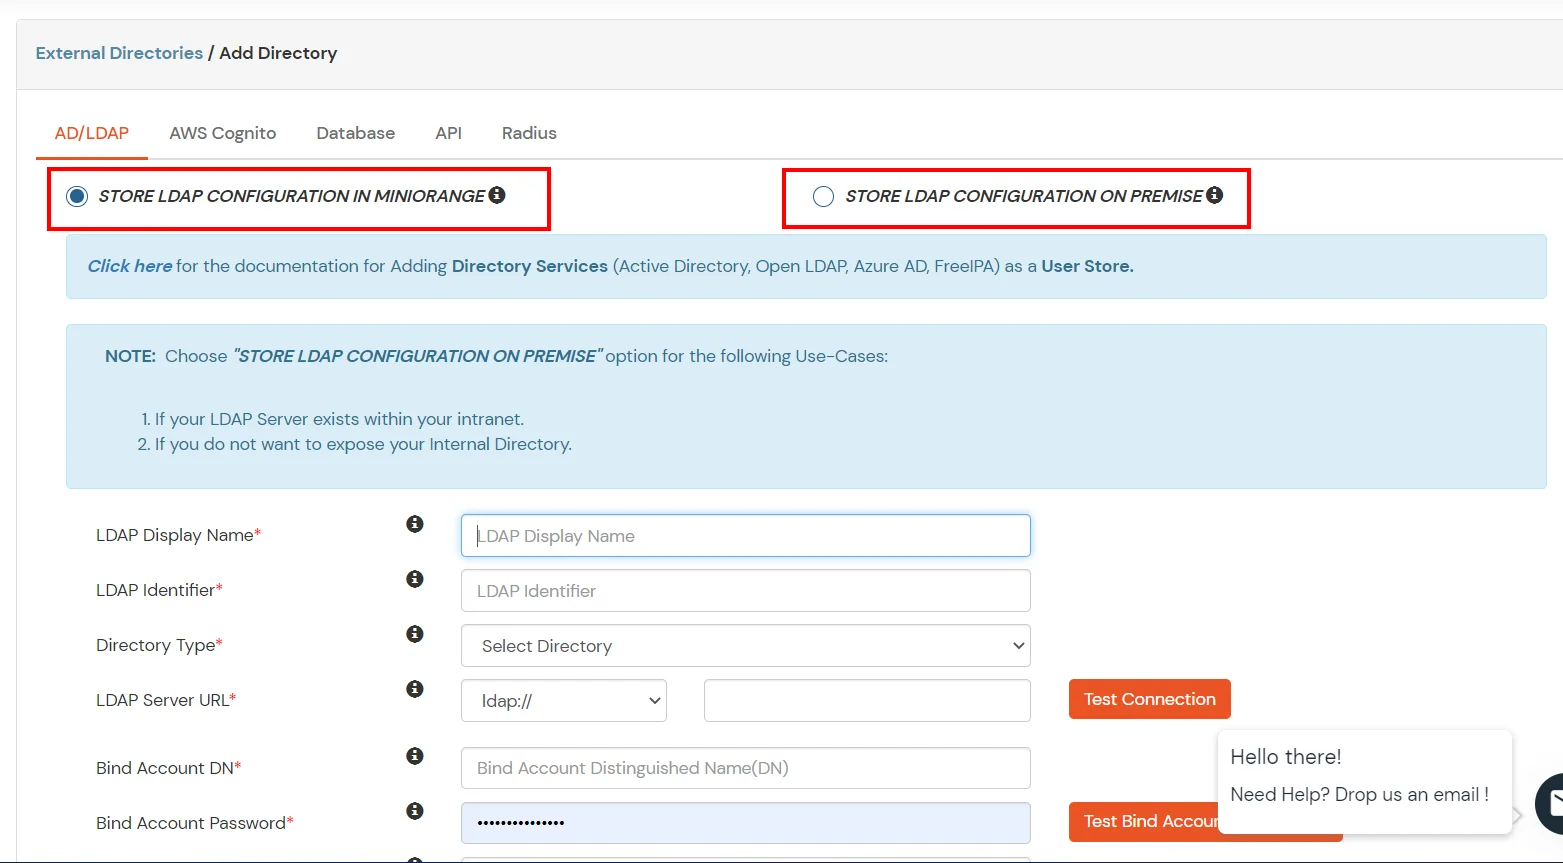
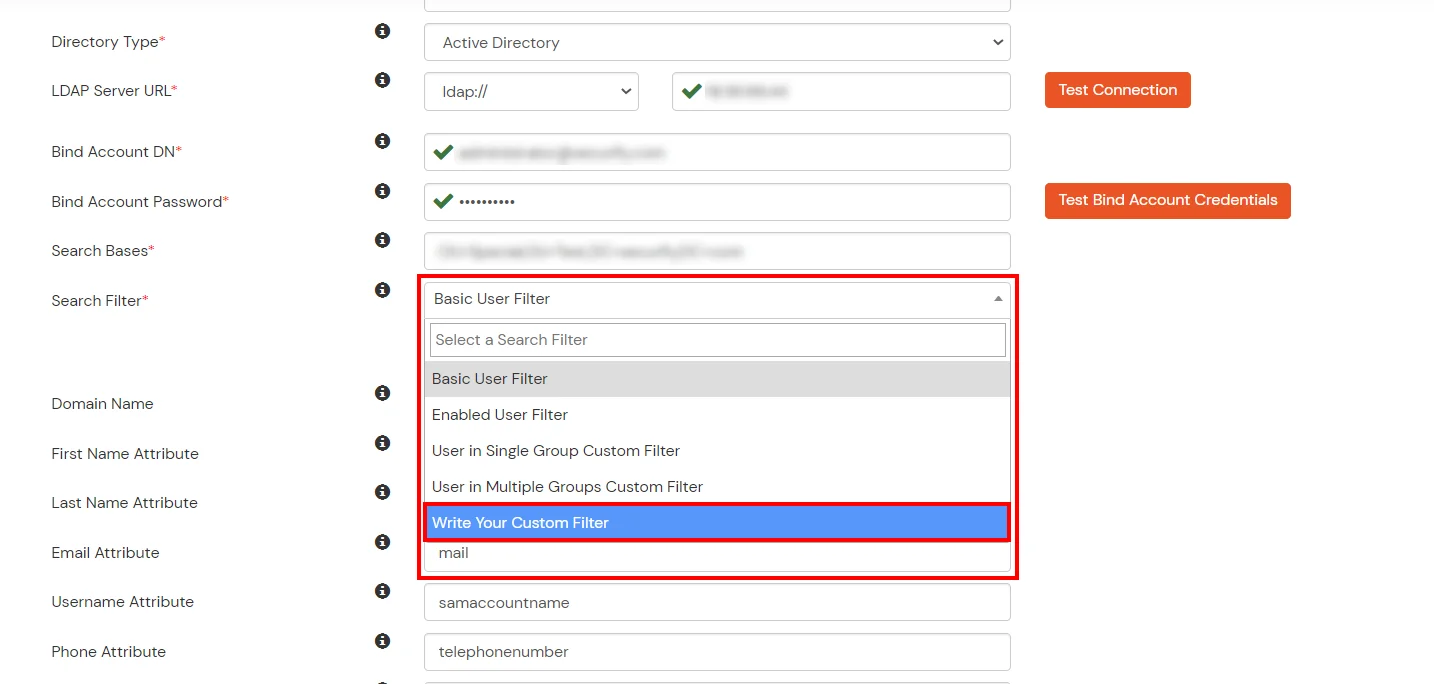
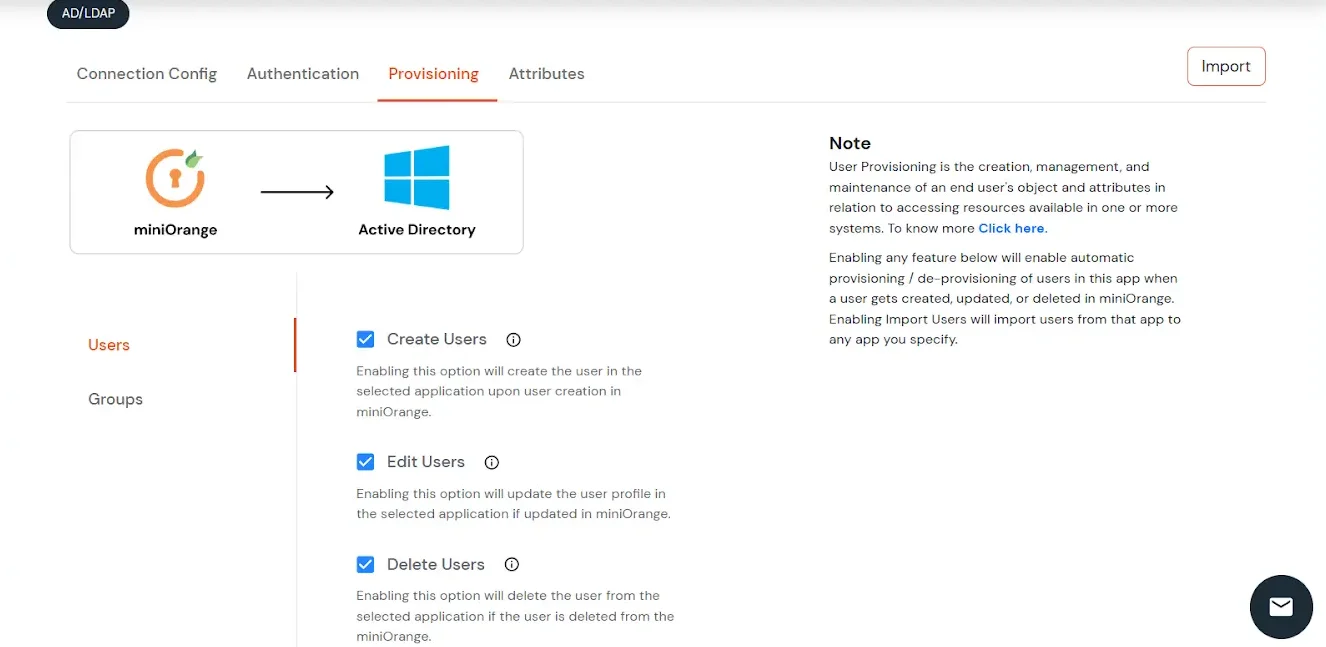
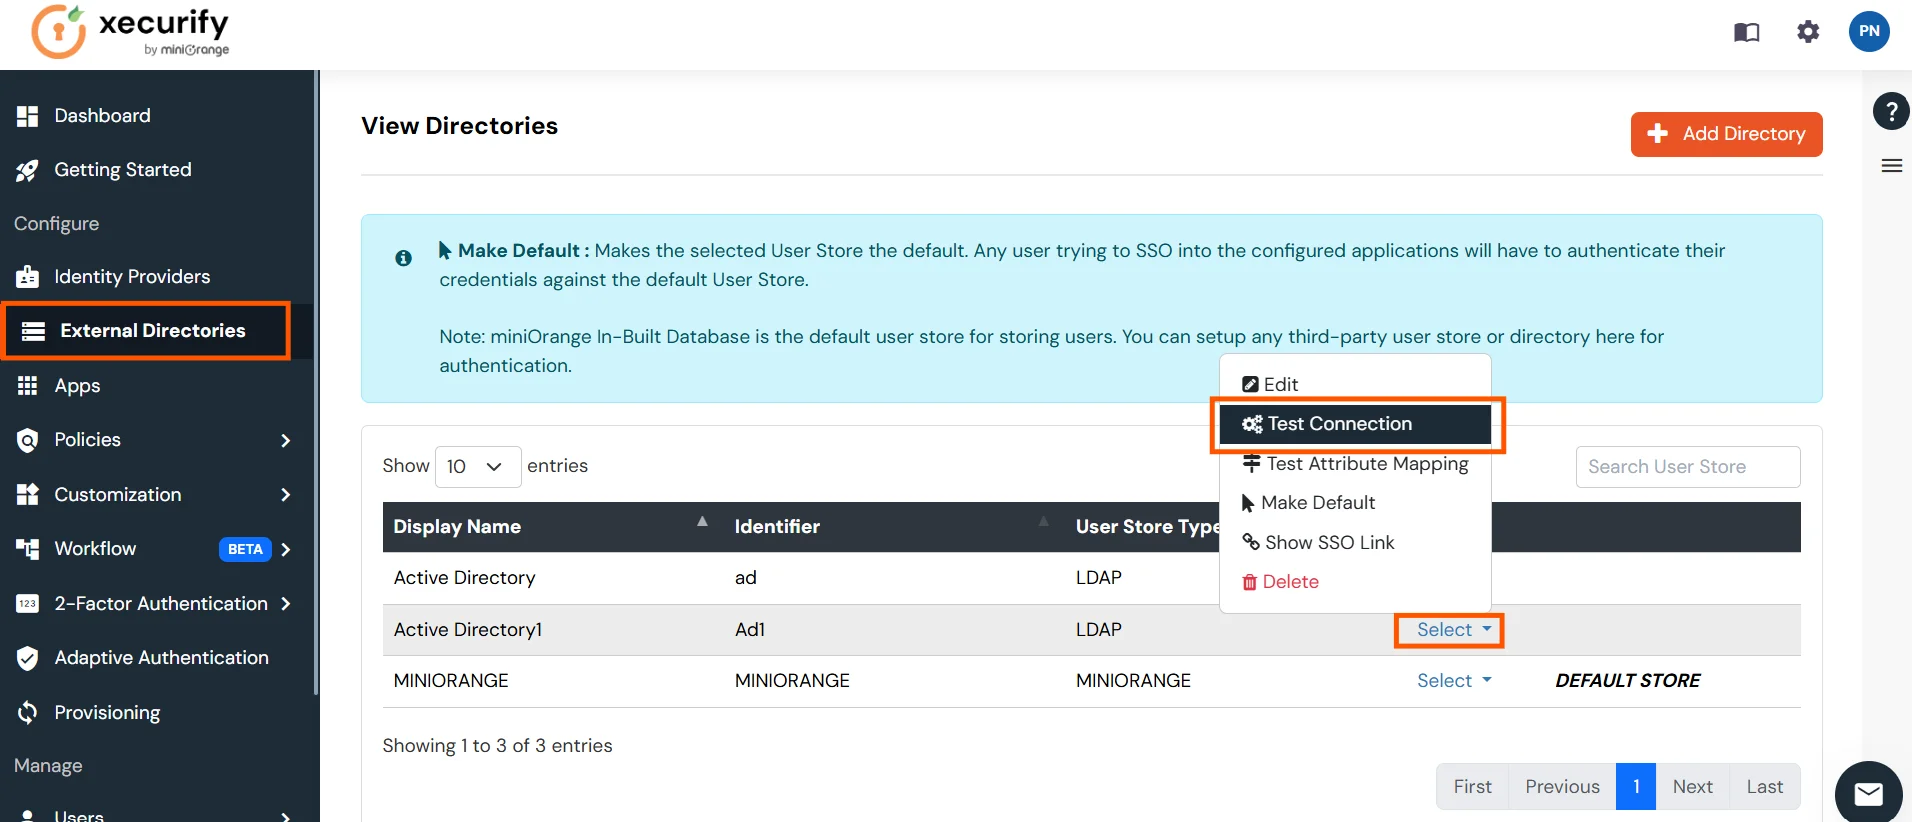
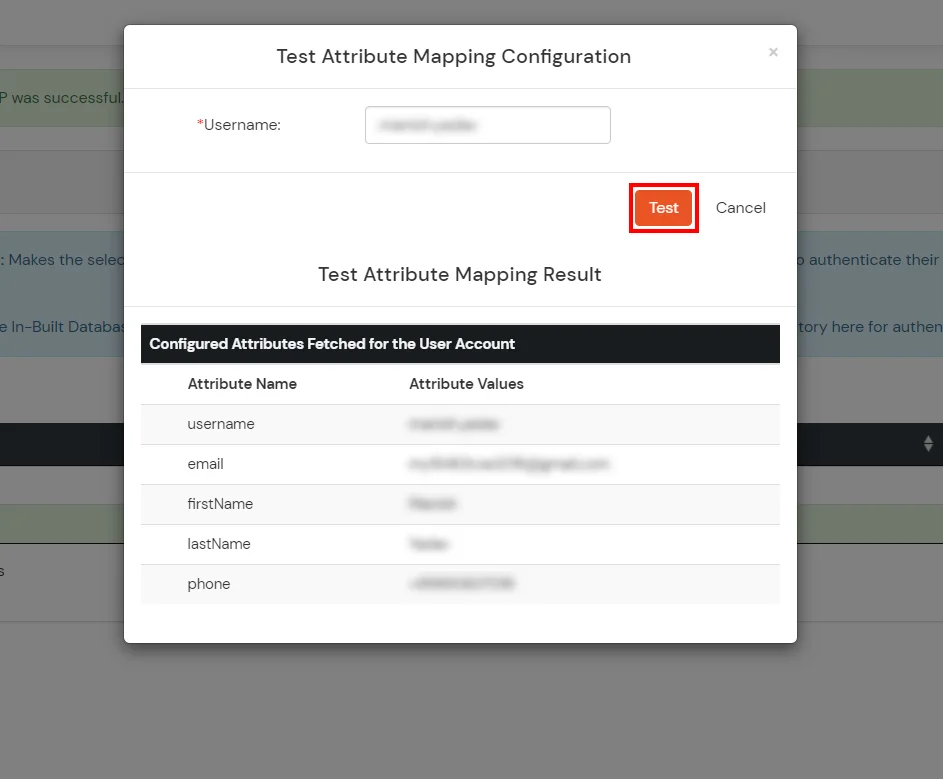
miniOrange provides user authentication from various external sources, which can be Directories (like ADFS, Microsoft Active Directory, Microsoft Entra ID, OpenLDAP, Google, AWS Cognito etc), Identity Providers (like Okta, Shibboleth, Ping, OneLogin, KeyCloak), Databases (like MySQL, Maria DB, PostgreSQL) and many more. You can configure your existing directory/user store or add users in miniOrange.
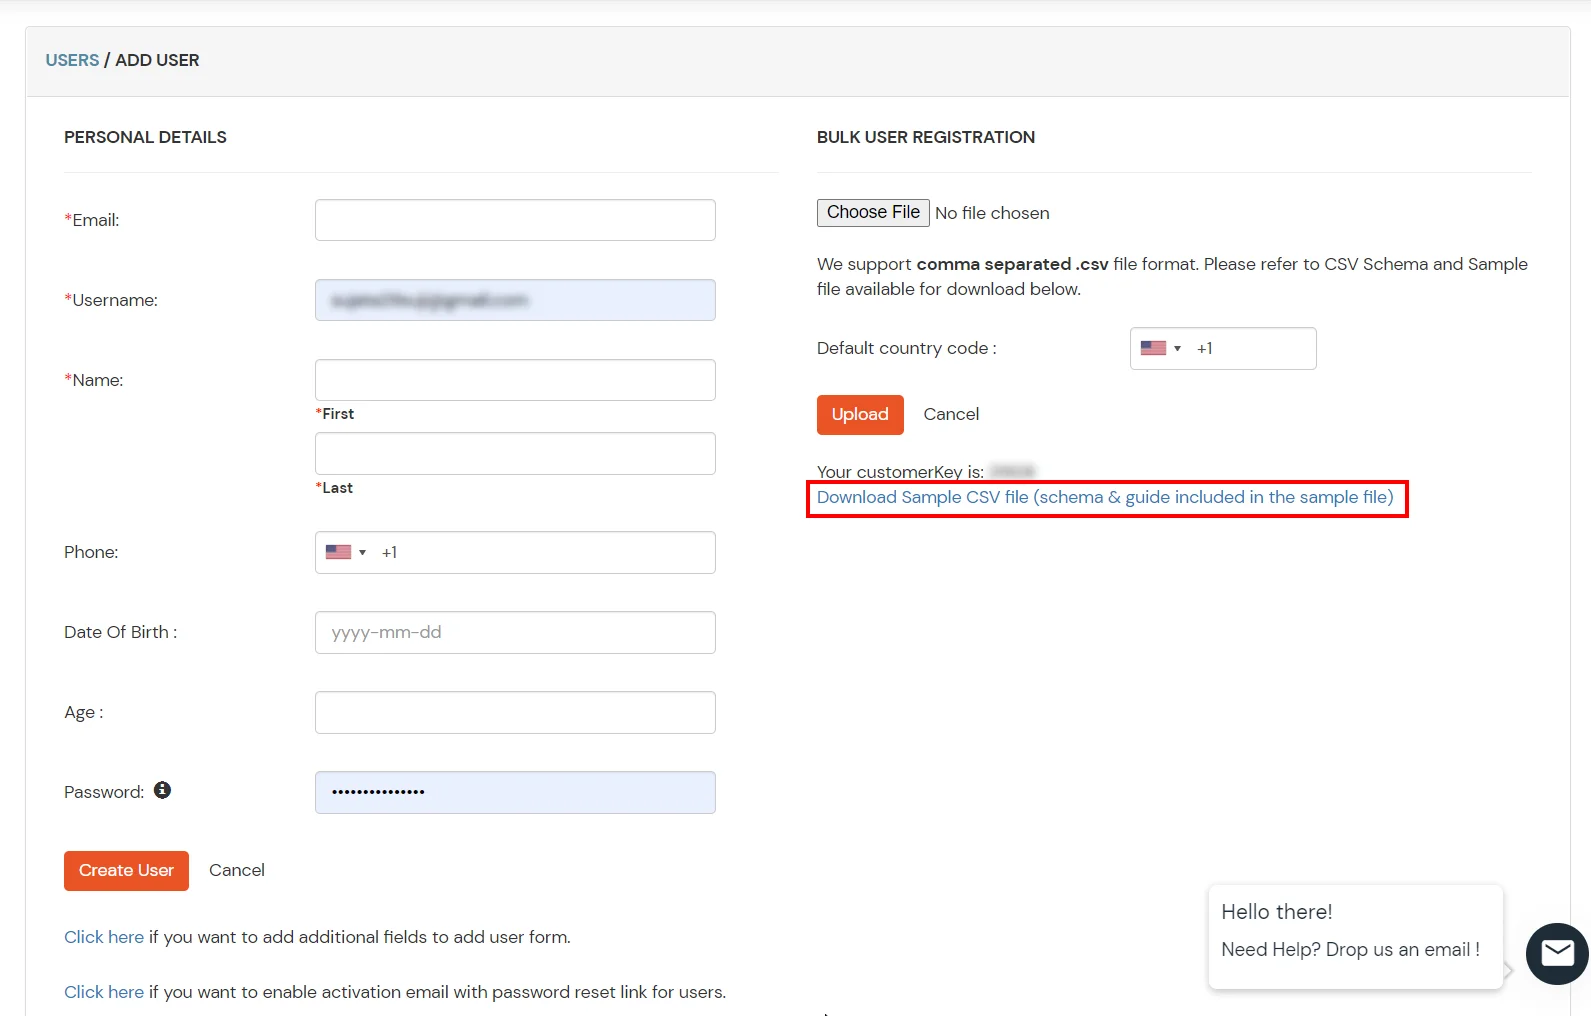
1. Create User in miniOrange
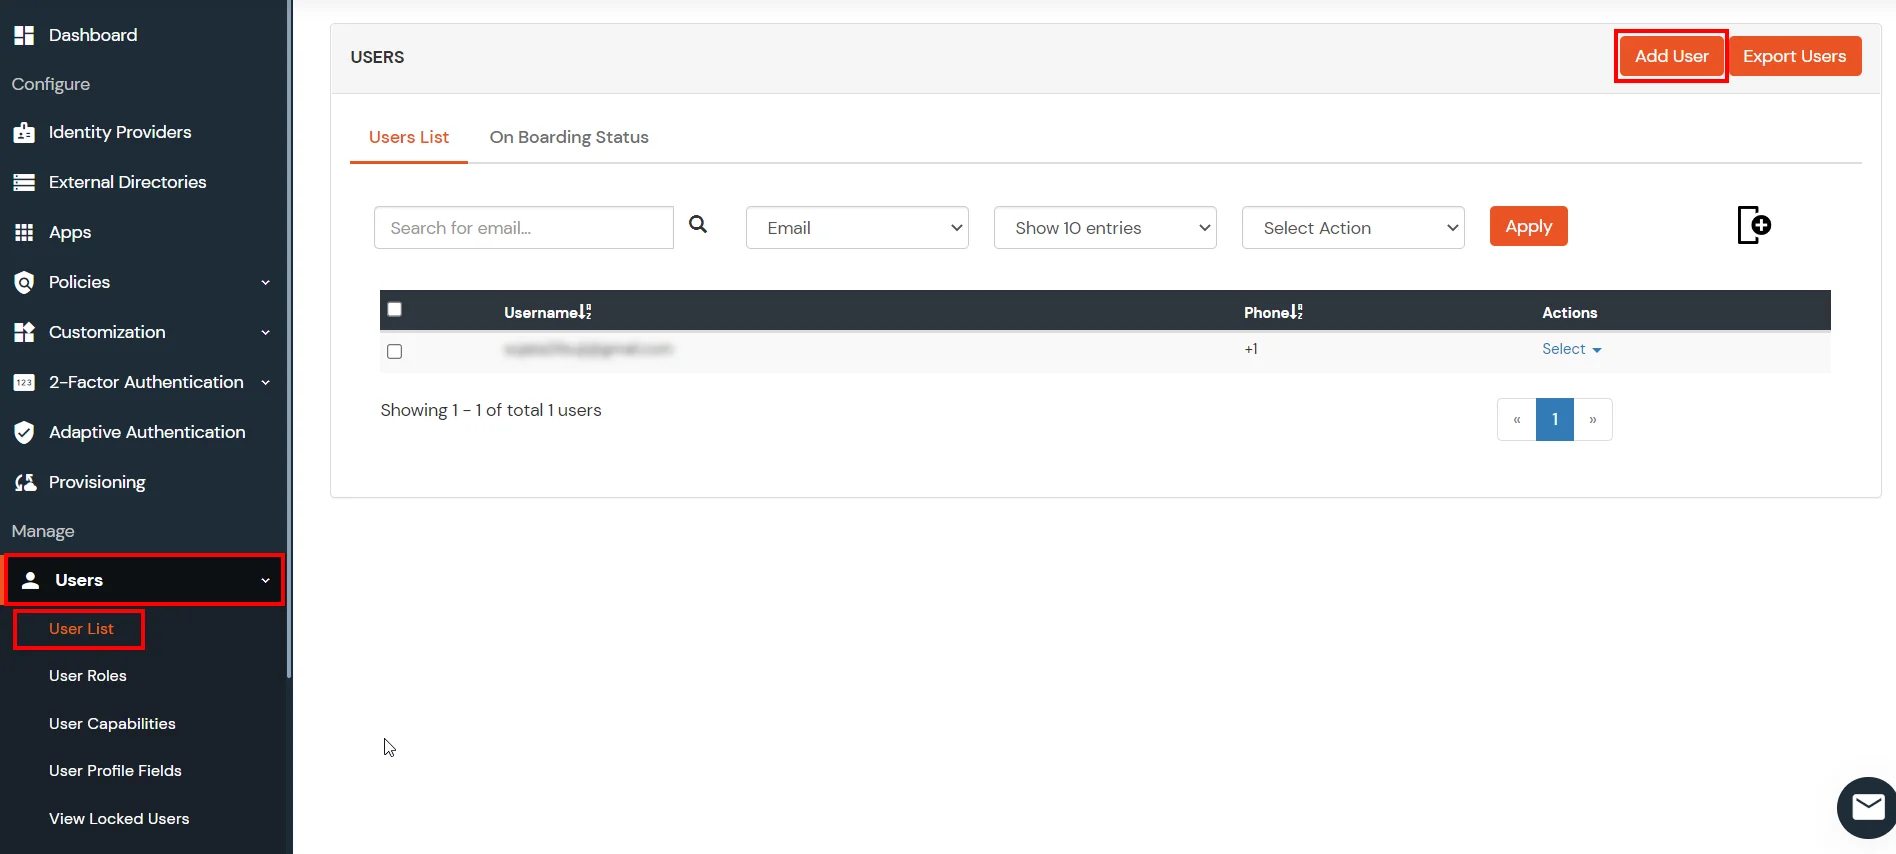
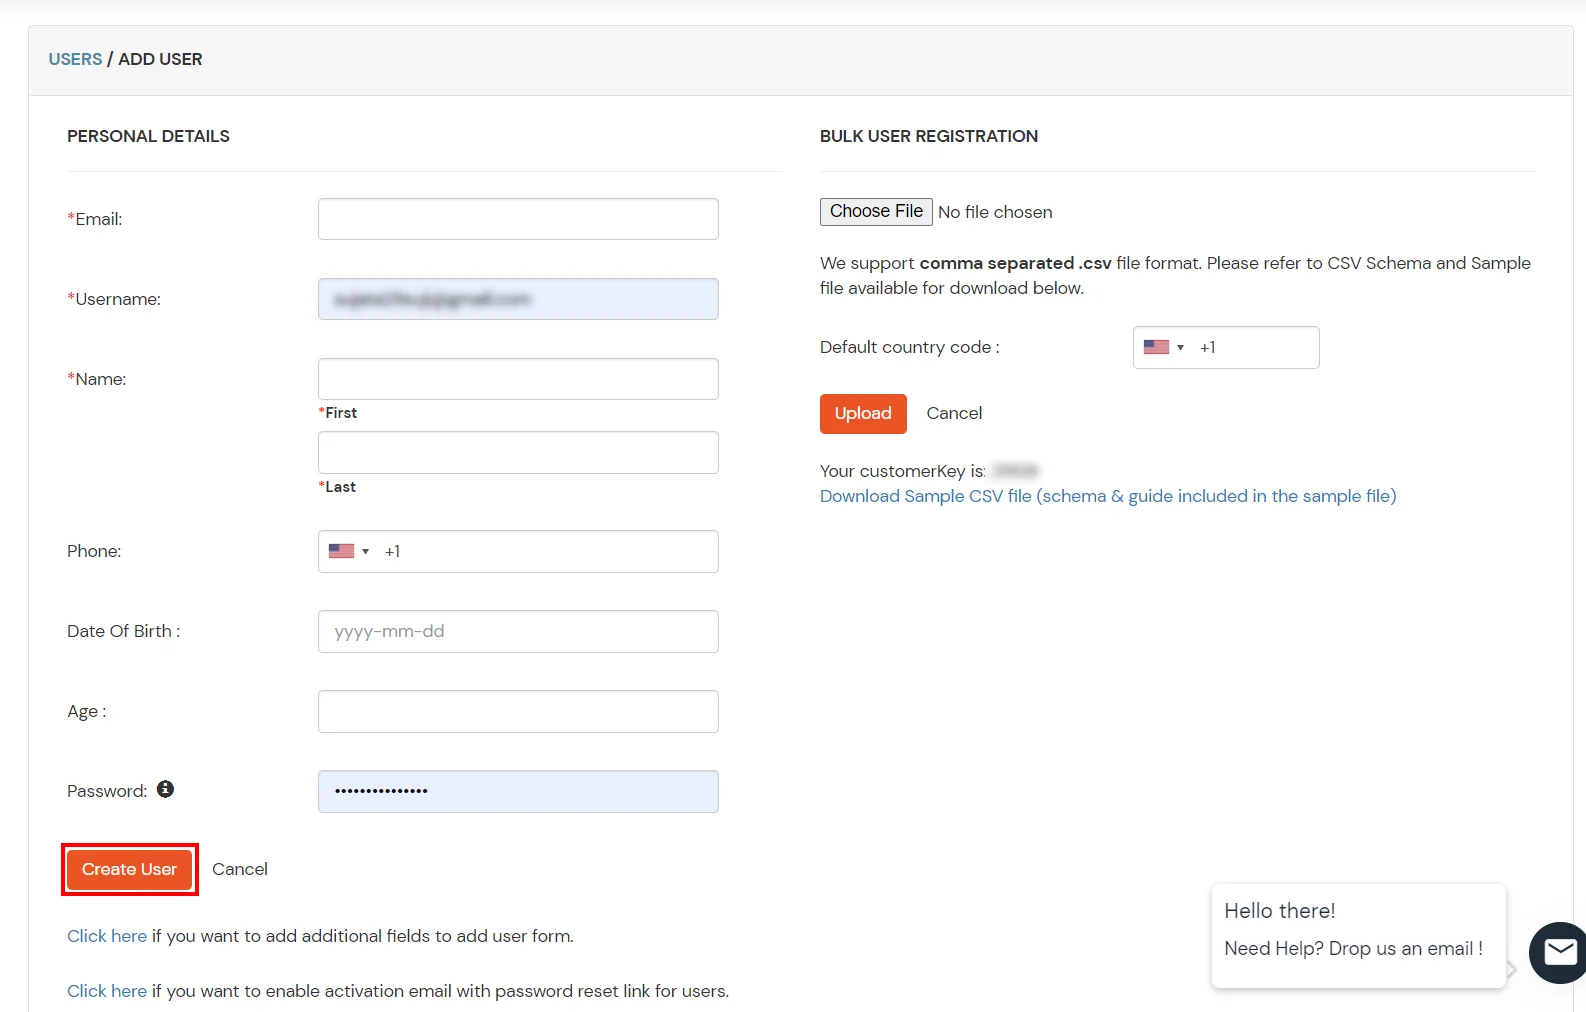
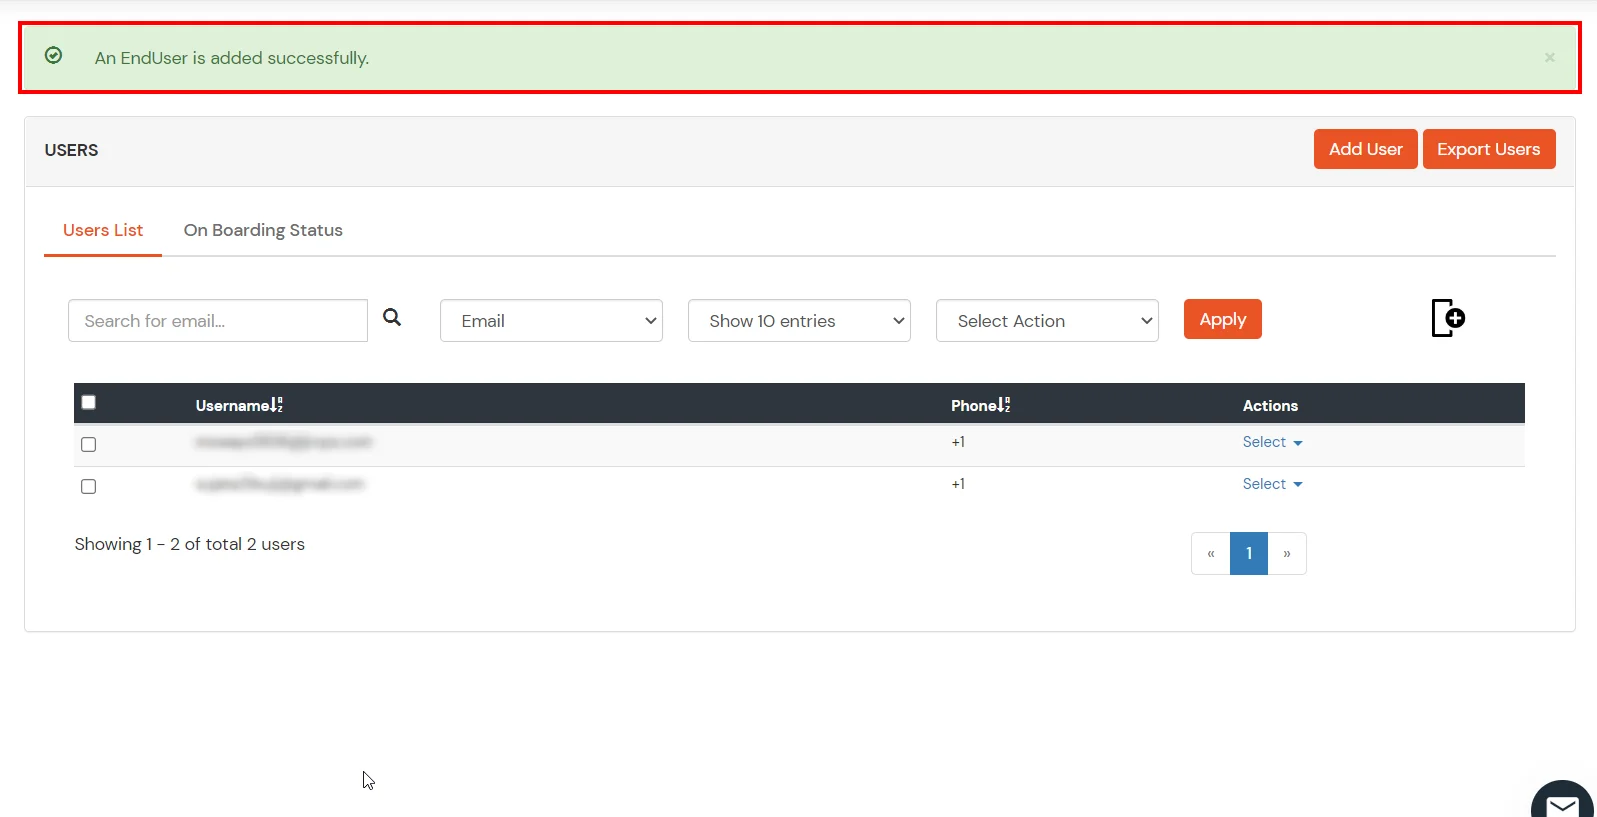
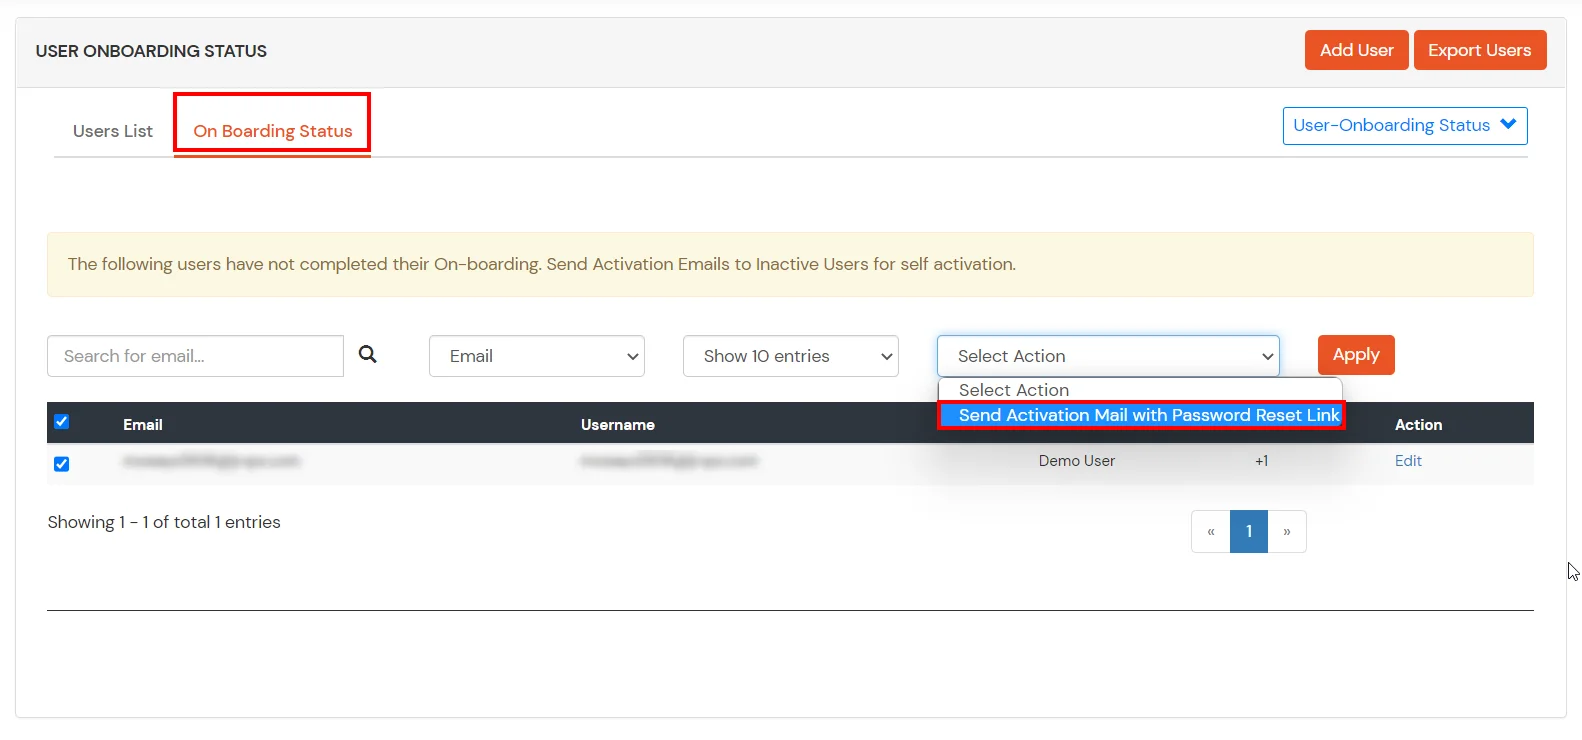
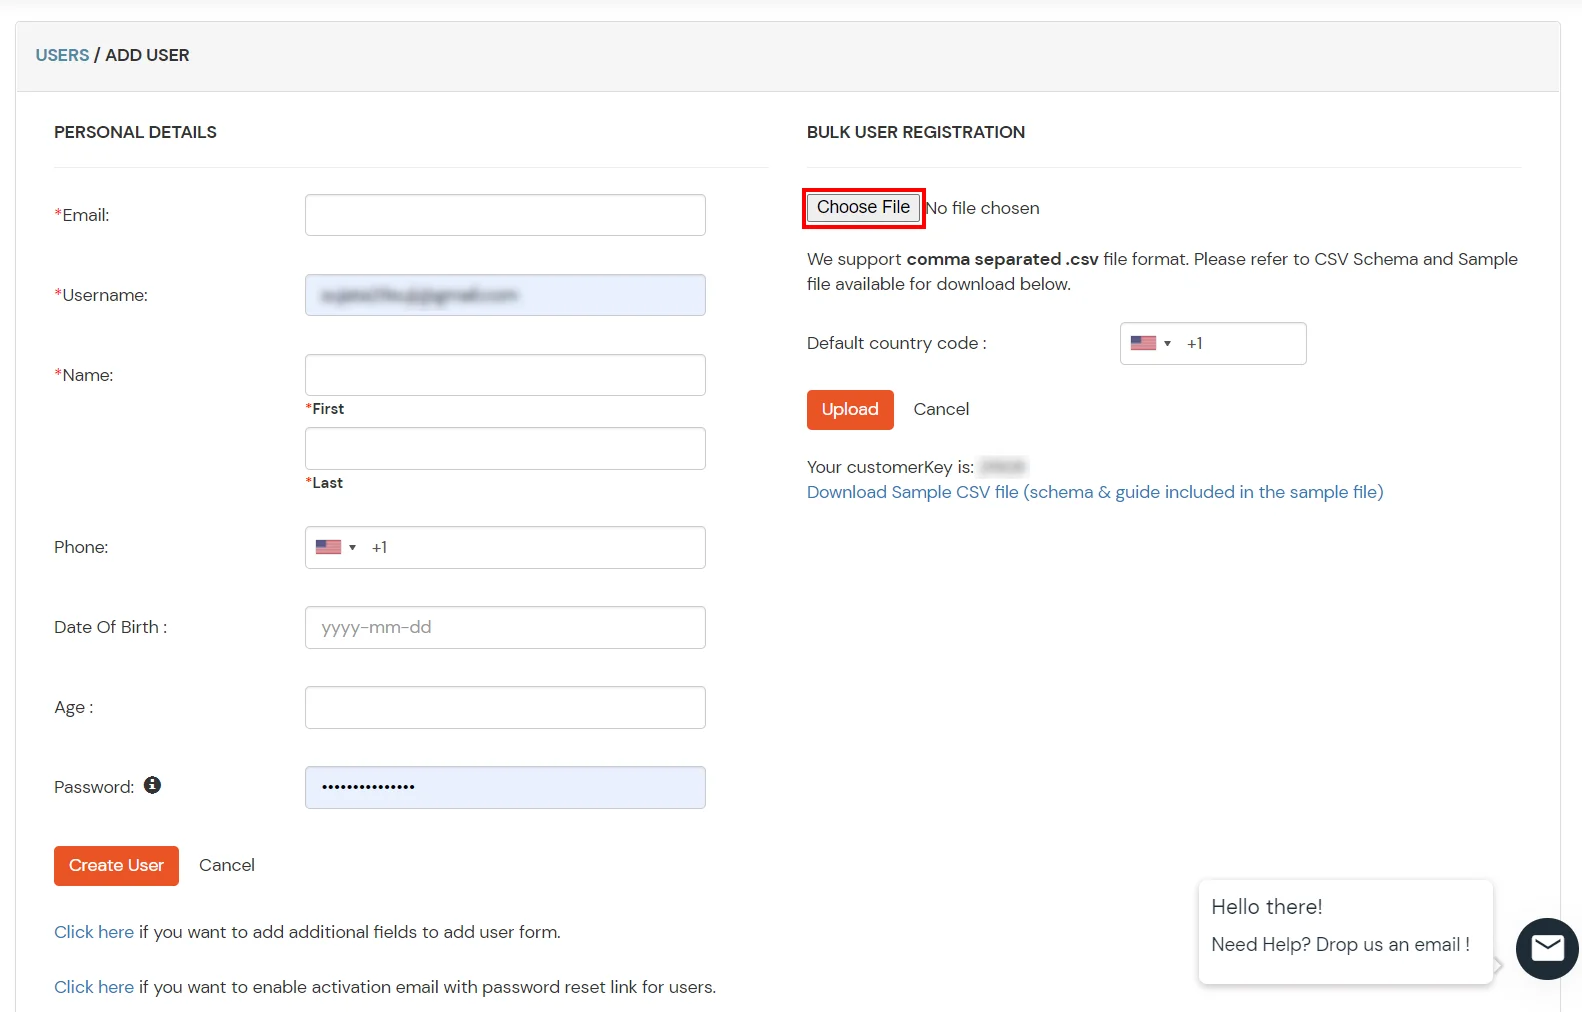
2. Bulk Upload Users in miniOrange via Uploading CSV File.

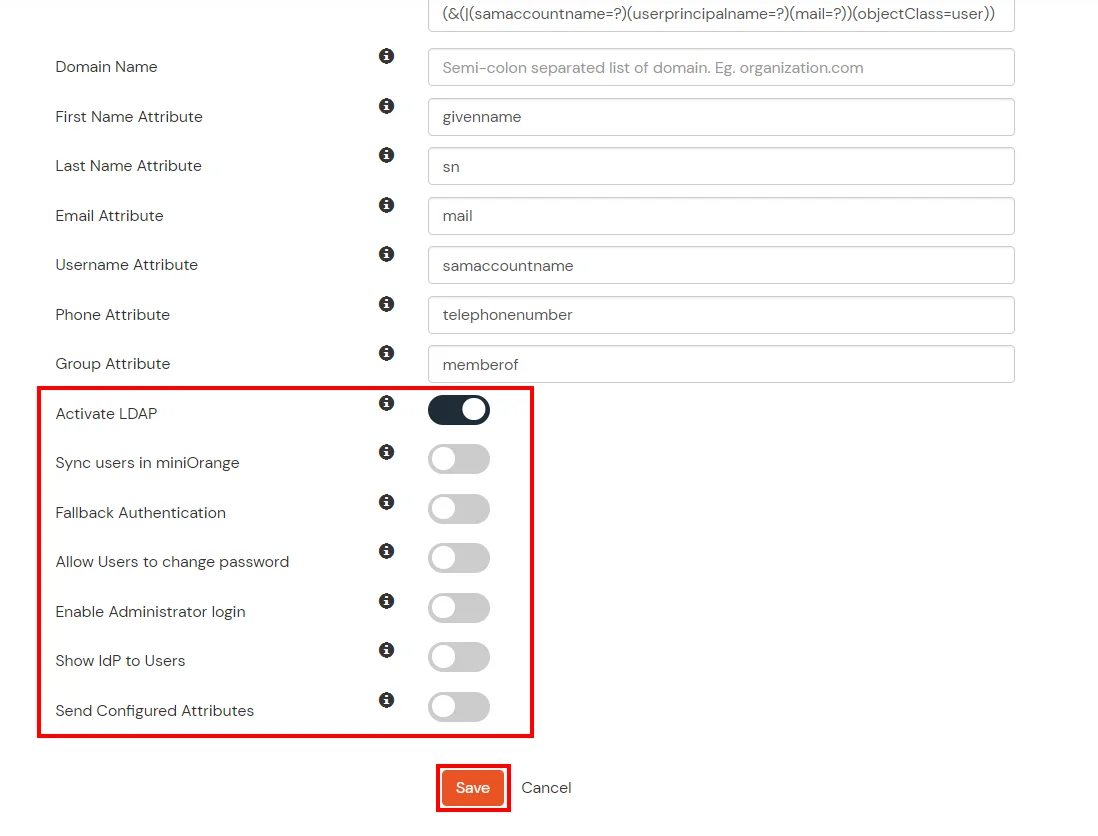
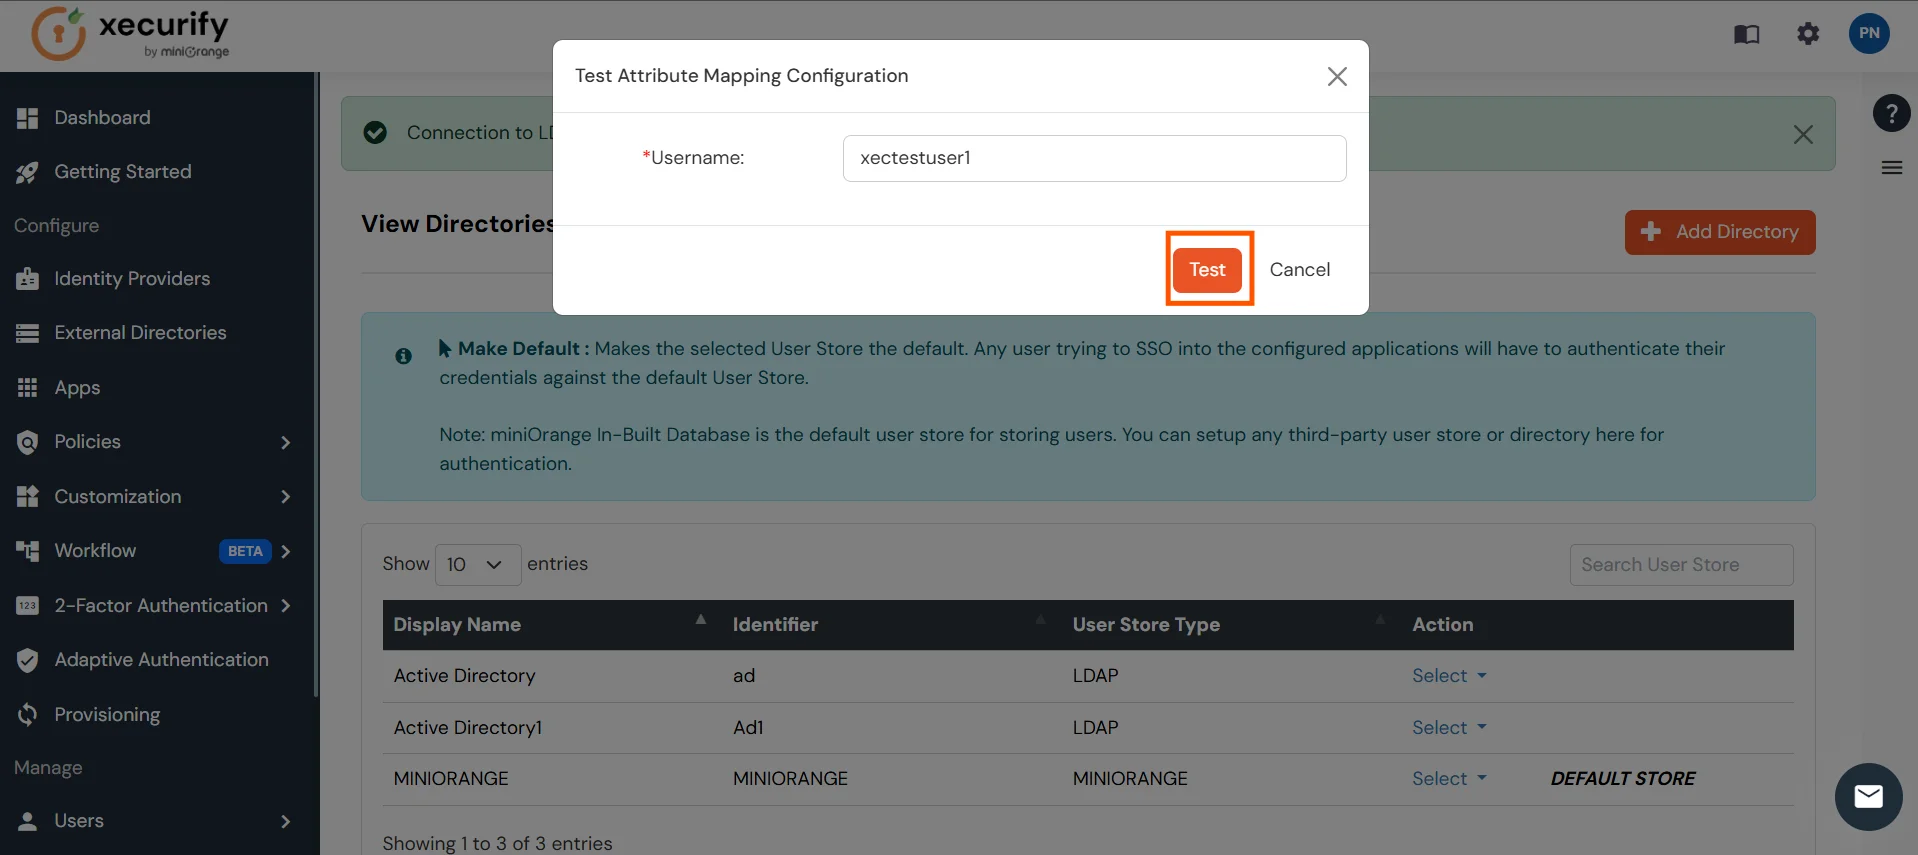
Here's the list of the attributes and what it does when we enable it. You can enable/disable accordingly.
| Attribute | Description |
|---|---|
| Activate LDAP | All user authentications will be done with LDAP credentials if you Activate it |
| Fallback Authentication | If LDAP credentials fail then user will be authenticated through miniOrange |
| Enable administrator login | On enabling this, your miniOrange Administrator login authenticates using your LDAP server |
| Show IdP to users | If you enable this option, this IdP will be visible to users |
| Sync users in miniOrange | Users will be created in miniOrange after authentication with LDAP |
Attribute Name sent to SP = organization
Attribute Name from IDP = company
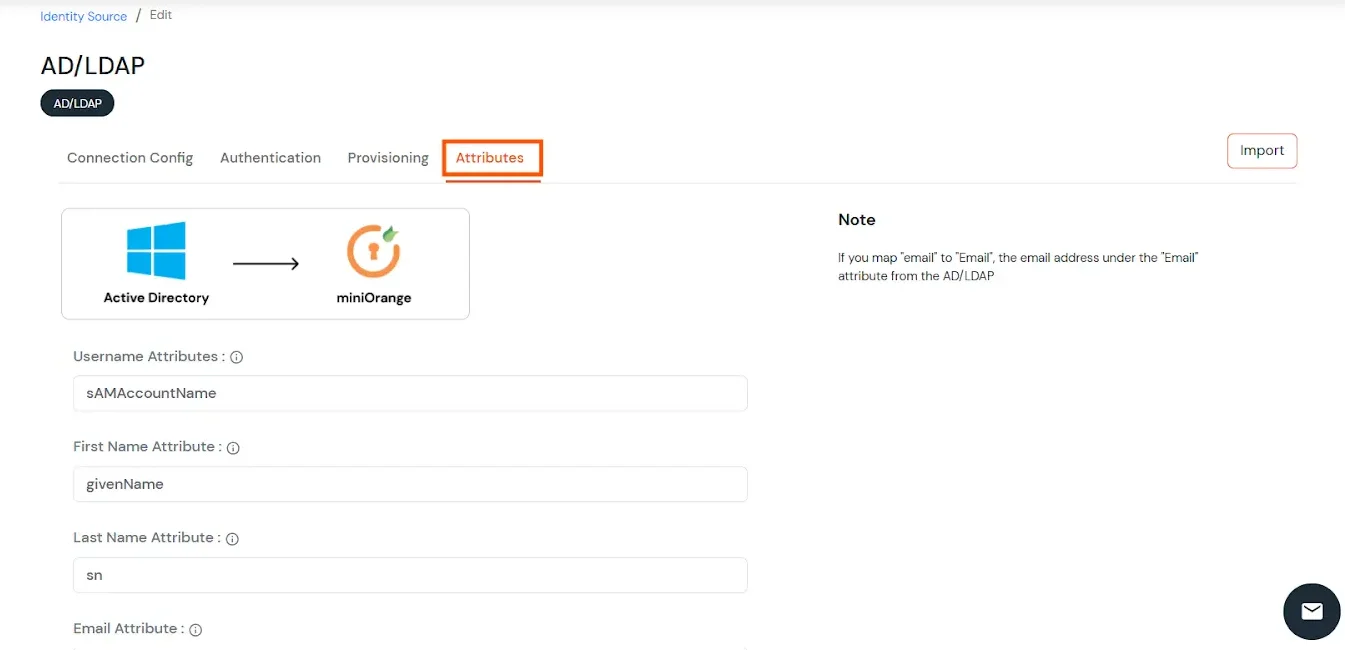
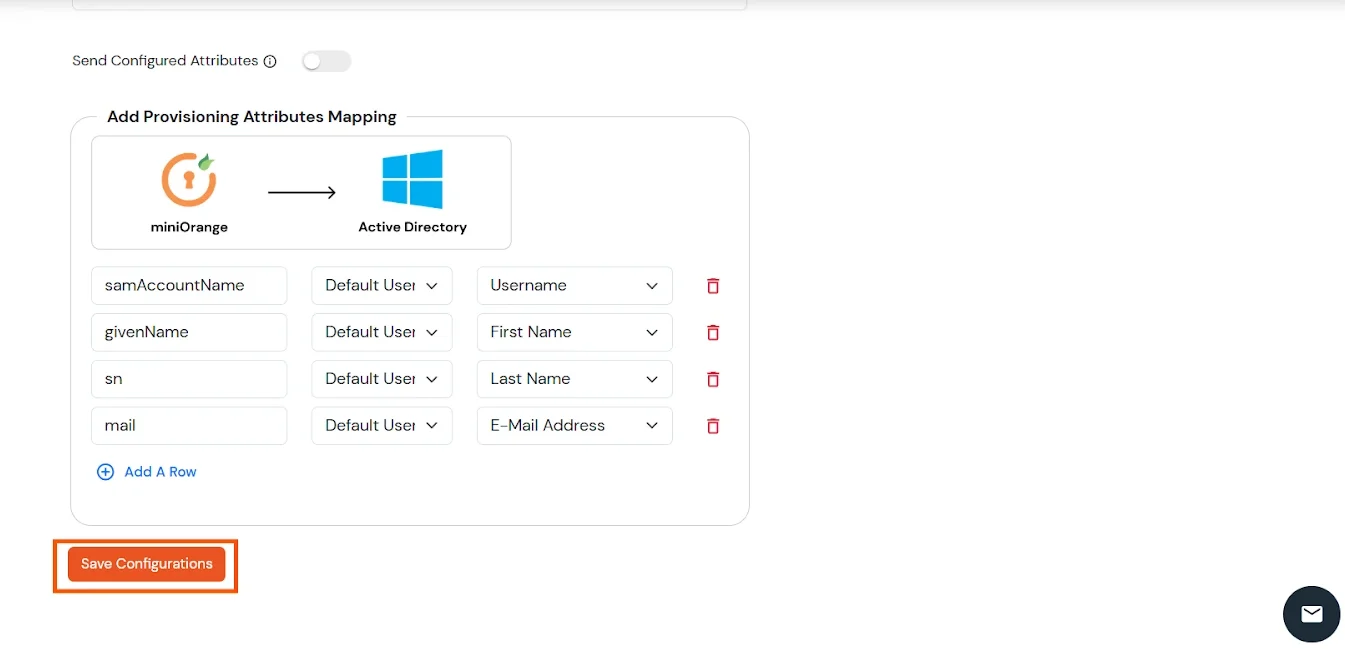
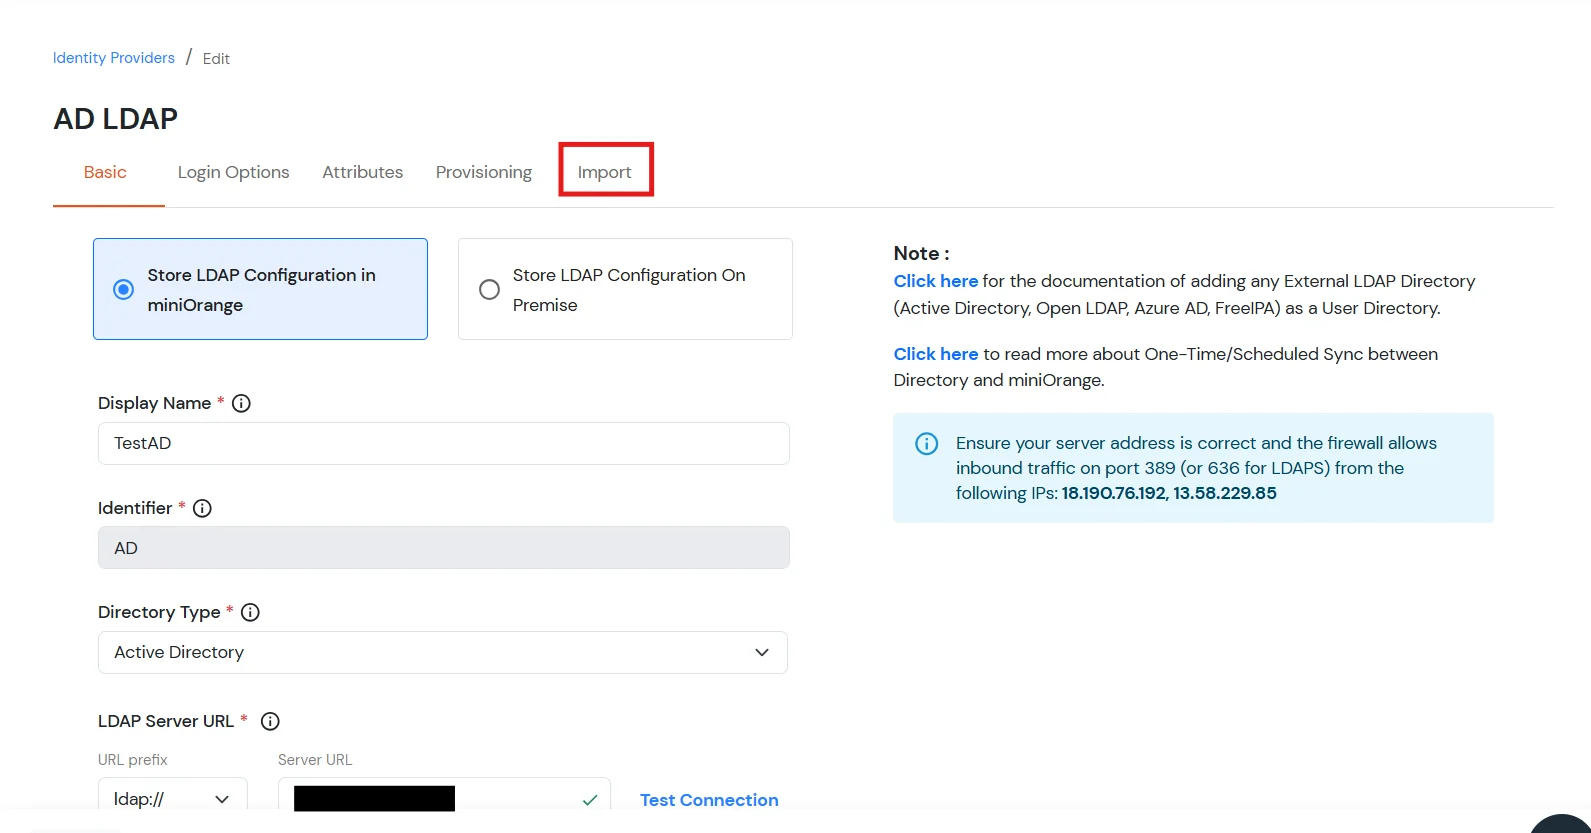
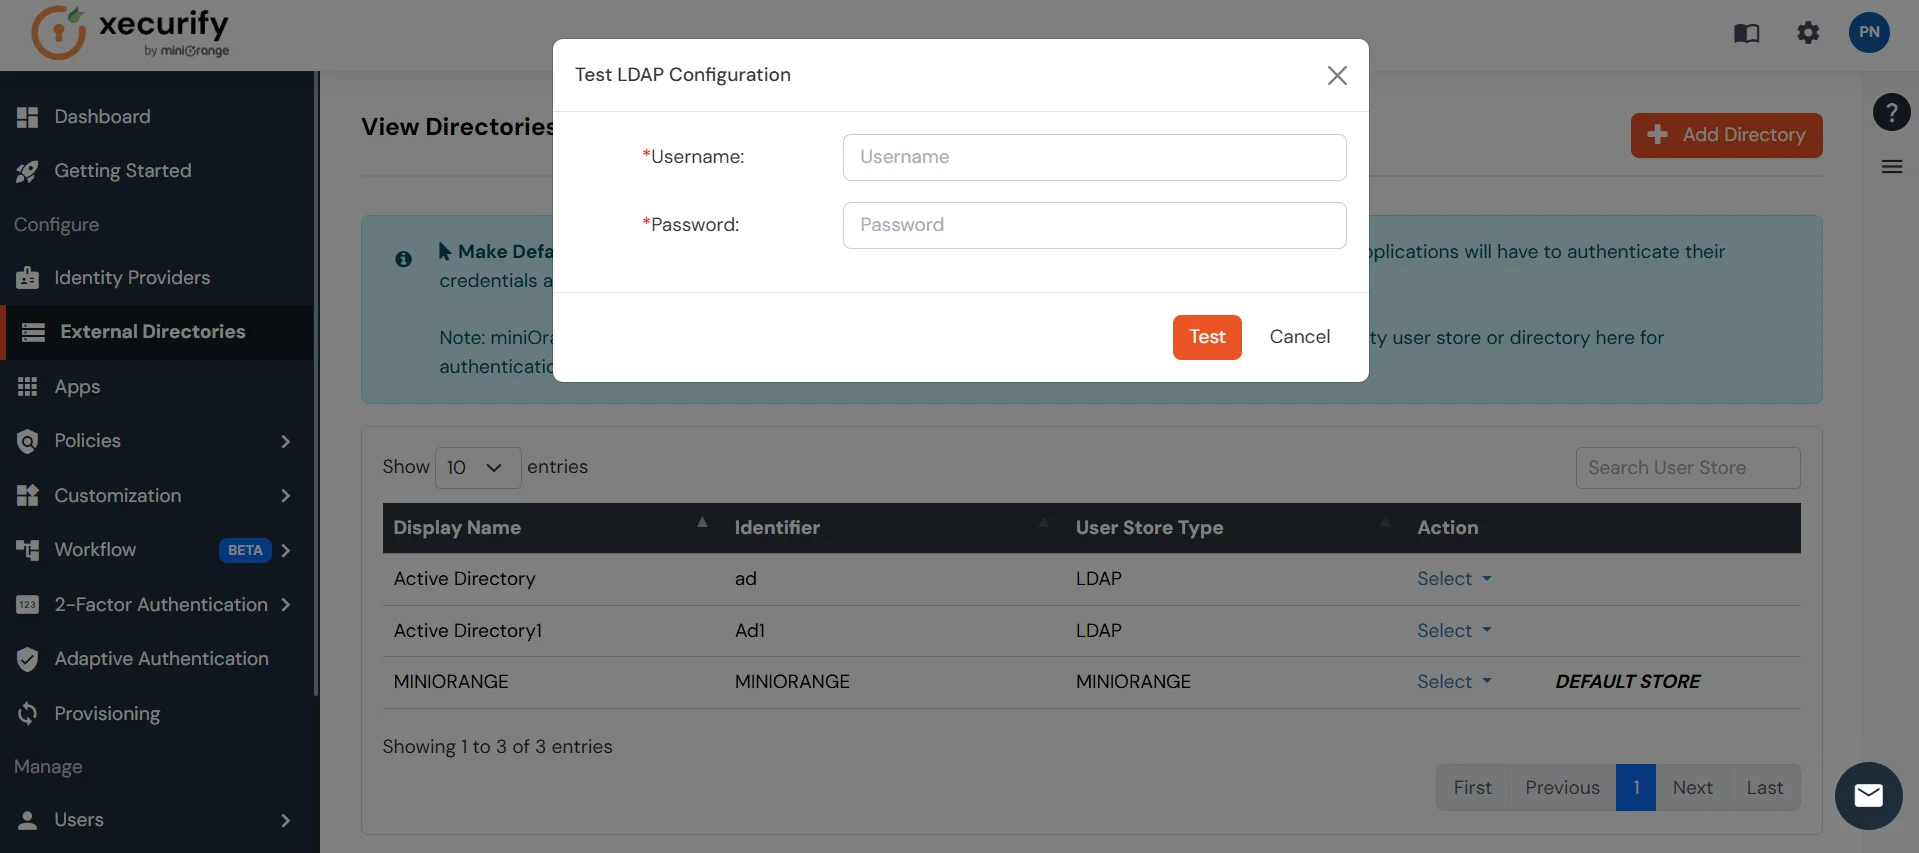
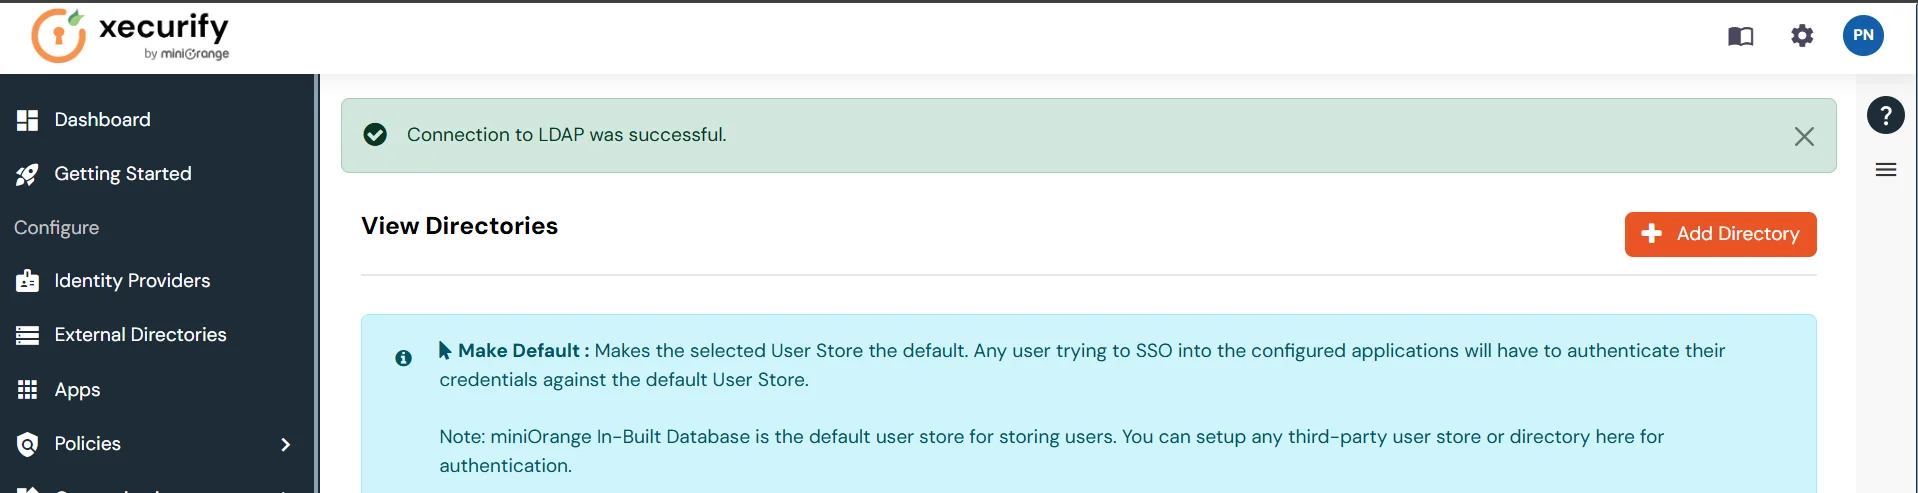
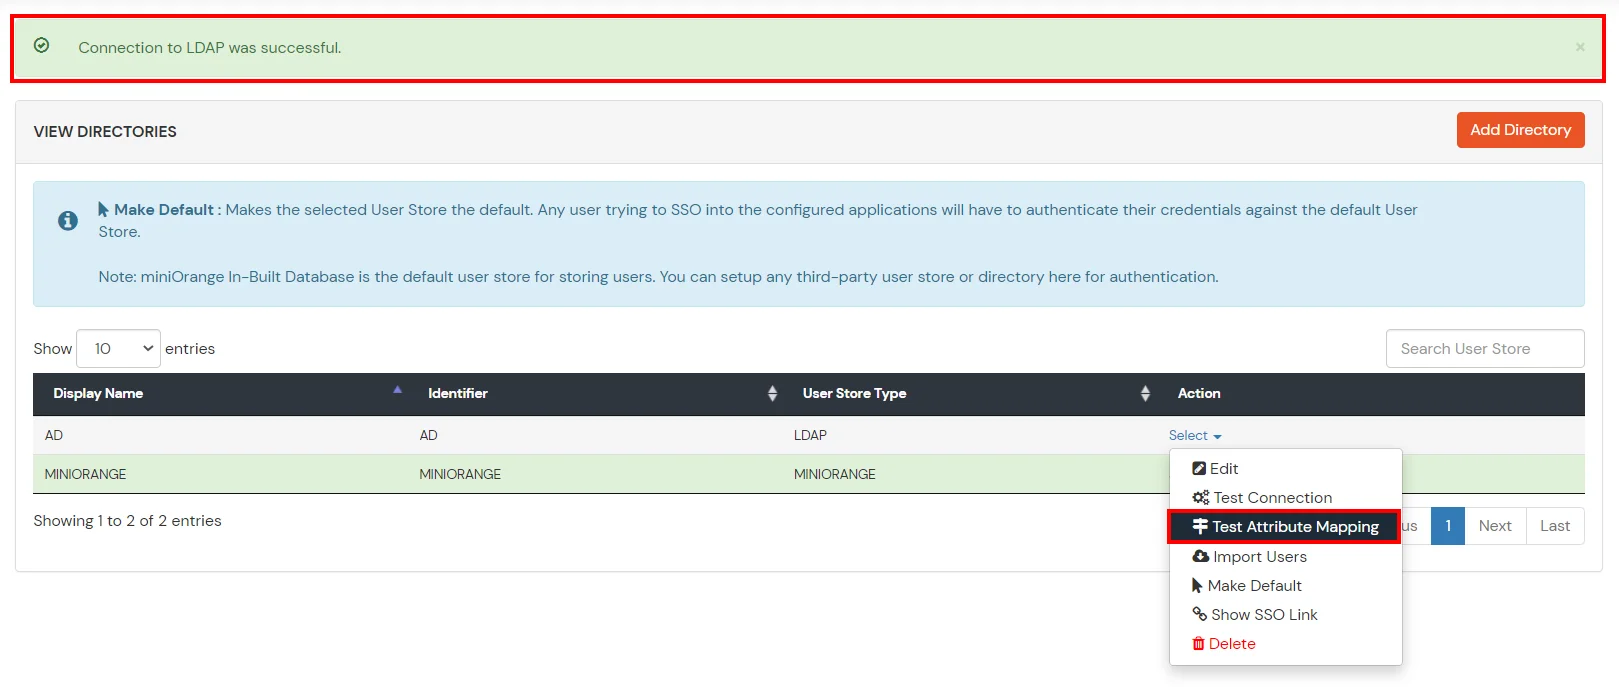
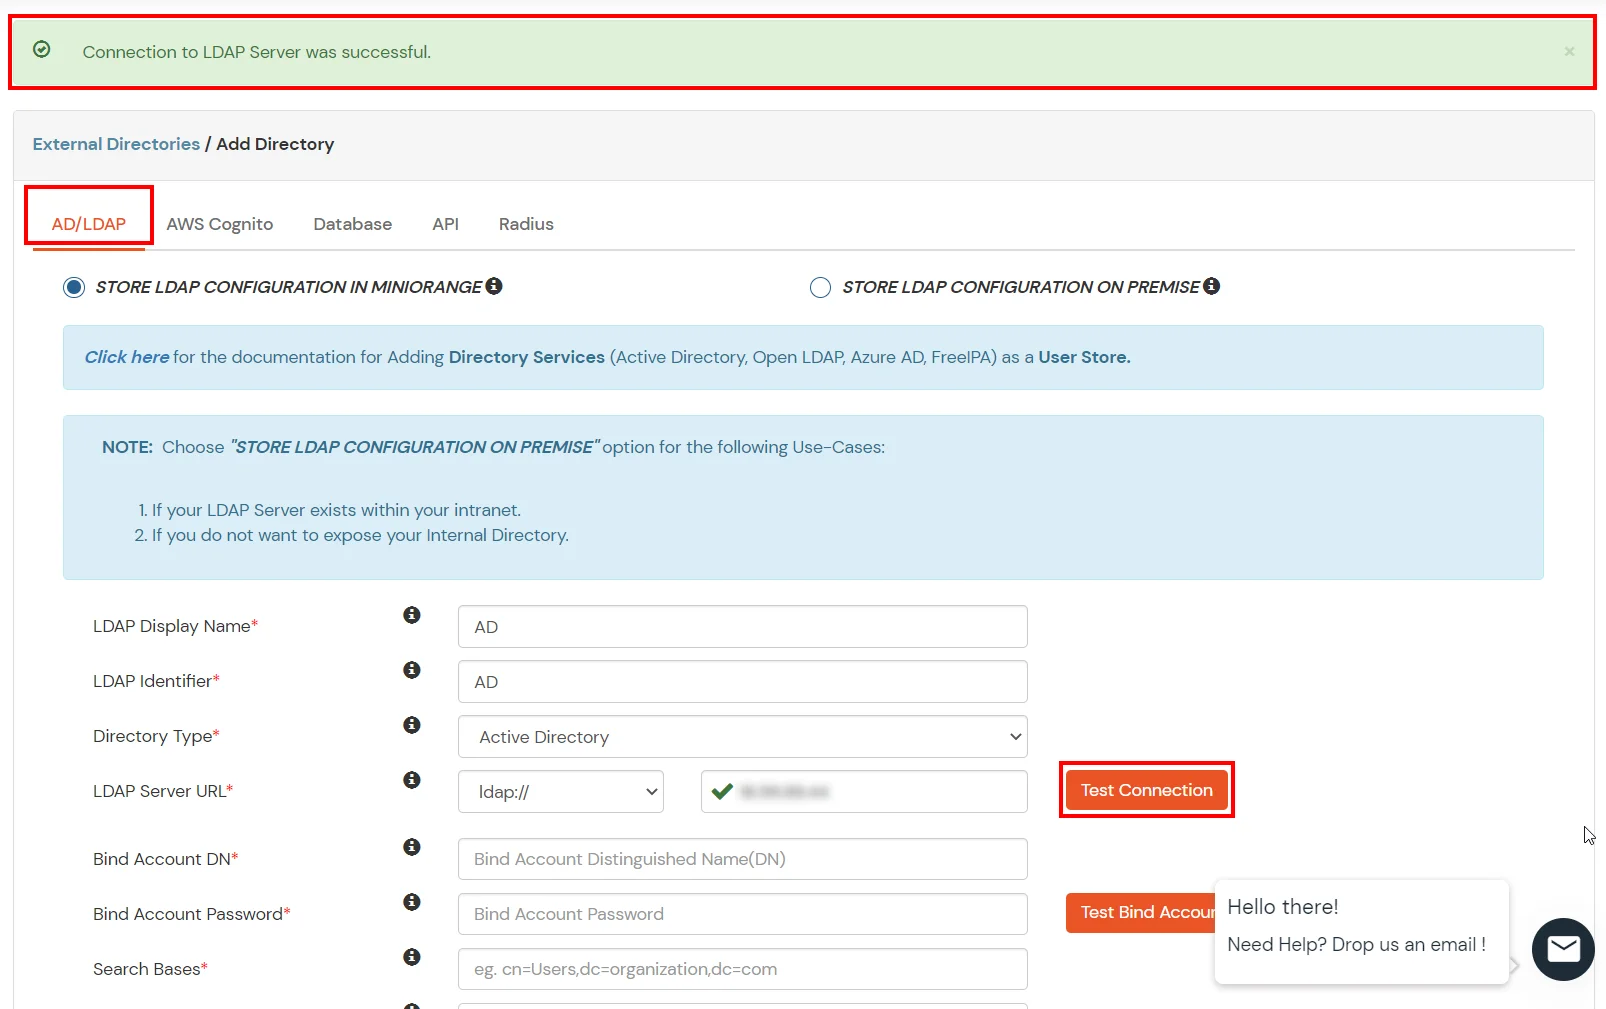
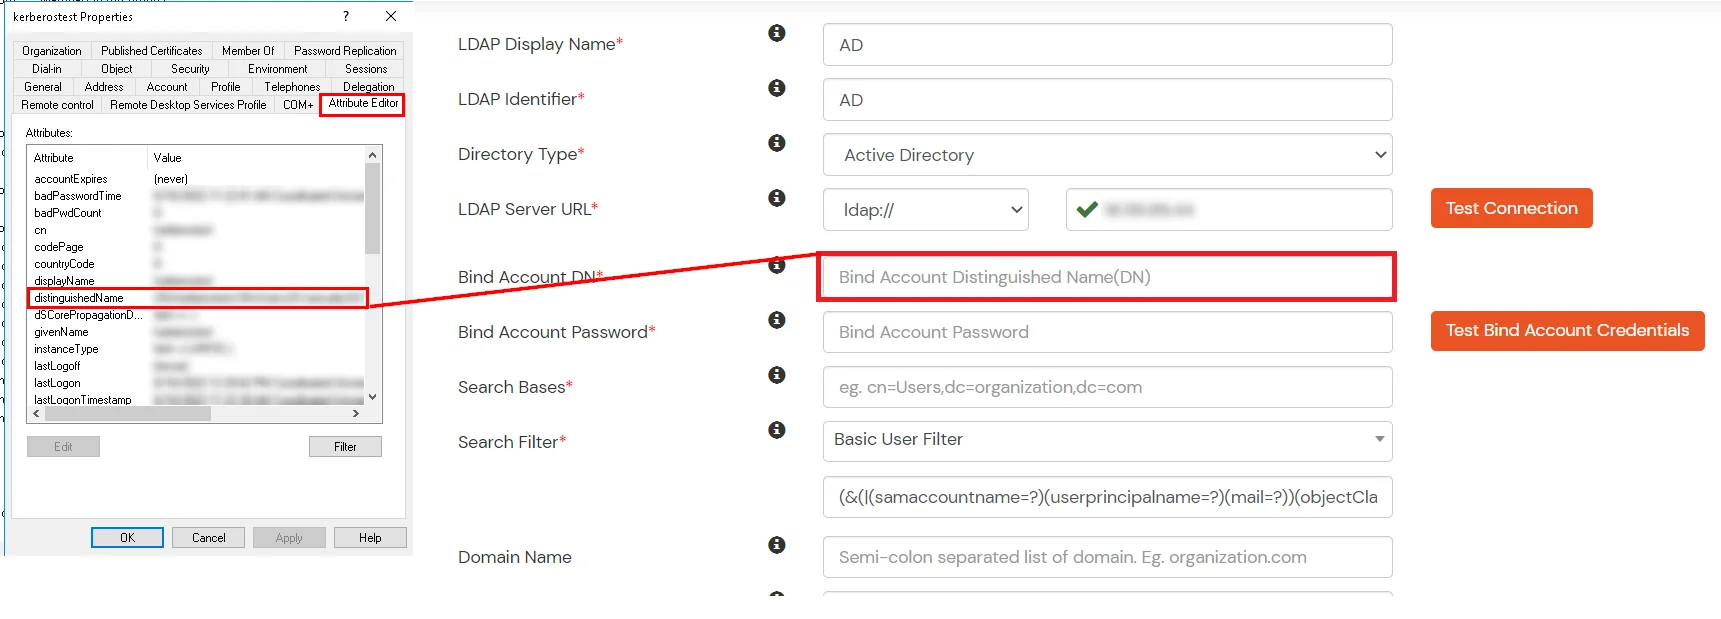
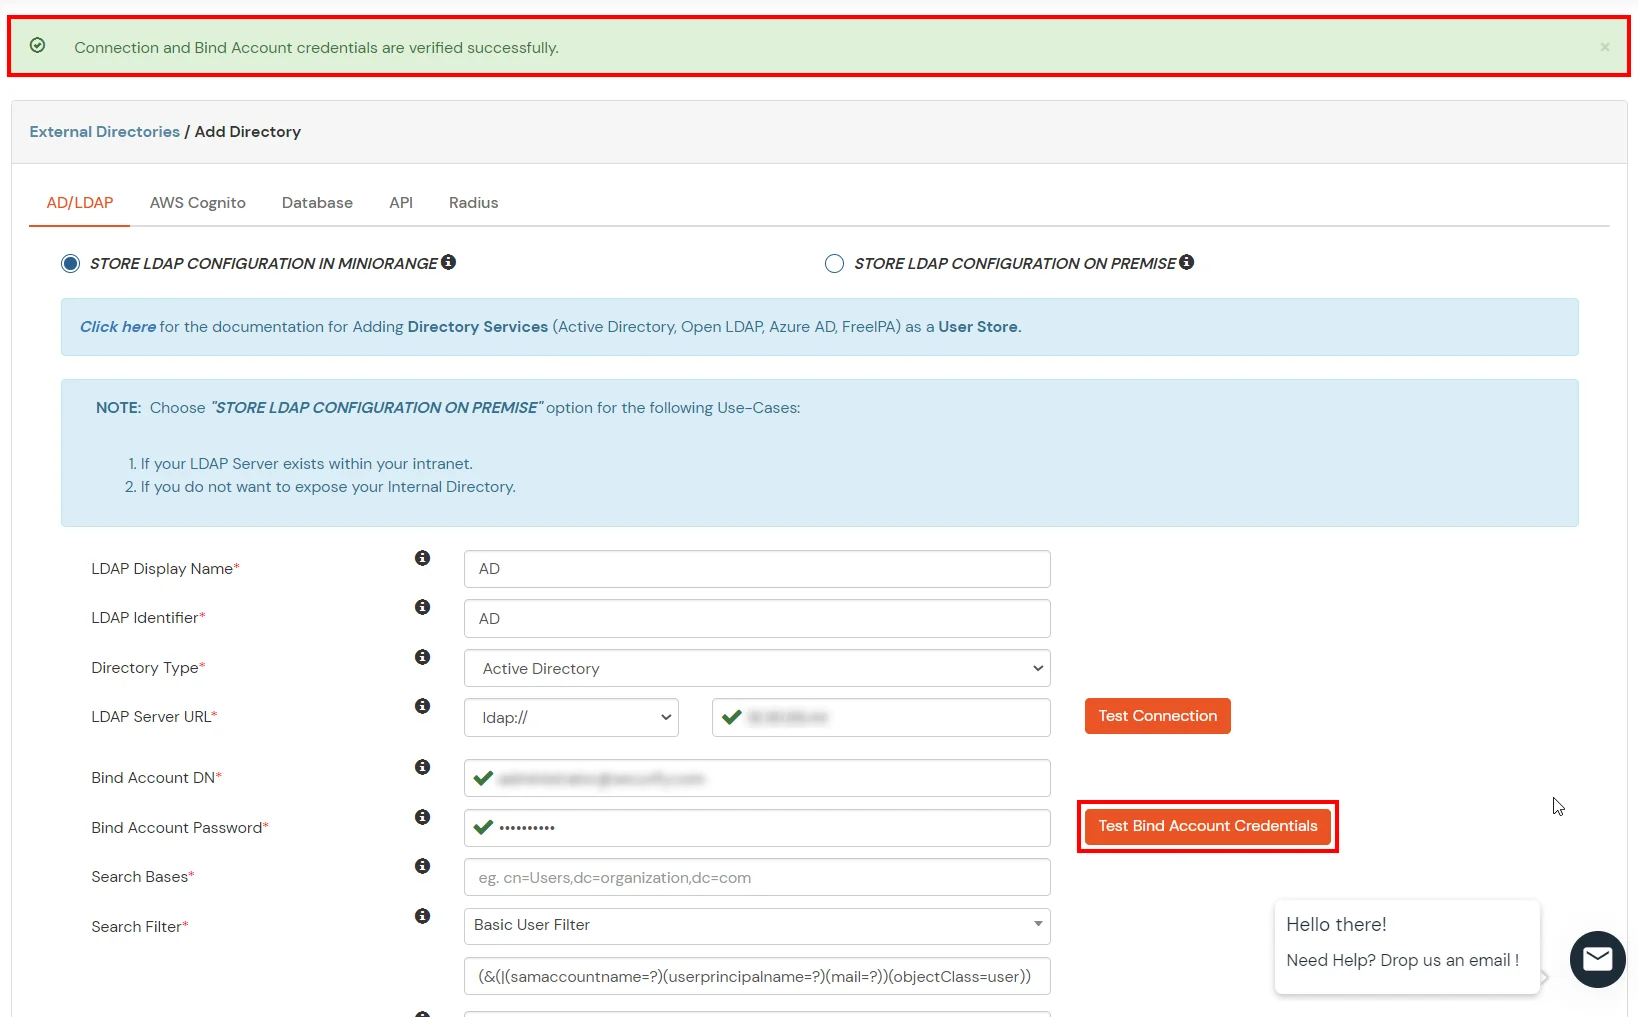
Set up AD as External Directory configuration is complete.
Note: Refer our guide to setup LDAP on windows server.
miniOrange integrates with various external user sources such as directories, identity providers, and etc.
Contact us or email us at idpsupport@xecurify.com and we'll help you setting it up in no time.
This error is usually caused by a time mismatch between the miniOrange server and your mobile device (or a mismatch between your machine time and mobile device time in the case of Offline Authentication for Windows/Linux/Mac).
Security tokens generated by Authenticator apps are "Time-based" (TOTP). They are valid only for a specific 30–60 second window. If the system time on your phone running the Authenticator or your machine(in case of offline authentication) is fast or slow by even 2 minutes, the code will be considered expired by the server/machine.
