Provisioning with Okta
Provisioning with Okta saves time when setting up new users and teams, and helps you manage access privileges through the user lifecycle. miniOrange can create, read, and update user accounts for new or existing users, remove accounts for deactivated users, and synchronize attributes across multiple user stores via Okta.
Follow the steps given below to configure provisioning with miniOrange.
Connect with External Source of Users
miniOrange provides user authentication from various external sources, which can be Directories (like ADFS, Microsoft Active Directory, OpenLDAP, AWS etc), Identity Providers (like Microsoft Entra ID, Okta, AWS), and many more. You can configure your existing directory/user store or add users in miniOrange.
Follow the step-by-step guide given below for Okta
1. Configure SCIM Client for Okta in miniOrange
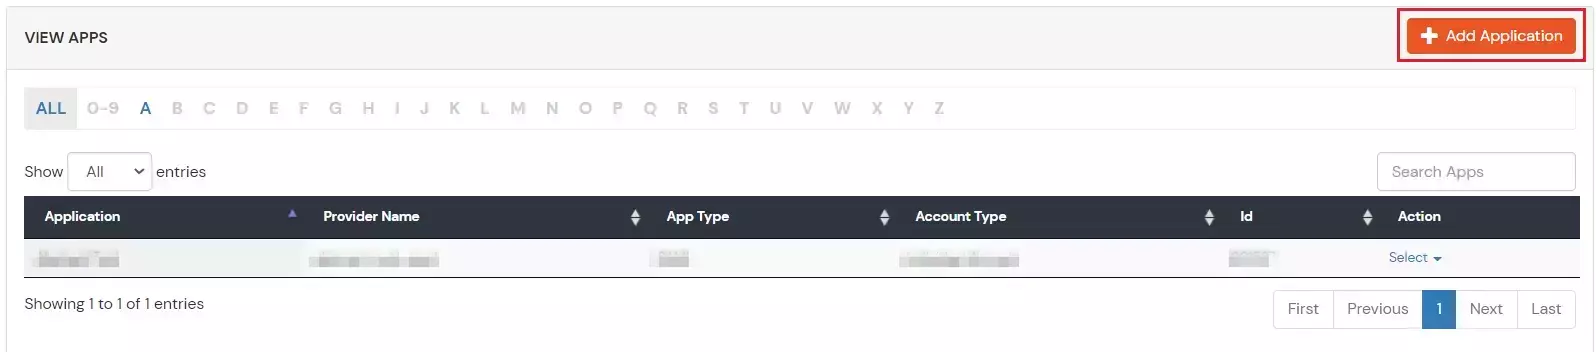
- Login to miniOrange dashboard.
- Go to Apps section
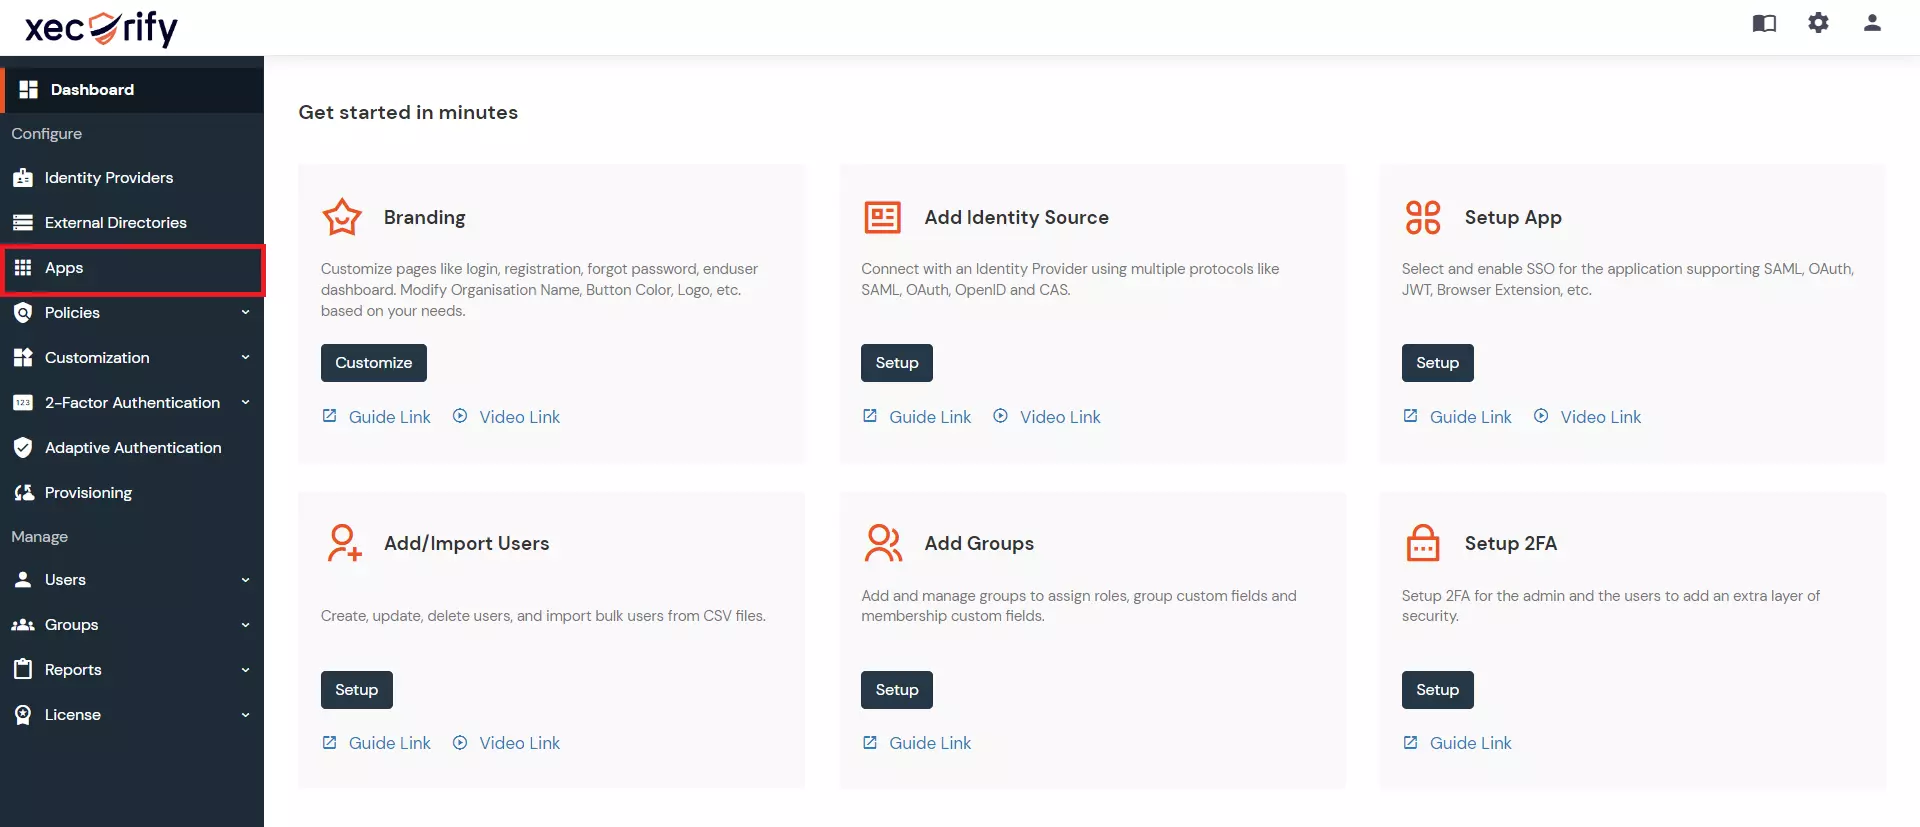
- Go to Apps > Add Application button.
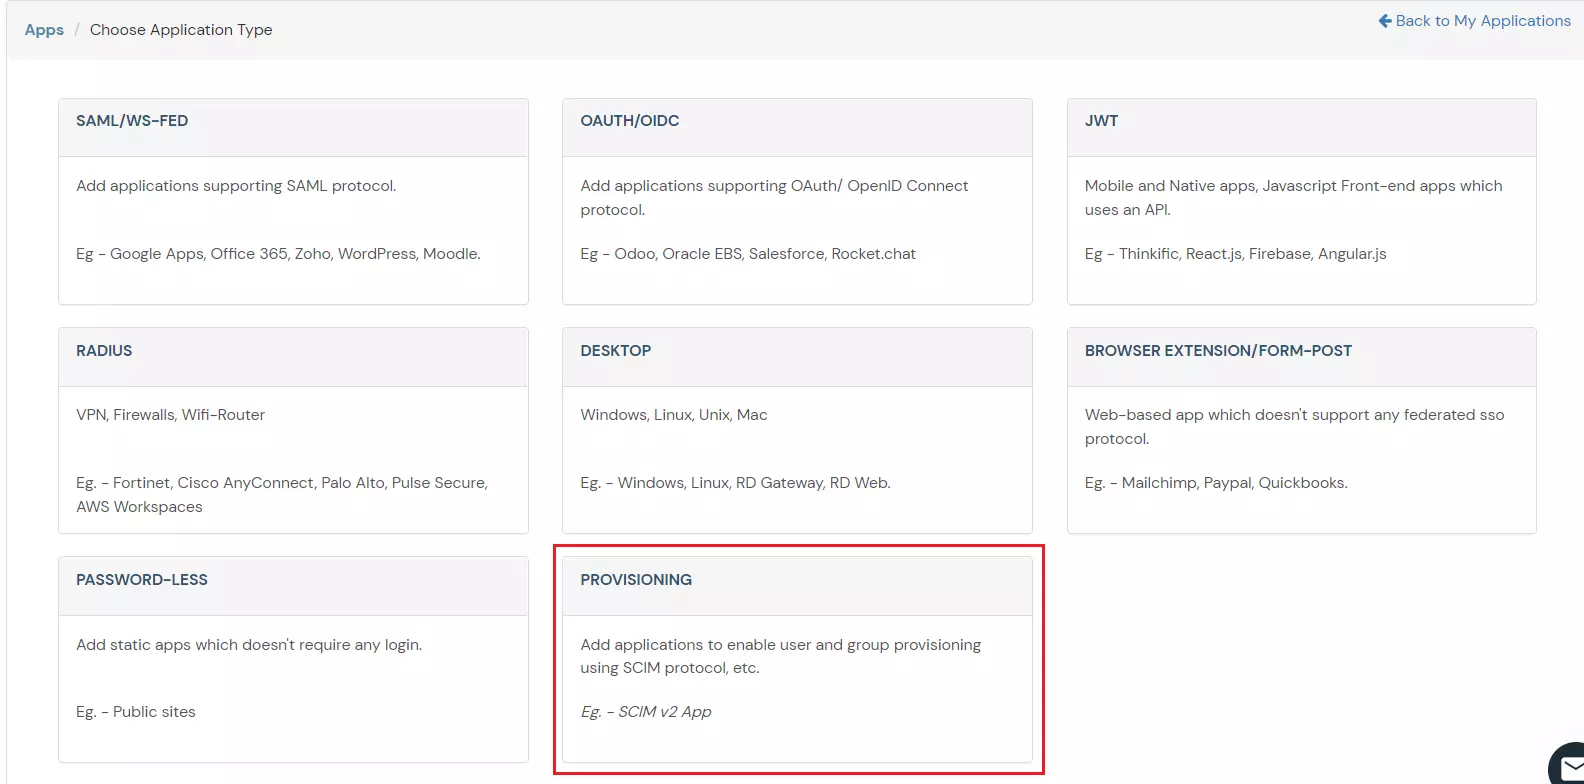
- Select Provisioning >> SCIM Client (source).
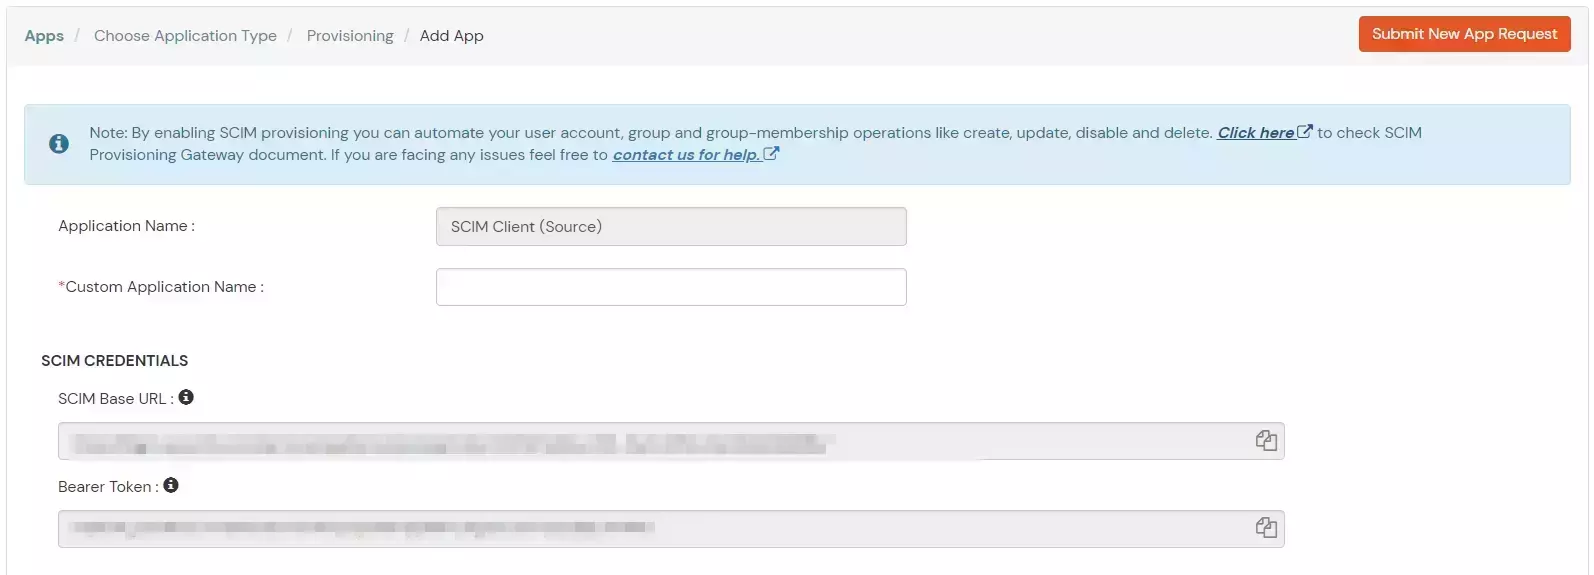
- Add the Custom Application Name
- Copy the Scim Base URL and Bearer Token and save it for further configuration.
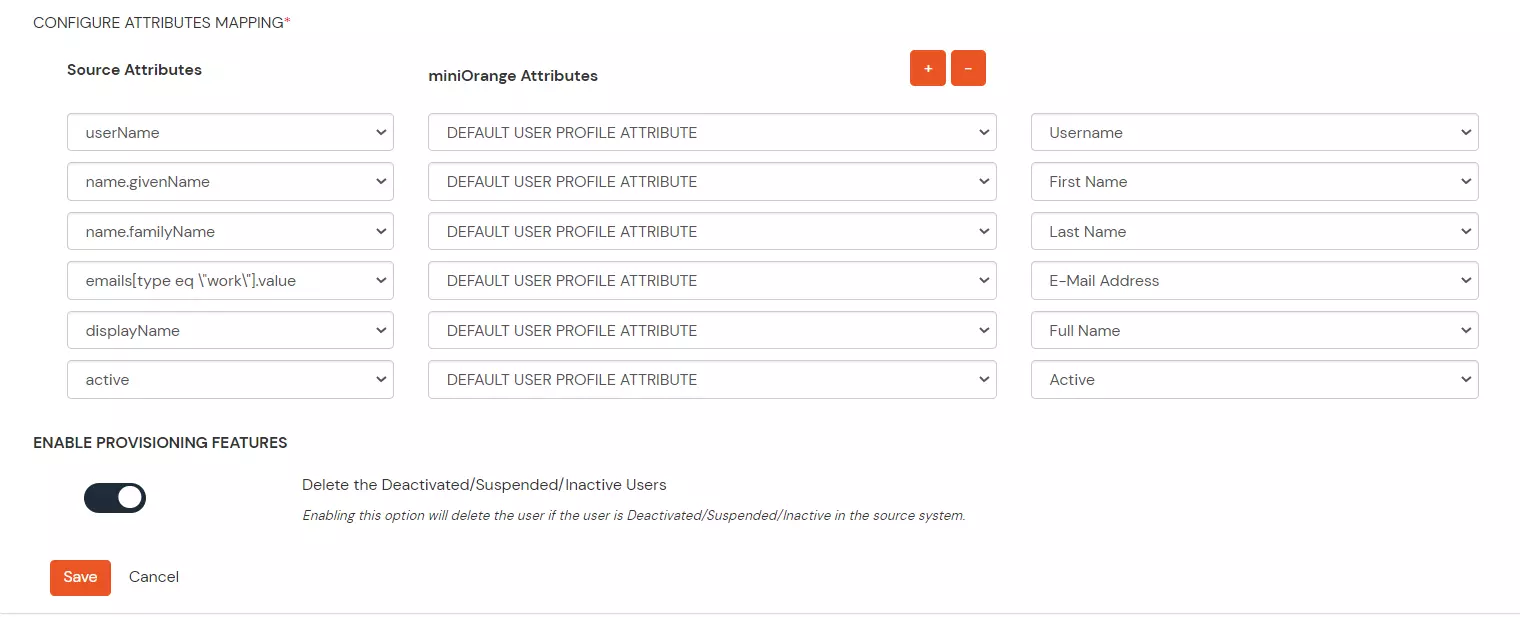
- Configure the attributes mappings and toggle on/off Enable Provisioning Features based on your requirements.
- SCIM base URL and Bearer Token can also be retrieved later by editing the app.
- If the provisioning feature “Delete the Deactivated users” is enabled then the unassigned/deleted users in source will be deprovisioned otherwise they will be disabled.
- Save the app.
2. Configure provisioning in Okta
Create an SSO integration that supports SCIM
- Configure SAML SSO with the help of the following guide - Okta SSO
Add SCIM provisioning
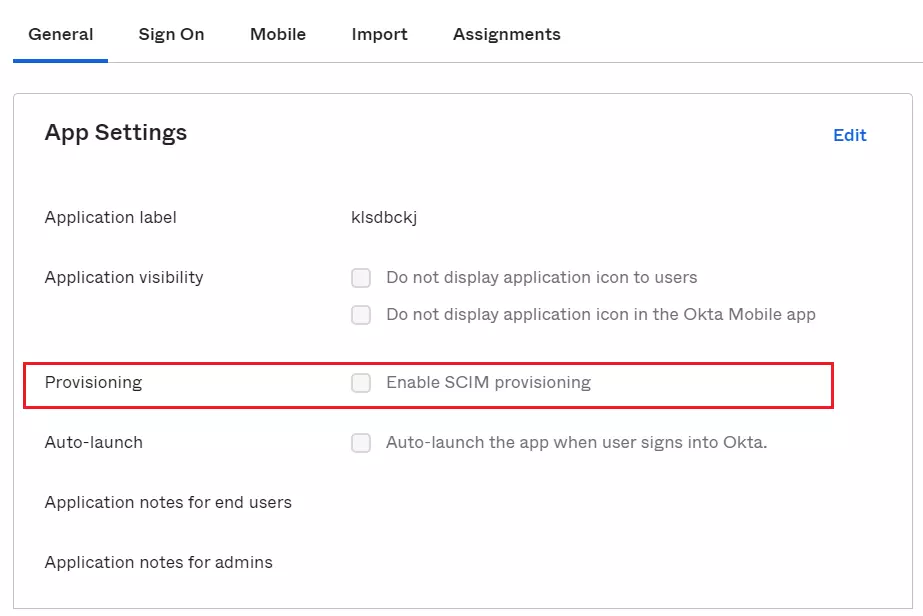
- After your integration is created, click the General tab.
- Click Edit.
- In the Provisioning section, select Enable SCIM Provisioning and click Save.
Choose provisioning options
- From the integration's settings page, choose the Provisioning tab. The SCIM connection settings appear under Settings > Integration.
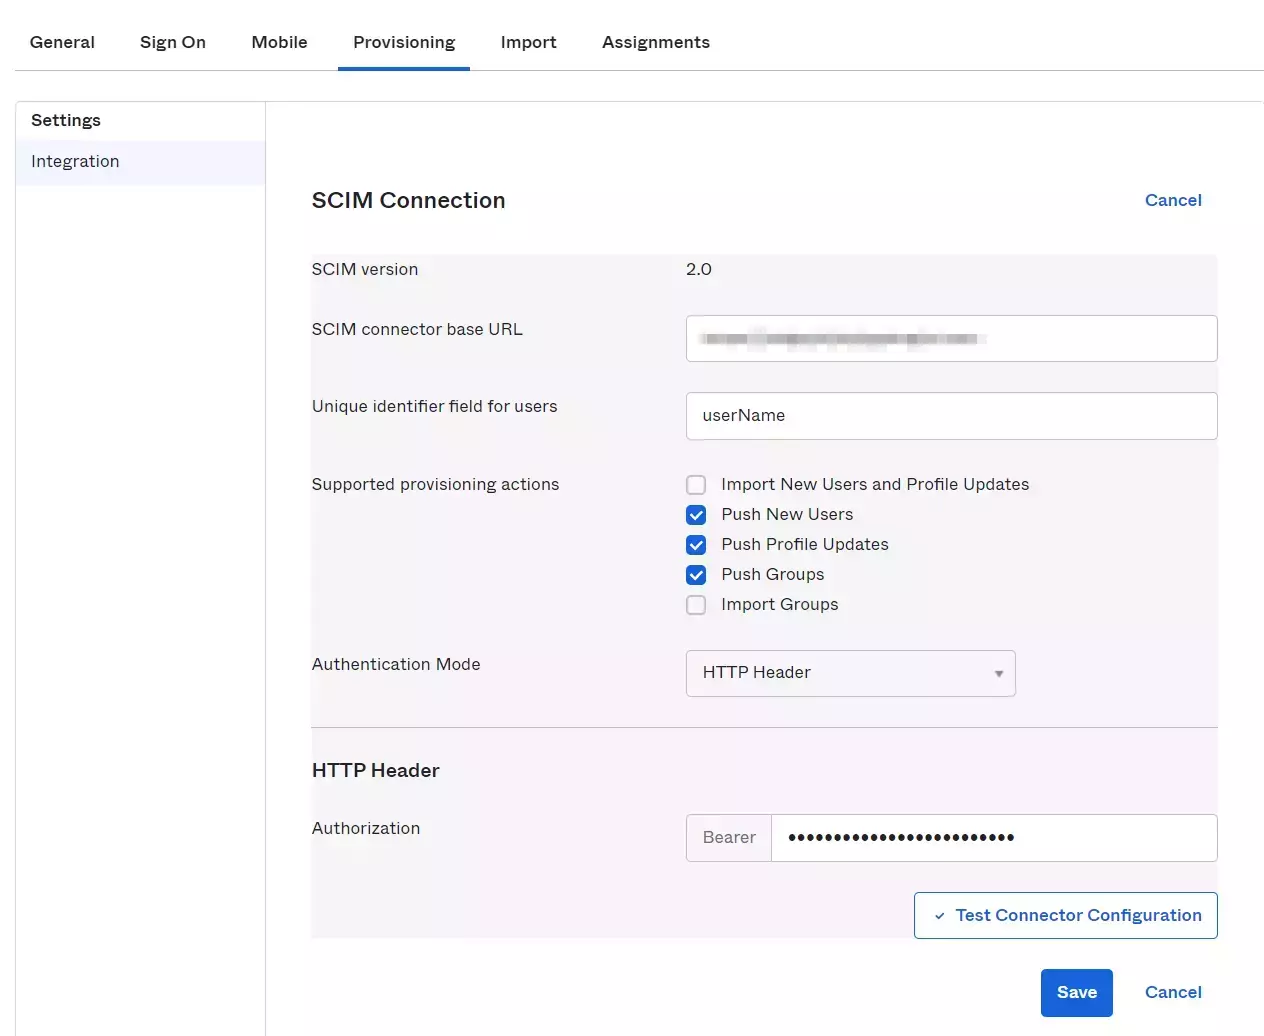
- Click Edit.
- Specify the SCIM connector base URL and the field name of the unique identifier for your users on your SCIM server.
- Under Supported provisioning actions, choose the provisioning actions supported by your SCIM server.
- Import New Users and Profile Updates: This option populates the Settings > To Okta page. You can specify the details of how Okta imports new users and user profile updates.
- Push New Users: This option populates the Settings > To App page, and contains settings for all the user information that flows from Okta into your SCIM app.
- Push Profile Updates: This option populates the Settings > To App page, and contains settings for all profile information that flows from Okta into your SCIM app.
- Push Groups: This option populates the Settings > To App page, and contains settings for all group information that flows from Okta into your SCIM app.
- Use the Authentication Mode dropdown box to choose which mode you want Okta to use to connect to your SCIM app. For miniOrange, select HTTP Header.
- Basic Auth: To authenticate using Basic Auth mode, you need to provide the username and password for the account that handles the create, update, and deprovisioning actions on your SCIM server.
- HTTP Header: To authenticate using HTTP Header, you need to provide a bearer token that will provide authorization against your SCIM app.
- OAuth2: To authenticate using OAuth 2.0, you need to provide the access token and authorization endpoints for your SCIM server, along with a client ID and a client secret.
- Click Save
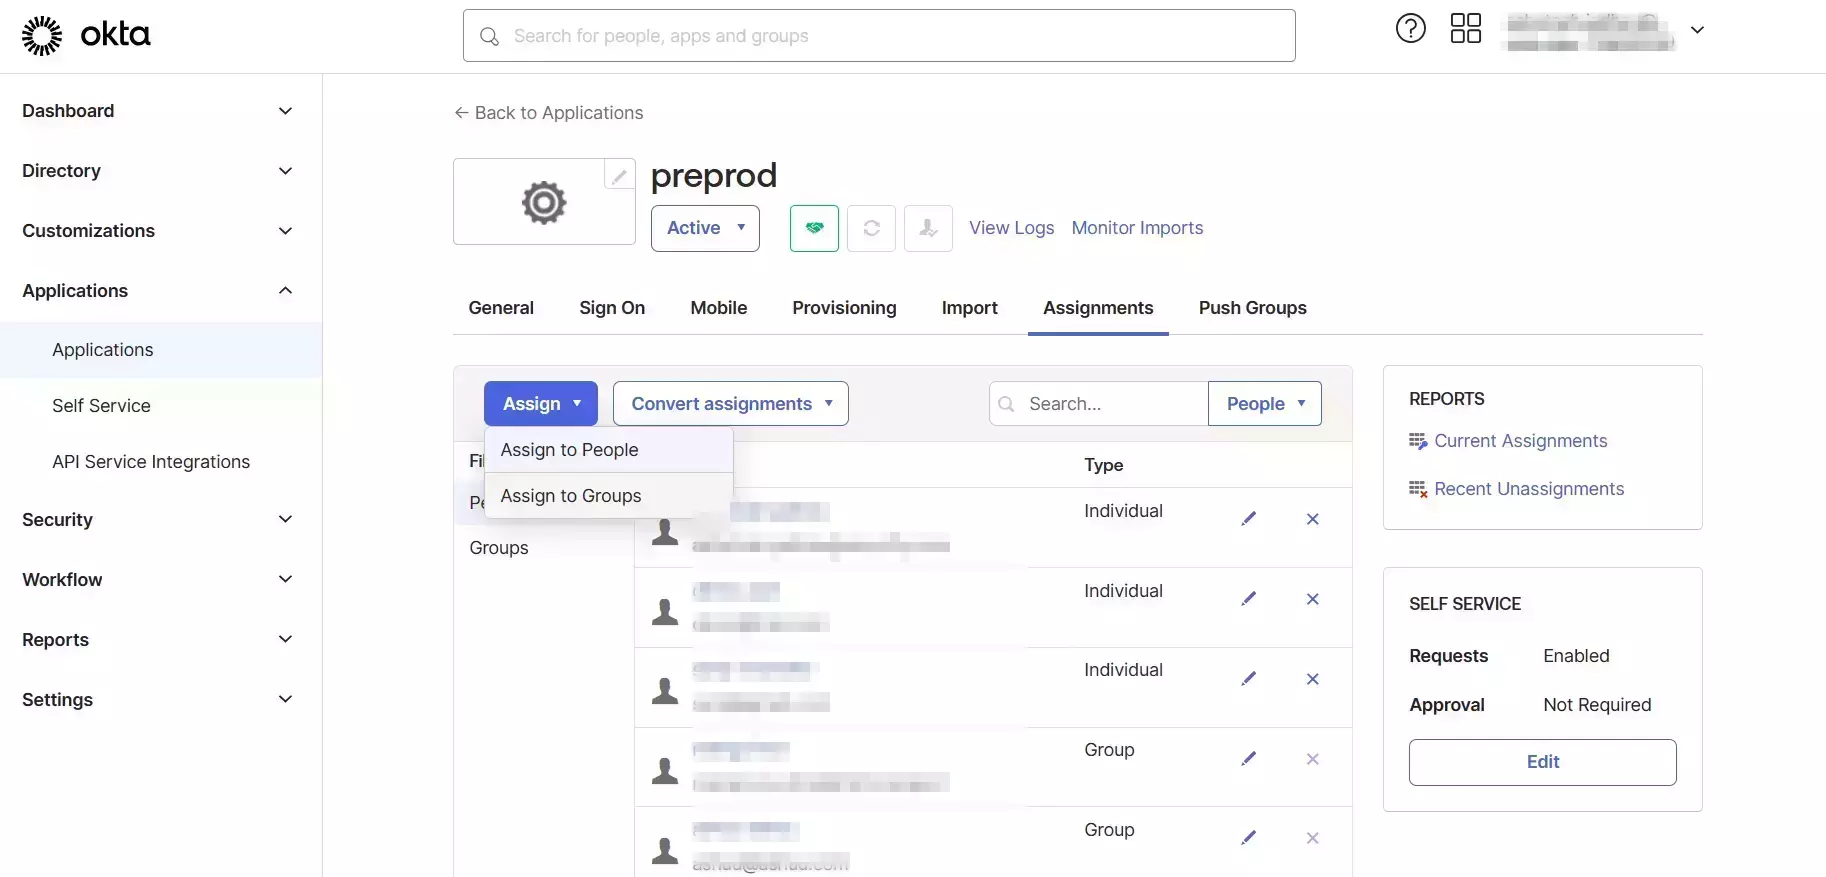
3. Assign users/group to the application in Okta
- Open Assignments Tab and select Assign.
- Select Assign to group/people and assign the users/groups to the application.
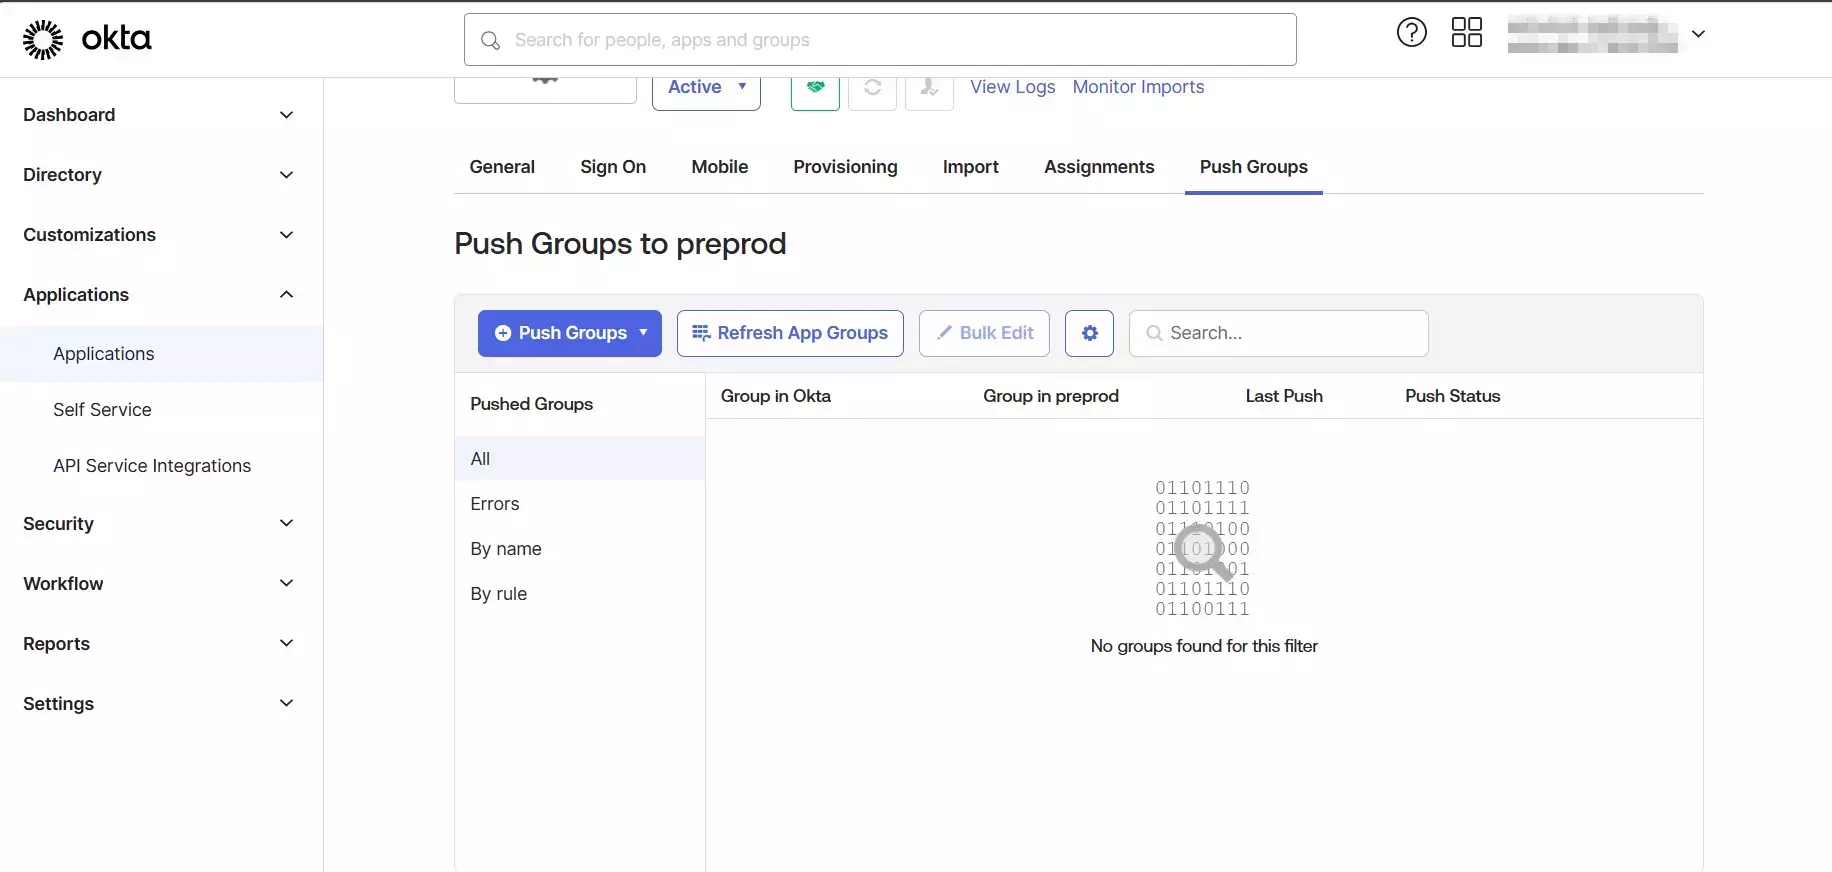
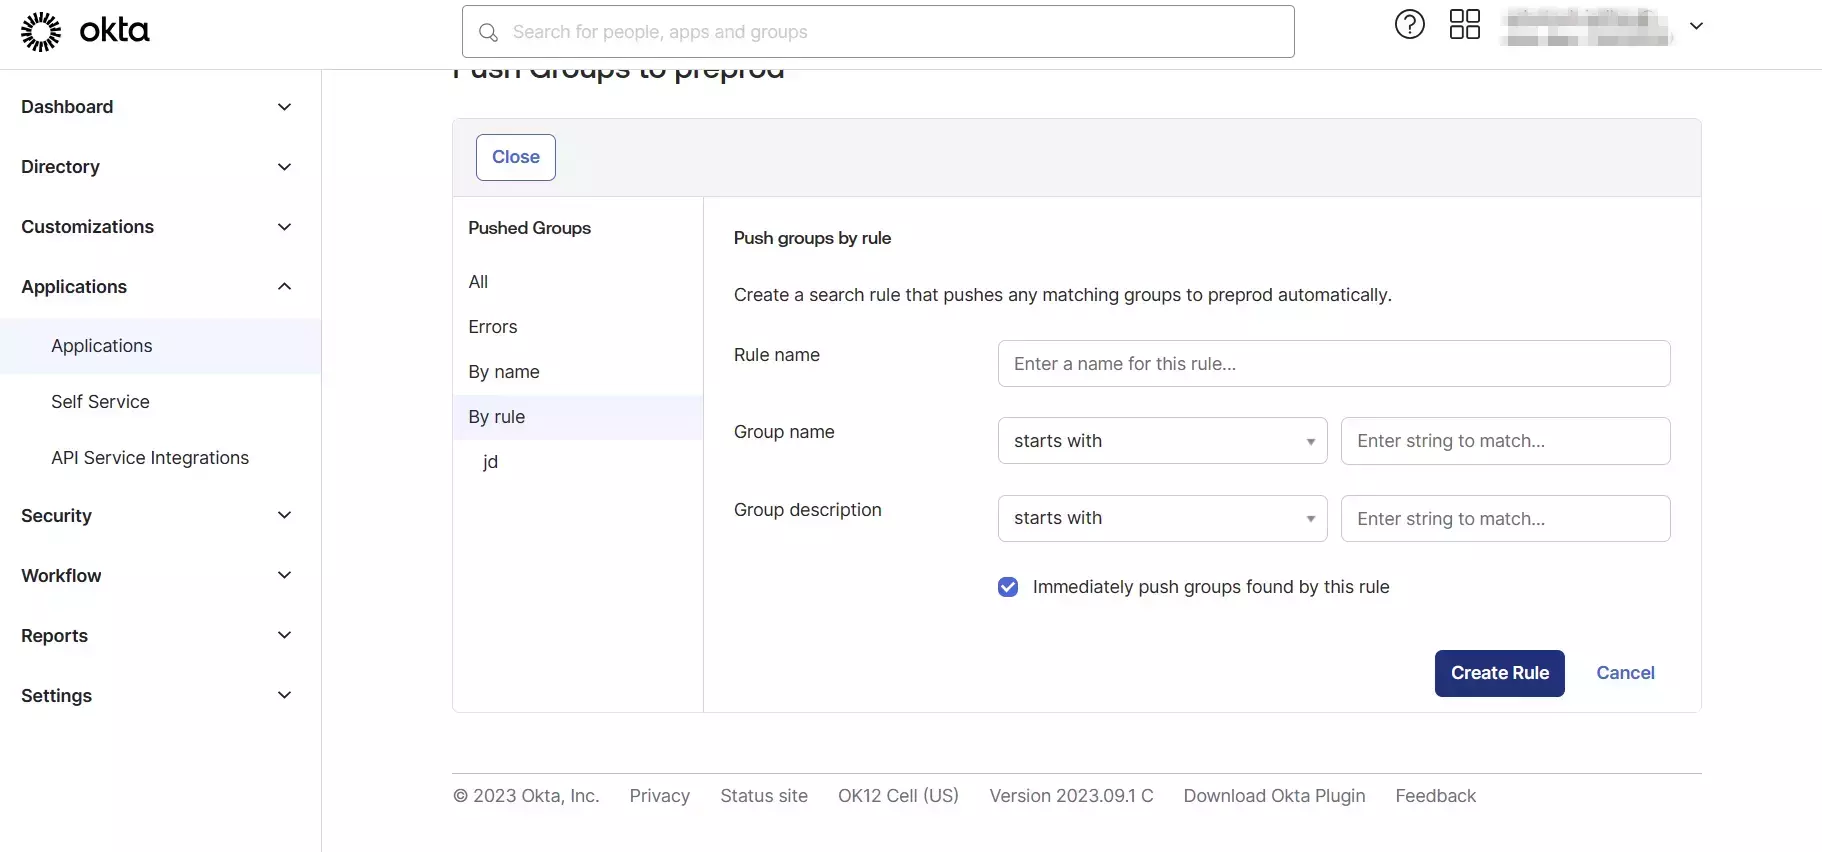
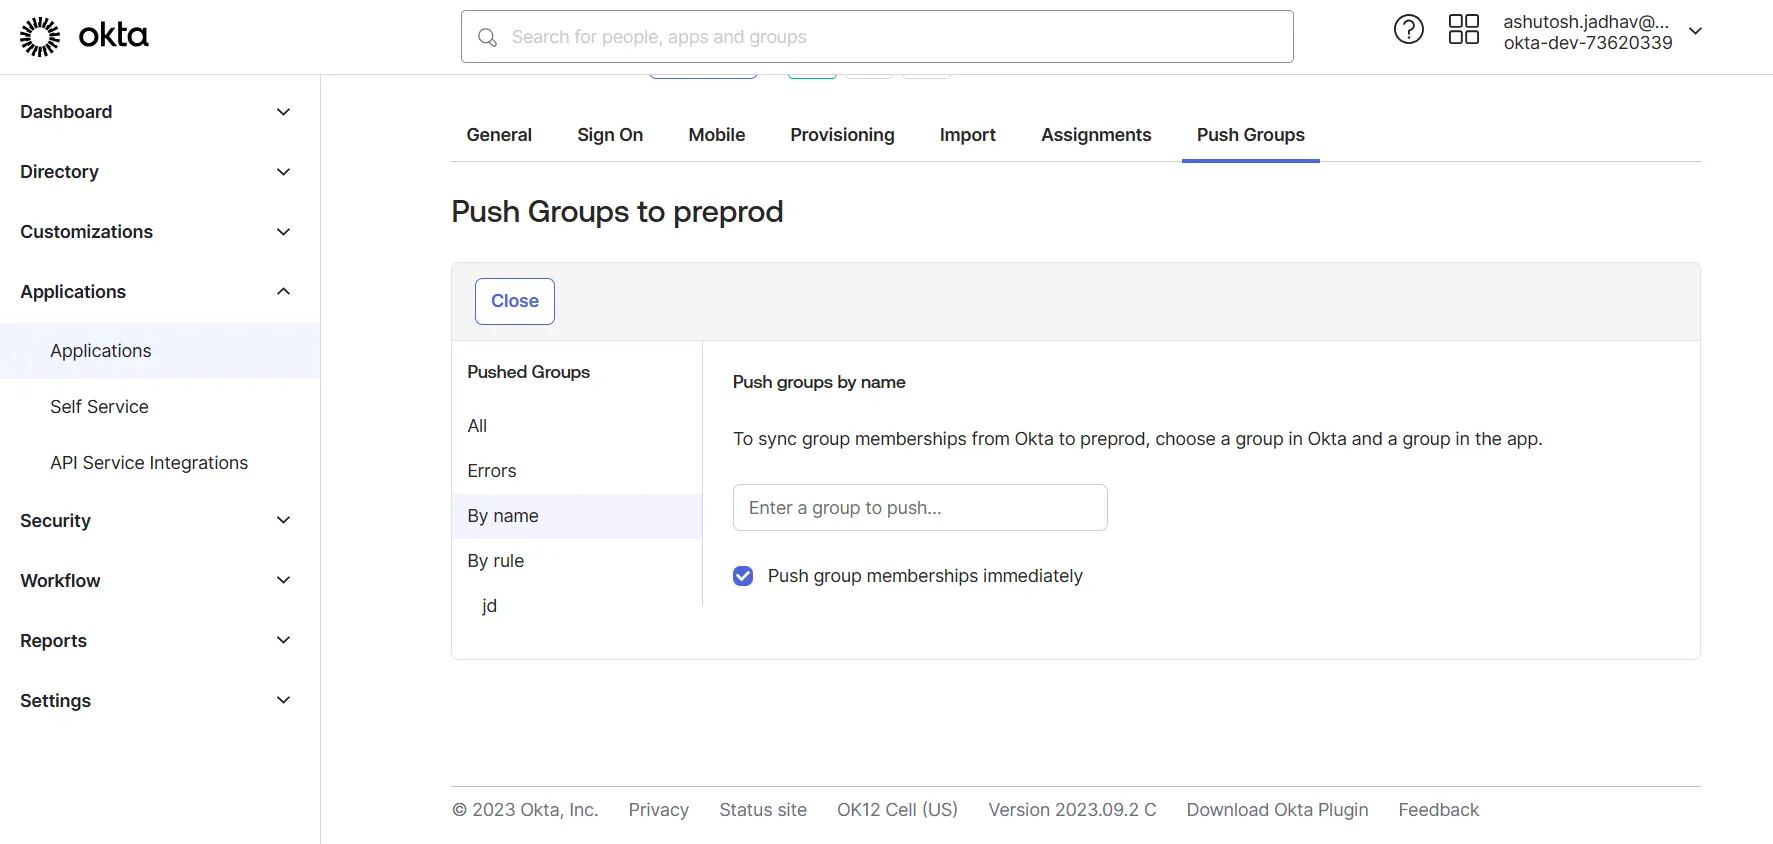
4. Provision Group membership
View Provisioning Reports
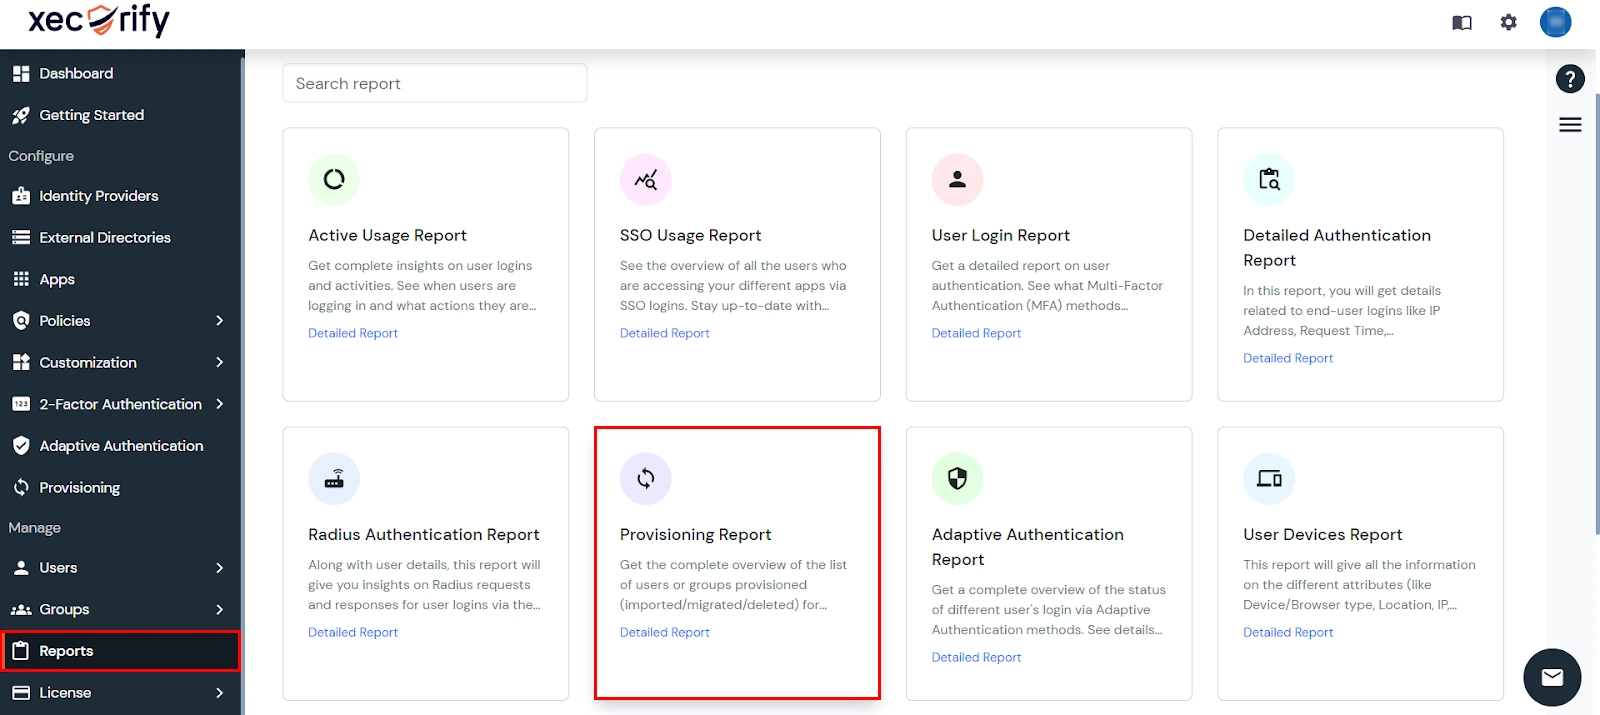
How to access Provisioning Reports?
- Navigate to Reports in the left-hand navigation pane, search for Provisioning, and select Provisioning Report.
- Filter the reports by specifying Enduser Identifier and Application Name criteria. Additionally, choose the desired timespan for the reports. Once done, click on the Search.
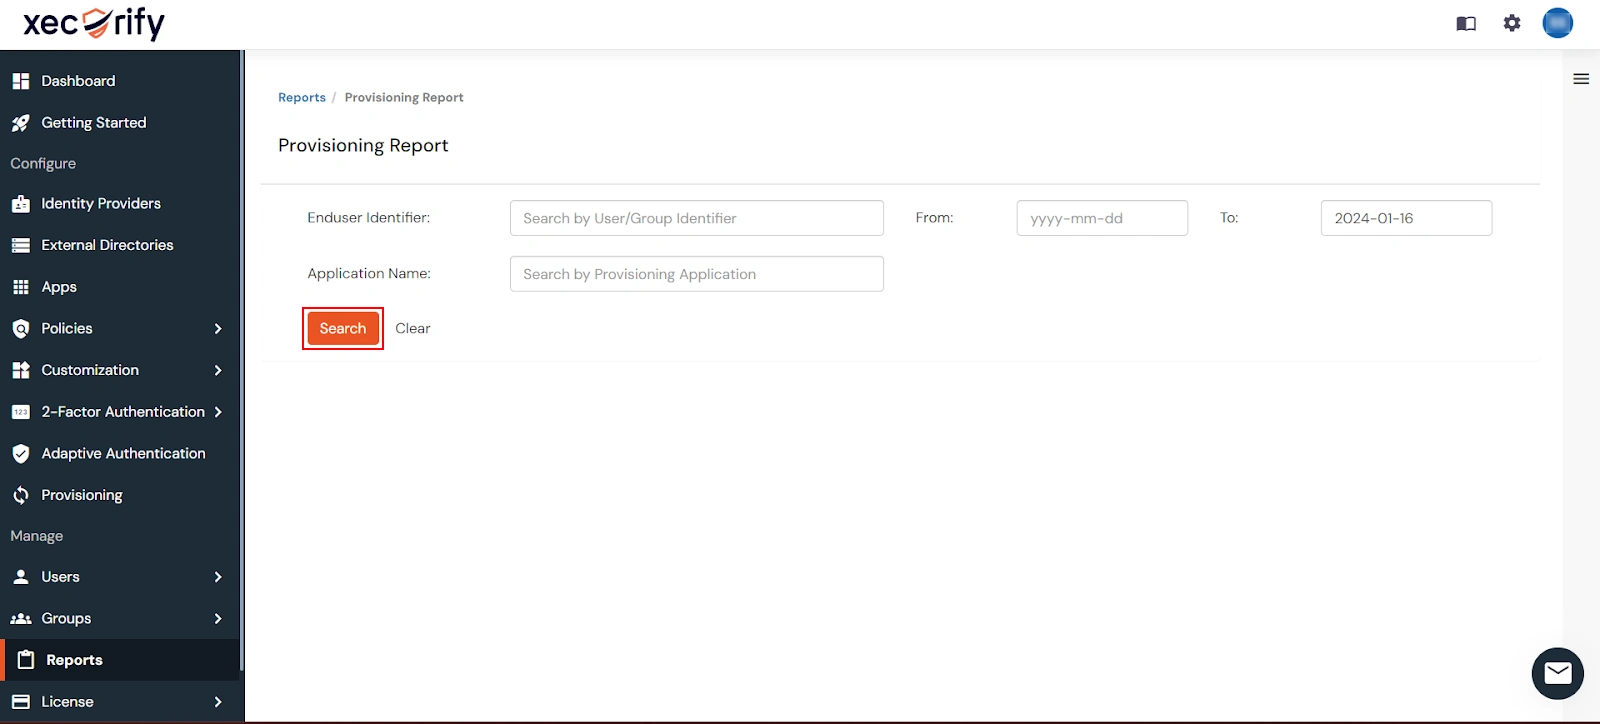
- Alternatively, you can directly click on Search to retrieve all provisioning reports based on time without applying any specific filters.
External References