BigCommerce Social Login allows customers to create an account or log in to your BigCommerce store using their existing social media credentials, such as Apple, Facebook, Google, or Twitter. This makes the registration & login process quicker & more convenient for customers, as they do not need to create a new account & remember additional login information.
With BigCommerce Social Login SSO features, you can:
Enable your users to automatically log into BigCommerce using any existing social media credentials.
Provide extra layer of security on your BigCommerce store with 2-Factor Authentication (OTP over SMS/Email).
Speed up customer checkout with pre-filled social media profiles, reducing friction & cart abandonment.
miniOrange offers free help through a consultation call with our System Engineers to Install or Setup BigCommerce SSO solution in your environment with 30-day free trial.
For this, you need to just send us an email at idpsupport@xecurify.com to book a slot and we'll help you in no time.
miniOrange provides user authentication from various external sources, which can be Directories (like ADFS, Microsoft Active Directory, OpenLDAP, AWS etc), Identity Providers (like Microsoft Entra ID, Okta, AWS), and many more. You can configure your existing directory/user store or add users in miniOrange.
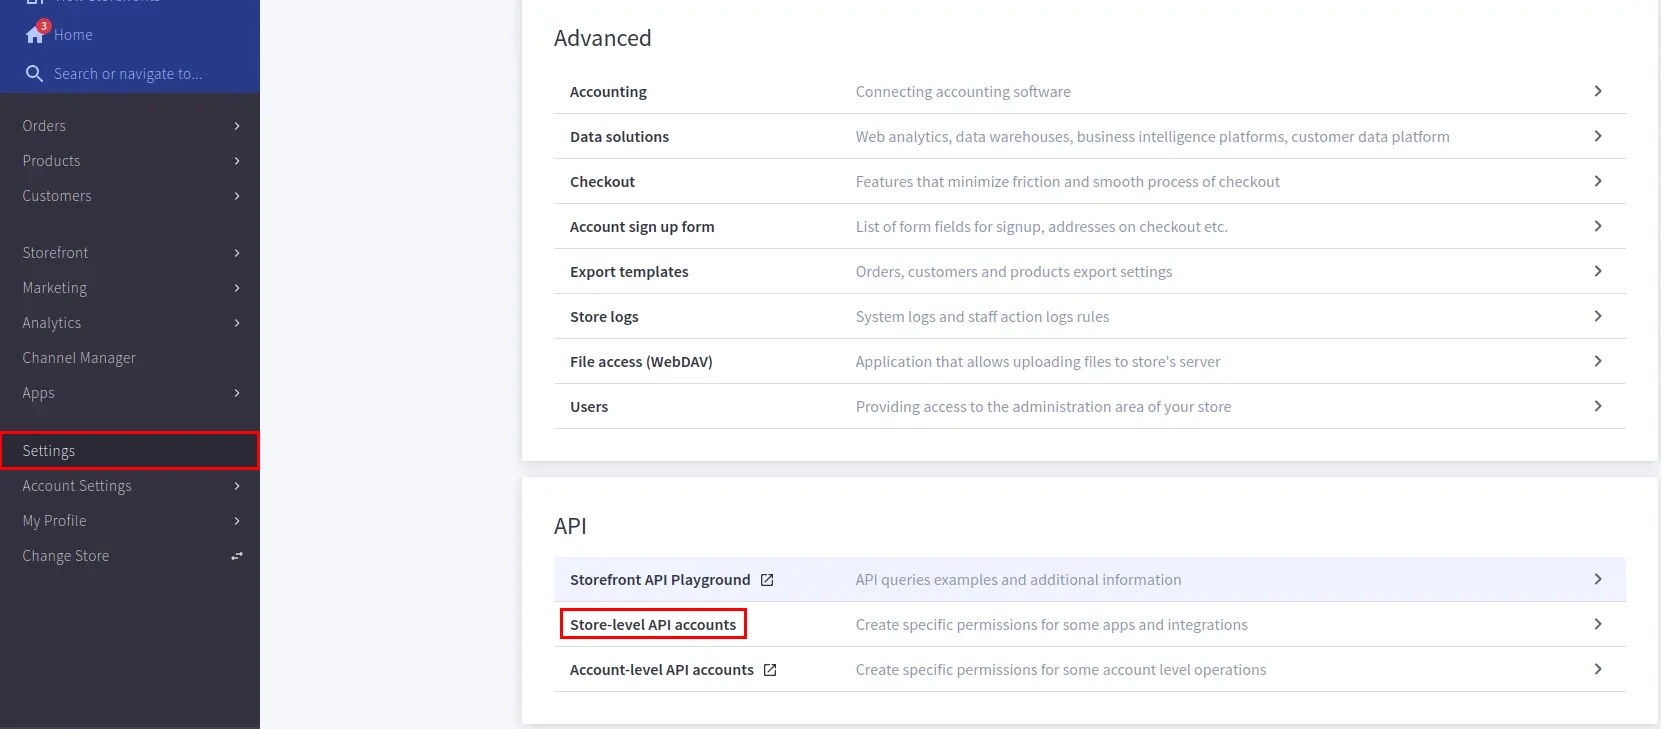
Prerequisites
Please make sure your organisation branding is already set under Customization >> Login and Registration Branding in the left menu of the dashboard.
Follow the Step-by-Step Guide given below for BigCommerce Single Sign-On (SSO)
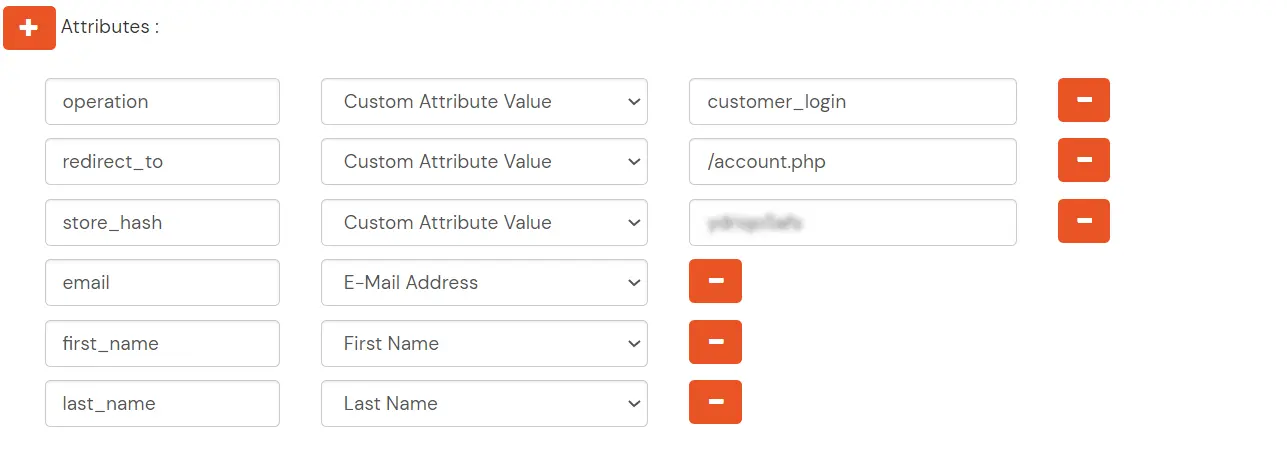
Endpoint where you wish to redirect the user to after sso. [Homepage or account page e.g. /account.php]
operation
customer_login
Click on Save.
Now, You can access BigCommerce Account Using IDP credentials through the Single-sign-on URL as shown in image above.
If you are using an external IDP:
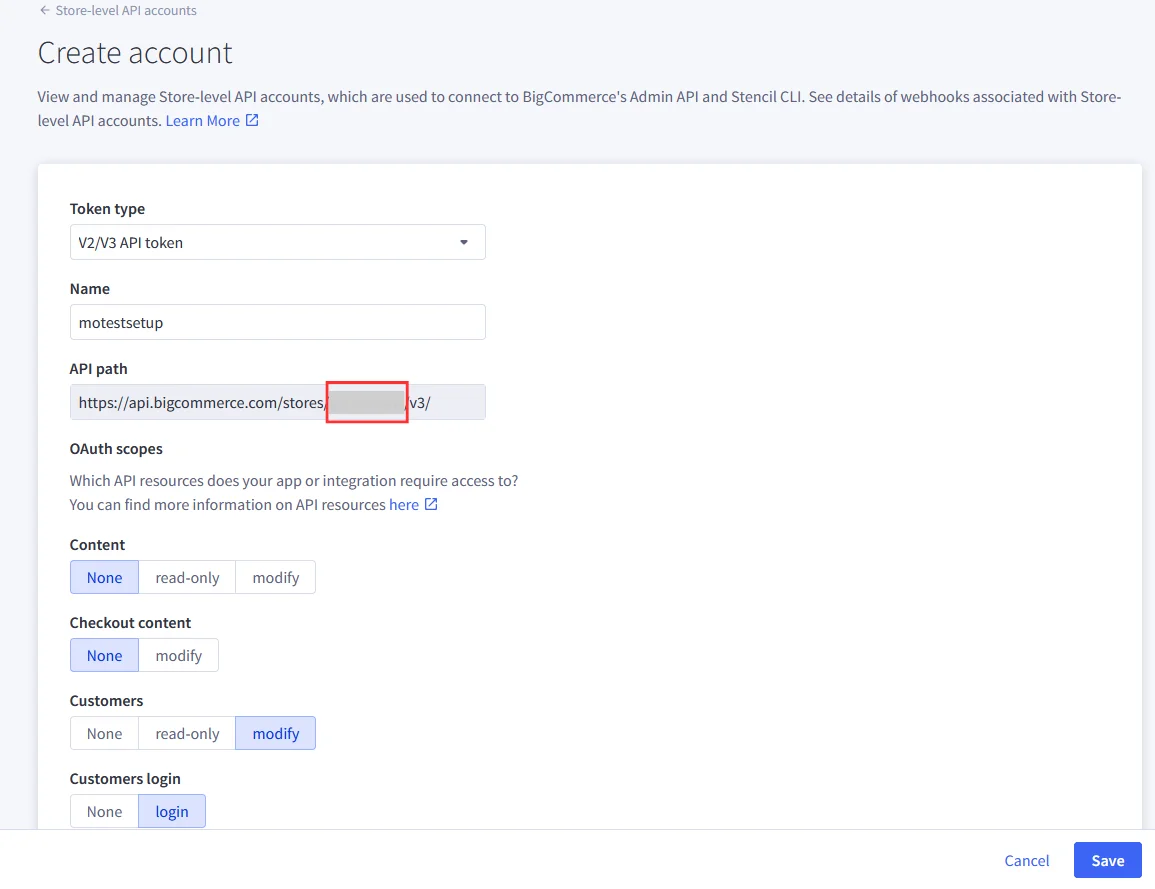
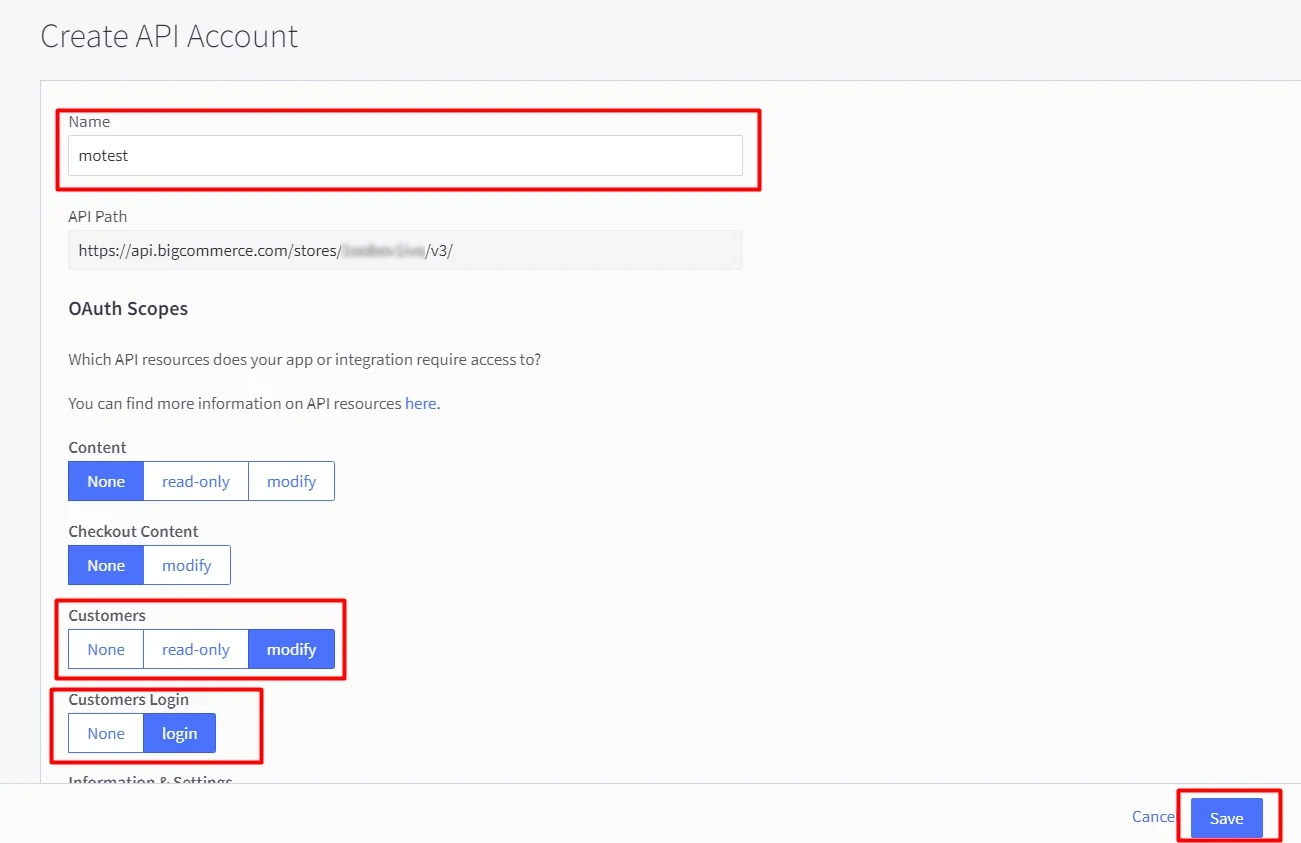
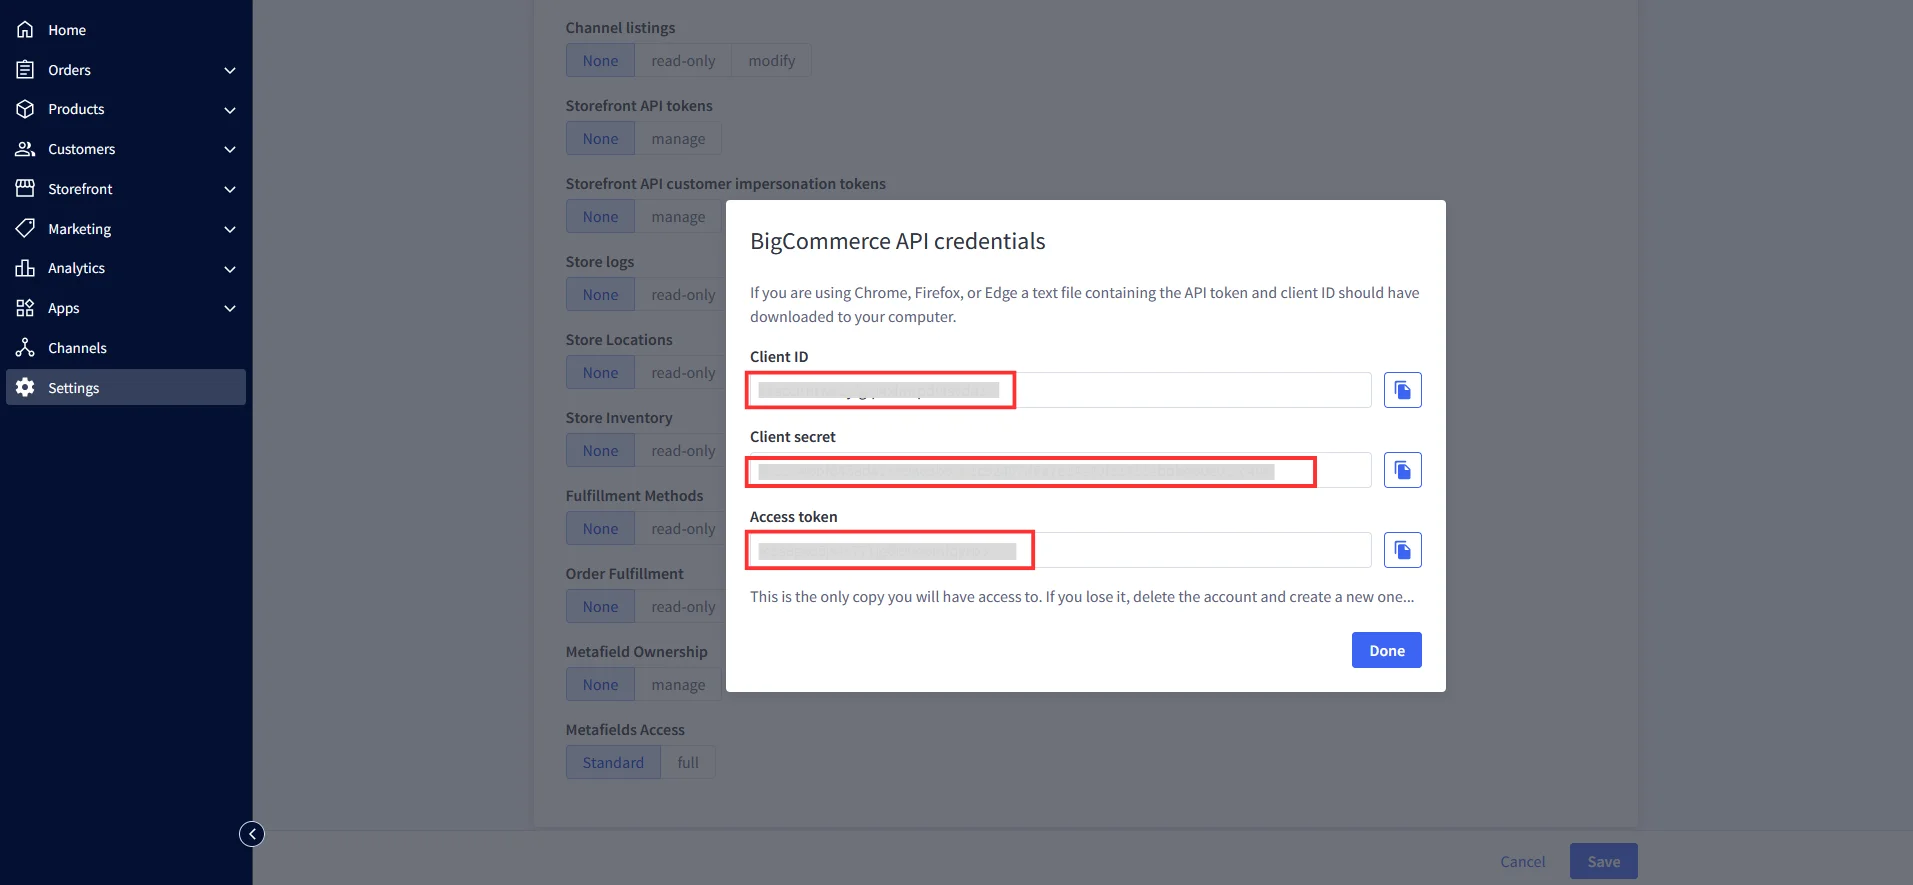
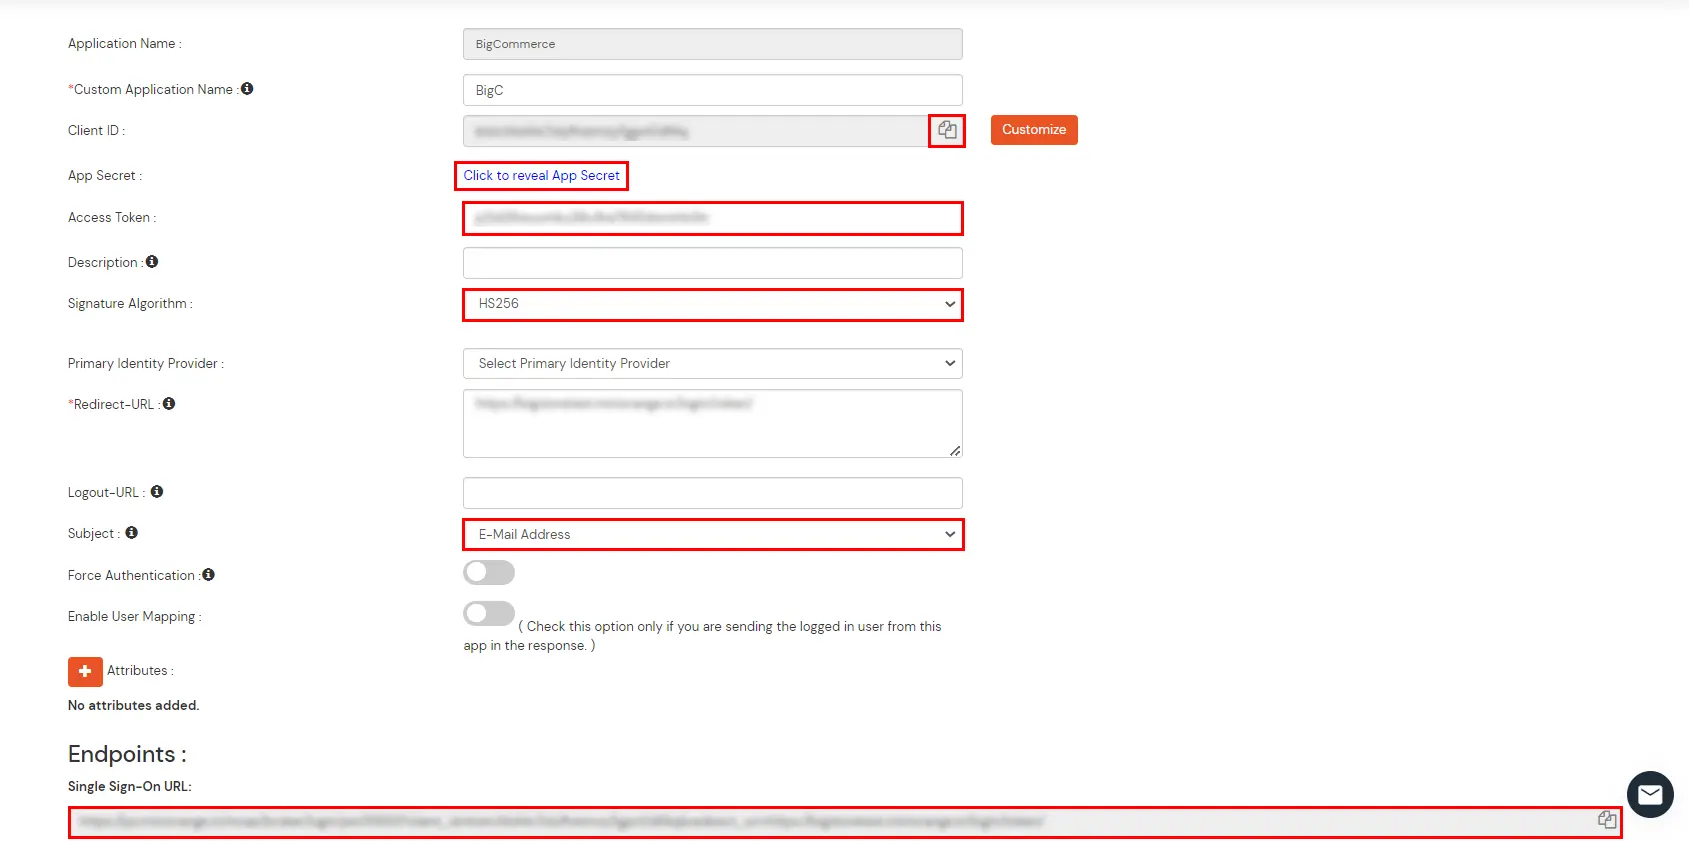
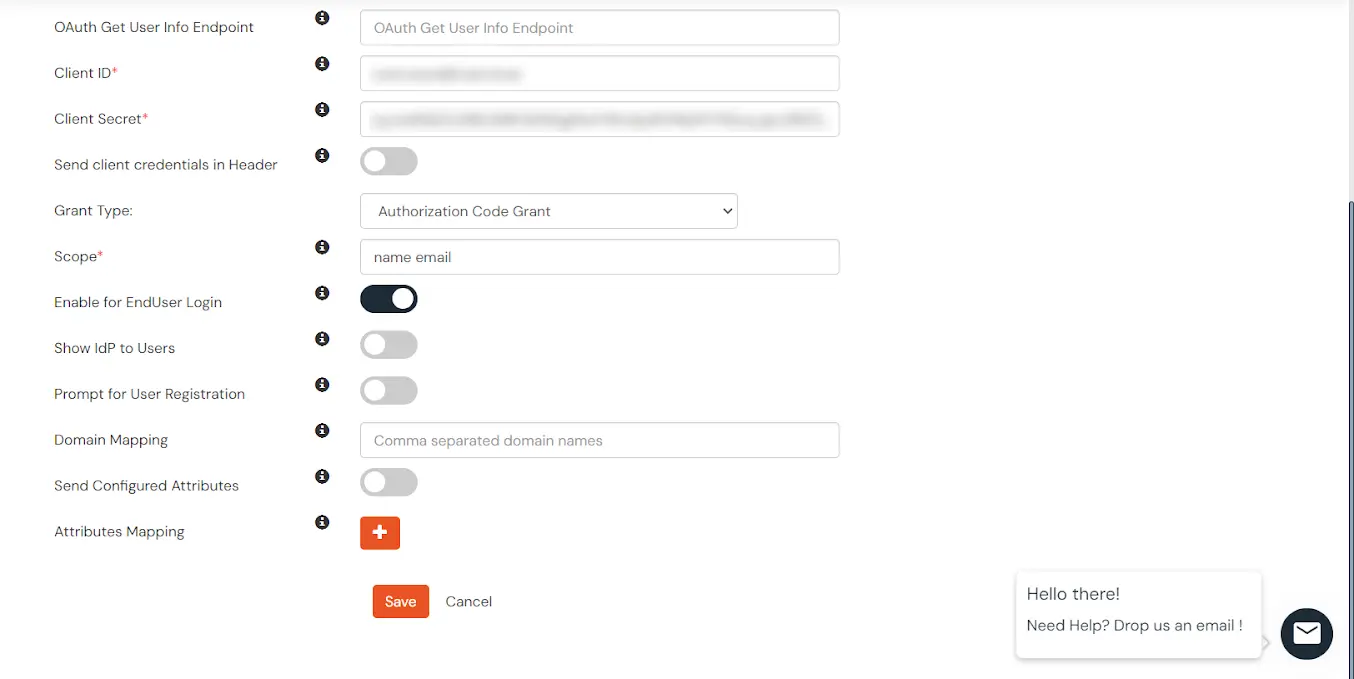
Enter the Client Id, App Secret and Access Token (which we have downloaded from step 1 during API creation in BigCommerce Console).
For Signature Algorithm, select HS-256 from the dropdown menu.
Set Subject to E-Mail Address.
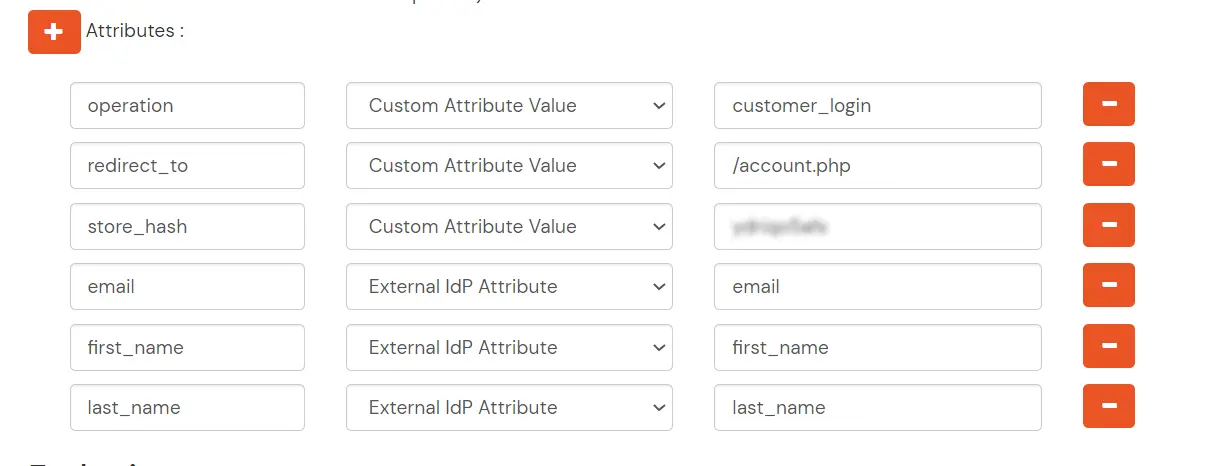
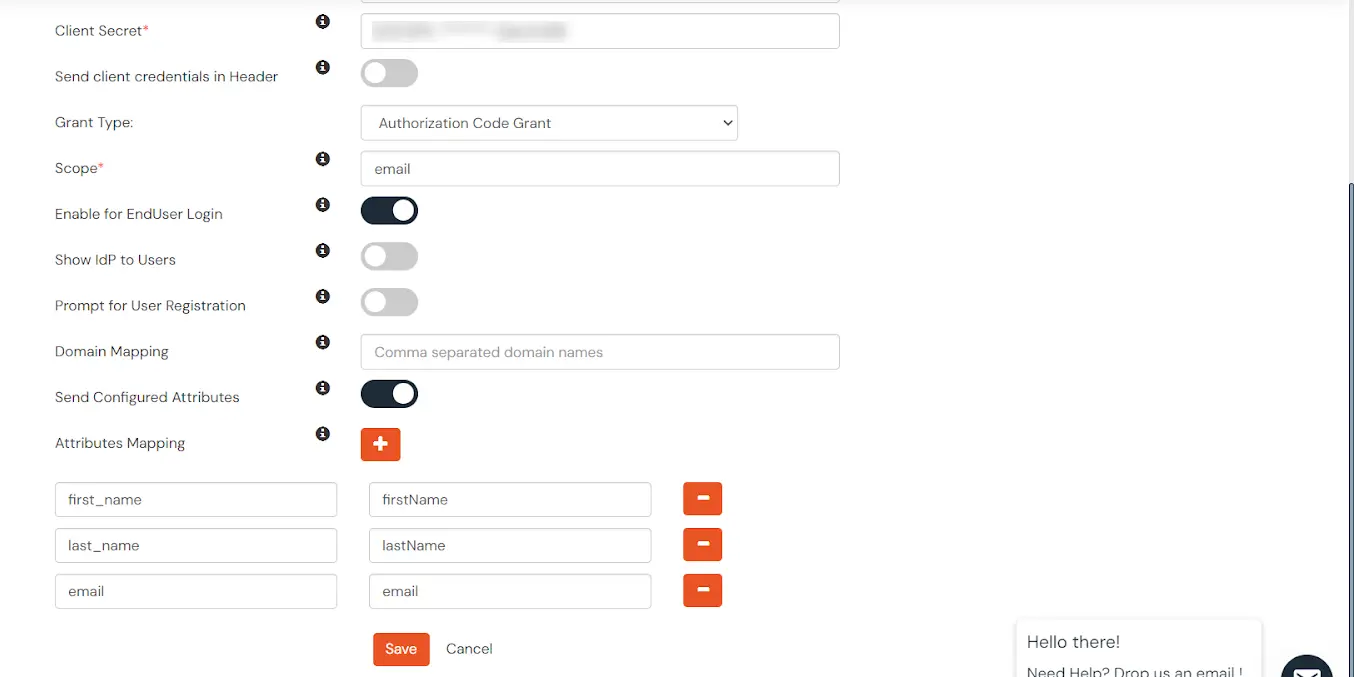
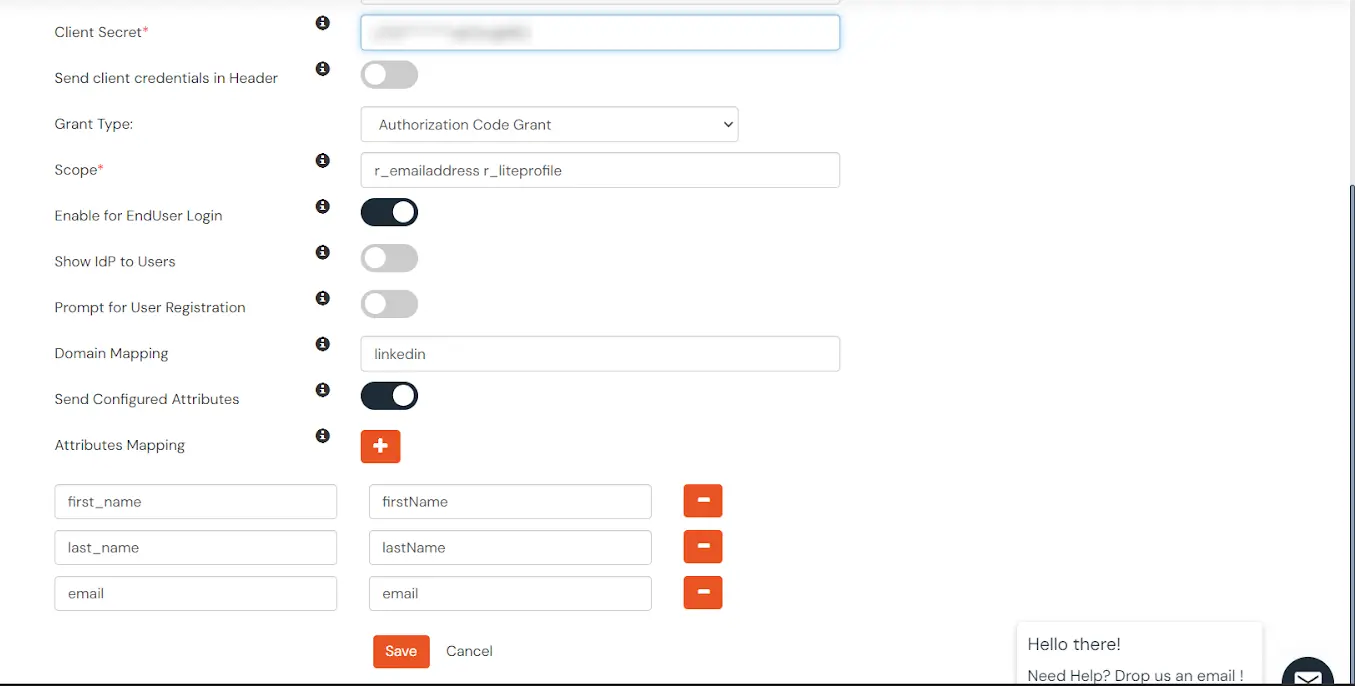
You need to map the following attributes coming in from the idp by choosing the external IDP option.
Click on Save.
Now, You can access BigCommerce Account Using IDP credentials through the Single-sign-on URL as shown in image above.
3. Configure Social Login Providers
miniOrange provides user authentication from various external sources, which can be Directories (like ADFS, Microsoft Entra ID, OpenLDAP, Google, AWS Cognito etc), Identity Providers (like Okta, Shibboleth, Ping, OneLogin, KeyCloak), Databases (like MySQL, Maria DB, PostgreSQL) and many more. You can configure your existing directory/user store or add users in miniOrange.
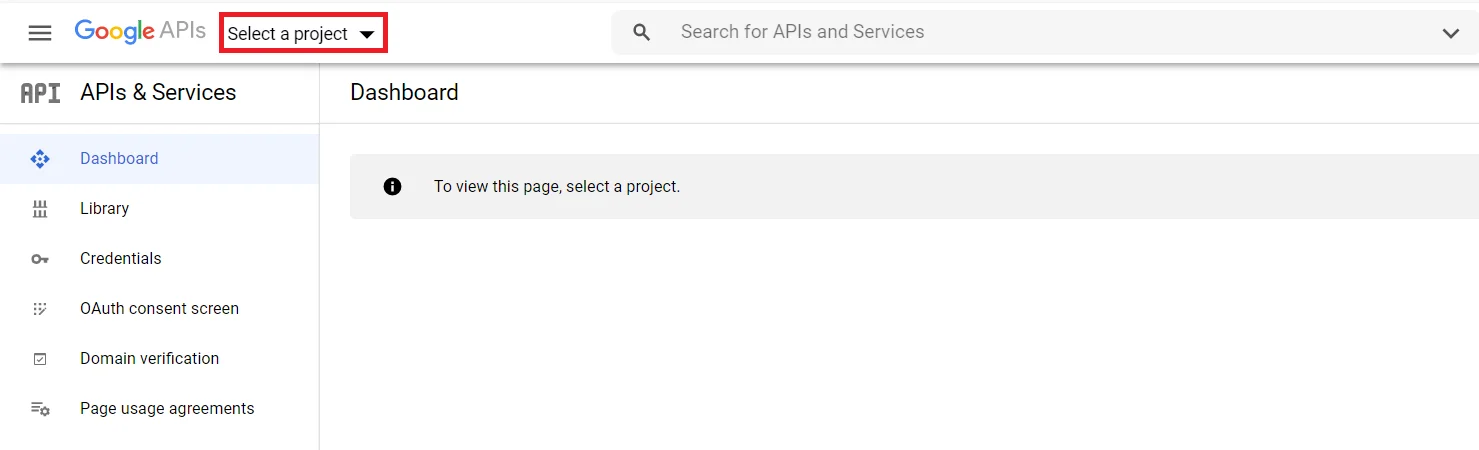
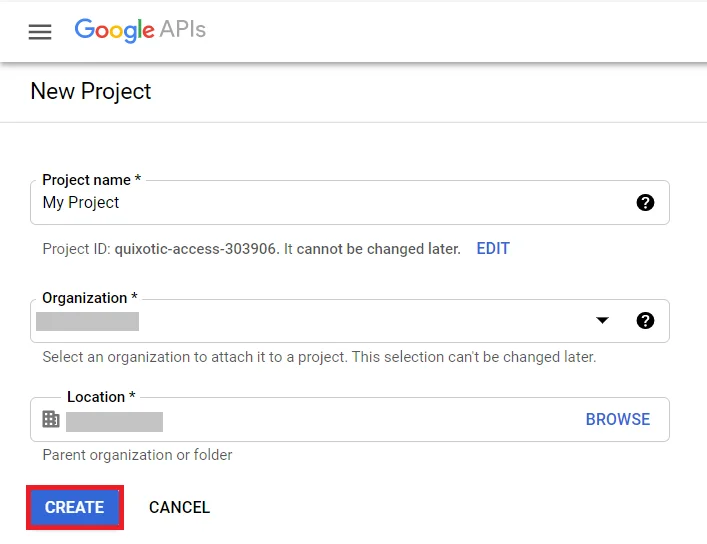
Click on Select Project to create a new Google Apps Project,you will see a popup with the list of all your projects.
You can click on the New project button to create new project.
Enter your Project name under the Project Name field and click on Create.
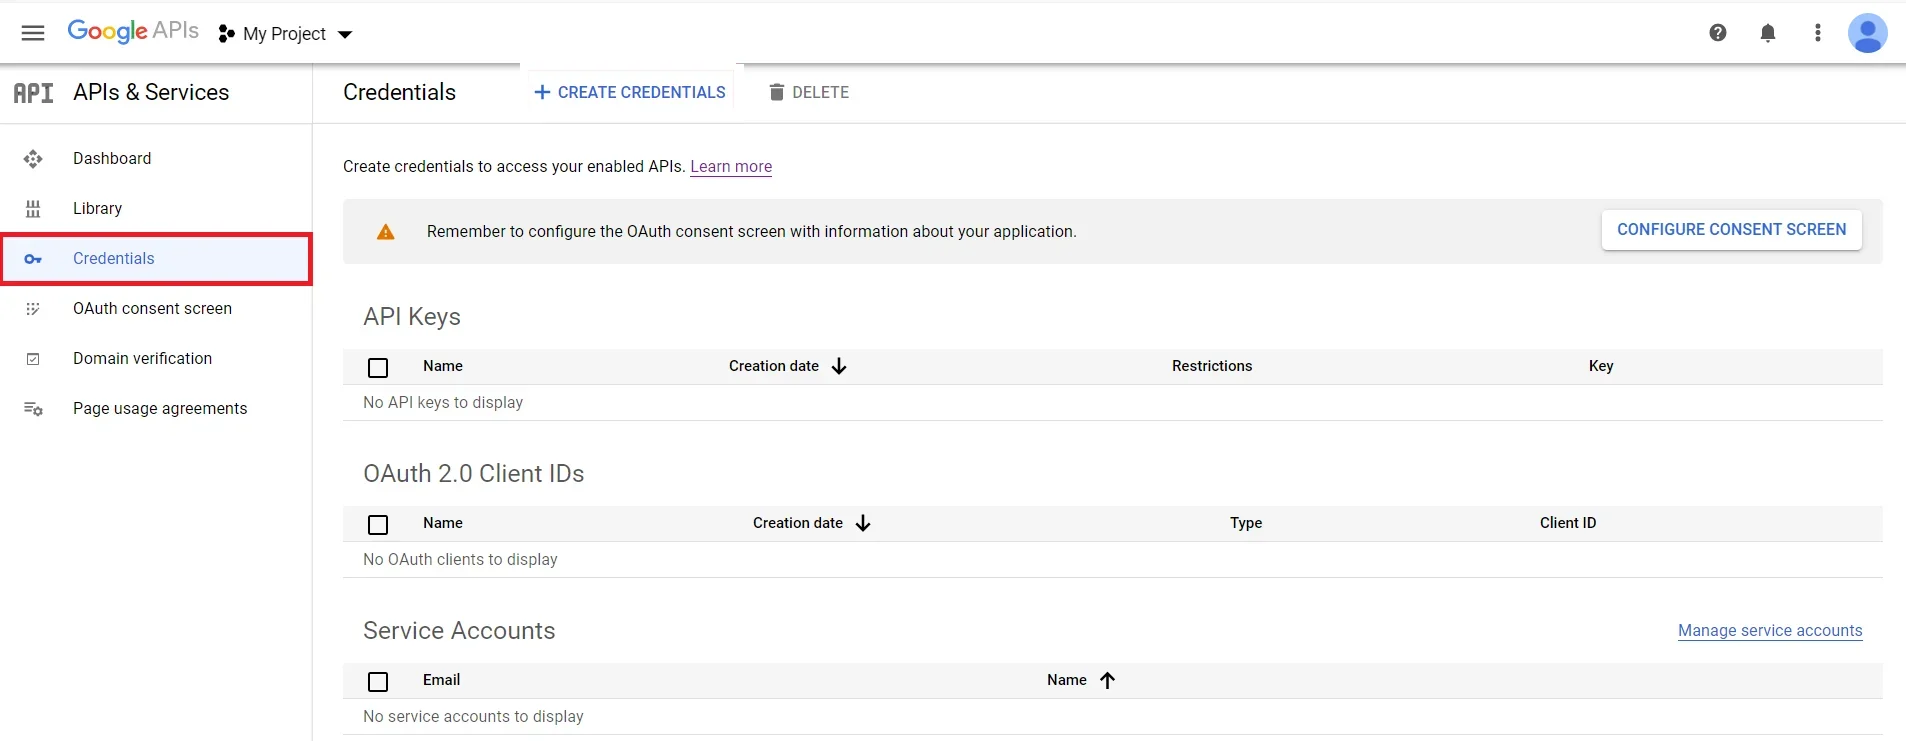
Go to Navigation MenuAPIsServicesCredentials.
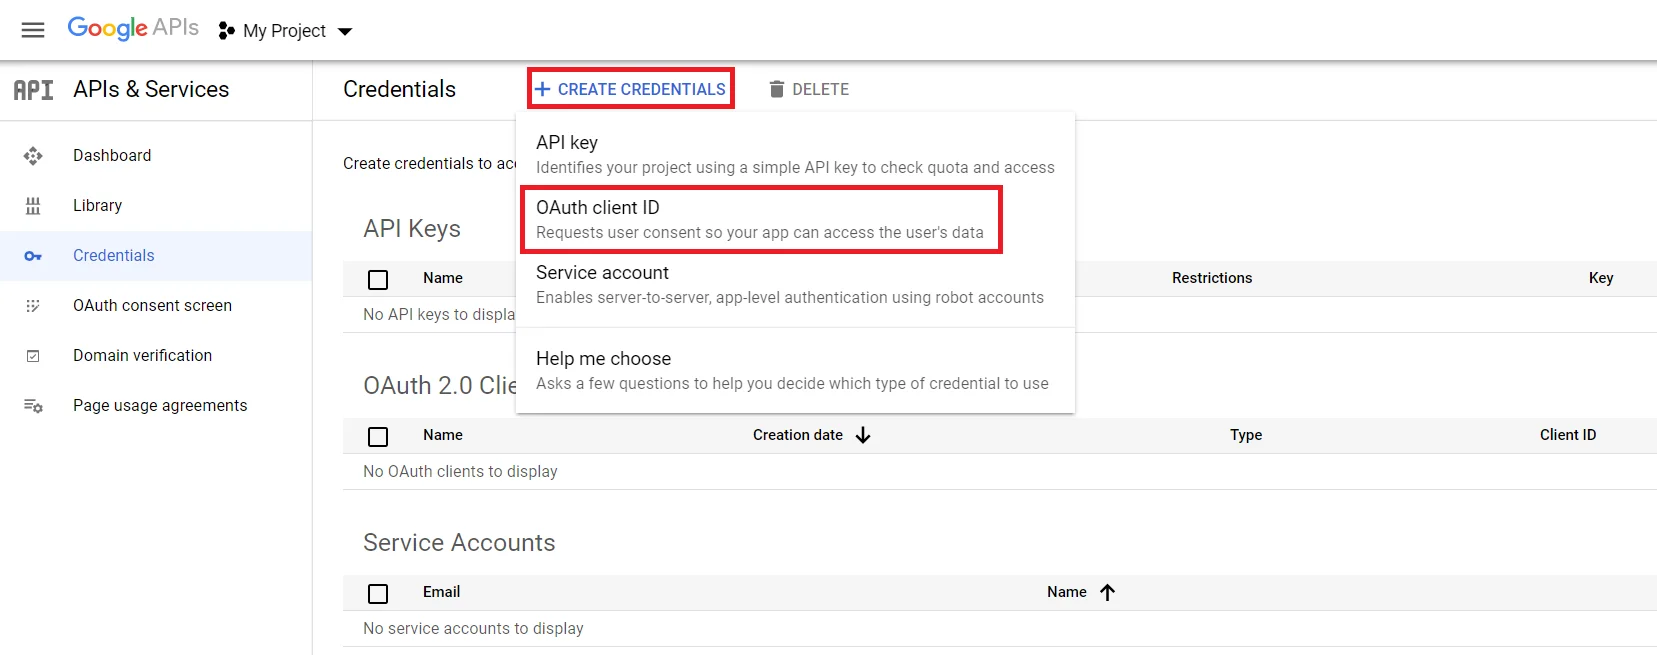
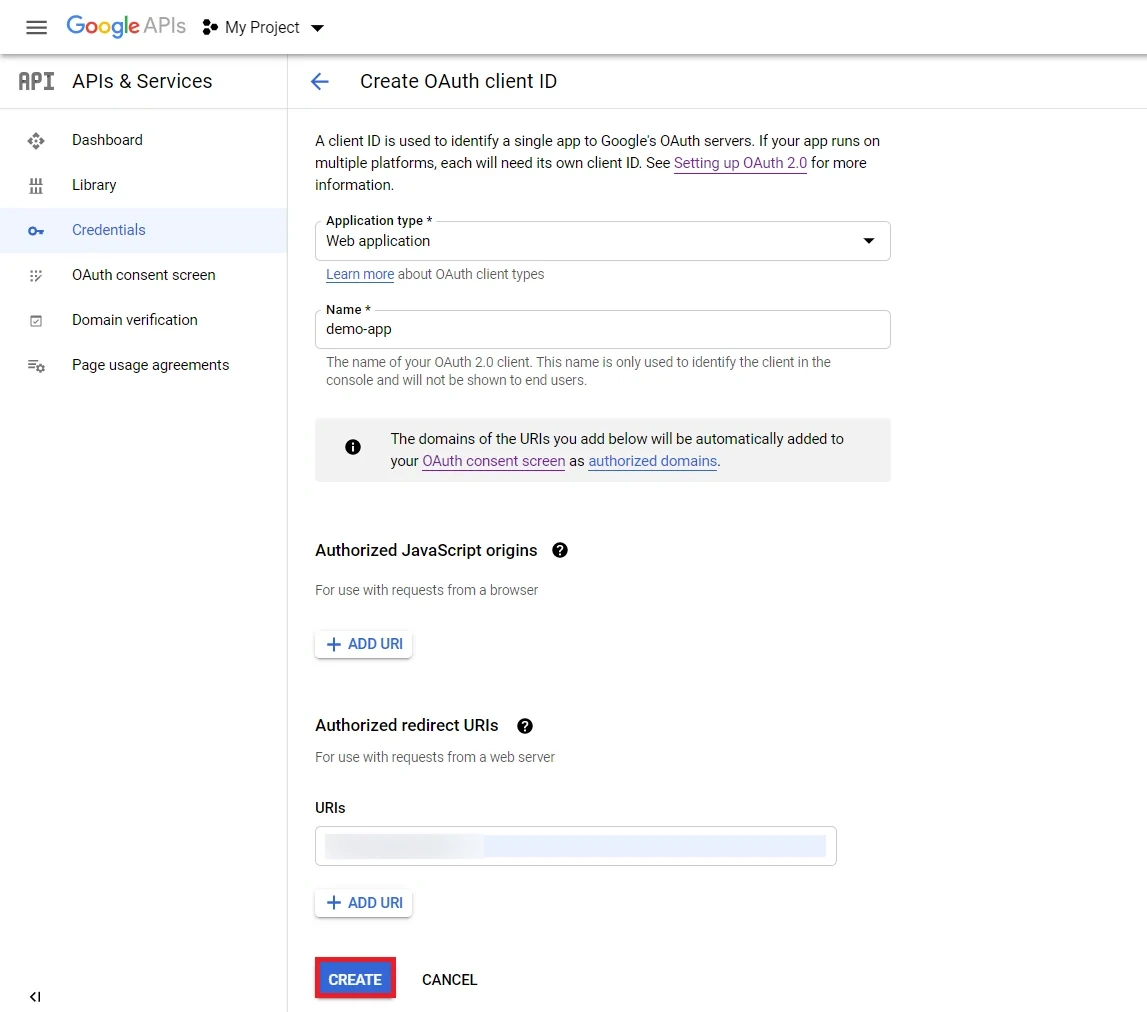
Click on Create Credentials button and then select OAuth Client ID from the options provided.
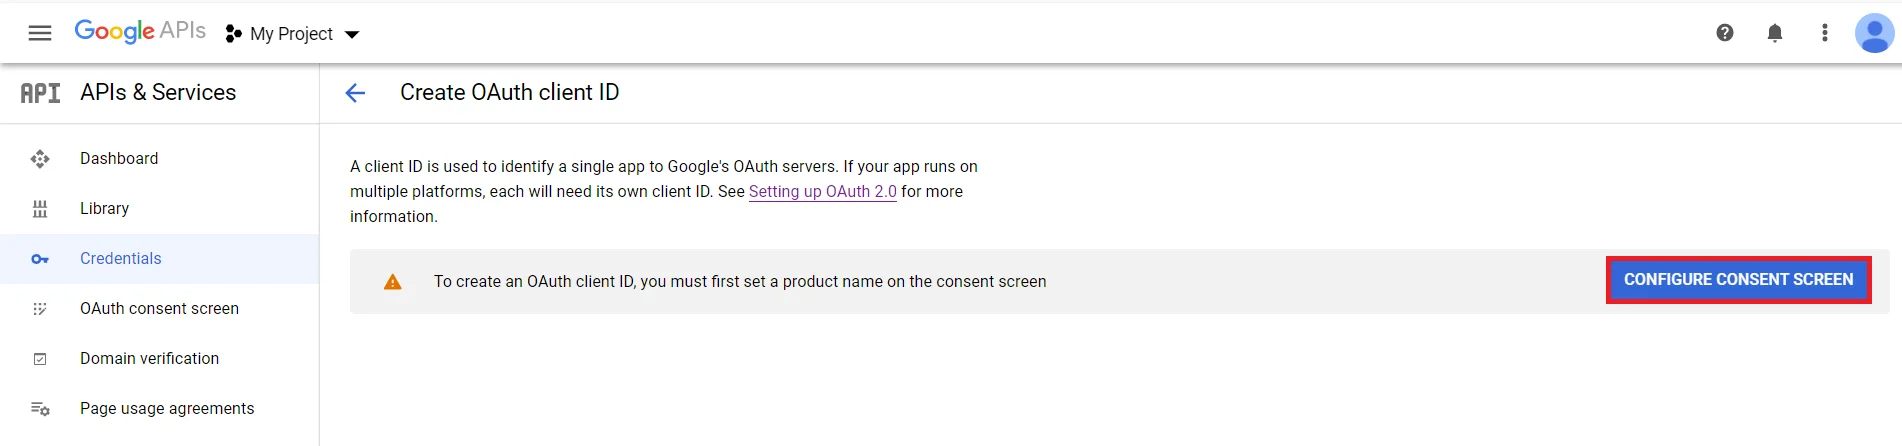
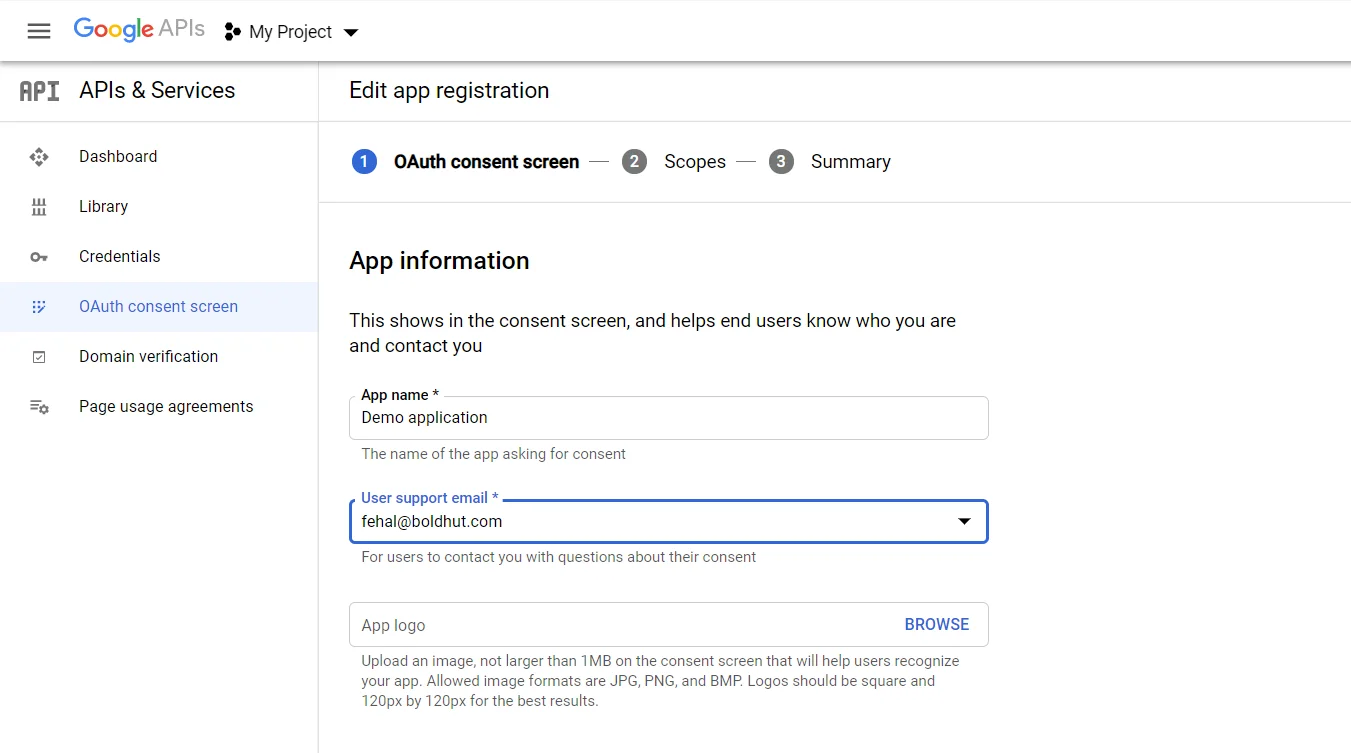
In case you are facing some warning saying that in order to create an OAuth Client ID, you must set a product name on consent screen (as shown in below image). Click on the Configure consent screen button.
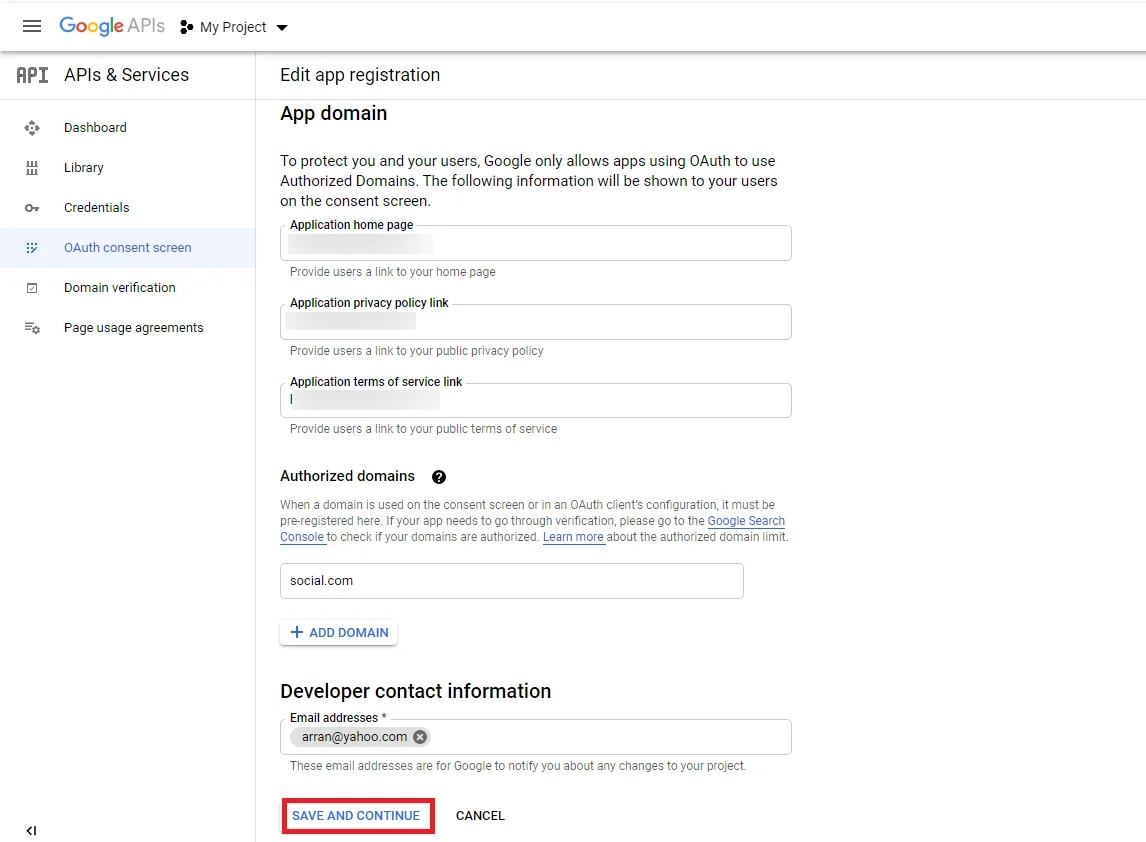
Enter the required details such as App Name, User Support Email. and click on Save and Continue button.
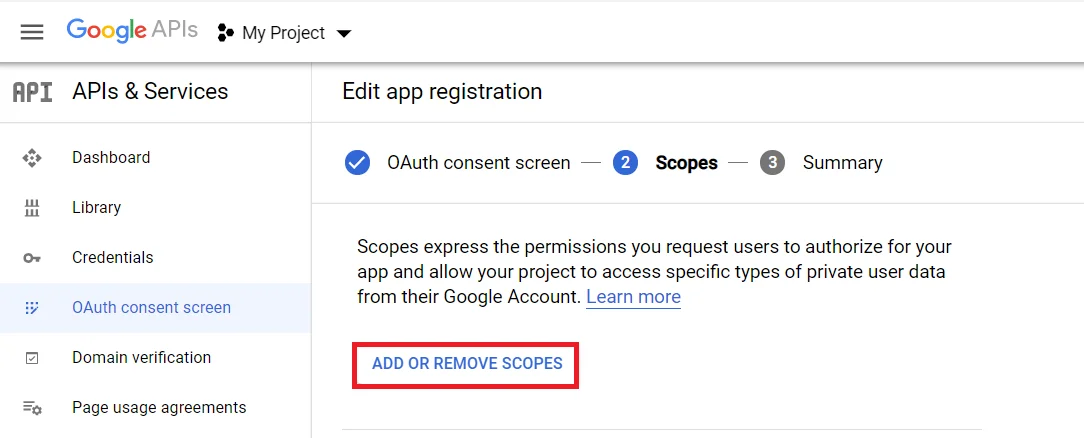
Now for configuring scopes, click on Add or Remove the Scopes button.
Now, Select the Scopes to allow your project to access specific types of private user data from their Google Account and click on Save and Continue button.
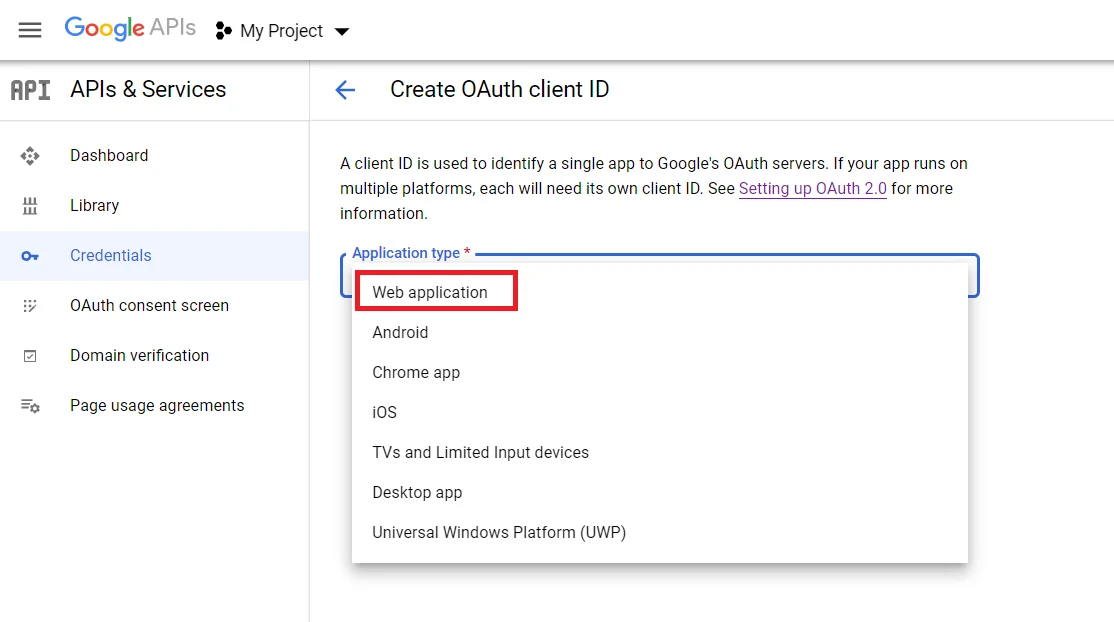
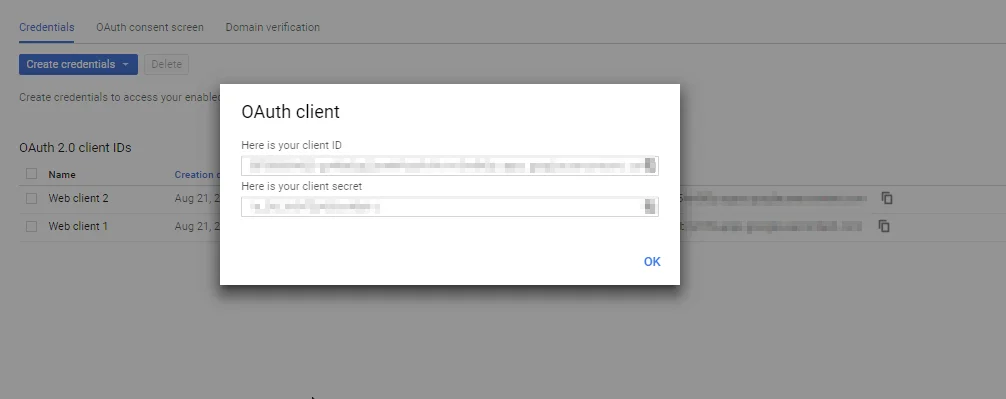
Go to the Credentials tab and click on Create Credentials button. Select Web Application from dropdown list to create new application.
Enter the required details and click on the Create app button to save your changes.
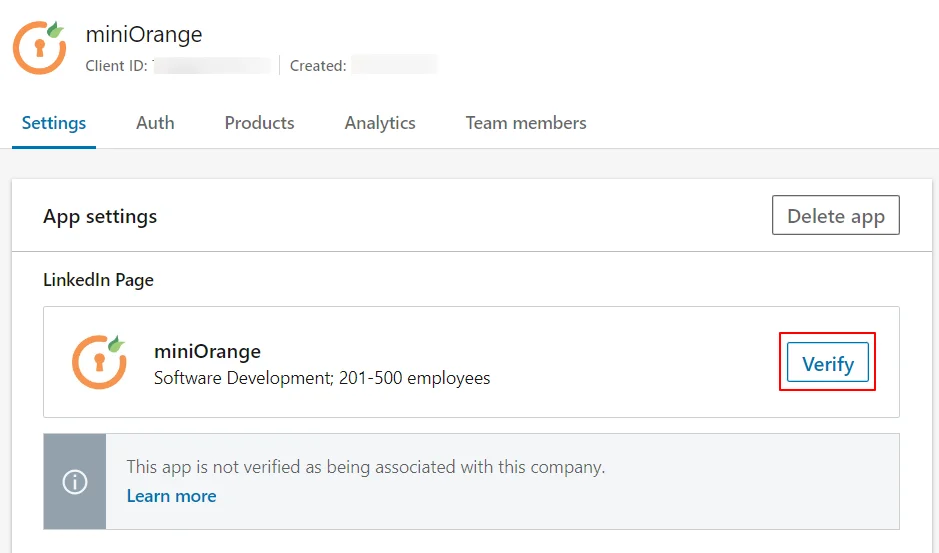
Here you need to verify the provided page. If the verification of the page is not done, then SSO will not work.
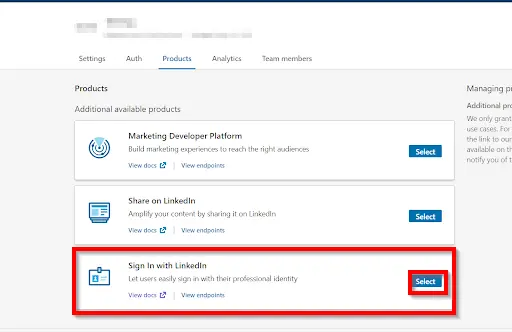
Navigate to Products section and then select Sign in with LinkedIn.
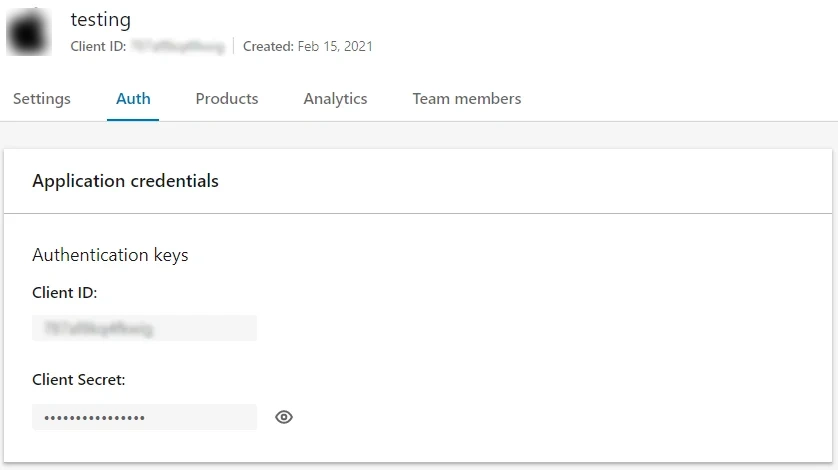
Copy the Client Id and the Client Secret and save it in your miniOrange OAuth App configuration under Client Id and the Client Secret text fields respectively.
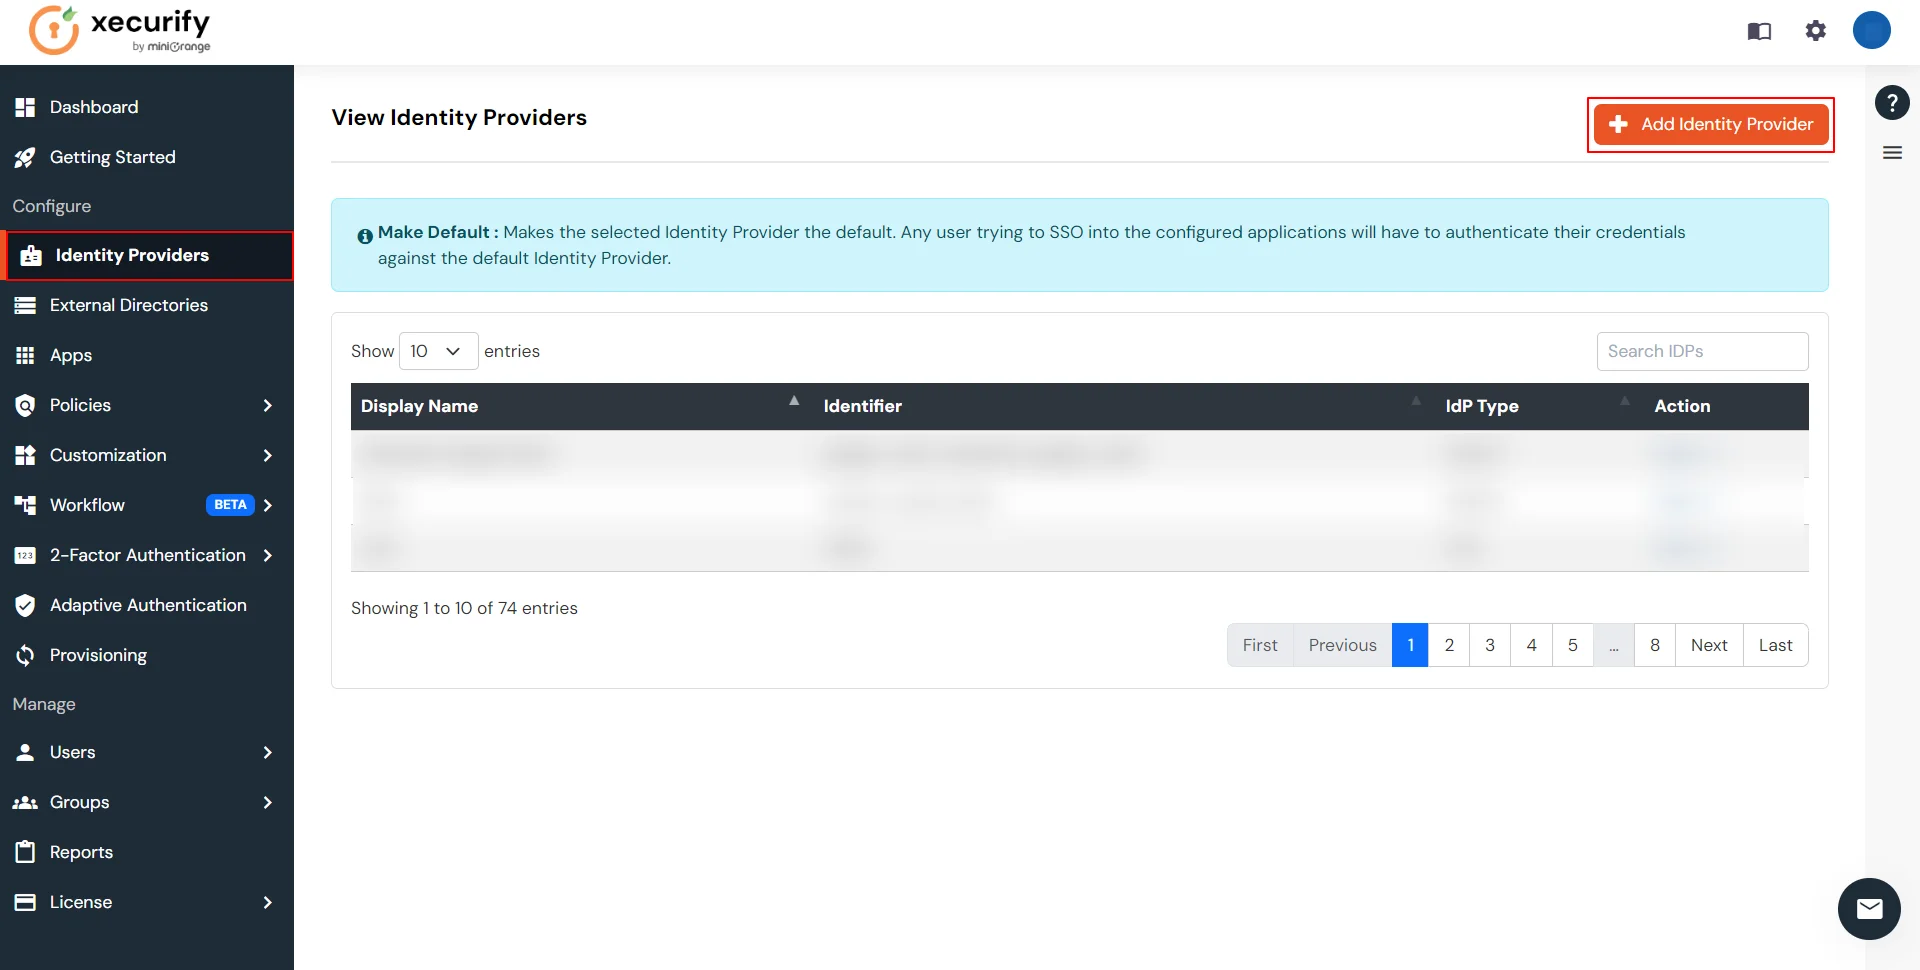
From the left navigation bar select Identity Provider.
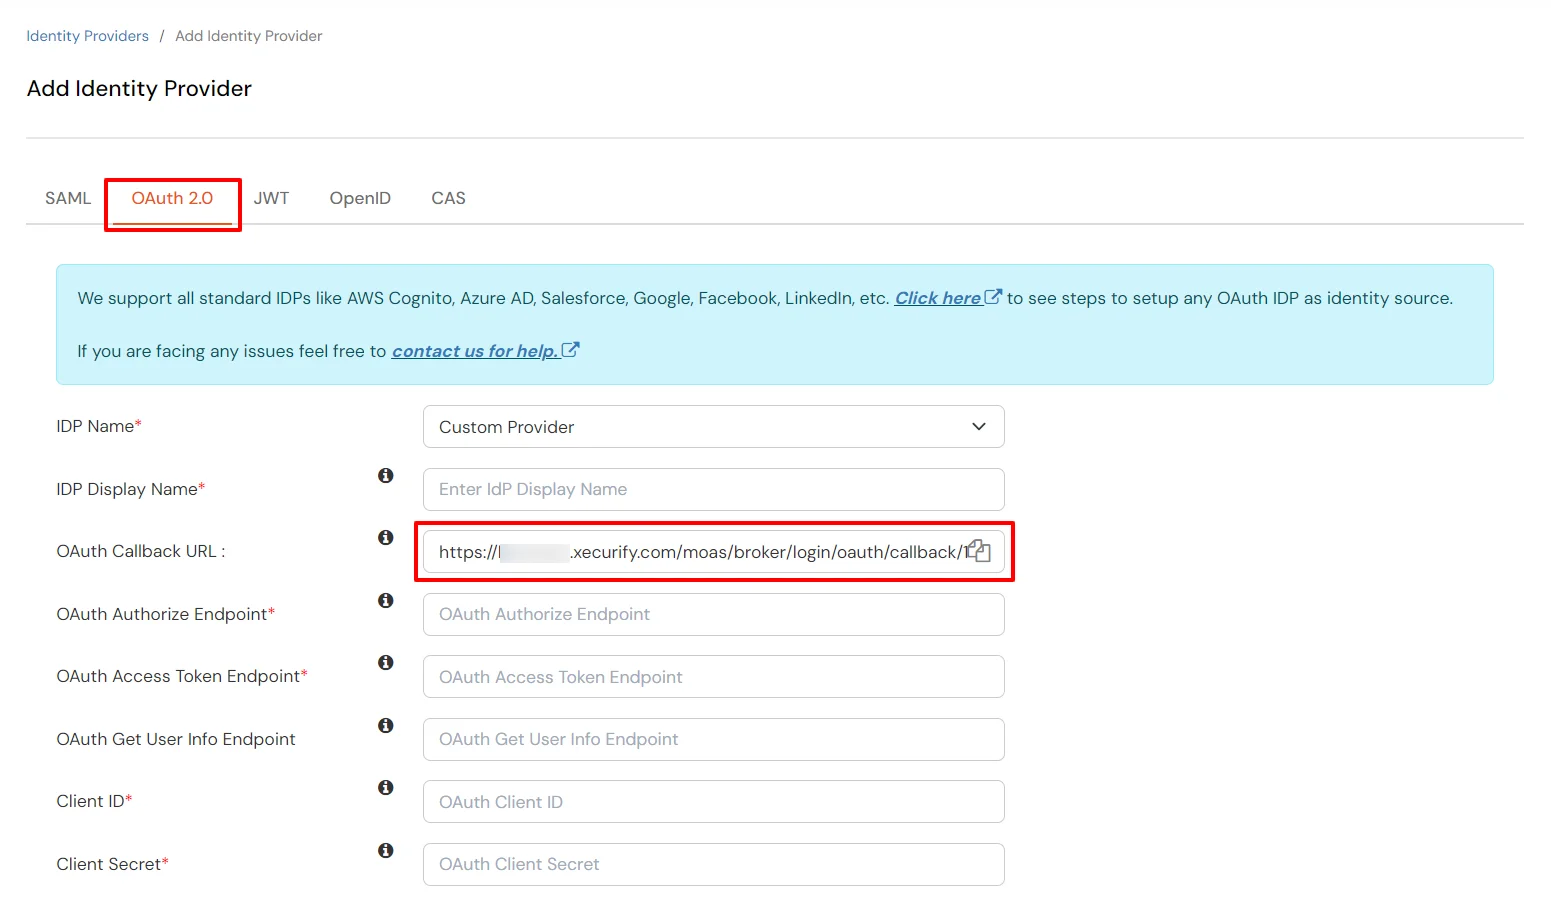
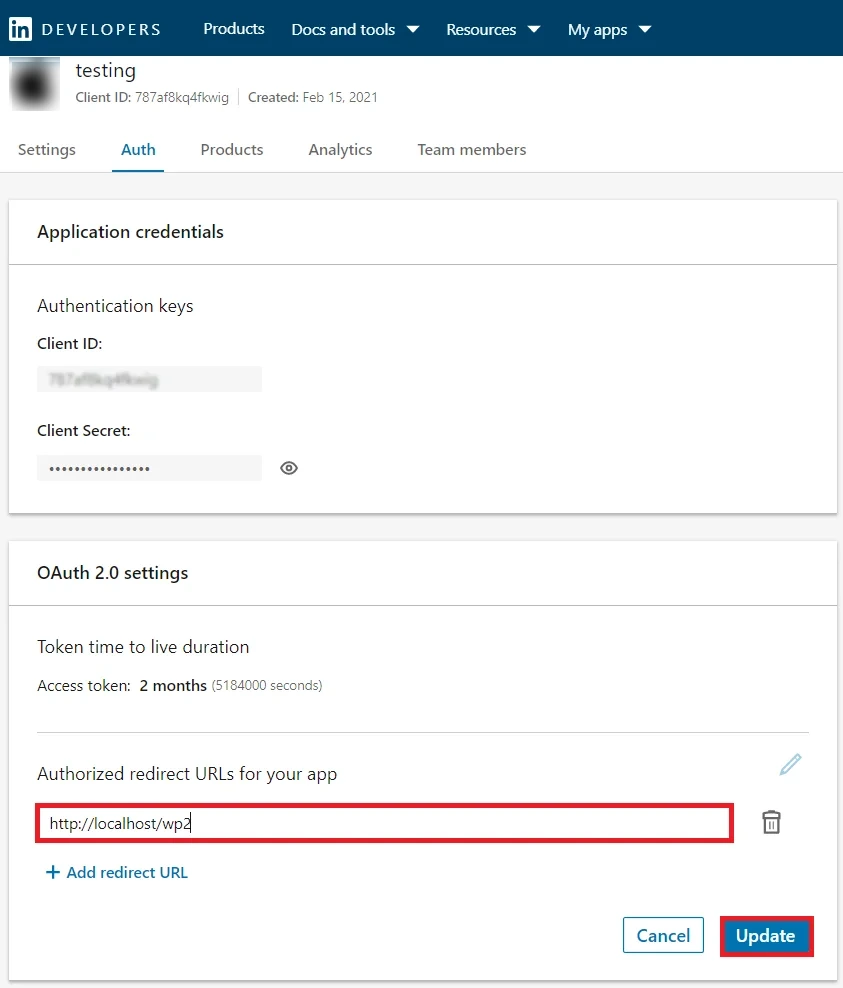
Copy the Callback URL as Redirect URL required for next step.
Copy the Redirect/ Callback URl from above step and enter it under OAuth 2.0 -> Authorized Redirect URLs text box. Click on the Add button adjacent to the text box to save it. Finally, click on the Update button to save your configurations. (image on the next page).
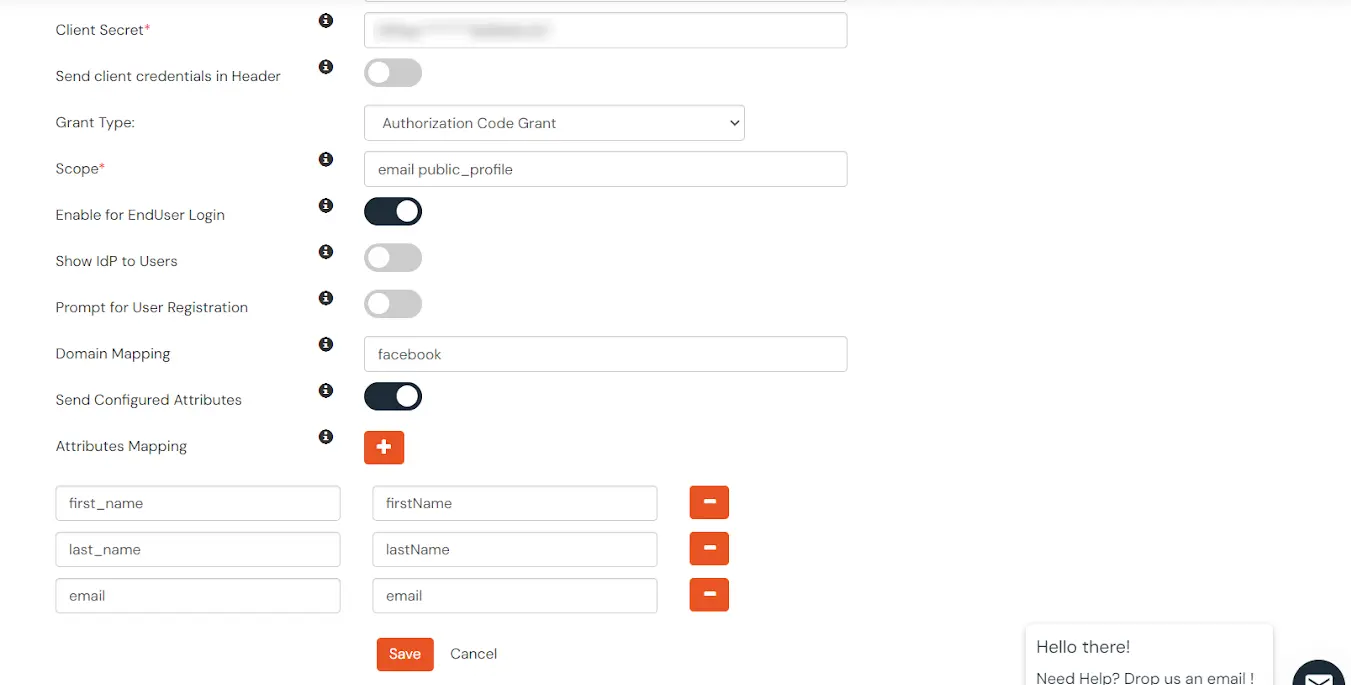
Step 3.1: Configure Facebook as OAuth 2.0 Provider in miniOrange.
From the left navigation bar select Identity Provider.
Copy the Callback URL as Redirect URL required for next step.
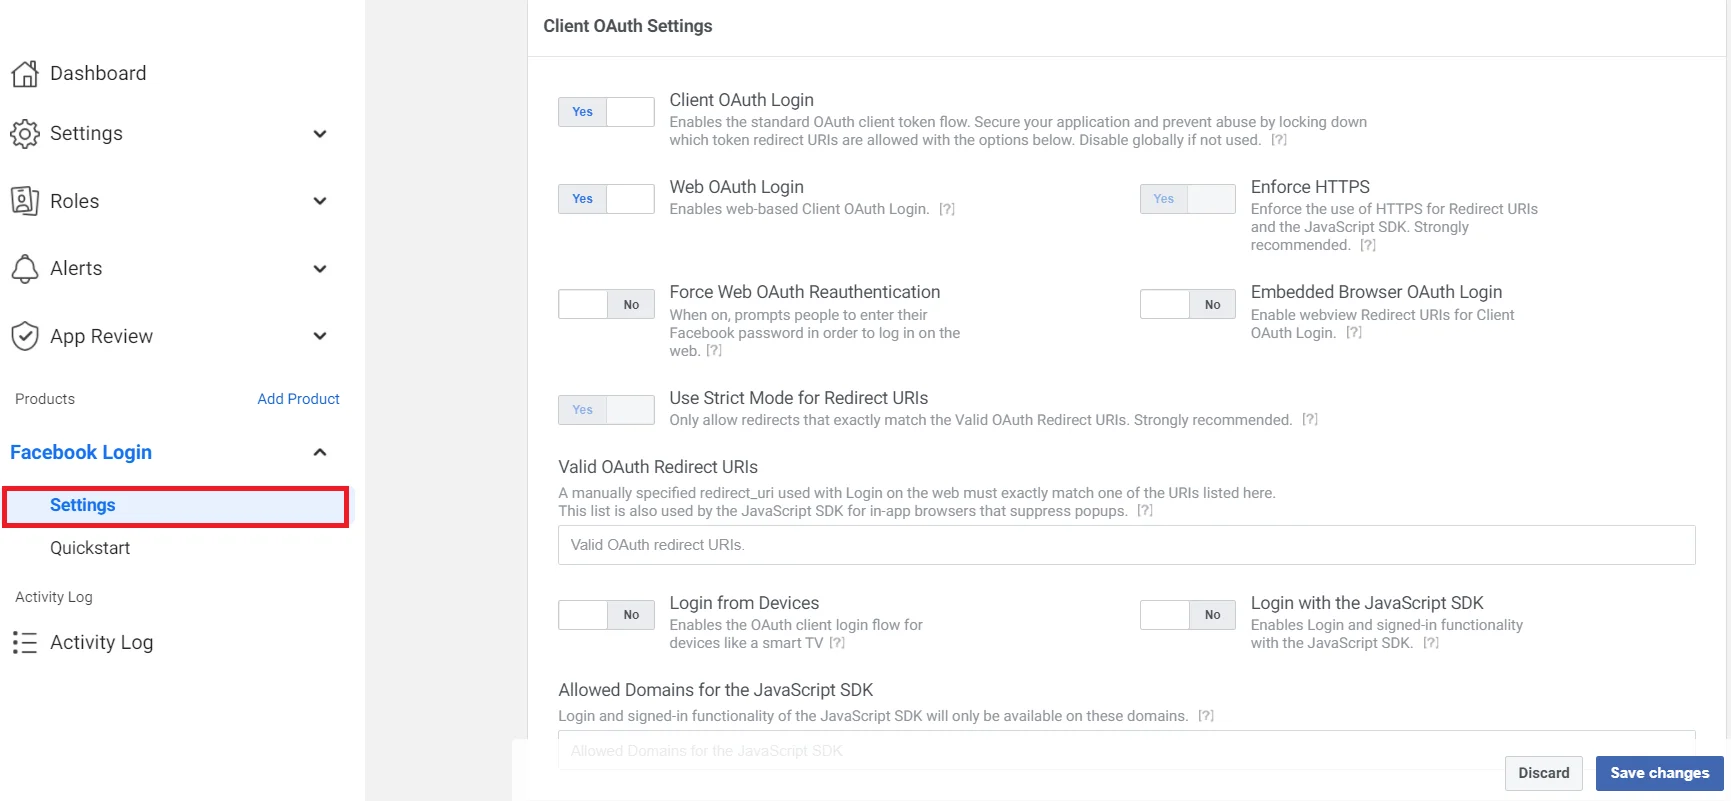
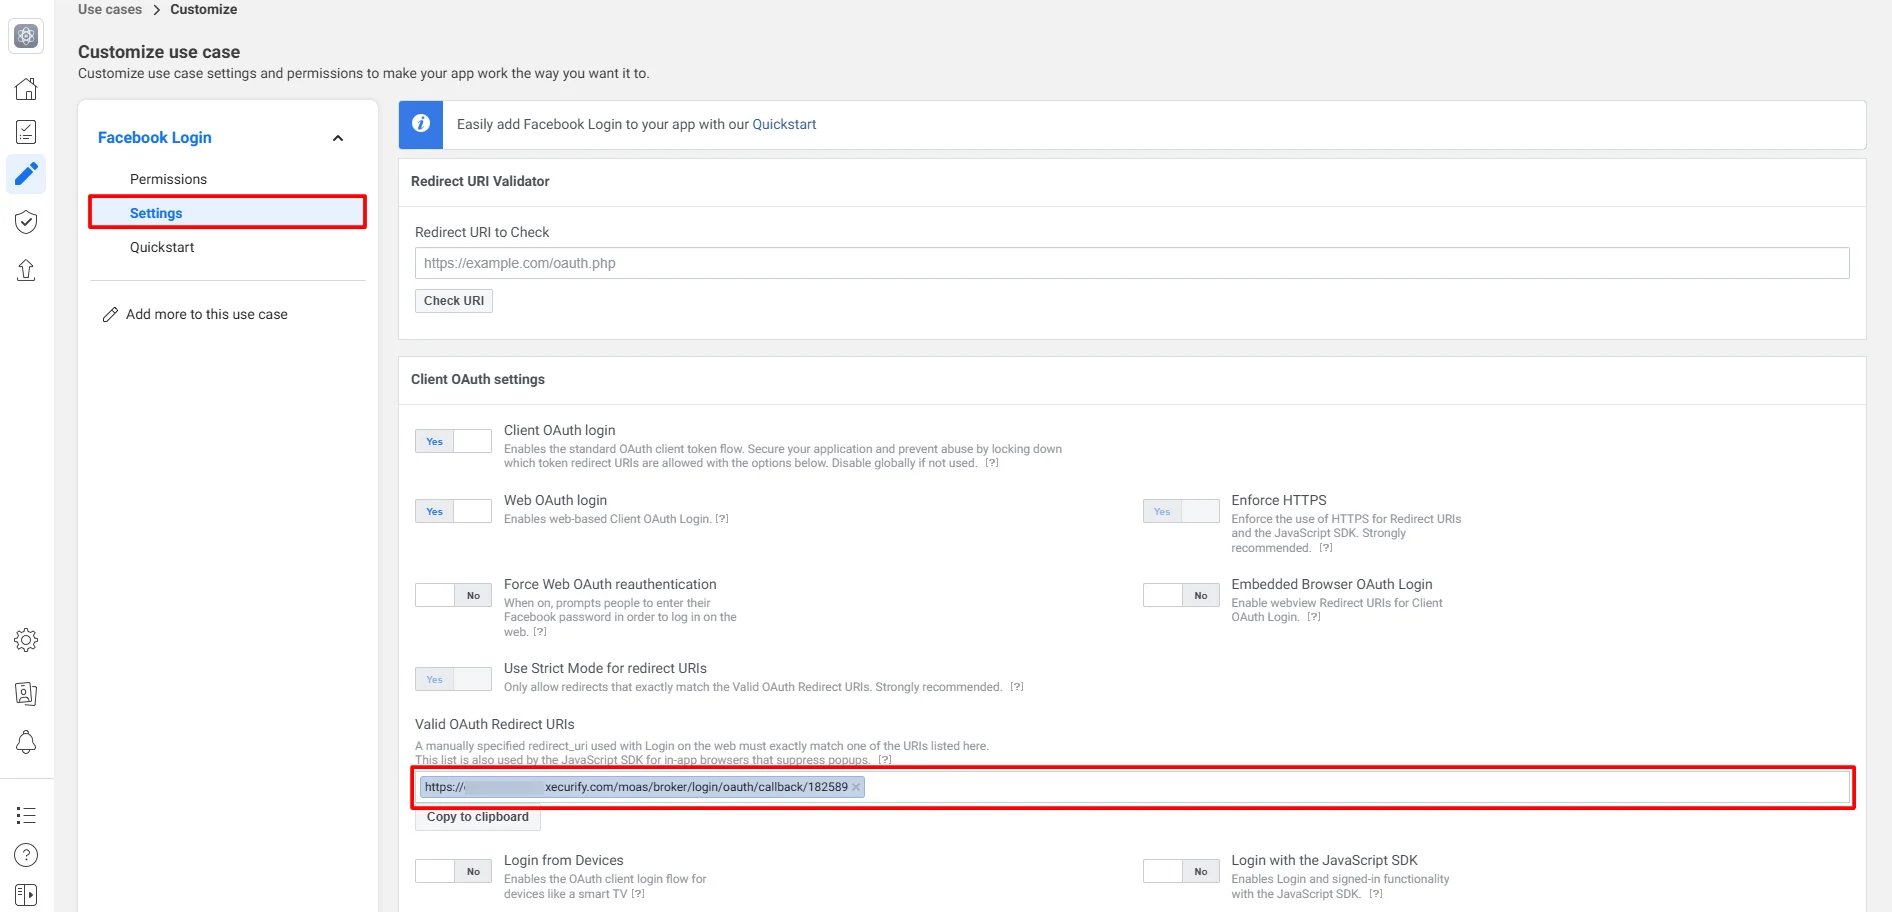
Under Client OAuth Settings, enter the Callback/Redirect URL in the Valid OAuth Redirect URIs field. Click on the Save button to save your configurations. Most importantly, your Callback/Redirect URI should be https and not http. It is mandatory while configuring Facebook as an OAuth Server.
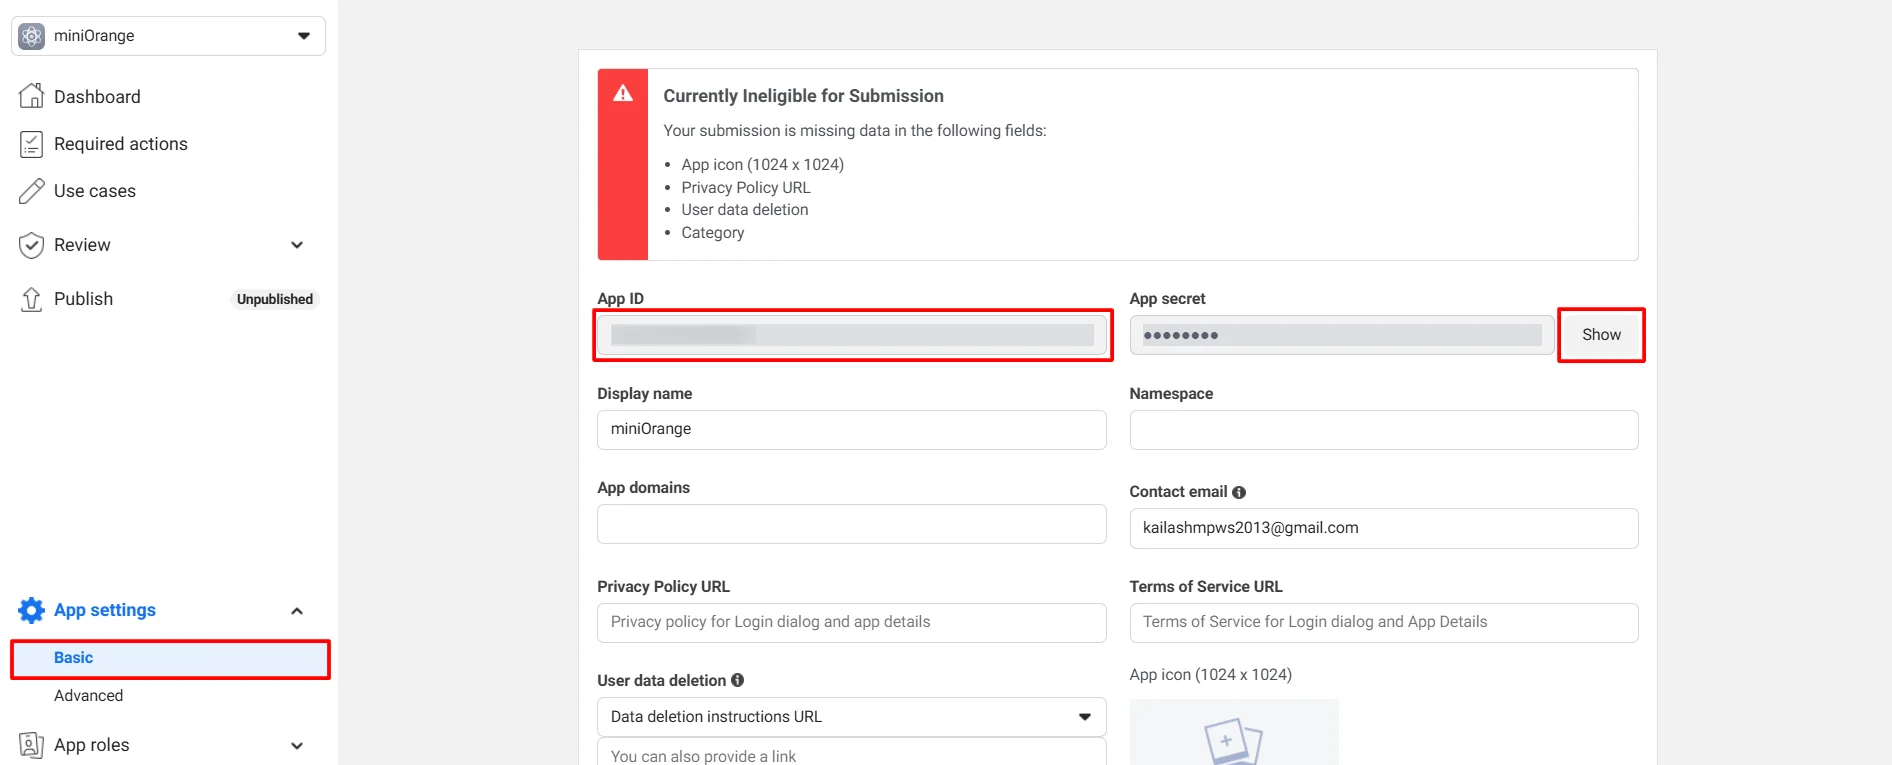
Go to Settings -> Basic to view your App Id and App Secret (Refer to the image below).
You have successfully completed your Facebook App OAuth Server side configurations.
Step 3.1: Configure Apple Apps as OAuth 2.0 Provider in miniOrange.
Go to Identity Providers and click on Add Identity Provider button.
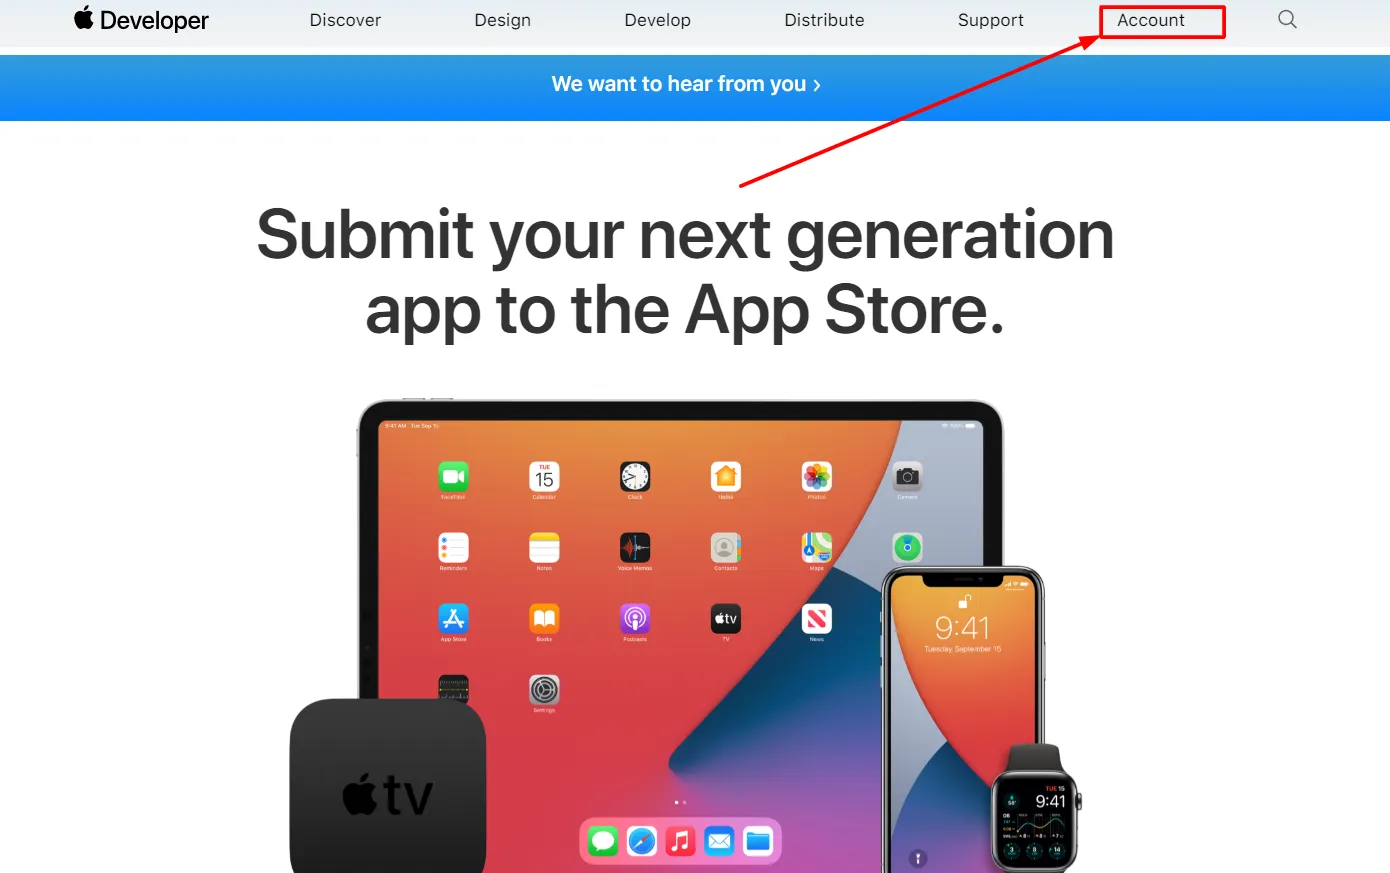
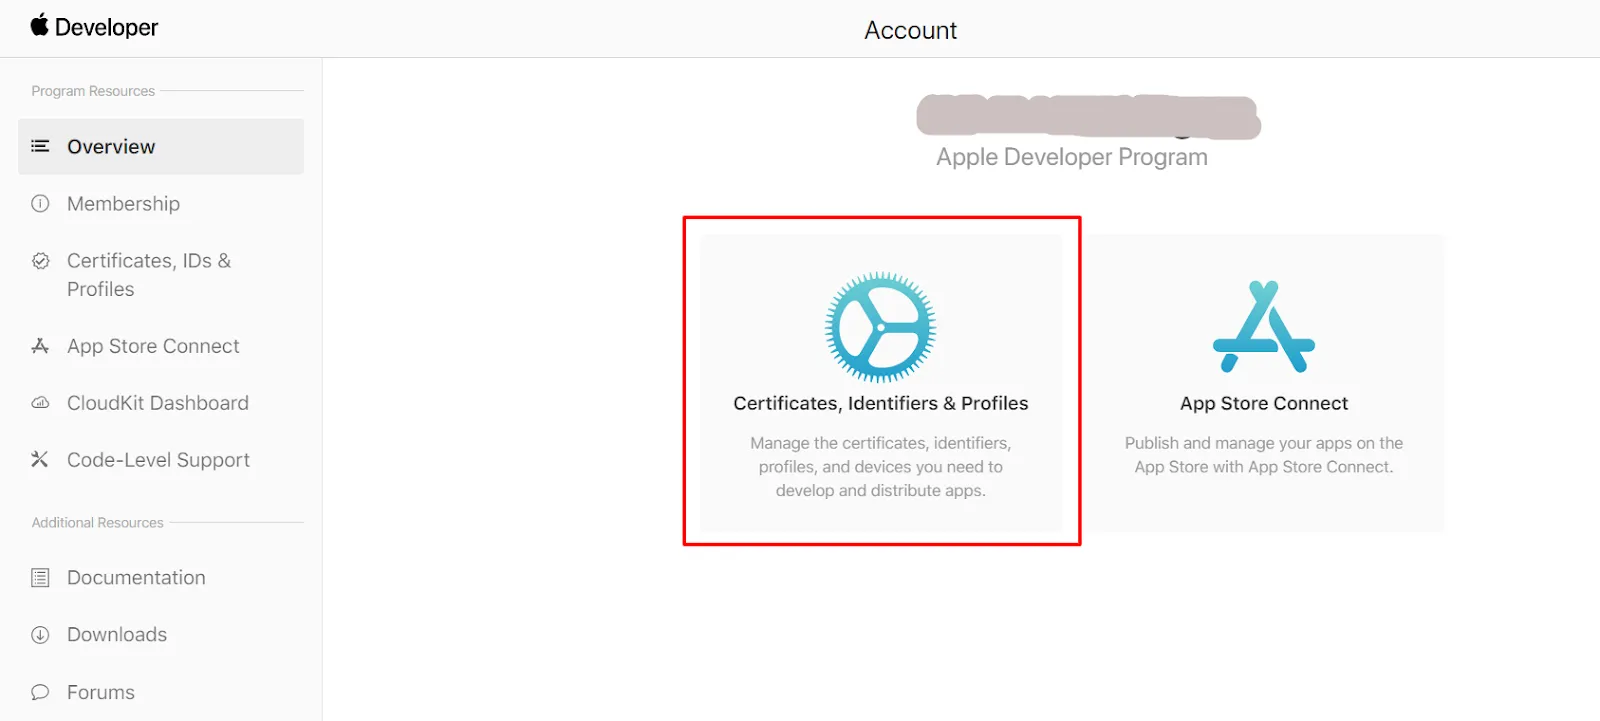
Click on Certificates, Identifiers and Profiles in Apple Account.
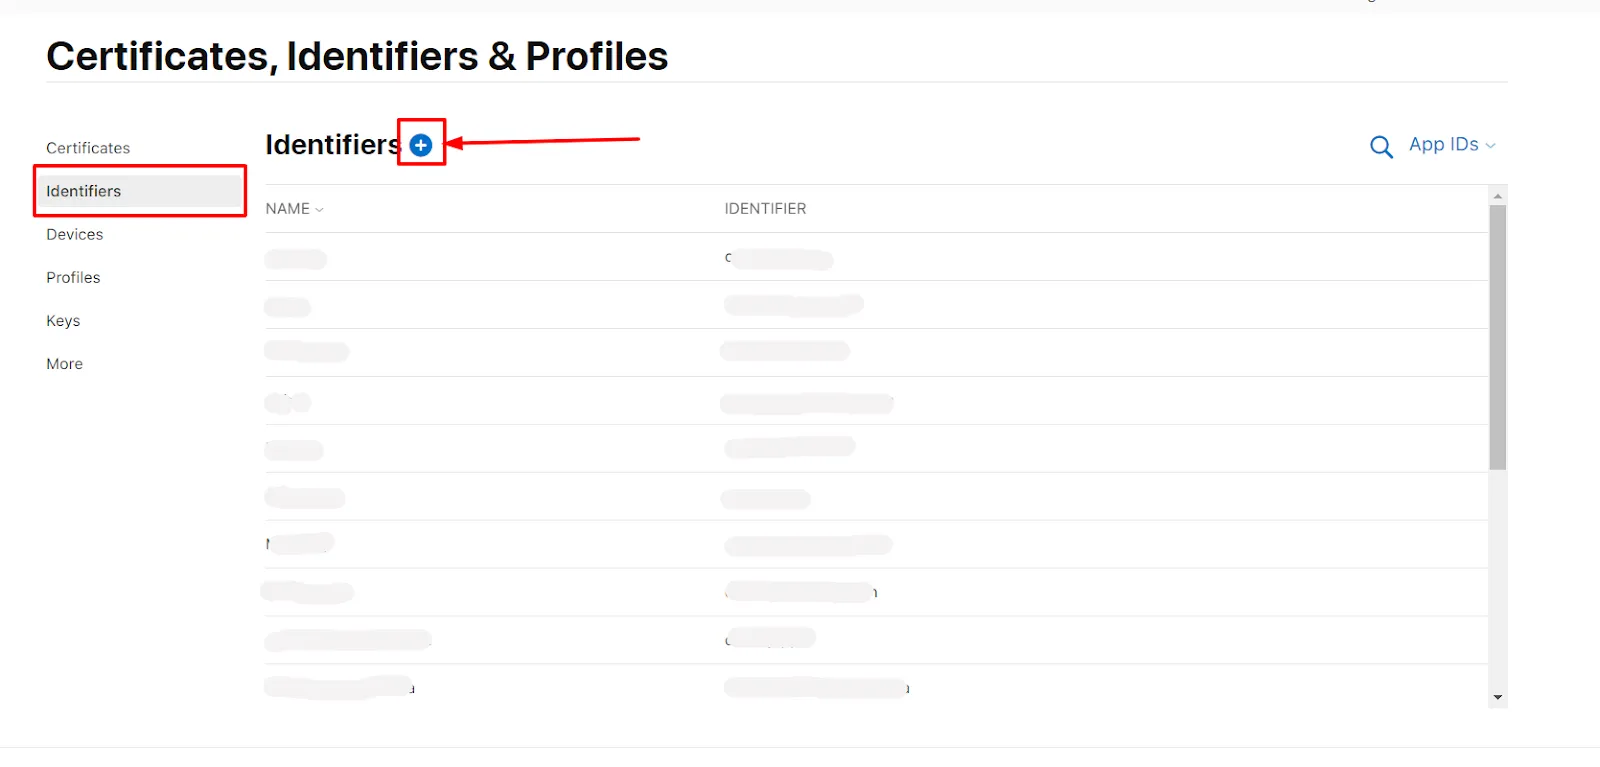
In the left menu Click on Identifiers and after that click on the Plus Icon(blue color). Click on Continue for the next 2 pages of Apple Account.
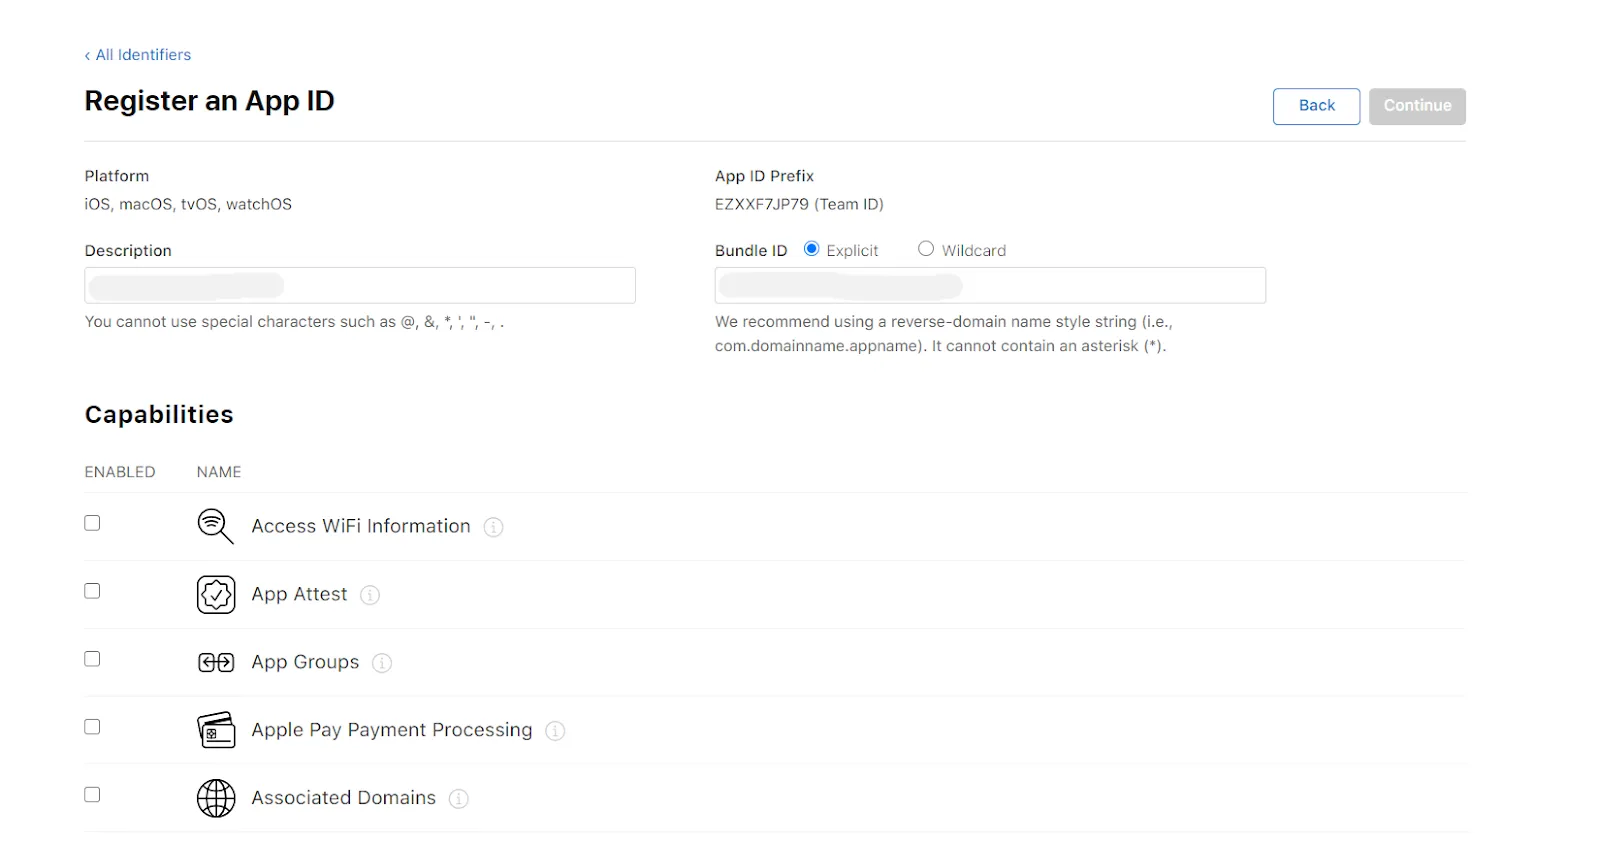
Enter Description and Bundle ID for the App ID. (The Bundle ID is best when it’s a reverse-dns style string.)
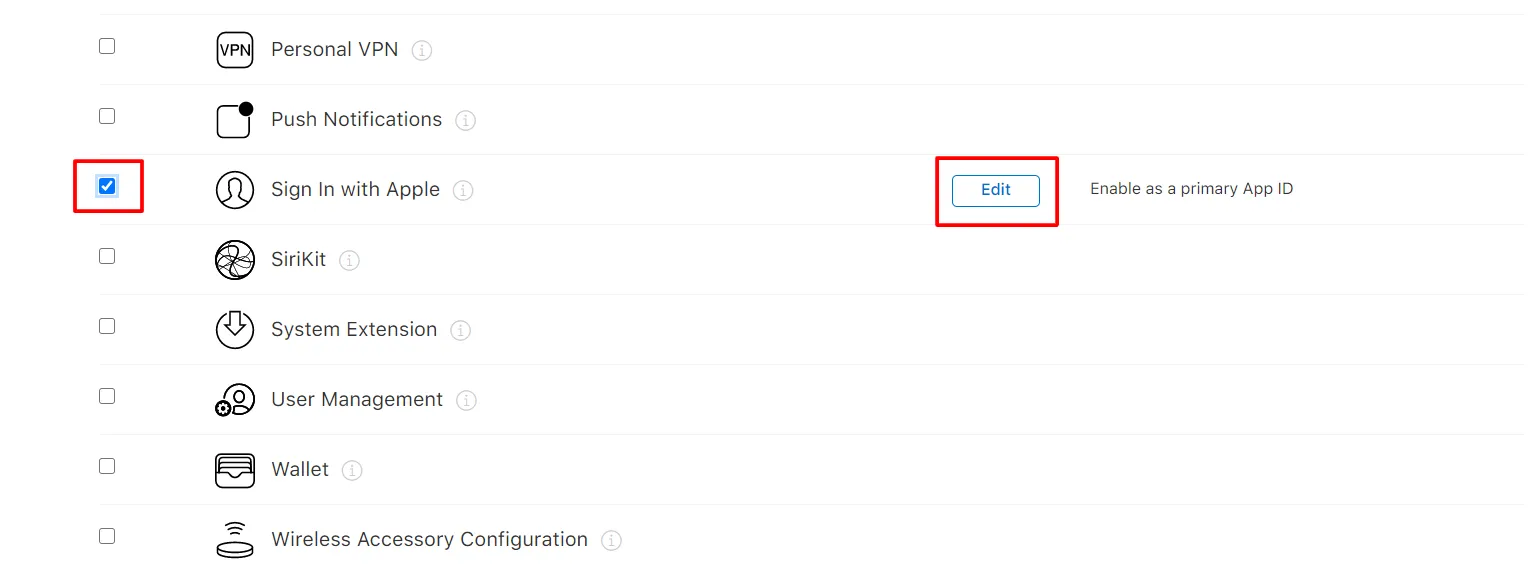
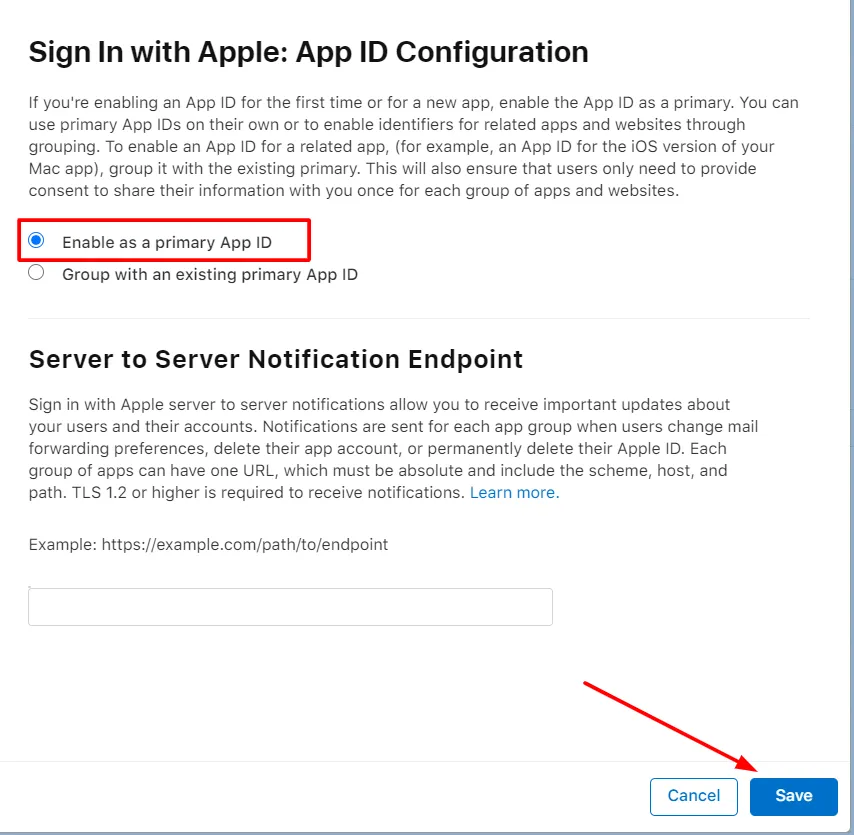
In the Capabilities section scroll down and select sign up with apple. Click on Edit and select Enable as a primary App Id and click on Save. Click on Continue and then click on Register.
In the right corner click on Continue and after that Register button.
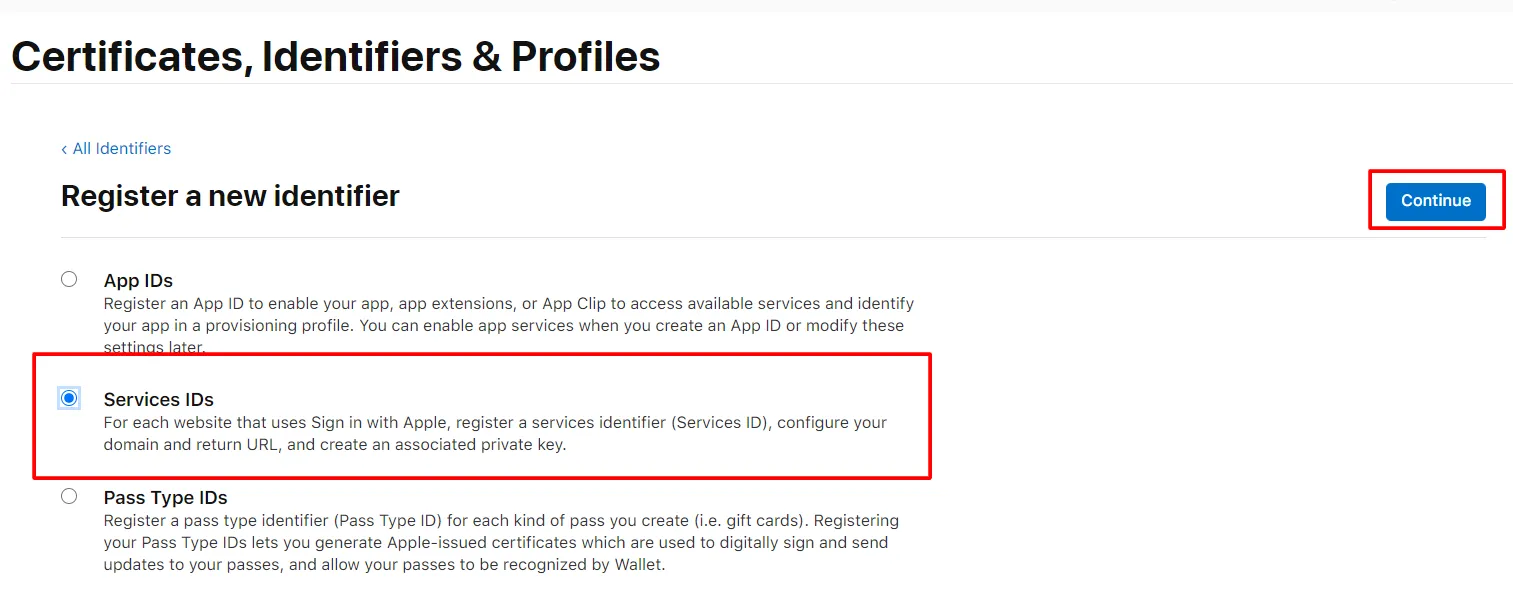
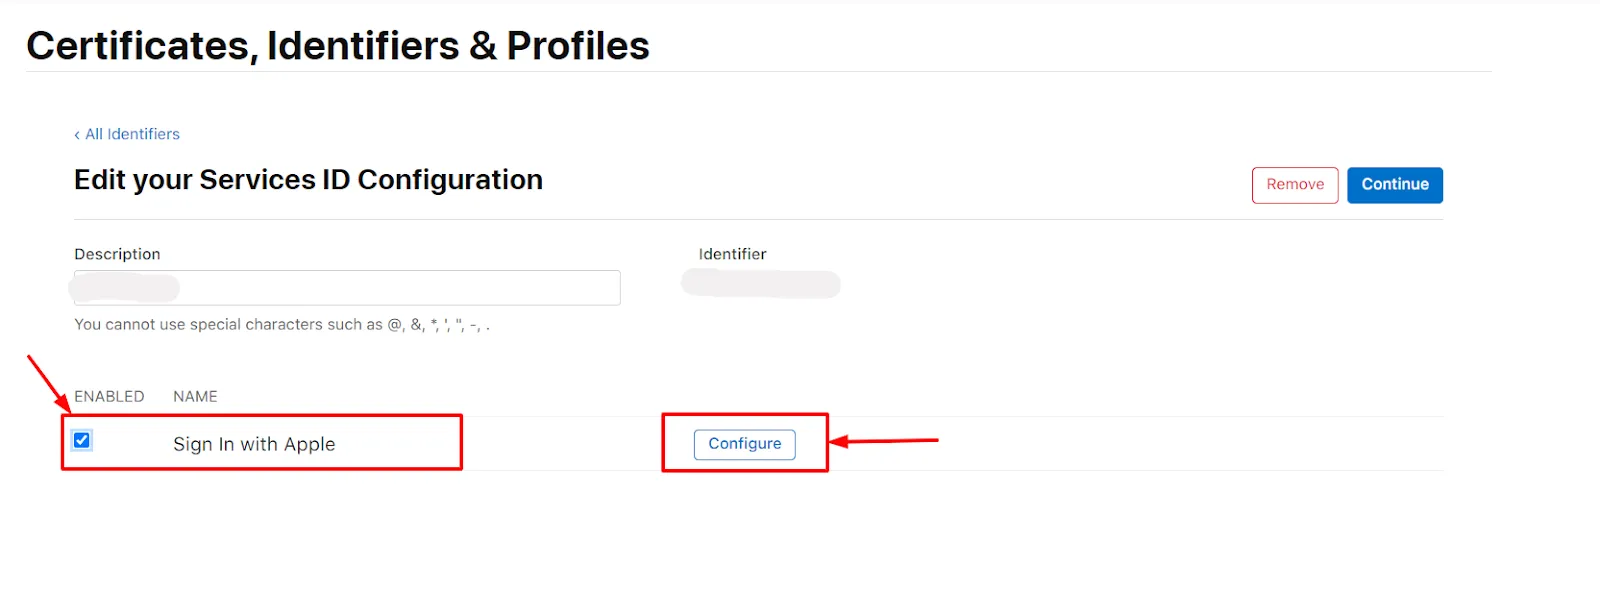
Again click the Plus icon( blue color). Select Service IDs and click on Continue.
Enter Description and Identifier( Identifier would be your client id - Copy this id and Paste in the above field of Client ID). and click on the Continue and after that Register button.
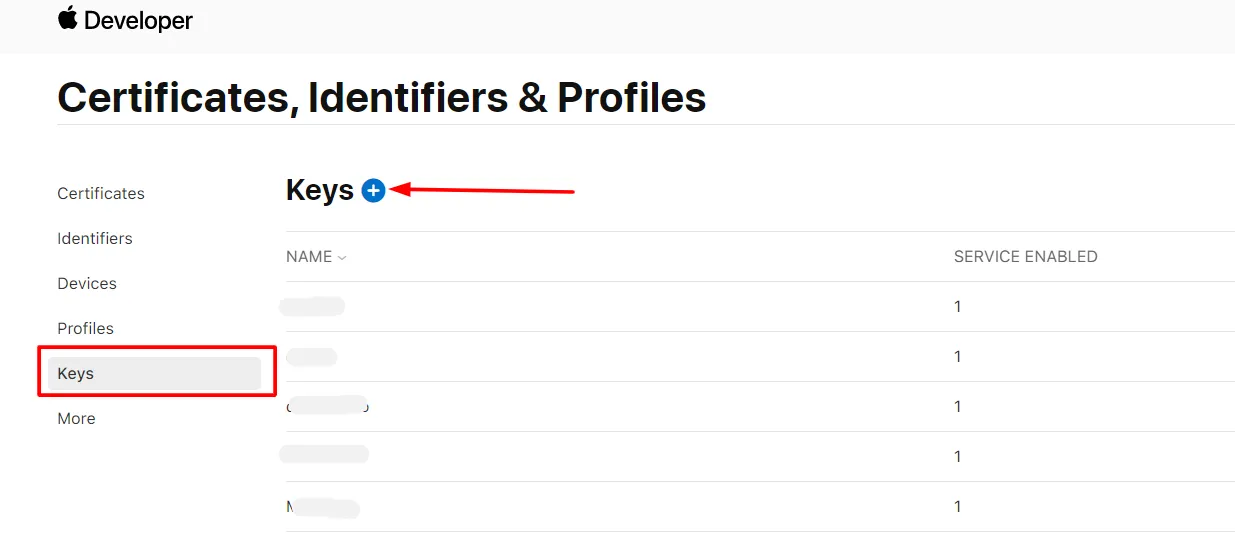
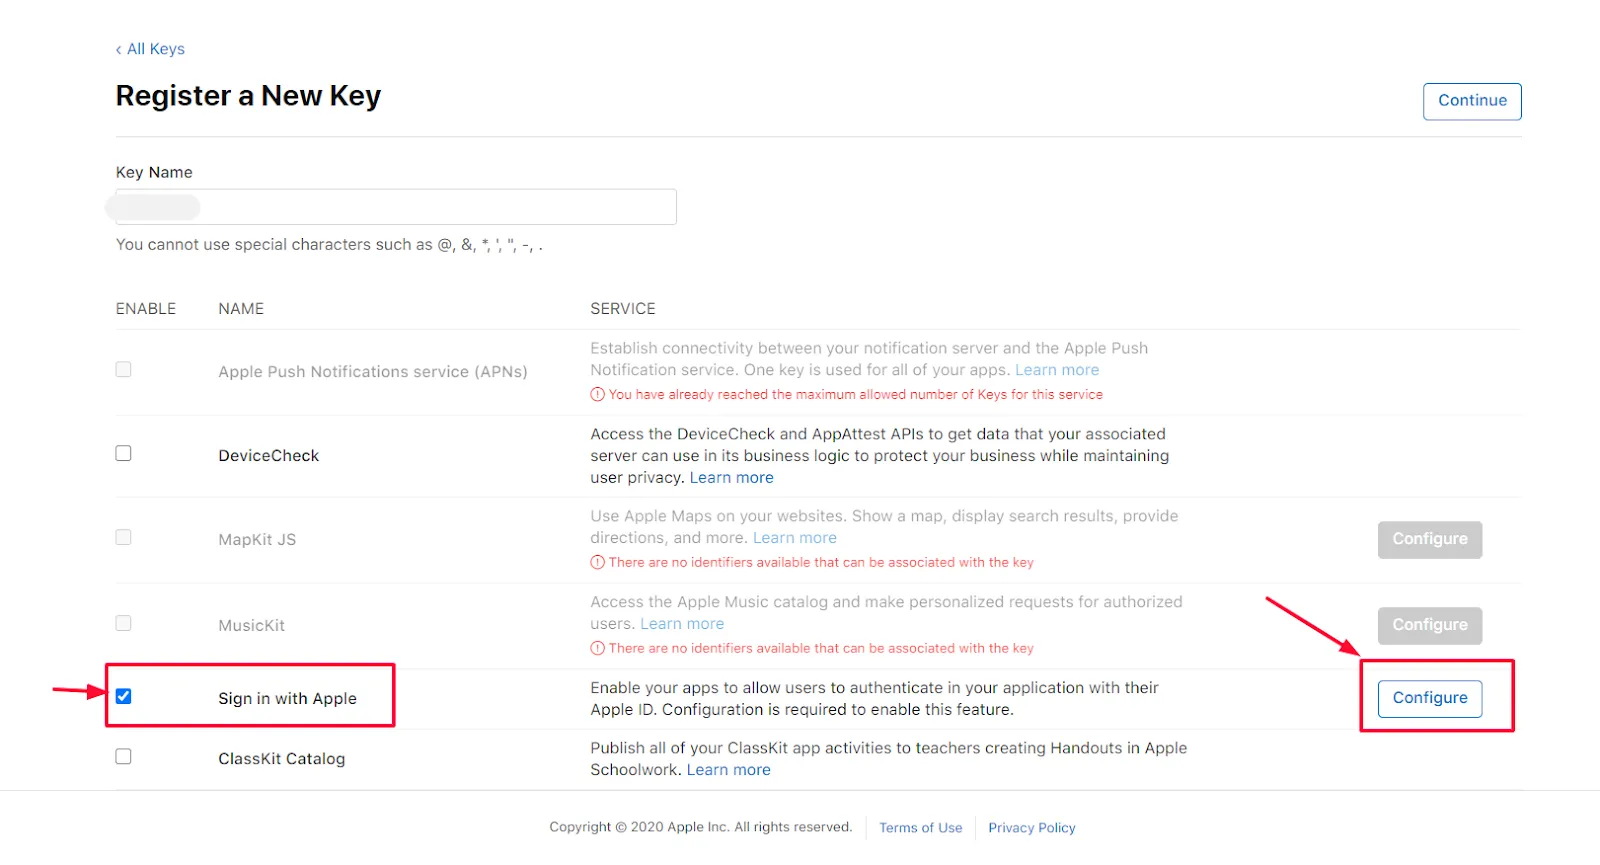
Click Keys from the left menu.Click on the Plus icon to register a new key.
Give your Key a name, and select Sign In with Apple and click on Configure button
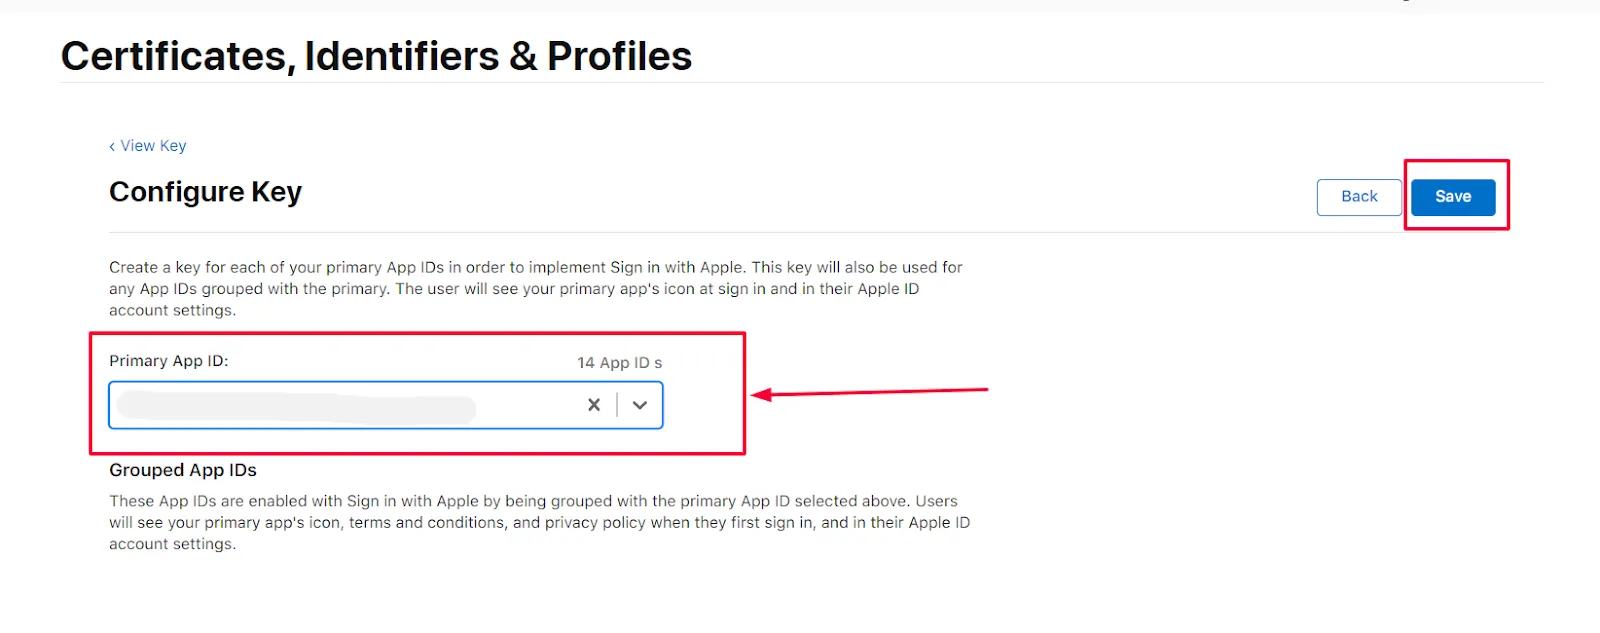
Select your Primary Id and click on the Save button and after that at the right corner click on Continue and Register button.
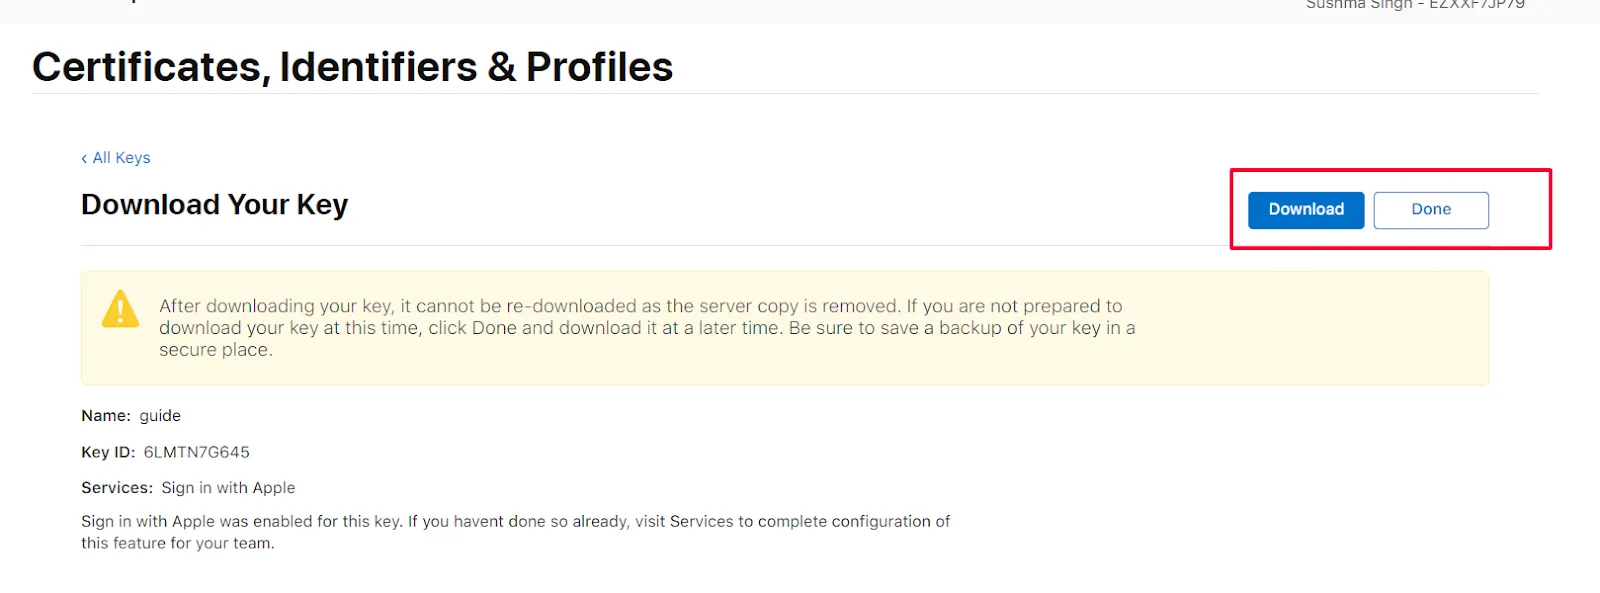
Click on the Download button once the key is downloaded click on the Done button.
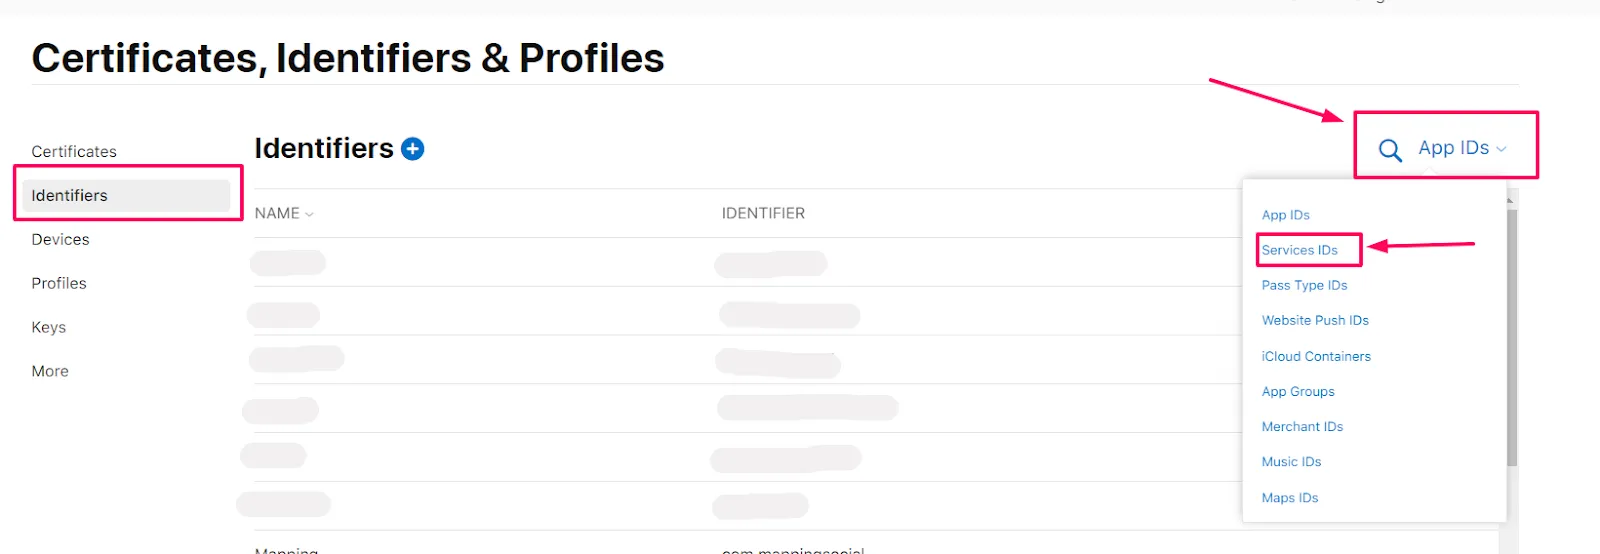
In the left menu click on Identifiers.
At the right top click on App IDs.
Select Service IDs from the drop-down menu.
Select your Service Id from the List.
Select Sign In with Apple and click on Configure button
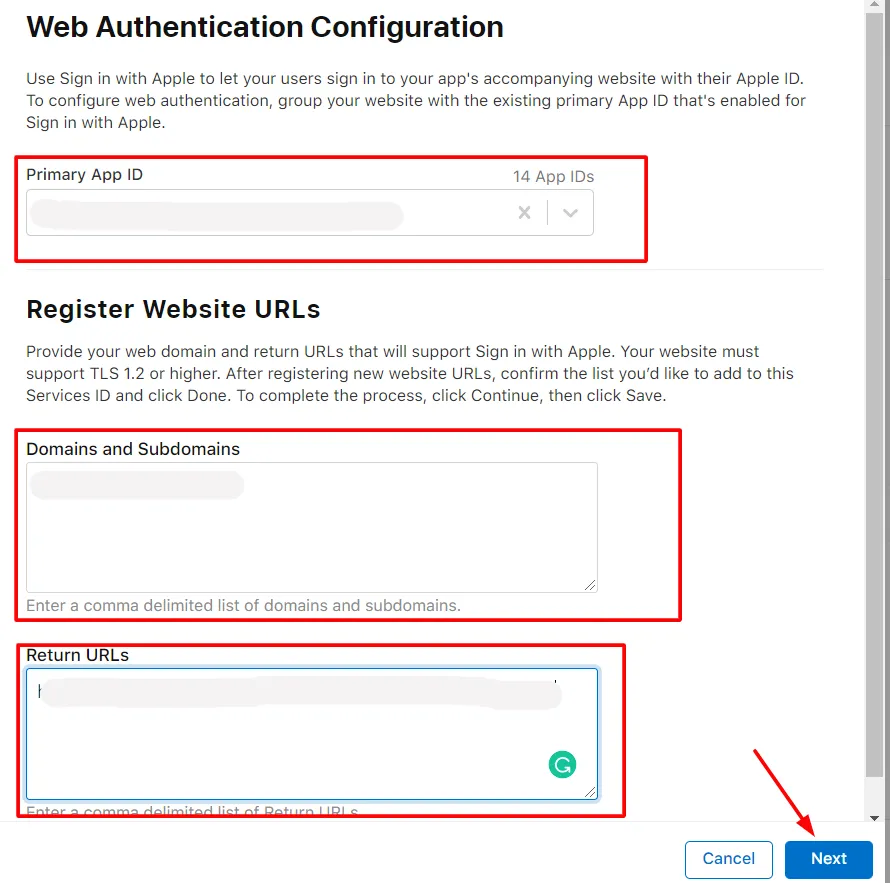
Select the Primary App Id from the drop-down, and Enter the Domain and Redirect URL in Domains and Subdomains and Return URLs respectively and click on the Next button (You will get the Domain name and Redirect URL from miniOrange dashboard)
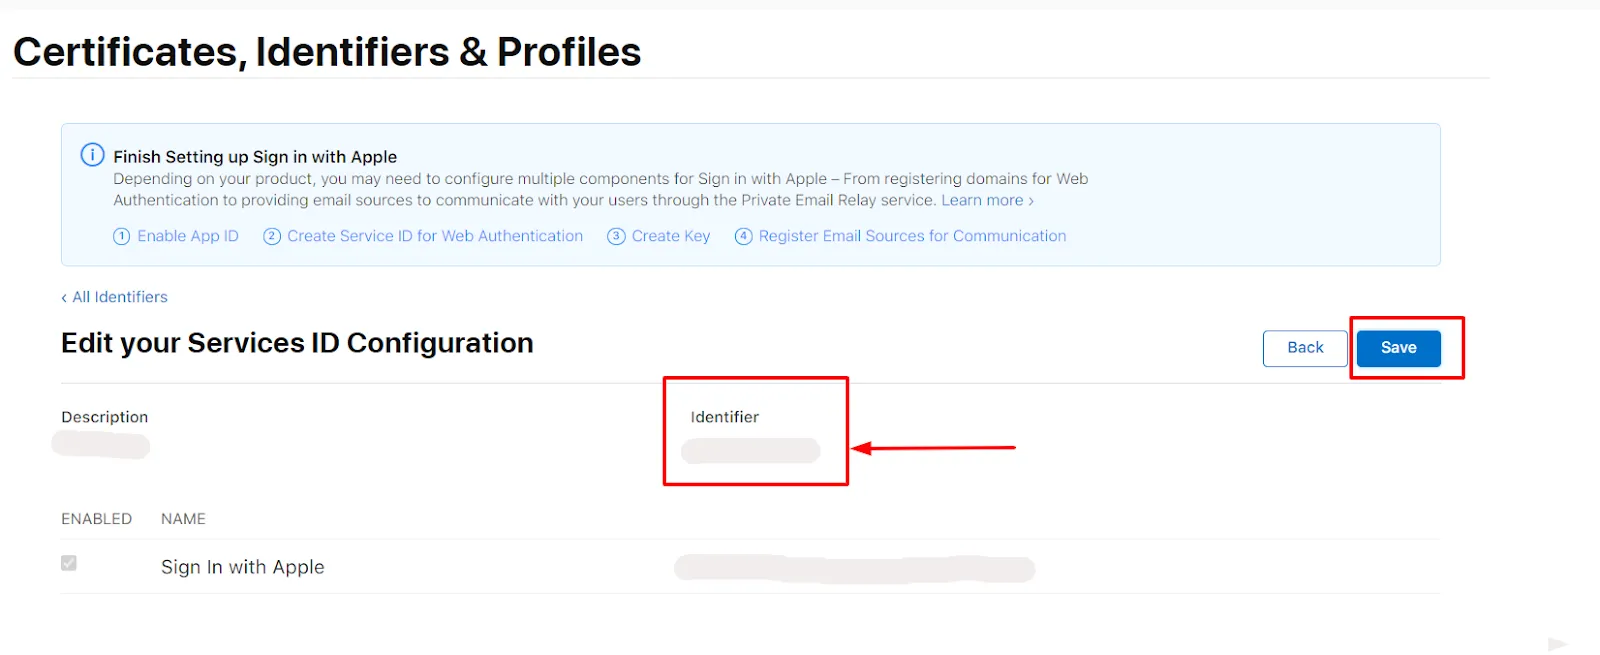
Verify the details and click on the Done button. After that at the right corner click on the Continue button.
Copy the Identifier value and click on the Save button.
Enter the Identifier value in the App Id field and copy the downloaded key value in App secret field of the Apple Login instruction miniOrange plugin.
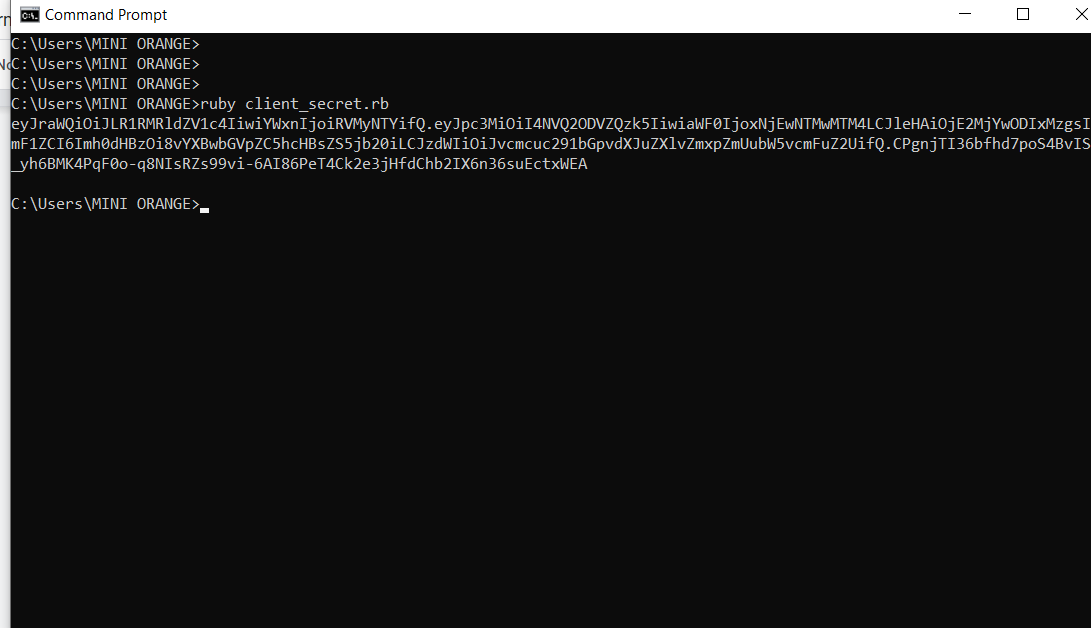
Search for the Start command prompt with ruby open the ruby command prompt and install the JWT gem by running the following command on the command line:gem install jwt
Copy the below code in a file and save the file with the .rb extension. Keep this .rb file and downloaded .p8 file in the same folder
Enter the name of downloaded file example= "key.P8", key_id , client_id, team_id in the code
Go to the BigCommerce Admin Panel and then Storefront >> Themes >> Advanced >> Edit Theme Files >> Templates >> pages>> auth>> login.html.
First, find the appropriate place in the code where you want to add the social media buttons. This could be after the "Forgot password" link, for example:
Create a new div element with a class of "social-login". This will be the container for the social media buttons. <div class="social-login">
<-- social media buttons will go here -->
</div>
Add buttons or links for the social media platforms you want to support. Here's an example :
<div class="social-login">
 <a href="{{Your facebook single login url}}">
   <button class="button button--primary">Login with Facebook</button>
 </a>
 <a href="{{your google single login url}}">
   <button class="button button--primary">Login with Google</button>
 </a>
</div>
Save and apply the changes.
5. Configure SLO in BigCommerce
Download the script to initiate SLO in BigCommerce.
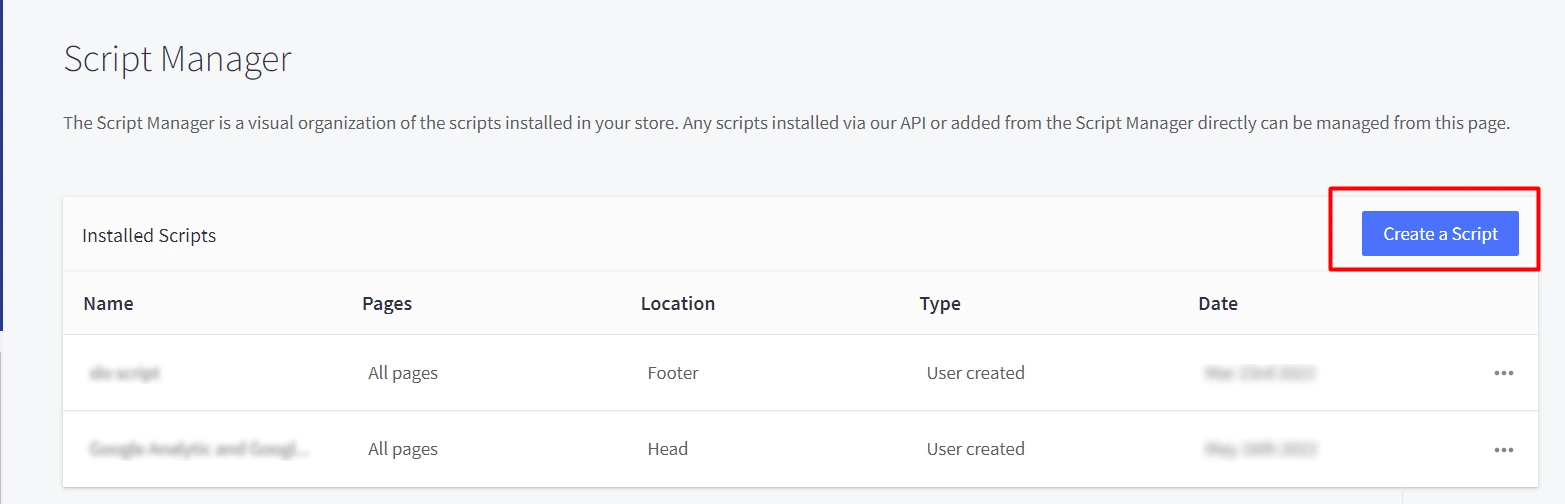
Navigate to Storefront >> Script Manager.
Click on create a script and add the script file which you have downloaded earlier in the footer of the page.
Enable settings as given in the image below:
A text box will be opened where you can add the downloaded script.
miniOrange BigCommerce Social Login SSO solution is available for all BigCommerce plans, including the free ones. We also offer support for a wide range of social login providers, including Google, Facebook, Twitter, and more. With our solution, customers can easily log in to their BigCommerce accounts using their preferred social media credentials, while website owners can benefit from increased engagement & streamlined login processes.