Hello there!
Need Help? We are right here!
Need Help? We are right here!
Search Results:
×Enabling 2FA (2-step verification) for your BigCommerce Store provides an extra level of security that goes beyond relying solely on a username & password. By introducing a second authentication factor, such as a one-time password sent via phone or email, the risk of unauthorized access to your BigCommerce store is significantly reduced. Even if an attacker manages to obtain a user's password, they would still need the second factor to gain access.
By implementing BigCommerce 2FA, merchants & users can effectively safeguard their BigCommerce store, customer data & sensitive business information from unauthorized access attempts & potential security breaches.
With miniOrange BigCommerce 2FA solution, you can:
Verified Technology Partner of BigCommerce
SSO + MFA Support for any BigCommerce Plan (Standard, Plus, Pro, Enterprise)
miniOrange offers free help through a consultation call with our System Engineers to Install or Setup BigCommerce 2FA solution in your environment with 30-day free trial.
For this, you need to just send us an email at idpsupport@xecurify.com to book a slot and we'll help you in no time.
miniOrange provides user authentication from various external sources, which can be Directories (like ADFS, Microsoft Active Directory, OpenLDAP, AWS etc), Identity Providers (like Microsoft Entra ID, Okta, AWS), and many more. You can configure your existing directory/user store or add users in miniOrange.

miniOrange
Authenticator App


Google
Authenticator App

Authy 2-Factor
Authentication App

Microsoft
Authenticator App

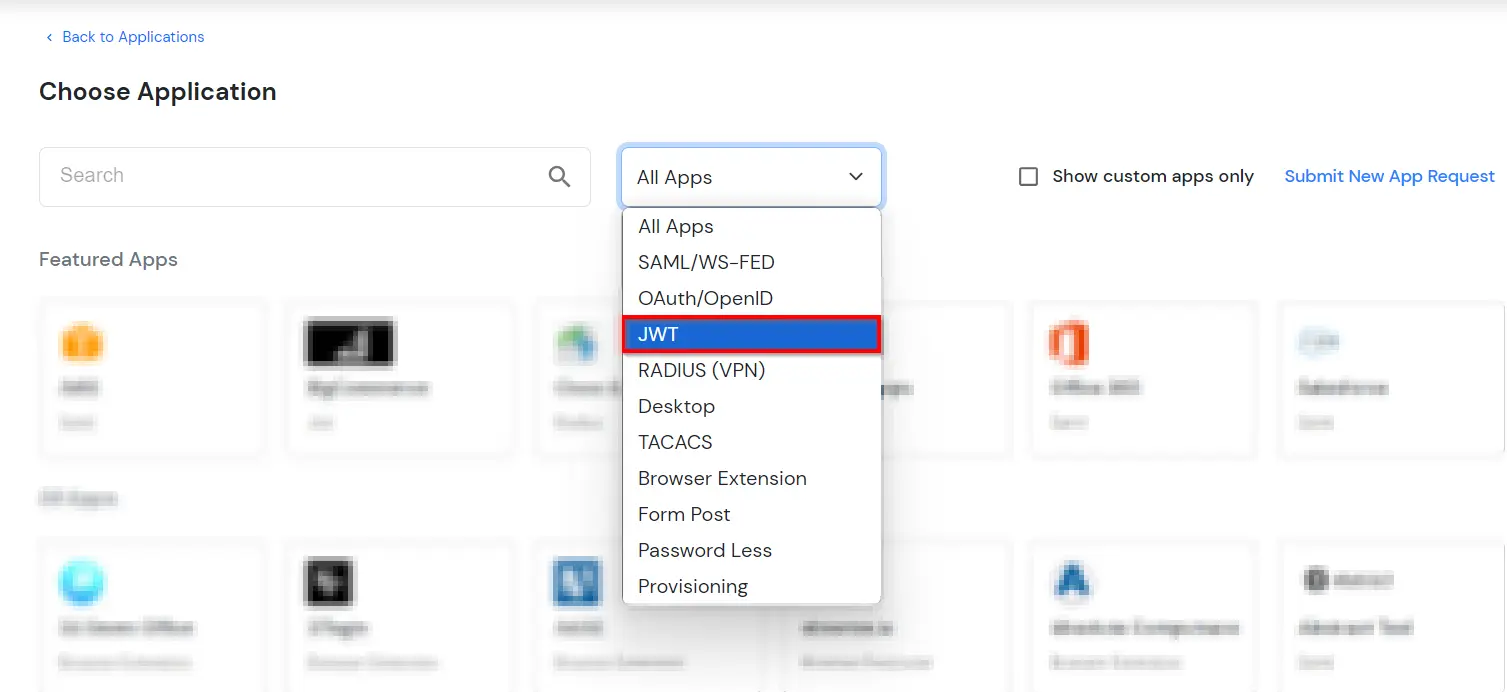
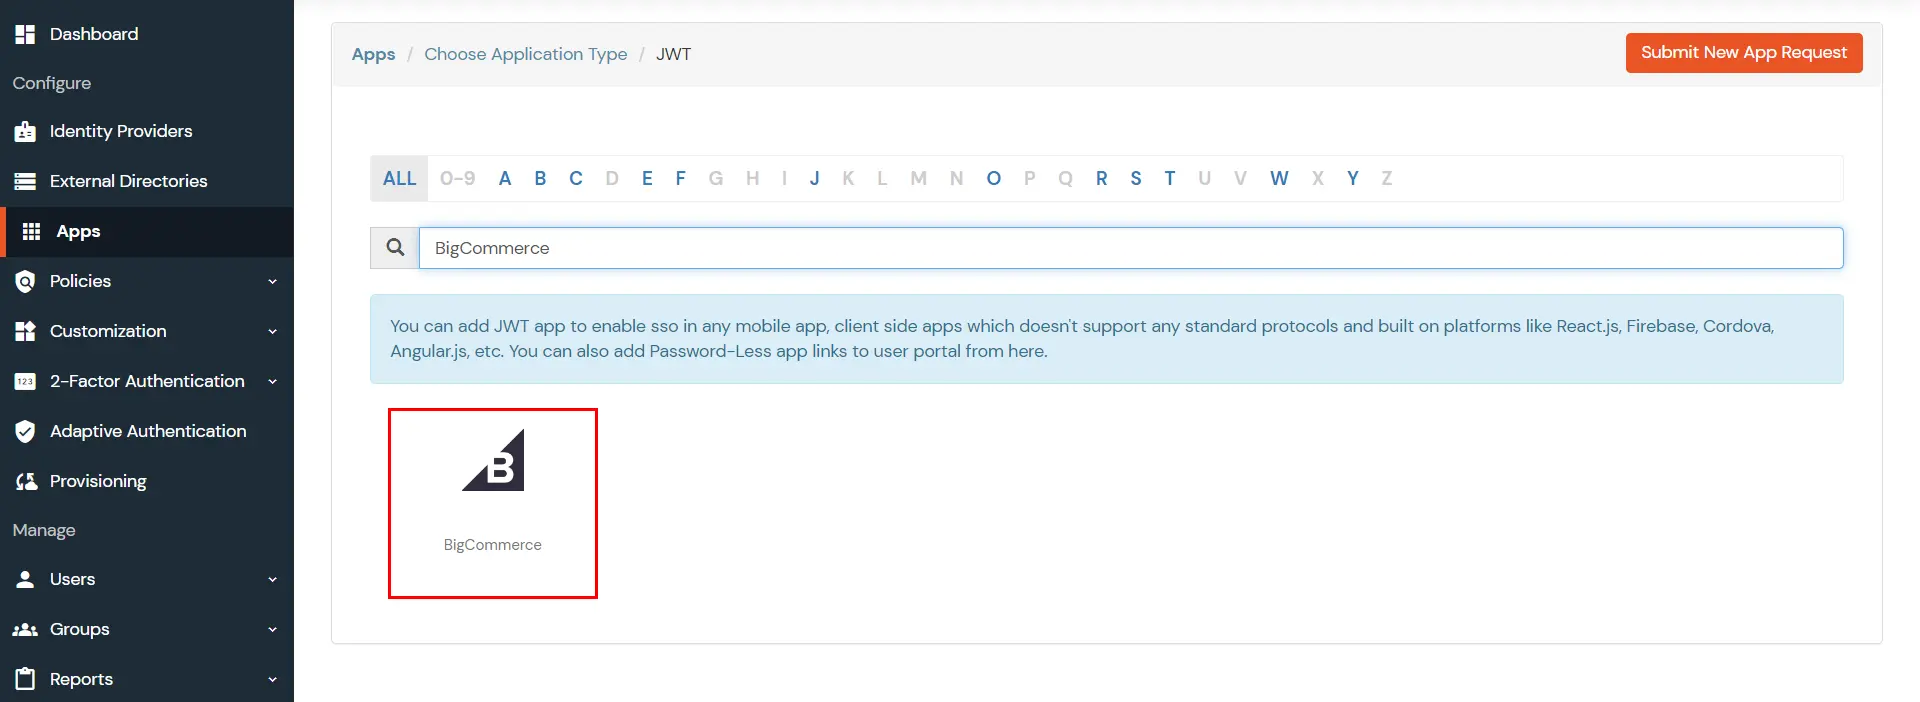
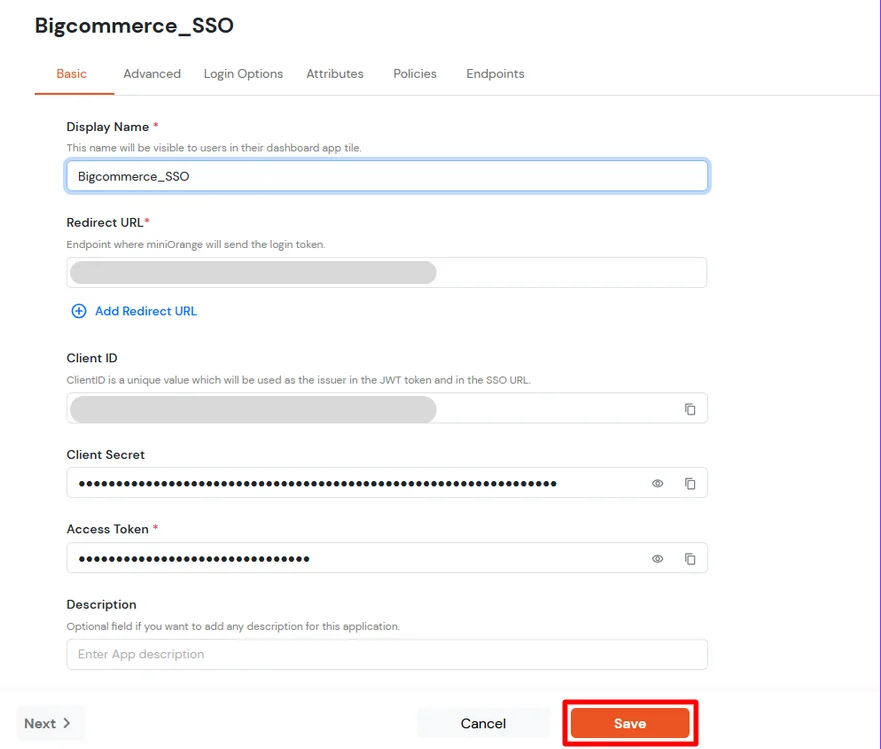
| Display Name [Required] | BigCommerce (According to your choice) |
| Redirect-URL [Required] | Refer to the Note section below to get the Redirect URL. |
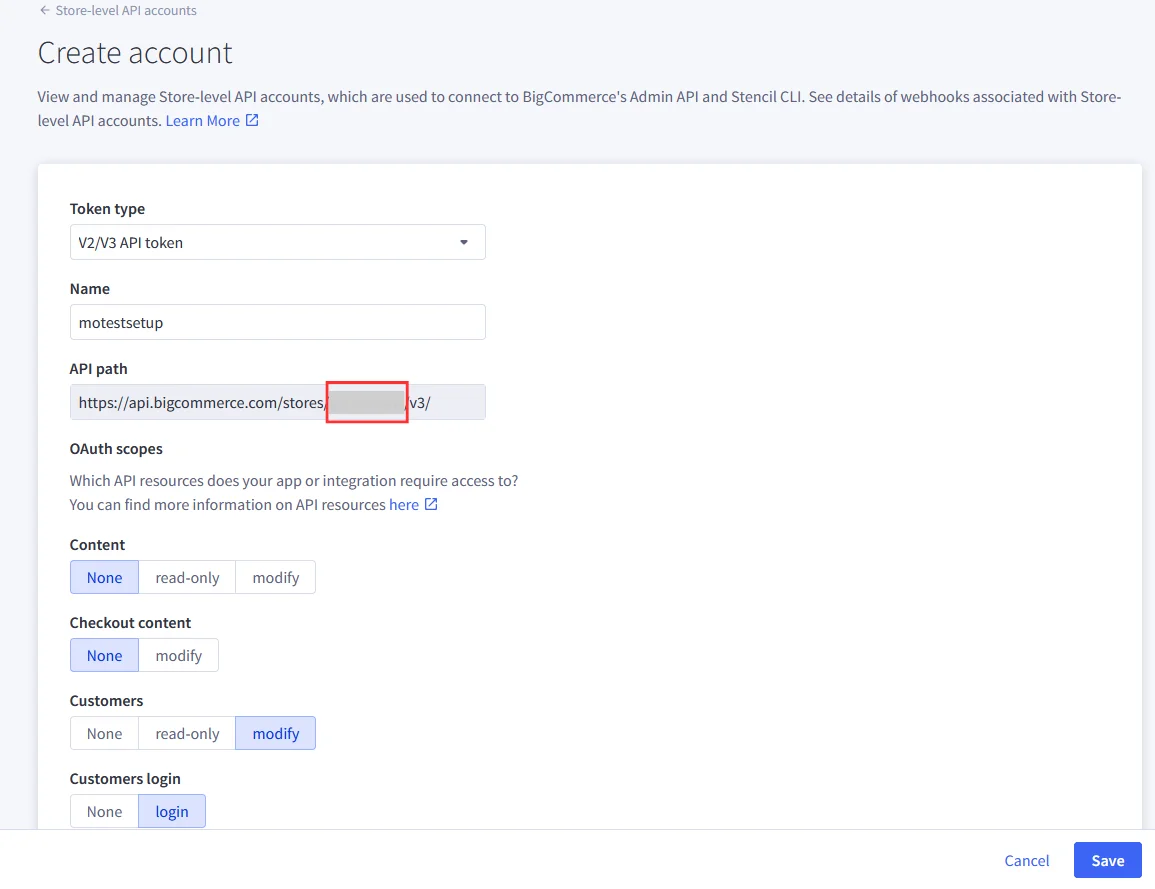
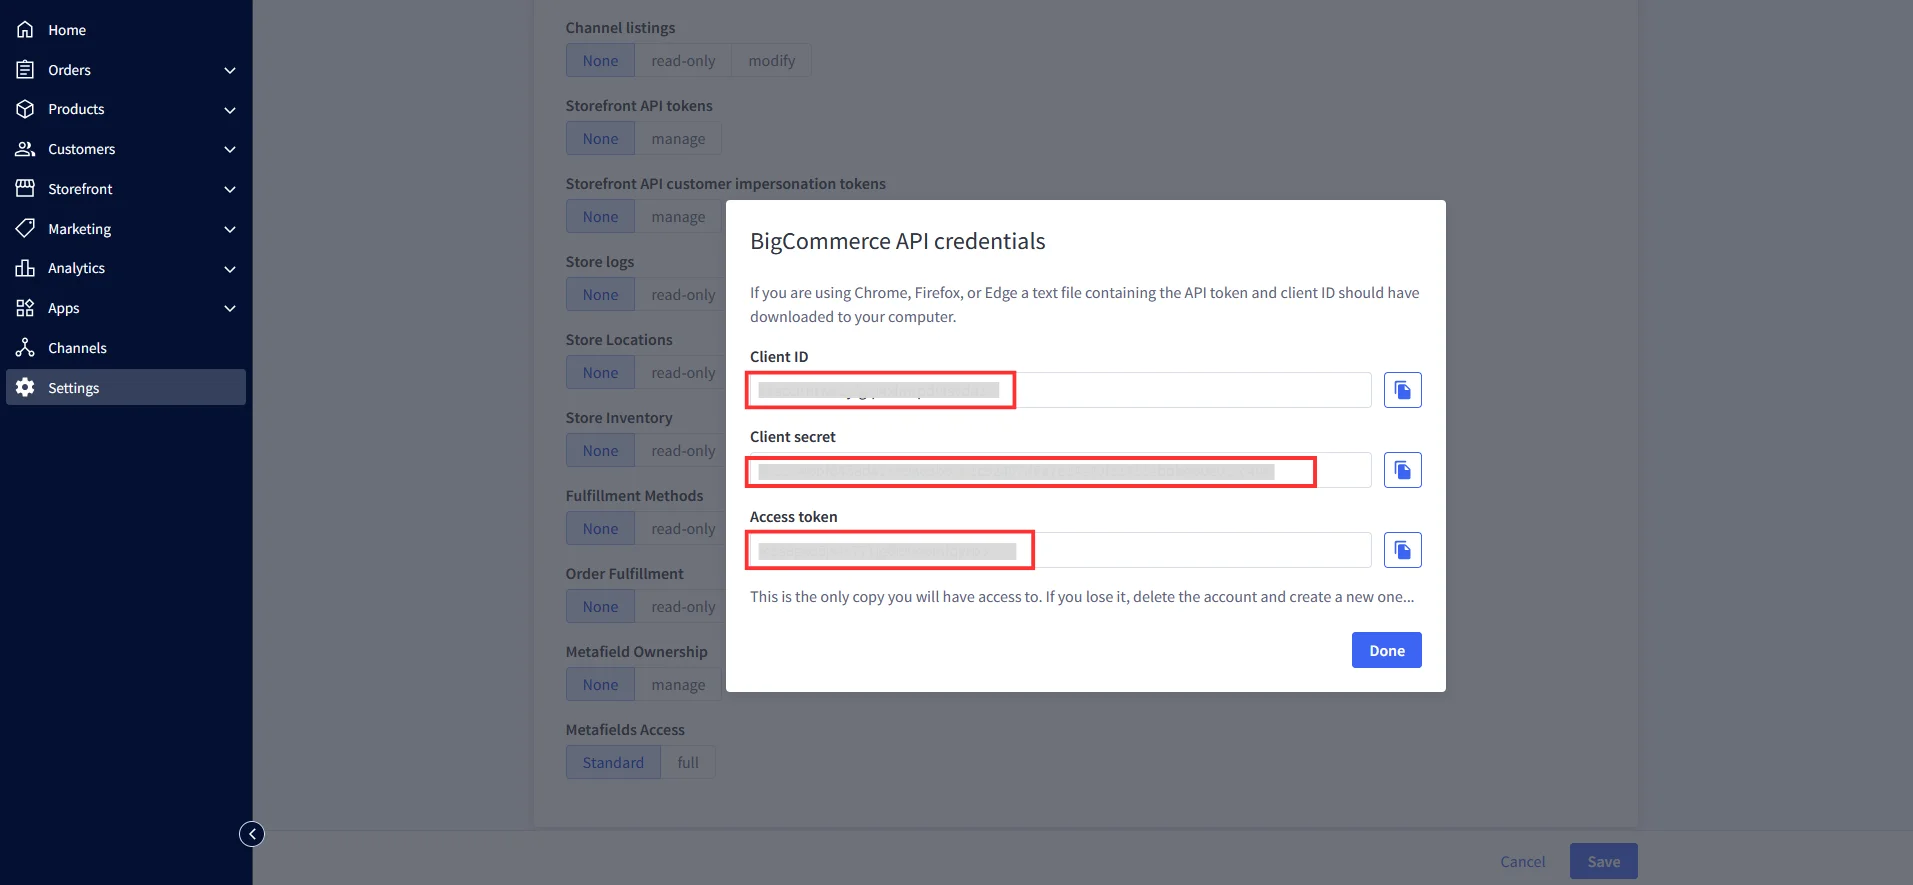
| Client ID | Copy from the downloaded file in Step 1 |
| Client Secret | Copy from the downloaded file in Step 1 |
| Access Token | Copy from the downloaded file in Step 1 |
| Description | According to your choice |
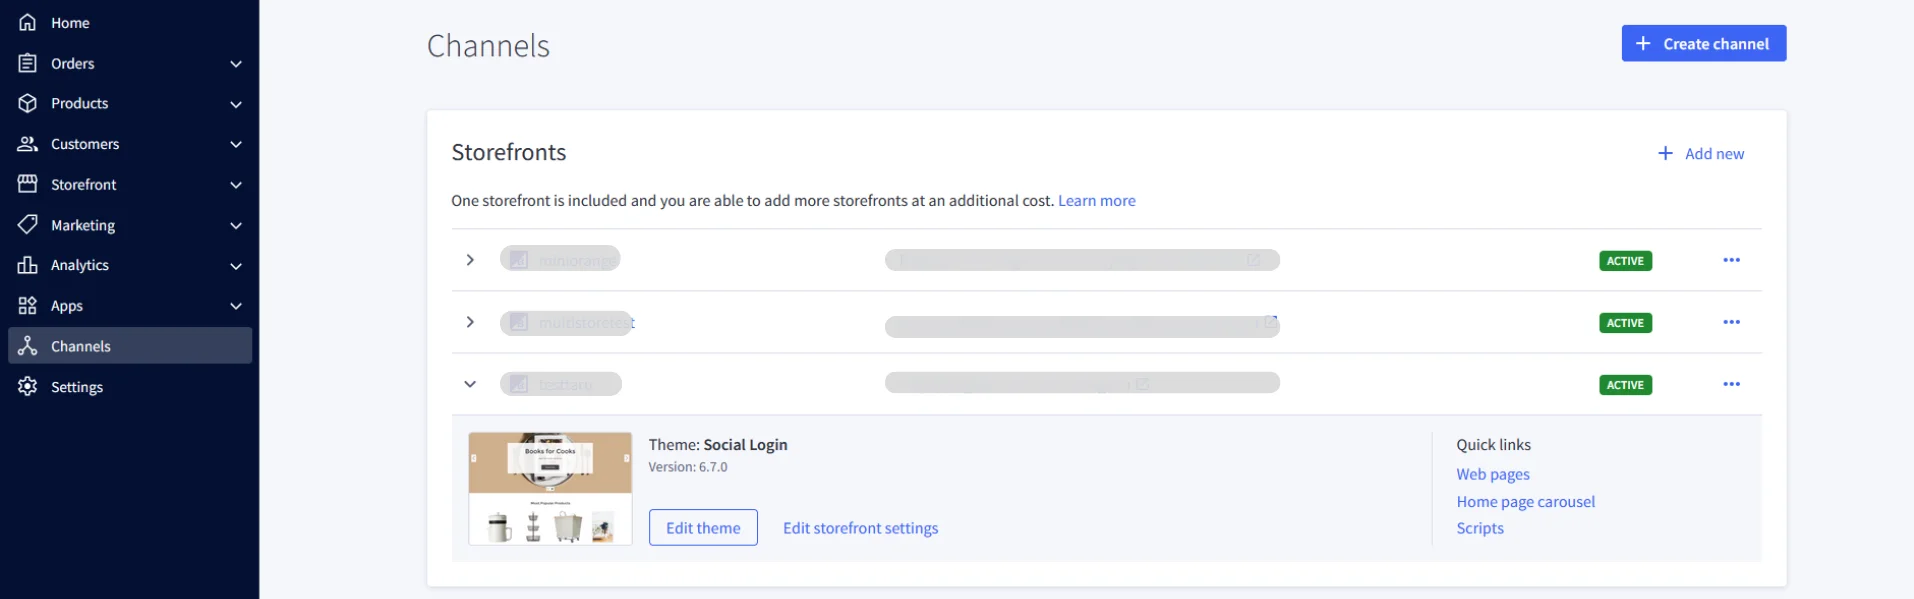
Note: Your Redirect URL should be: <Storefront URL>/login/token/
For Example: https://xyz.bigcommerce.com/login/token/
To find your Storefront URL: Go to Channels >> Storefronts. Copy the URL listed for your store.
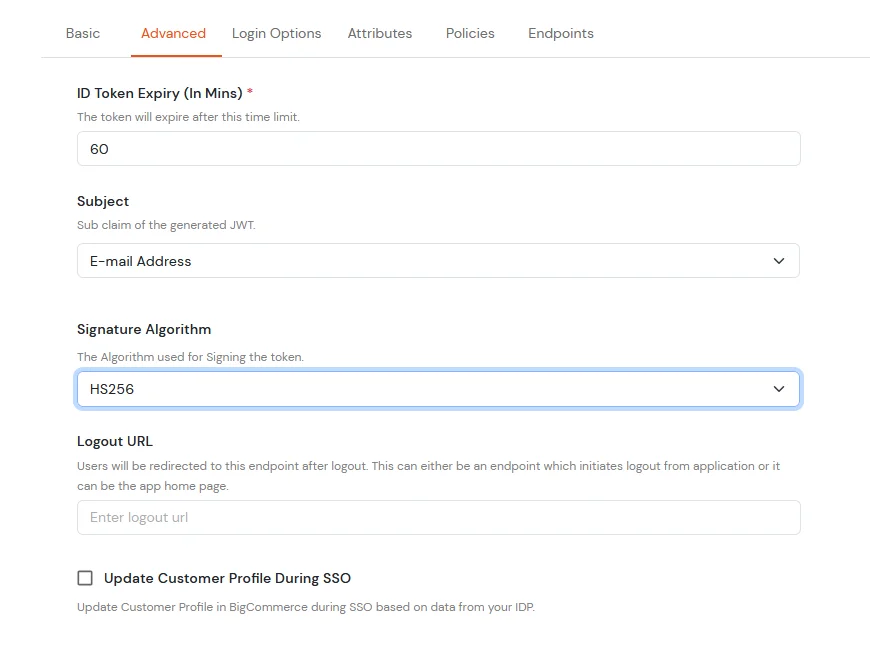
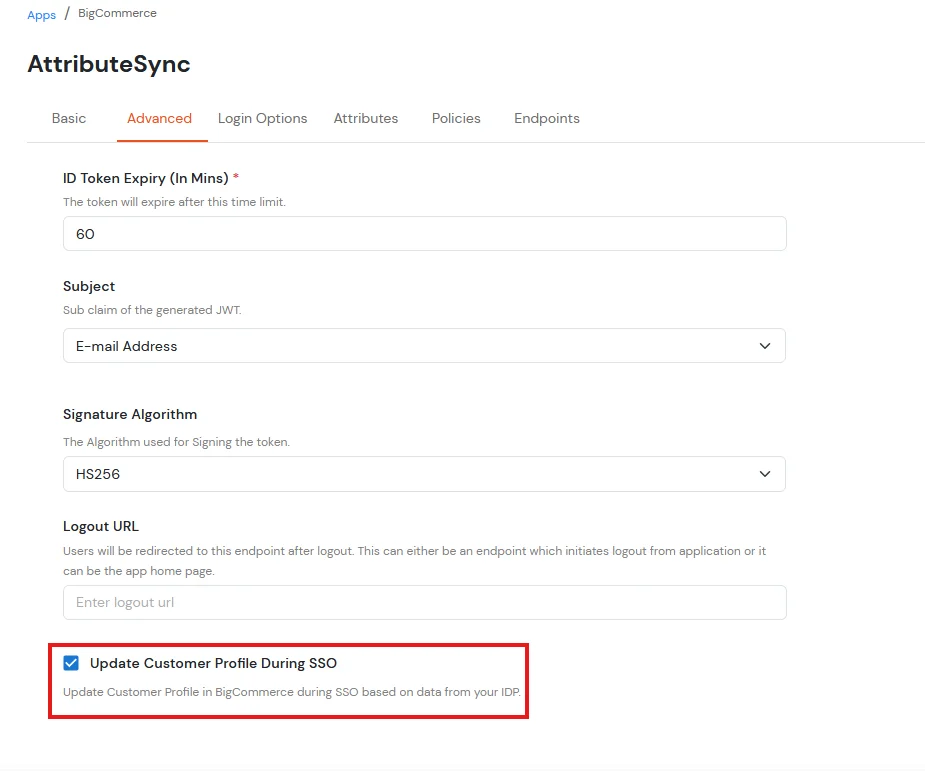
| Subject | E-Mail Address. |
| Signature Algorithm | HS256 |
| Logout URL | Copy the storefront URL as mentioned above and append /login.php?action=logout |
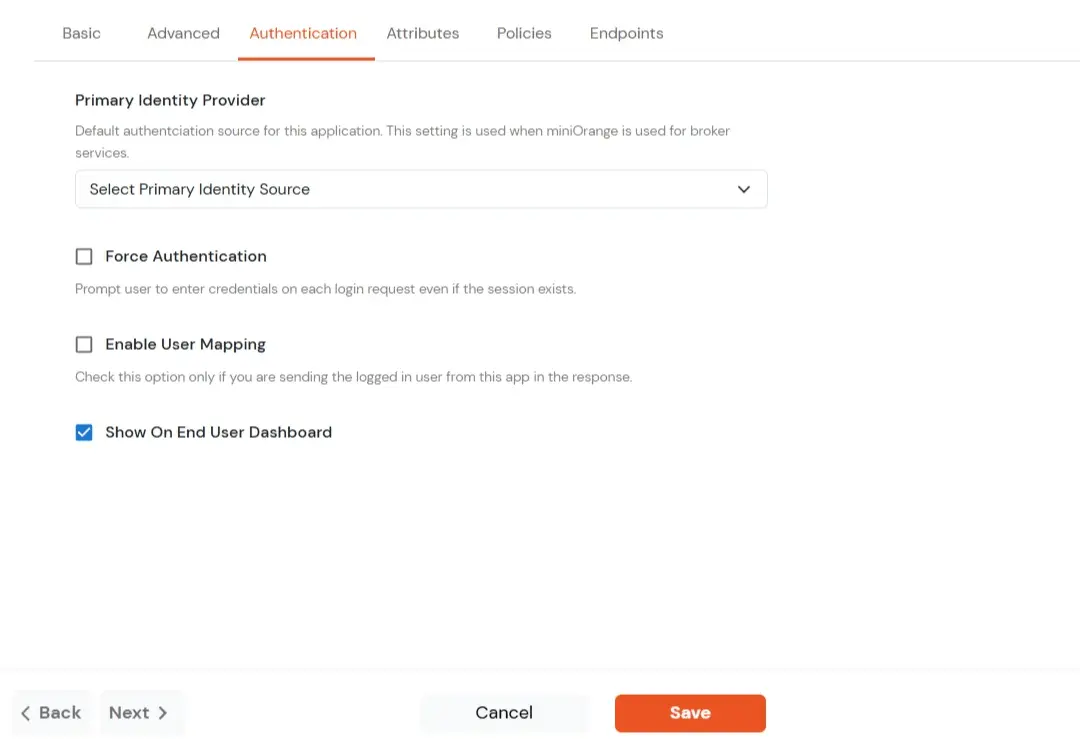
| Primary Identity Provider | The identity source against which user will be authenticated |
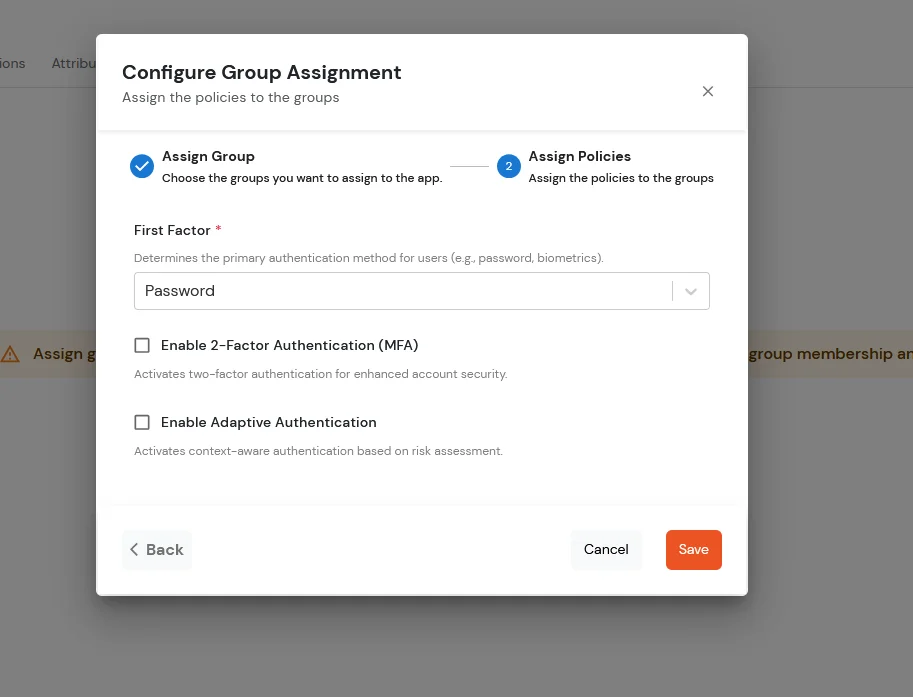
| Force Authentication | Enable if you want user to authenticate even if the user has a session |
| Enable User Mapping | Enable if you are sending the logged-in user from this app in the response |
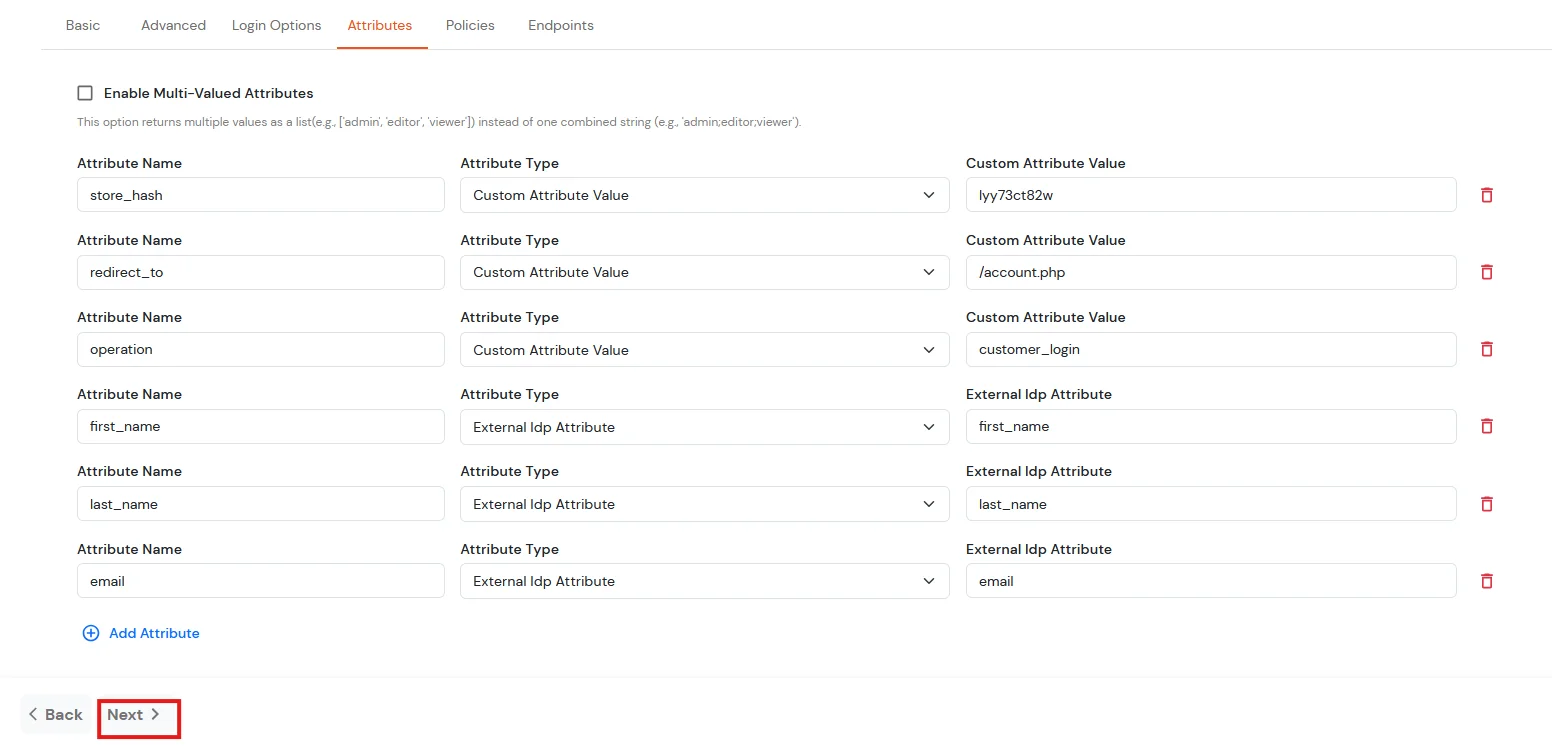
| Attribute Name | Attribute Type | Attribute Value |
|---|---|---|
| store_hash | Custom Attribute Value | Refer to Step 1 above. |
| redirect_to | Custom Attribute Value | Endpoint where you wish to redirect the user to after sso. [Homepage or account page e.g. /account.php] |
| operation | Custom Profile Attribute | customer_login |
| first_name | External Idp Attribute | first_name |
| last_name | External Idp Attribute | last_name |
| External Idp Attribute |
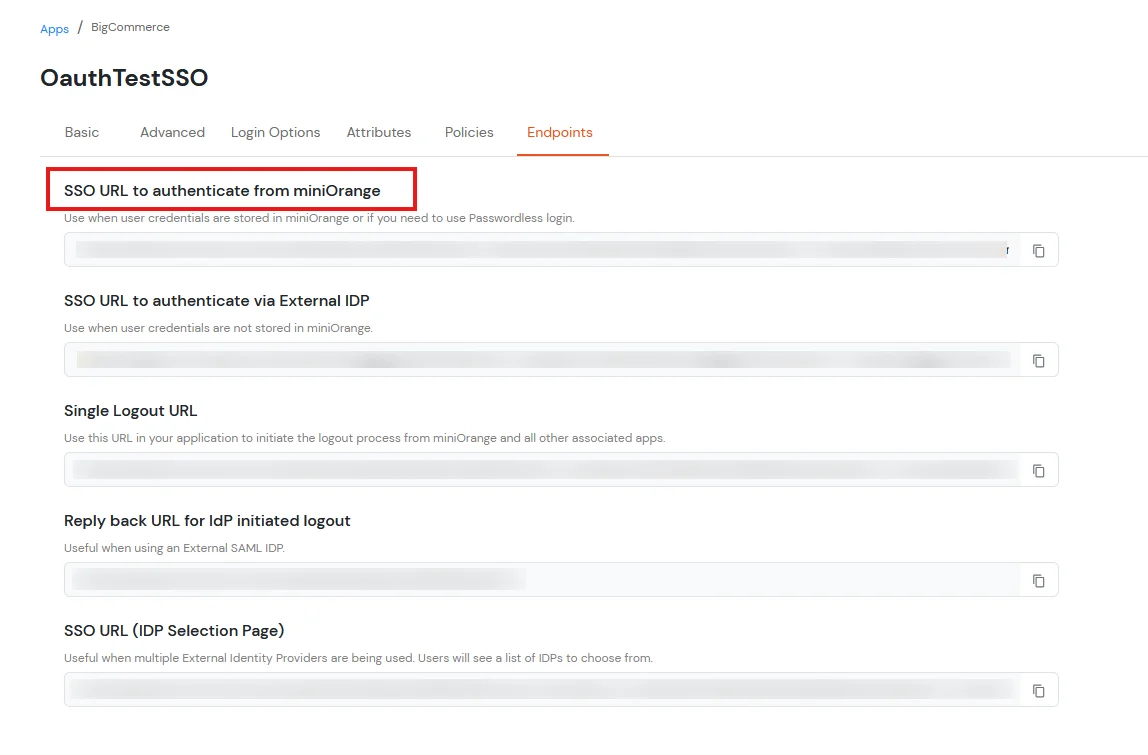
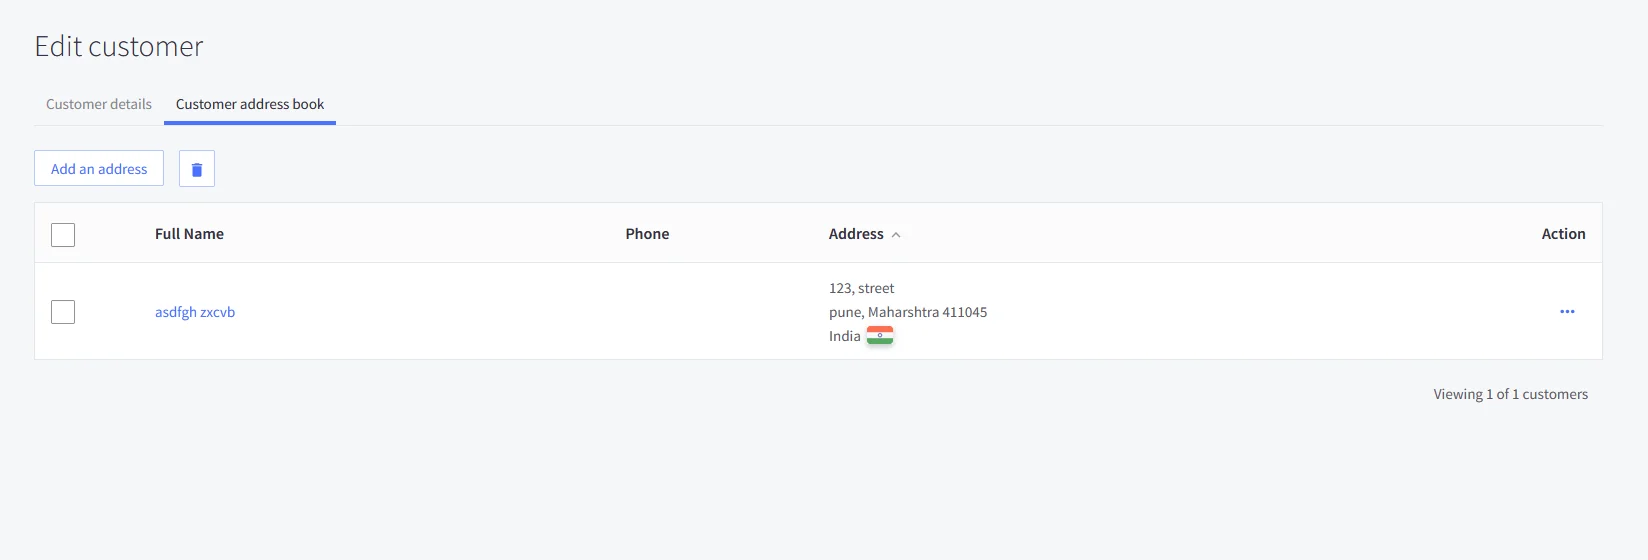
Now, you can access BigCommerce Account Using IDP credentials through SSO URL.
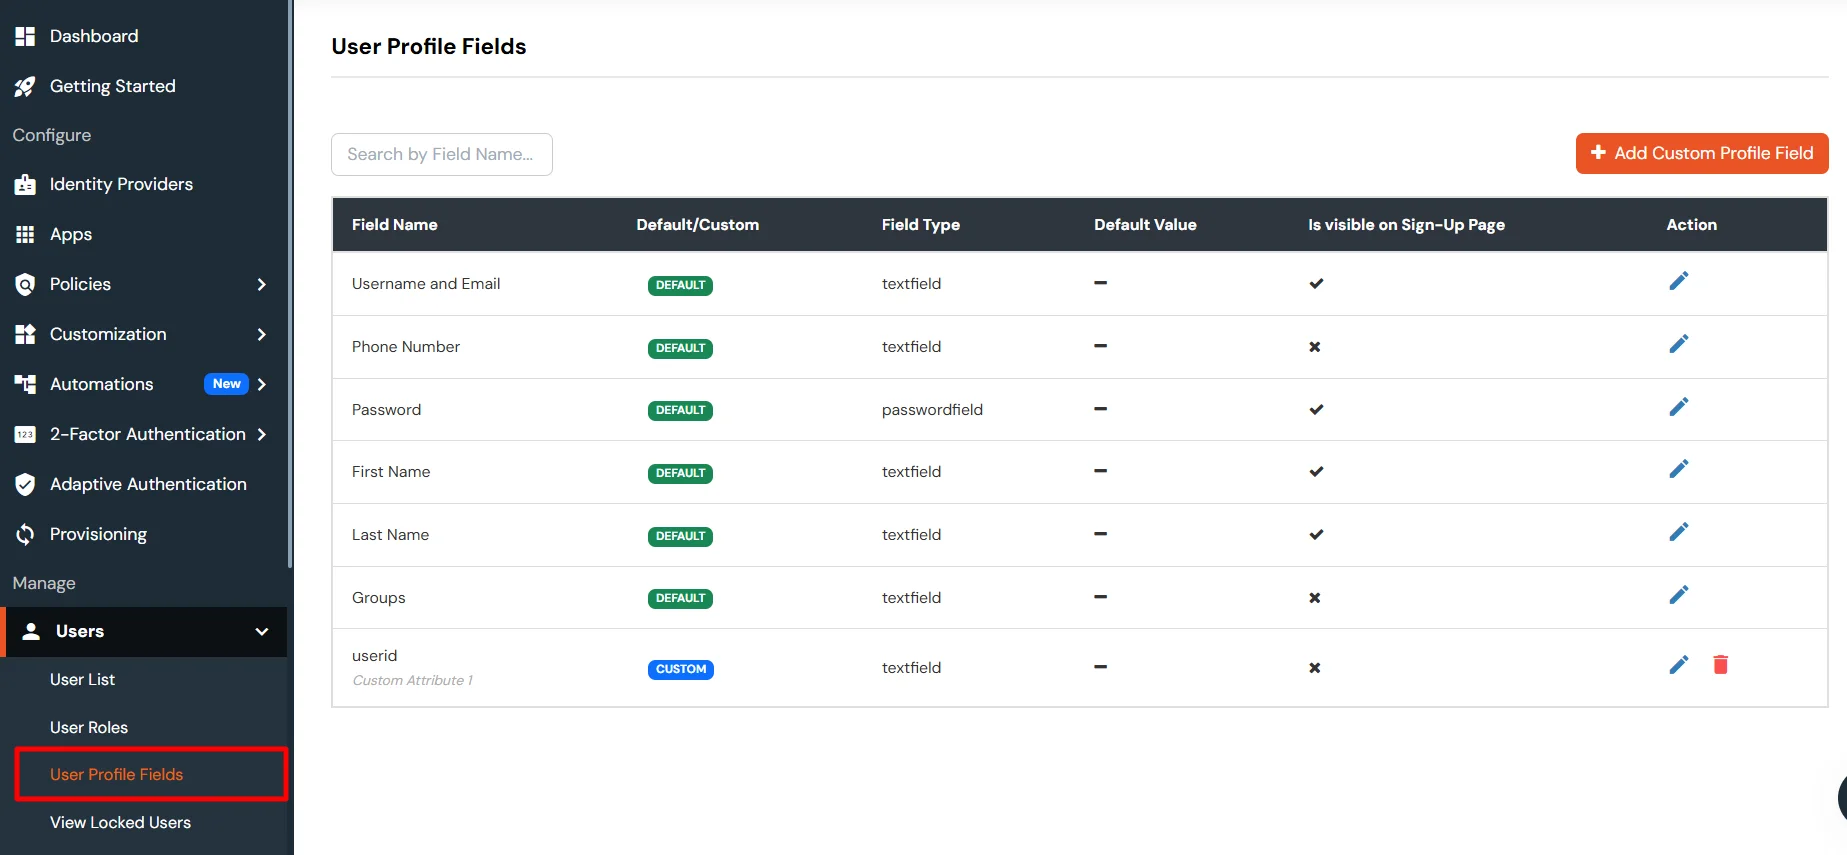
To synchronize address, custom attributes, and form fields from the Identity Provider (IDP) to BigCommerce, the following details must be configured:
Address Fields
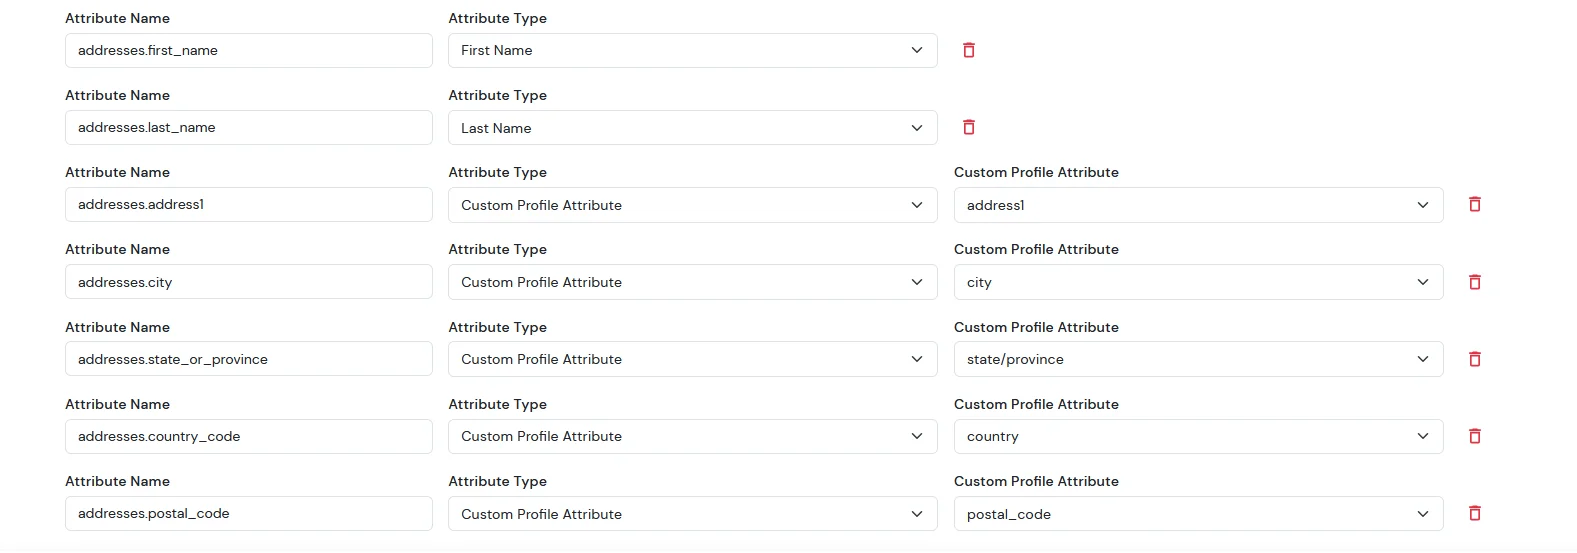
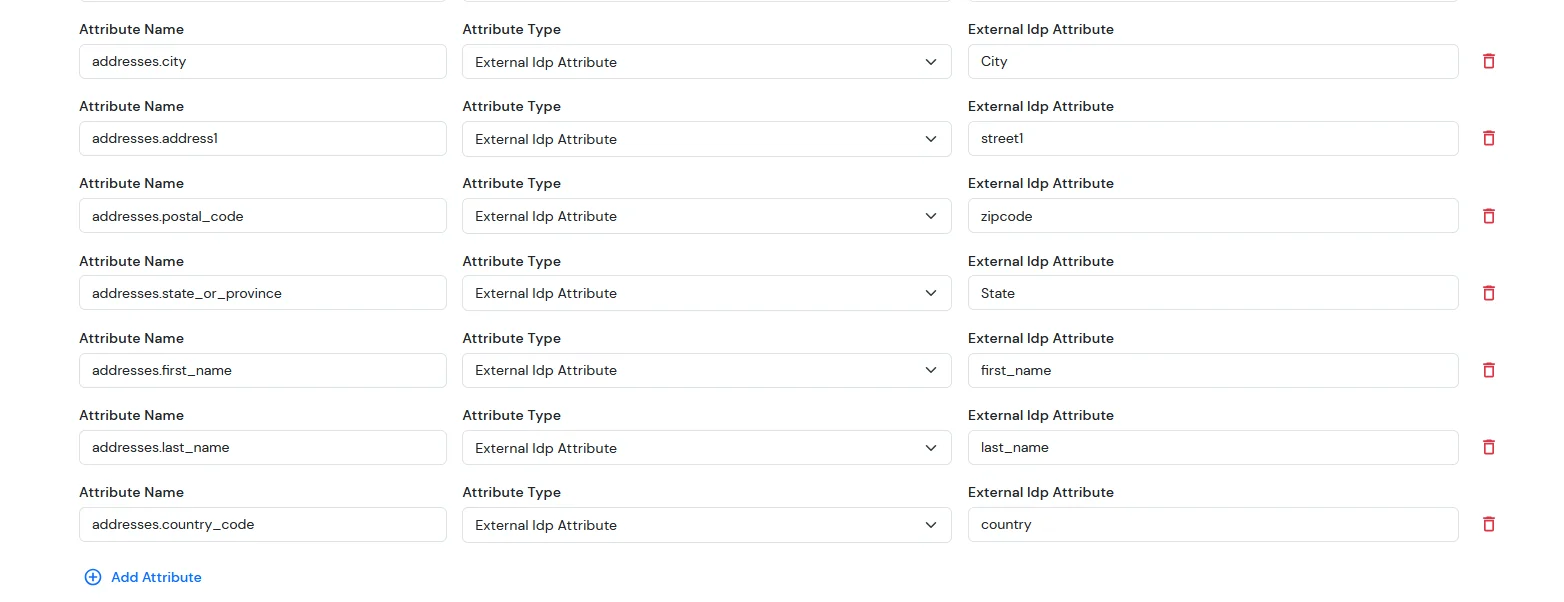
To successfully sync customer address information, the following attributes are required:
In the below diagram, we are using miniOrange as the IDP.
| Attribute Name | Attribute Type | Value |
|---|---|---|
| addresses.first_name | First Name | - |
| addresses.last_name | Last Name | - |
| addresses.address1 | Custom Profile Attribute | address1 |
| addresses.city | Custom Profile Attribute | city |
| addresses.state_or_province | Custom Profile Attribute | state/province |
| addresses.country_code | Custom Profile Attribute | country |
| addresses.postal_code | Custom Profile Attribute | postal_code |
Note: When sending the country value, always use the country code (e.g., US, IN). If you pass the full country name such as “United States”, the value will not be updated — only country codes are supported for correct mapping.
While syncing address fields, ensure that the city, state, and country values you provide are valid options supported by BigCommerce and exist in their respective dropdown lists.
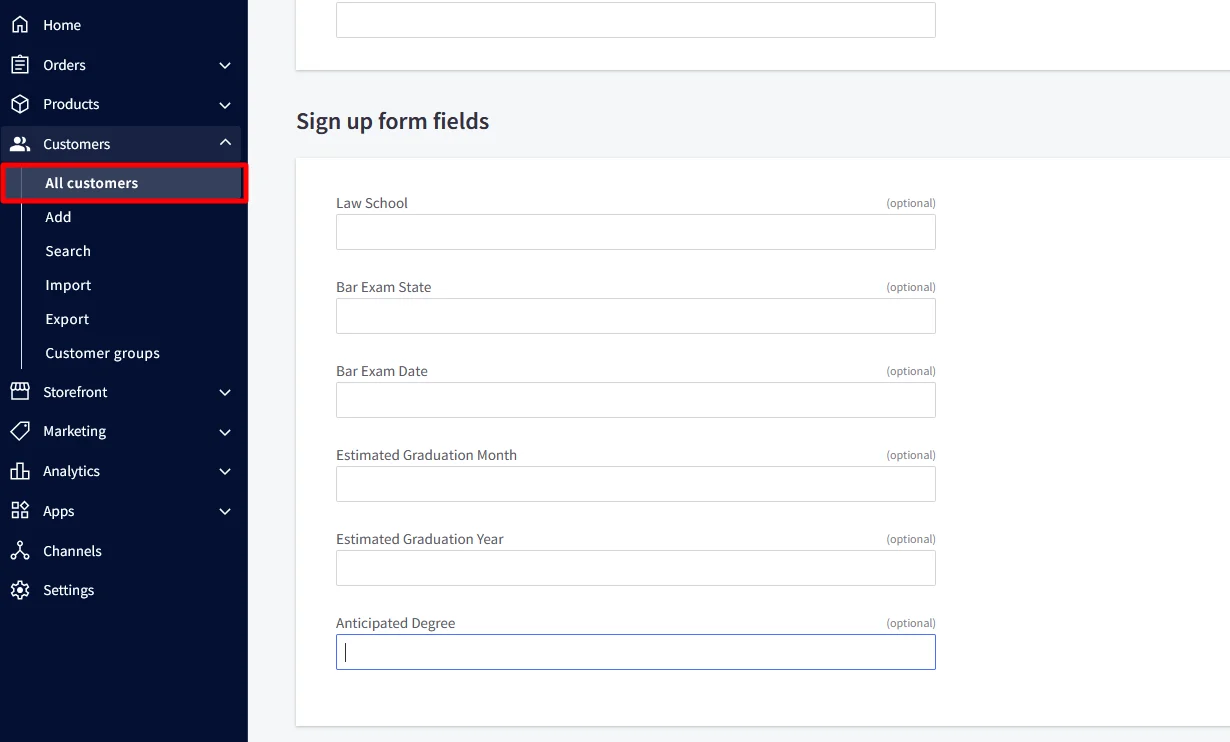
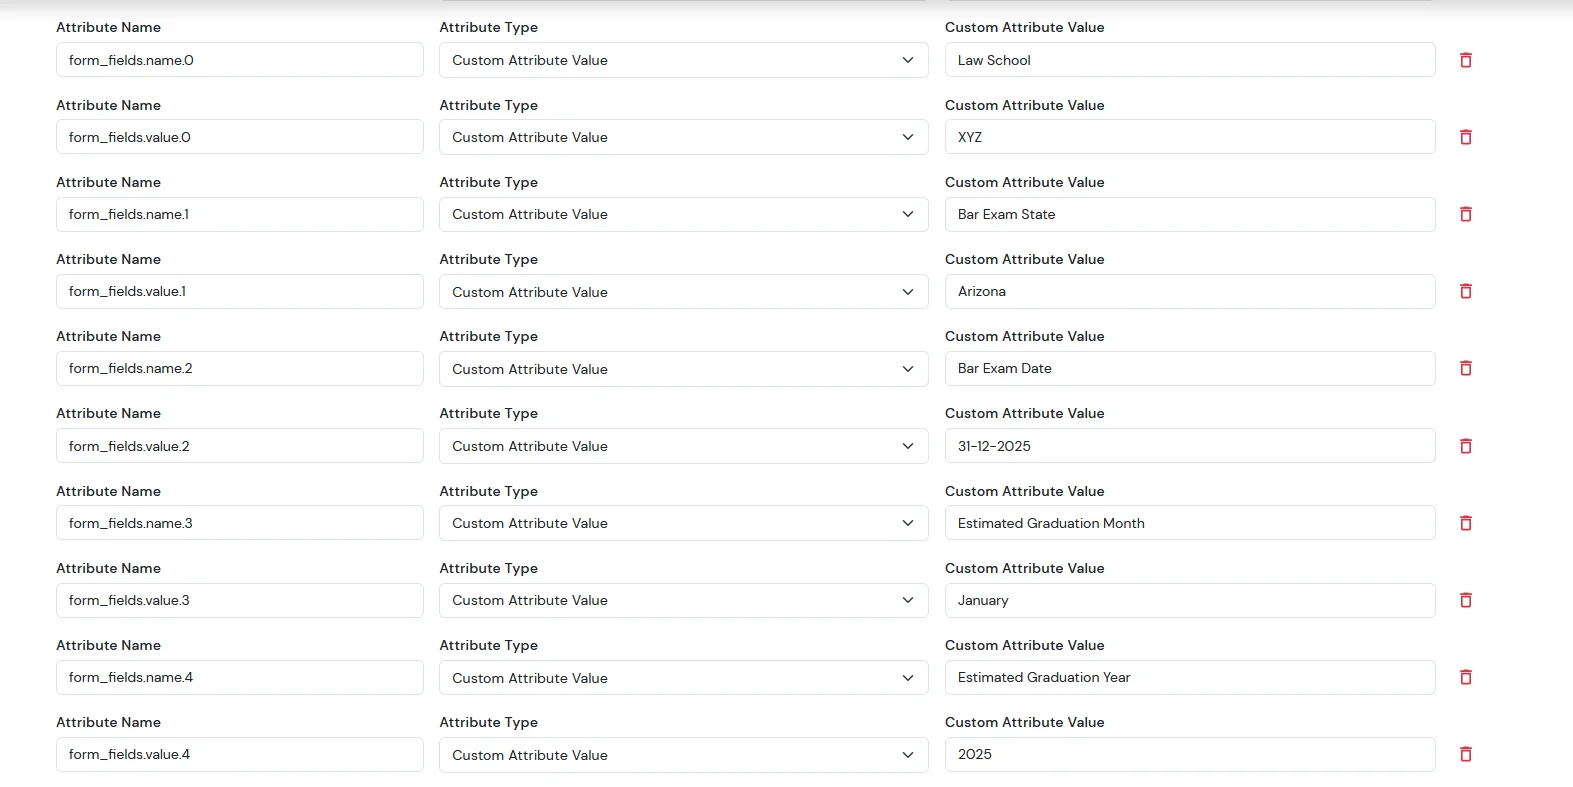
For the Sign up form fields:
| Attribute Name | Attribute Type | Value |
|---|---|---|
| addresses.first_name | First Name | - |
| addresses.last_name | Last Name | - |
| addresses.address1 | Custom Profile Attribute | address1 |
| addresses.city | Custom Profile Attribute | city |
| addresses.state_or_province | Custom Profile Attribute | state/province |
| addresses.country_code | Custom Profile Attribute | country |
| addresses.postal_code | Custom Profile Attribute | postal_code |
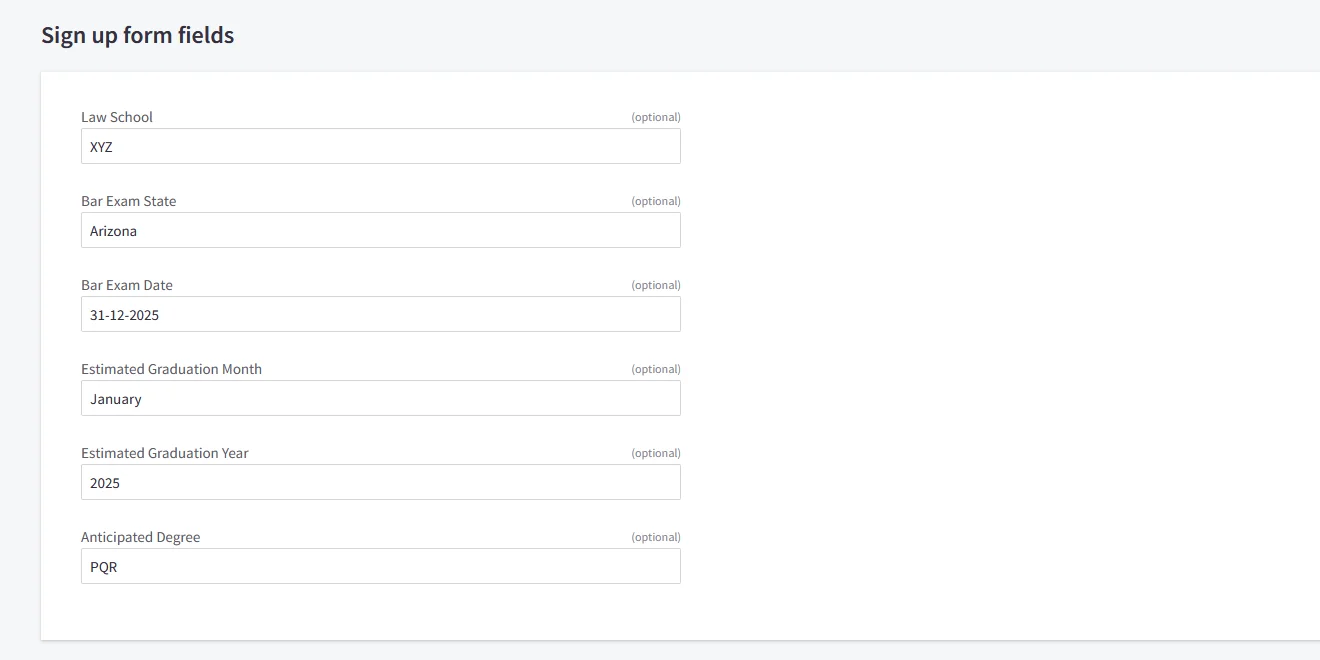
| form_fields.name.0 | Custom Attribute Value | Law School |
| form_fields.value.0 | Custom Attribute Value | XYZ |
| form_fields.name.1 | Custom Attribute Value | Bar Exam State |
| form_fields.value.1 | Custom Attribute Value | Arizona |
| form_fields.name.2 | Custom Attribute Value | Bar Exam Date |
| form_fields.value.2 | Custom Attribute Value | 31-12-2025 |
| form_fields.name.3 | Custom Attribute Value | Estimated Graduation Month |
| form_fields.value.3 | Custom Attribute Value | January |
| form_fields.name.4 | Custom Attribute Value | Estimated Graduation Year |
| form_fields.value.4 | Custom Attribute Value | 2025 |
For the Attribute Fields
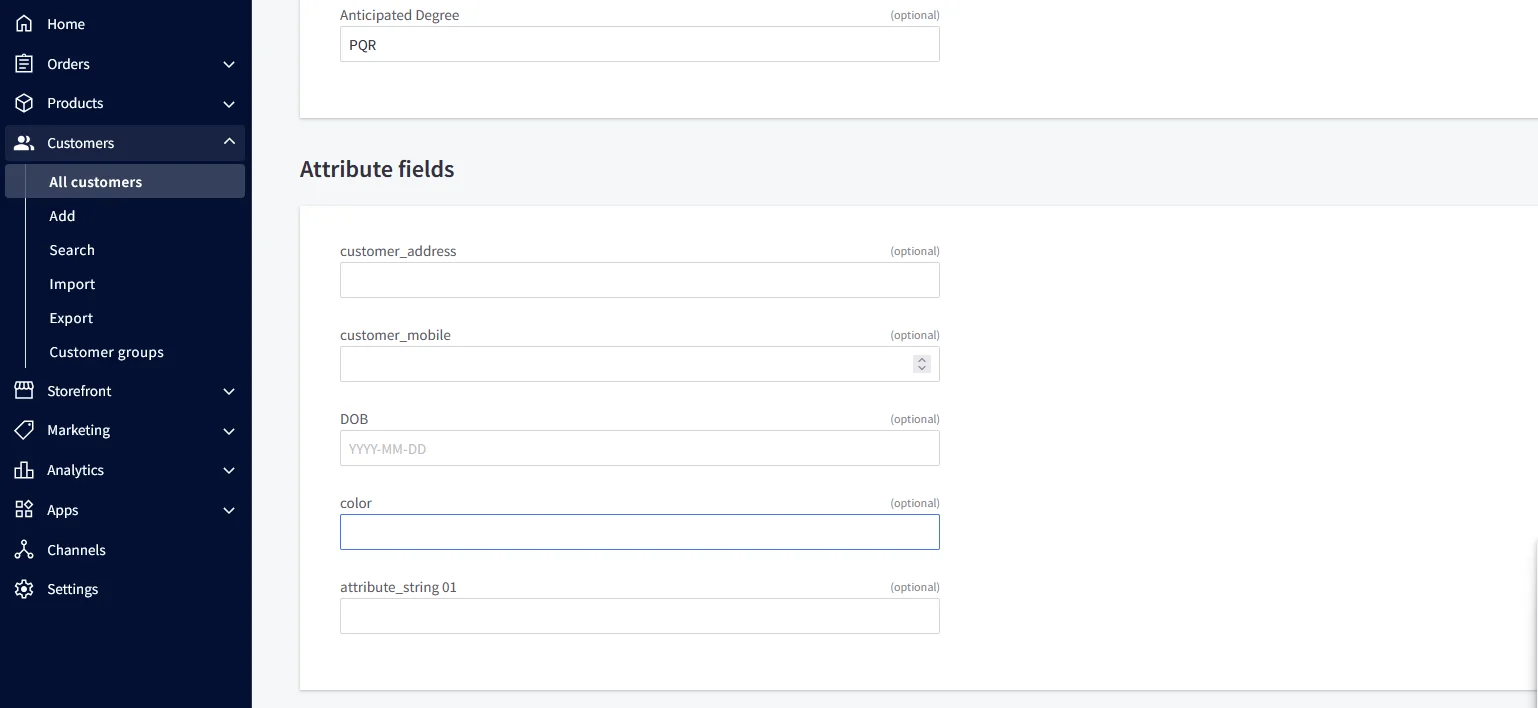
| Attribute Name | Attribute Type | Value |
|---|---|---|
| color | Custom Profile Attribute | blue |
| customer_address | Custom Profile Attribute | MG road |
| customer_mobile | Custom Profile Attribute | +911234567890 |
| DOB | Custom Profile Attribute | 2002-01-01 |
| attribute_string 01 | Custom Profile Attribute | testing |
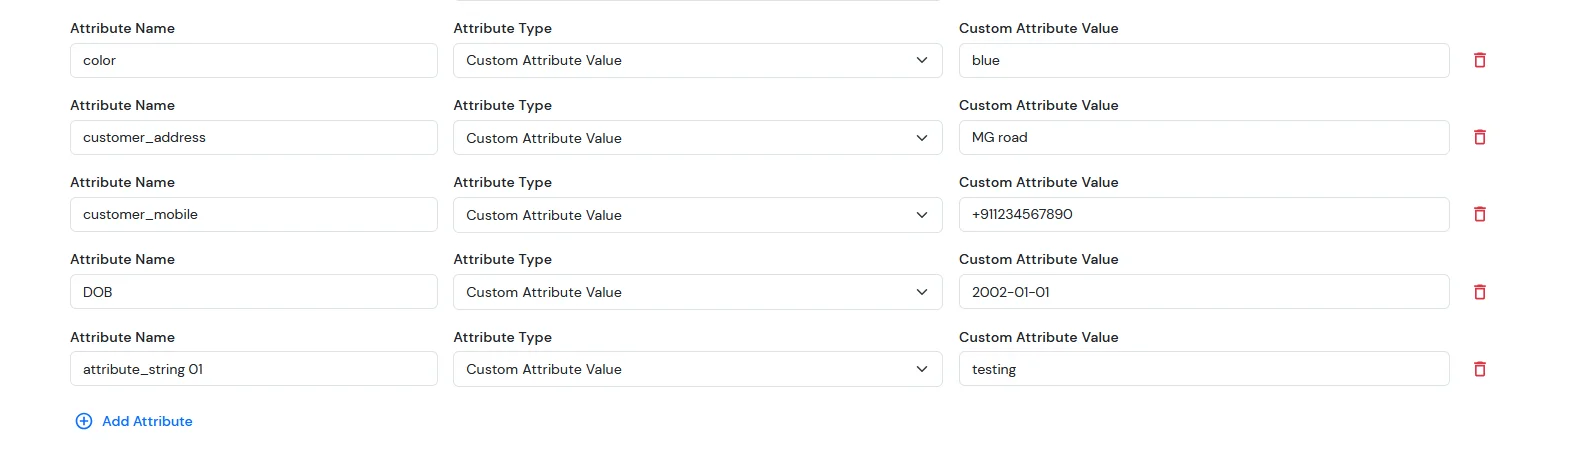
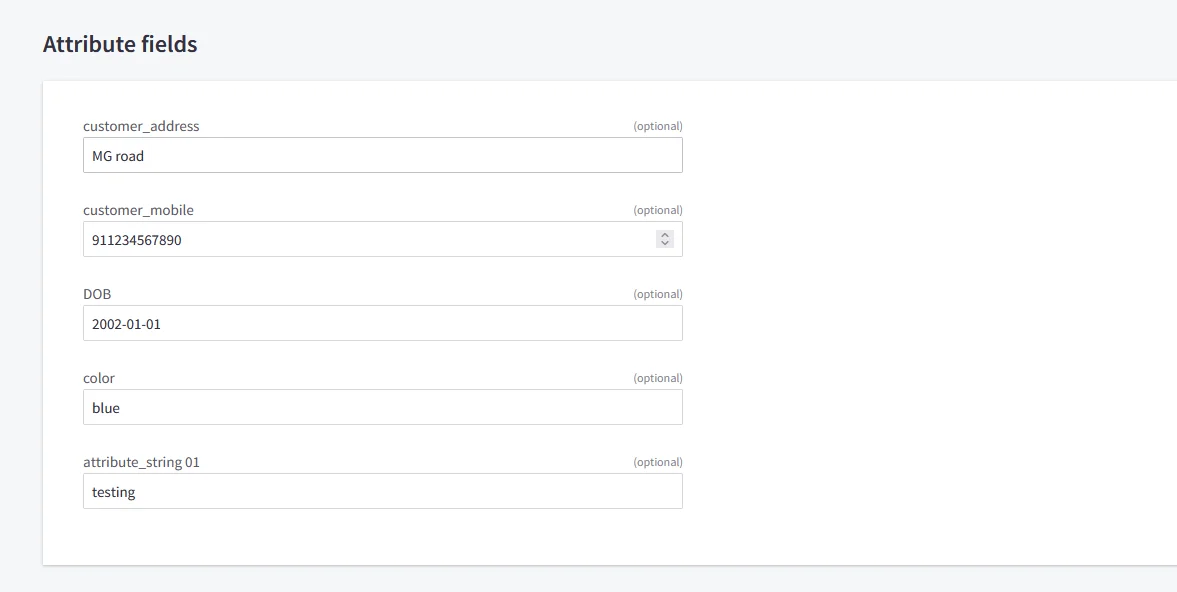
NOTE: Update customer profile during sso
For ExternaI Identity Provider
| Attribute Name | Attribute Type | Value |
|---|---|---|
| addresses.first_name | External Idp Attribute | first_name |
| addresses.last_name | External Idp Attribute | last_name |
| addresses.address1 | External Idp Attribute | address1 |
| addresses.city | External Idp Attribute | city |
| addresses.state_or_province | External Idp Attribute | state/province |
| addresses.country_code | External Idp Attribute | country |
| addresses.postal_code | External Idp Attribute | postal_code |
Note: When sending the country value, always use the country code (e.g., US, IN). If you pass the full country name such as “United States”, the value will not be updated — only country codes are supported for correct mapping.
While syncing address fields, ensure that the city, state, and country values you provide are valid options supported by BigCommerce and exist in their respective dropdown lists.
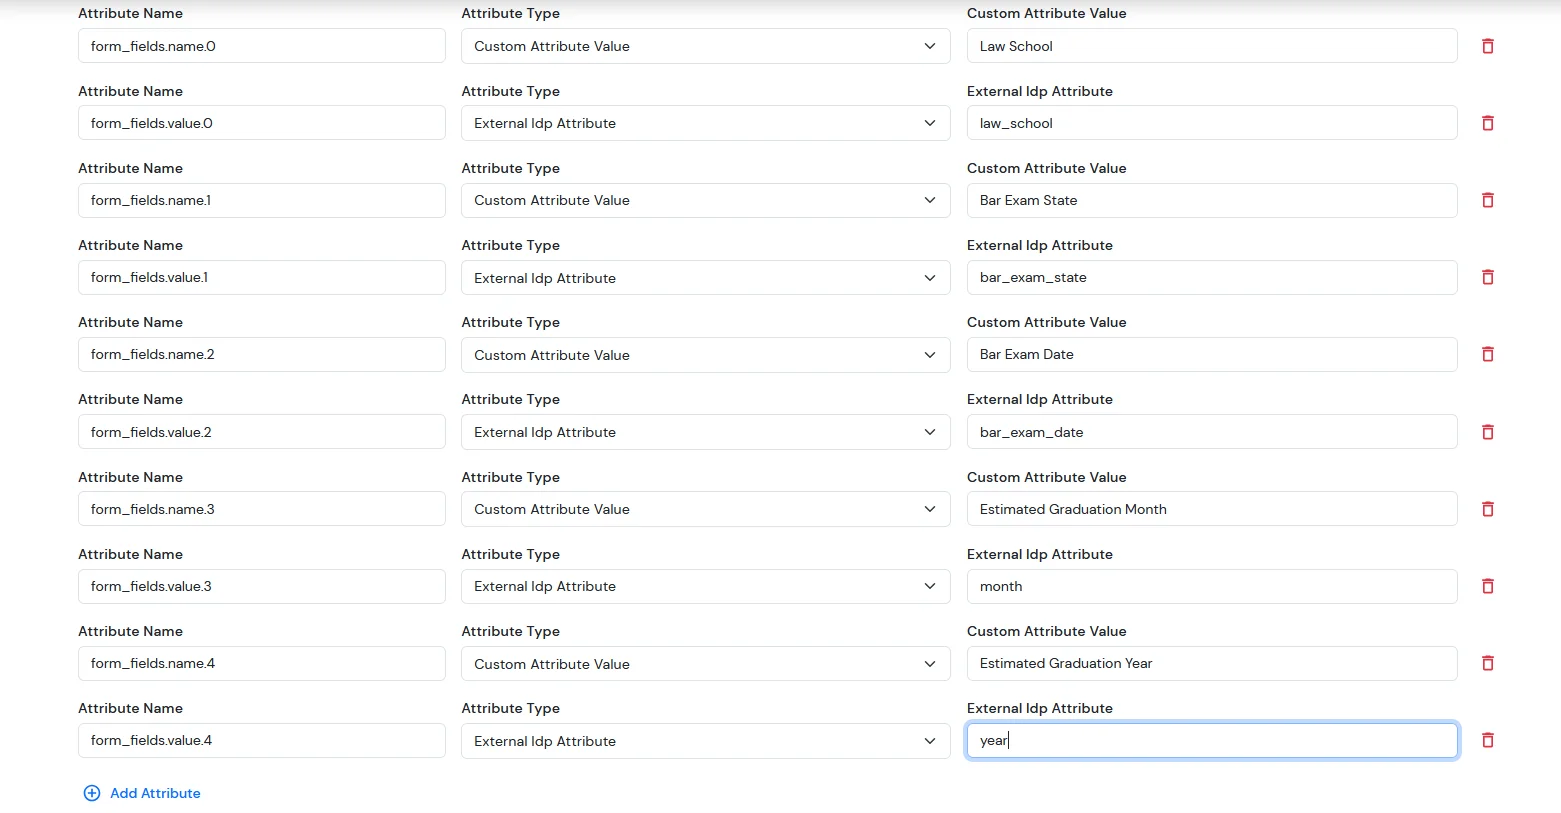
For the Sign up form fields:
| Attribute Name | Attribute Type | Value |
|---|---|---|
| form_fields.name.0 | Custom Attribute Value | Law School |
| form_fields.value.0 | External Idp Attribute | XYZ |
| form_fields.name.1 | Custom Attribute Value | Bar Exam State |
| form_fields.value.1 | External Idp Attribute | Arizona |
| form_fields.name.2 | Custom Attribute Value | Bar Exam Date |
| form_fields.value.2 | External Idp Attribute | 31-12-2025 |
| form_fields.name.3 | Custom Attribute Value | Estimated Graduation Month |
| form_fields.value.3 | External Idp Attribute | January |
| form_fields.name.4 | Custom Attribute Value | Estimated Graduation Year |
| form_fields.value.4 | External Idp Attribute | 2025 |
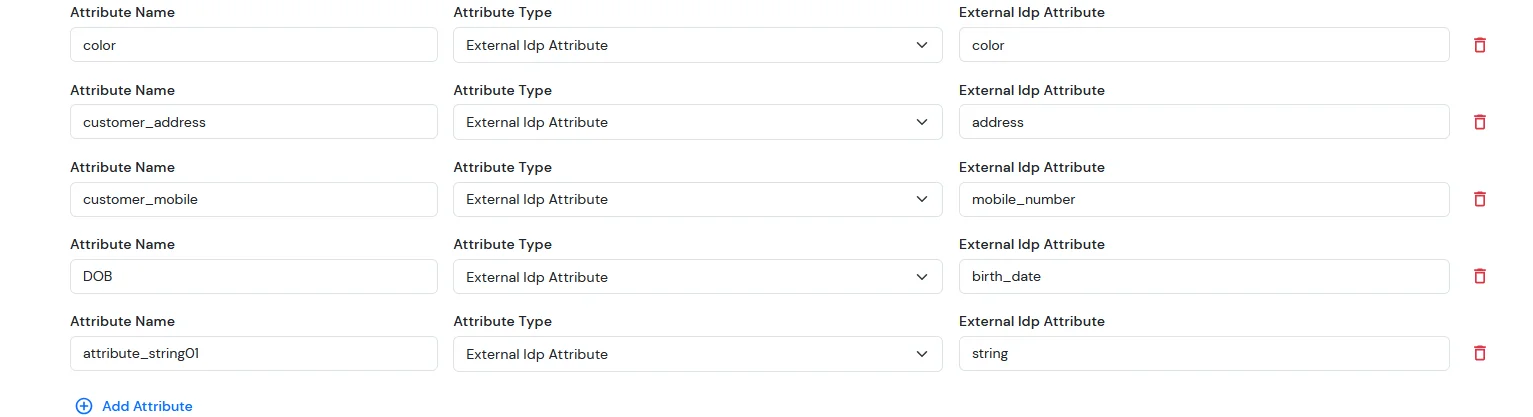
For Custom Attribute Fields
| Attribute Name | Attribute Type | Value |
|---|---|---|
| color | External Idp Attribute | blue |
| customer_address | External Idp Attribute | MG road |
| customer_mobile | External Idp Attribute | +911234567890 |
| DOB | External Idp Attribute | 2002-01-01 |
| attribute_string 01 | External Idp Attribute | testing |
NOTE: Update customer profile during sso
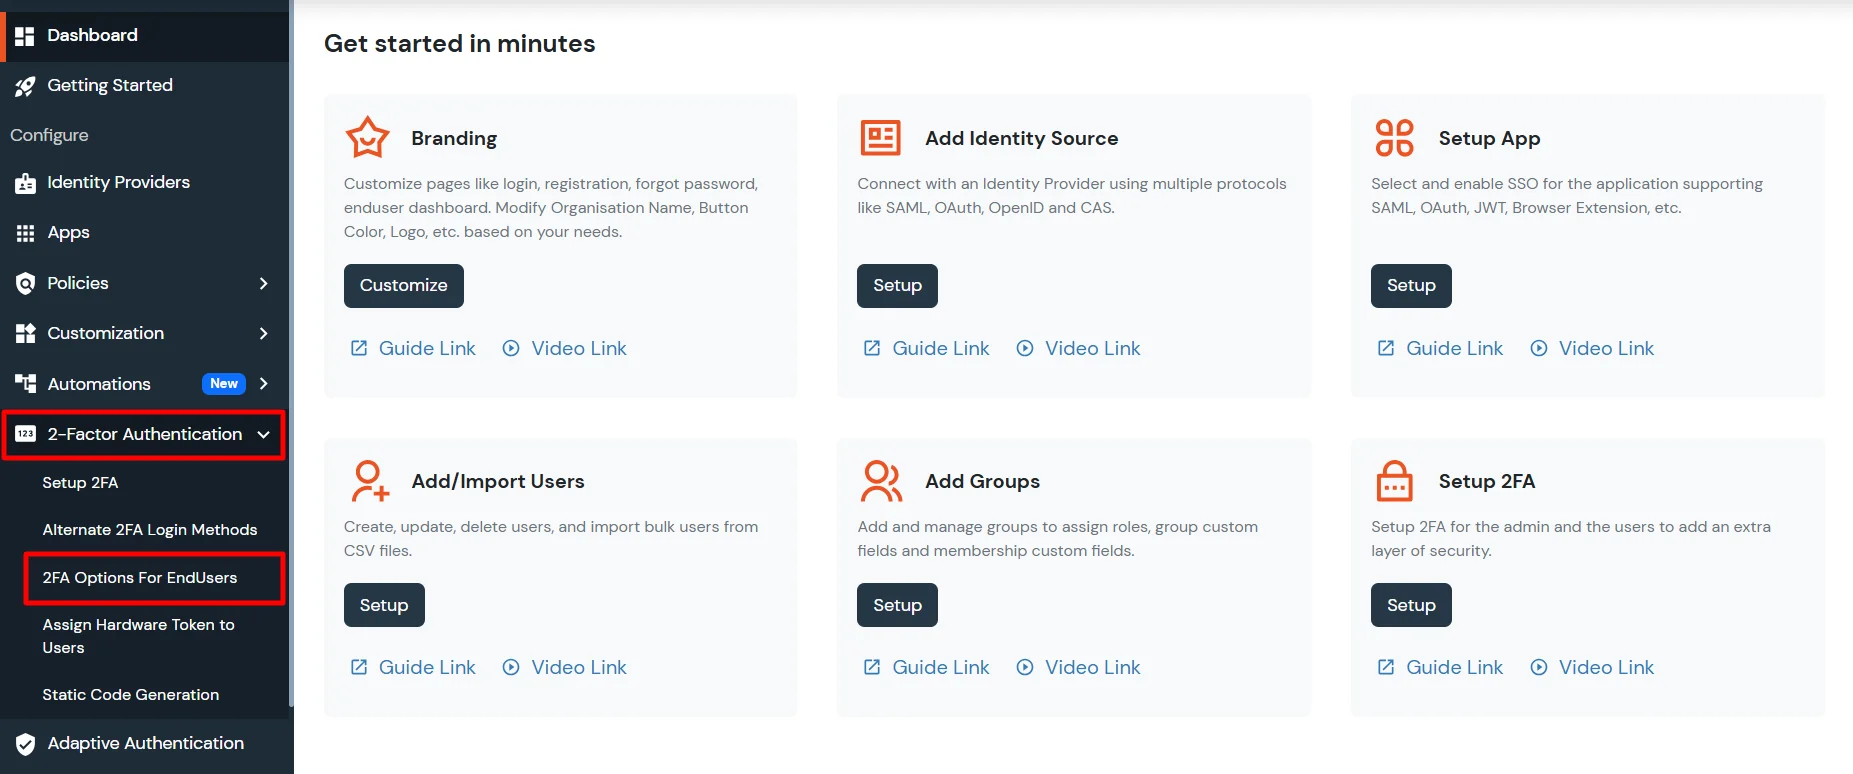
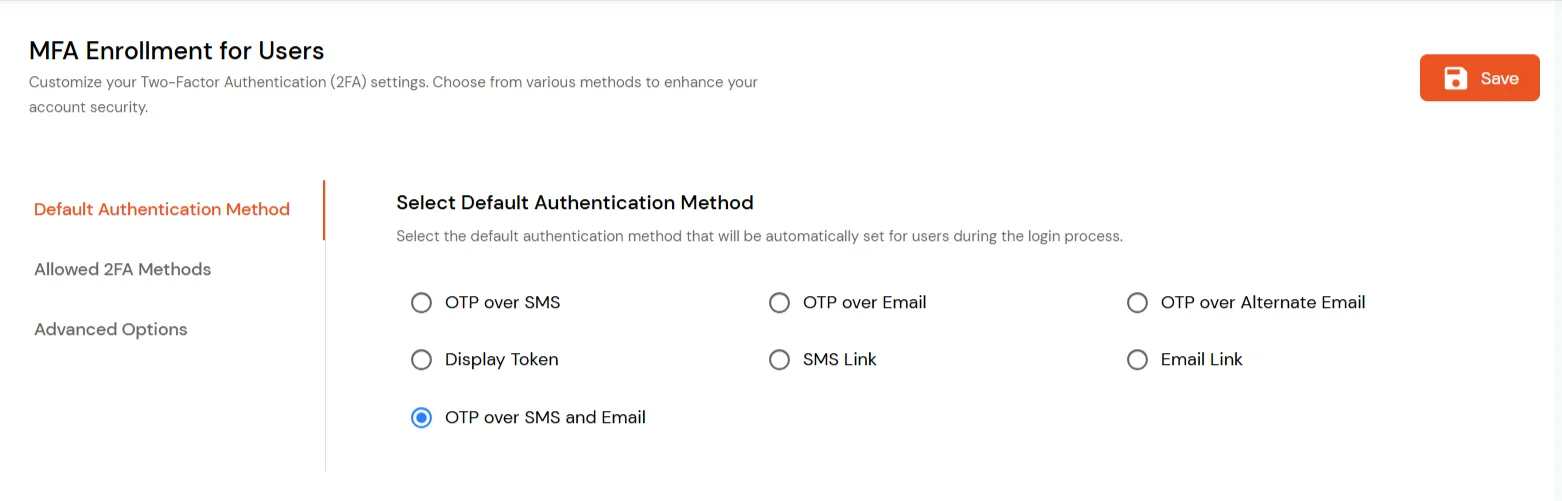
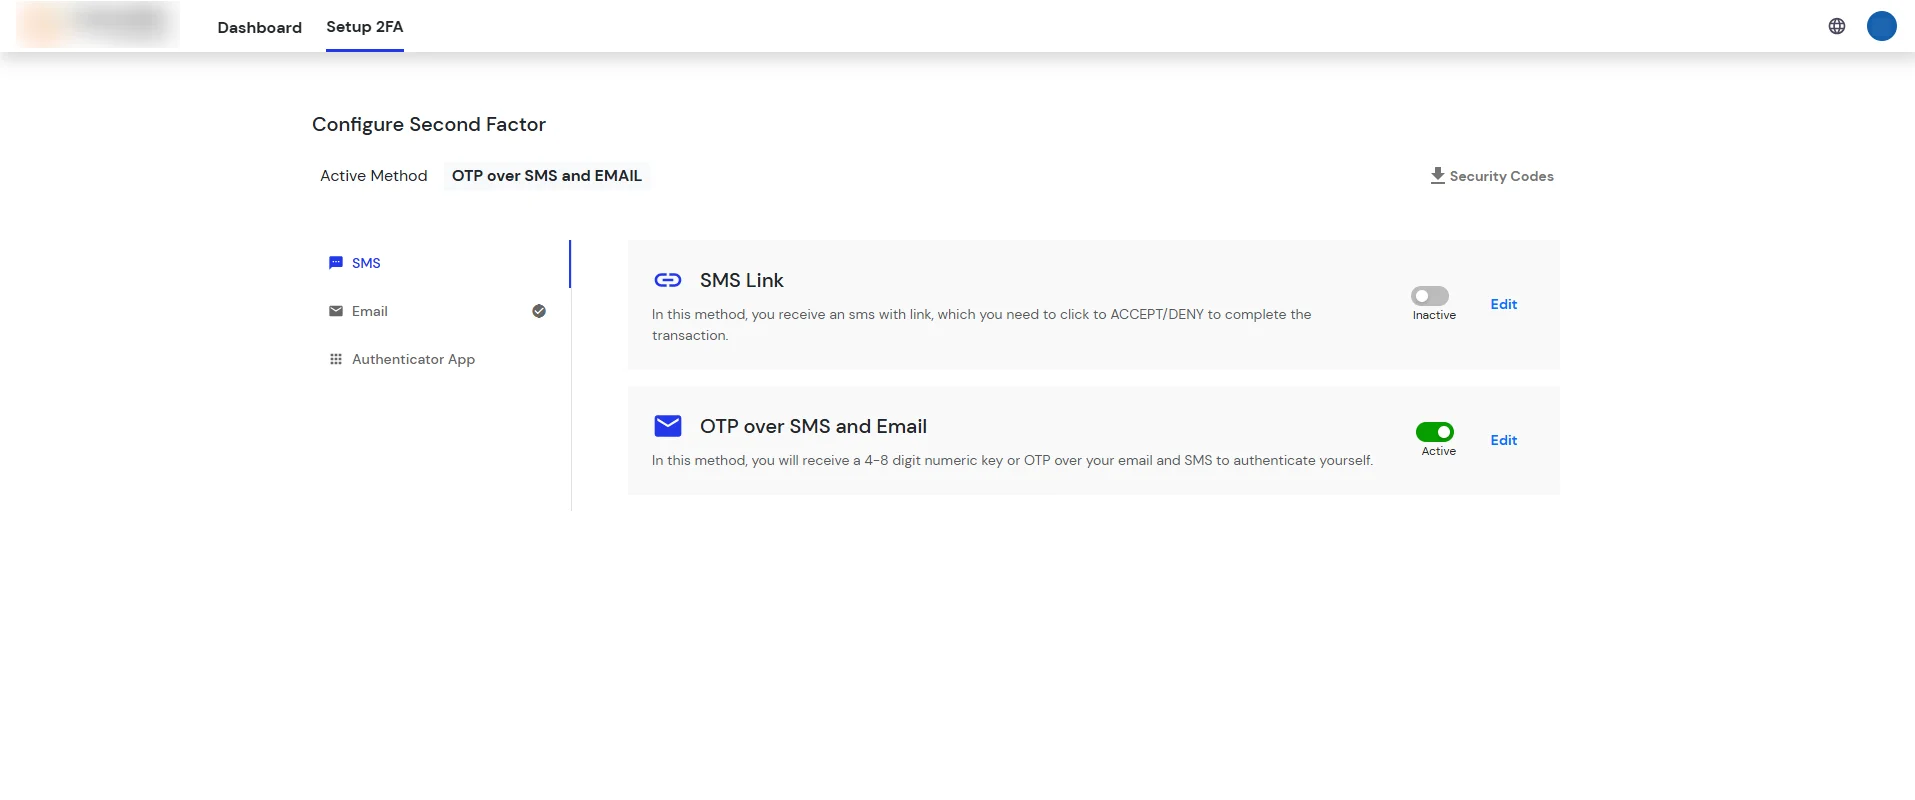
4.1: Configure 2FA for your Endusers
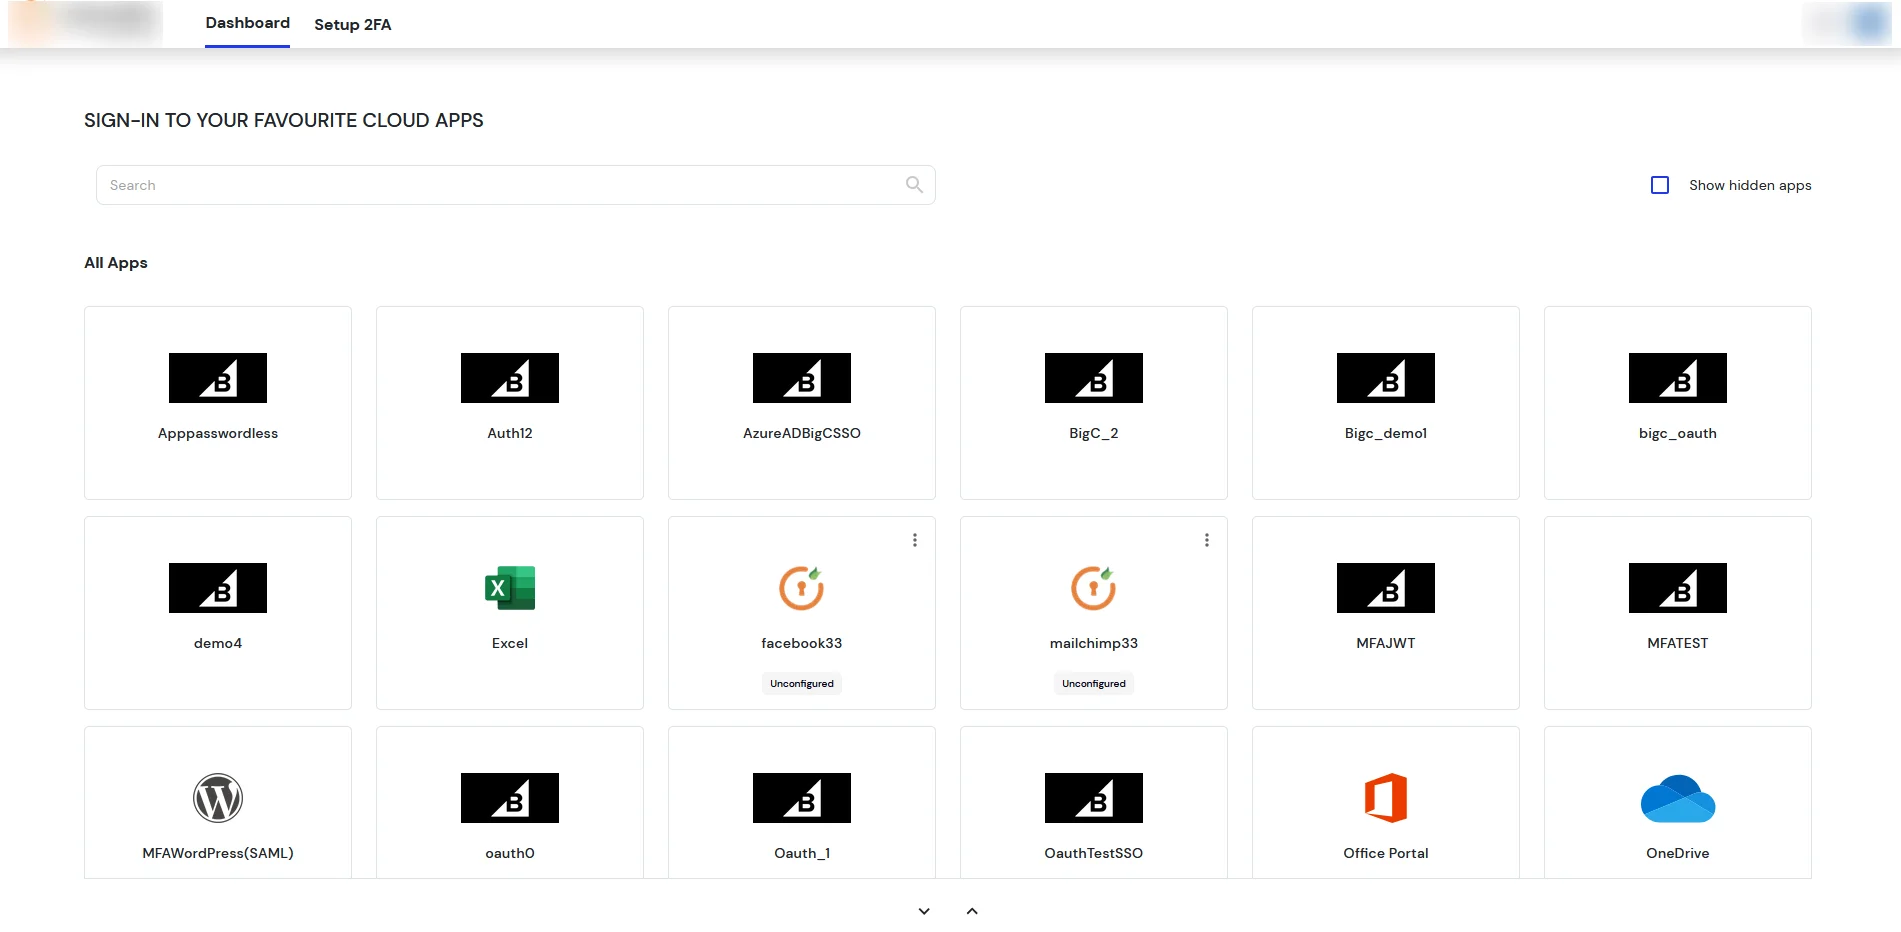
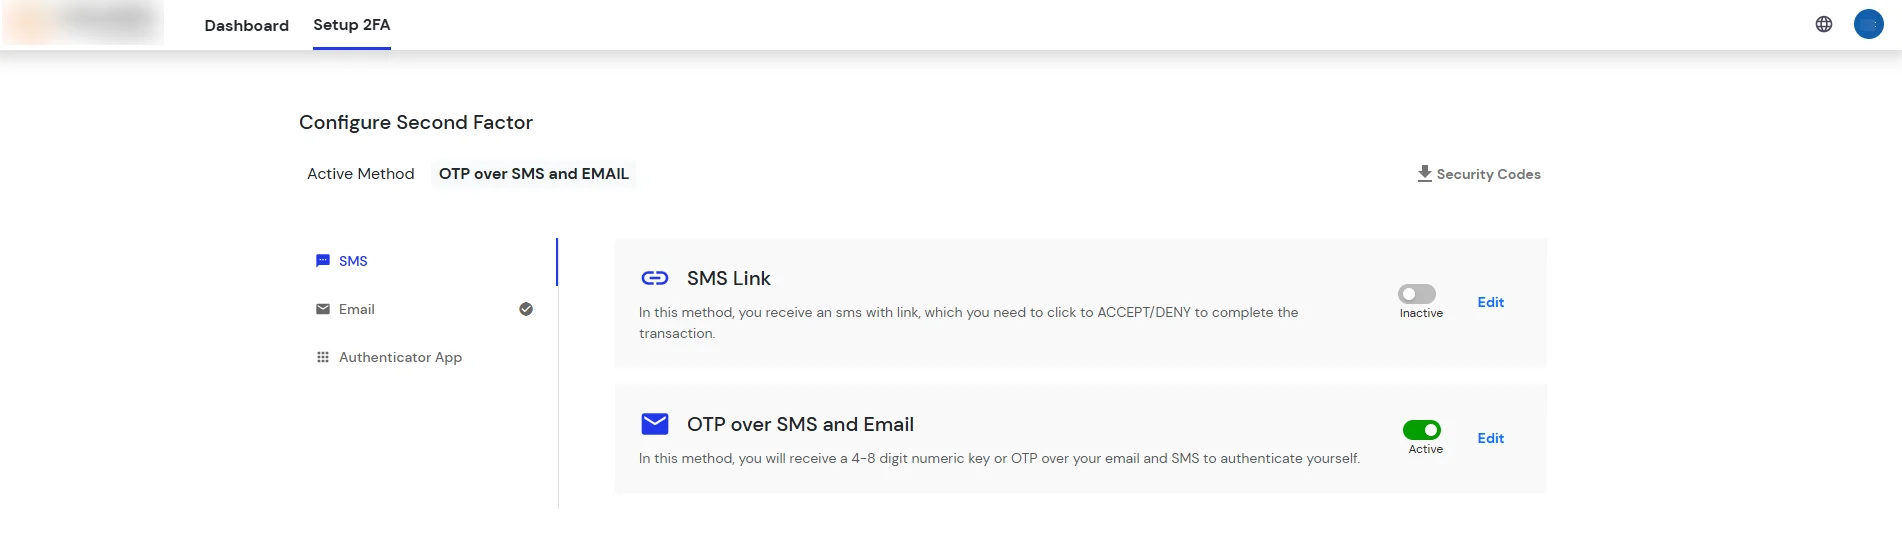
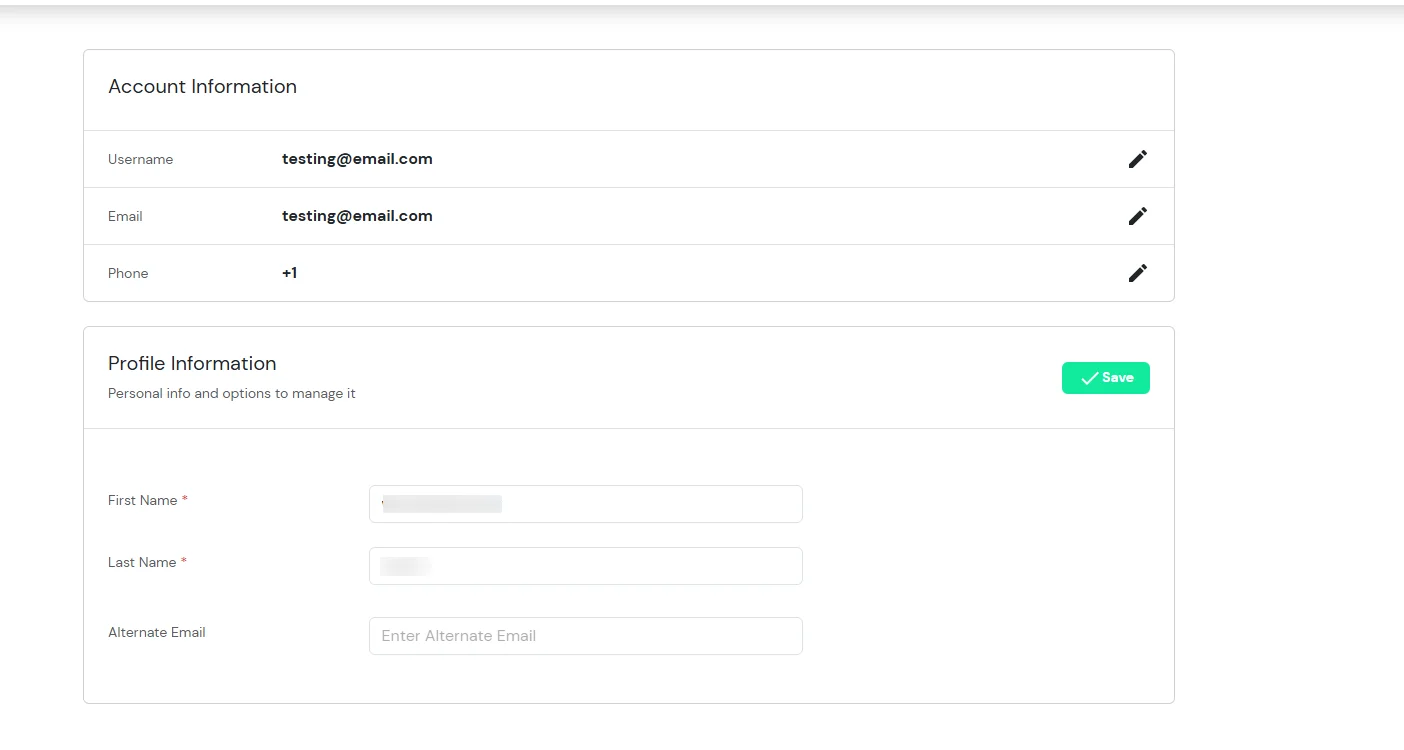
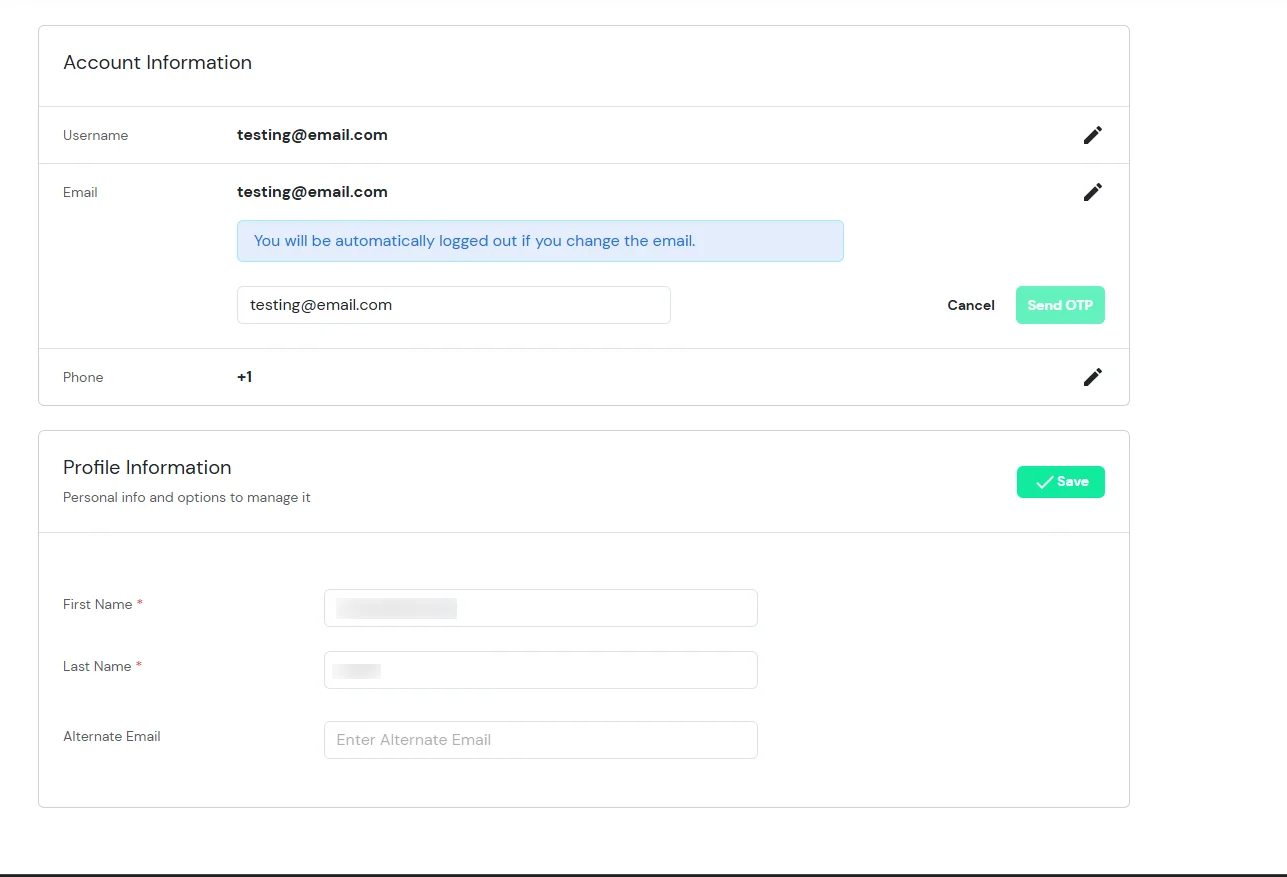
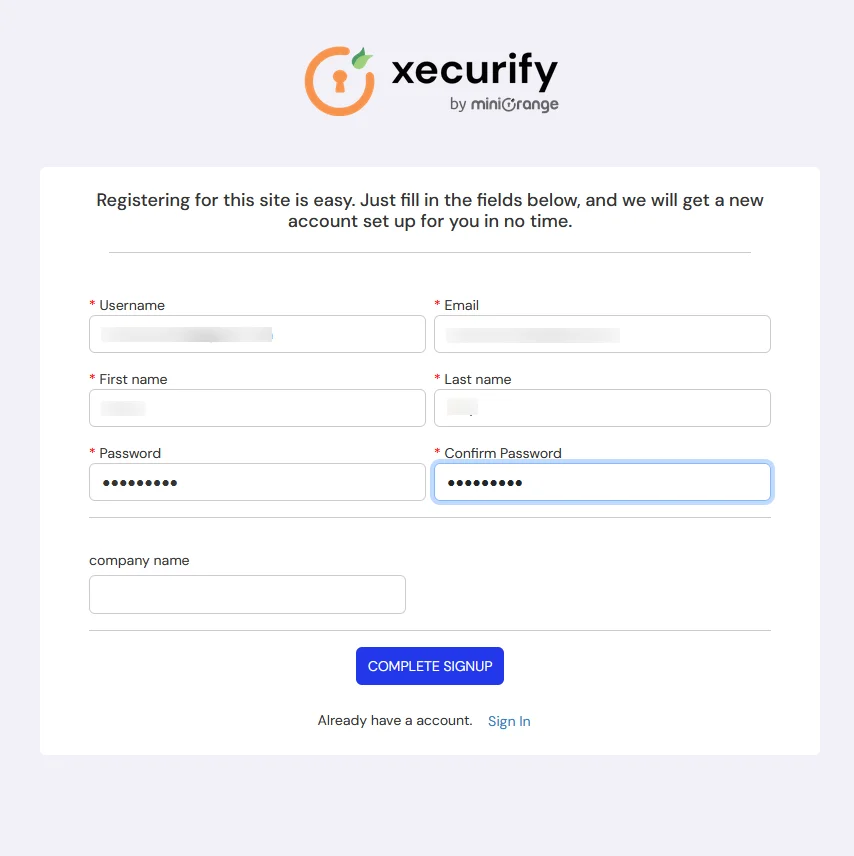
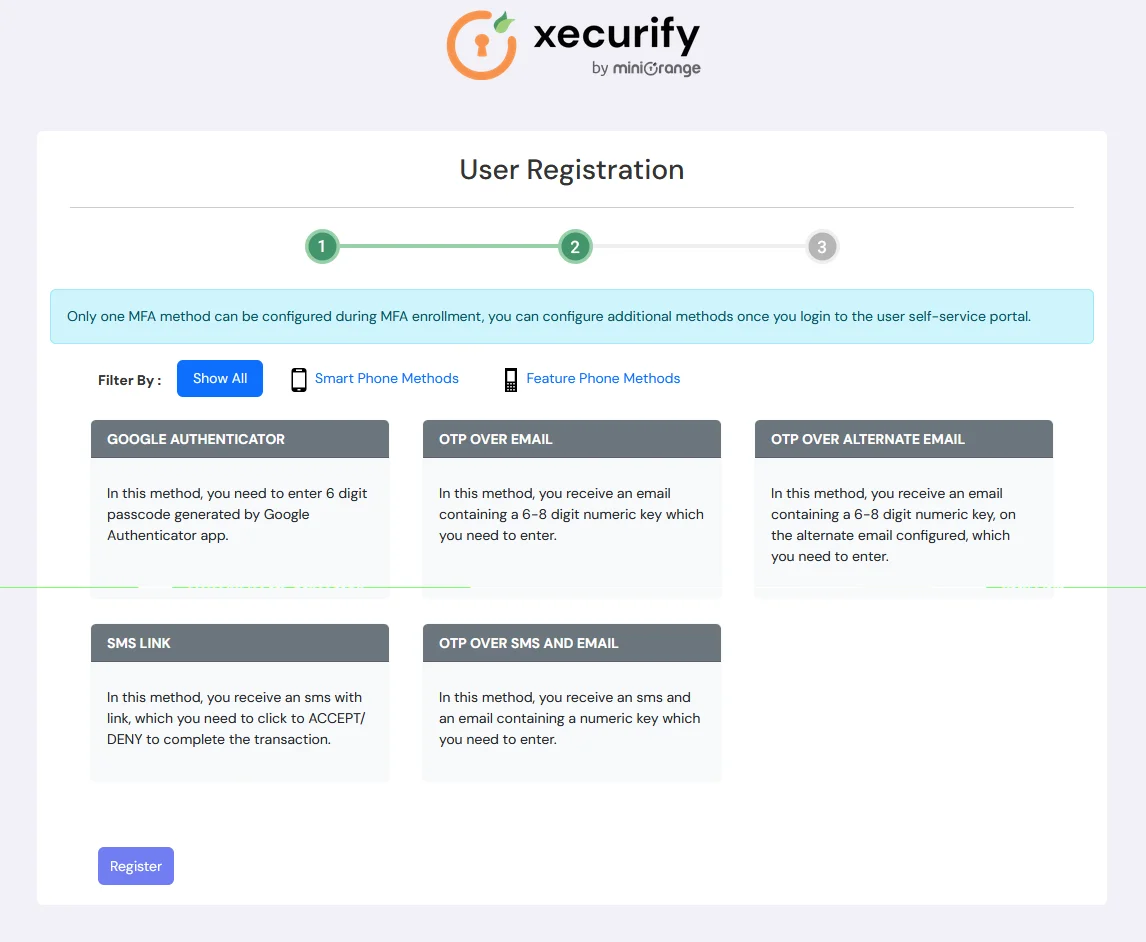
4.2: Enduser 2FA Setup
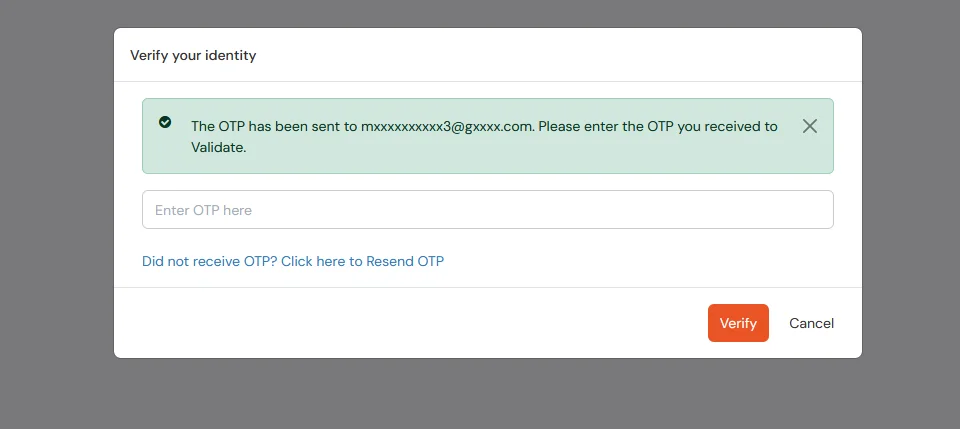
5.1: If 2FA for for End-user is configured
5.2: If 2FA for end-user is not enabled
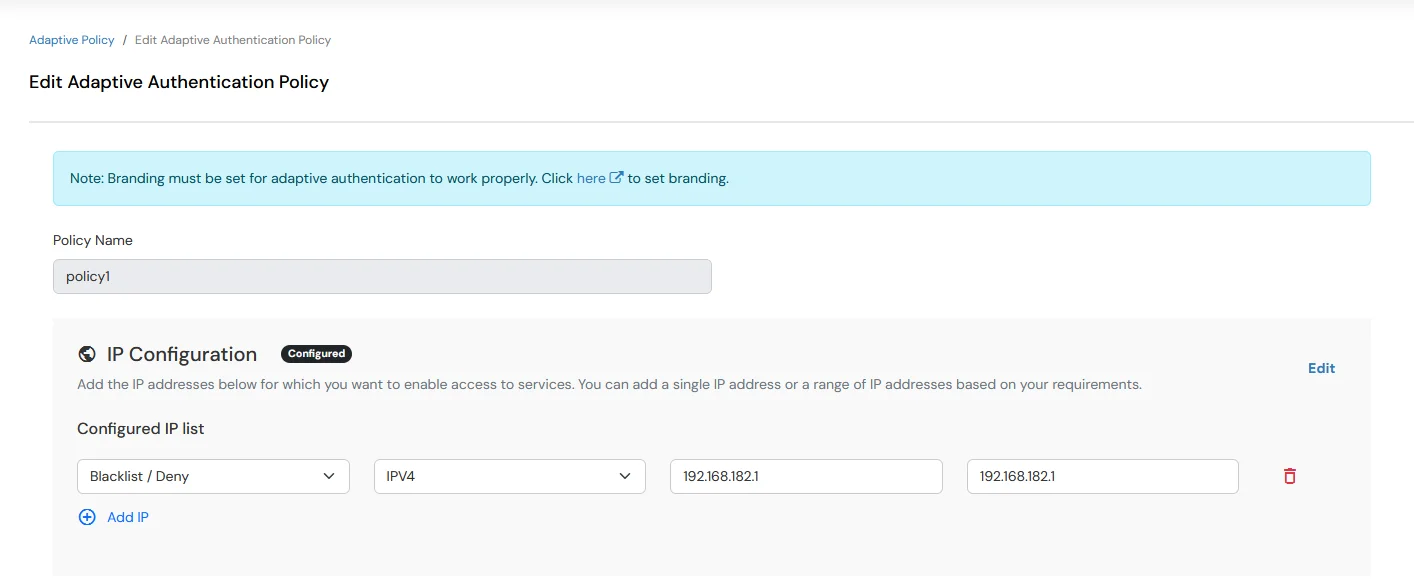
6.1: Restricting access to BigCommerce with IP Blocking
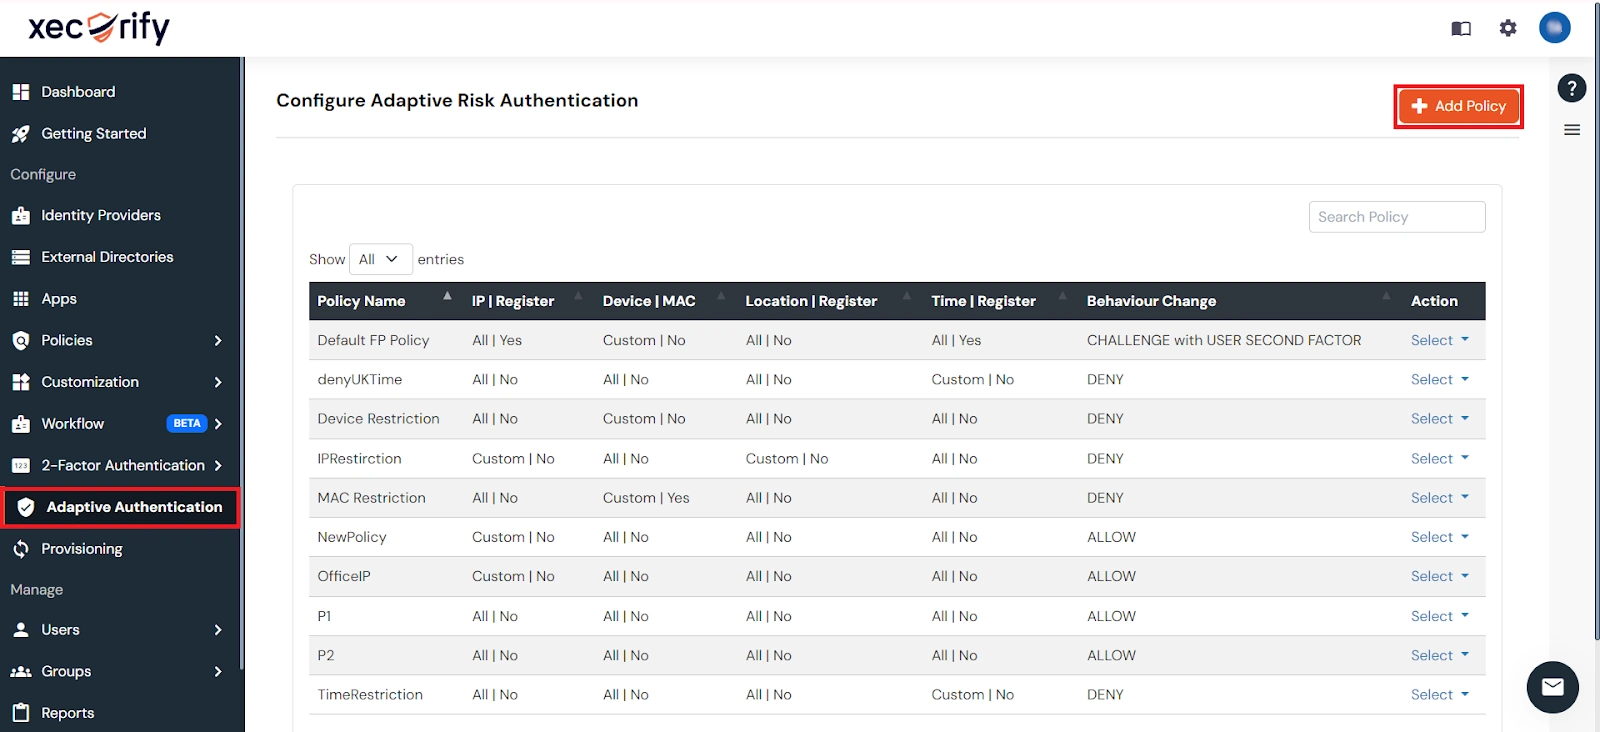
| Attribute | Description |
|---|---|
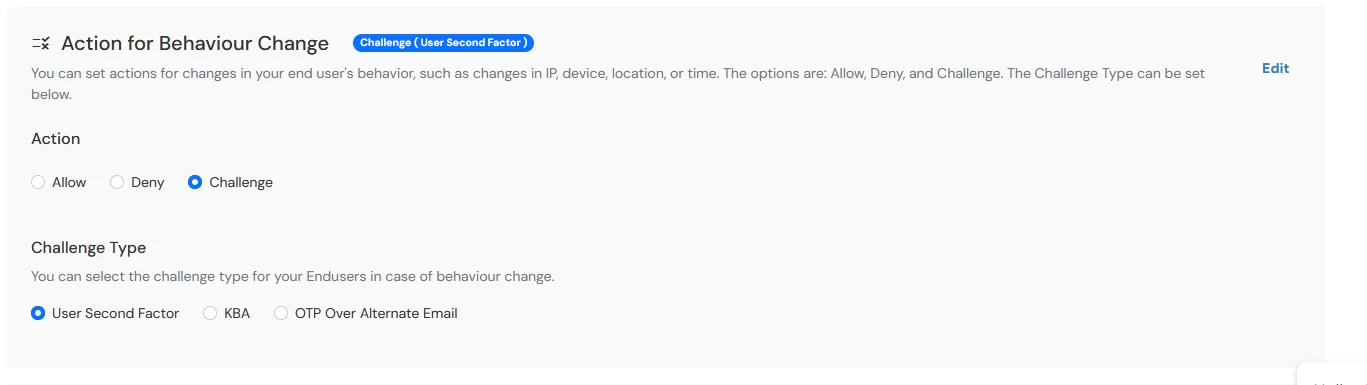
| Allow | Allow user to authenticate and use services if Adaptive authentication condition is true. |
| Deny | Deny user authentications and access to services if Adaptive authentication condition is true. |
| Challenge | Challenge users with one of the three methods mentioned below for verifying user authenticity. |
| Attribute | Description |
|---|---|
| User second Factor | The User needs to authenticate using the second factor he has opted or assigned for such as
|
| KBA (Knowledge-based authentication) | The System will ask user for 2 of 3 questions he has configured in his Self Service Console. Only after right answer to both questions user is allowed to proceed further. |
| OTP over Alternate Email | User will receive a OTP on the alternate email he has configured threw Self Service Console. Once user provides the correct OTP he is allowed to proceed further. |
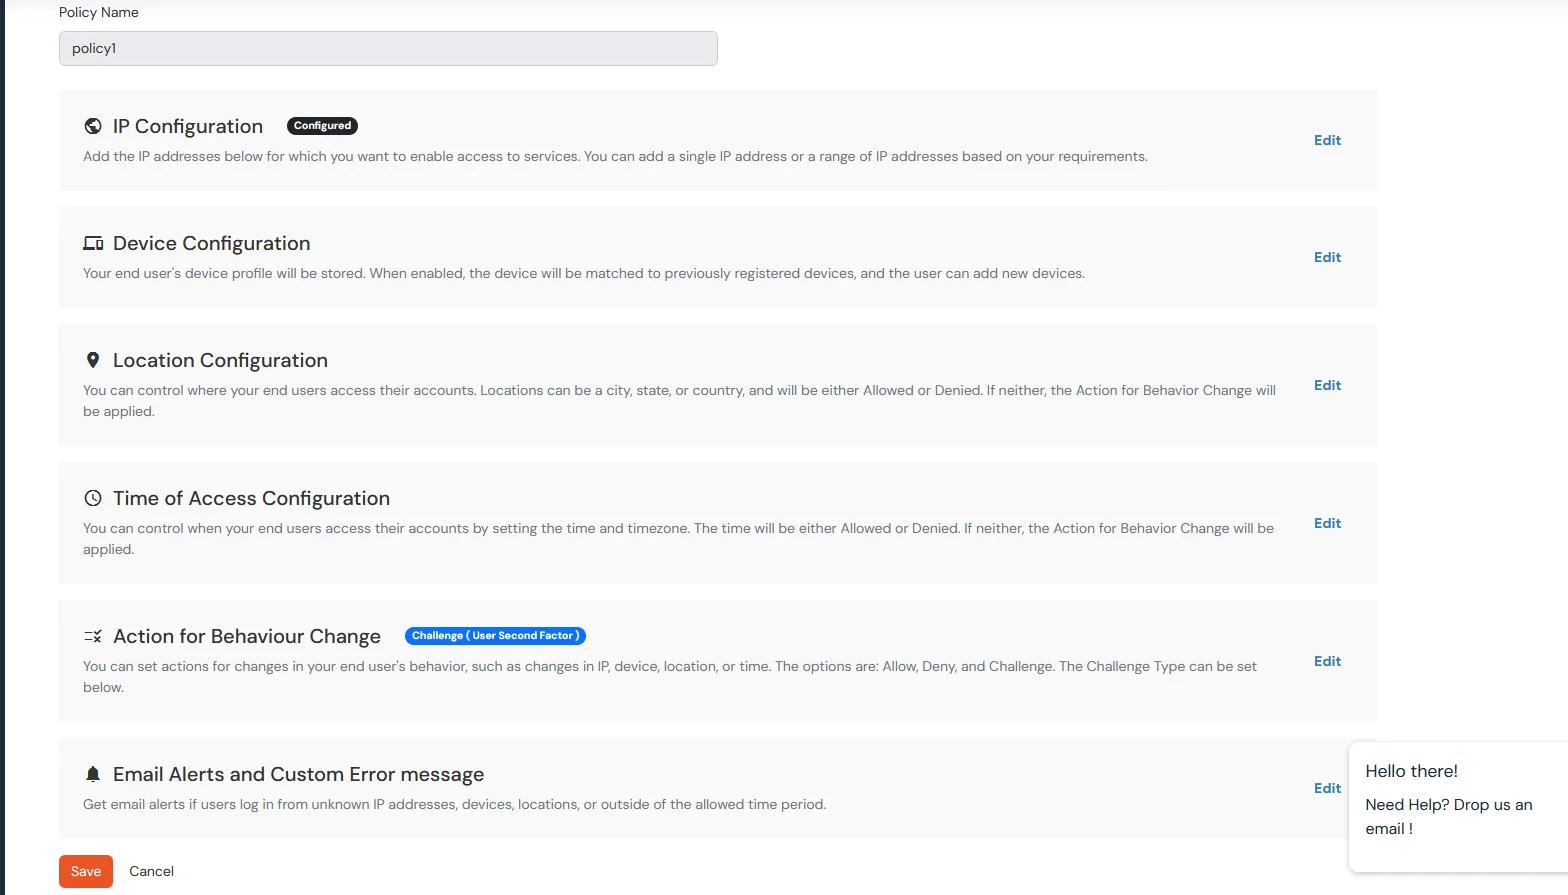
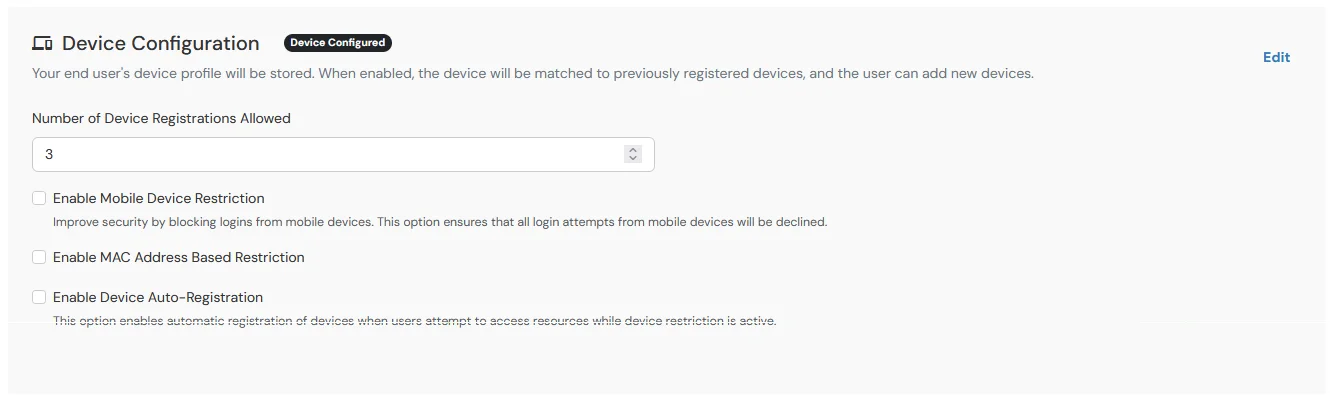
6.2: Adaptive Authentication with Limiting number of devices
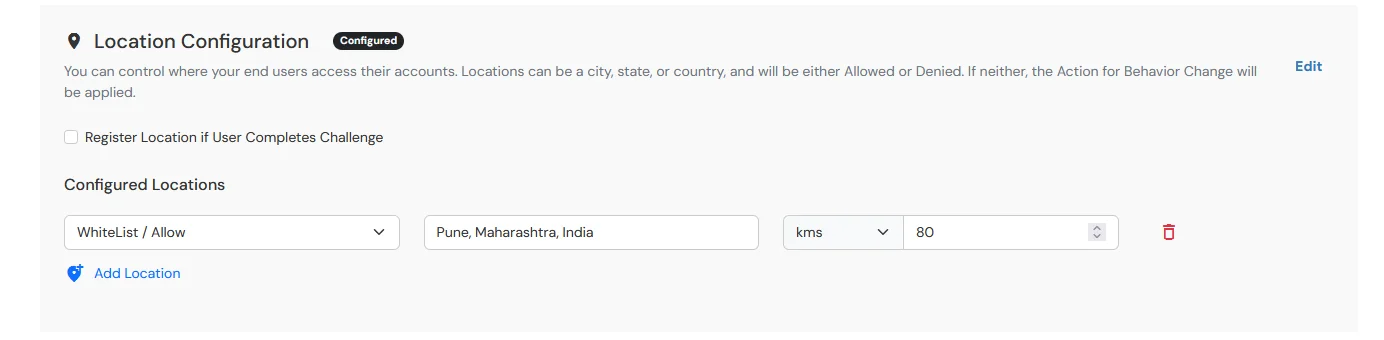
6.3: Location Restriction Configuration
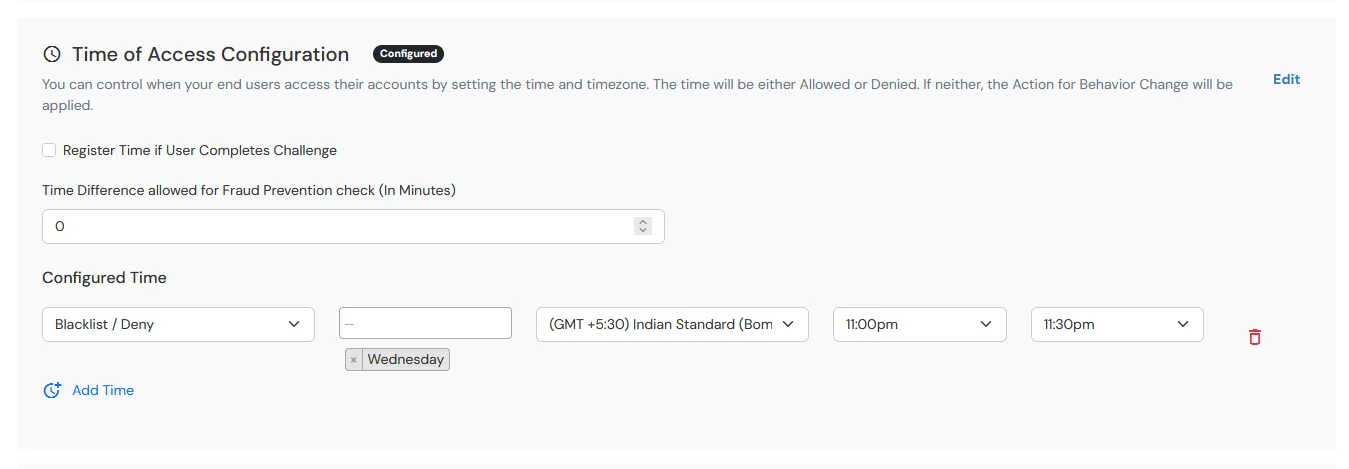
6.4: Time of Access Configuration
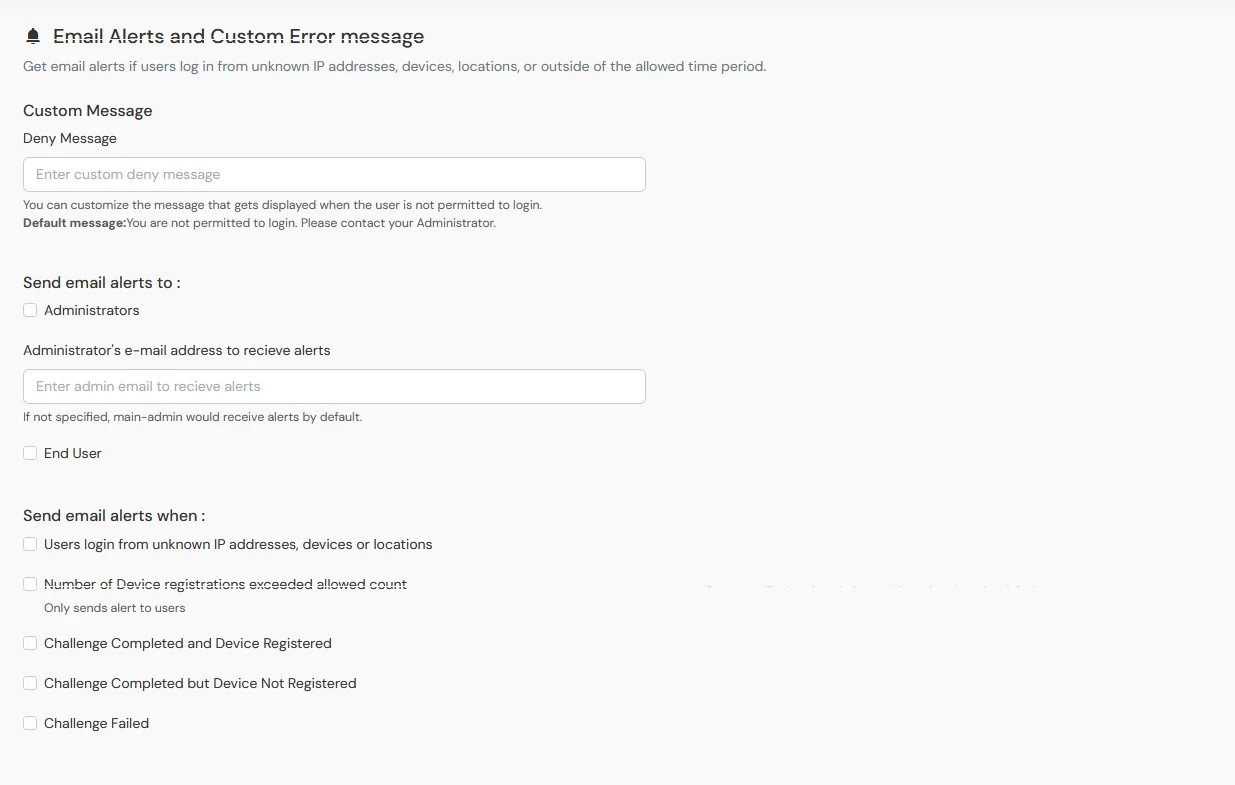
6.5: Email Alerts and Custom Error message
| Option | Description |
|---|---|
| Challenge Completed and Device Registered | Enabling this option allows you to send an email alert when an end-user completes a challenge and registers a device. |
| Challenge Completed but Device Not Registered | Enabling this option allows you to send an email alert when an end-user completes a challenge but do not registers the device. |
| Challenge Failed | Enabling this option allows you to send an email alert when an end-user fails to complete the challenge. |