- Home
- DLP
- How to configure Wi-Fi policy using miniOrange DLP
Restrict Wi-Fi Access to Secure Networks with miniOrange DLP Wi-Fi Policy
As organizations continue to adopt flexible work environments, securing wireless connectivity has become essential to prevent unauthorized access and data leakage. Public or unsecured Wi-Fi networks are one of the most common entry points for data theft and man-in-the-middle attacks. The miniOrange Data Loss Prevention (DLP) solution addresses this risk by enforcing a Wi-Fi Policy that ensures users connect only to trusted and approved wireless networks. By using SSID (Wi-Fi Name) and BSSID (Access Point MAC Address), miniOrange DLP ensures that devices communicate over secure networks while preventing access to untrusted or malicious hotspots.
Prerequisites
To implement an effective Wi-Fi Policy using miniOrange DLP, the following elements are essential:
- You need Administrator privileges to log in to the miniOrange Admin Dashboard.
- Specific Wi-Fi networks must be enrolled by adding their SSID and BSSID to the DLP system.
- Policies must be created for whitelisting specific Wi-Fi networks and specifying policy actions such as block, log, or notify.
Example Use Case Scenario
An employee attempts to connect their laptop to a nearby open public Wi-Fi network (e.g., Café_Free_Wi-Fi).
Process with miniOrange DLP:
- When the user tries to connect to a Wi-Fi network, the connection request is intercepted by the miniOrange DLP agent.
- The system verifies whether the network’s SSID and BSSID are registered and approved in the DLP dashboard.
- If the Wi-Fi network is not enrolled, the connection attempt is blocked instantly.
- The user receives a notification informing them that the connection to an unauthorized Wi-Fi network is not allowed.
- An alert is immediately sent to the administrator, and the event is logged under the Wi-Fi Reporting section for auditing and compliance.
Conclusion: By restricting devices to approved Wi-Fi networks only, miniOrange DLP ensures that all corporate communication occurs over secure channels. This prevents data interception, protects confidential information, and helps maintain compliance with data security regulations.
Step 1: Configuring Wi-Fi Policy
- Log in to your DLP Admin dashboard.
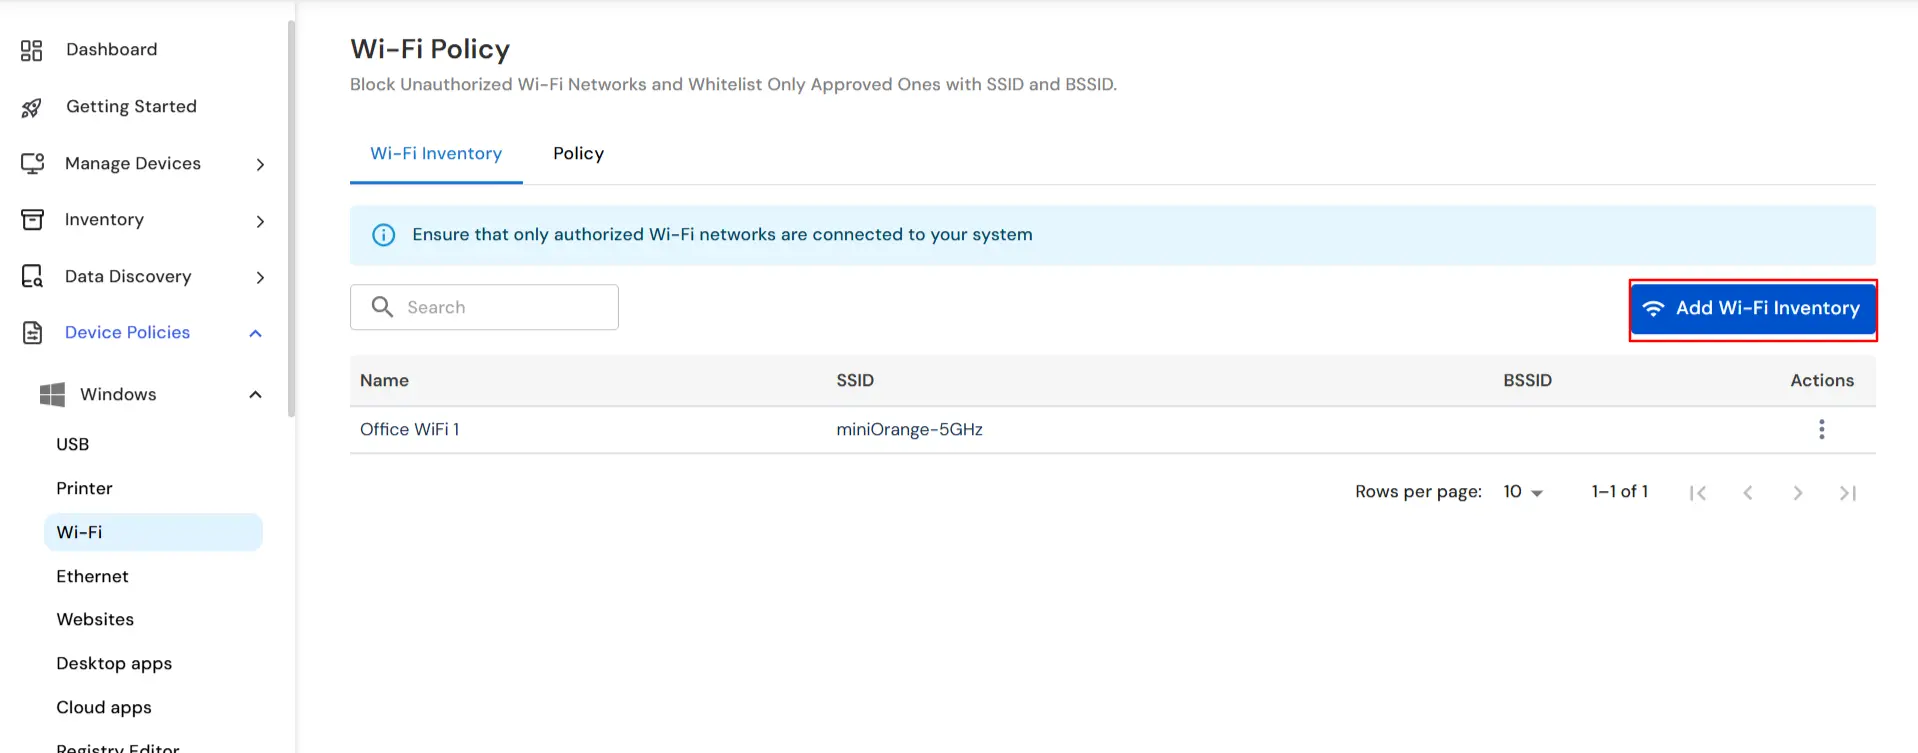
- Navigate to the Windows Tab → Wi-fi Control. tab
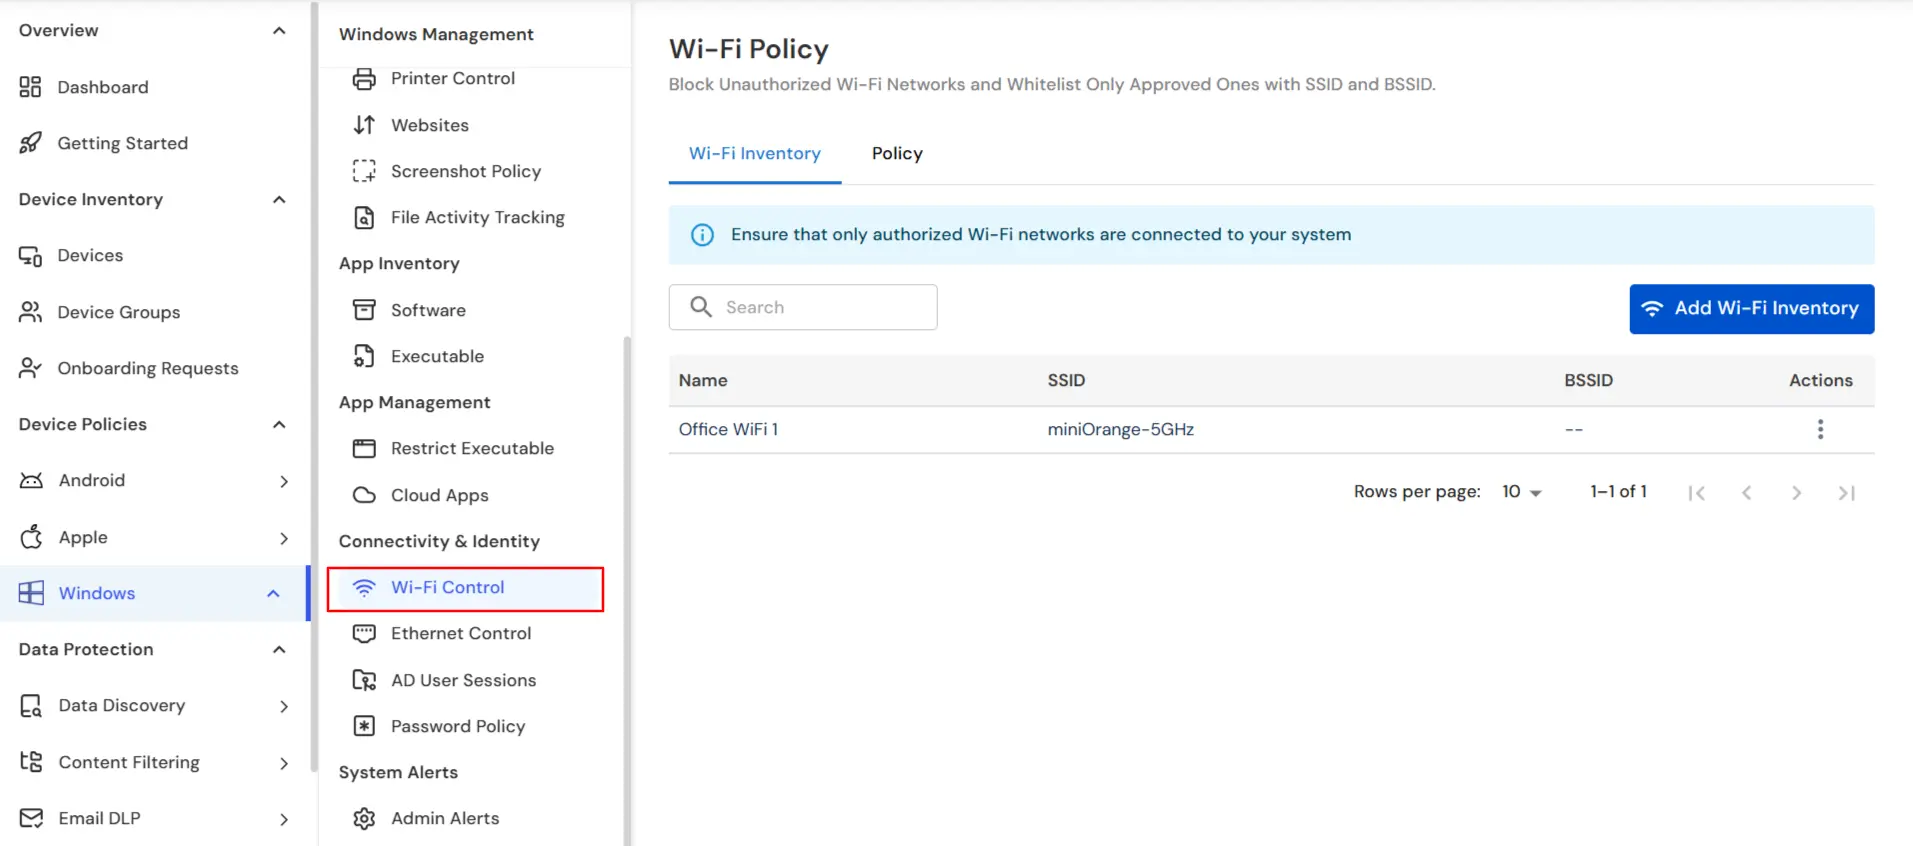
- Make sure all the Wi-Fi networks that you want to whitelist are enrolled in our miniOrange DLP dashboard, also to enroll a specific Wi-Fi network click on the Add Wi-fi Inventory button.
- Provide the SSID and BSSID of the Wi-Fi network you want to enroll.
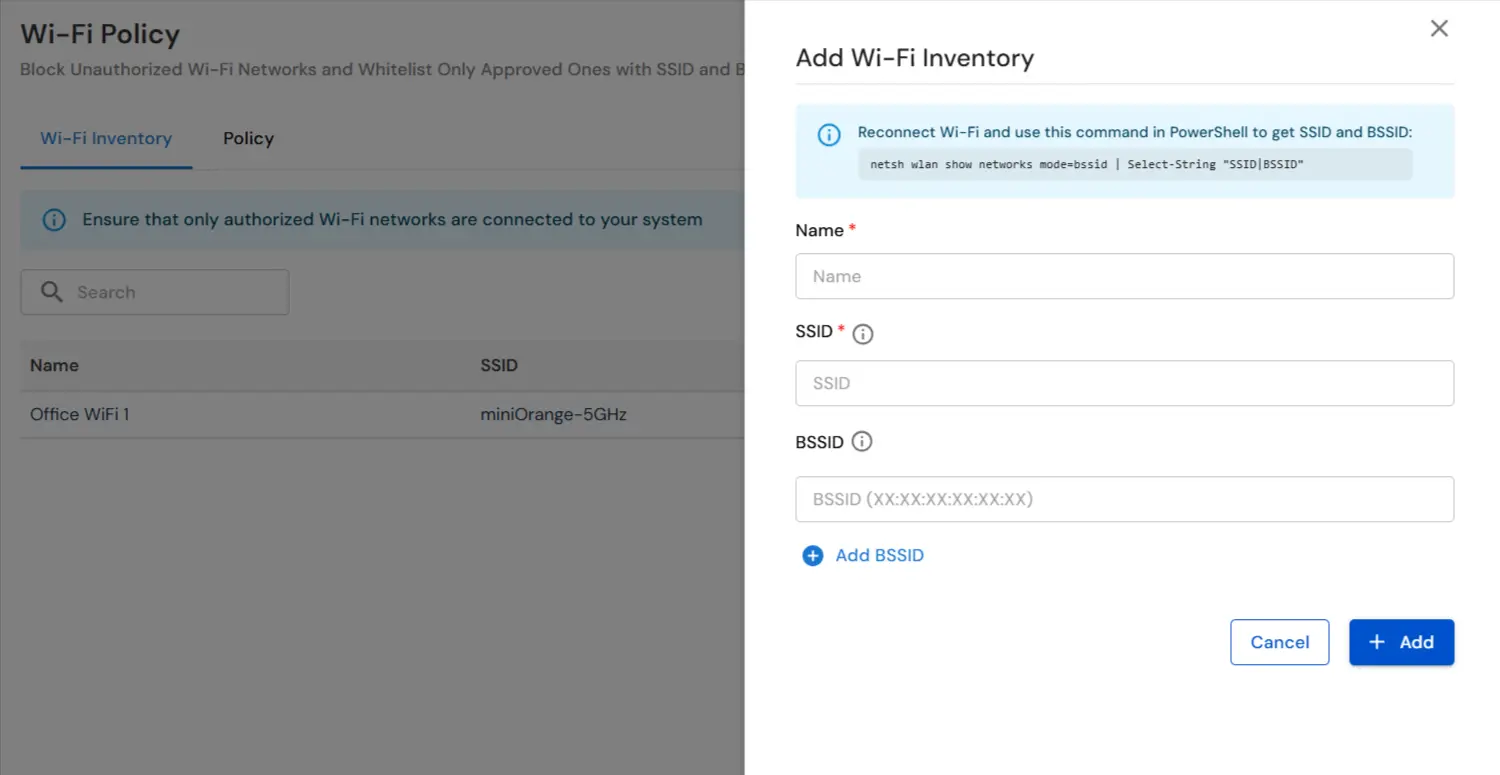
- You can find the SSID and BSSID by following the steps below:
- Click on the Wi-Fi icon on your system and connect to the desired network.
- Open Command Prompt and run the following command: netsh wlan show networks mode=bssid | Select-String "SSID|BSSID"
- For example, in a detected network entry: The SSID is: Office_WiFi_5G and The BSSID is: 00:1A:2B:3C:4D:5E.
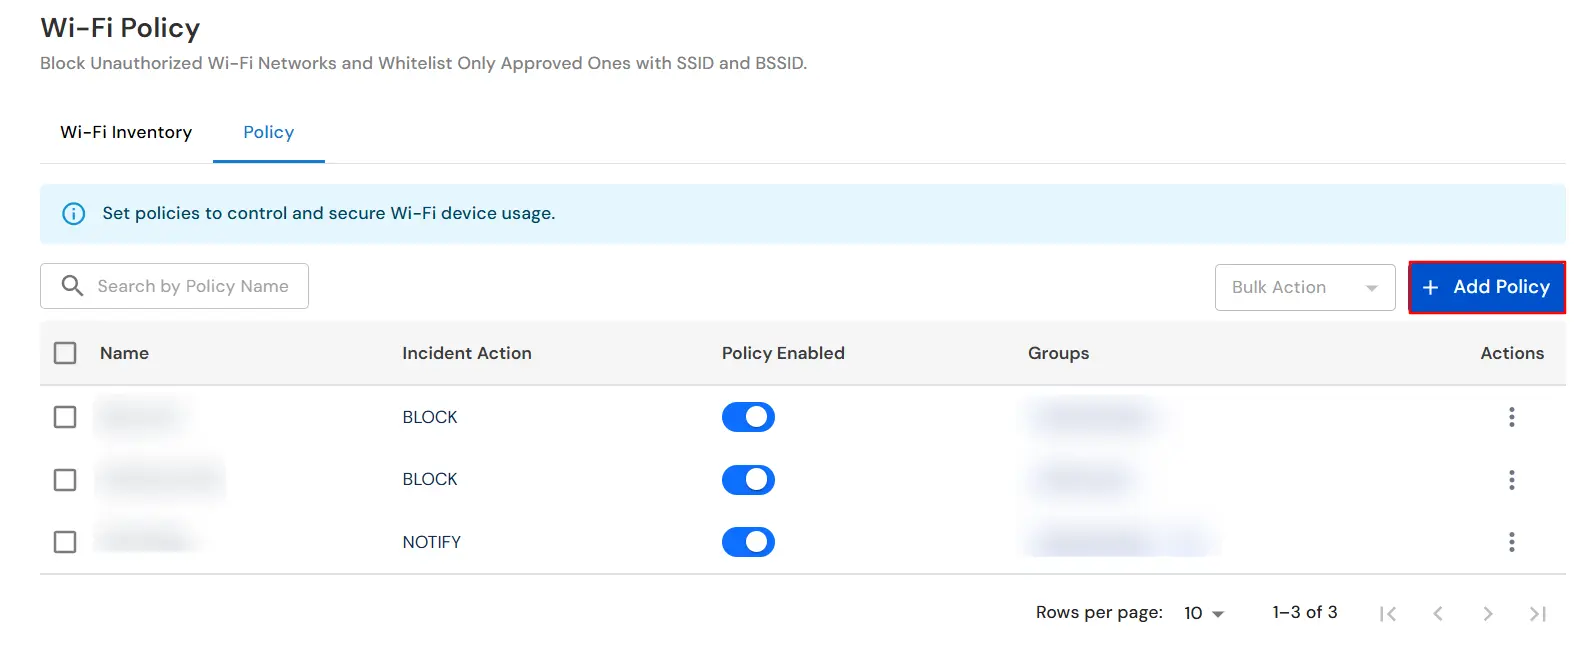
- Once the Wi-Fi networks are registered, switch to the Policy tab and click on Add Policy.
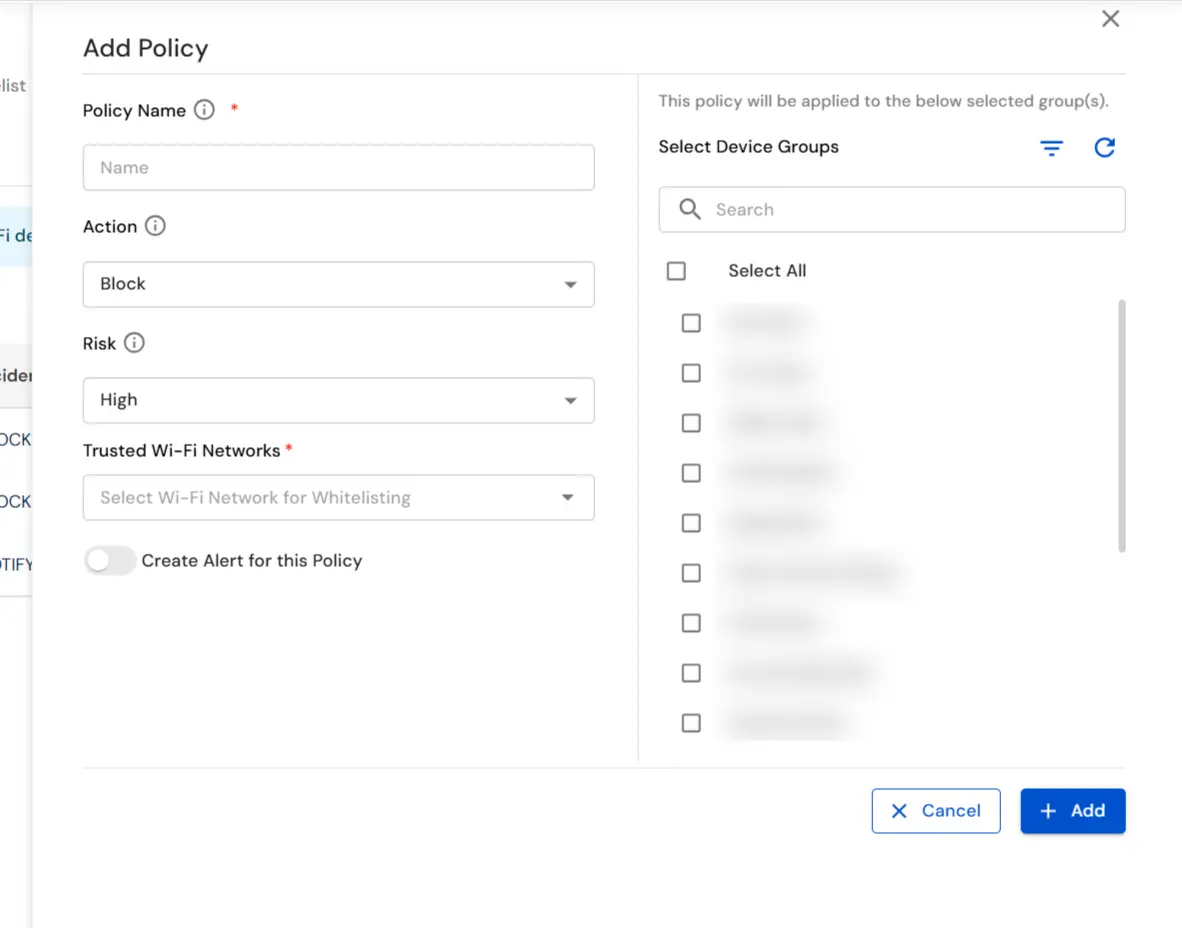
- In the policy form, enter the required details:
- Policy Name: Identifier for administrators.
- Actions: This option will allow you to choose what type action should be triggered when a Wi-Fi network is connected.
- Risk: This option will allow you to choose the risk level for the policy.
- Whitelist a specific Wi-Fi network: This option will allow you to whitelist a specific Wi-Fi network.
- Also, assign the Device group on which you want to apply the policy.
- In the Create Alert for this Policy section, you can specify the email addresses to which you want to notify policy breaches.
- If any policy is violated, you can view the report by going to the Reporting tab and selecting the Wi-Fi Reporting option.
In this way you have succesfully setup the Wi-Fi Policy by using our DLP solution. Also if you are facing any issues that you are not able to resolve please feel to reach out us uemsupport@xecurify.com
