- Home
- DLP
- How to configure Proxy Settings for Secure Network Monitoring using miniOrange DLP
How to configure Proxy Settings for Secure Network Monitoring using miniOrange DLP
Configuring proxy settings is a critical step in securing your network against data exfiltration threats. With miniOrange Data Loss Prevention (DLP), you can activate local proxy monitoring to intercept and inspect HTTP/HTTPS traffic effectively. This step-by-step guide walks you through the complete process of setting up the DLP agent’s proxy configuration—including enabling interception, defining override URLs, setting up upstream proxies, and securing agent settings to prevent unauthorized changes. Follow these instructions to ensure comprehensive protection against data leakage through web traffic.
Prerequisites
There are a couple of things you need to check before you start with the setup:
- You need Administrator privileges to log in to the miniOrange DLP Admin Dashboard.
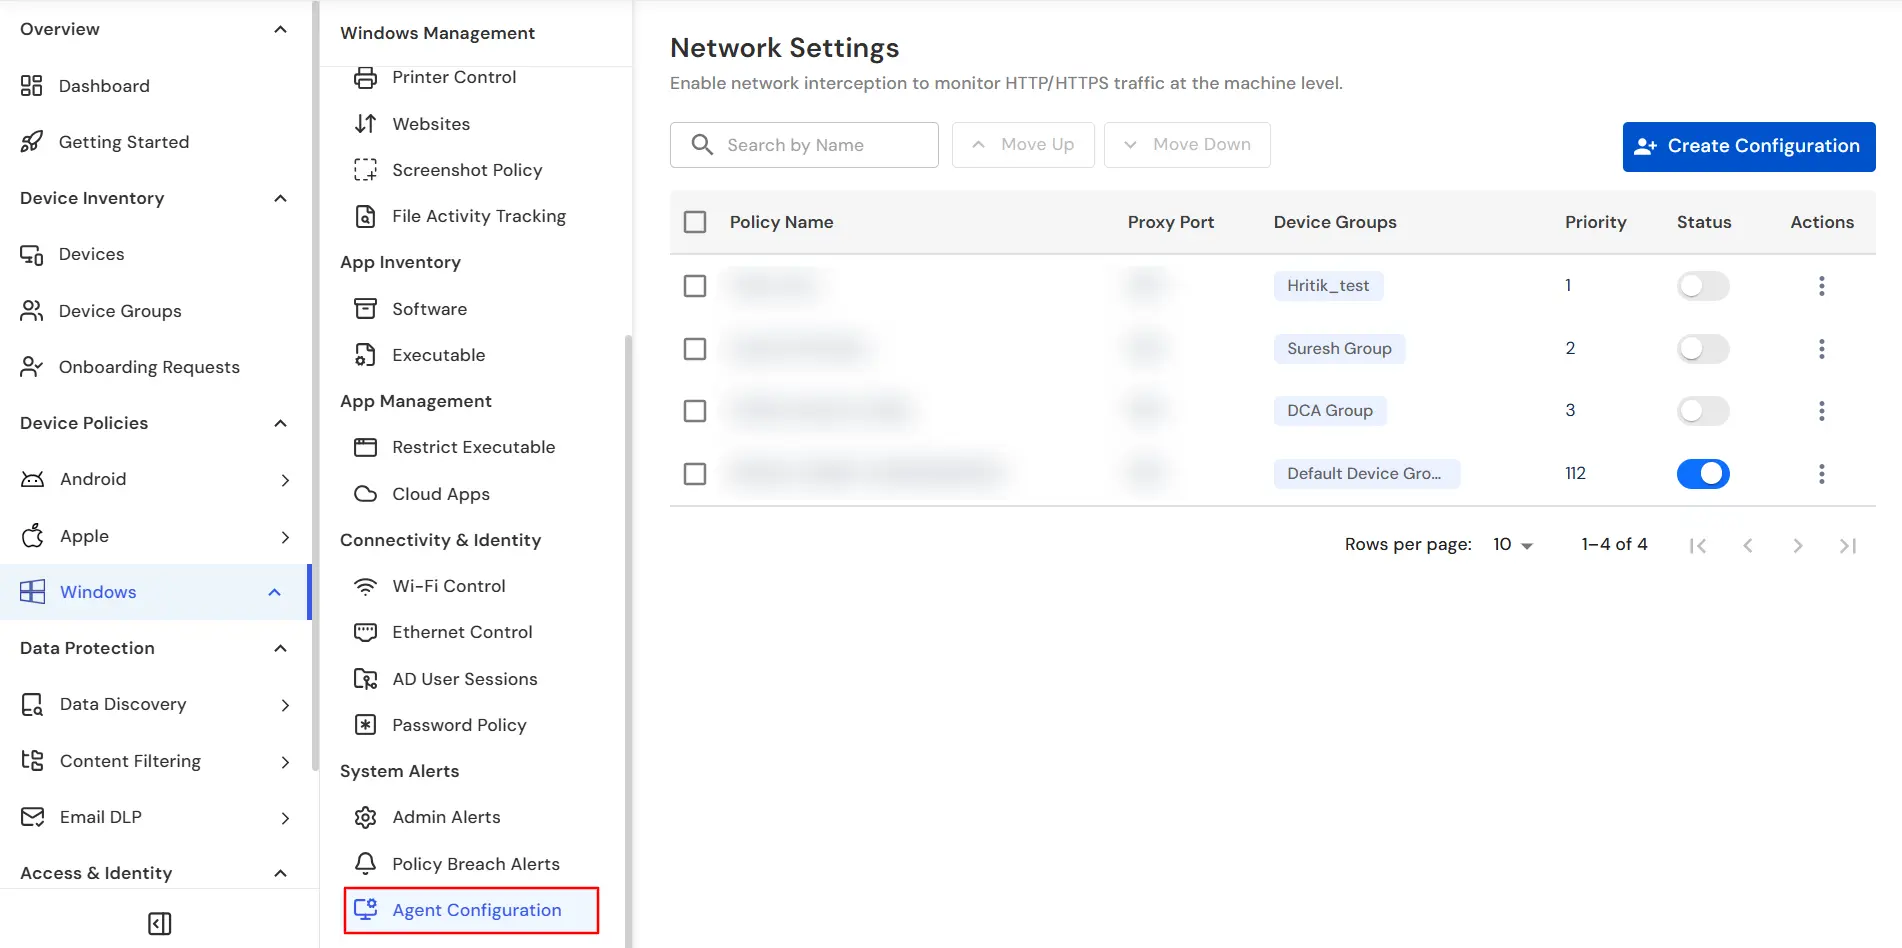
Step 1: Configuring Agent Proxy Settings
- Sign in to your DLP Admin dashboard.
- Navigate to Windows Tab → Agent Configuration tab.
Step 2: Set Local Proxy
- First provide a name for the Network Configuration. Then in the Port field, specify the port number for the local proxy server to listen on.
Example: 3128 or 8080
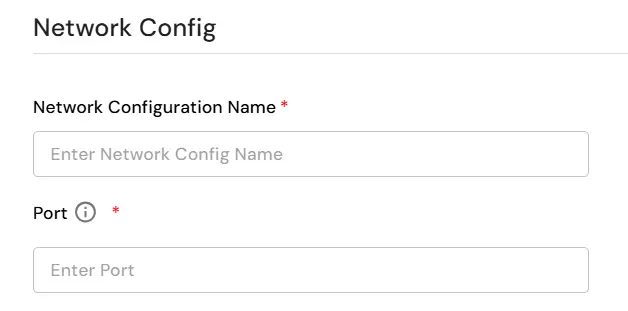
- Ensure this port is not blocked by the OS or antivirus and is open for localhost communication.
Step 3: Exclude Host URls
- In the Exclude Host URLs field, enter semicolon-separated URLs or domains that should bypass interception.
Example: intranet.company.local, *.trusted.com
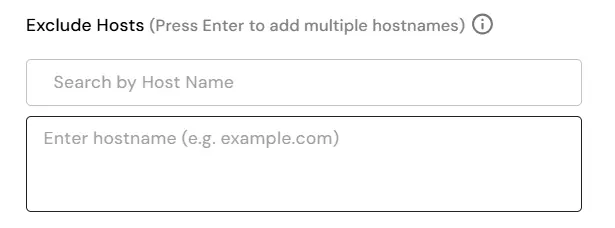
- These can include Internal applications, Intranet resources, Websites that should not be inspected due to compatibility or performance issues.
Step 4: Configure Upstream Proxy (Optional)
Step 5: Restrict User Access to Proxy Settings amd set Priority
- Set the Priority for the network configuration. Then enable the option to Prevent end users from modifying the local proxy.
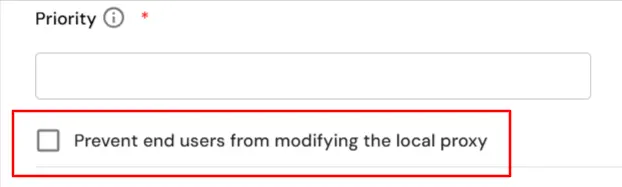
- This ensures: Users cannot change proxy settings in Windows settings or Bypass attempts through manual proxy changes are blocked.
- This setting enhances tamper-resistance and ensures policy enforcement.
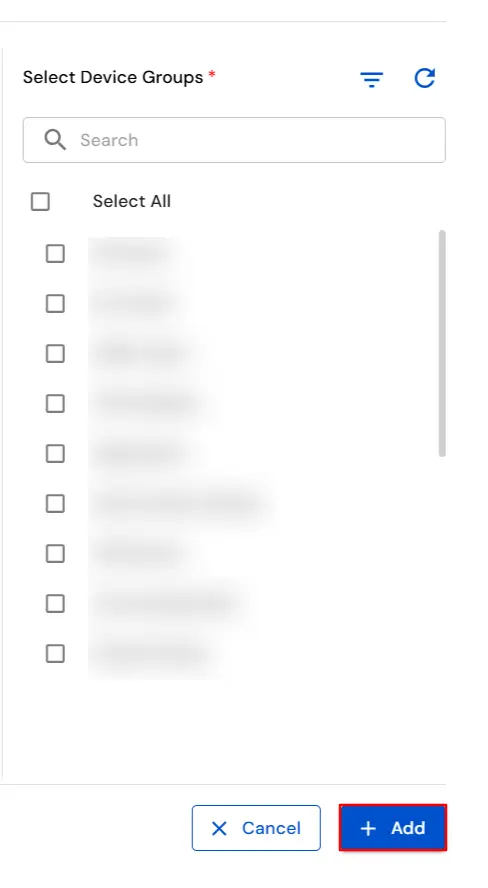
- Once you cofigure the proxy settings then select the Device Groups to which you want to apply this configuration.
Step 6: Save and Apply Configuration
- Review all the settings and click on Save to apply the configuration.
- The new settings will be pushed to all connected agents.
In this way you have succesfully configured the Proxy Settings by using our DLP solution. Also if you are facing any issues that you are not able to resolve please feel to reach out us uemsupport@xecurify.com

