Hello there!
Need Help? We are right here!
Need Help? We are right here!
Search Results:
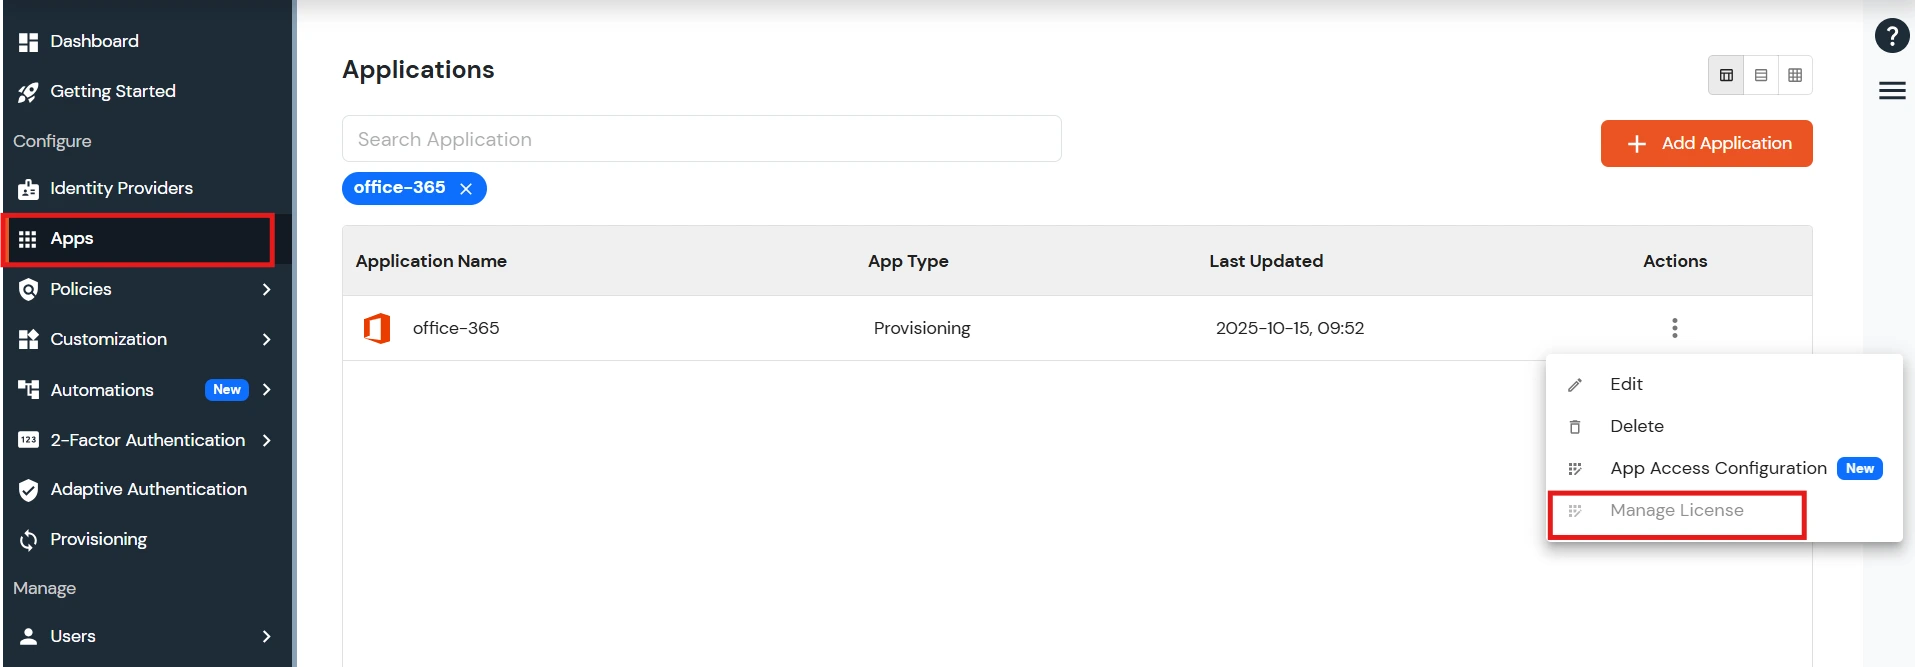
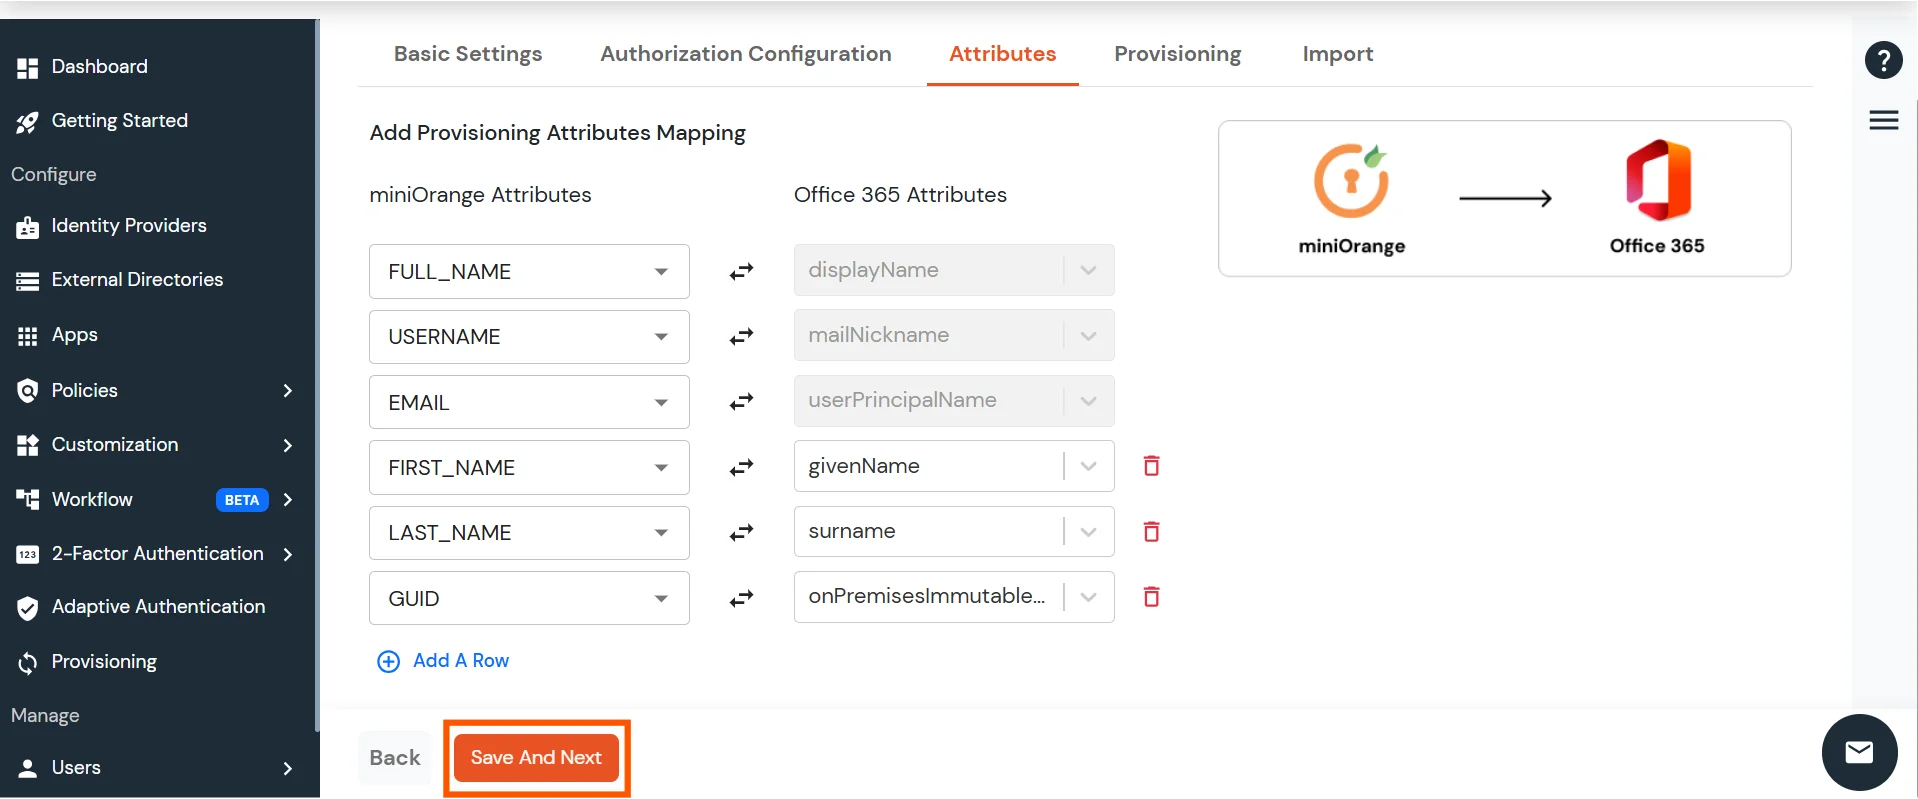
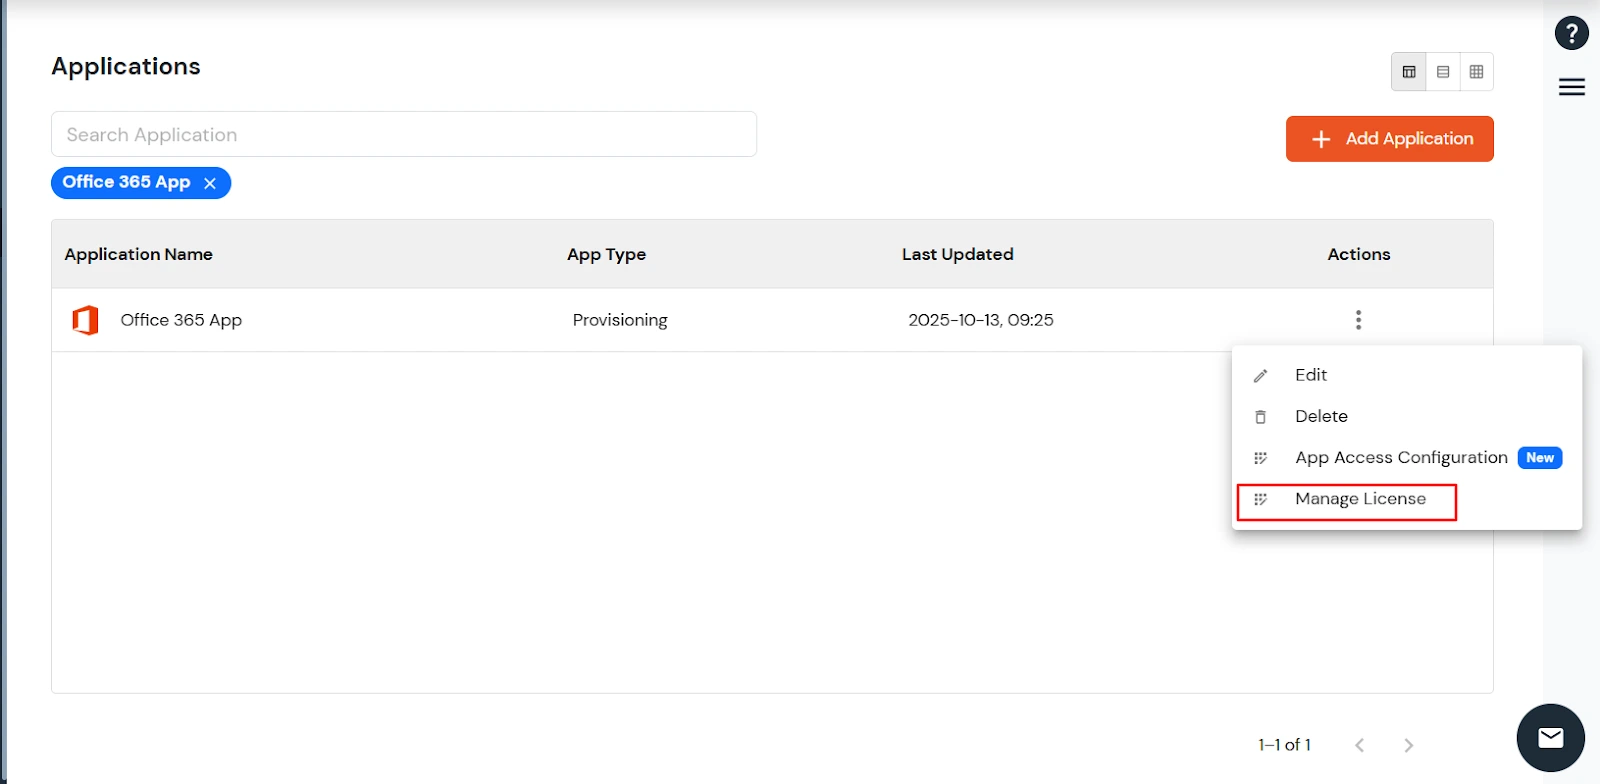
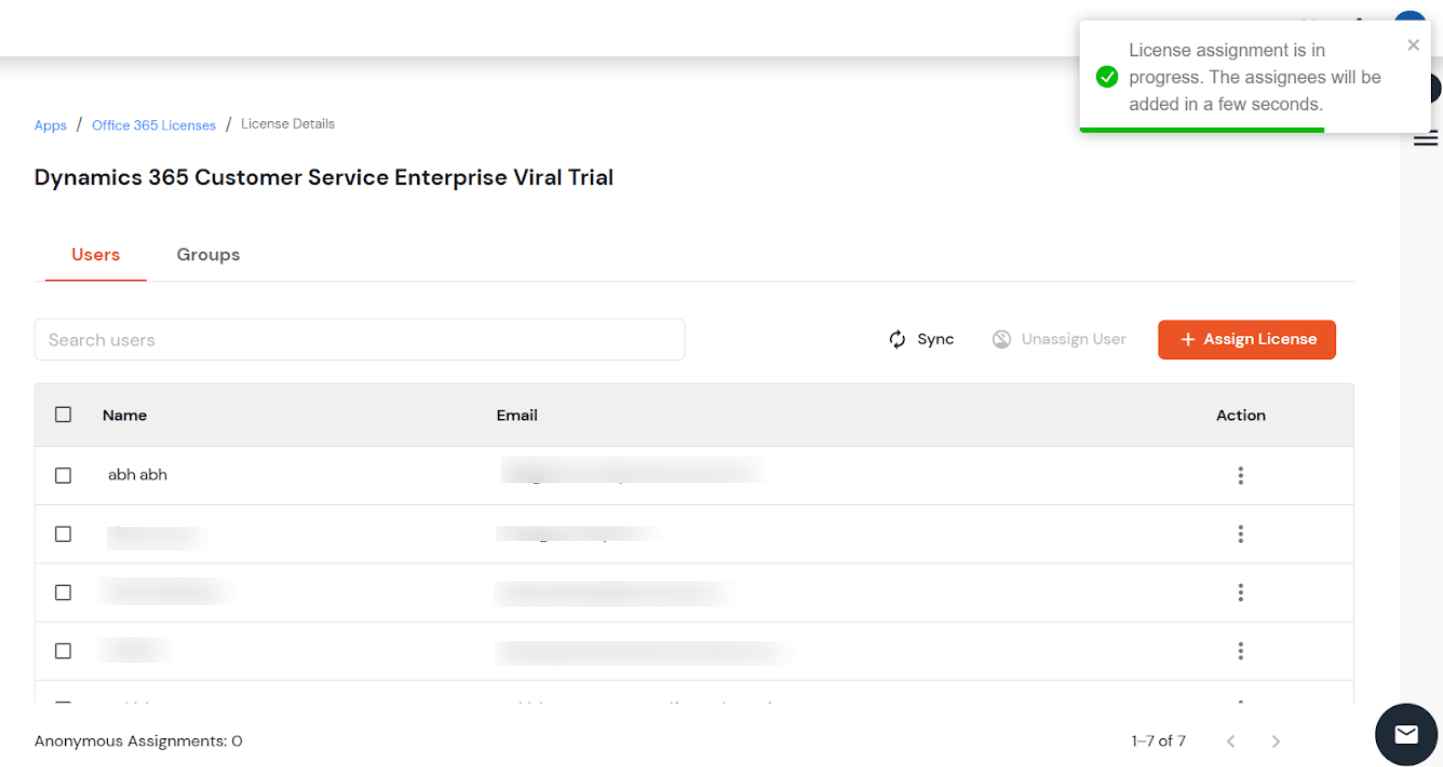
×This guide explains how to assign and manage Office 365 licenses for users or groups directly from the miniOrange dashboard. It covers how to enable license management, map the required usageLocation attribute, and sync users and groups with Microsoft 365. Once synced, you can easily assign, update, or remove licenses for users and groups.
miniOrange offers free help through a consultation call with our System Engineers to configure SSO for different apps using Azure AD as IDP in your environment with 30-day free trial.
For this, you need to just send us an email at idpsupport@xecurify.com to book a slot and we'll help you in no time.
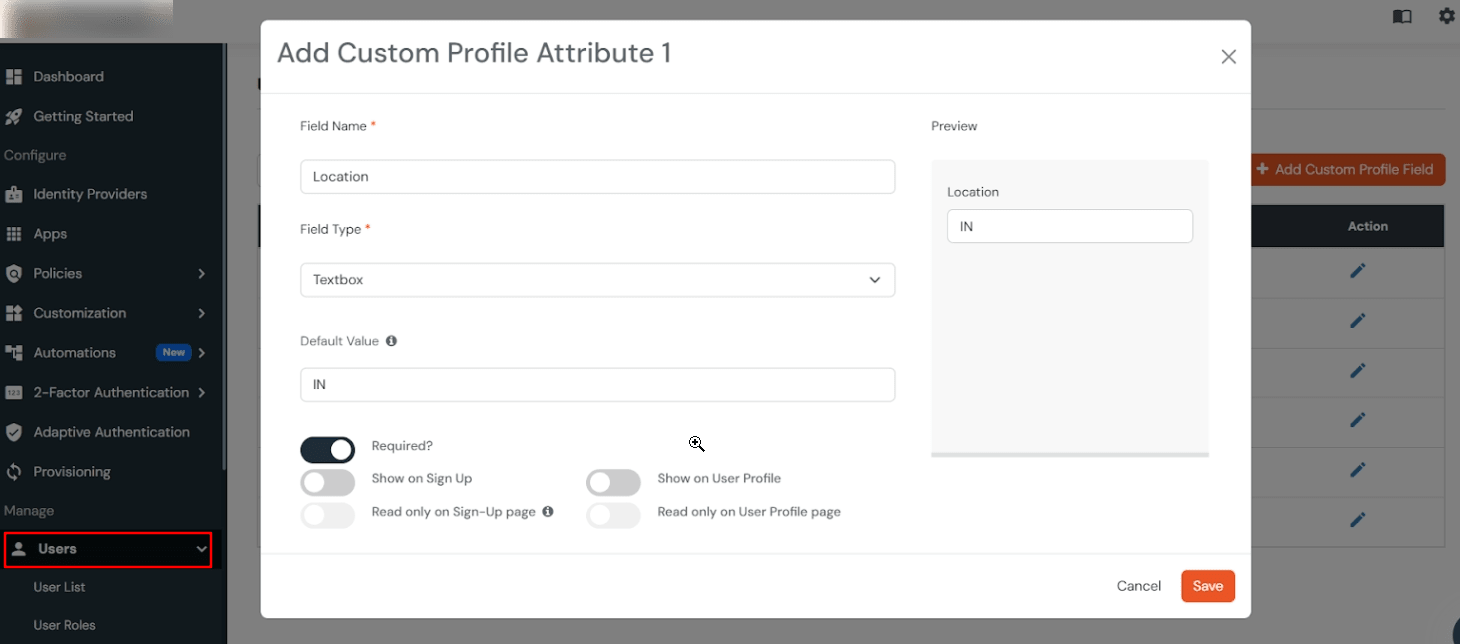
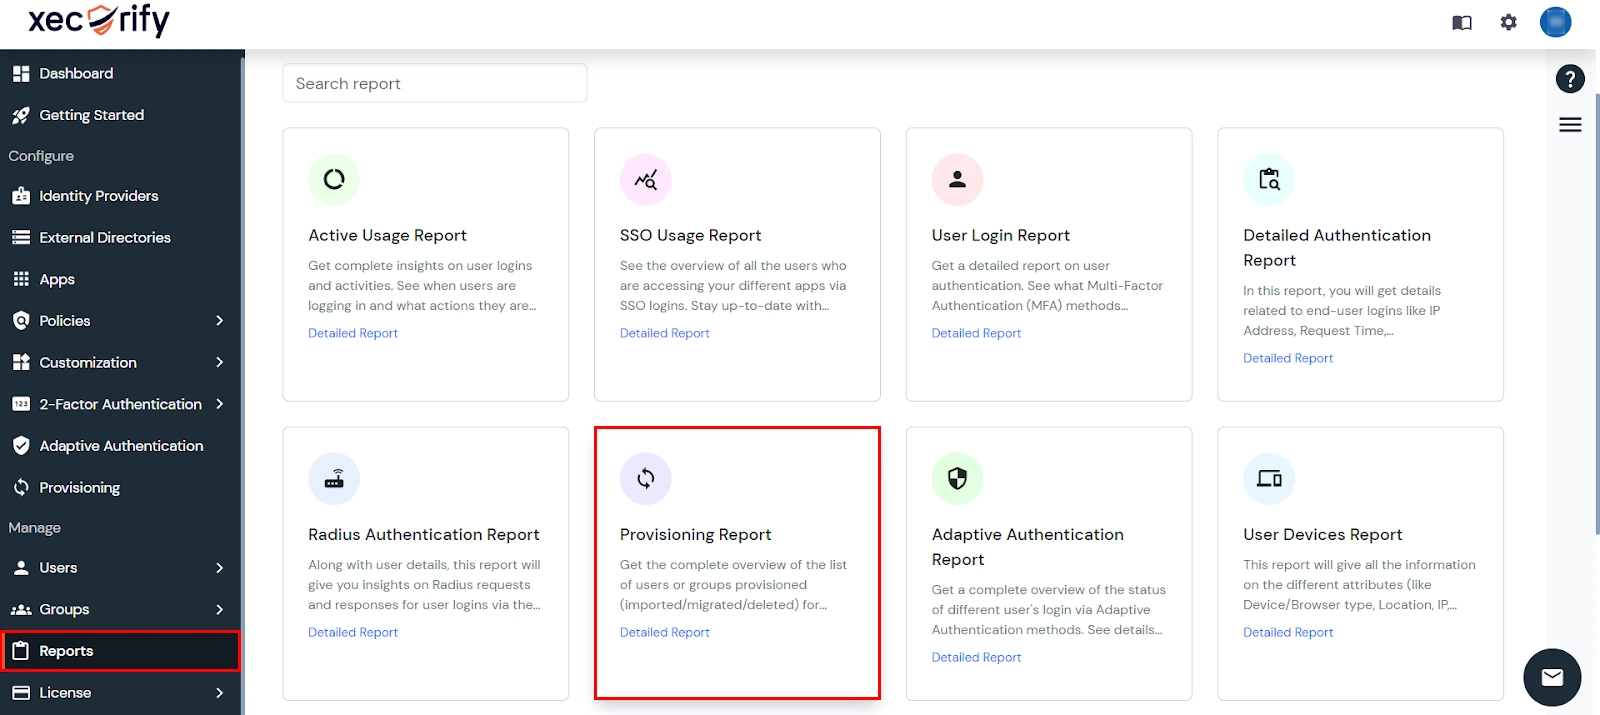
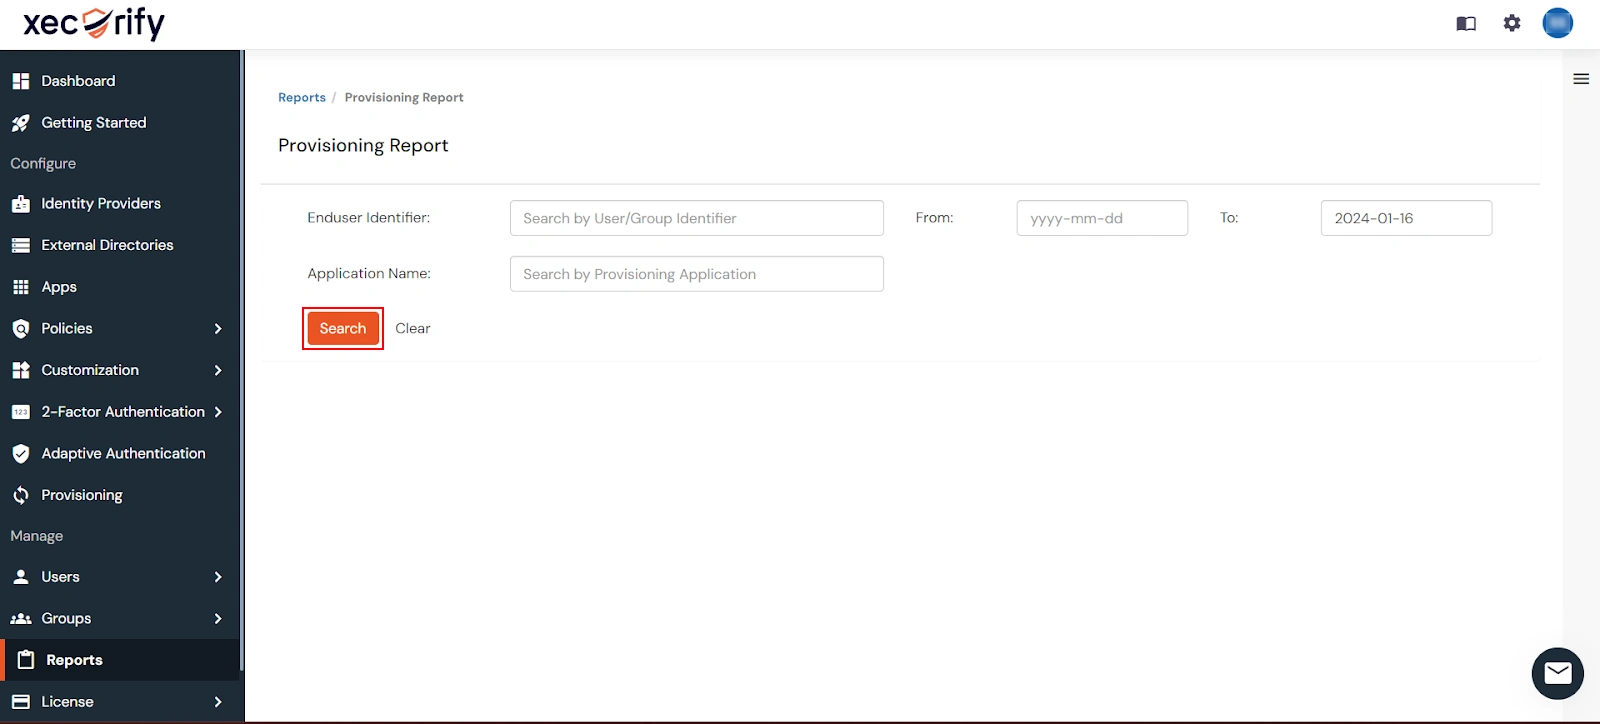
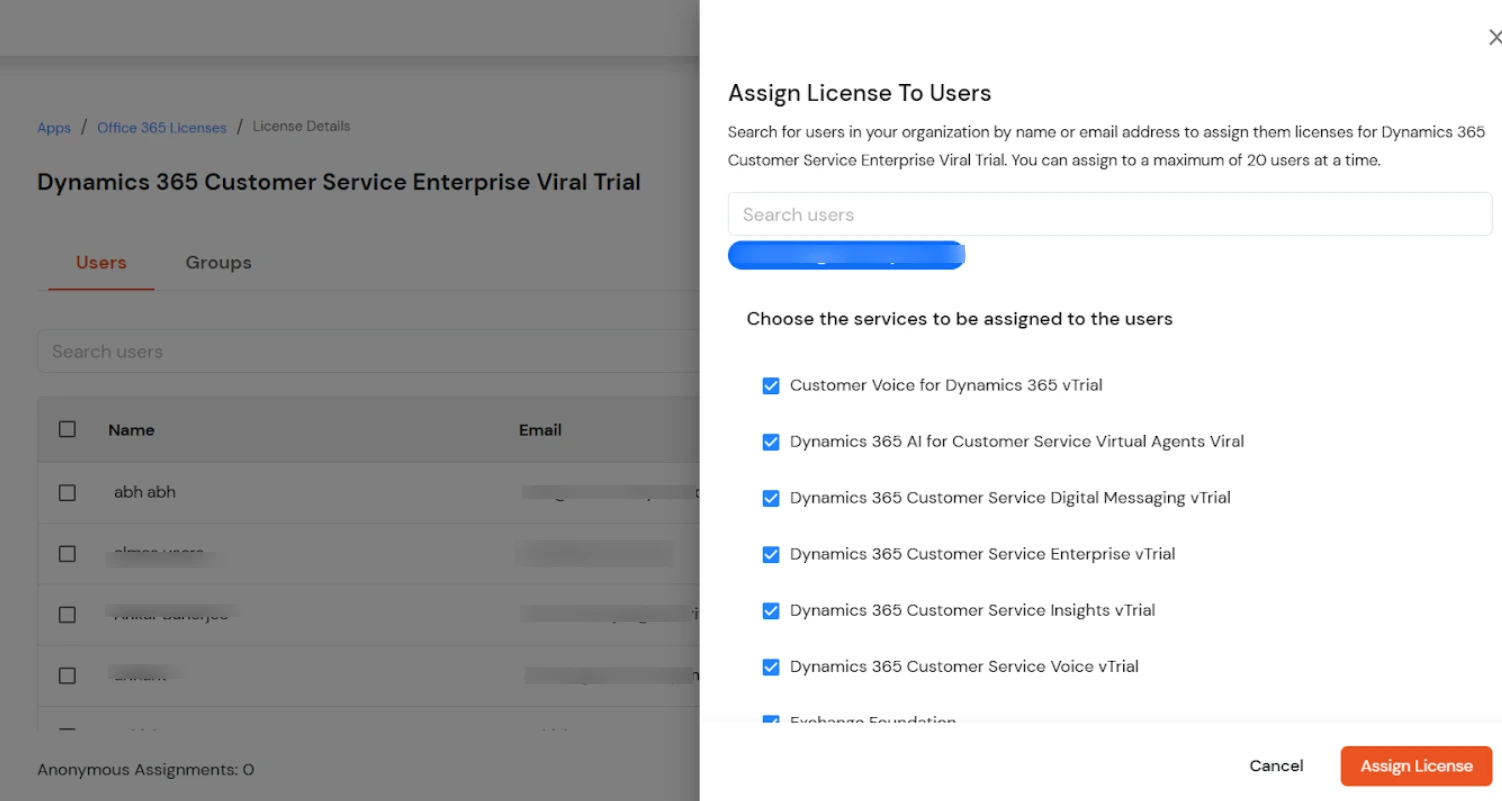
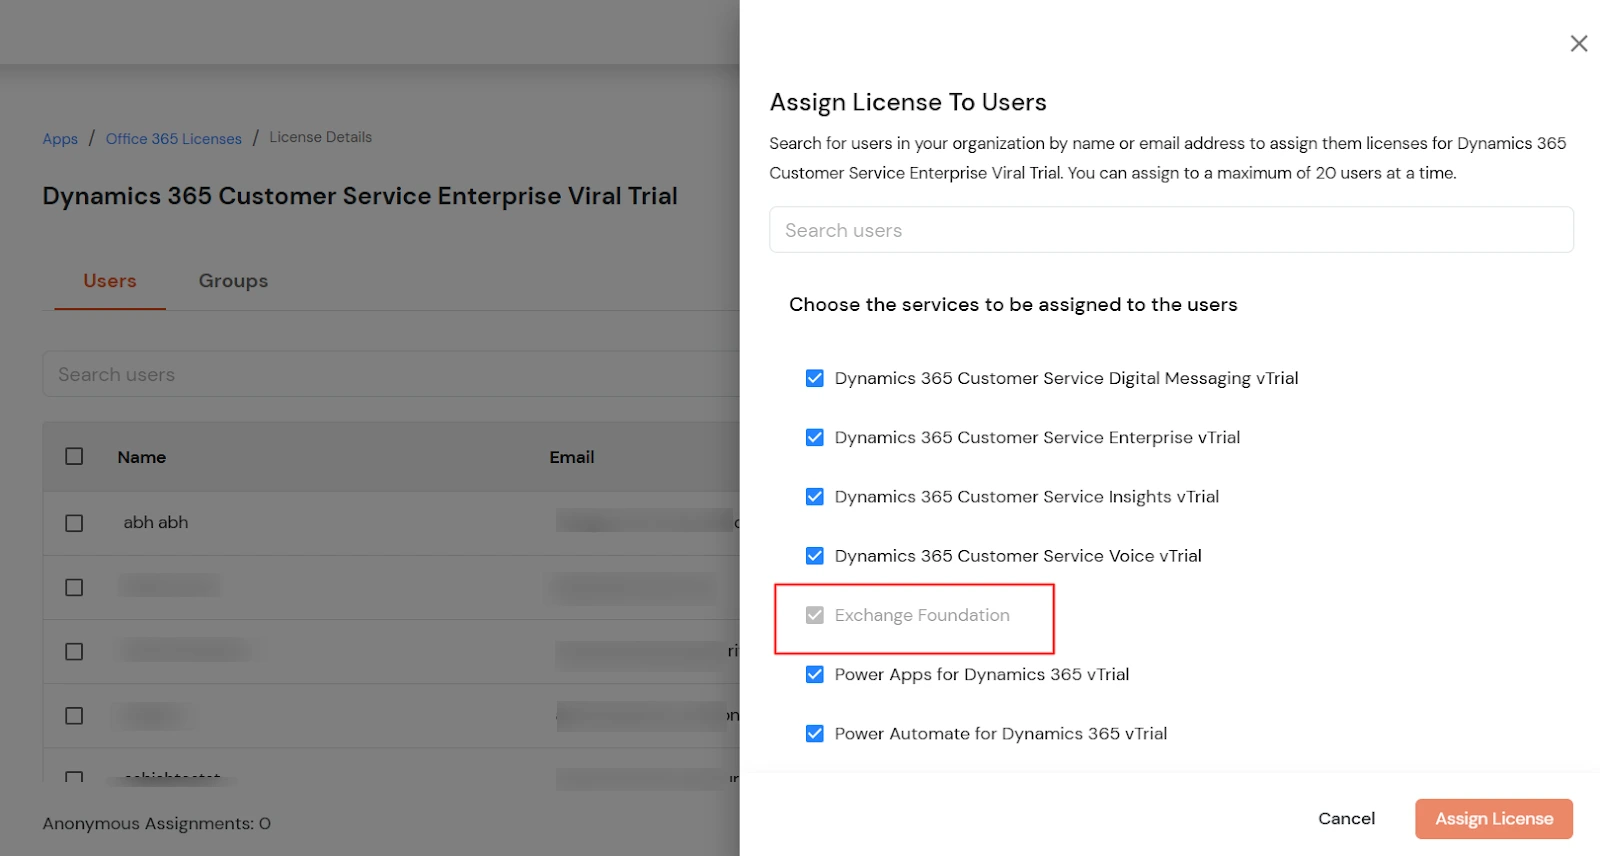
Only users who have a usage location set in Microsoft 365 can be assigned an Office 365 license.If you attempt to assign a license to a user without a usage location, you will see an error like: “License assignment cannot be done for user with invalid usage location.” This can be viewed in Reports > Provisioning Reports.
 "/>
"/>
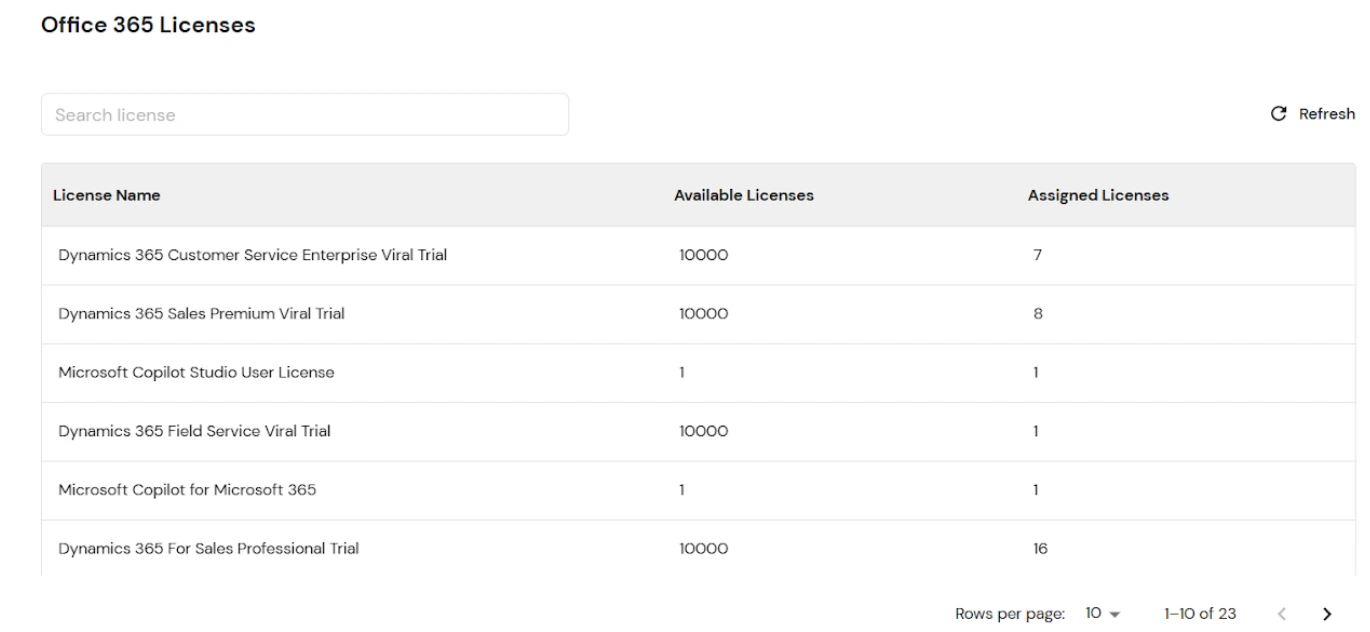
For miniorange IDP on-premise setup, to view the license names and service names properly on the Office 365 Licenses page, the data of product names and service plan identifiers of Office 365 licenses should be populated into the office365_products_services table in your database.
Please download the SQL script according to the DB you are using for the miniOrange IDP on-premise setup, and run the queries/script in your DB.
| Database | Download Link |
|---|---|
| PostgreSQL | Download |
| OracleSQL | Download |
| MySQL | Download |
| Microsoft Server SQL | Download |
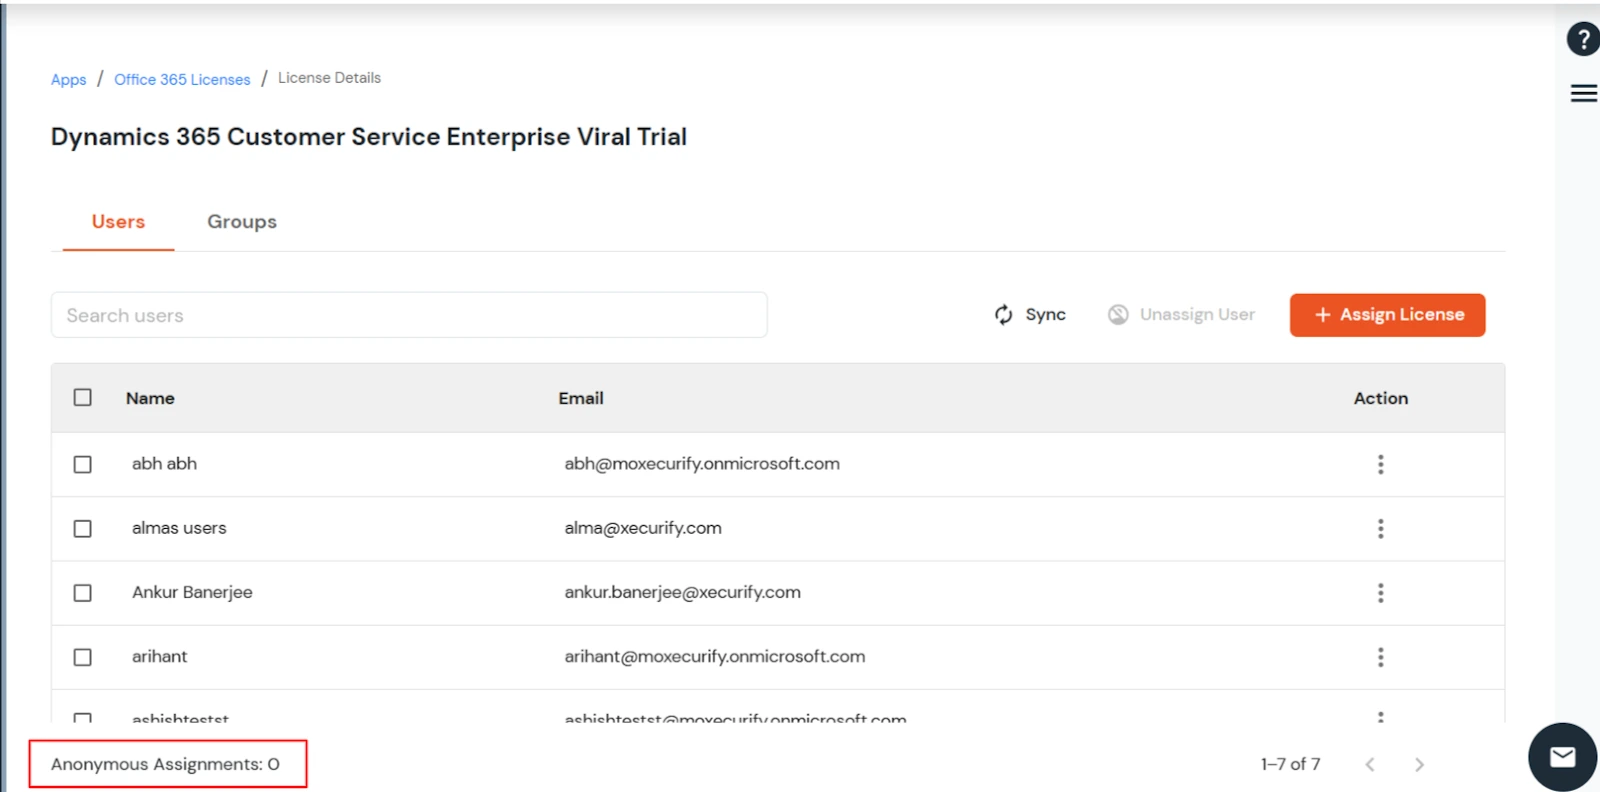
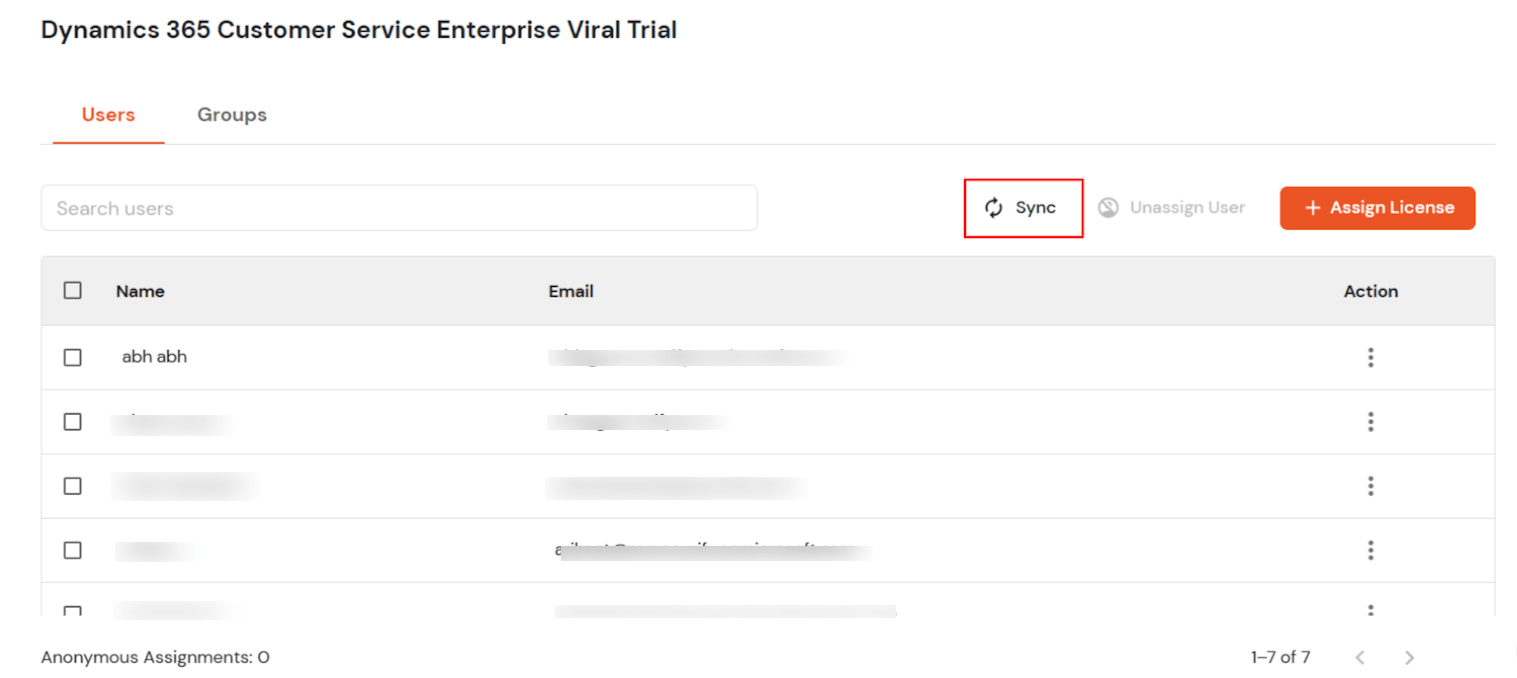
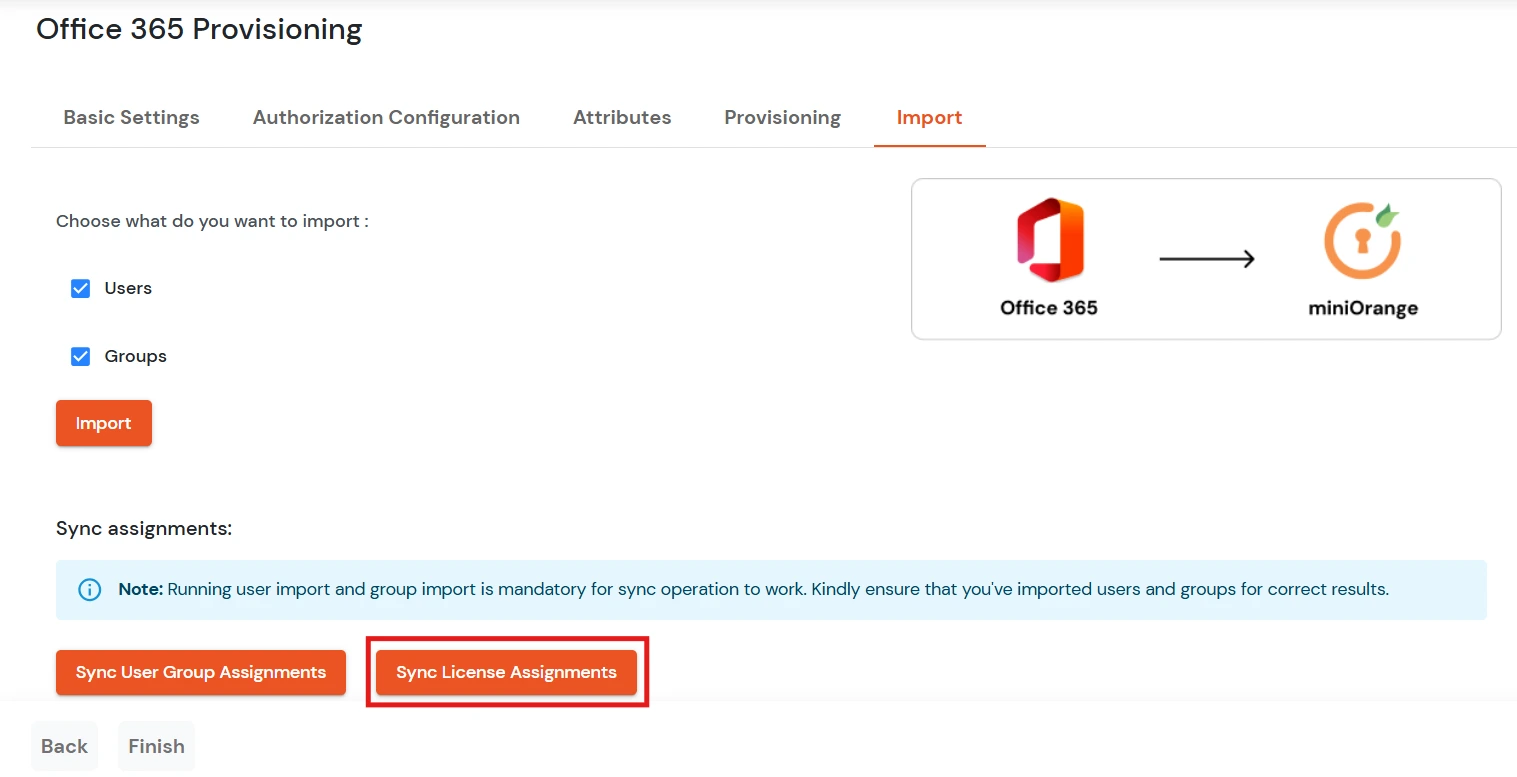
If you see any differences in the license assignments on Microsoft 365 and on miniOrange, that is not resolved by clicking on the Sync button in Users/Groups section, you can follow the step of Sync License Assignments. This will sync all the license assignments from Microsoft 365 afresh.