Umbraco SAML
Single Sign-On (SSO) plugin allows SSO / Login
in Umbraco using Azure AD, Azure B2C,
Okta, ADFS, Keycloak, OneLogin, Salesforce, Google Apps (G Suite), Shibboleth, PingFederate, Auth0 and
other SAML 2.0 compliant IdPs (Identity Providers). It acts as SAML SP (Service Provider) which can
be configured to establish a trust between the plugin and IDP to securely authenticate and enable
SSO / Login for the user into the Umbraco site. With the help of the given guide you can configure
Umbraco easily. To know more about the features we provide, click here.
Select your umbraco version to configure SSO with:
Follow the Step-by-Step Guide given below for Umbraco SAML Single Sign-On
(SSO)
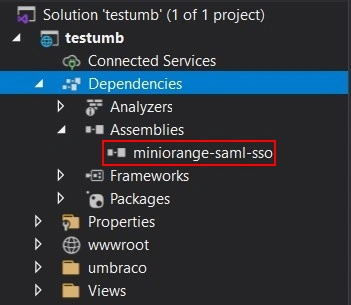
For setting up the module, extract the
umbraco-saml-sso-module.zip, you will find a DLL file
miniorange-saml-sso.dll, a configuration file
saml.config and a integration.md file which contain
the steps for adding the module into your application.
2. Add the module in your application
Add miniorange-saml-sso.dll in the bin folder (where your
other DLL files exist) for your Umbraco site.
Register miniorangesamlsso module for your umbraco
according to the provided steps in the integration.md file.
Add the provided configuration file saml.config in the root
directory for your umbraco site.
After integration open browser and browse the module dashboard
with URL below: https://<umbraco-base-url>/?ssoaction=config
If it pops up the registration page or login page, you have
successfully added the miniOrange saml sso module for your
application.
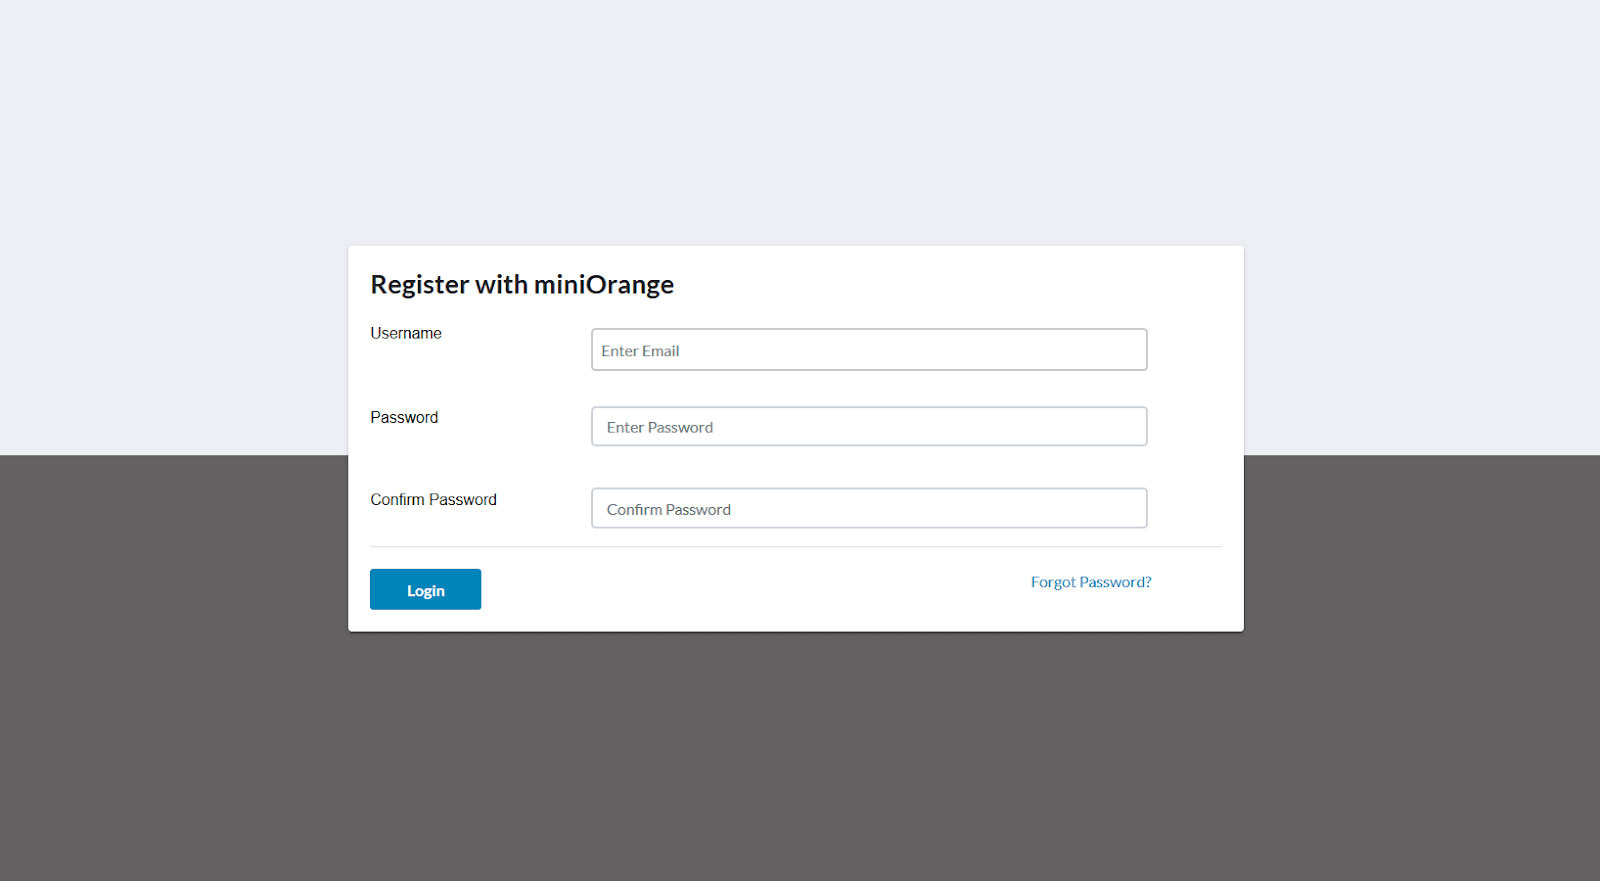
Register or Login for configuring the module.
Add the reference miniorange-saml-sso.dll file in your Umbraco application:
Add the miniOrange-sso-configuration file in your Umbraco application.
In the Startup.cs file:
Add the namespace miniOrange.samlusing miniOrange.saml;
Update the Umbraco middleware snippet lines in Startup.Configure method as below:
app.UseUmbraco()

            .WithMiddleware(u =>
        {

                u.UseBackOffice();

                u.UseWebsite();

                u.AppBuilder.UseminiOrangeSAMLSSOMiddleware();

            })

            .WithEndpoints(u =>
        {

                u.UseInstallerEndpoints();

                u.UseBackOfficeEndpoints();

                u.UseWebsiteEndpoints();

            });
Run the application when the configuration is done.
After integration, open your browser and browse the plugin dashboard with the URL
below:
https://<umbraco-application-base-url>/?ssoaction=config
If the registration page or login page pops up, you have successfully added the
miniOrange Umbraco SAML middleware in your Umbraco application.
Register or log in with your account by clicking the Register button to configure the
plugin
3. Configure your Identity Provider
There are below two ways with which you can get the SAML SP metadata to configure on your identity
provider end.
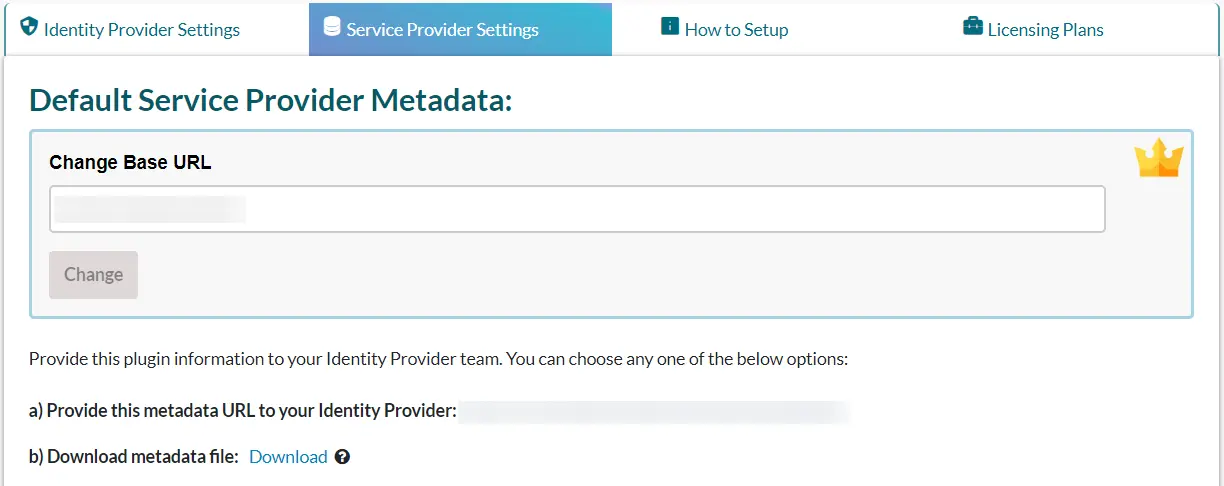
Using SAML metadata URL or metadata file:
Under the Service Provider Settings section, you can find the metadata URL as well as the
option to download the SAML metadata
Copy metadata URL or download metadata file to configure the same on your identity provider
end.
You can refer to the below screenshot:
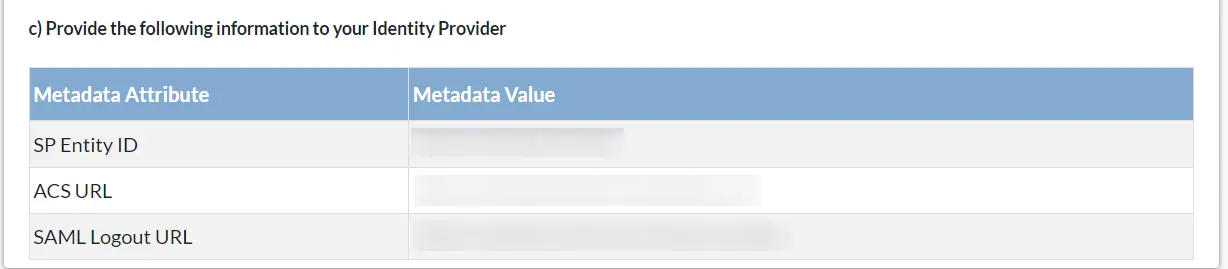
Uploading metadata manually:
From the Service Provider Settings section, you can copy the service provider metadata
manually like SP Entity ID, ACS Url, Single Logout Url, and provide it to your identity
provider for configuration.
You can refer to the below screenshot:
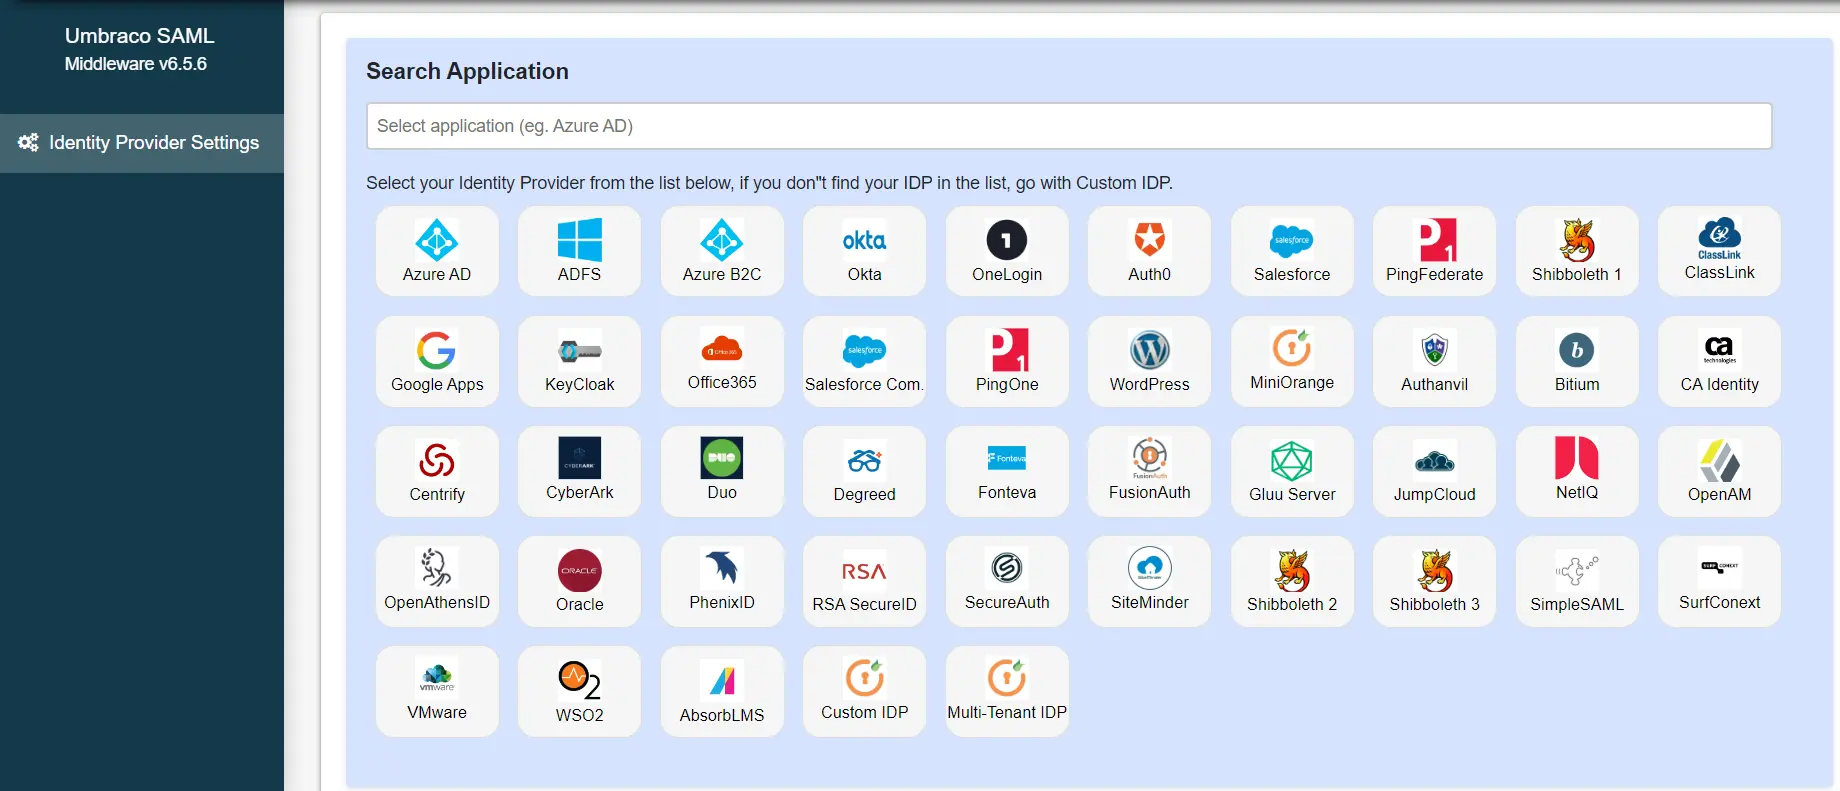
Under the Plugin Settings tab, select your identity provider from
the list shown below:
There are two ways detailed below with which you can get the SAML SP
metadata to configure onto your identity provider end.
A] Using SAML metadata URL or metadata file:
In the Plugin Settings menu, look for Service Provider settings.
Under that, you can find the metadata URL as well as the option to
download the SAML metadata.
Copy metadata URL or download the metadata file to configure the same on
your identity provider end. You may refer to the screenshot below:
B] Uploading metadata manually:
From the Service Provider settings section, you can manually copy
the service provider metadata like SP Entity ID, ACS URL,
Single Logout URL and share it with your identity provider for
configuration. You may refer to the screenshot below:
4. Configure your Service Provider
There are below two ways with which you can configure your SAML identity provider metadata in the
module.
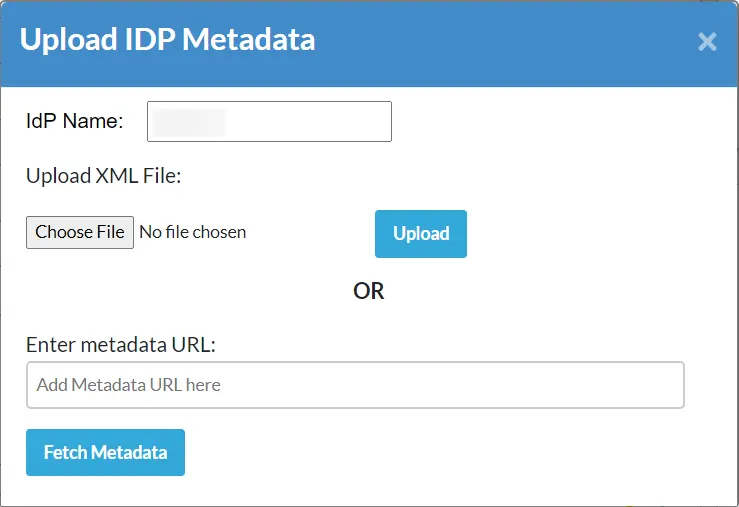
Upload metadata using the Upload IDP Metadata button:
If your identity provider has provided you with the metadata URL or metadata file (.xml
format only) then you simply configure the identity provider metadata in the module using
the Upload IdP Metadata option.
You can refer to the below screenshot:
You can choose any one of the options according to the metadata format you are available
with.
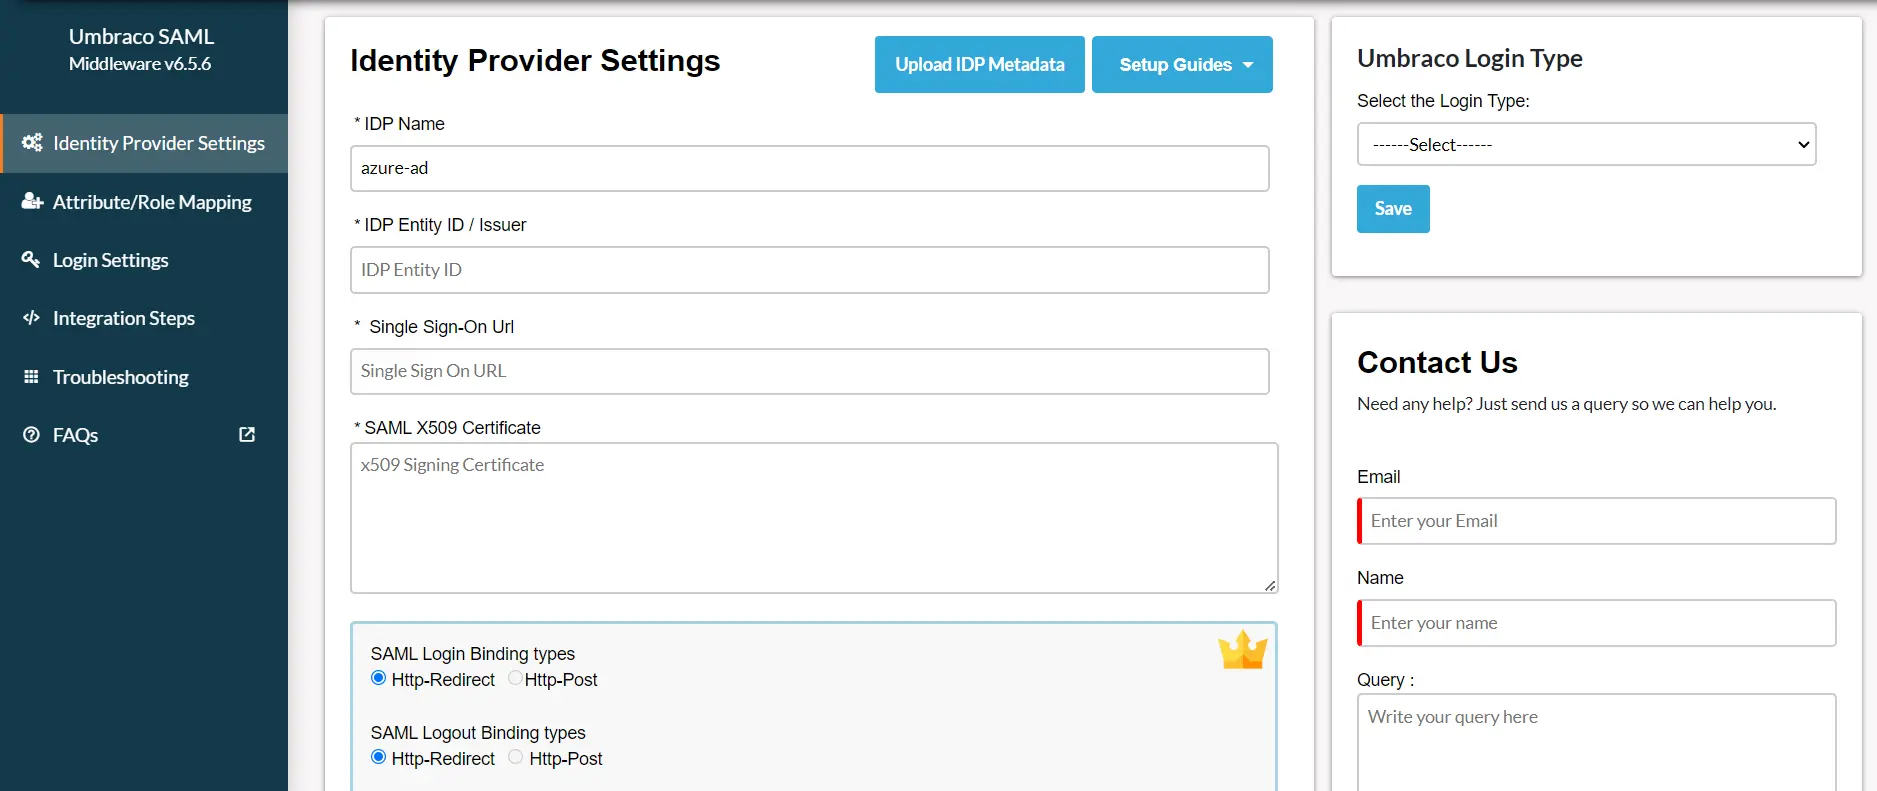
Configure the identity provider metadata manually:
After configuring your Identity Provider, it will provide
you with IDP Entity ID, IDP Single Sign On URL and
x.509 Certificate. Configure these values under
IDP Entity ID, Single Sign-On Url and
SAML X509 Certificate fields respectively.
Click Save to Save your IDP details.
There are two ways detailed below with which you can configure your SAML identity provider
metadata in the plugin.
A] Upload metadata using the Upload IDP Metadata button:
If your identity provider has provided you with the metadata URL or metadata file (.xml
format only), then you can simply configure the identity provider metadata in the plugin using
the Upload IDP Metadata option. You may refer to the screenshot below:
You can choose any one of the options according to the metadata format you have
available.
B] Configure the identity provider metadata manually:
After configuring your Identity Provider, it will provide you with IDP Entity ID, IDP
Single
Sign On URL and SAML X509 Certificate fields respectively.
Click Save to save your IDP details
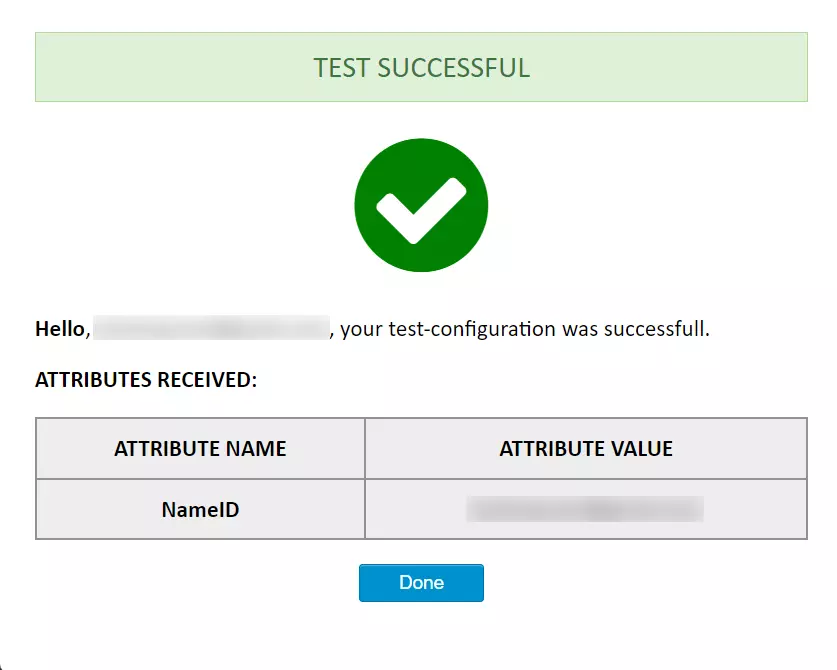
5. Test Configuration
Click on Test Configuration button to test whether the SAML configuration you’ve done is
correct or not.
The below screenshot shows a successful result.
Click on the Test Configuration button to test whether the SAML Configuration you’ve
done is correct.
The screenshot below shows a successful result. Click on SSO Integration to further
continue with the SSO Integration.
If you are experiencing any error on the plugin end you’ll be shown with the window
similar to below.
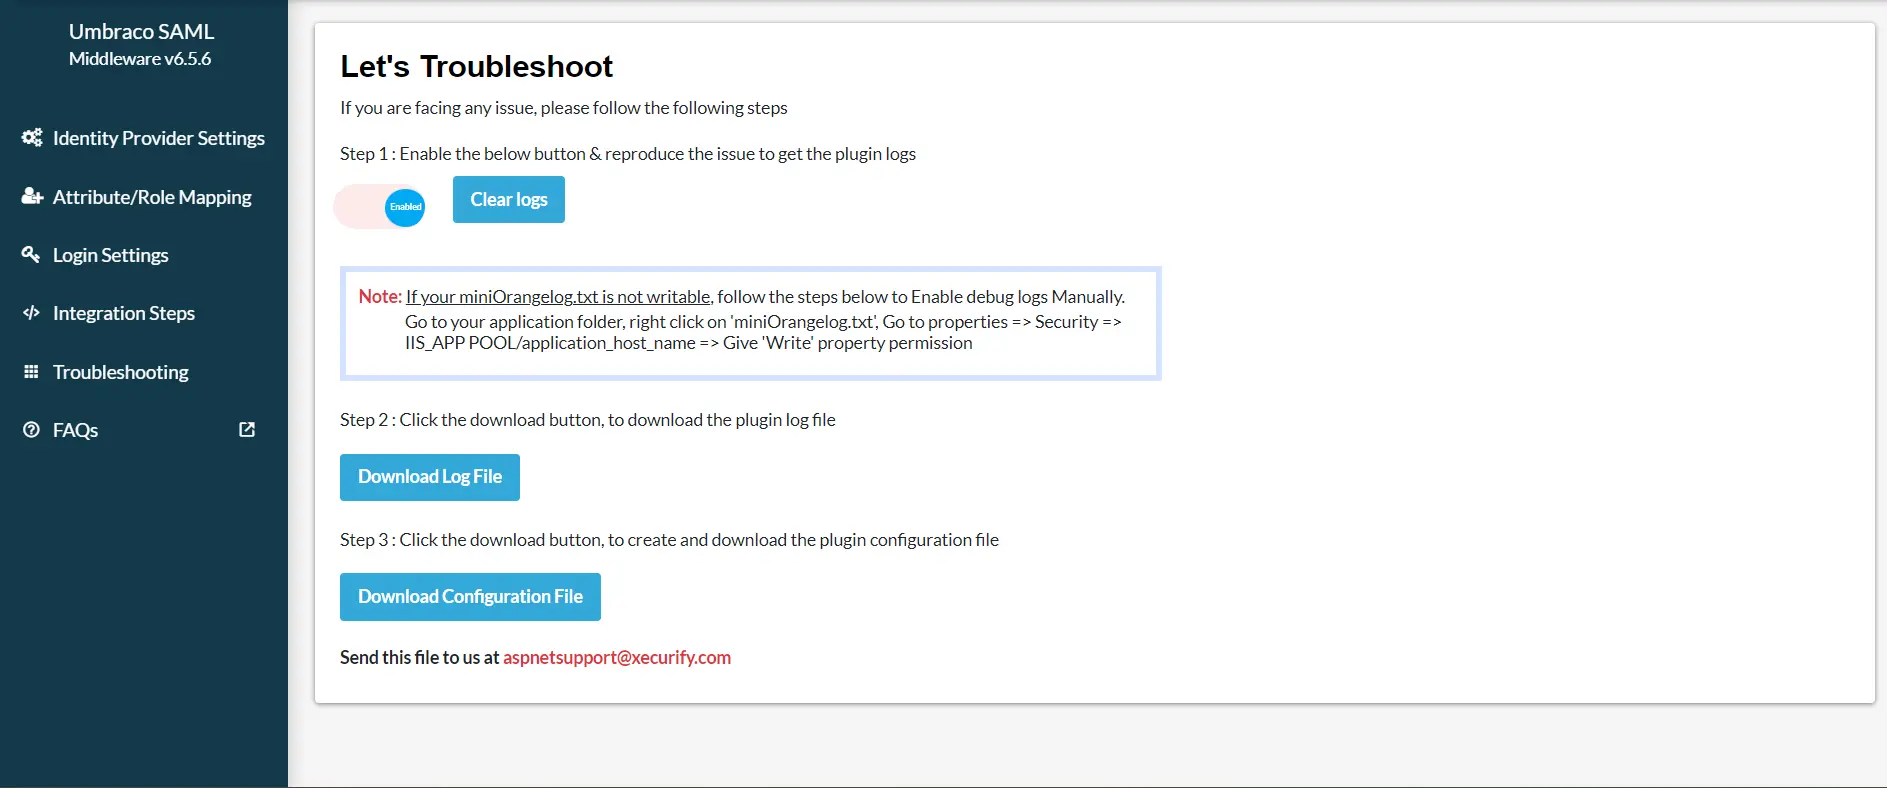
To troubleshoot the error you can follow the below steps:
Under the Troubleshoot tab, enable the toggle to receive the plugin logs.
Once enabled, you will be able to retrieve plugin logs by navigating to the Plugin
Settings tab and clicking on Test Configuration.
Download the log file from the Troubleshoot tab to see what went wrong.
You can share the log file with us at umbracosupport@xecurify.com and our team
will reach out to you to resolve your issue.
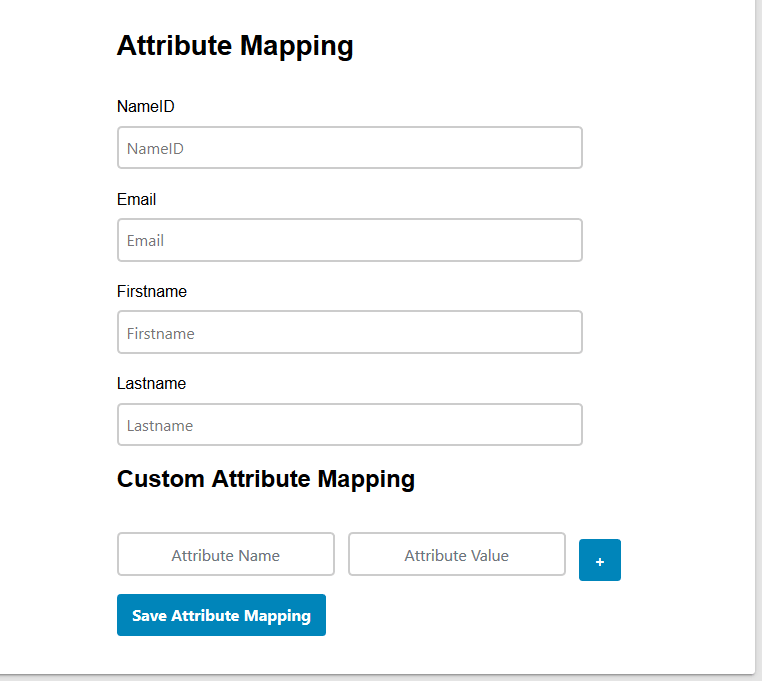
6. Attribute Mapping
Map your umbraco attributes with the Identity Provider (IdP)
attributes.
Click on Save Attribute Mapping button to save the settings.
7. Add following link in your Umbraco to initiate Single Sign-On (SSO)
Use the following URL as a link in your Umbraco site from where you want to initiate SSO: https://umbraco-base-url/?ssoaction=login
For example you can use it as: <a href="https://umbraco-base-url/?ssoaction=login”>Login</a>"
Use the following URL as a link in the application from where you want to perform SSO:
https://<umbraco-application-base-url>/?ssoaction=login
8. Add following link in your Umbraco to initiate Single Logout (SLO)
Use the following URL as a link in your Umbraco from where you
want to perform SLO: https://umbraco-base-url/?ssoaction=logout
For example you can use it as: <a href="https://umbraco-base-url/?ssoaction=logout”>Logout</a>"
You can configure the Umbraco SAML Single Sign-On (SSO)
module with any identity provider such as ADFS, Azure AD, Bitium,
Centrify, G Suite, JBoss Keycloak, Okta, OneLogin, Salesforce, AWS
Cognito, OpenAM, Oracle, PingFederate, PingOne, RSA SecureID,
Shibboleth-2, Shibboleth-3, SimpleSAML, WSO2 or even with your own
custom identity provider. To check out other identity providers, click here.
Not able to find your IdP? Contact us at
info@xecurify.com and
we'll help you set up SSO with your IdP in no time.