Two-Factor Authentication (2FA) for Github
Two Factor Authentication (2FA) or Multifactor Authentication is the process of the authentication in which you have to provide two factors to gain the access. First Factor is the one that you know username and password and Second factor is what you might have as unique like a phone (For OTP) or Fingerprint. This additional layer prevents the unauthorized person from accessing the resources even if they know your username and password. miniOrange provides 15+ authentication methods and solutions for various use cases.
Connect with External Source of Users
miniOrange provides user authentication from various external sources, which can be Directories (like ADFS, Microsoft Active Directory, OpenLDAP, AWS etc), Identity Providers (like Microsoft Entra ID, Okta, AWS), and many more. You can configure your existing directory/user store or add users in miniOrange.

miniOrange
Authenticator App

Google
Authenticator App

Authy 2-Factor
Authentication App

Microsoft
Authenticator App
Follow the Step-by-Step Guide given below for Github Single Sign-On (SSO)
1. Configure Github in miniOrange
- Login into miniOrange Admin Console.
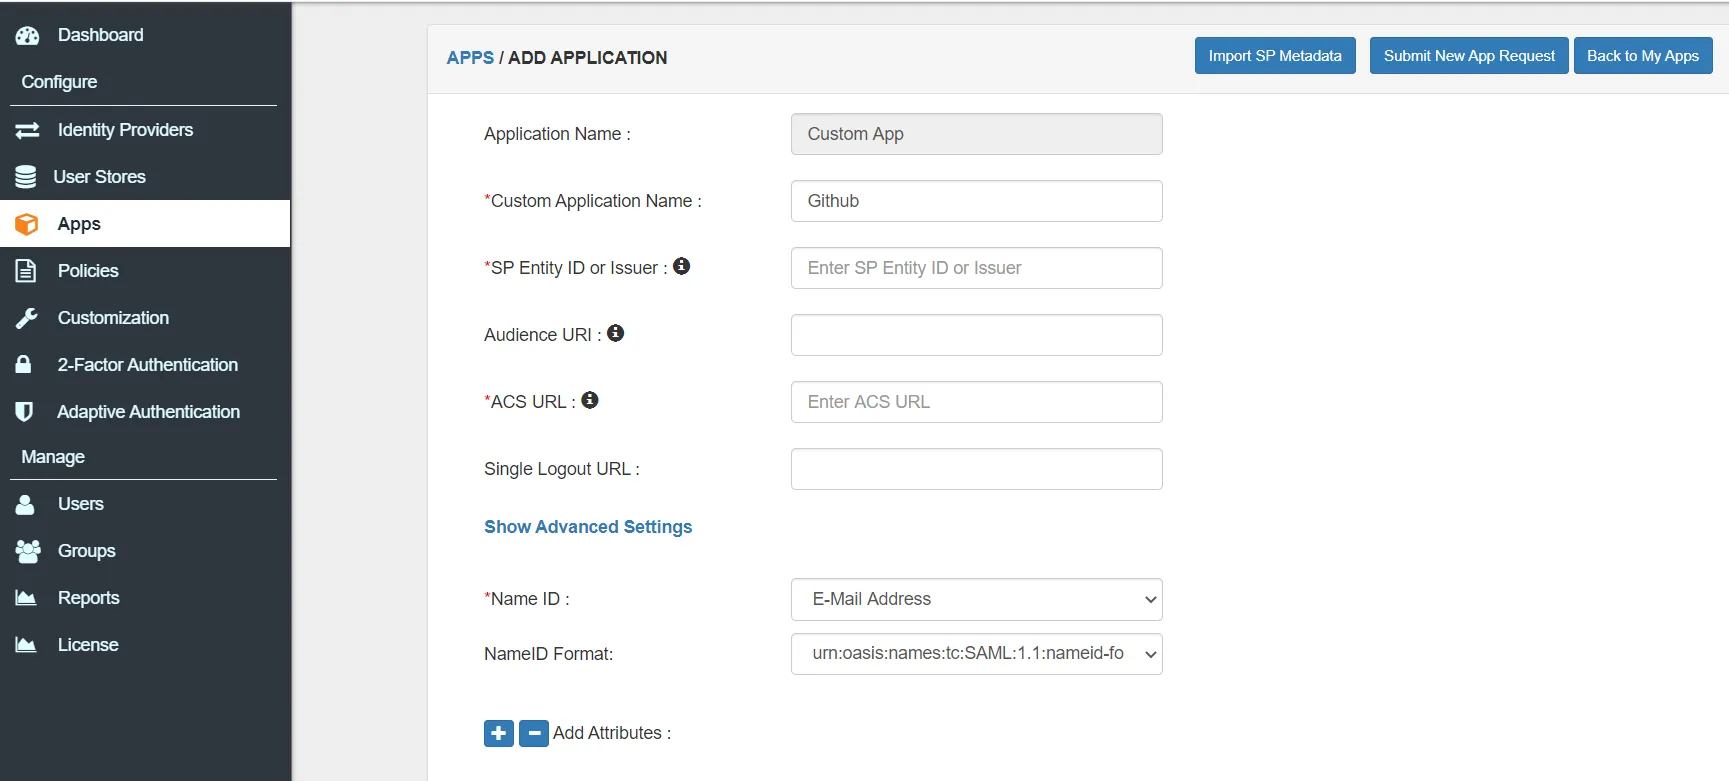
- Go to Apps and click on Add Application button.

- In Choose Application Type, select SAML/WS-FED from the All Apps dropdown.
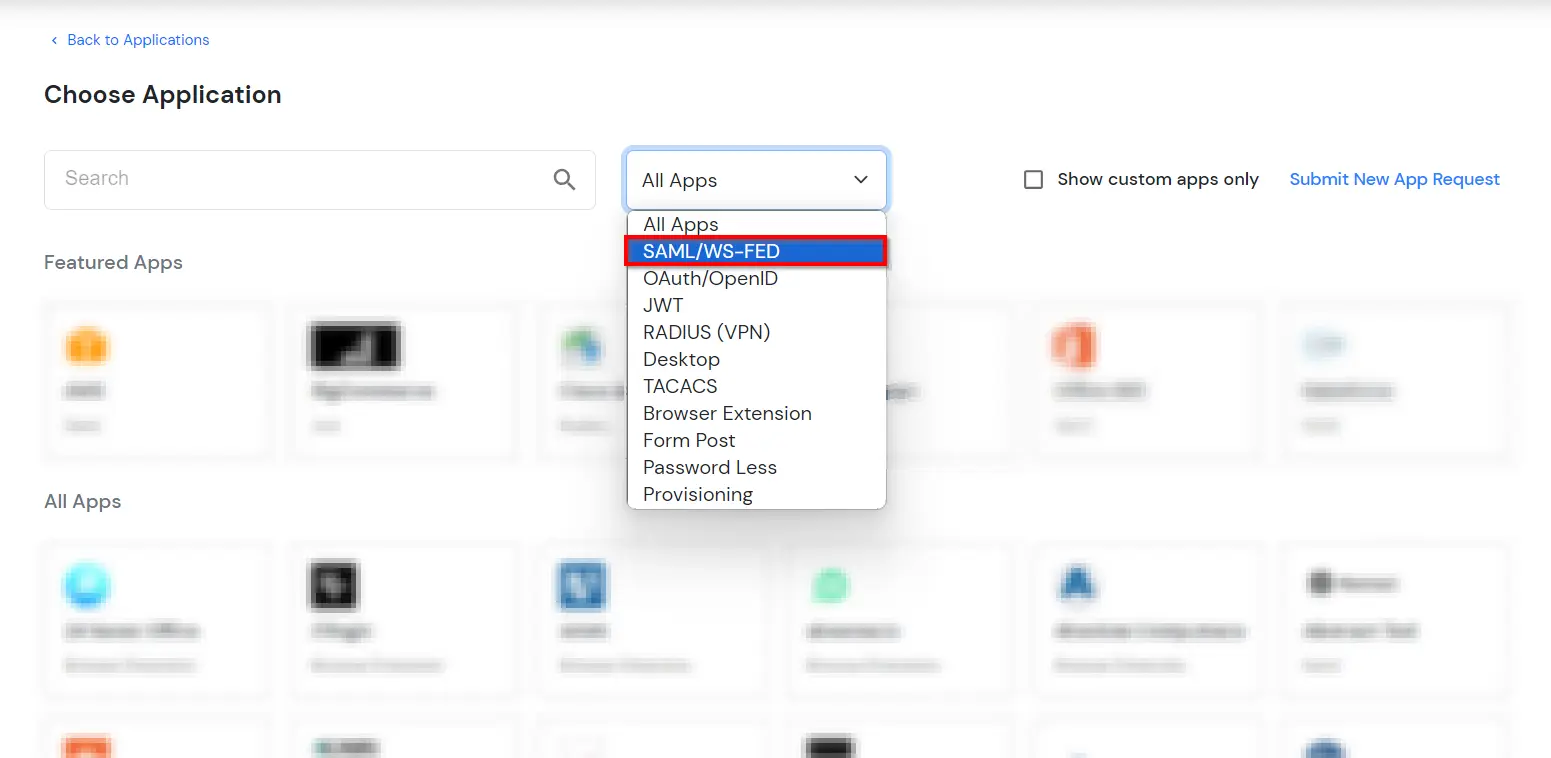
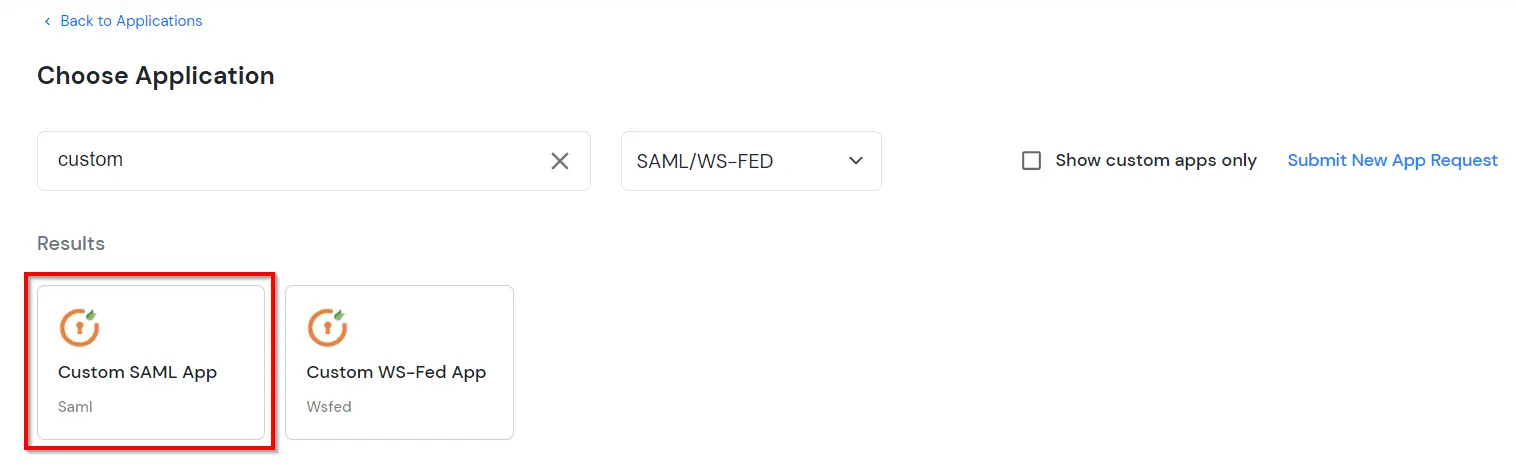
- Search for Github in the list, if you don't find Github in the list then, search for custom and you can set up your application in Custom SAML App.
- Make sure to enter the temporary SP Entity ID.
- Make sure to enter the temporary ACS URL.
- Select the Email ID from the Name ID dropdown.
- Leave the Attributes section empty.
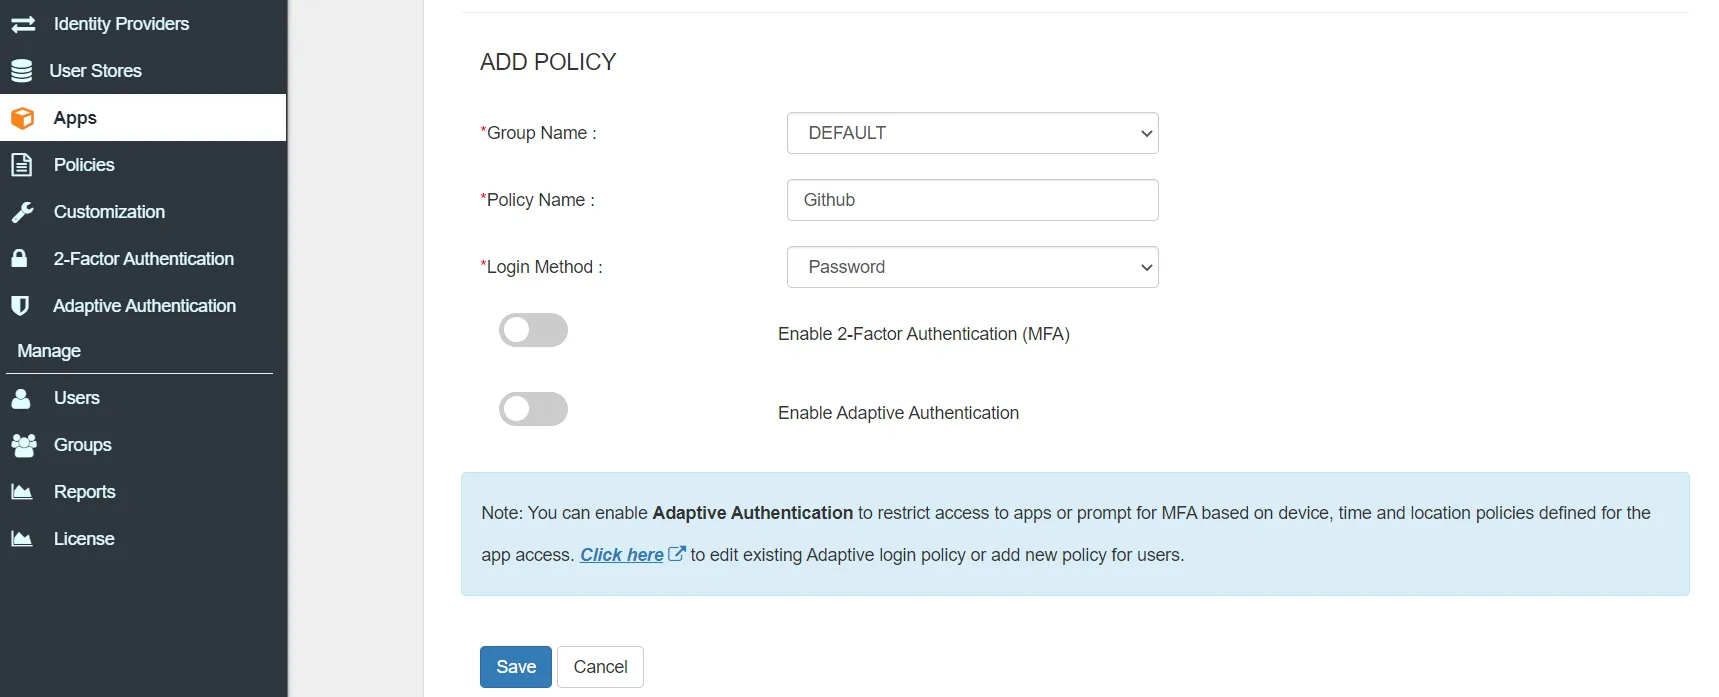
- Go to the Add Policy and select DEFAULT from the Group Name dropdown.
- Now enter the Github in the Policy Name field.
- Select PASSWORD from the First Factor Type dropdown.
- Click on Save to configure Github.
- Click on Metadata link to download the metadata which will be required later. Click on Link to see the IDP initiated SSO link for Github.
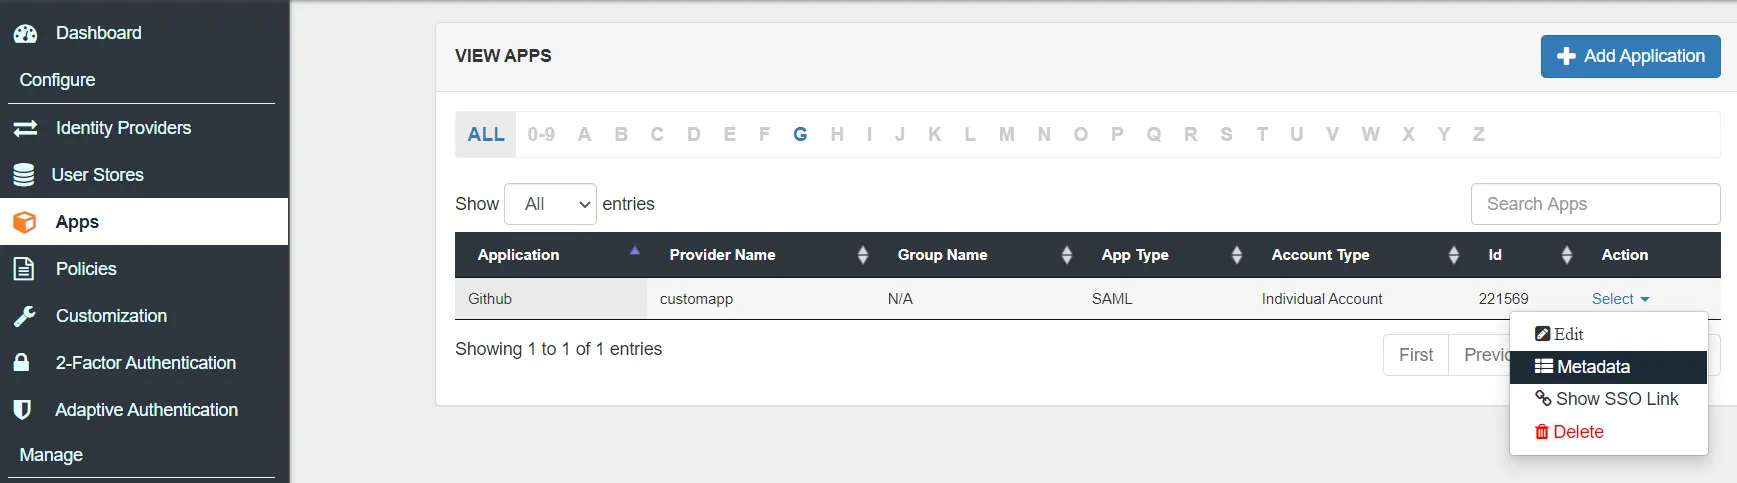
- Hit on the Download Metadata XML button to download the metadata.xml file.
2. Configure SSO in Github
- In the top right corner of GitHub, click your profile photo, then click Your profile.
- On the left side of your profile page, under "Organizations", click the icon for your organization.
- Under your organization name, click Settings.
- In the organization settings sidebar, click Security.

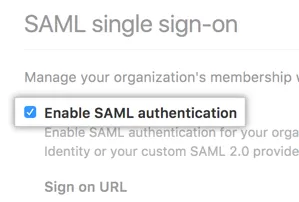
- Under "SAML single sign-on", select Enable SAML authentication.
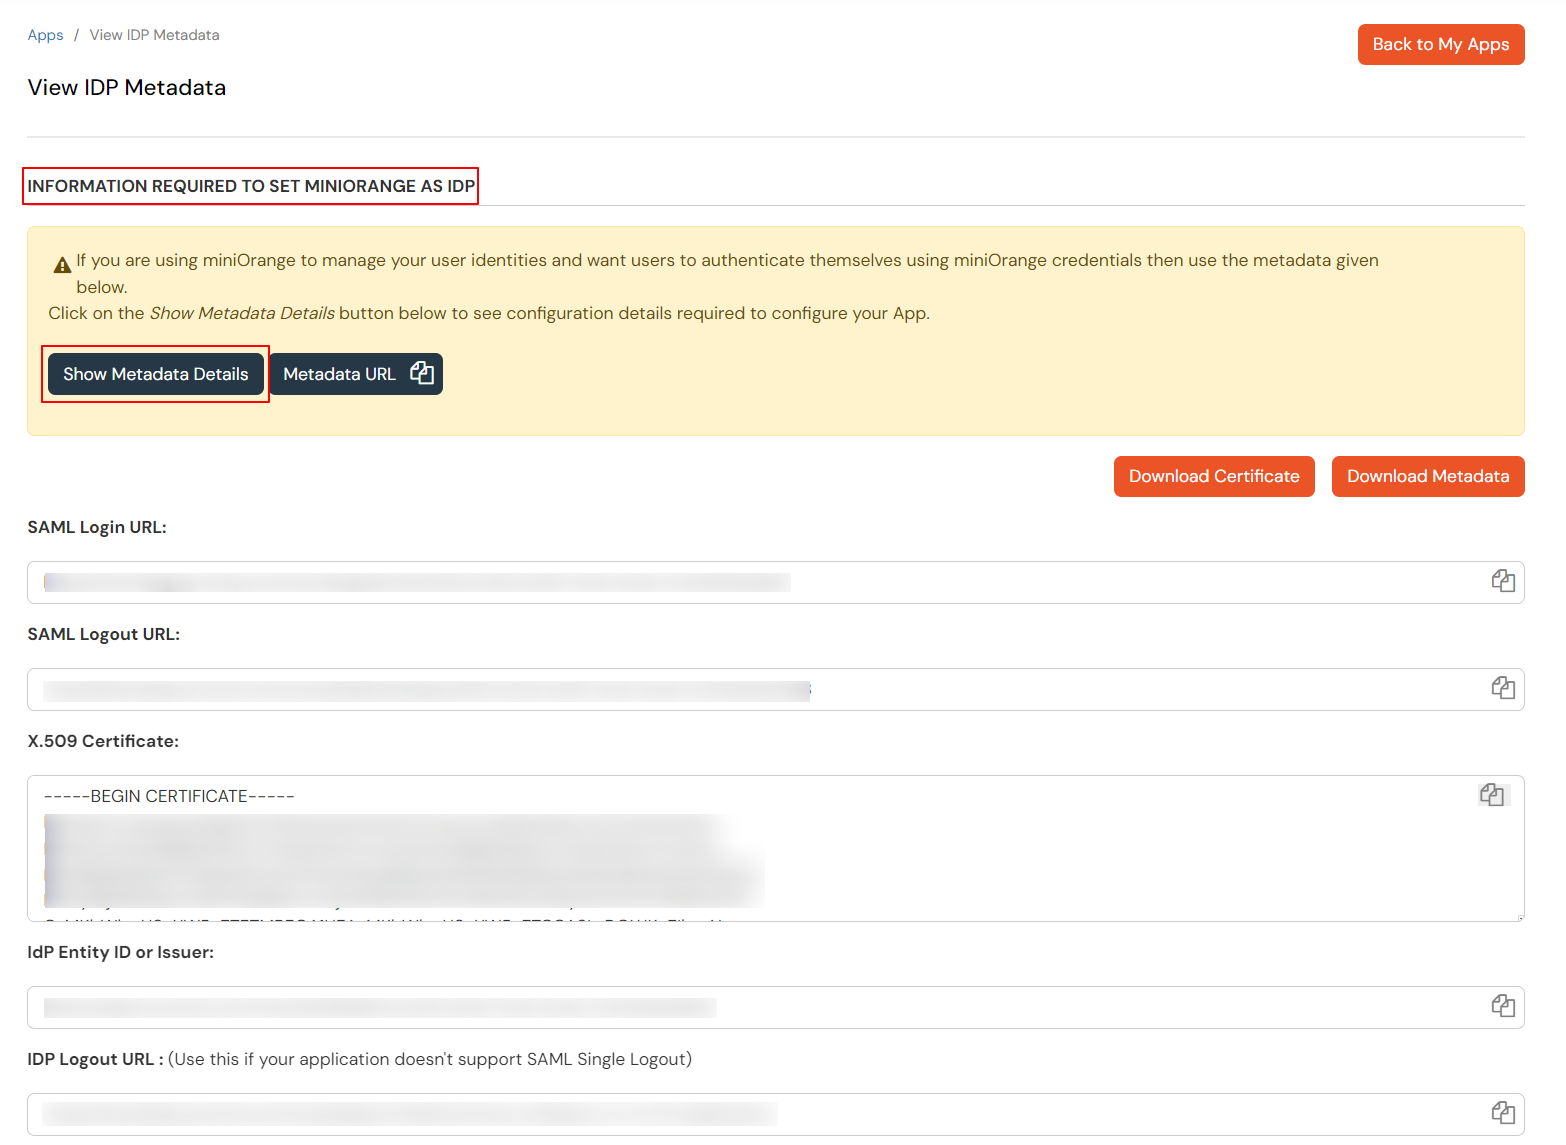
- In the "Sign on URL" field, type the HTTPS endpoint of your IdP for single sign-on requests. This value is available in your IdP configuration.
- Optionally, in the "Issuer" field, type your SAML issuer's name. This verifies the authenticity of sent messages.
- Under "Public Certificate," paste a x509 certificate to verify SAML responses.
- Click Edit icon and then in the Signature Method and Digest Method drop-downs, choose the hashing algorithm used by your SAML issuer to verify the integrity of the requests.
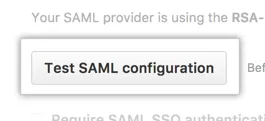
- Before enabling SAML SSO for your organization, click Test SAML configuration to ensure that the information you've entered is correct.
- To enforce SAML SSO and remove all organization members who haven't authenticated via your IdP, select Require SAML SSO authentication for all members of the organization name organization.

- Click Save.
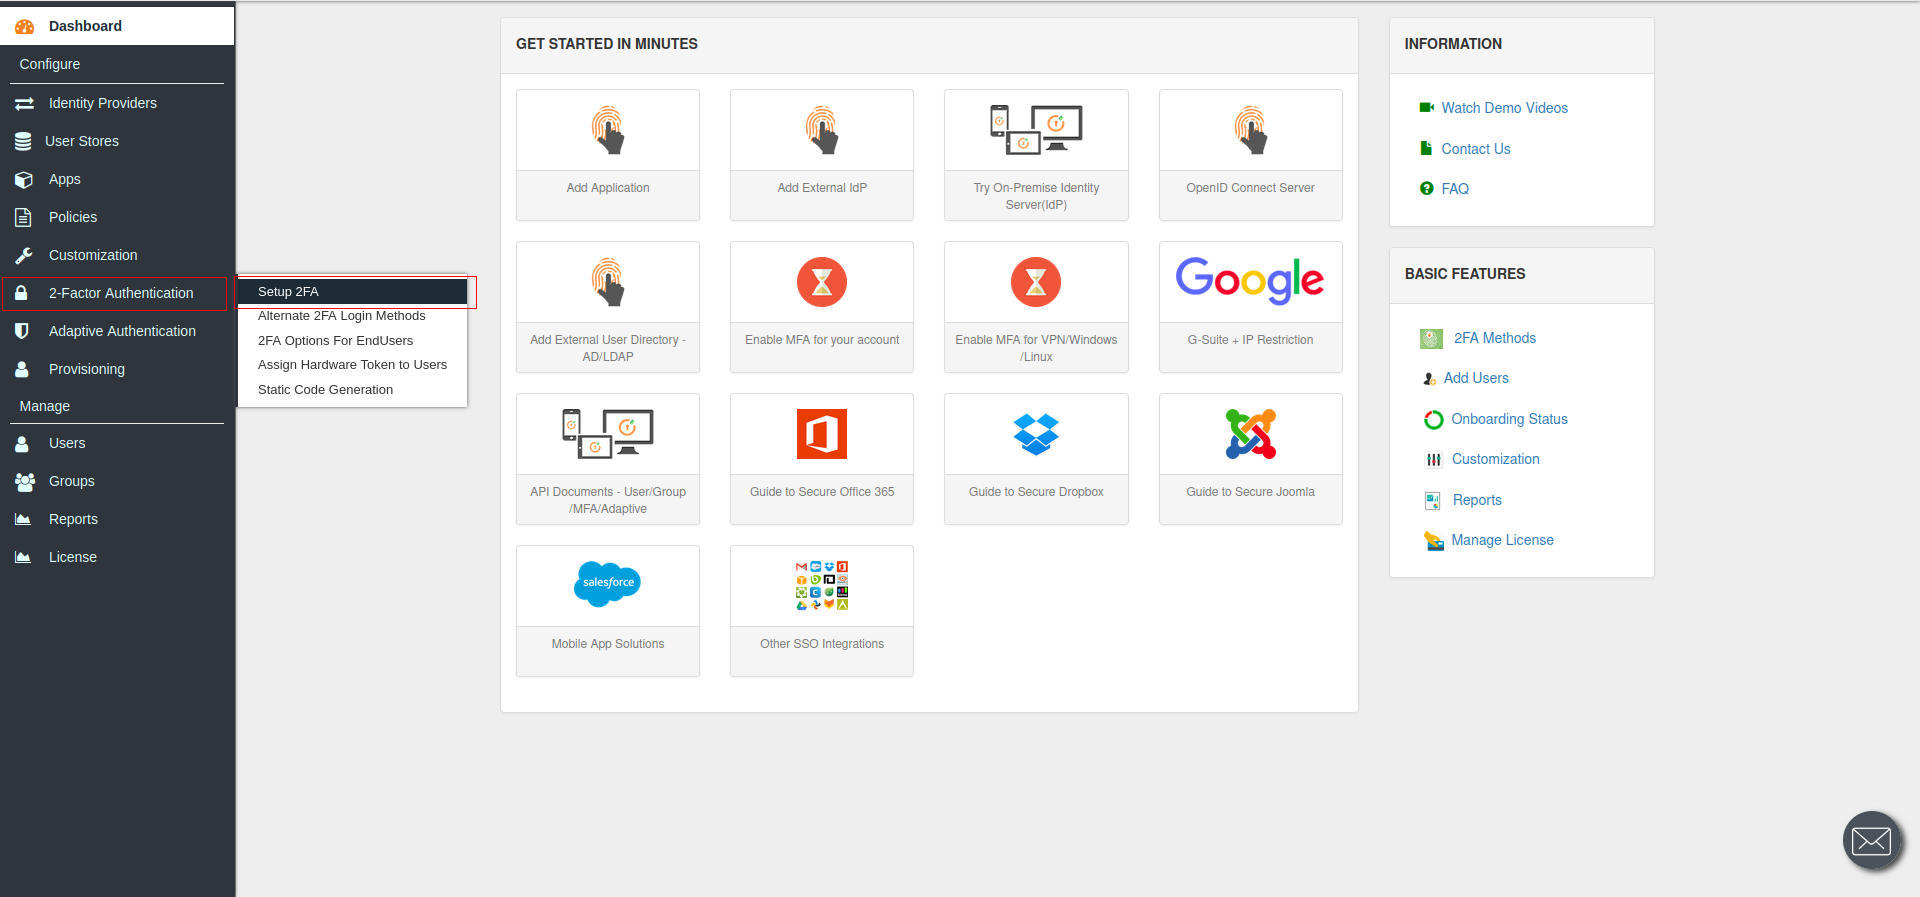
3. Configure 2FA for Github
4. Login with miniOrange
- Go to your Github Domain. It will redirect you to miniOrange Single Sign-On Service console.
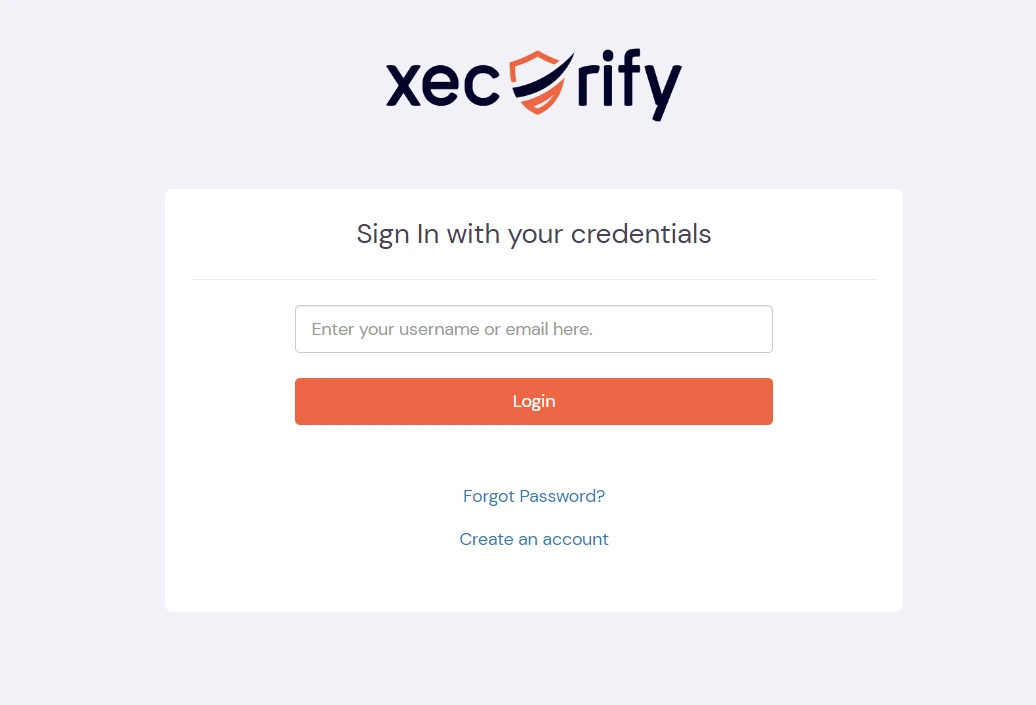
- Enter your miniOrange login credentials and click on Login.
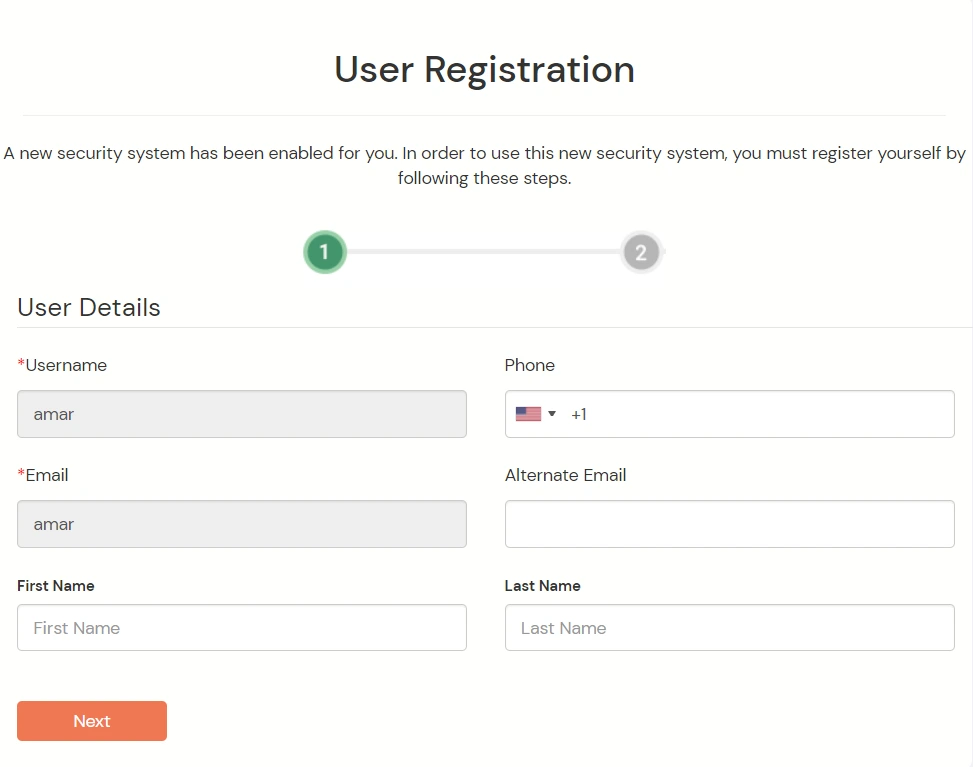
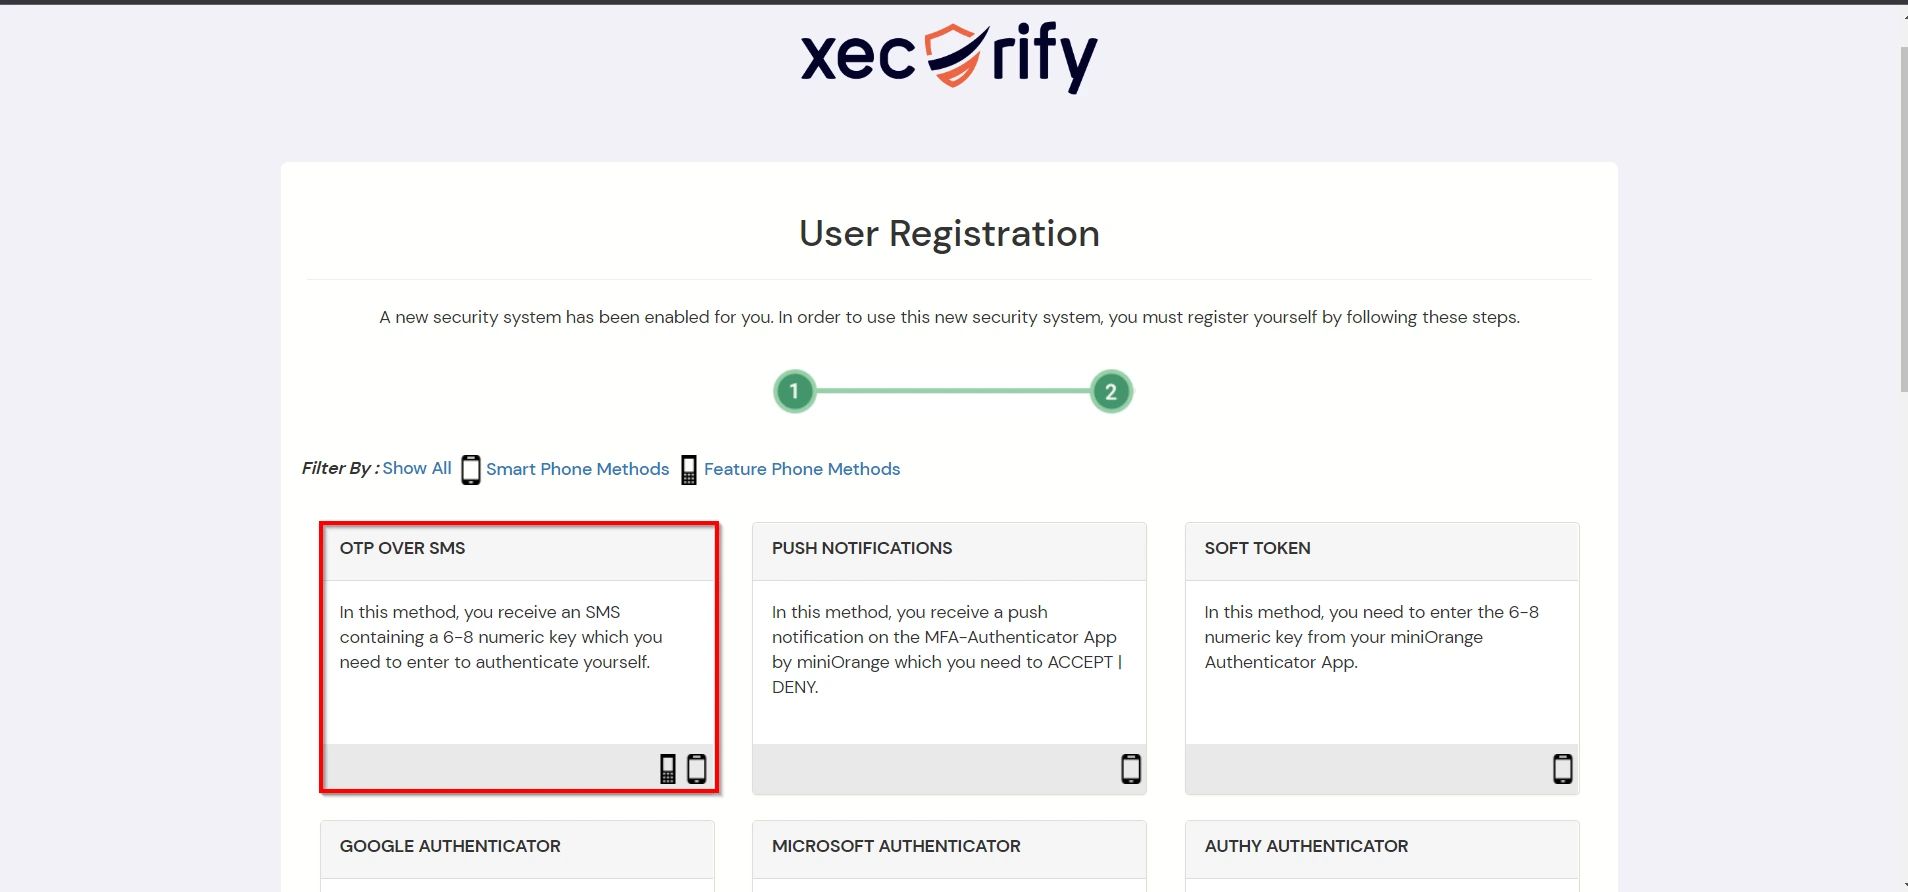
- Since we have Two-factor authentication(2FA) enabled, you will be prompted to register for it. It's a one time process.
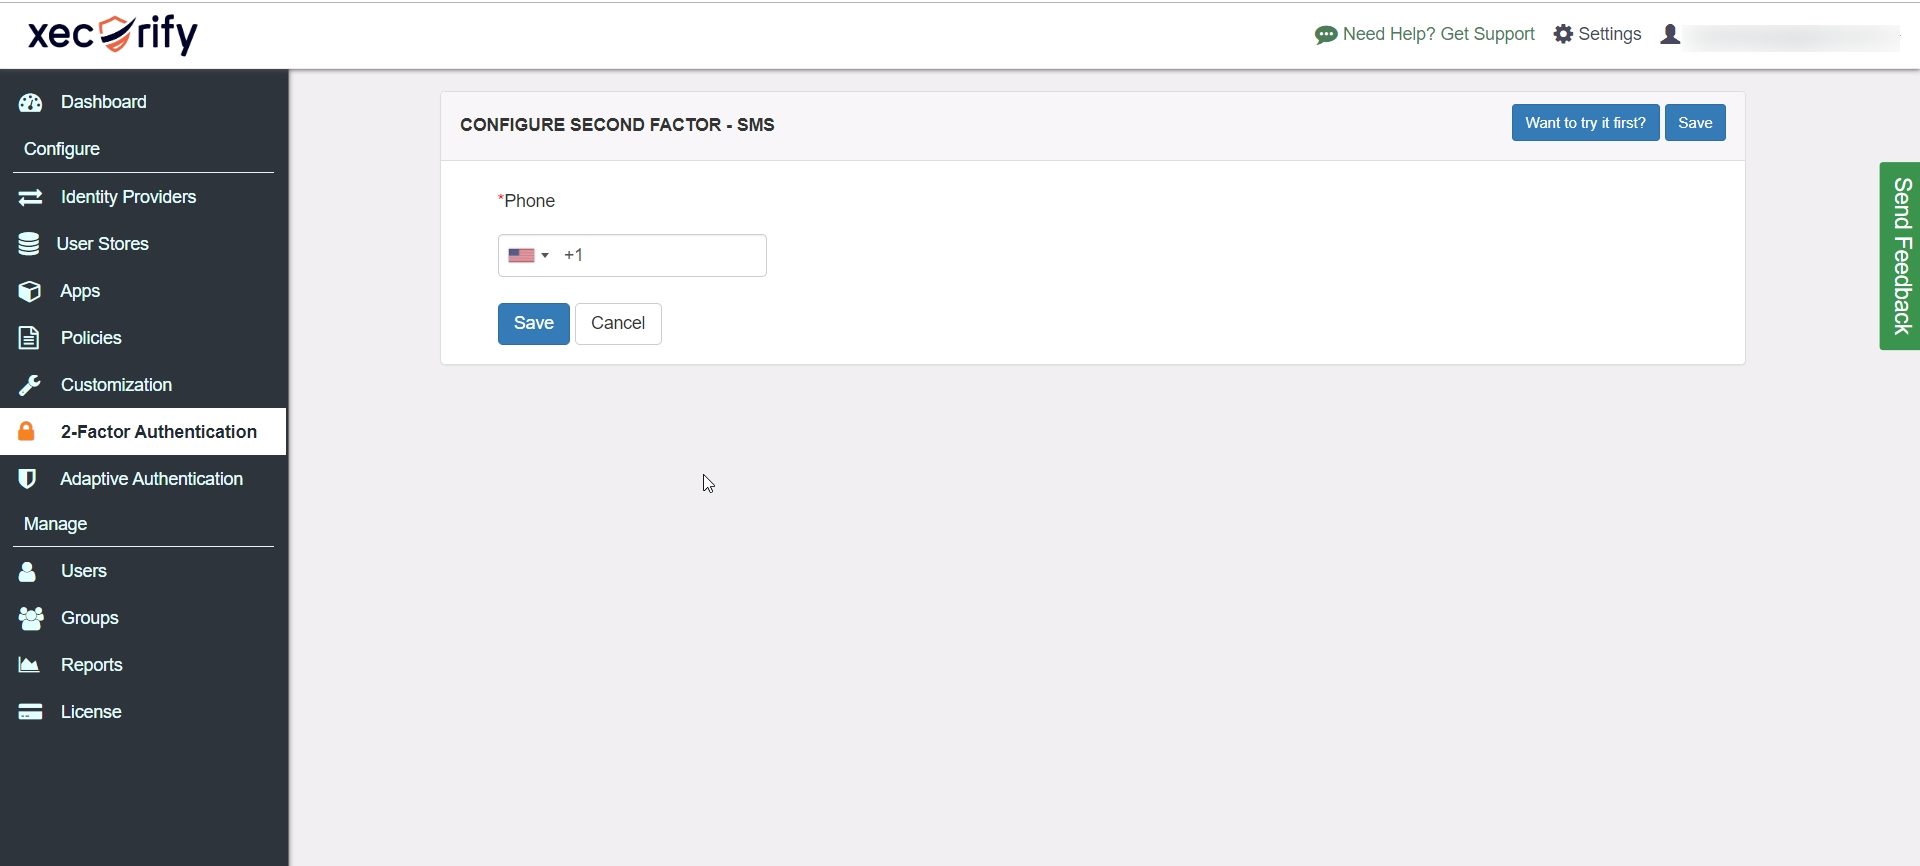
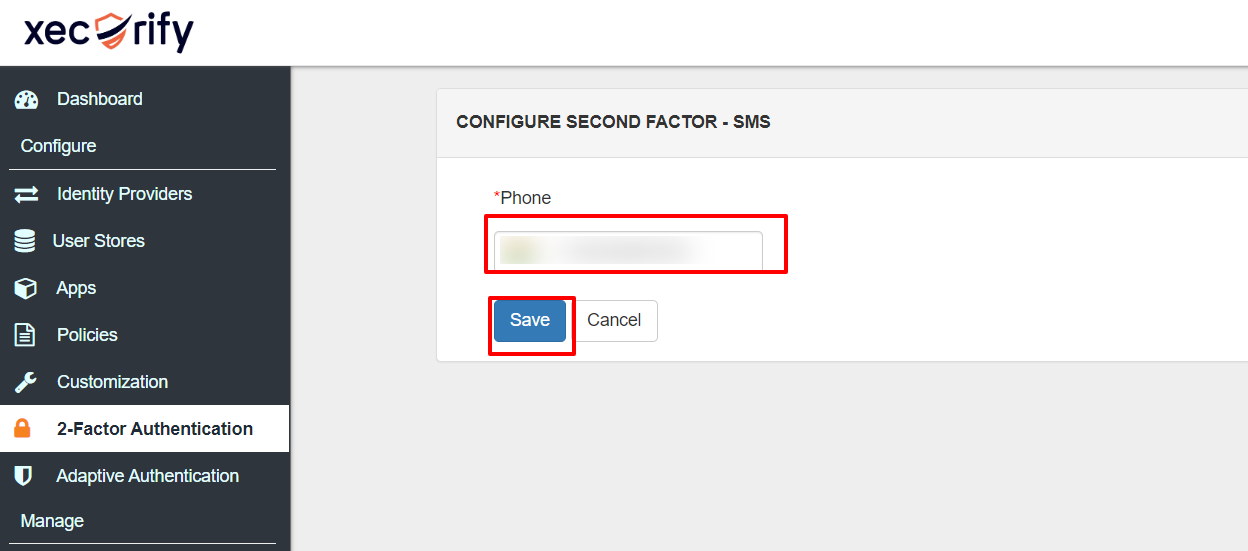
- Configure your basic details.
- Configure any authentication method of your choice.
- After successful registration, you will be logged in to your Github account.
- Now we have Two-factor authentication enabled.
- To verify your Two-factor authentication(2FA) configuration, go to your Github Domain. You will be redirected to miniOrange login console.
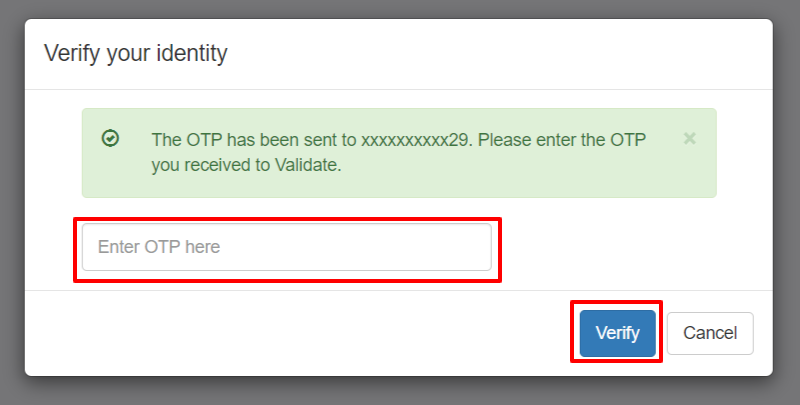
- Enter your login credentials, and click on login. It will prompt to verify yourself against the configured 2fa method.
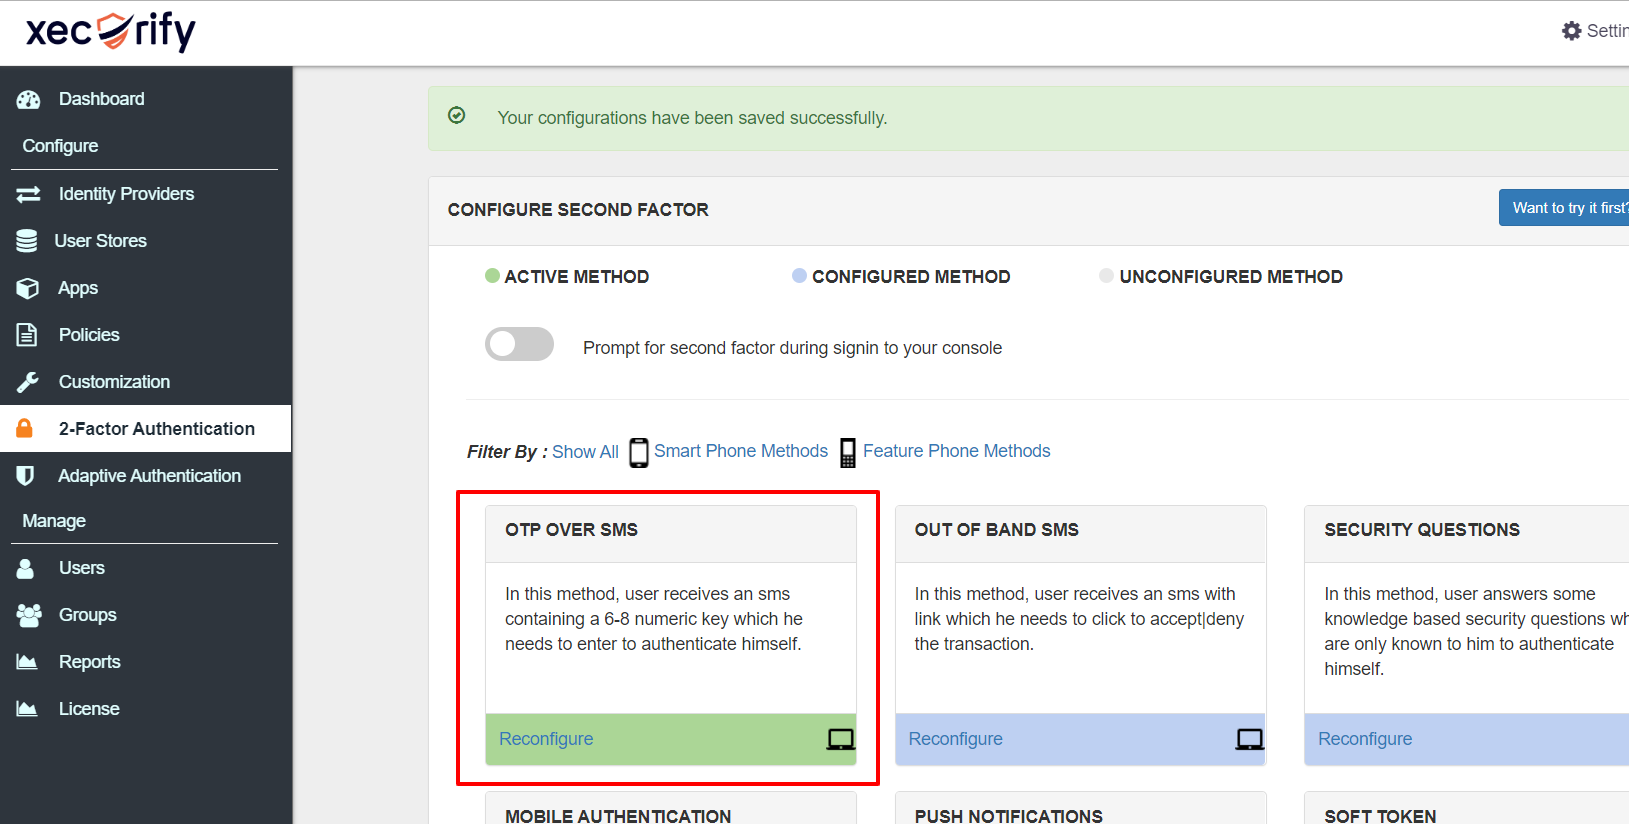
e.g. If you have configured OTP over SMS, after login into
Github it will prompt for OTP. 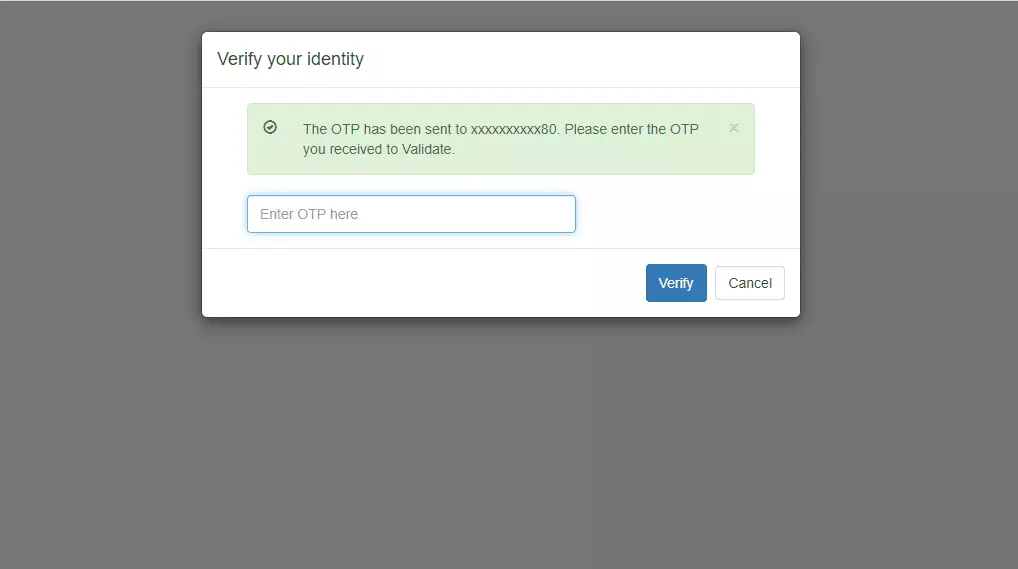
- Enter the OTP received in your phone, after successful 2fa verification, you will be redirected to the
Github dashboard.
5. Adaptive Authentication with Github
A. Restricting access to Github with IP Configuration
You can use adaptive authentication with Single Sign-On (SSO) for Github to improve the security and functionality of Single Sign-On. You can allow a IP Address in certain range for SSO or you can deny it based your requirements and you can also challenge the user to verify his authenticity. Adaptive authentication manages the user authentication bases on different factors such as Device ID, Location, Time of Access, IP Address and many more.
You can configure Adaptive Authentication with IP Blocking in following way :
- Login to Self Service Console >> Adaptive Authentication >> Add Policy.
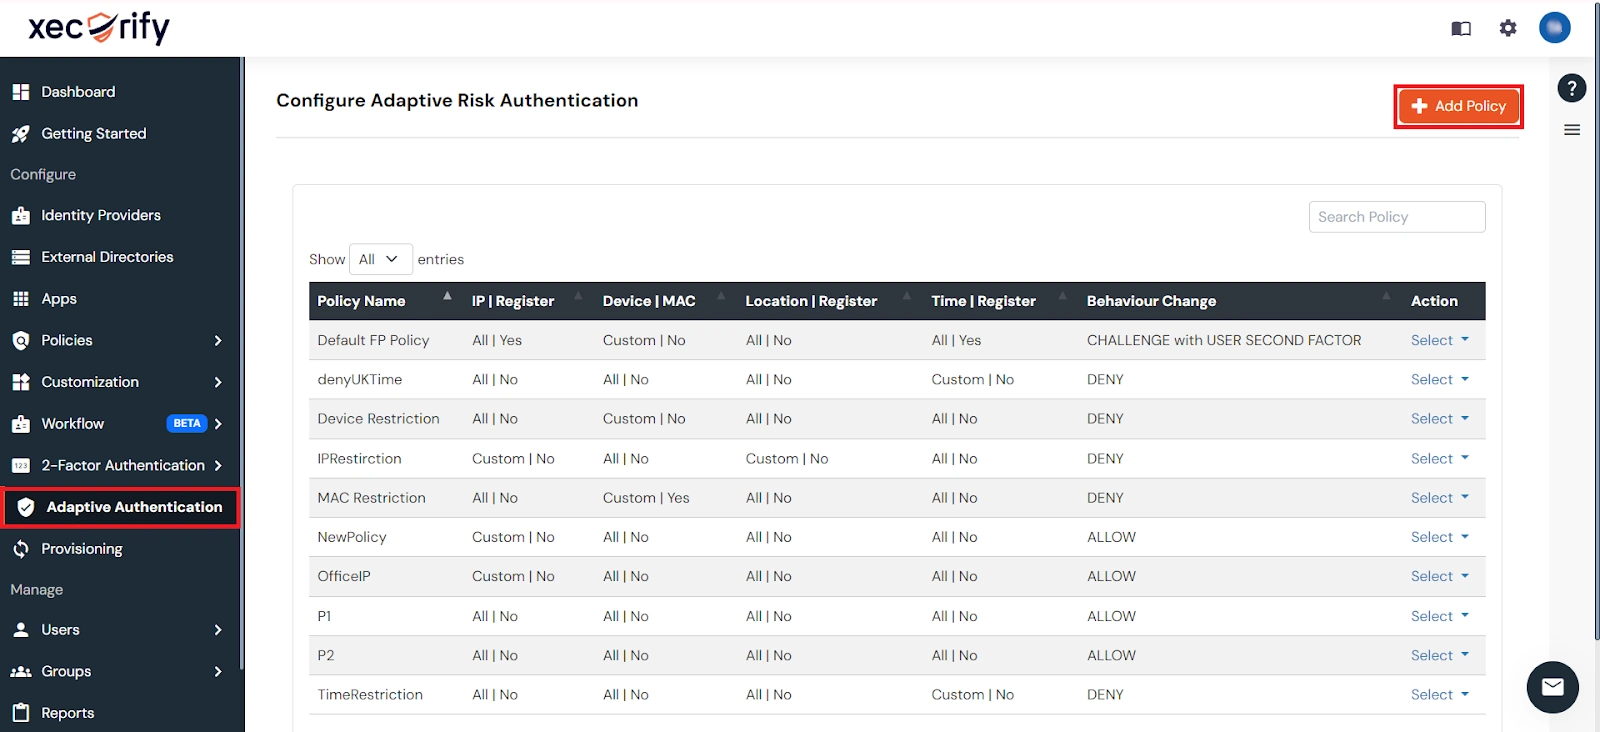
- Add a Policy Name for your Adative Authentication Policy.
- Select Action for Behavior Change, click the Edit link, and then choose the appropriate Action and Challenge Type for the user from that section.
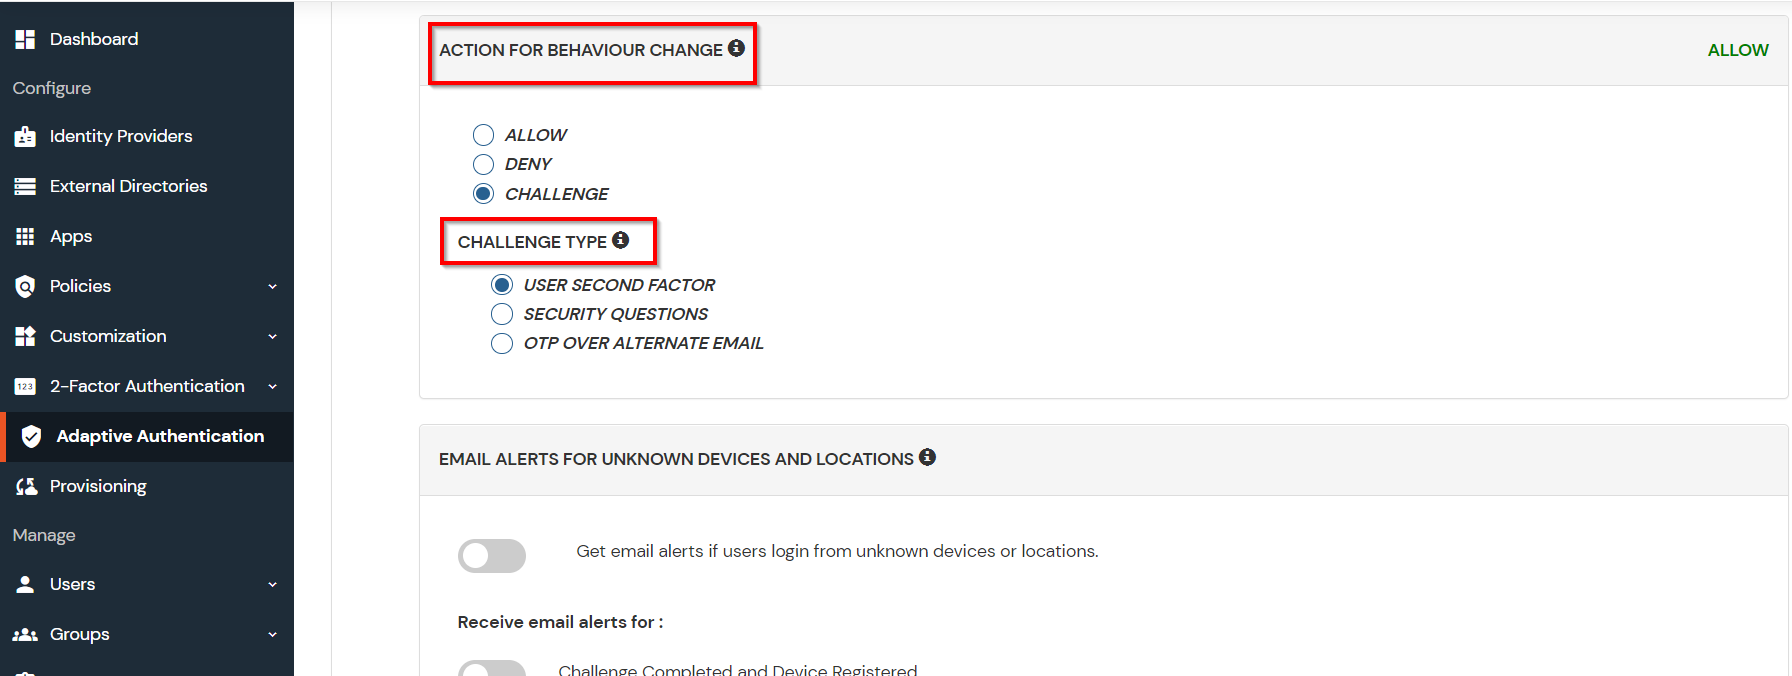
Action for behavior Change Options :
| Attribute |
Description |
| Allow |
Allow users to authenticate and use services if Adaptive authentication condition is true. |
| Deny |
Deny user authentications and access to services if Adaptive authentication condition is true. |
| Challenge |
Challenge users with one of the three methods mentioned below for verifying user authenticity. |
Challenge Type Options :
| Attribute |
Description |
| User second Factor |
The User needs to authenticate using the second factor he has opted or assigned for such as
- OTP over SMS
- PUSH Notification
- OTP over Email and, many more.
|
| KBA (Knowledge-based authentication) |
The System will ask the user for 2 of 3 questions he has configured in his Self-Service Console. Only after the right answer to both questions is the user allowed to proceed further. |
| OTP over Alternate Email |
User will receive an OTP on the alternate email they have configured through the Self Service Console. Once the user provides the correct OTP, they are allowed to proceed further. |
- Now click Edit option from the IP Configuration section to configure custom IP range.
- Select Add IP if the User's IP Address is not in the configured list.
- Specify the IP Address that you want to whitelist. For the IP Range other than the whitelisted one, you can select the above setting to reflect.
- Choose either allow or deny by selecting the corresponding option from the dropdown.
- If a user tries to login with the whitelisted IP address, they will always be allowed access.
- We support IP address range in three formats i.e., IPv4, IPv4 CIDR, and IPv6 CIDR. You can choose whichever is suitable for you from the dropdown menu.
- You can add multiple IPs or IP ranges by clicking the + Add IP button.
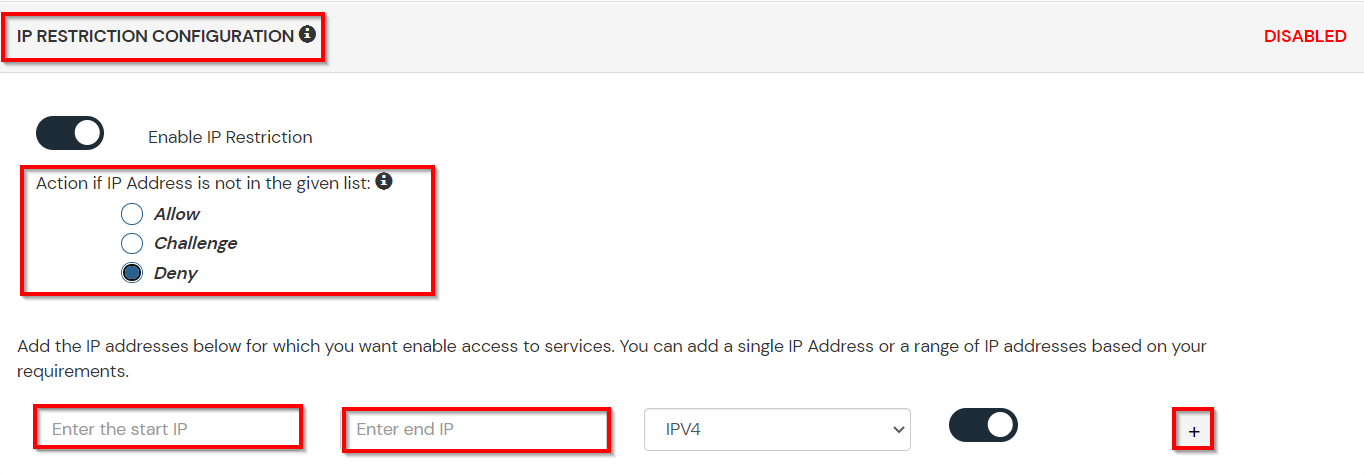
- Once the changes are made, scroll down to the end and click on Save.
B. Adaptive Authentication with Limiting number of devices
Using Adaptive Authentication you can also restrict the number of devices the end user can access the Services on. You can allow end users to access services on a fixed no. of devices. The end users will be able to access services provided by us on this fixed no. of devices.
You can configure Adaptive Authentication with Device Restriction in following way
- Login to Self Service Console >> Adaptive Authentication >> Add Policy.
- Add a Policy Name for your Adaptive Authentication Policy.
- Select your Action for behavior Change and Challenge Type for user from the Action for behavior Change Section.
- On the Add Policy tab, go to the Device Configuration section and click the Edit button.
- Enter the Number of Device Registrations Allowed as per your requirement. (2-3 devices are recommended.)
- Choose Action if number of devices exceeded (This will override your setting for Action for behavior Change.)
- Challenge: The user needs to verify himself using any of the three methods mentioned in table in step 5.1
- Deny : Deny users access to the system
- Enable Mobile Device Restriction to block logins from mobile devices. This ensures all login attempts from mobile devices will be declined.
- Enable MAC Address Based Restriction if you want to restrict access based on device MAC address.
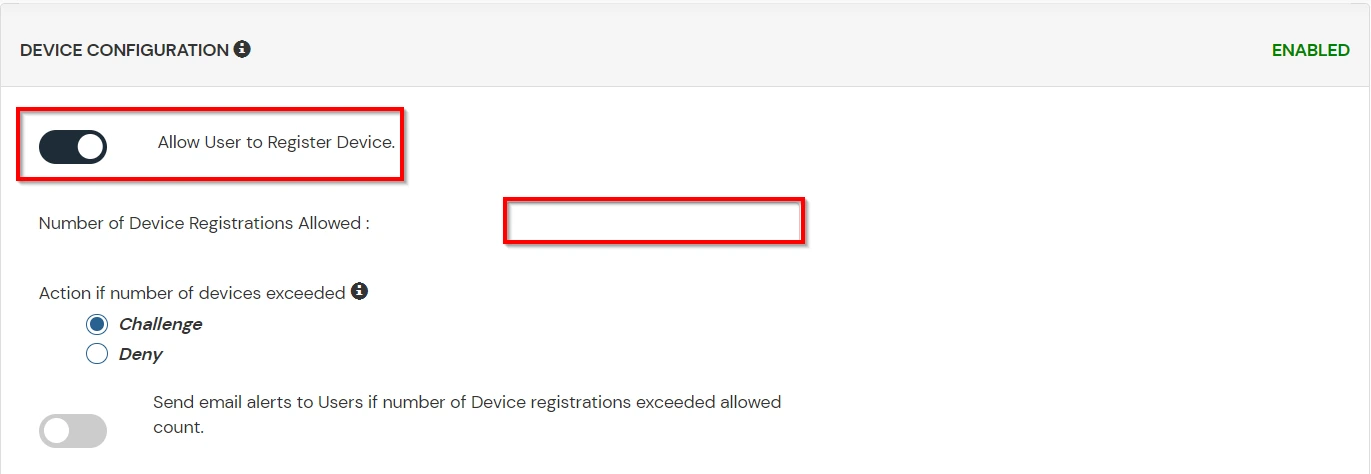
- Scroll down to the bottom of the page and click on Save.
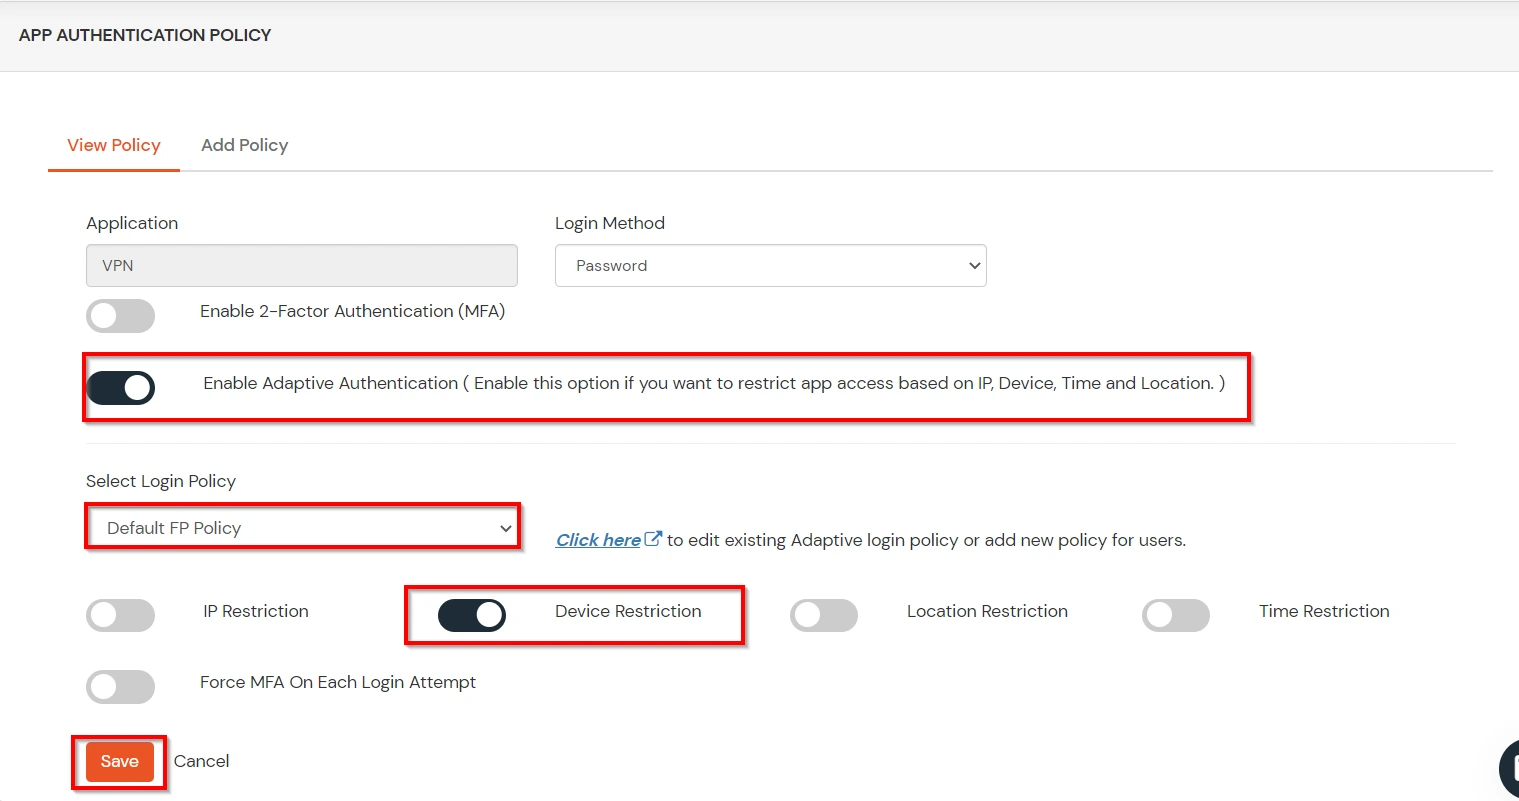
C. Add Adaptive Authentication policy to Github
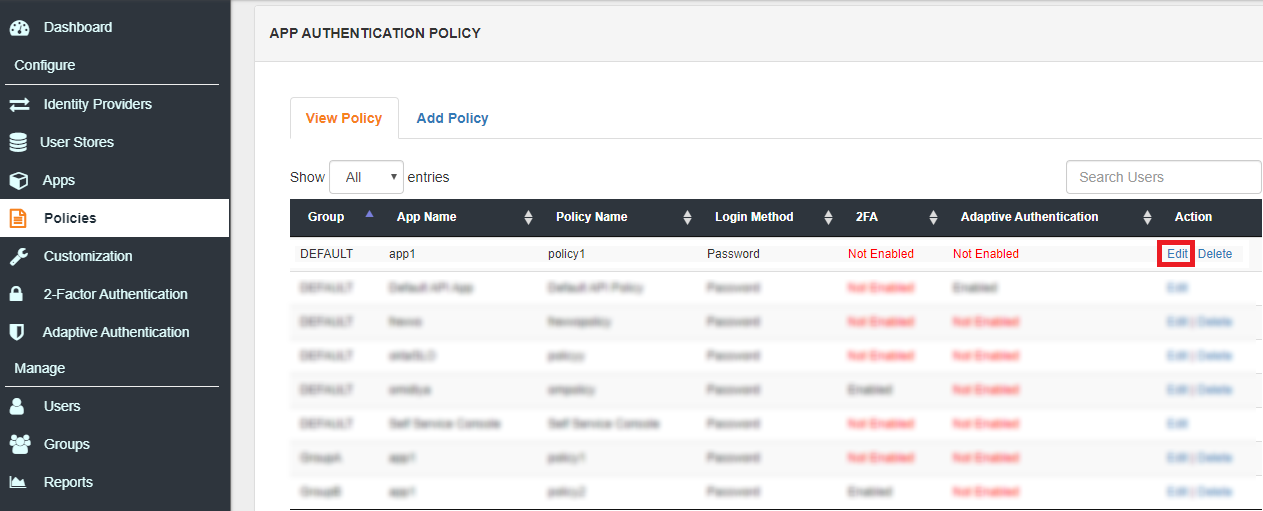
- Login to Self Service Console >> Policies >> Add Login Policy.
- Click on Edit icon option for predefined app policy.
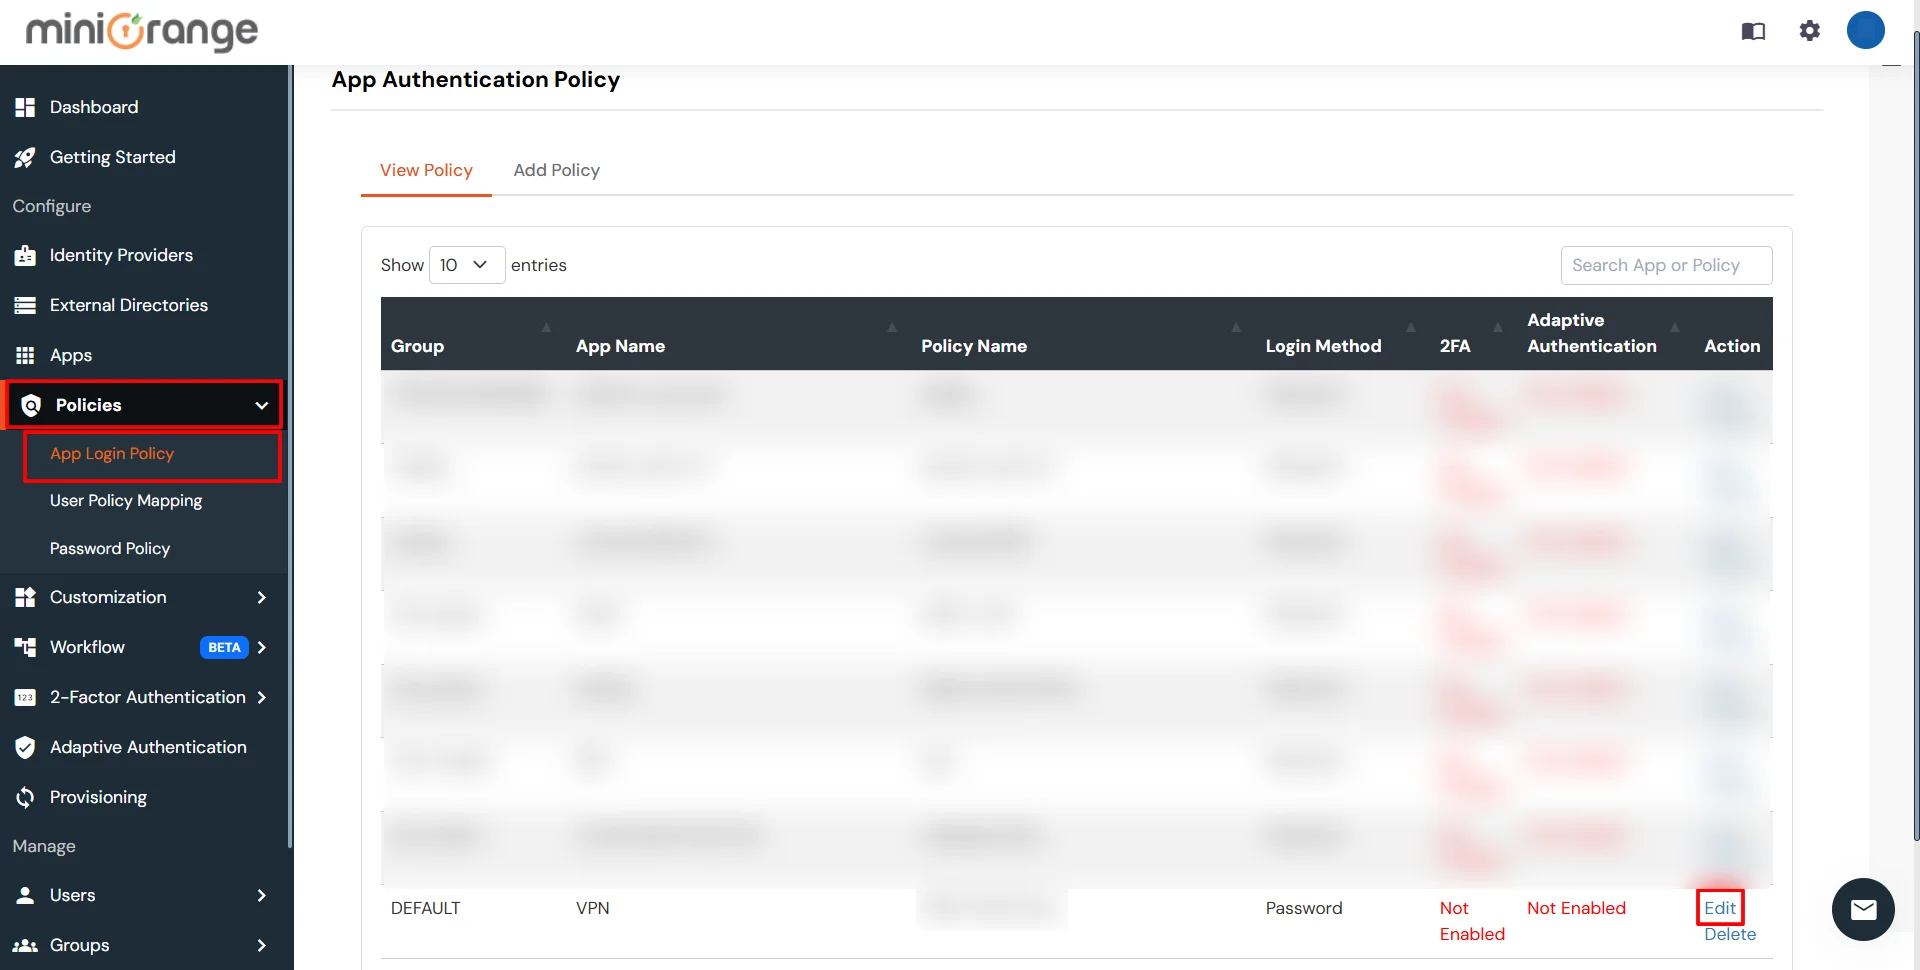
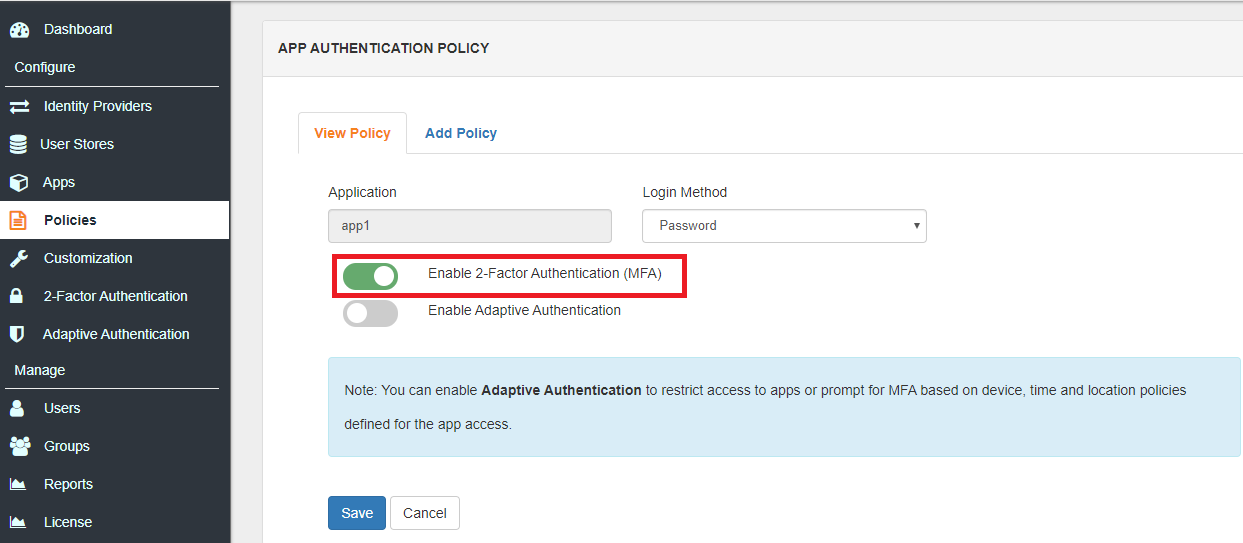
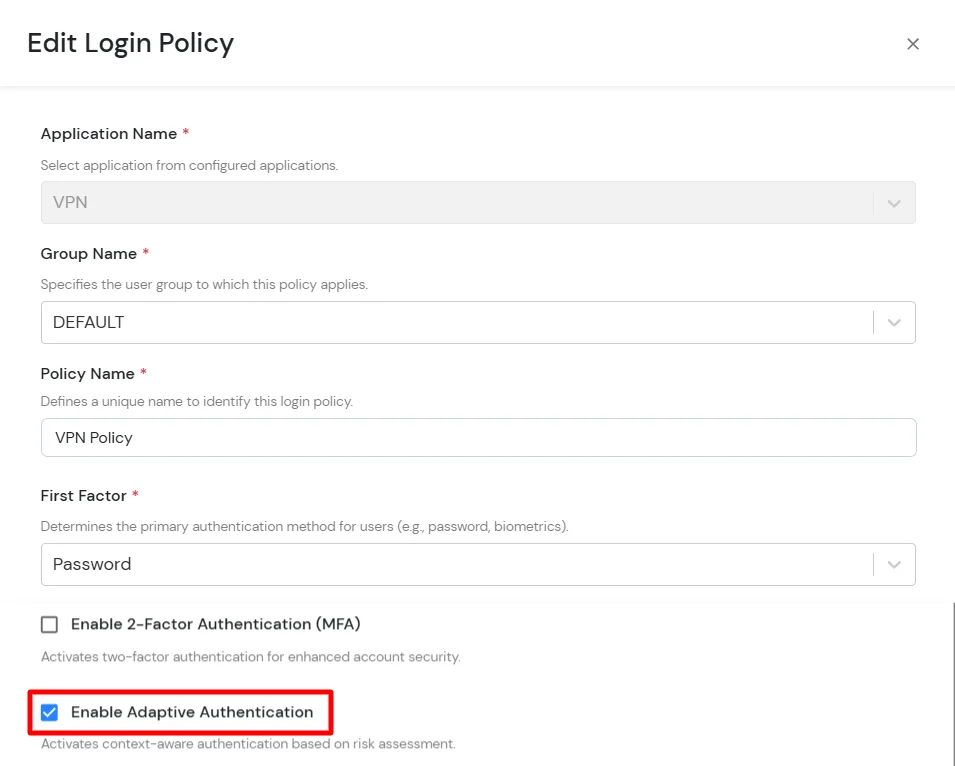
- Set your policy in the Policy Name and select Password as First Factor.
- Enable Adaptive Authentication on Edit Login Policy page and select the required restriction method as an option.
- From Select Login Policy dropdown select the policy we created in last step and click on Submit.
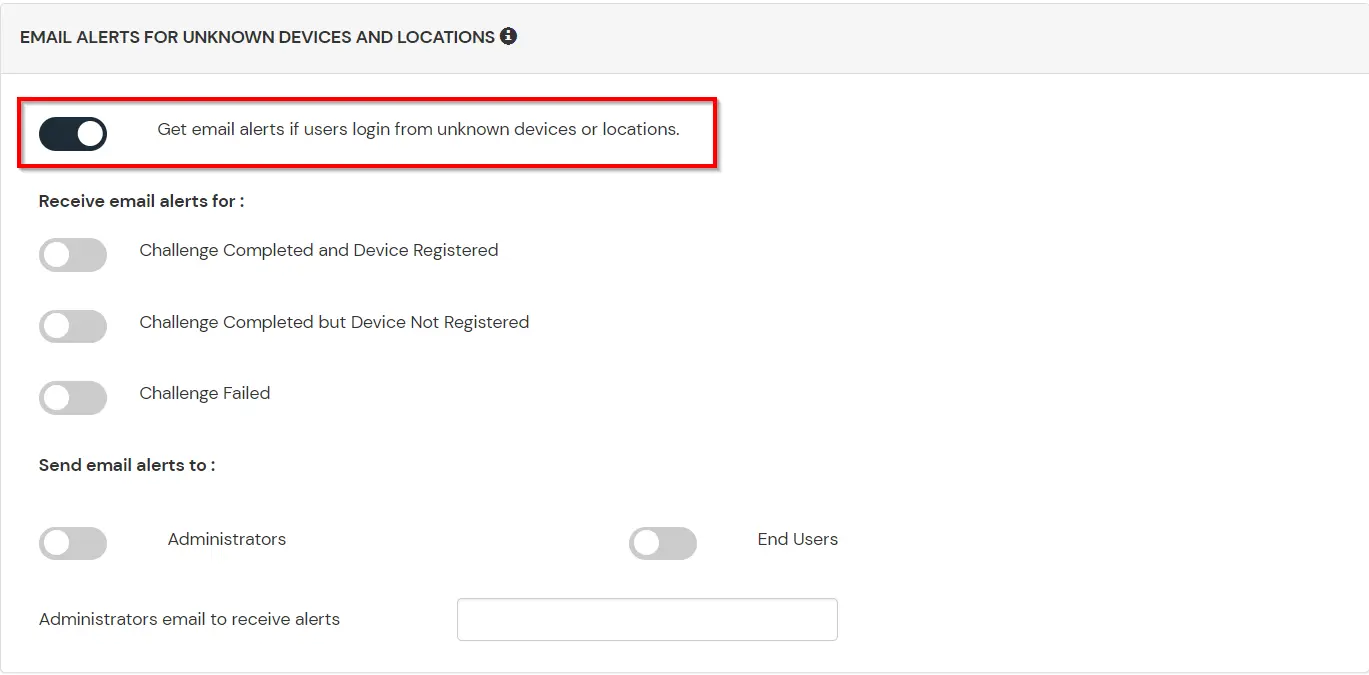
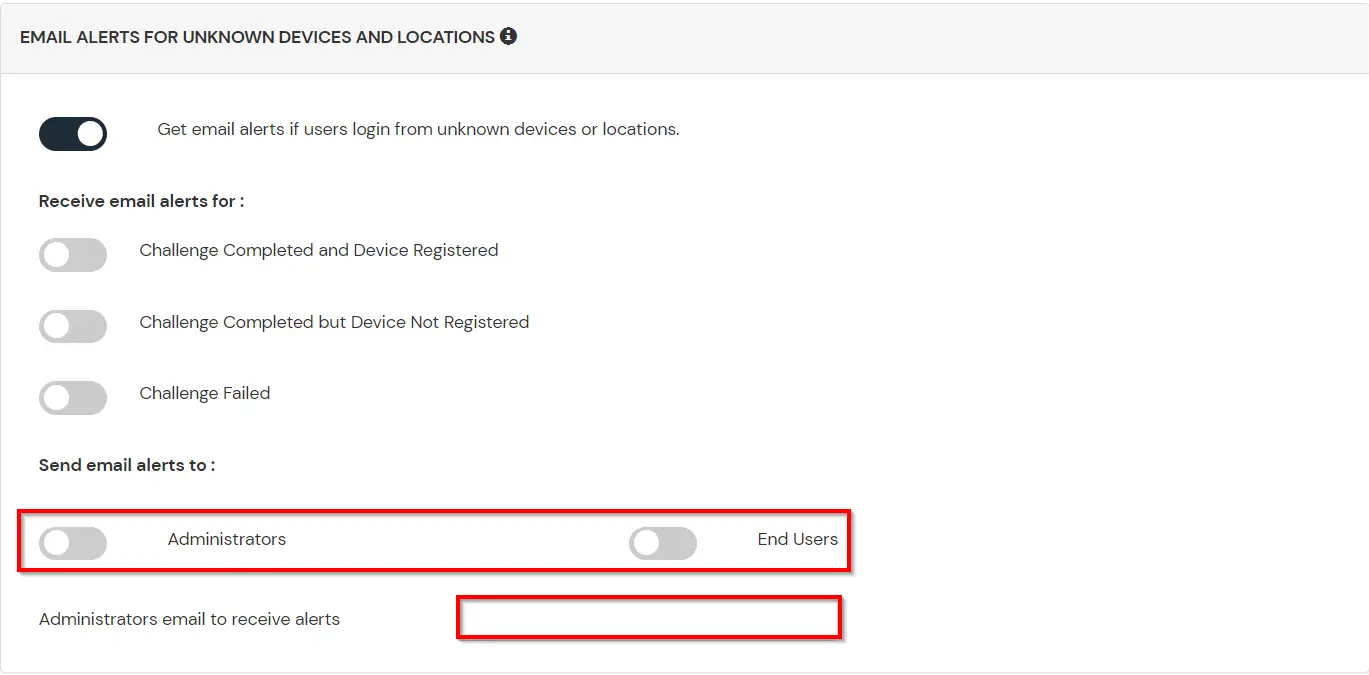
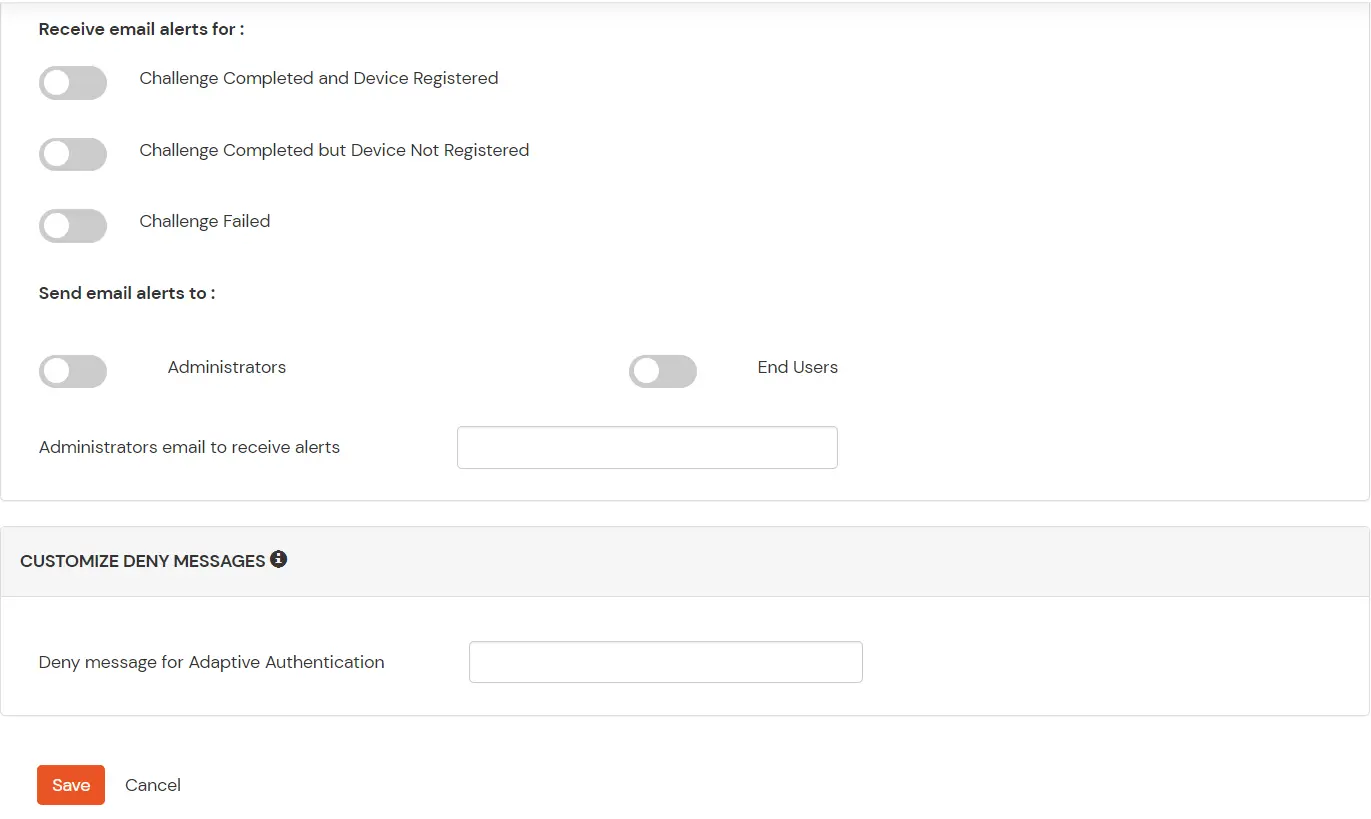
D. Notification and Alert Message.
How to add a trusted Device
- When End-user log in to the self service console after the policy for device restriction is on, he is provided the option to add the current device as a trusted device.
External References