Import Users from AD
This feature enables synchronization of Users and Groups from Active Directory (AD) to PAM using LDAP integration. It supports JIT, manual and scheduled synchronization, allowing administrators to import, update, or delete user and group data based on the configured settings.
Key Capabilities
- Establishes a secure LDAP/AD connection using configured Search Bases and Filters.
- Imports new users and groups from AD into PAM.
- Automatically maps AD users to existing PAM groups if the AD group and group membership already exists in PAM.
- Updates existing PAM users and groups when their attributes change in AD.
- Deletes users or groups or group membership from PAM that no longer exist in AD (based on configuration).
- Maintains a one-to-one mapping between AD and PAM for users and groups.
- Sends email (if SMTP configured) and dashboard notifications summarizing synchronization results.
- Supports JIT, manual and scheduled (once/periodic) synchronization.
Steps to Configure and Import Users from AD
1. Add AD Configuration and Set Up Import
- Log in as Admin and open the PAM dashboard.
- Navigate to Authentication → LDAP.
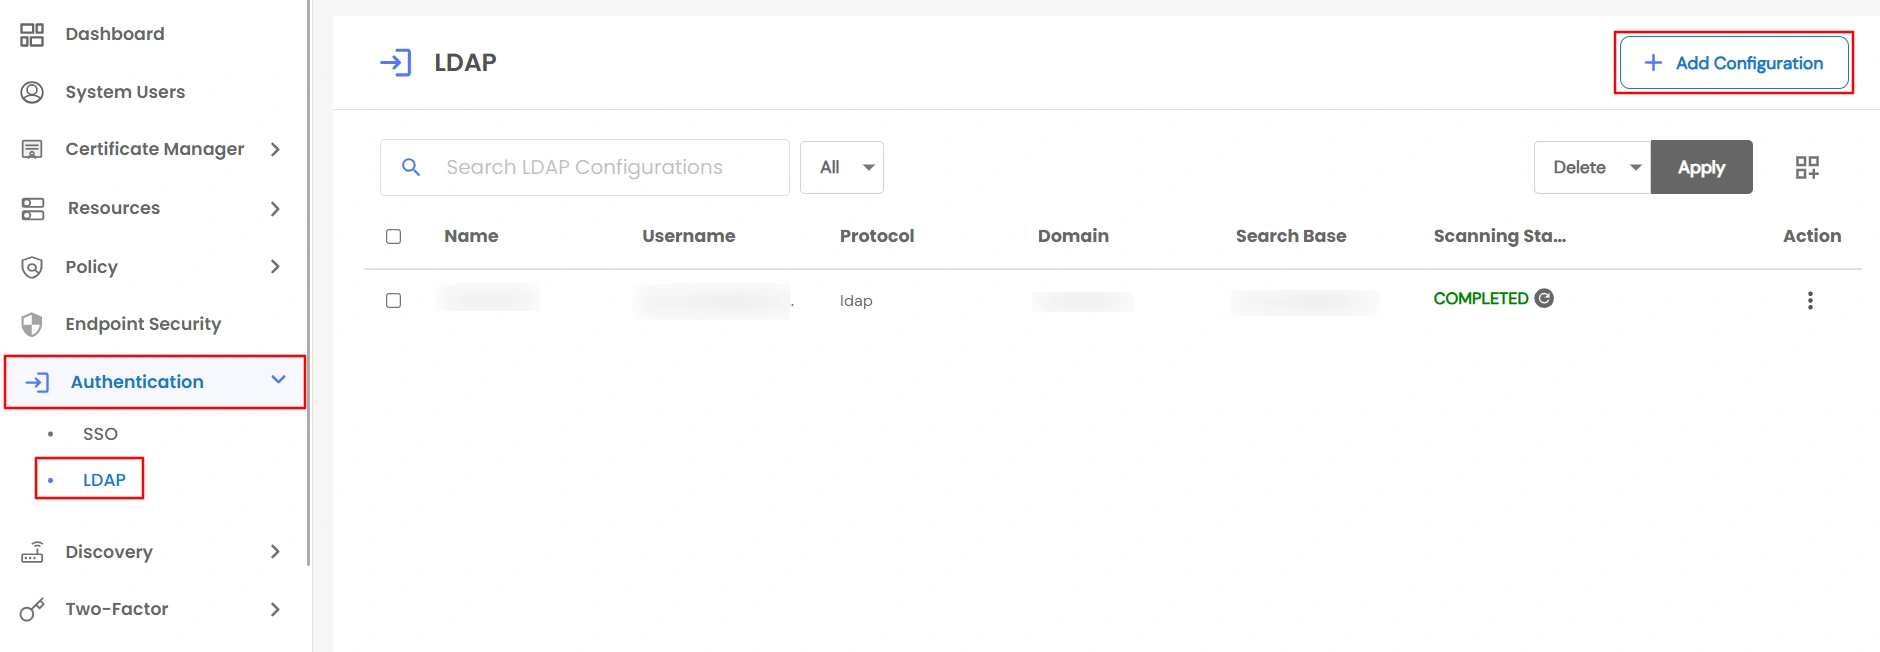
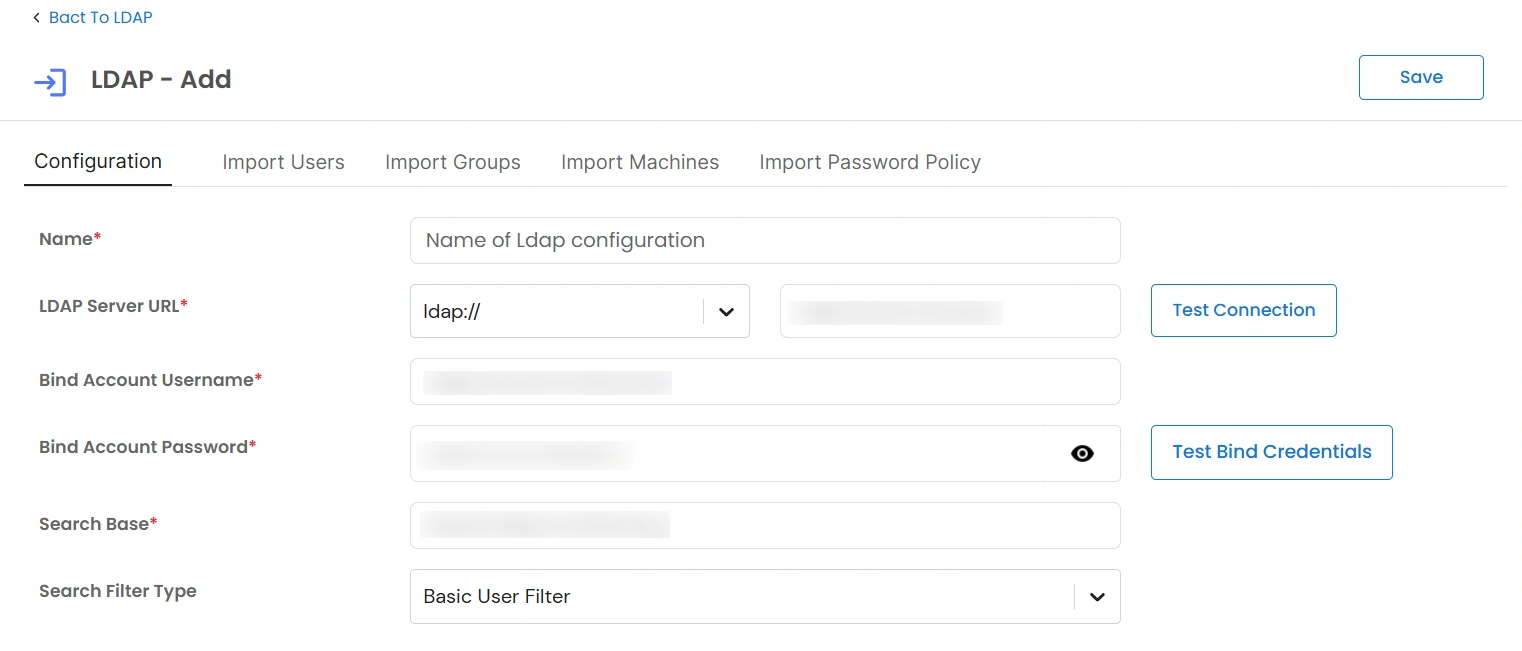
- Click Add Configuration and fill in the required details:
| Field |
Description |
| Name |
A unique name used to identify this LDAP/Active Directory configuration in PAM. |
| LDAP Server URL |
The protocol and hostname or IP address of the LDAP server. |
| Bind Account Username |
The LDAP service account username used to authenticate and perform directory searches. |
| Bind Account Password |
The password for the bind account to securely connect to the LDAP server. |
| Search Base |
The base Distinguished Name (DN) from which LDAP objects such as users, groups, and machines are searched. |
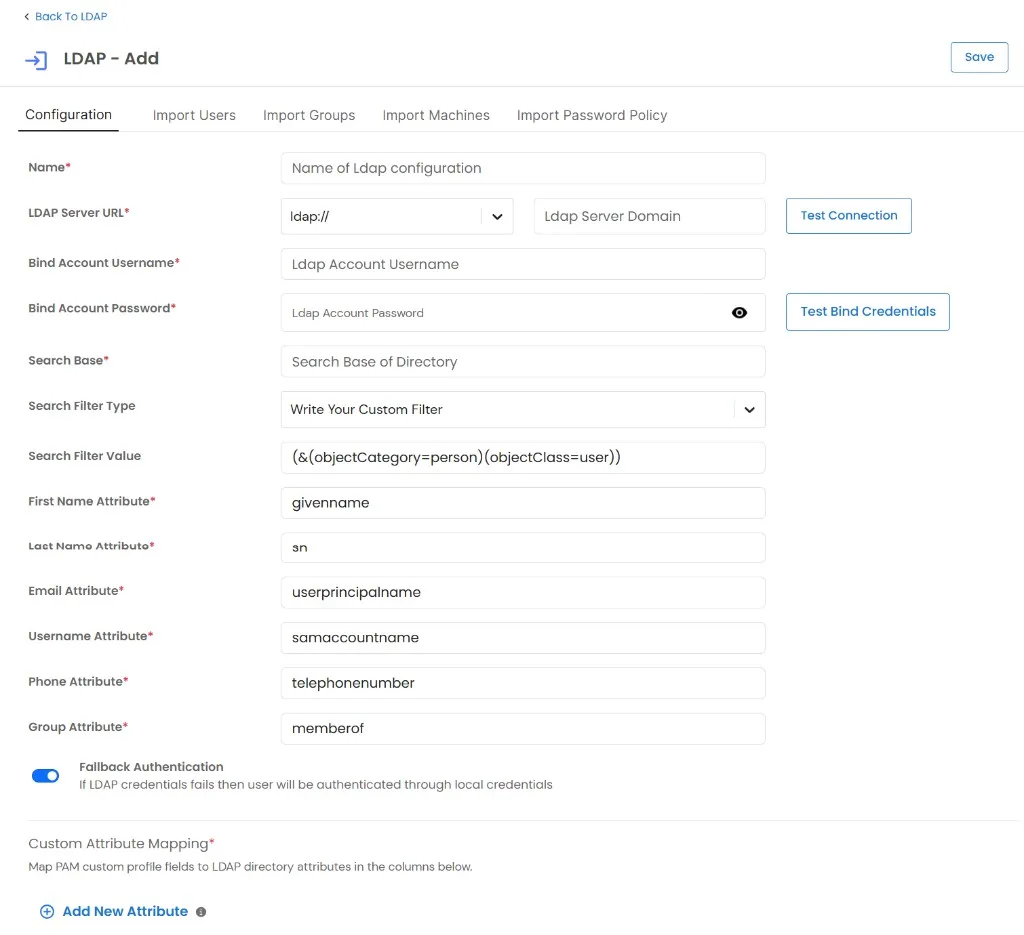
- Map the following attribute fields:
Note: Default AD attributes will be mapped by default in the new configuration.
- First Name
- Last Name
- Email
- Username
- Phone Number
- Group Attribute
These attribute mappings define how PAM identifies and retrieves user details from AD.
Import Users from AD
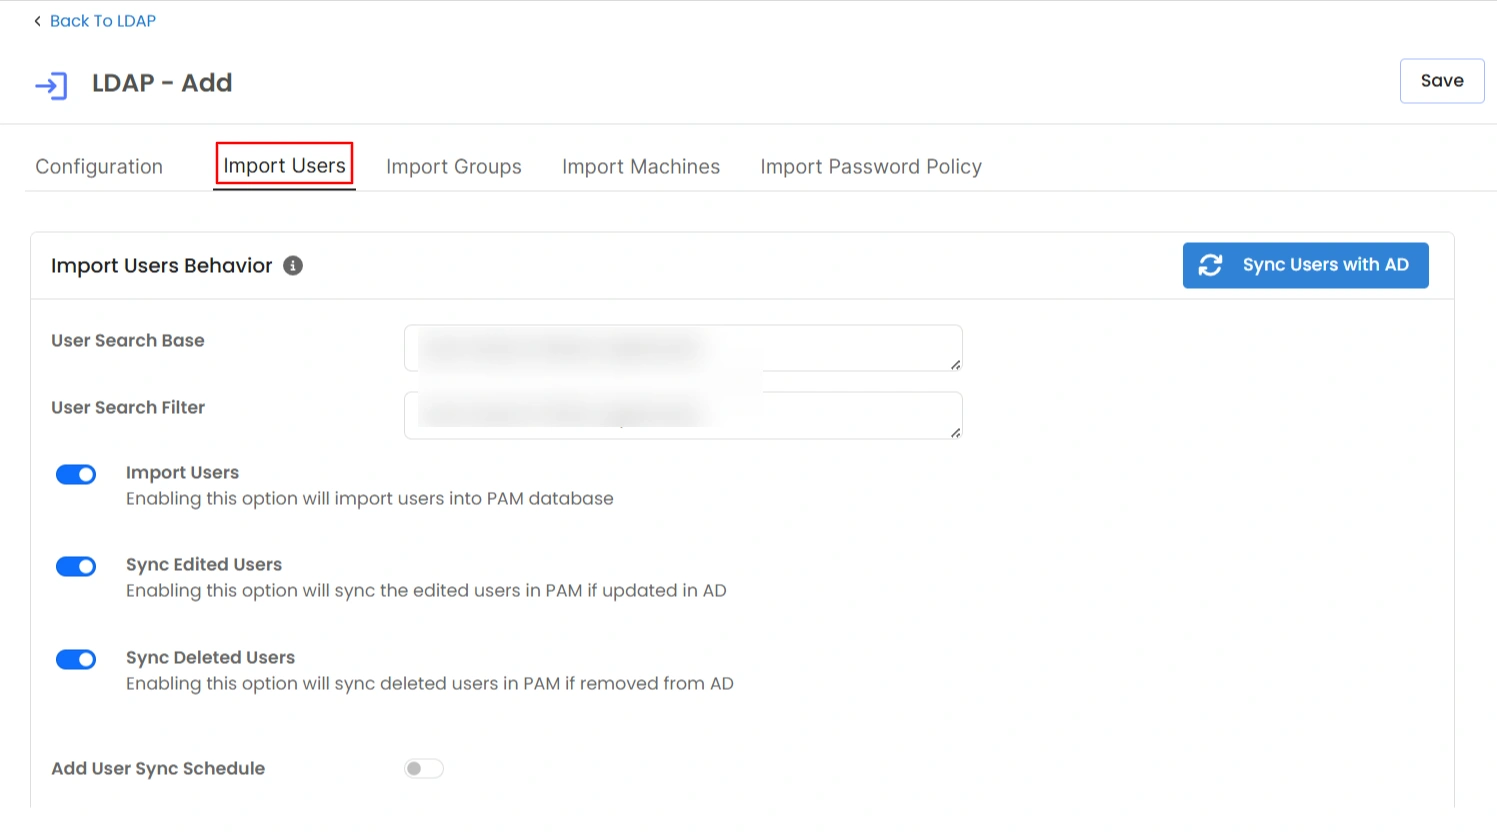
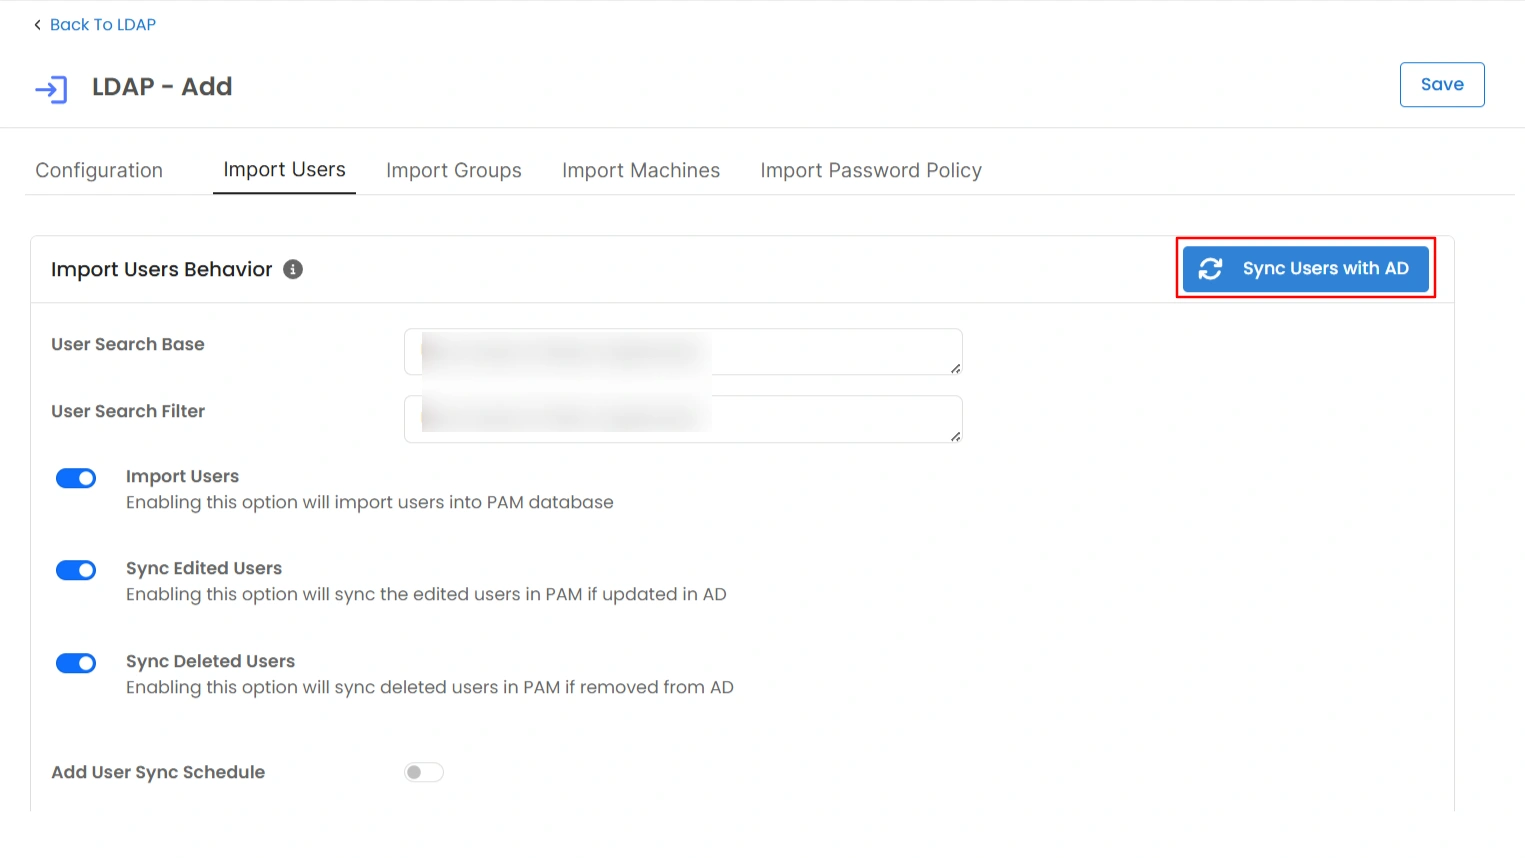
Step 1: Go to the Import Users Tab
- Open the Import Users tab in your LDAP configuration.
Step 2: Configure Import Options
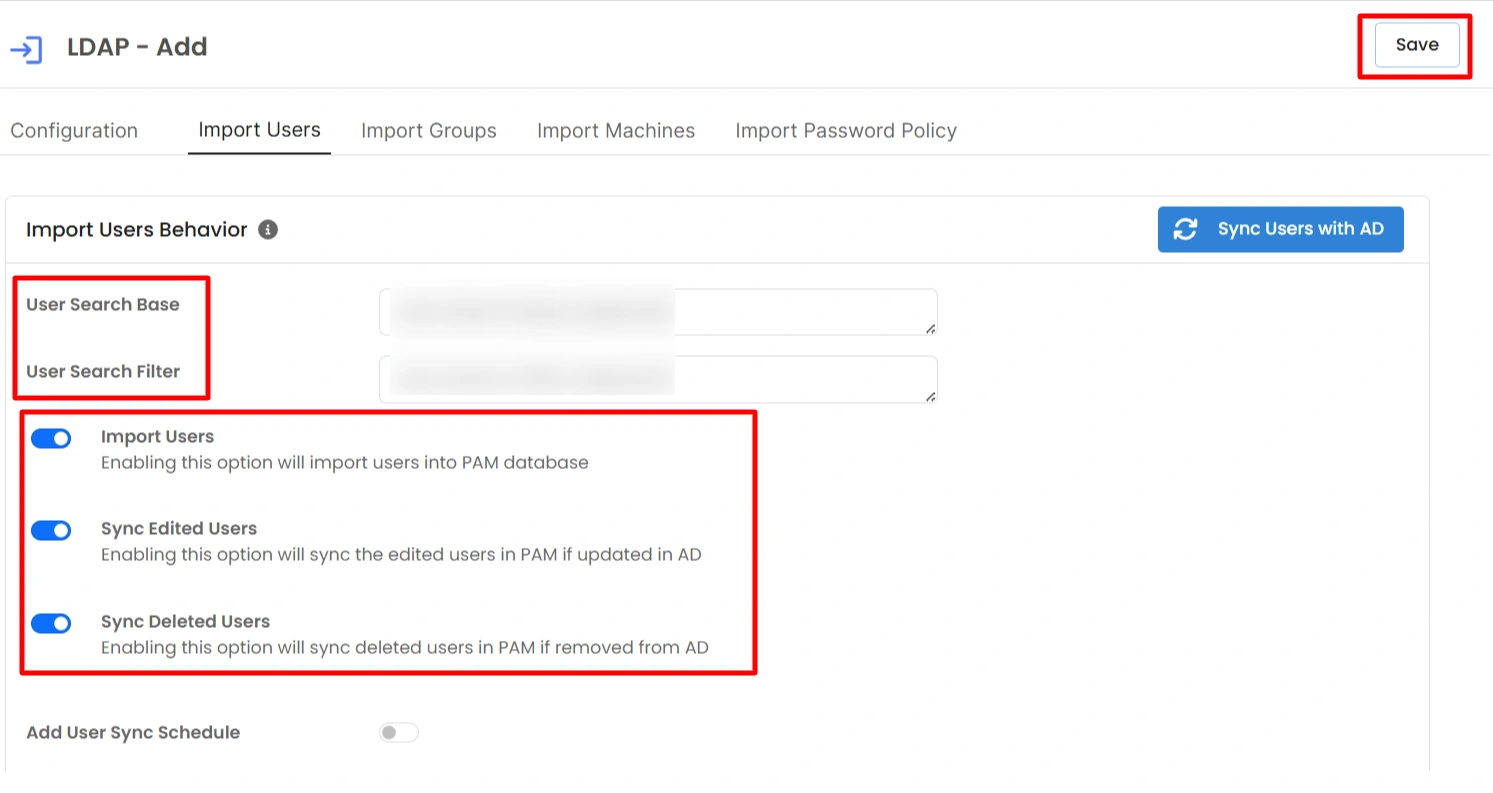
- Add Search Base and Search Filter if needed.
- If provided, they will be used specifically for this import.
- If left blank, PAM will use values from the main LDAP configuration.
- Configure the Import User, Edit User, and Delete User options as required.
- Click Save to apply the configuration.
Step 3: Import Users
You can import users in two ways:
-
a. Via AD Configuration Action
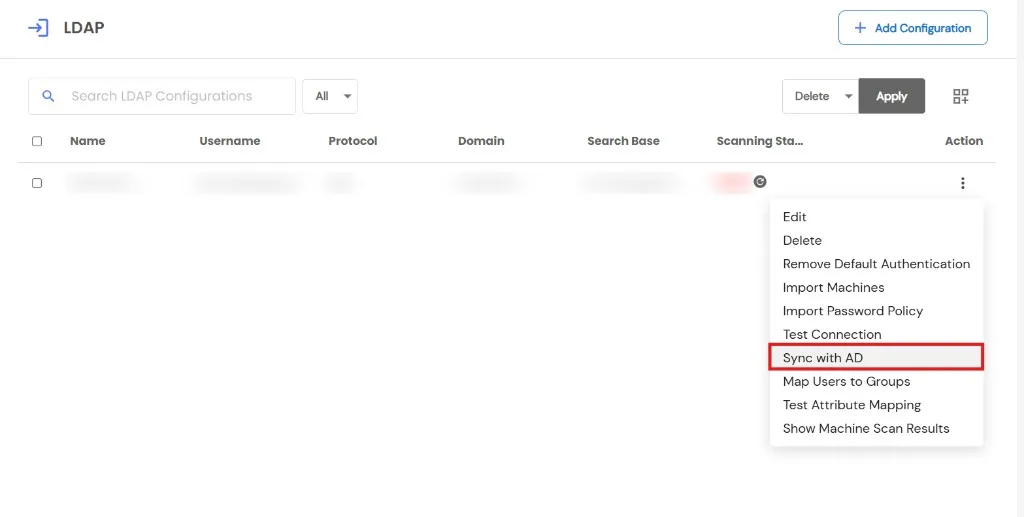
- After adding the AD configuration, click the Action button and select Sync with AD.
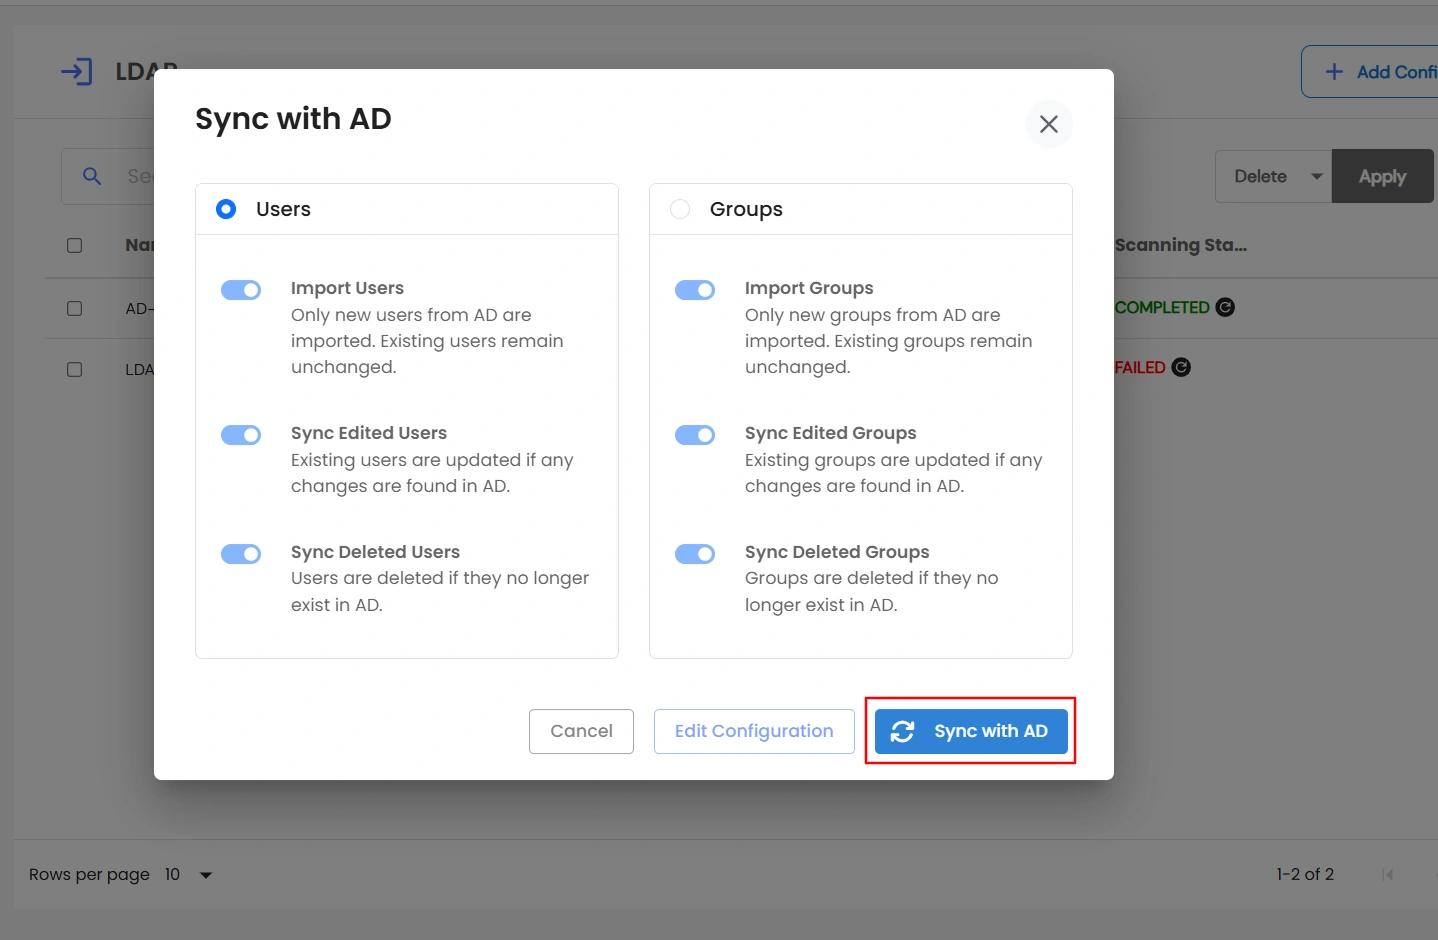
- Choose User to import users.
- Click Sync with AD to start synchronization.
-
b. Via Settings
- Go to Settings and update any configuration options such as Import, Edit, or Delete as needed.
- Click Save to apply the changes.
- Once saved, click Sync with AD to initiate synchronization directly.
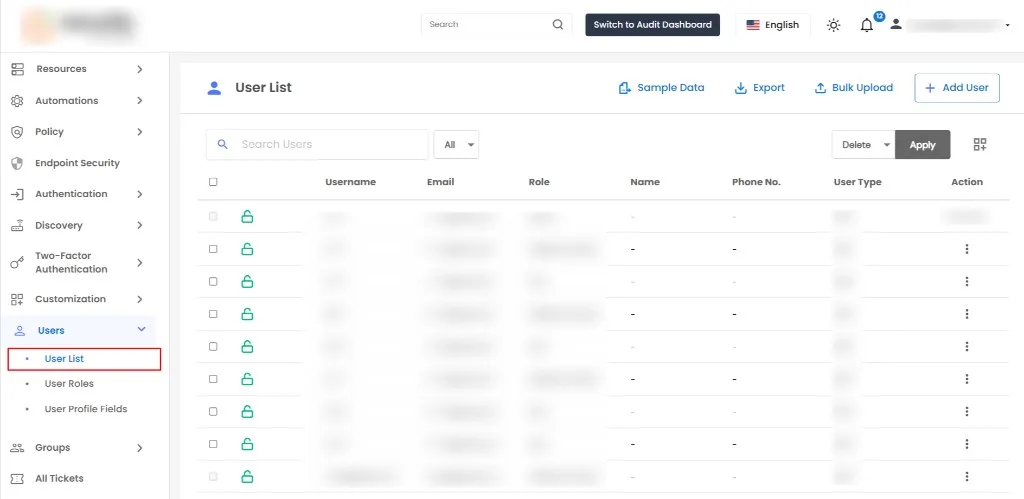
Step 4: Verify Imported Users
- Go to the Users list in PAM and verify:
- New users are added successfully.
- Existing users are updated with AD data.
- Users removed from AD are handled according to deletion settings.
- After import, notifications and emails (if SMTP configured) are sent summarizing the results.
- If a group already exists in PAM, AD users belonging to that group are automatically mapped to it.
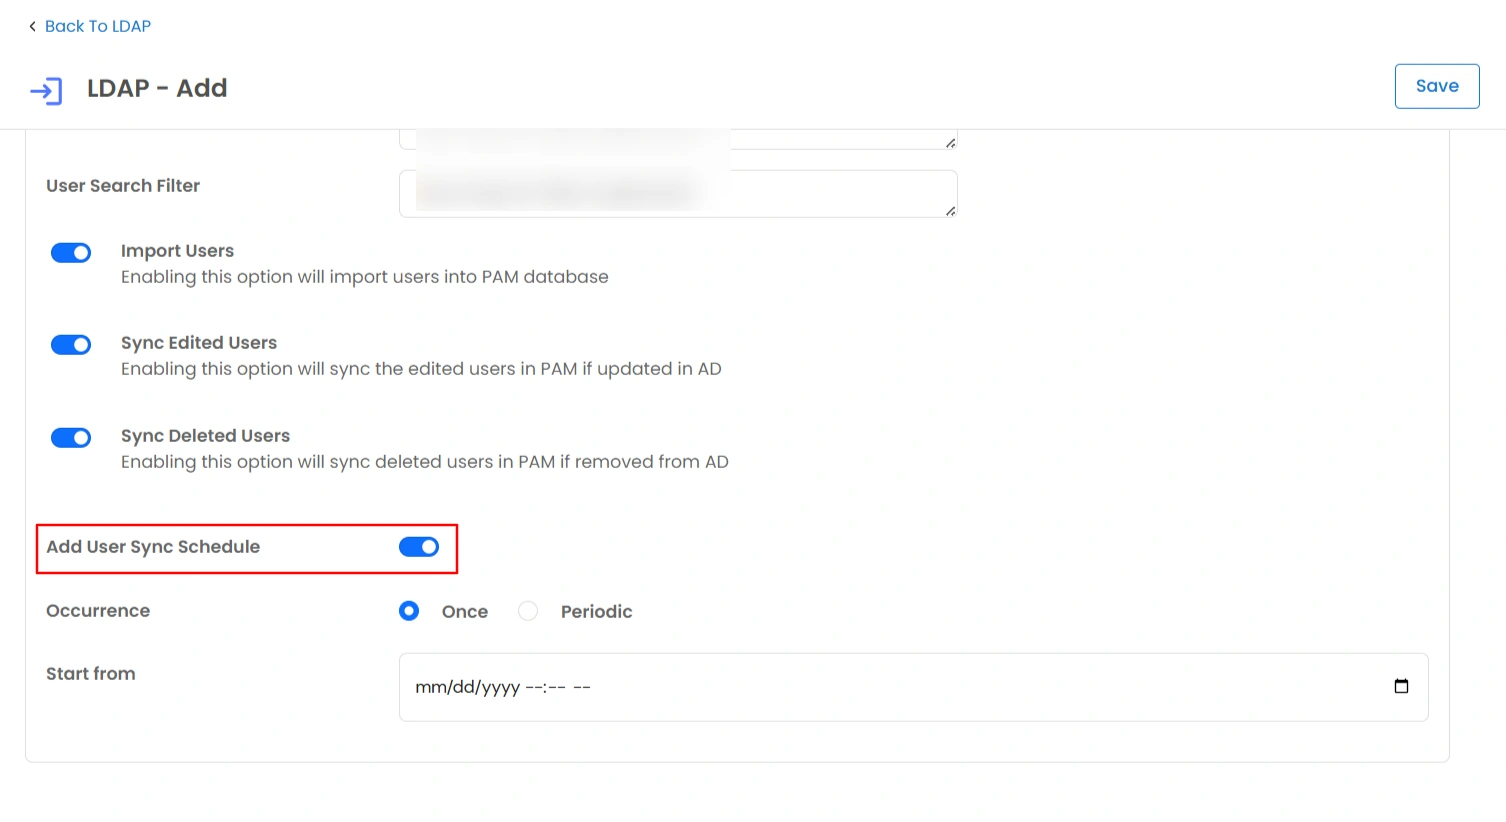
Step 5: Optional – Schedule Periodic Sync
To automate user imports:
- Enable Scheduler.
- Choose a frequency (Once or Periodic).
- Save the scheduler to enable automatic synchronization.