Hello there!
Need Help? We are right here!
Need Help? We are right here!
Search Results:
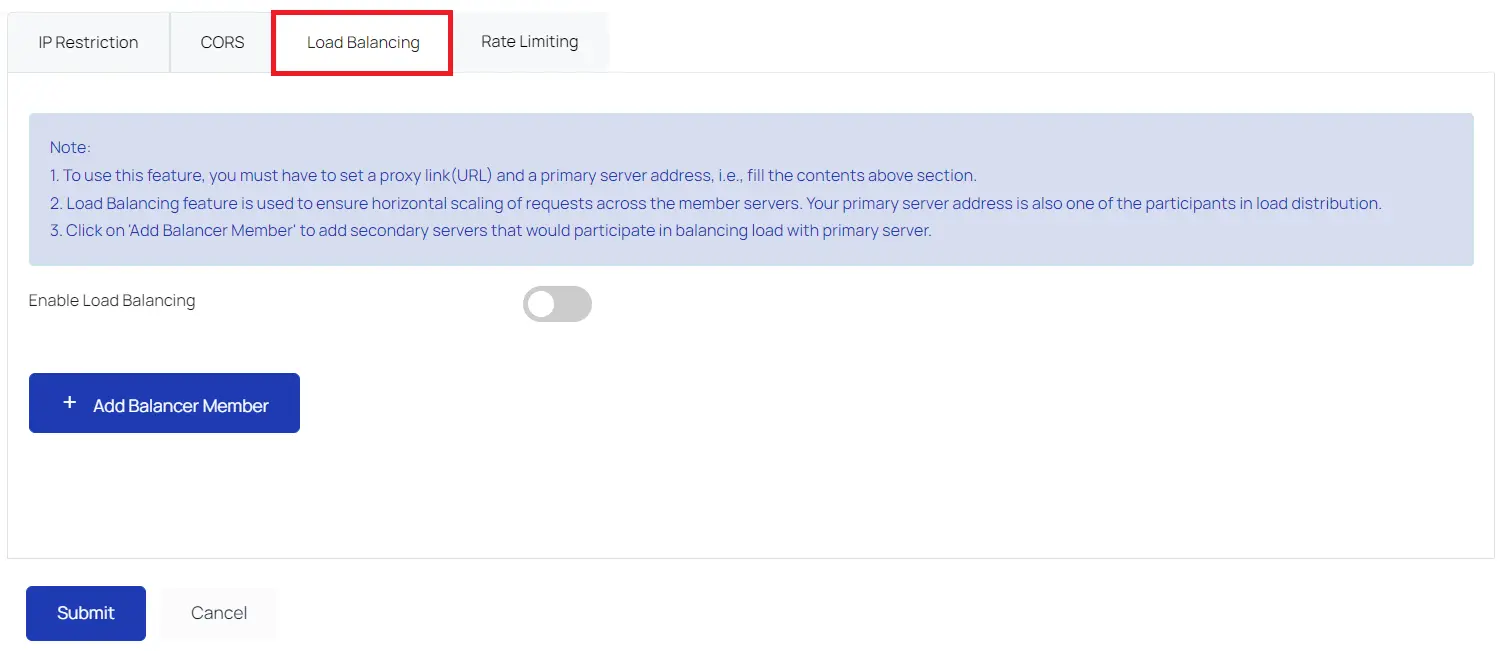
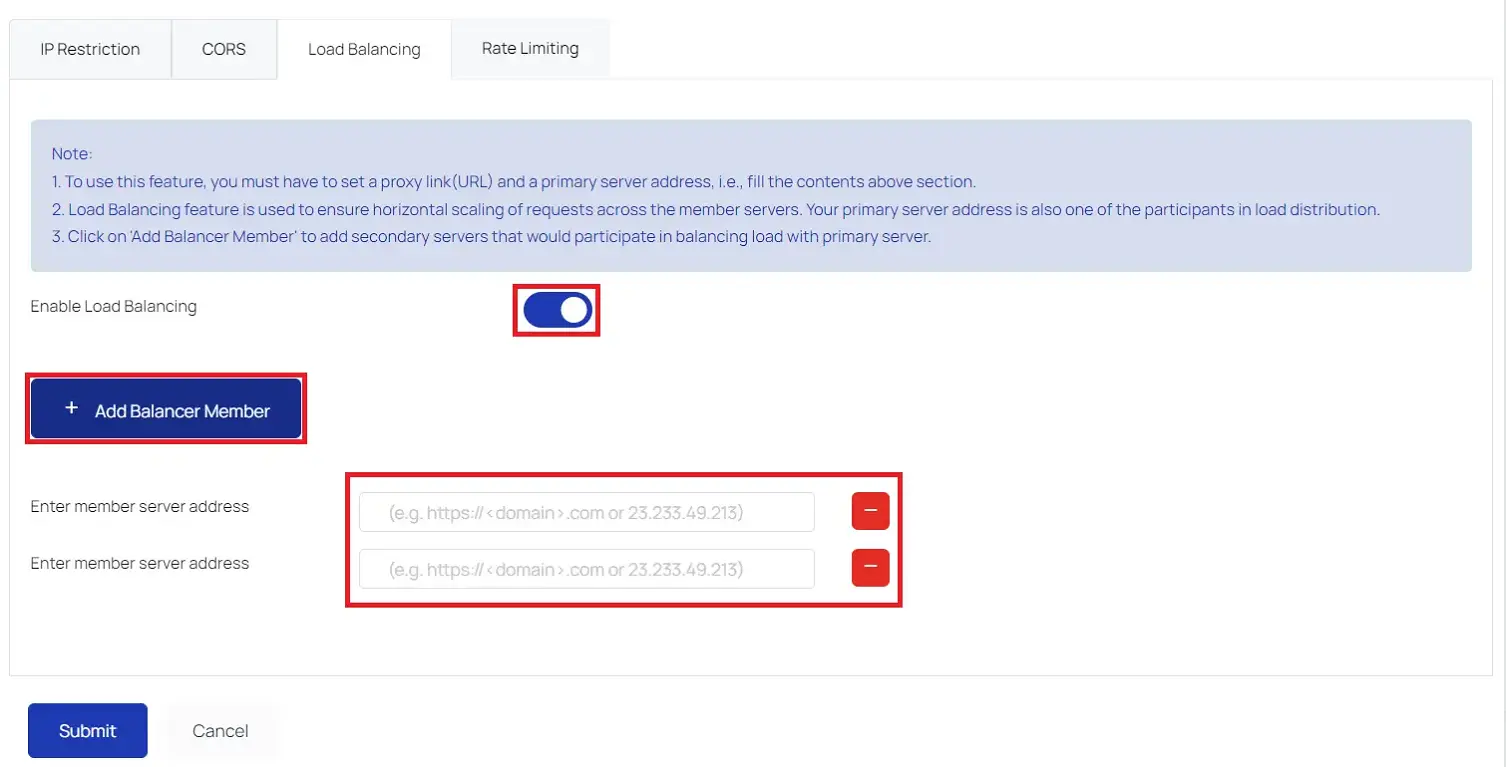
×Load balancing allows network traffic to be distributed among many servers. When you enable load balancing, it adds other features, such as application security, Network Load Balancing, DNS Load Balancing, Network Load Balancing, Server Load Balancing and many more. Learn how Load balancing works and how to activate it.
When enabled, this feature provides a platform for you to input all of the server addresses over which the load of requests will be evenly spread, resulting in smooth horizontal scalability. This feature will enhance the User experience as it will automatically detect the server failure and redirect it to other available servers. The miniOrange reverse proxy solution sits in front of the user's servers and distributes the load across the user's specified server addresses. Load Balancing in cloud applications is the most essential feature as it will decrease the load from one server and distribute it evenly among the available servers.

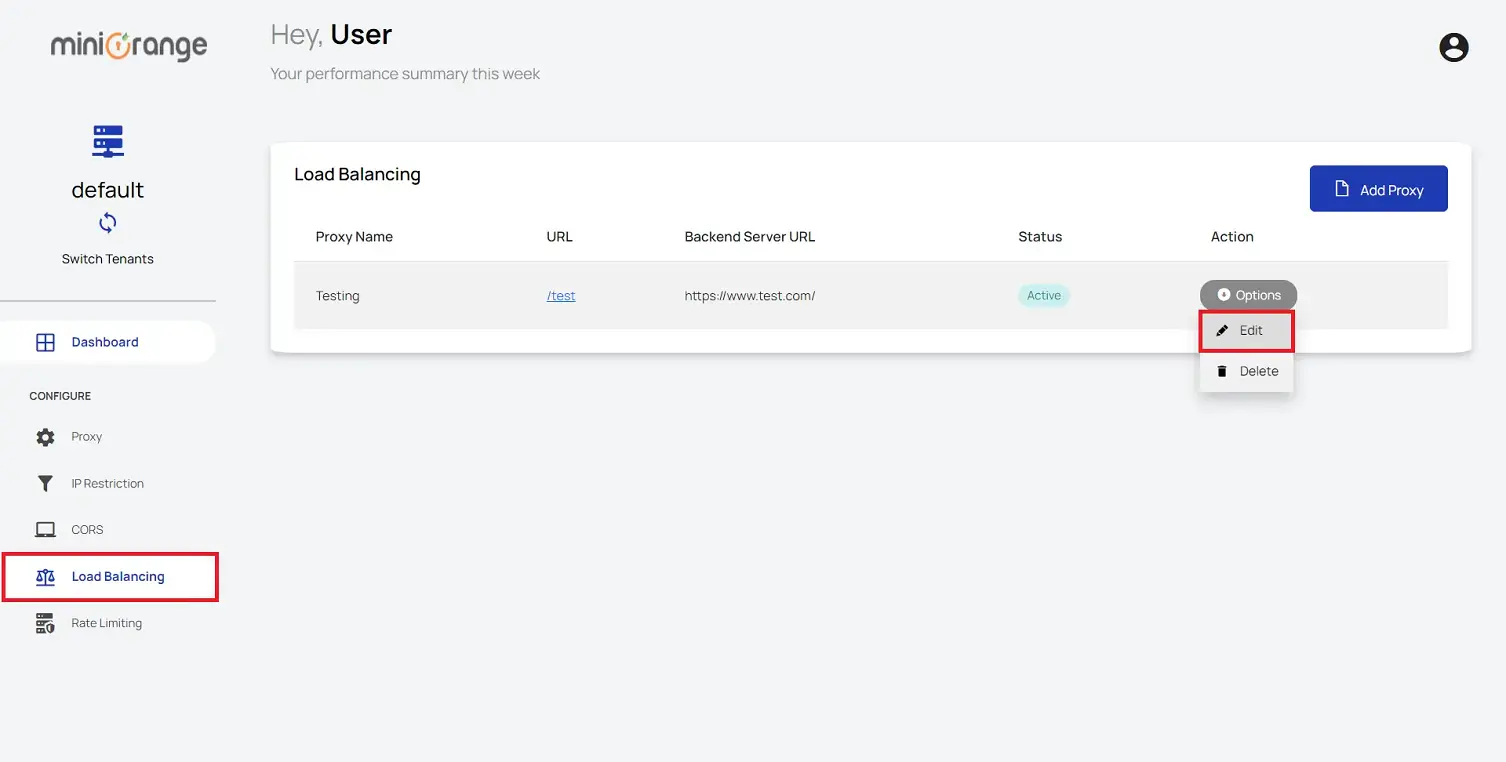
In this Guide, you have successfully Setup Load Balancing using miniOrange Reverse Proxy. When you enable load balancing, it ensures that the load can be divided among a number of servers. This solution can be useful for network load balancing, server load balancing and many more.
miniOrange Reverse Proxy offers a wide variety of security features with flexible scalability, all available at the most affordable price to all types of businesses. Start by signing up now!
