What is Linux two-factor authentication (2FA/MFA)?
Linux two-factor authentication (2FA/MFA) module provides a secure way to login into the linux desktop logins, remote or local linux Secure Shell (or SSH) access servers that enhance the security and makes the brute force attacks more difficult. Two Factor Authentication (2FA / MFA) on top of Secure Shell (or SSH) Access and Linux systems, adds an extra layer of security to increase the identity assurance and reduce risk and exposure. The clients will use their existing credentials (username and password) as their first factor and then they will be prompted for entering the configured second factor type. miniOrange can connect to the on-premise AD (Active Directory) so that user will use their AD credentials to authenticate themselves on Linux system. miniOrange Two Factor Authentication (2FA) module can be installed on Linux operating systems to add Two-Factor or Multi-Factor authentication on the top of local and Remote login.
miniOrange supports following methods for Linux 2FA:
The miniOrange Linux MFA / 2FA module has been well tested on the following Linux distributions.
(If you have other than the following mentioned distributions please Contact us)
Ubuntu
RHEL based systems (e.g. Red Hat, CentOS)
Connect with External Source of Users
miniOrange provides user authentication from various external sources, which can be Directories (like ADFS, Microsoft Active Directory, OpenLDAP, AWS etc), Identity Providers (like Microsoft Entra ID, Okta, AWS), and many more. You can configure your existing directory/user store or add users in miniOrange.
Video Setup Guide
Get Free Linux 2FA Installation Help - Book a Slot
miniOrange offers free help through a consultation call with our System Engineers to Install or Setup Linux MFA / 2FA (Two-Factor Authentication) and Secure Shell (or SSH) access MFA solution in your environment with 30 days Free trial.
For this, you need to just send us an email at idpsupport@xecurify.com to book a slot and we'll help you setting it up in no time.
Enroll Users in miniOrange before Linux 2FA Configuration: The username of the user in miniOrange should be the same as in user's local Username. This is required so that the service can prompt the appropriate 2FA for the customer based on the defined policy and provide secure access to Linux machines and systems. There are multiple methods to add users in miniOrange. Admin can add end users or else setup user provisioning from your existing identity source.
Step by step guide to enable Linux MFA / 2FA (Two/Multi Factor Authentication) using SSH
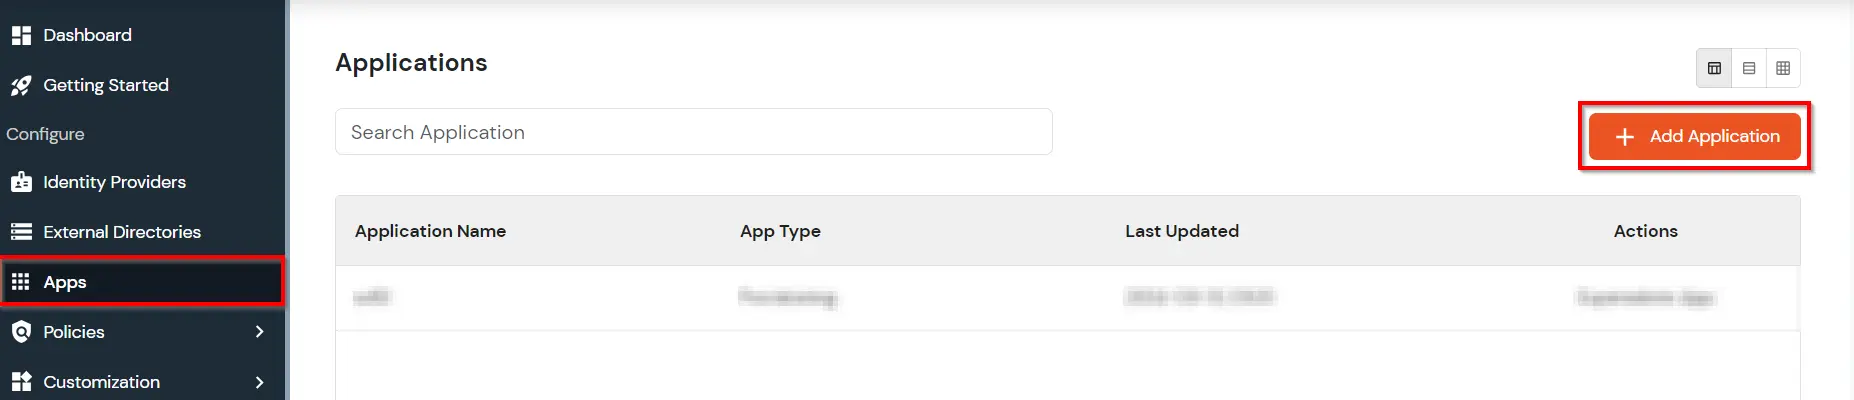
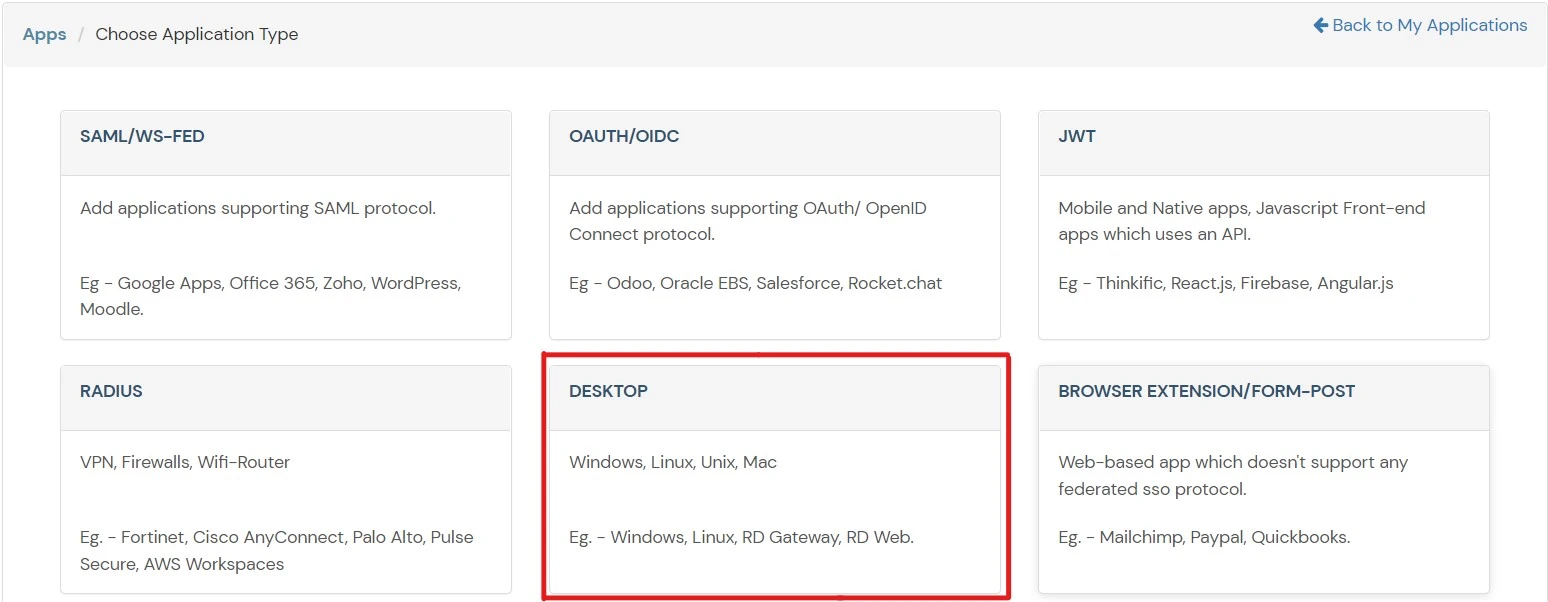
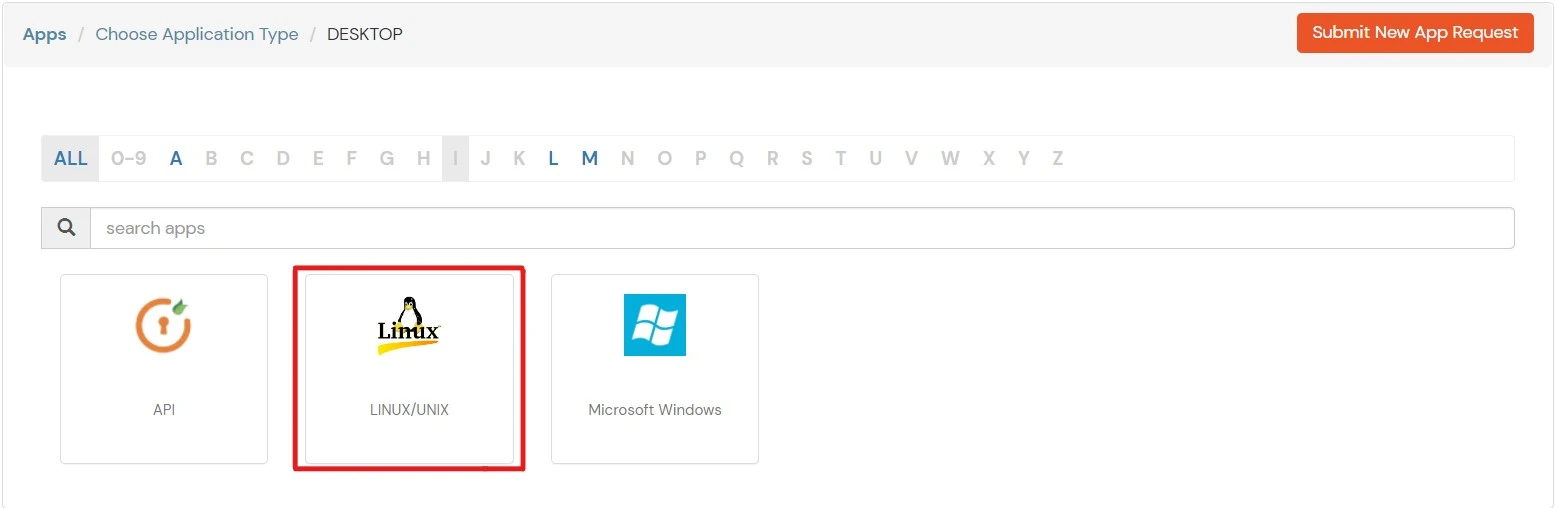
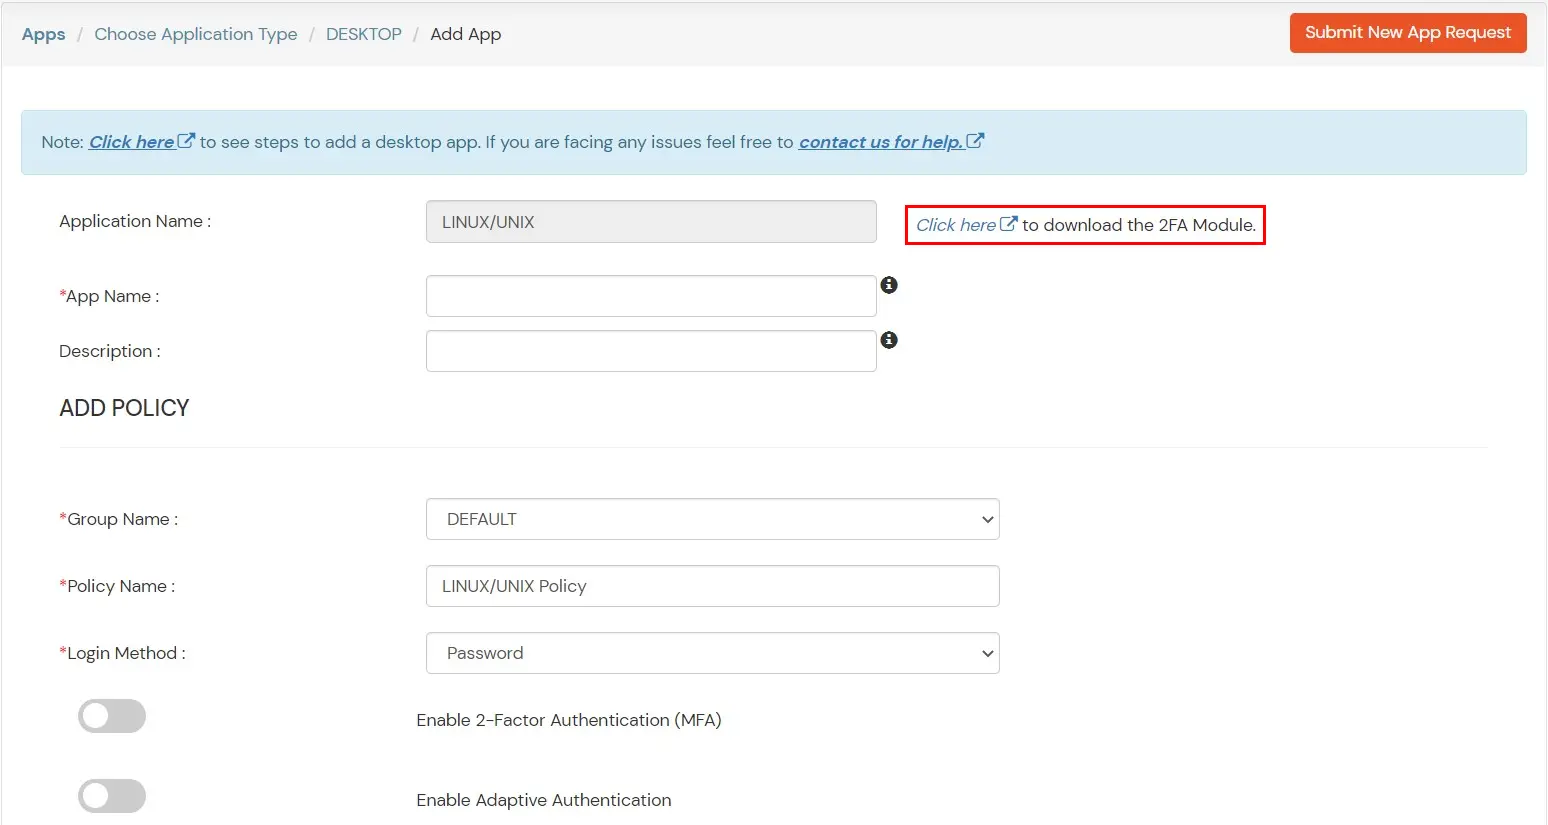
Open your Linux terminal and make sure you are the root user.
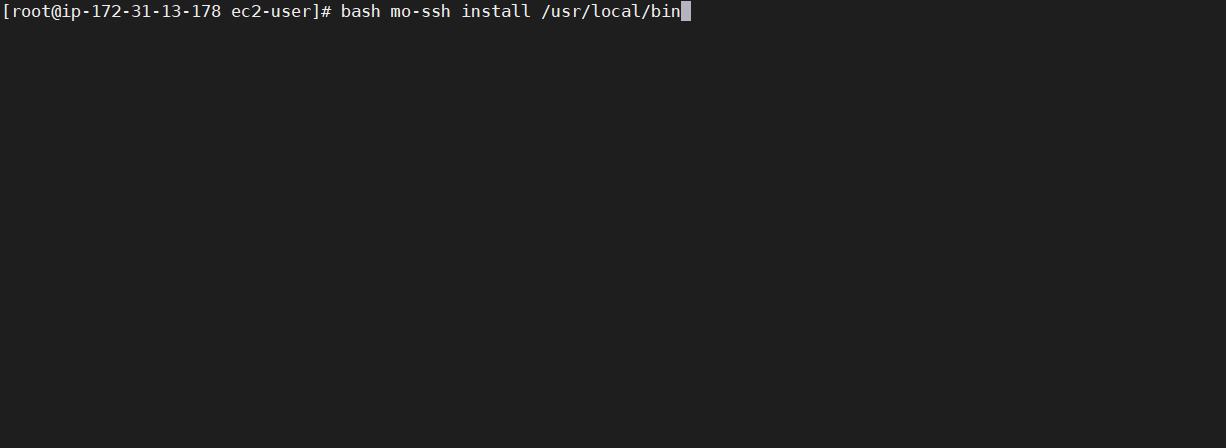
Execute the following command to install “mo-ssh” module.
# bash mo-ssh install < path > e.g. # bash mo-ssh install /usr/local/bin
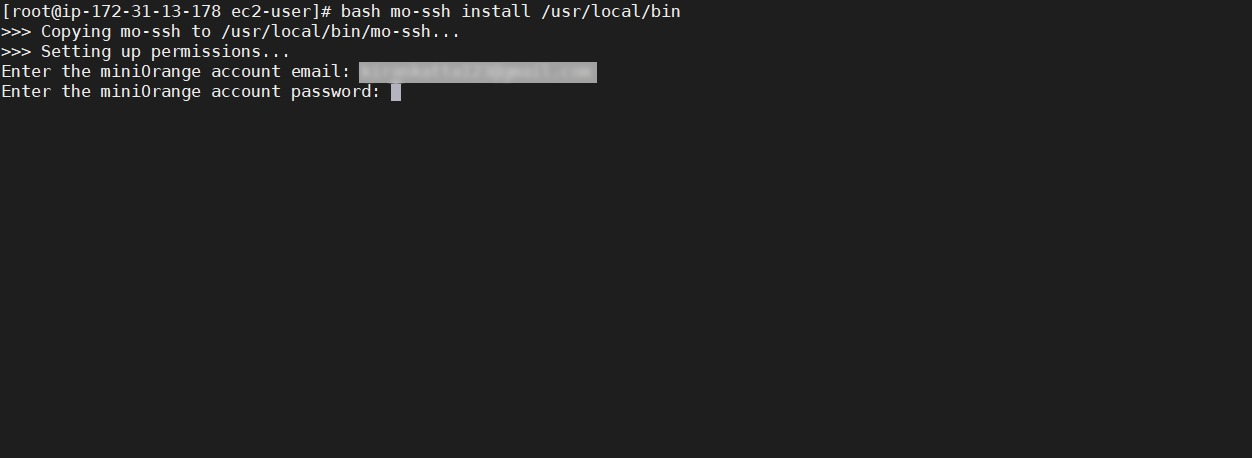
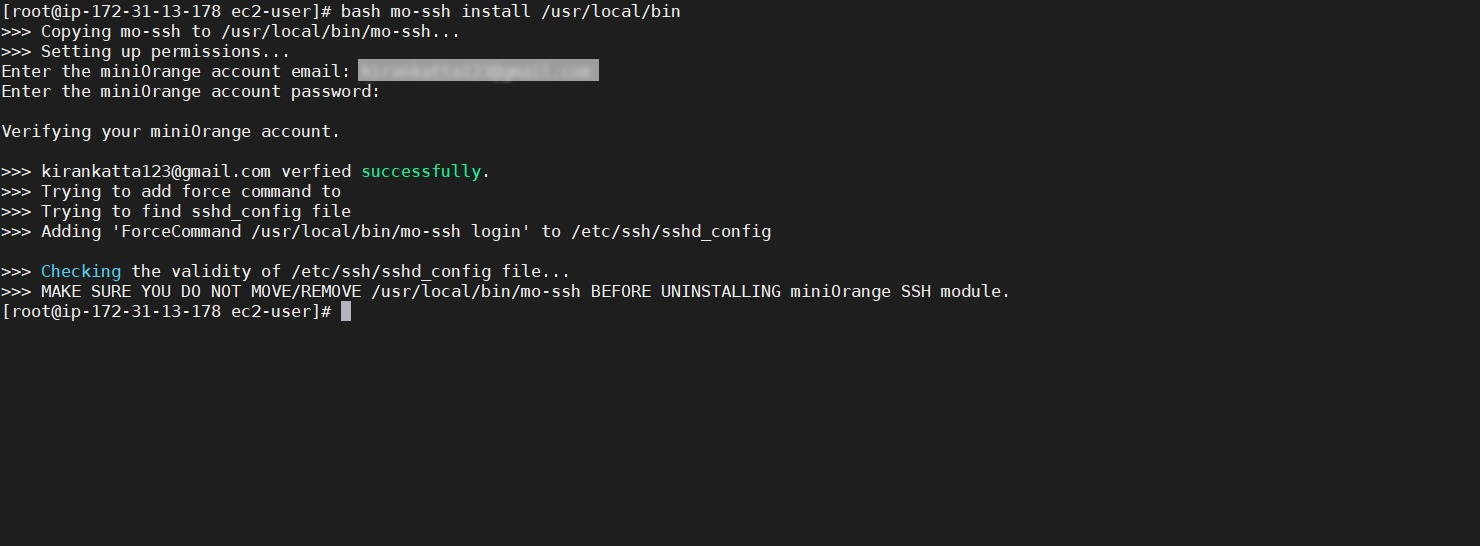
Enter the miniOrange account credentials.
Proceed for the following steps once you have successfully logged in.
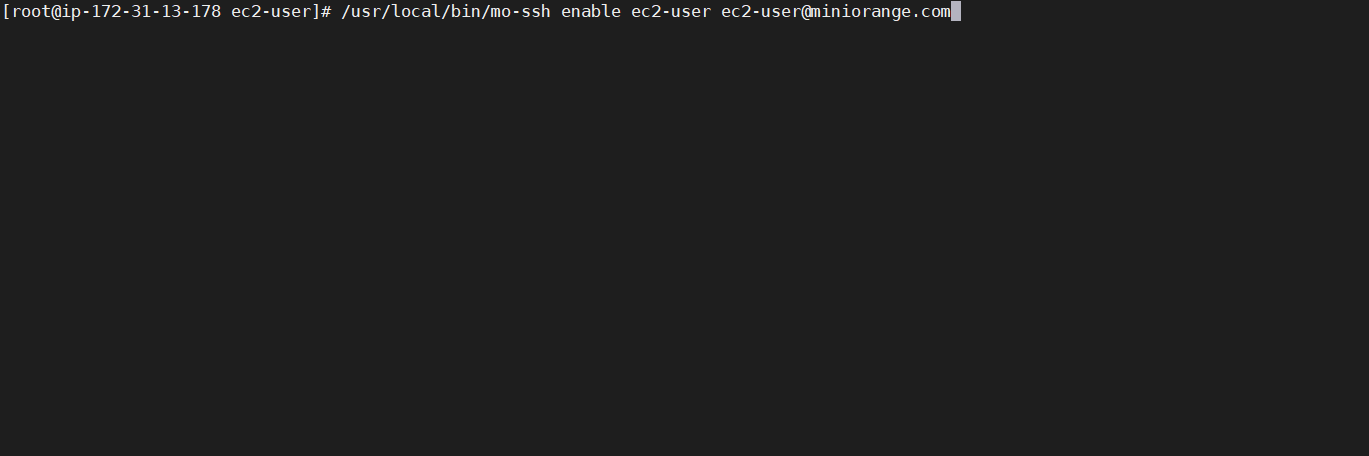
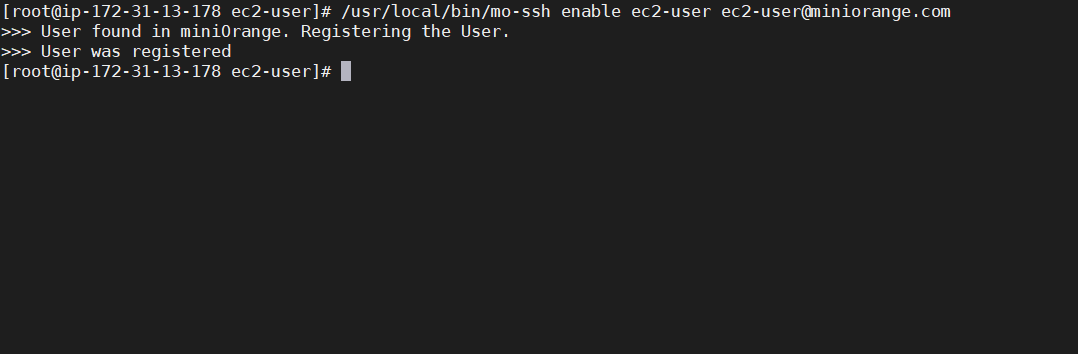
Execute the below command to enable Linux MFA / 2FA (Two / Multi Factor Authentication) for the directory users.
‹path of mo-ssh file› enable ‹local_username› ‹miniOrange_email› e.g. # /usr/local/bin enable ec2-user ec2user@xecurify.com
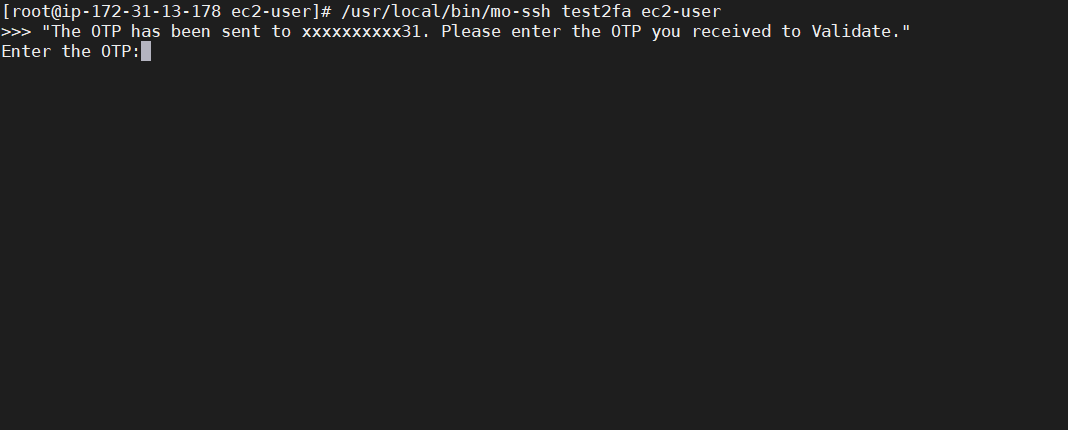
Two/Multi Factor Authentication (2fa/MFA) is now enabled for the directory users. You can now test your MFA / 2fa setup.
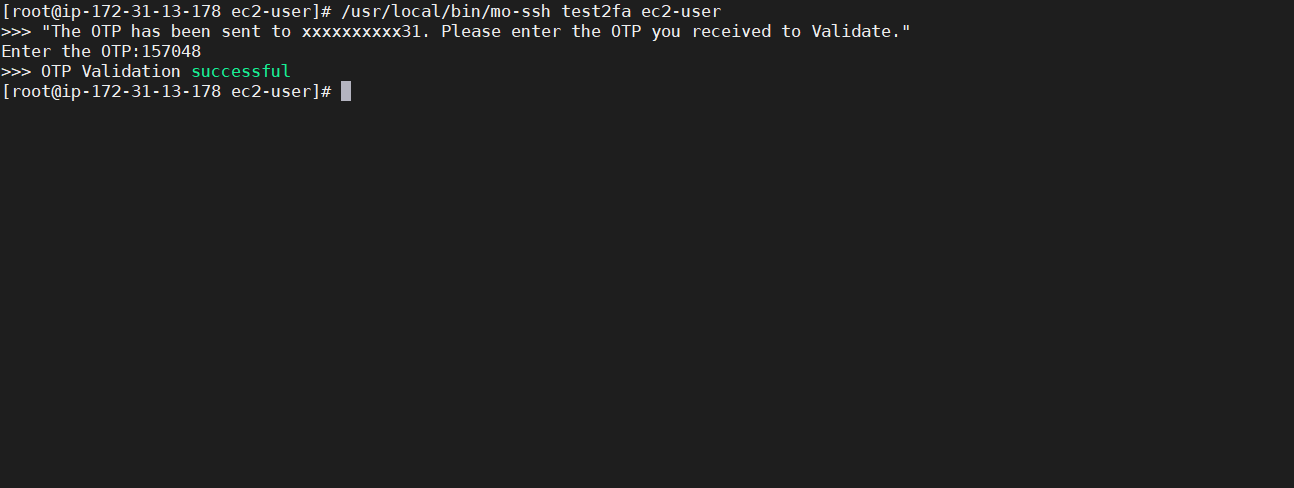
In case you have set OTP over SMS 2FA method. Enter the otp code that you will receive on your phone number. Please enter the otp code.
After entering the correct otp code, the test authentication will be successful.
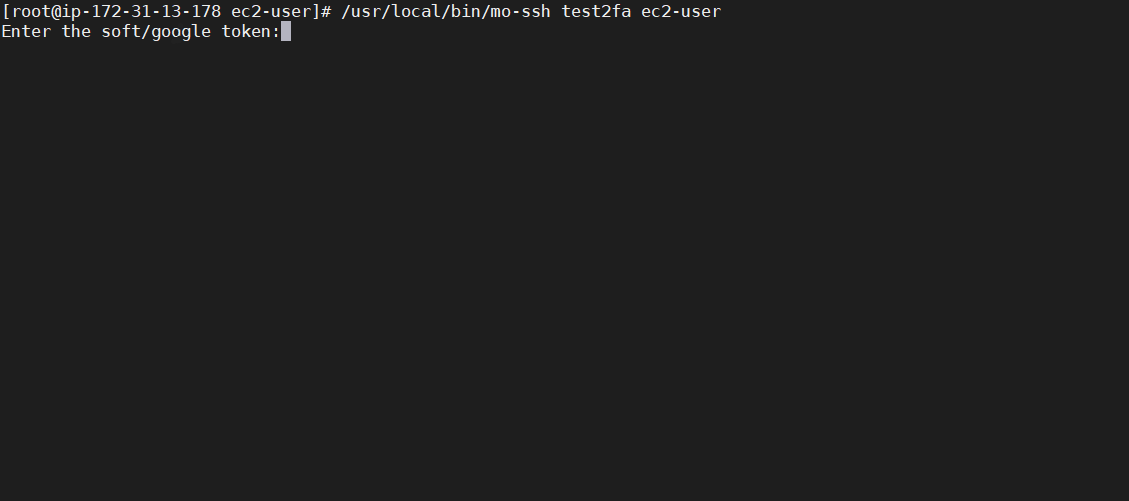
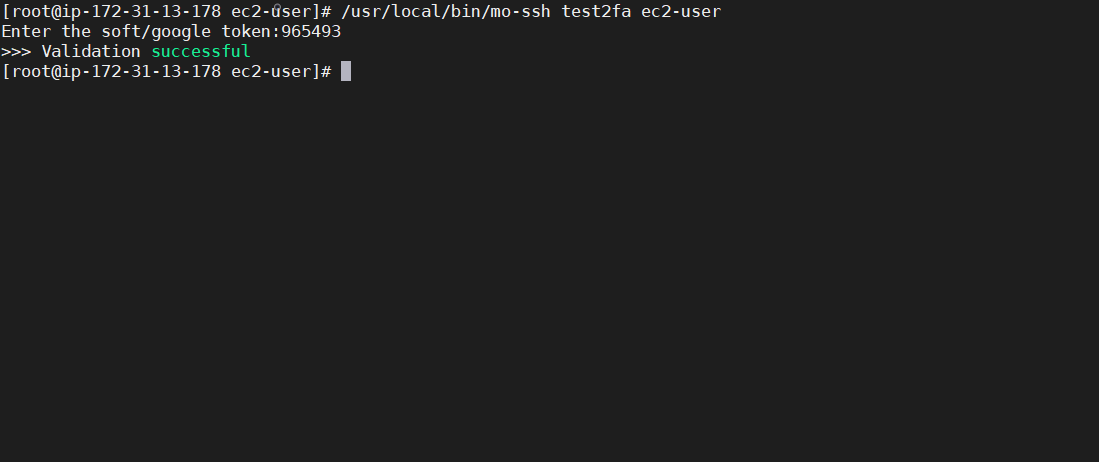
In case you have set Google Authenticator MFA / 2FA method and already added the secret key, You will need to enter the token number.
Enter the token number from google authenticator app. The test authentication will be successful.
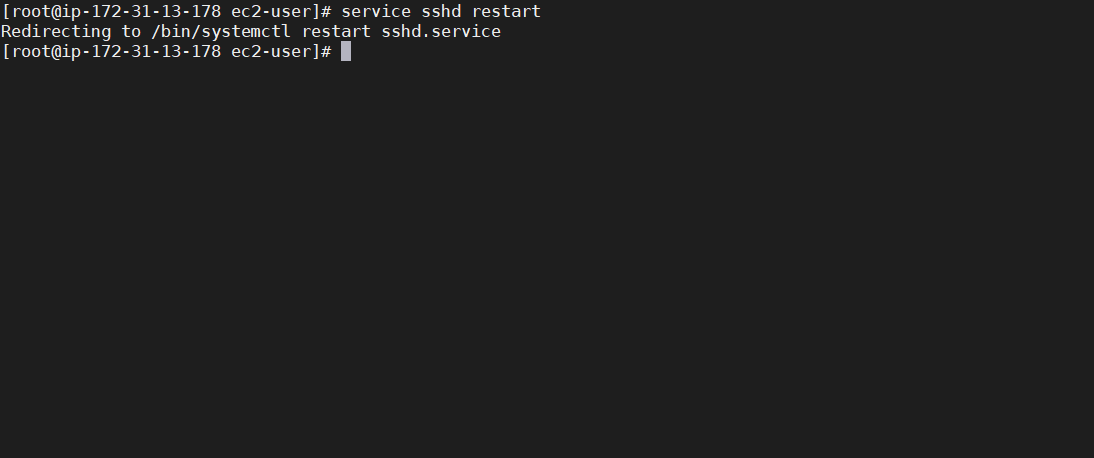
Execute the below command to restart the sshd service.
$ service sshd restart
3. Configure Linux MFA / 2FA (Two-Factor Authentication)
Login into your End-User Dashboard using Active Directory Credentials.
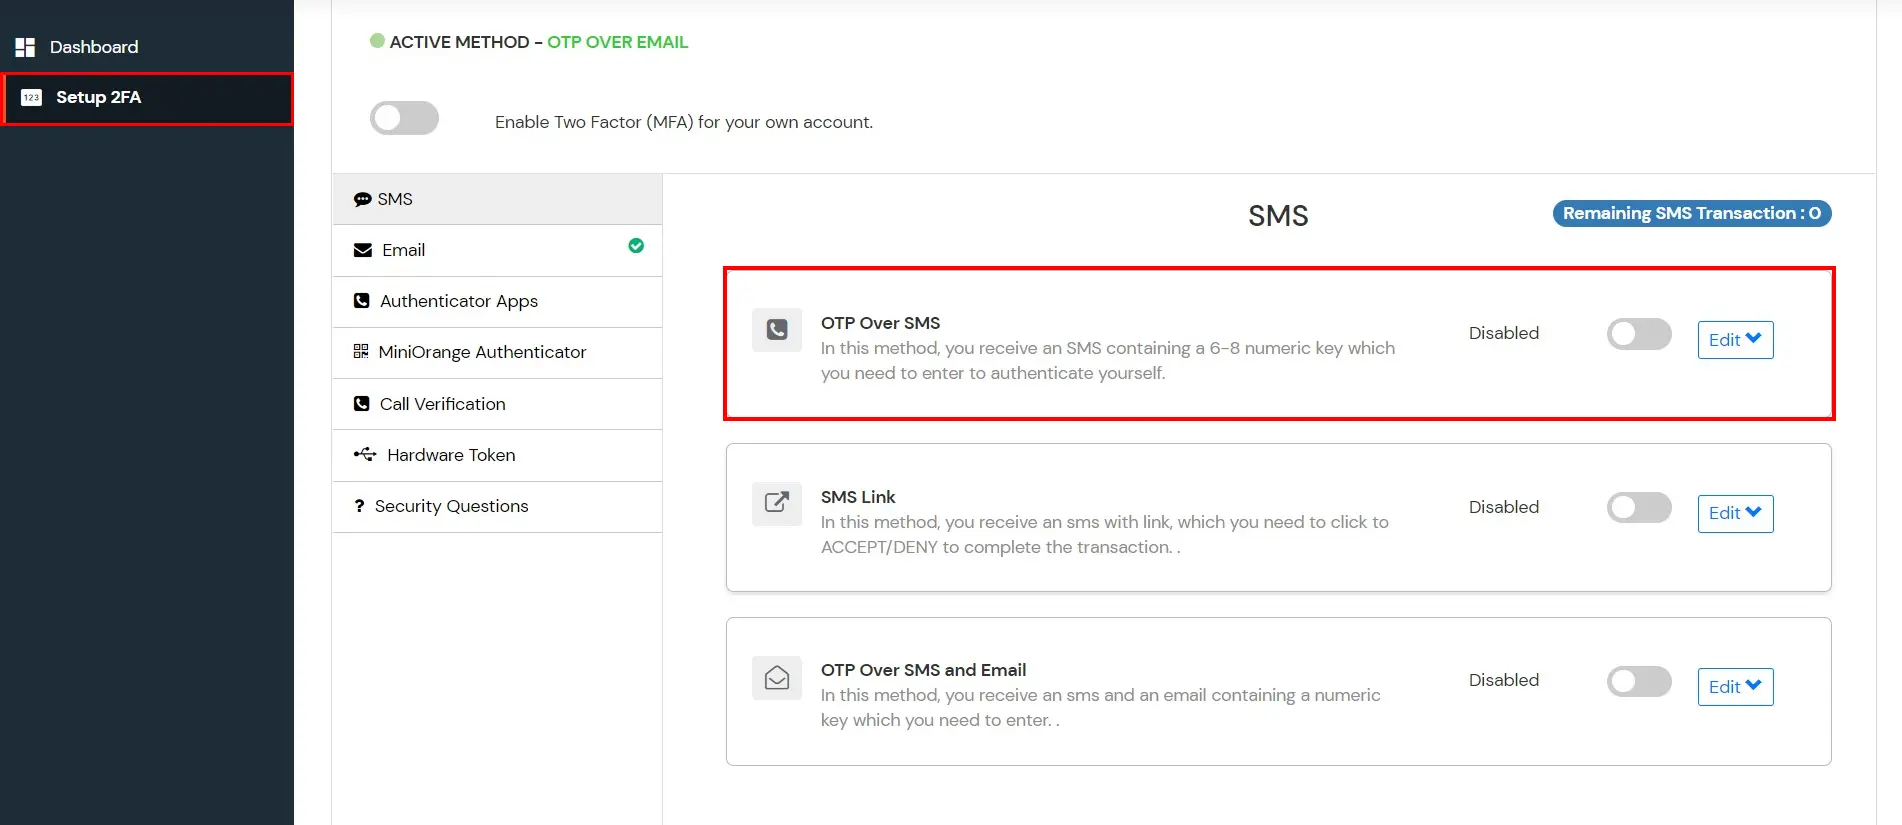
Select Setup 2FA from left panel.
Browse through the Second factor options and choose an appropriate method to be used by the particular directory User during login.
In this guide, we have selected the method "OTP OVER SMS". You can explore the guide to setup other methods like Google Authenticator here.
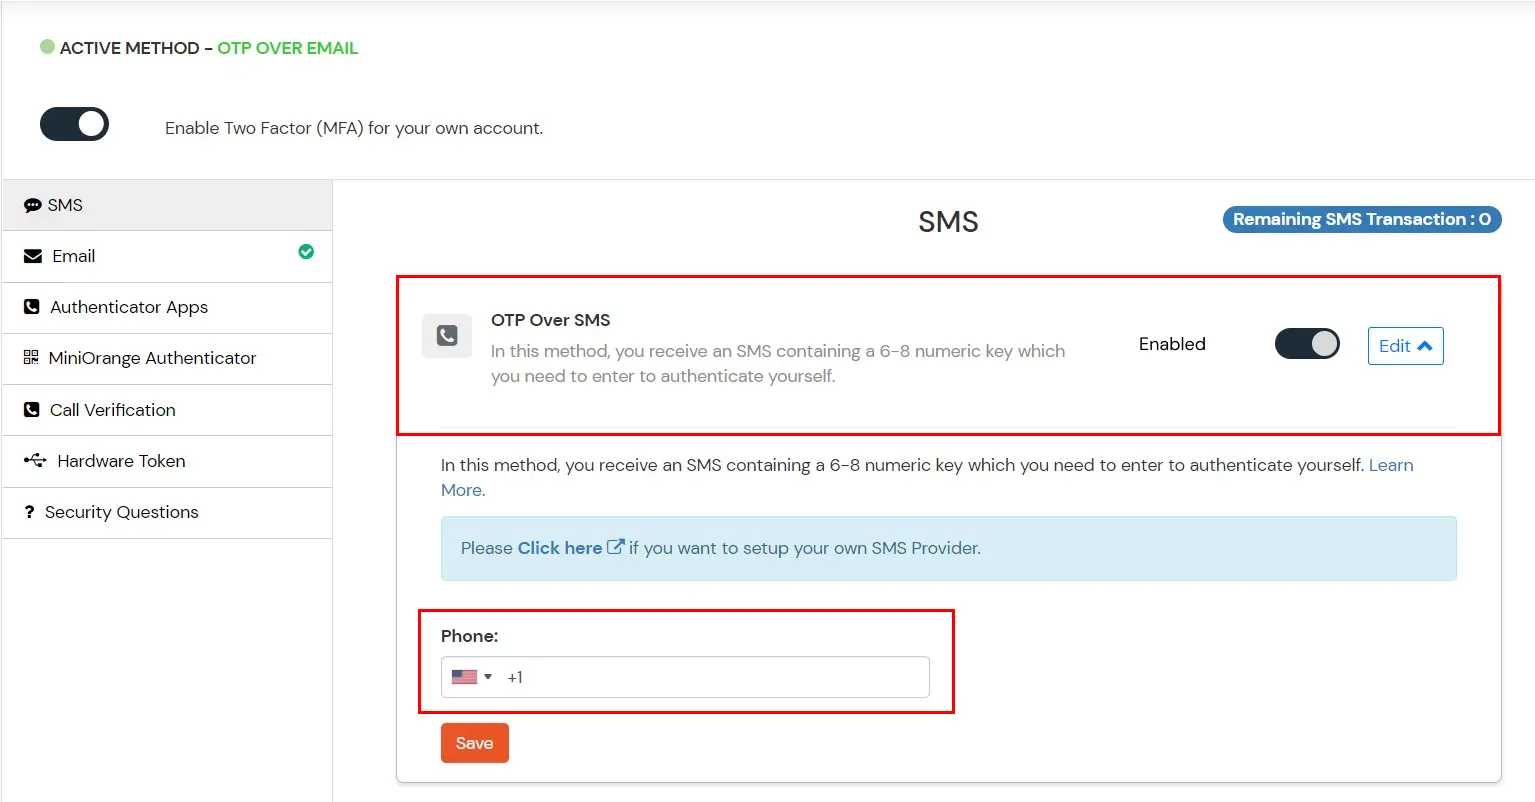
Click on edit "OTP OVER SMS".
Enter you phone number along with the necessary country code and click on SAVE below. After the Phone details are saved successfully, click on the Save button to set this as your 2FA method.
To use a particular method of 2FA, we configure that method first and then select the method and click on SAVE.
Click Here to configure the 2FA method from miniOrange Admin dashboard.
Click here for step by step guide to configure 2FA methods for end-users.
4. Test your Linux MFA / 2FA Setup
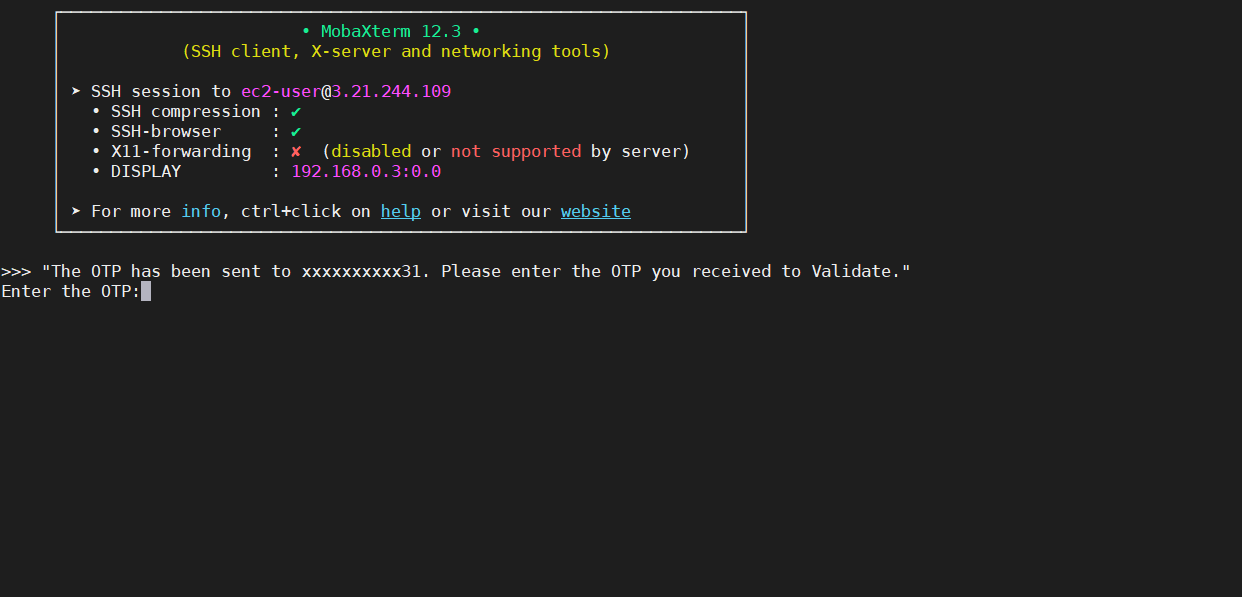
Initiate SSH into your system and enter your username. It will prompt for the two / multi factor authentication (2fa / MFA) verification.
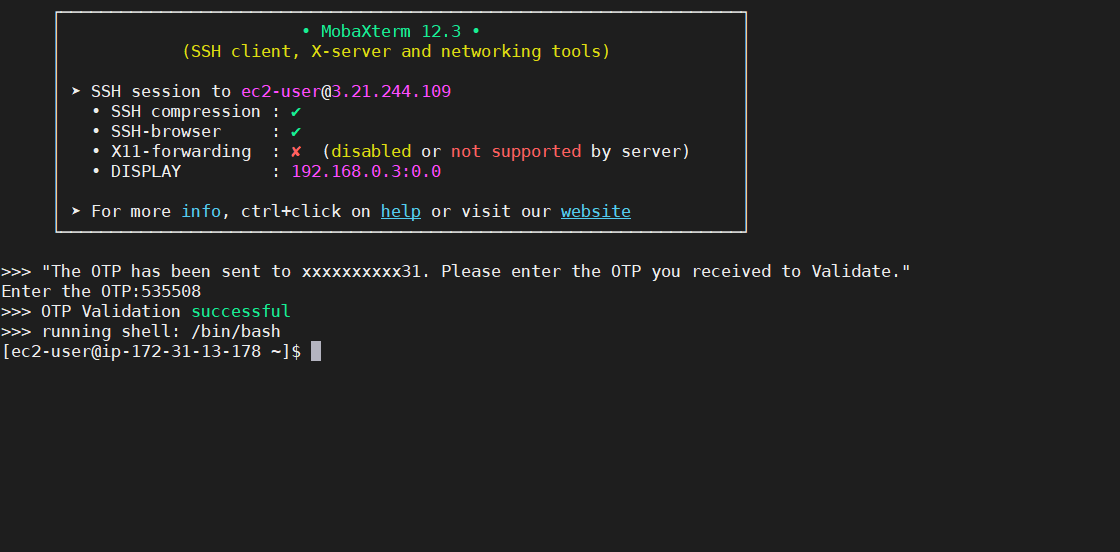
If you have set OTP over SMS 2FA method. Enter the otp code will recieve on your phone number.
After entering the correct otp code the authentication will be successful.
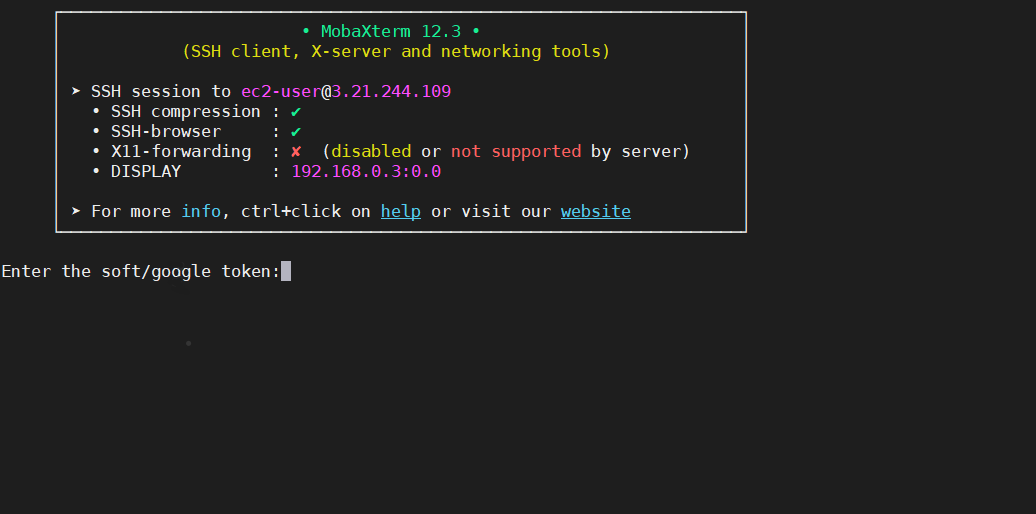
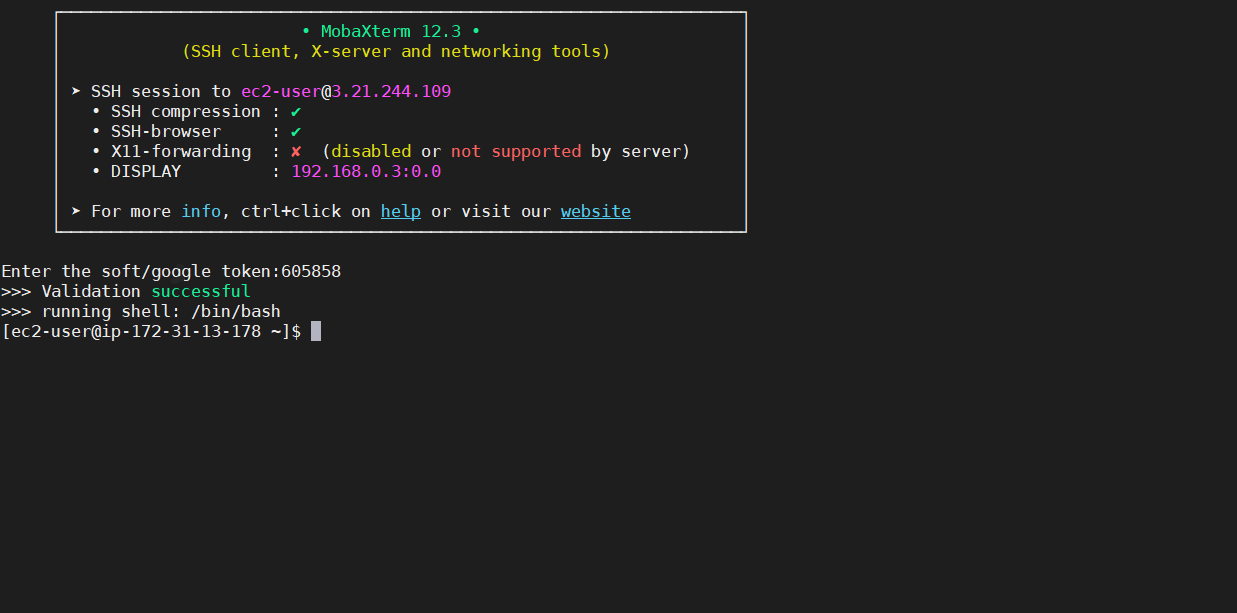
If you have set Google Authenticator 2FA method and added the secret key in the app, You will need to enter the token number.
Enter the token number from google authenticator app. The authentication will be successful.
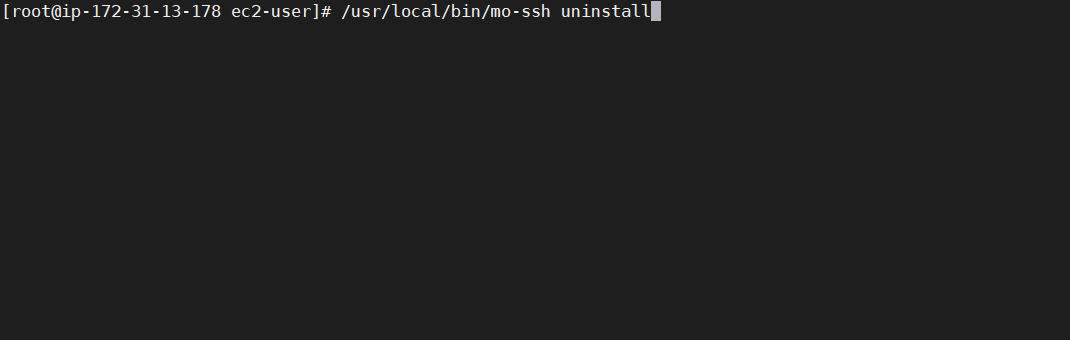
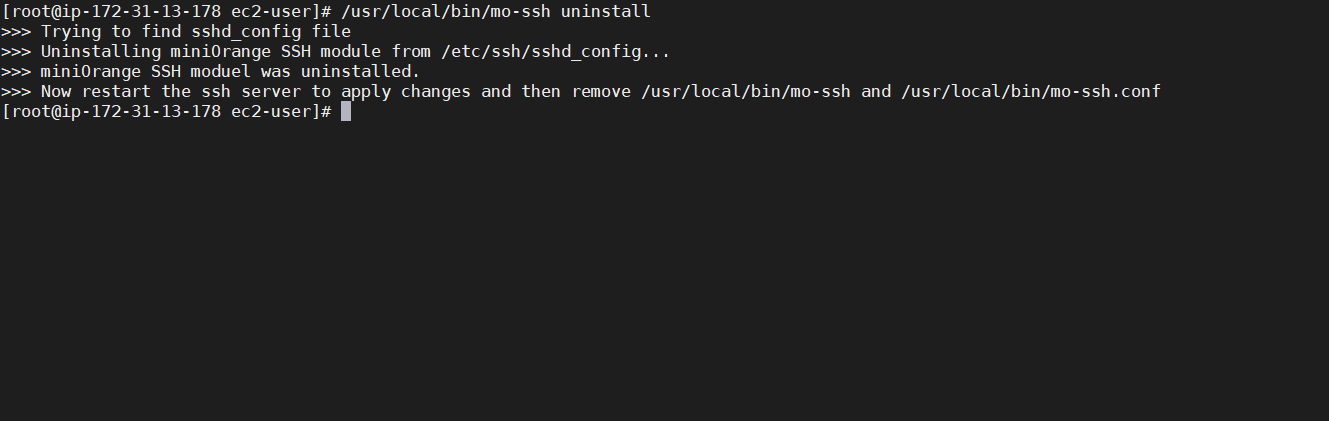
Execute the below command to uninstall the module. # < path > mo-ssh uninstall e.g. # /usr/local/bin/mo-ssh uninstall
The module is uninstalled successfully.
5. Configure Your User Directory (Optional)
miniOrange provides user authentication from various external sources, which can be Directories (like ADFS, Microsoft Active Directory, Microsoft Entra ID, OpenLDAP, Google, AWS Cognito etc), Identity Providers (like Okta, Shibboleth, Ping, OneLogin, KeyCloak), Databases (like MySQL, Maria DB, PostgreSQL) and many more. You can configure your existing directory/user store or add users in miniOrange.
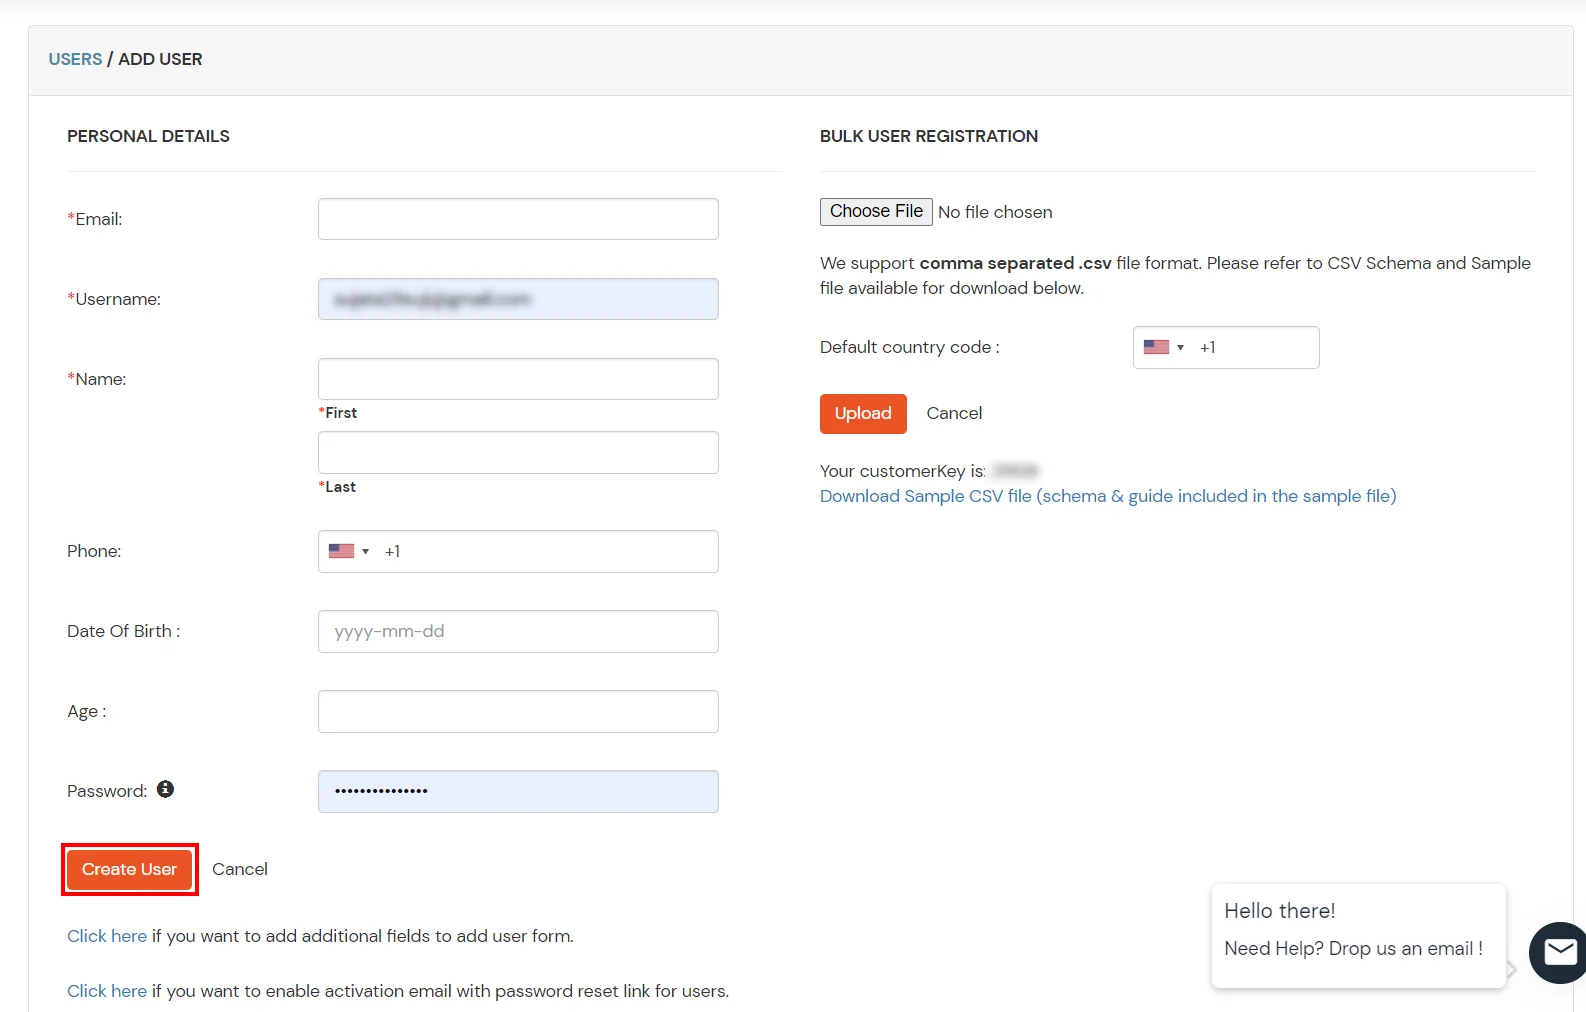
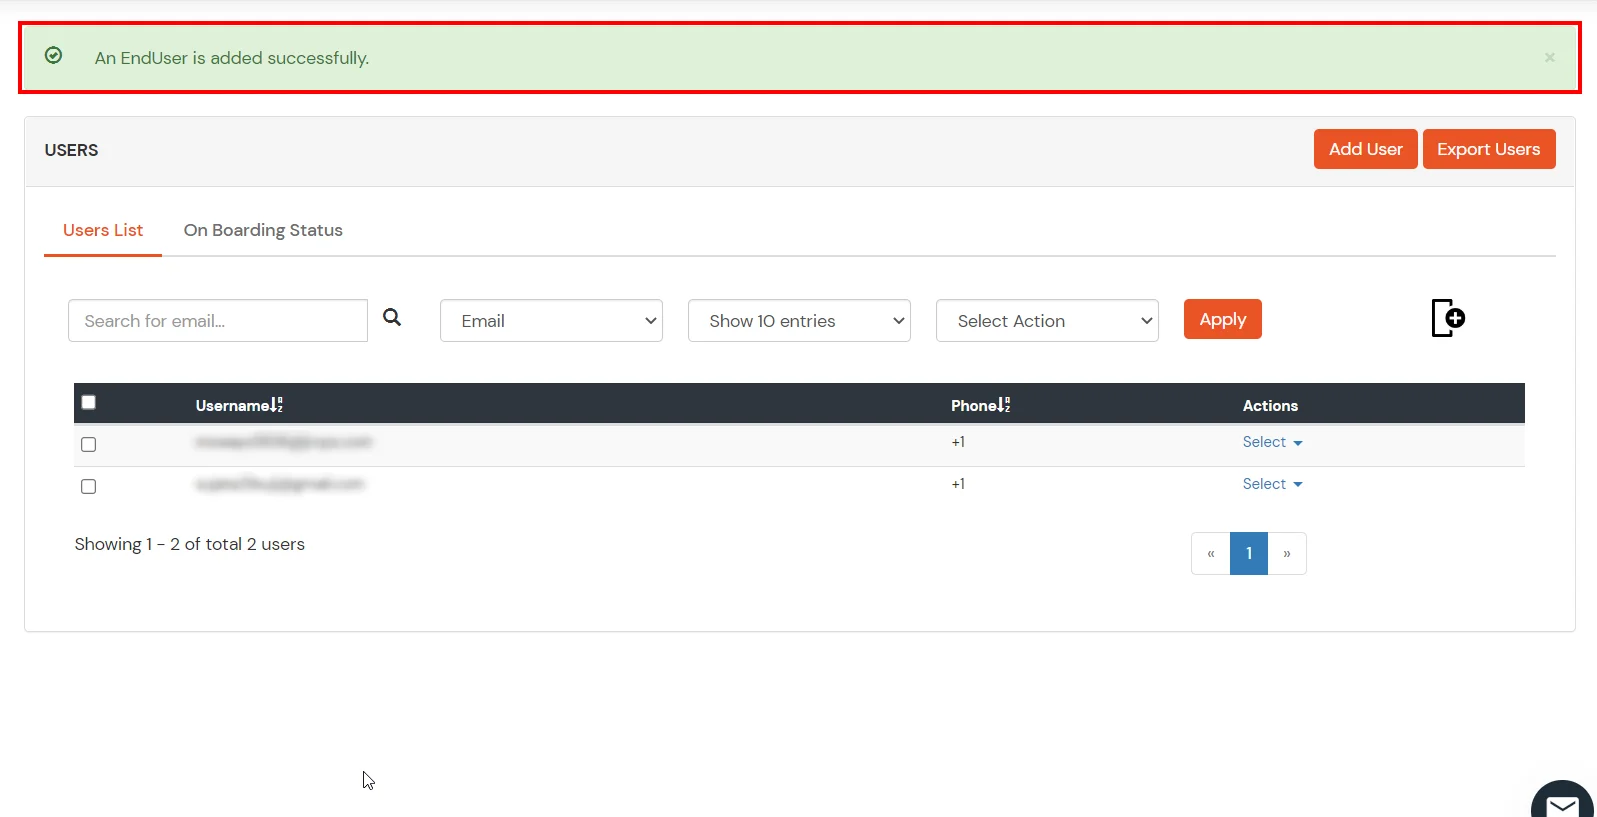
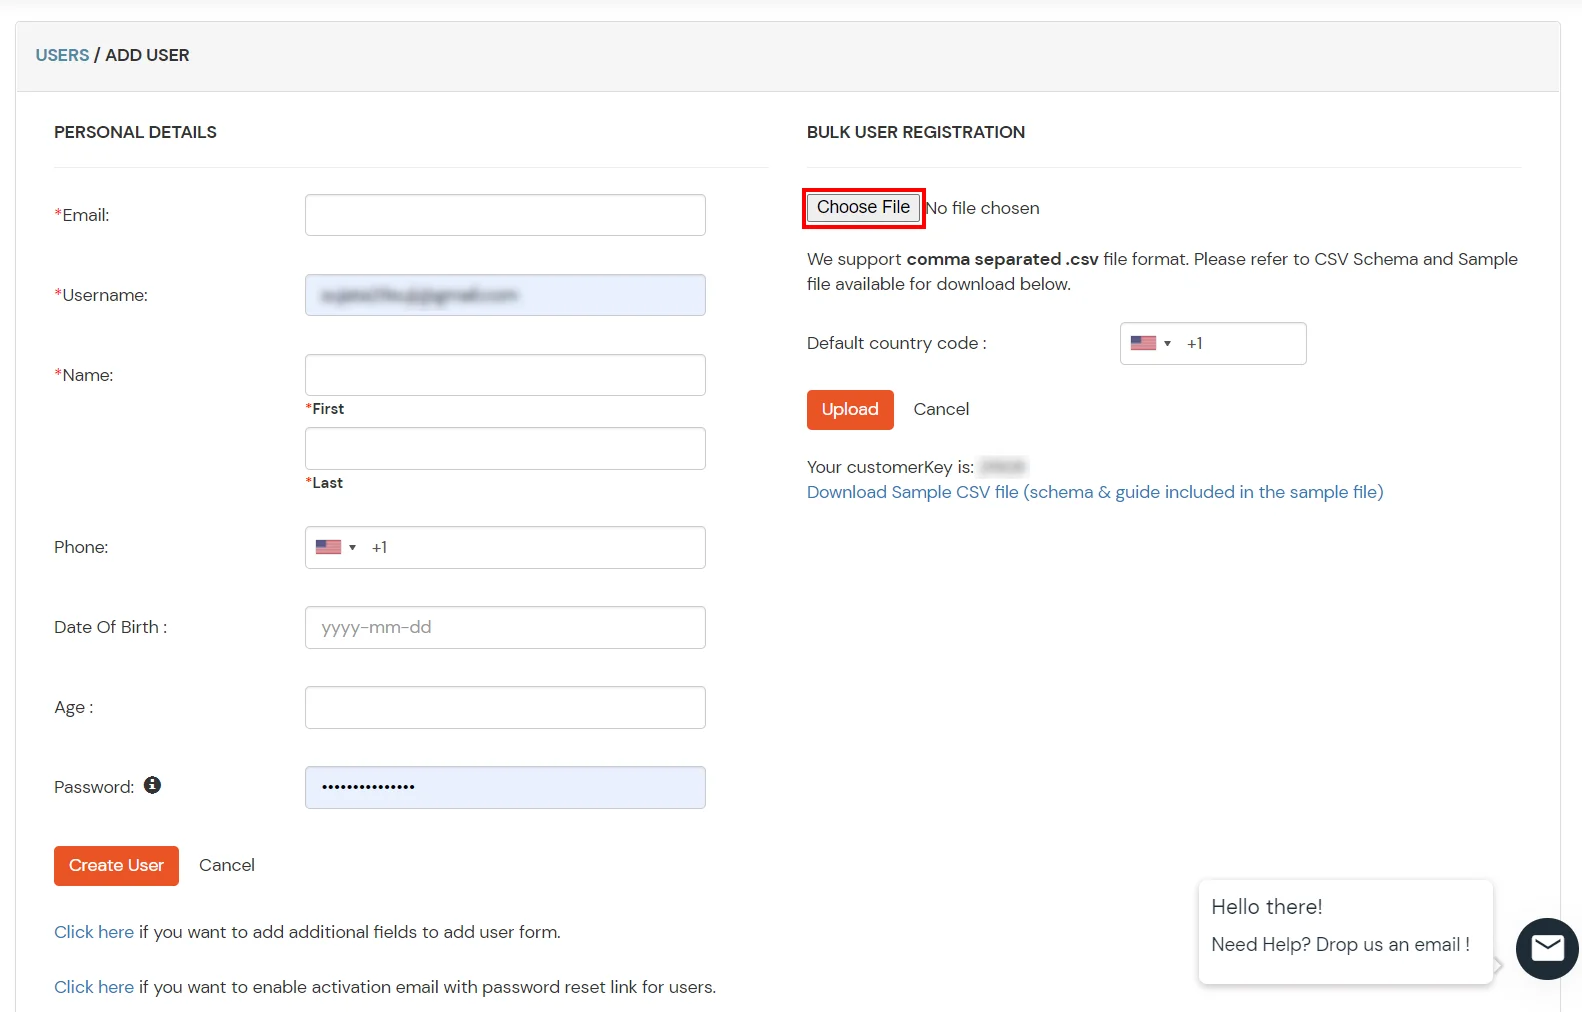
Here, fill the user details without the password and then click on the Create User button.
After successful user creation a notification message "An end user is added successfully" will be displayed at the top of the dashboard.
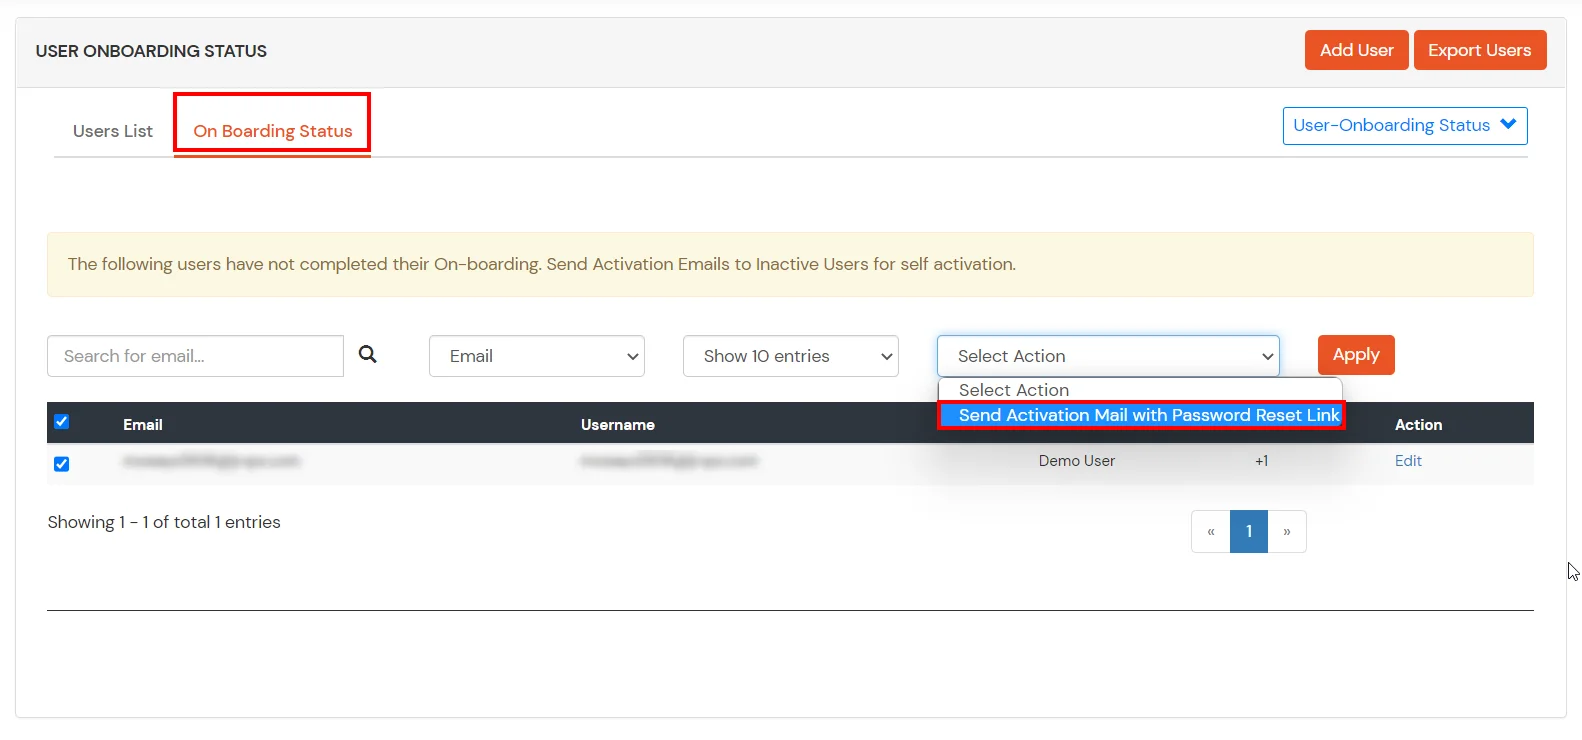
Click on Onboarding Status tab. Check the email, with the registered e-mail id and select action Send Activation Mail with Password Reset Link from Select Action dropdown list and then click on Apply button.
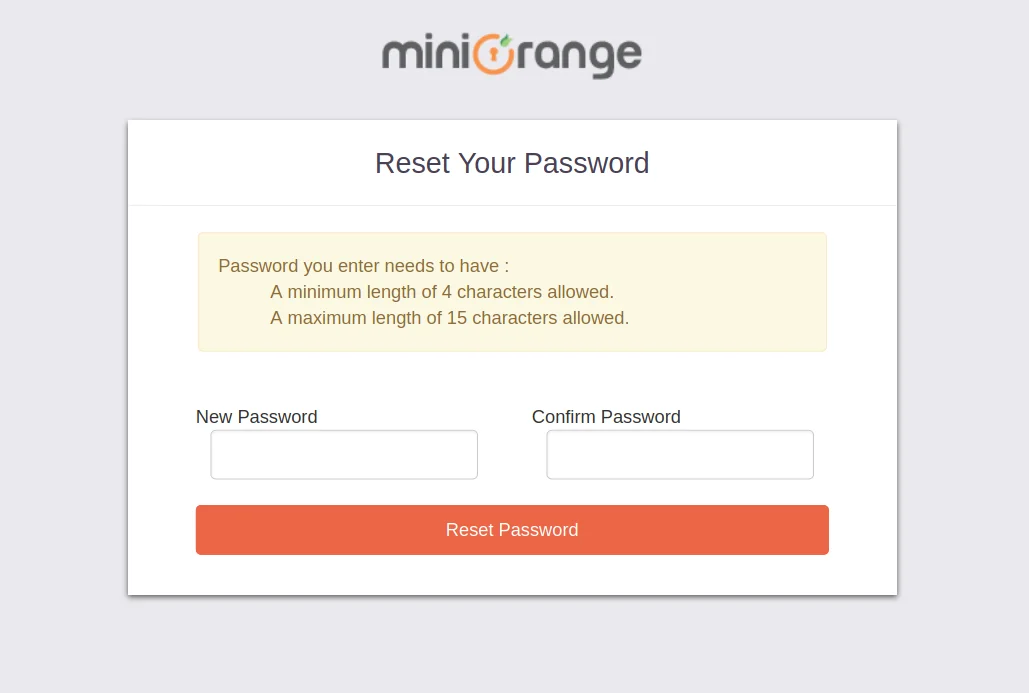
Now, Open your email id. Open the mail you get from miniOrange and then click on the link to set your account password.
On the next screen, enter the password and confirm password and then click on the Single Sign-On (SSO) reset password button.
Now, you can log in into miniOrange account by entering your credentials.
2. Bulk Upload Users in miniOrange via Uploading CSV File.
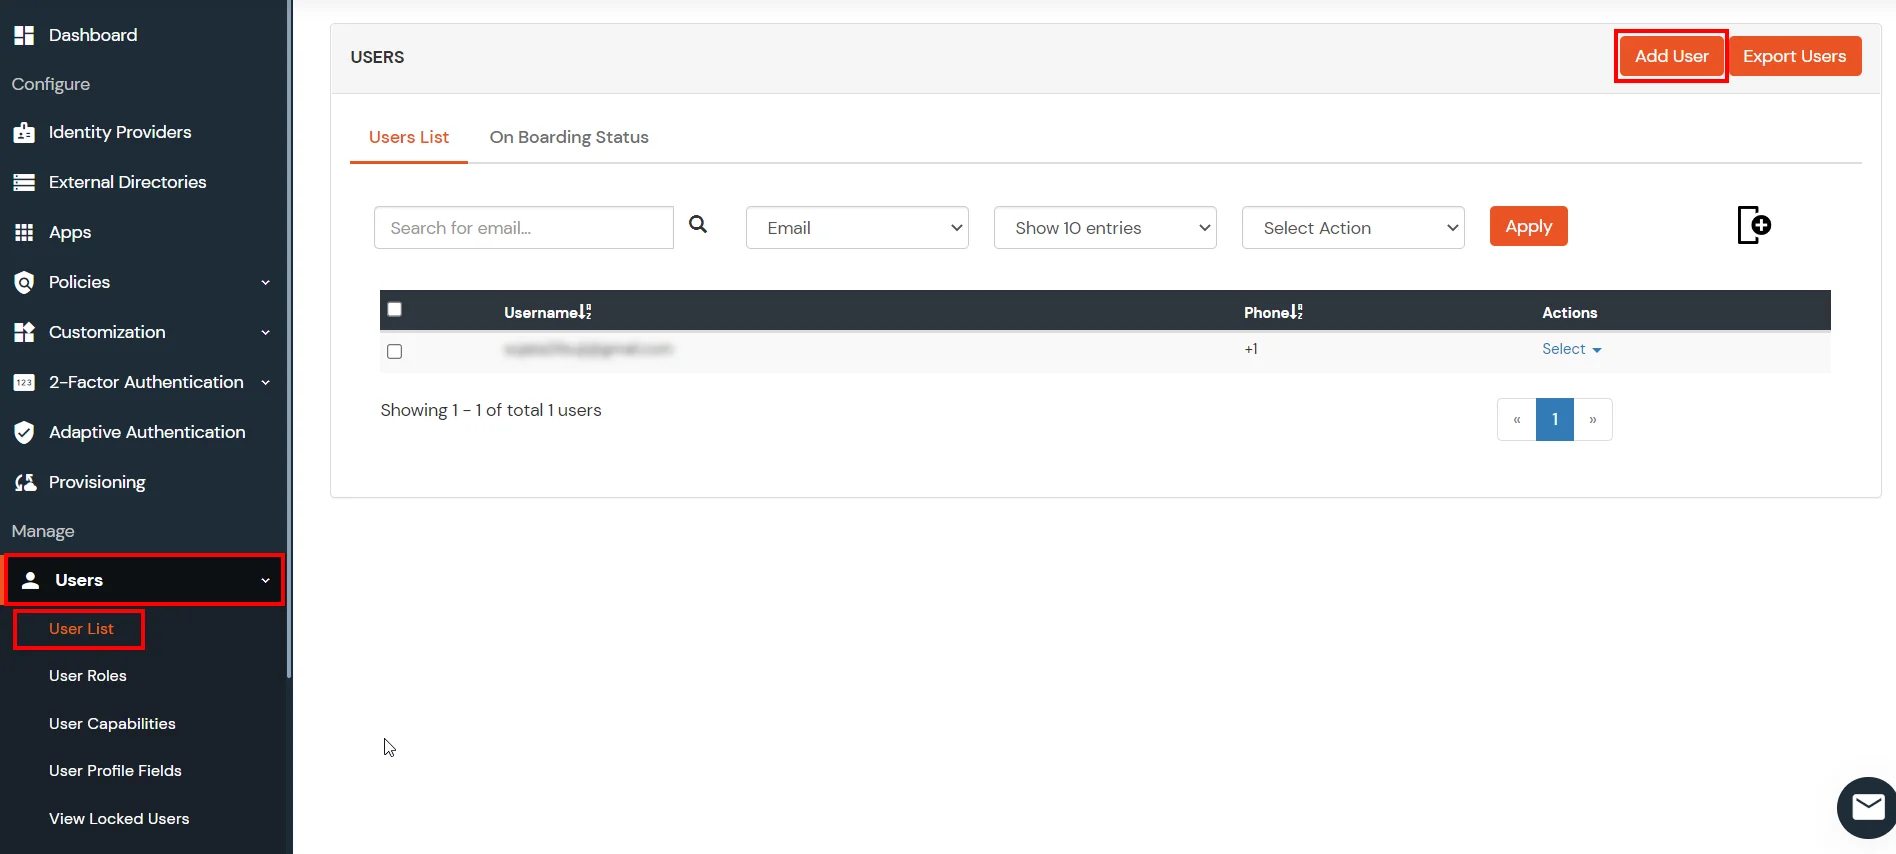
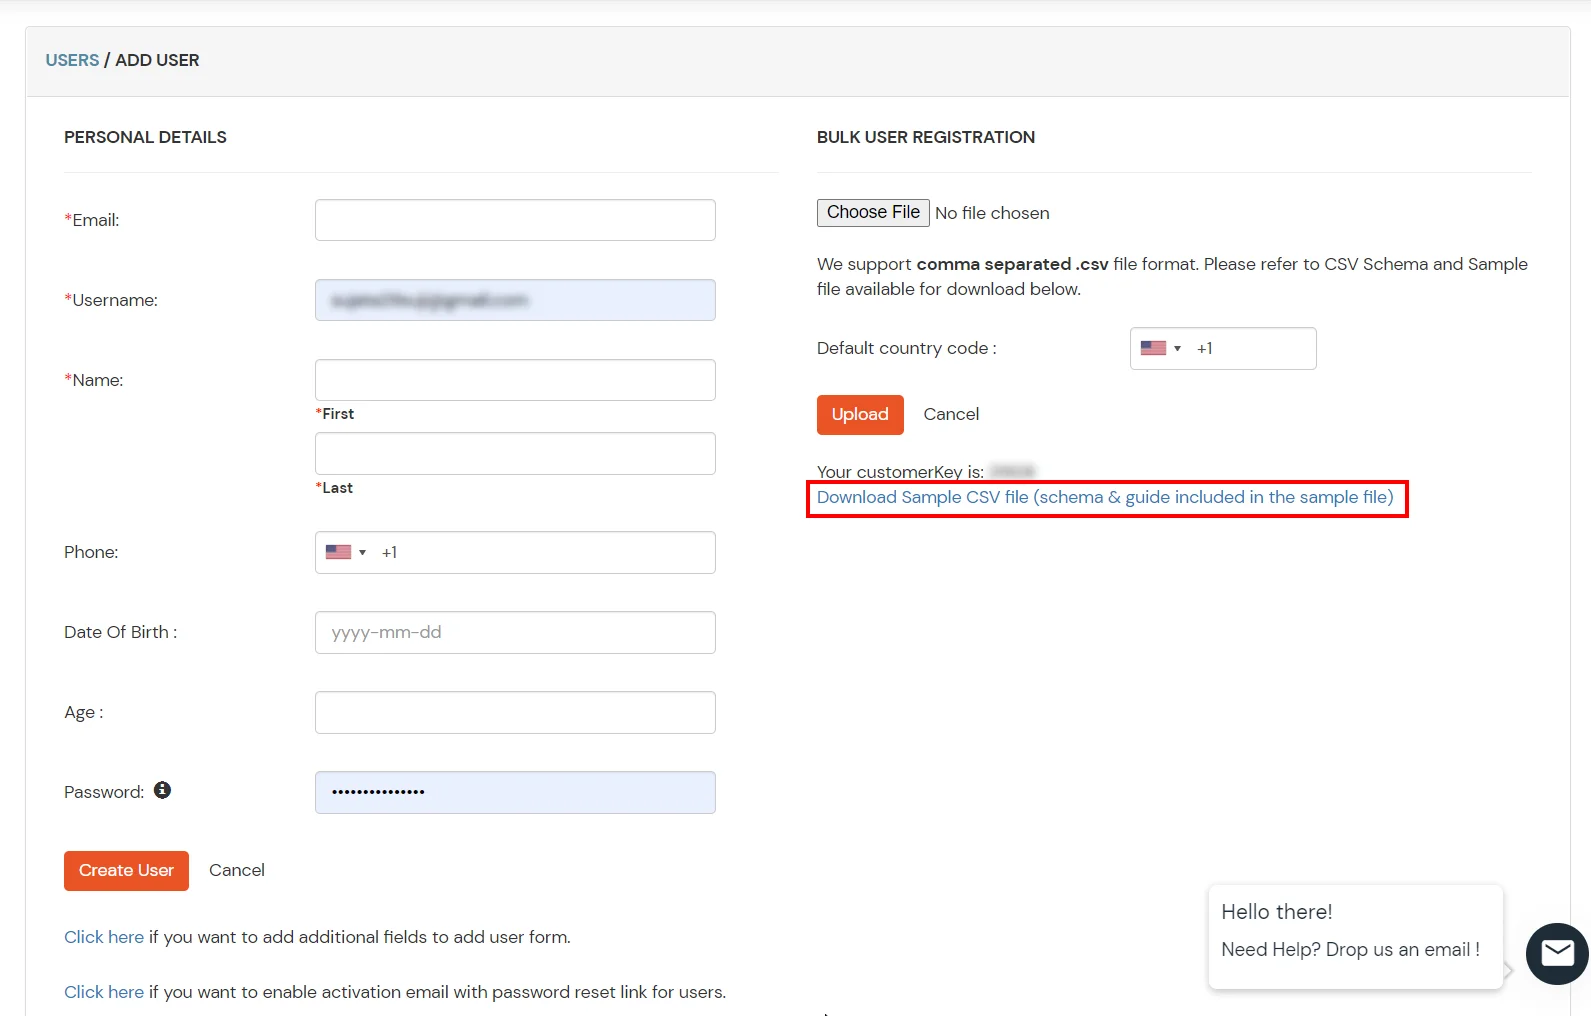
Navigate to Users >> User List. Click on Add User button.
In Bulk User Registration Download sample csv format from our console and edit this csv file according to the instructions.
To bulk upload users, choose the file make sure it is in comma separated .csv file format then click on Upload.
After uploading the csv file successfully, you will see a success message with a link.
Click on that link you will see list of users to send activation mail. Select users to send activation mail and click on Send Activation Mail. An activation mail will be sent to the selected users.
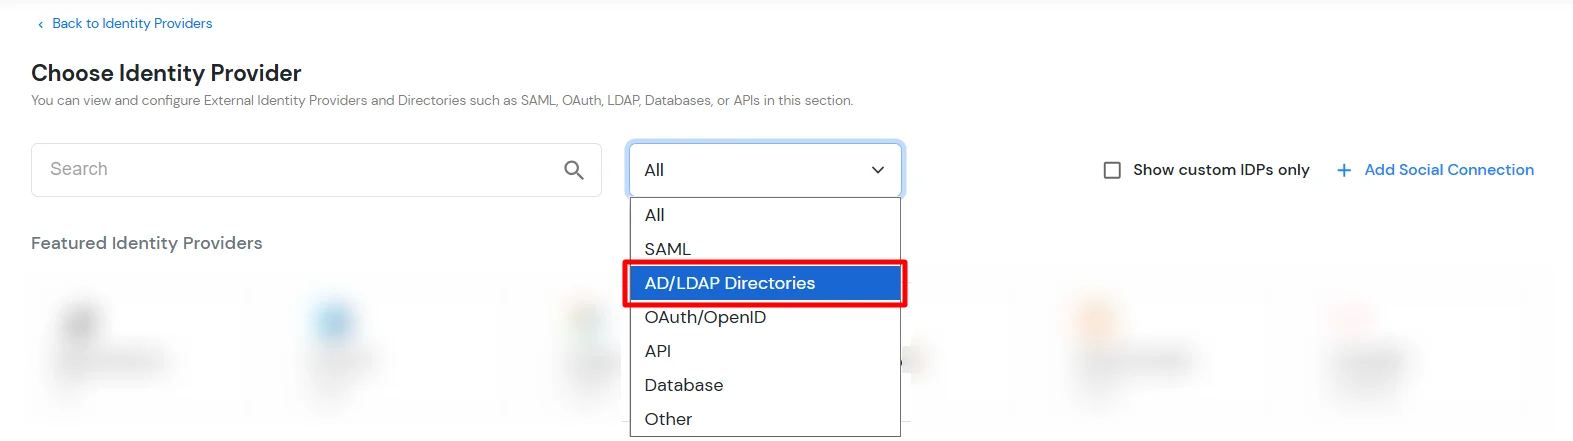
Click on Identity Providers >> Add Identity Provider in the left menu of the dashboard
In Choose Identity Provider, select AD/LDAP Directories from the dropdown.
Then search for AD/LDAP and click it.
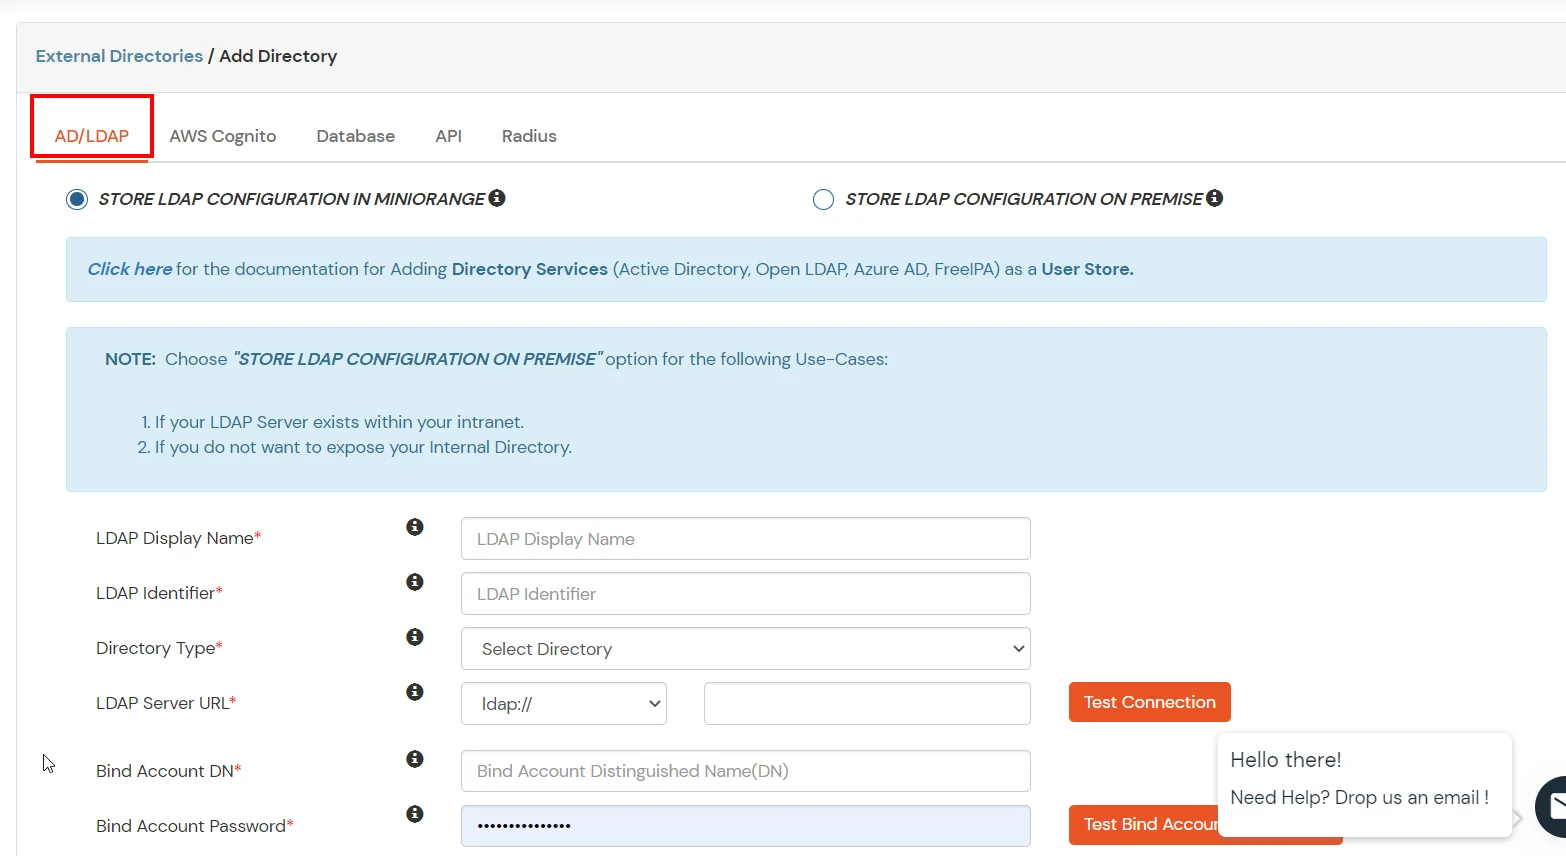
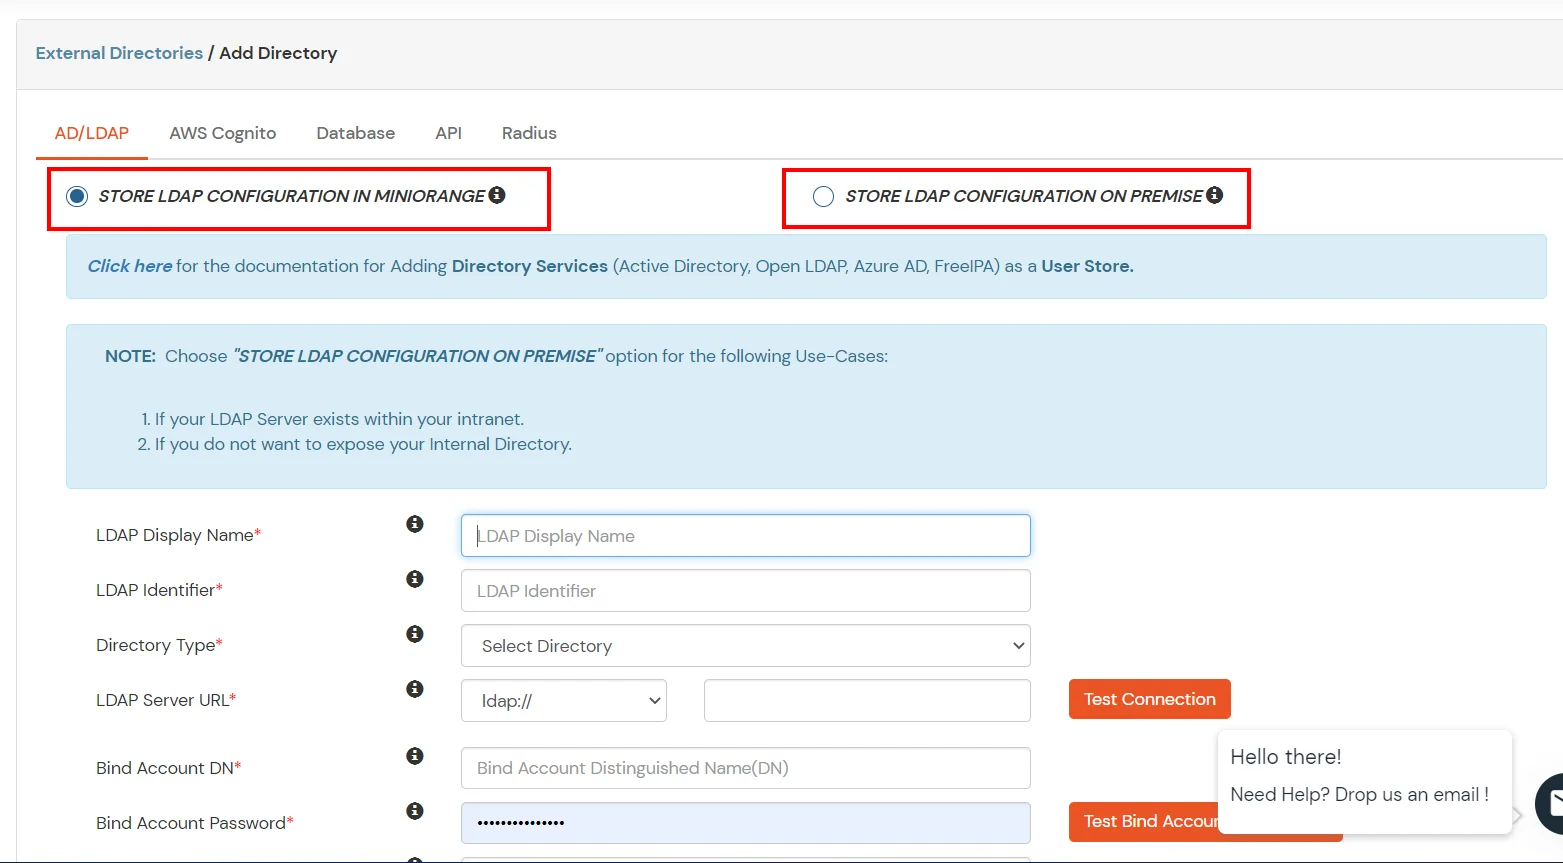
STORE LDAP CONFIGURATION IN MINIORANGE: Choose this option if you want to keep your configuration in miniOrange. If the active directory is behind a firewall, you will need to open the firewall to allow incoming requests to your AD.
STORE LDAP CONFIGURATION ON PREMISE: Choose this option if you want to keep your configuration in your premise and only allow access to AD inside premises. You will have to download and install miniOrange gateway on your premise.
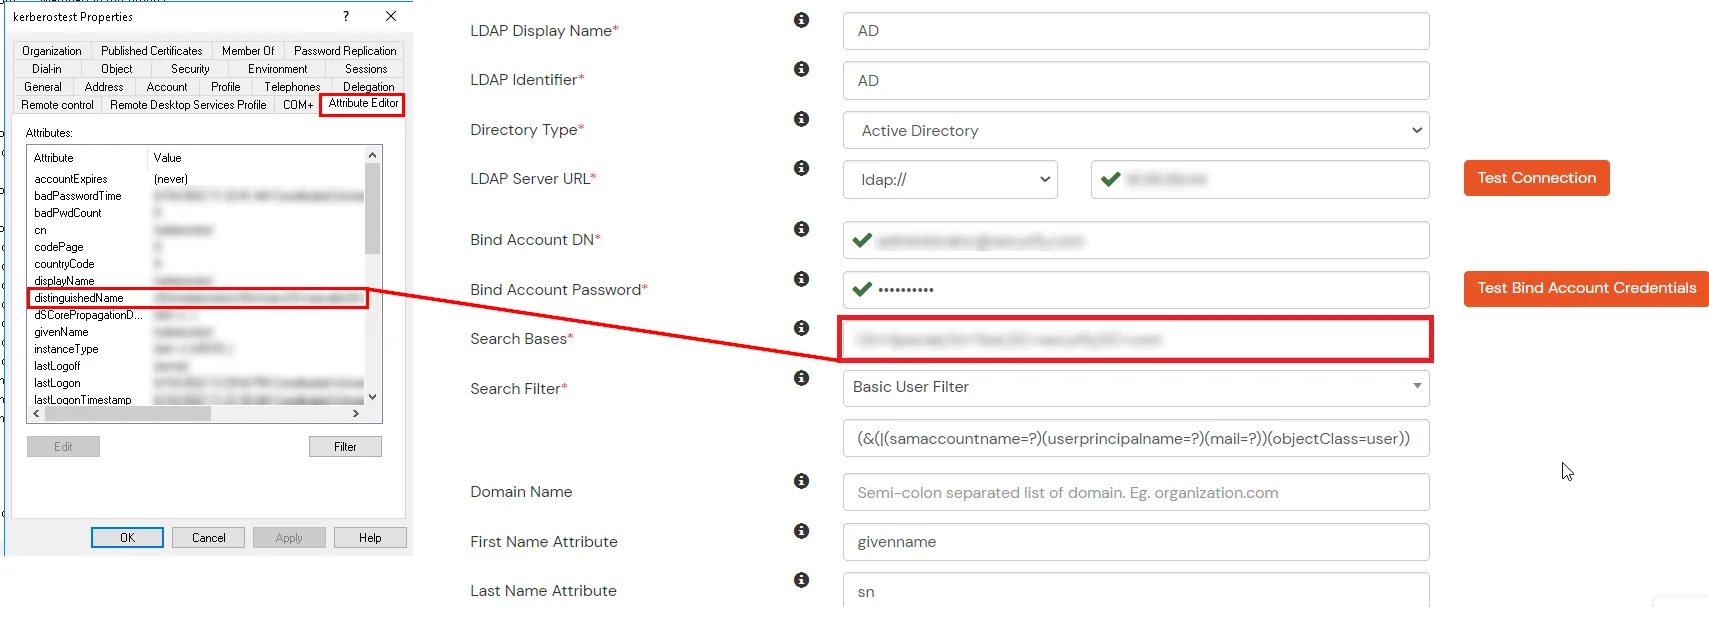
Enter AD/LDAP Display Name and Identifier name.
Select Directory Type as Active Directory.
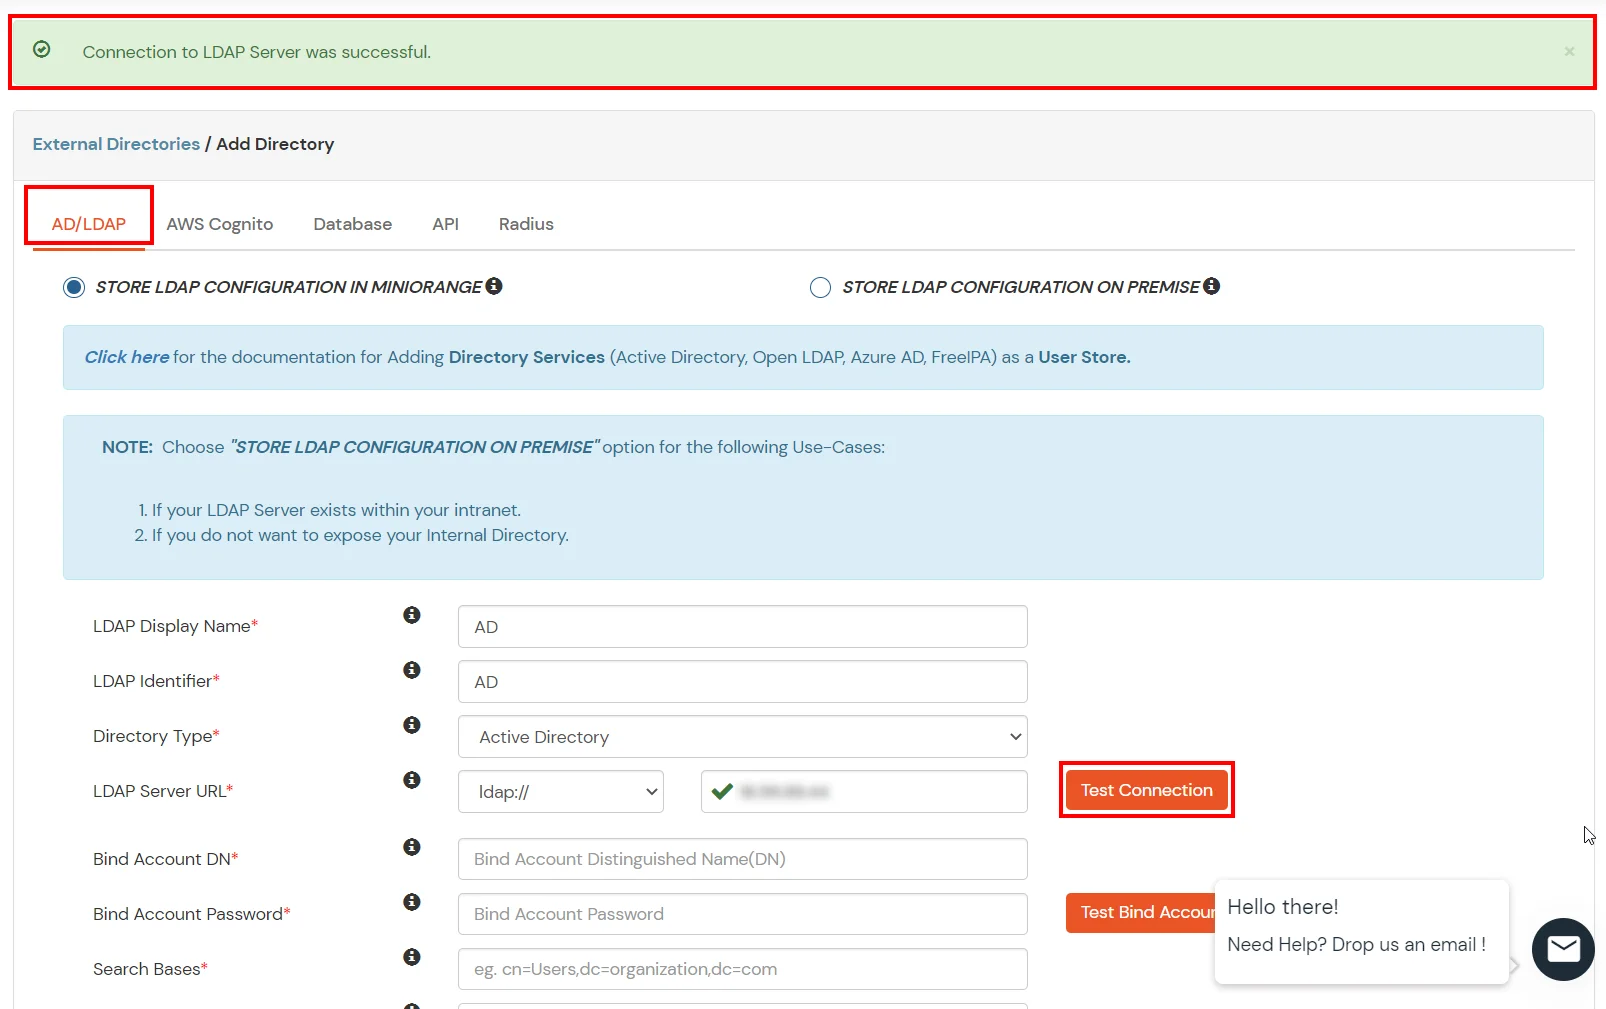
Enter the LDAP Server URL or IP Address against the LDAP Server URL field.
Click on the Test Connection button to verify if you have made a successful connection with your LDAP server.
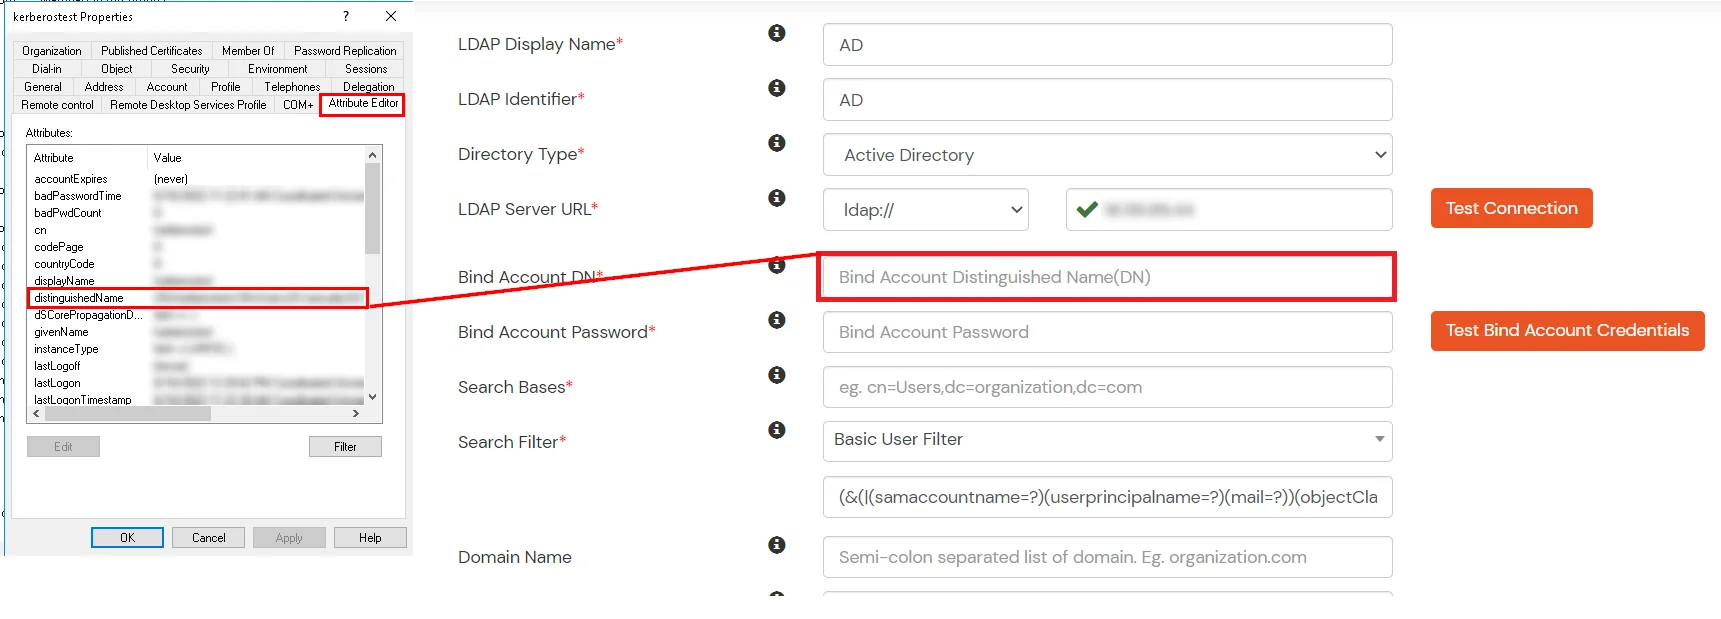
In Active Directory, go to the properties of user containers/OU's and search for the Distinguished Name attribute. The bind account should have minimum required read privileges in Active Directory to allow directory lookups. If the use case involves provisioning (such as creating, updating, or deleting users or groups), the account must also be granted appropriate write permissions.
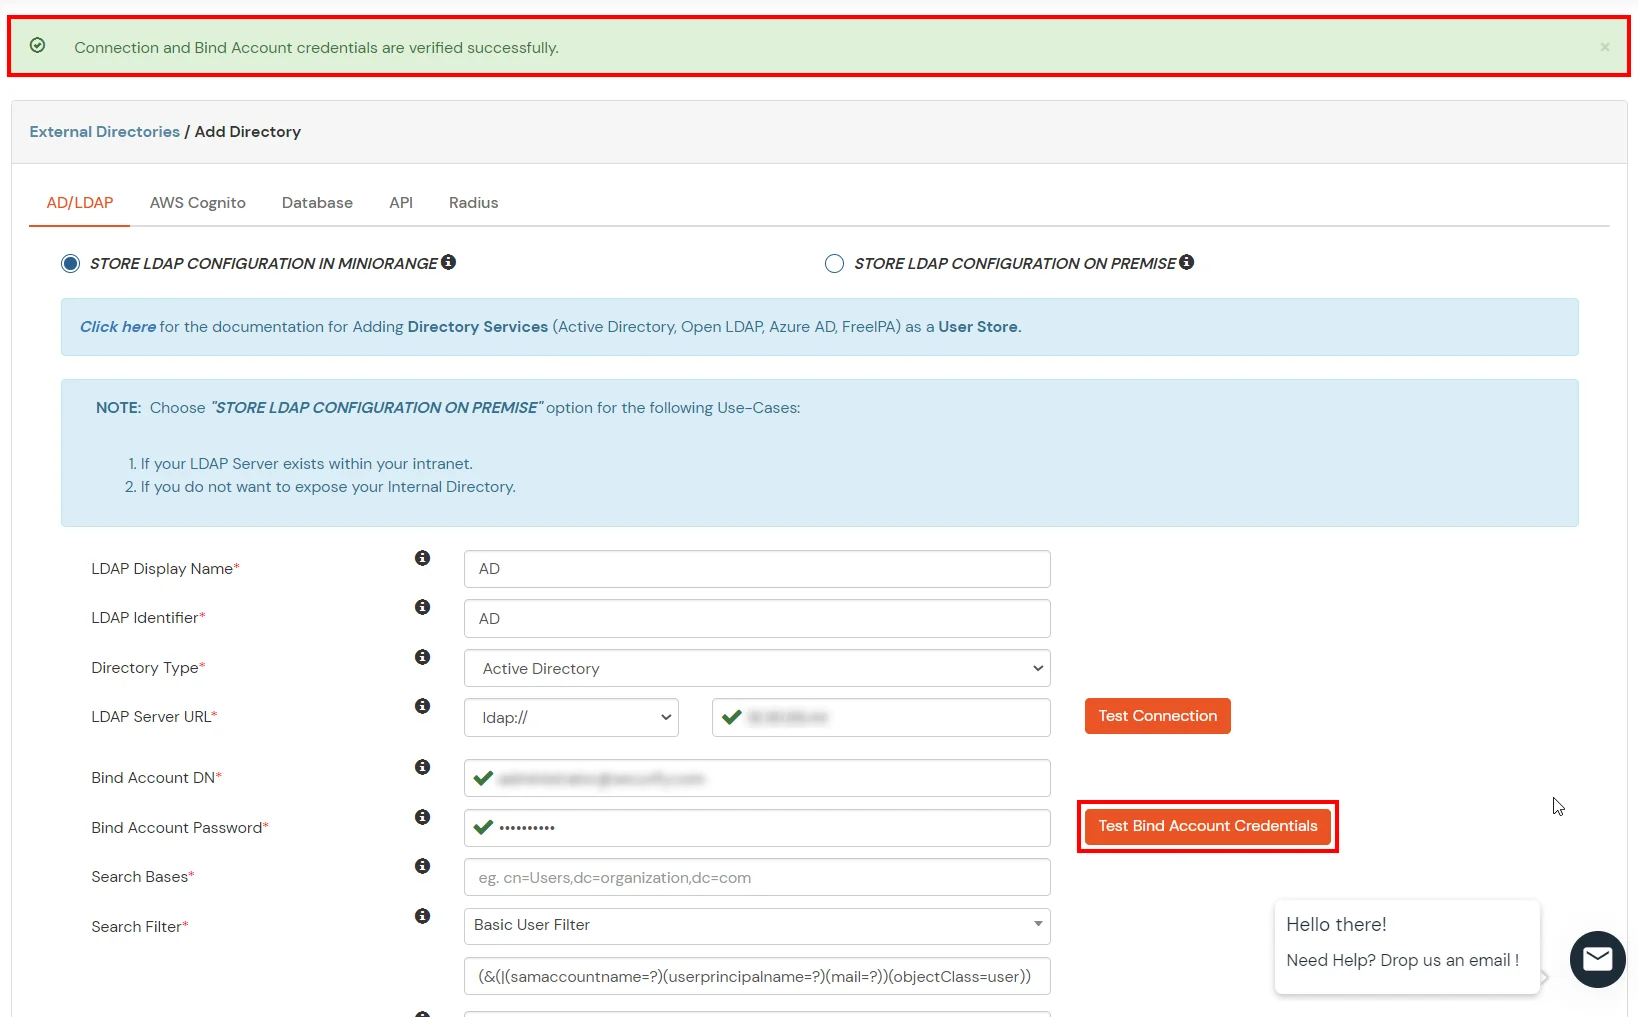
Enter the valid Bind account Password.
Click on the Test Bind Account Credentials button to verify your LDAP Bind credentials for LDAP connection.
Search Base is the location in the directory where the search for a user begins. You will get this from the same place you got your Distinguished name.
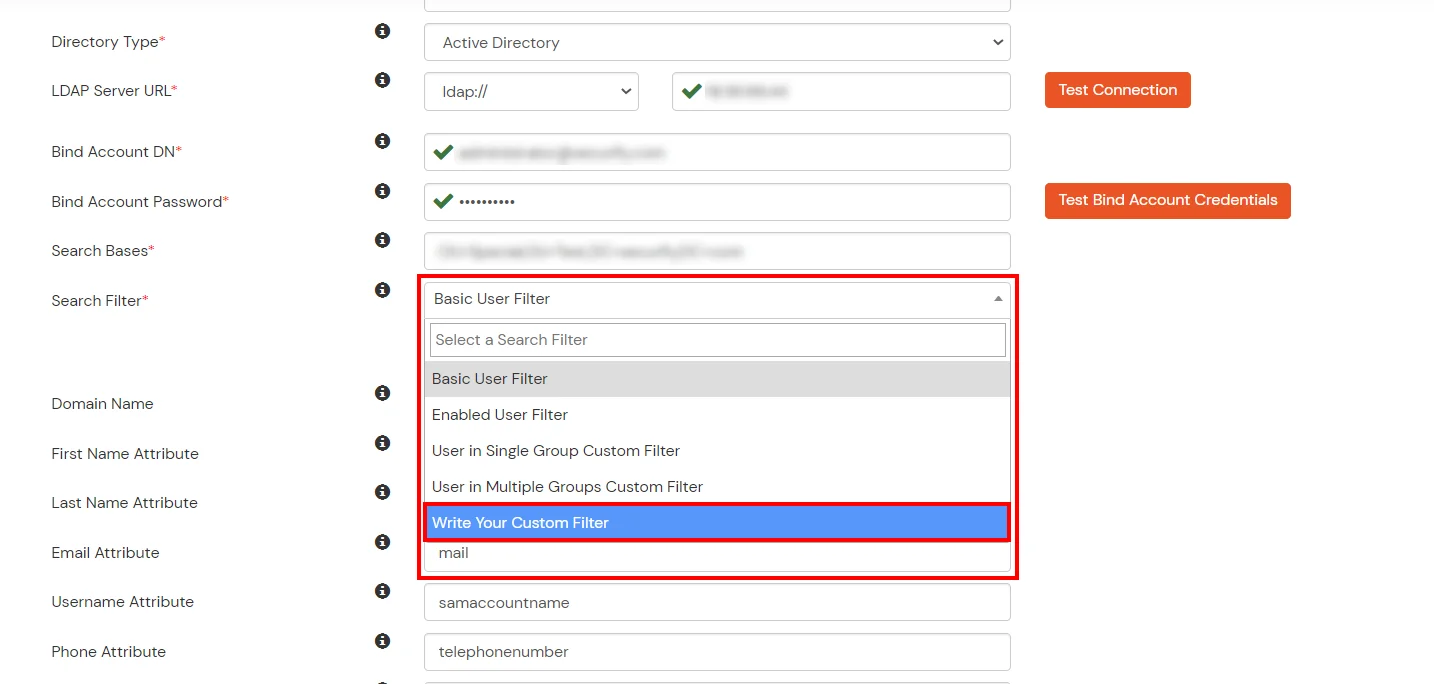
Select a suitable Search filter from the drop-down menu. If you use User in Single Group Filter or User in Multiple Group Filter, replace the <group-dn> in the search filter with the distinguished name of the group in which your users are present. To use custom Search Filter select "Write your Custom Filter" option and customize it accordingly.
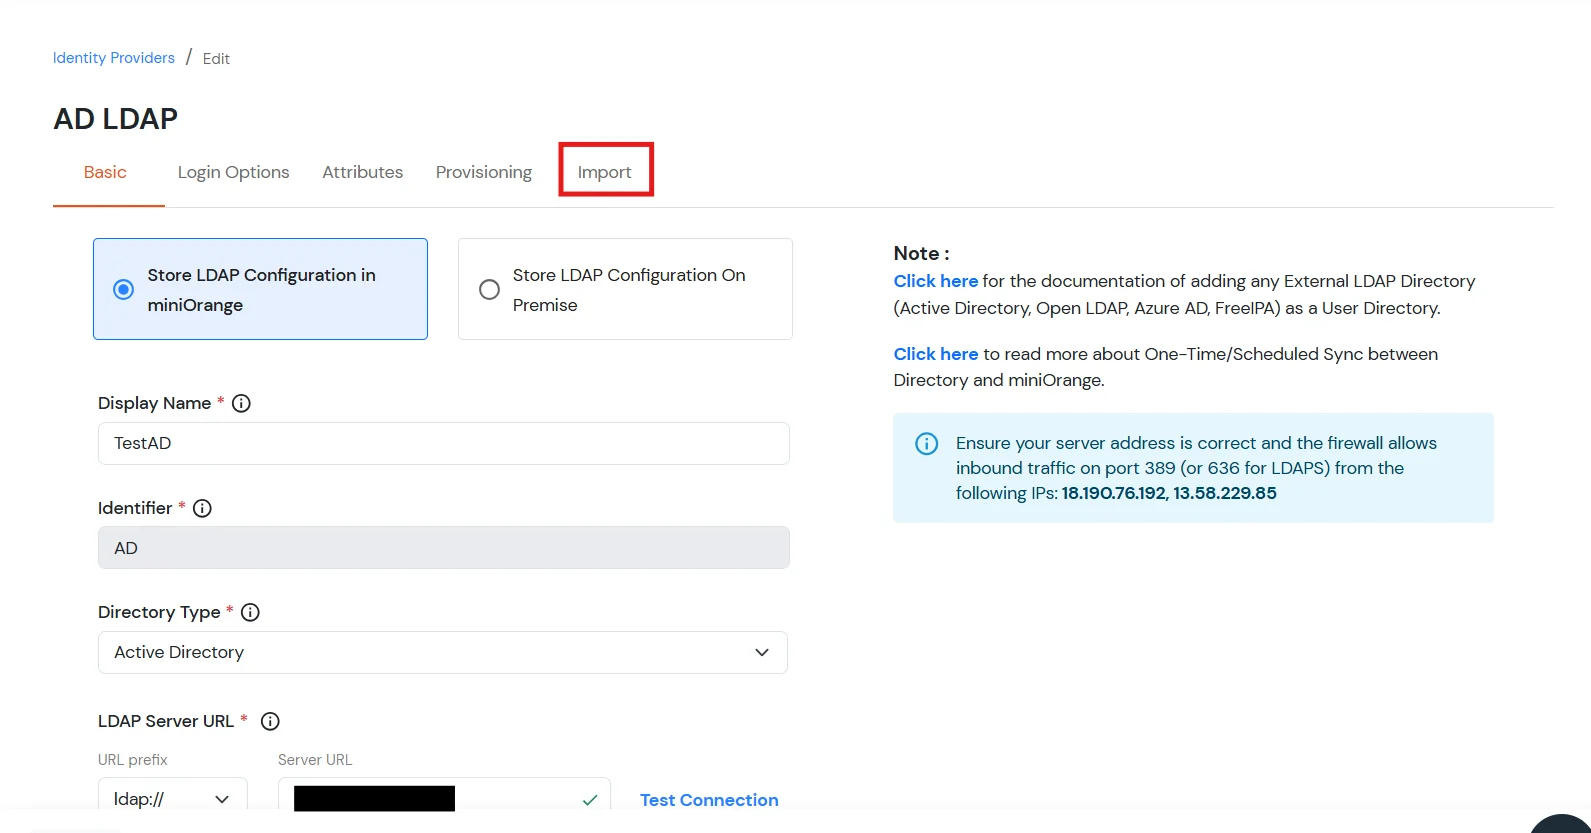
Click on the Next button, or go to the Login Options tab.
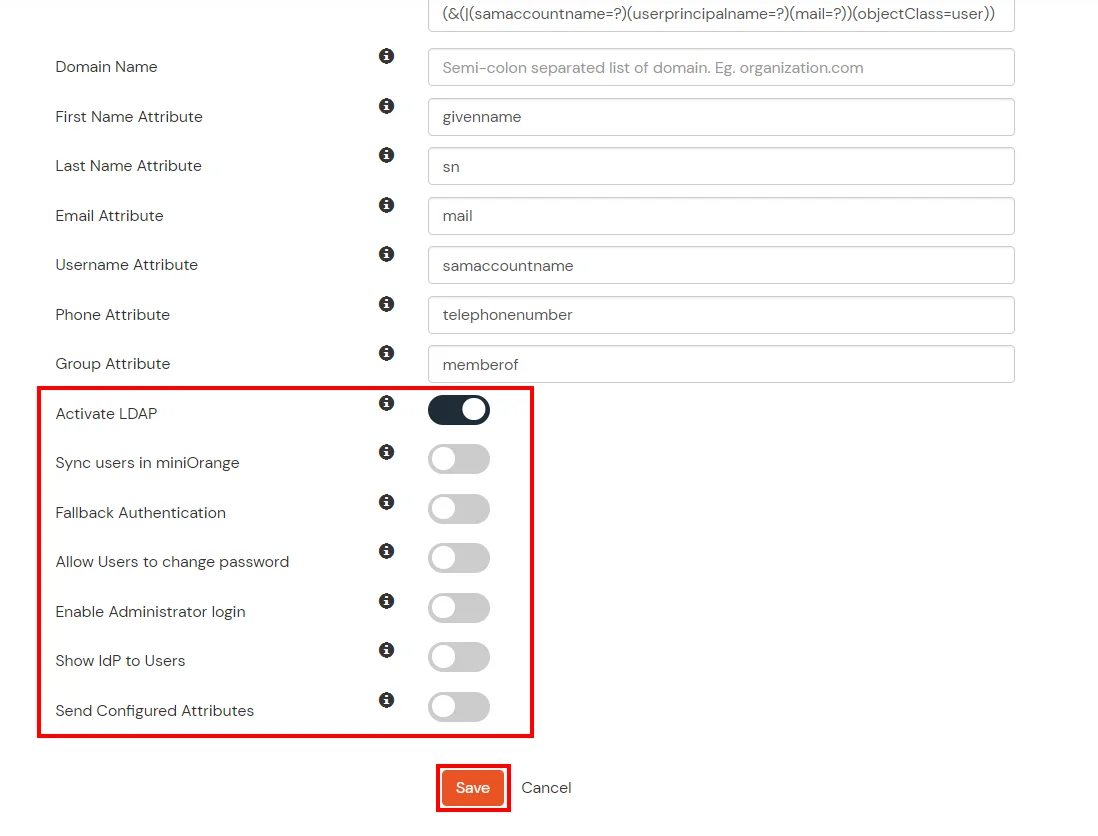
You can also configure following options while setting up AD. Enable Activate LDAP in order to authenticate users from AD/LDAP. Click on the Next button to add user store.
Here's the list of the attributes and what it does when we enable it. You can enable/disable accordingly.
Attribute
Description
Activate LDAP
All user authentications will be done with LDAP credentials if you Activate it
Fallback Authentication
If LDAP credentials fail then user will be authenticated through miniOrange
Enable administrator login
On enabling this, your miniOrange Administrator login authenticates using your LDAP server
Show IdP to users
If you enable this option, this IdP will be visible to users
Sync users in miniOrange
Users will be created in miniOrange after authentication with LDAP
Click on the Next button, or go to the Attributes tab.
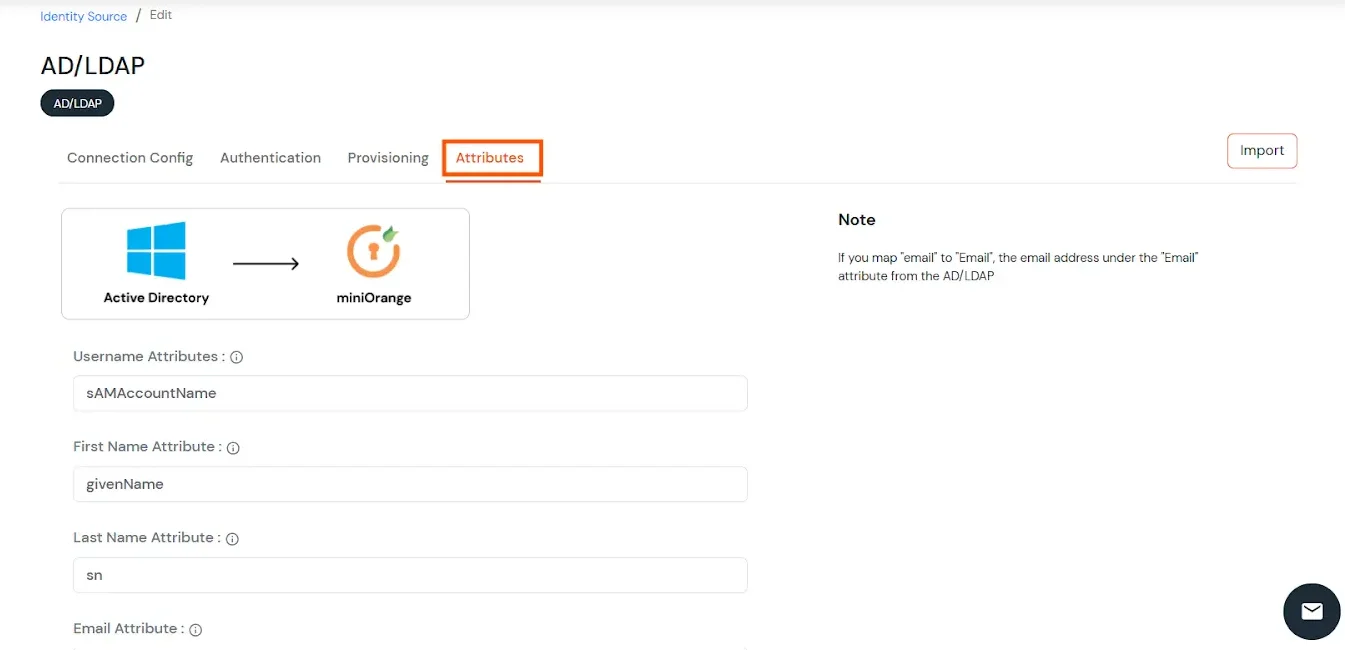
Attributes Mapping from AD
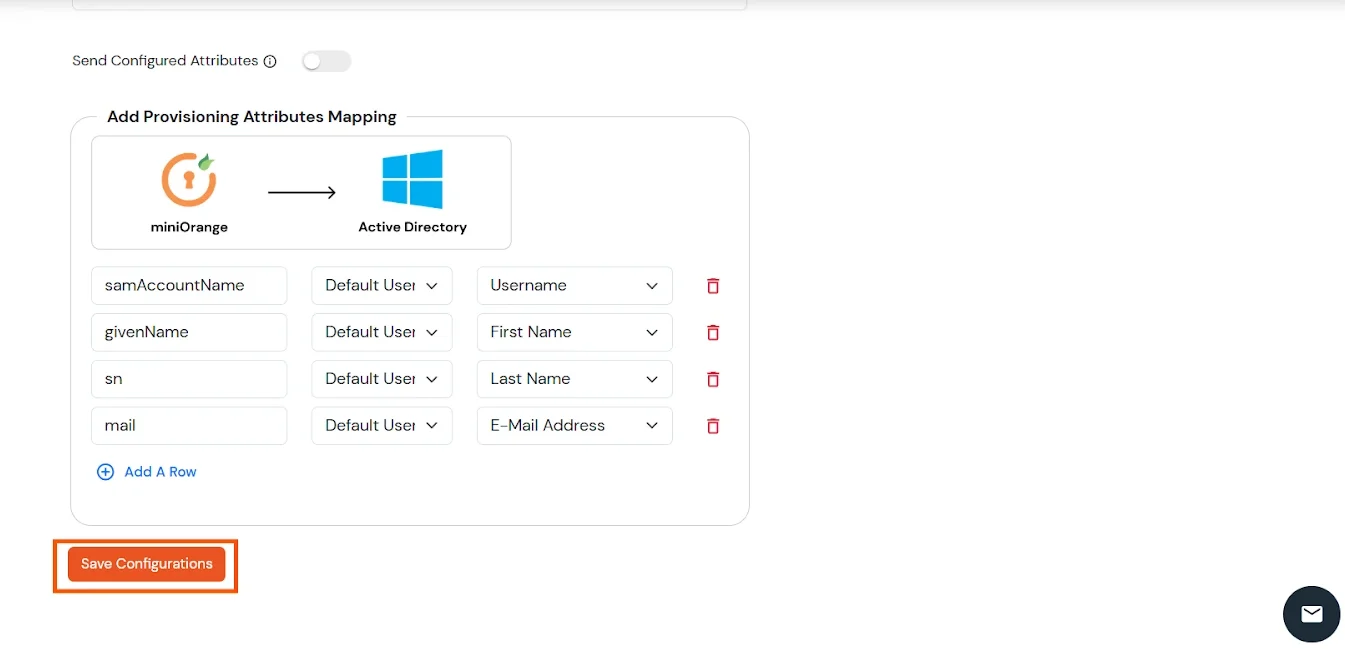
By default userName, firstName, lastName, email are configured. Scroll down and click on Save button. To fetch additional attributes from Active Directory, enable Send Configured Attributes. On the left side, enter the name that you wish to release to the applications. On the right side, enter the attribute name from Active Directory. E.g., if you wish to fetch company attribute from Active Directory, and send it as organization to configured applications, enter the following:
Attribute Name sent to SP = organization Attribute Name from IDP = company
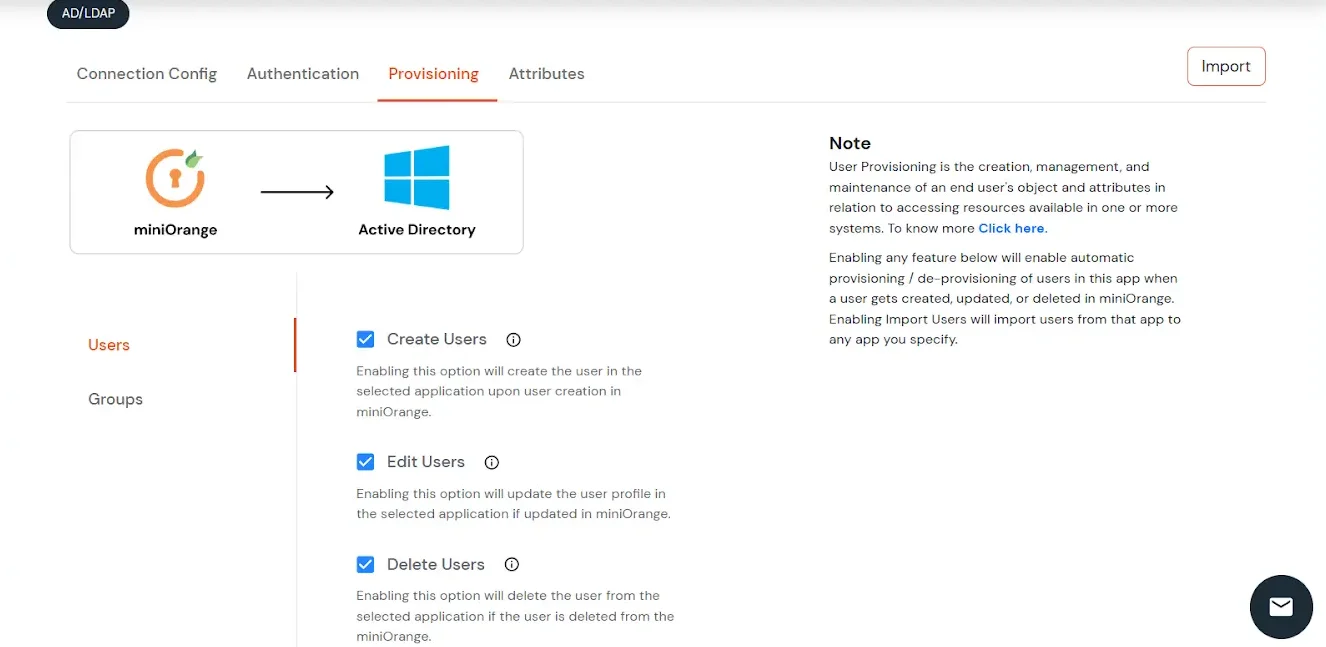
Click on the Next button, or go to the Provisioning tab.
User Import and Provisioning from AD
If you want to set up provisioning, click here for detailed information. We will skip this step for now.
Import Password Policy from AD
If you want to import your Active Directory password policy into miniOrange, click here for detailed information. We will skip this step for now.
Test Connections
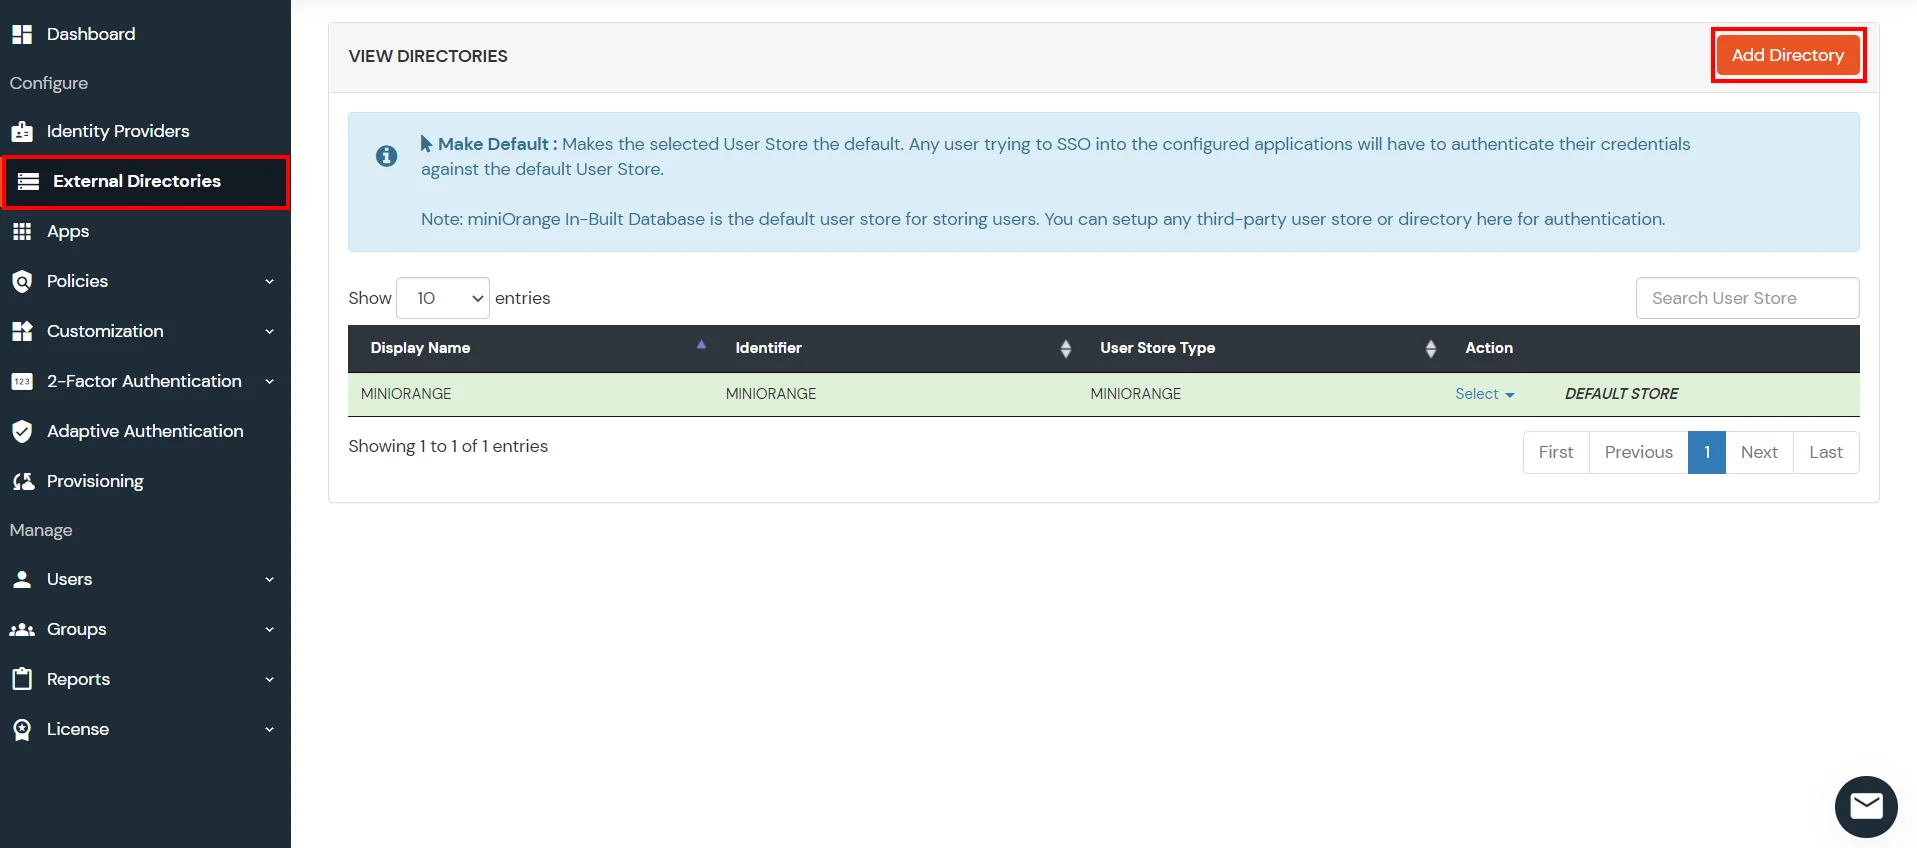
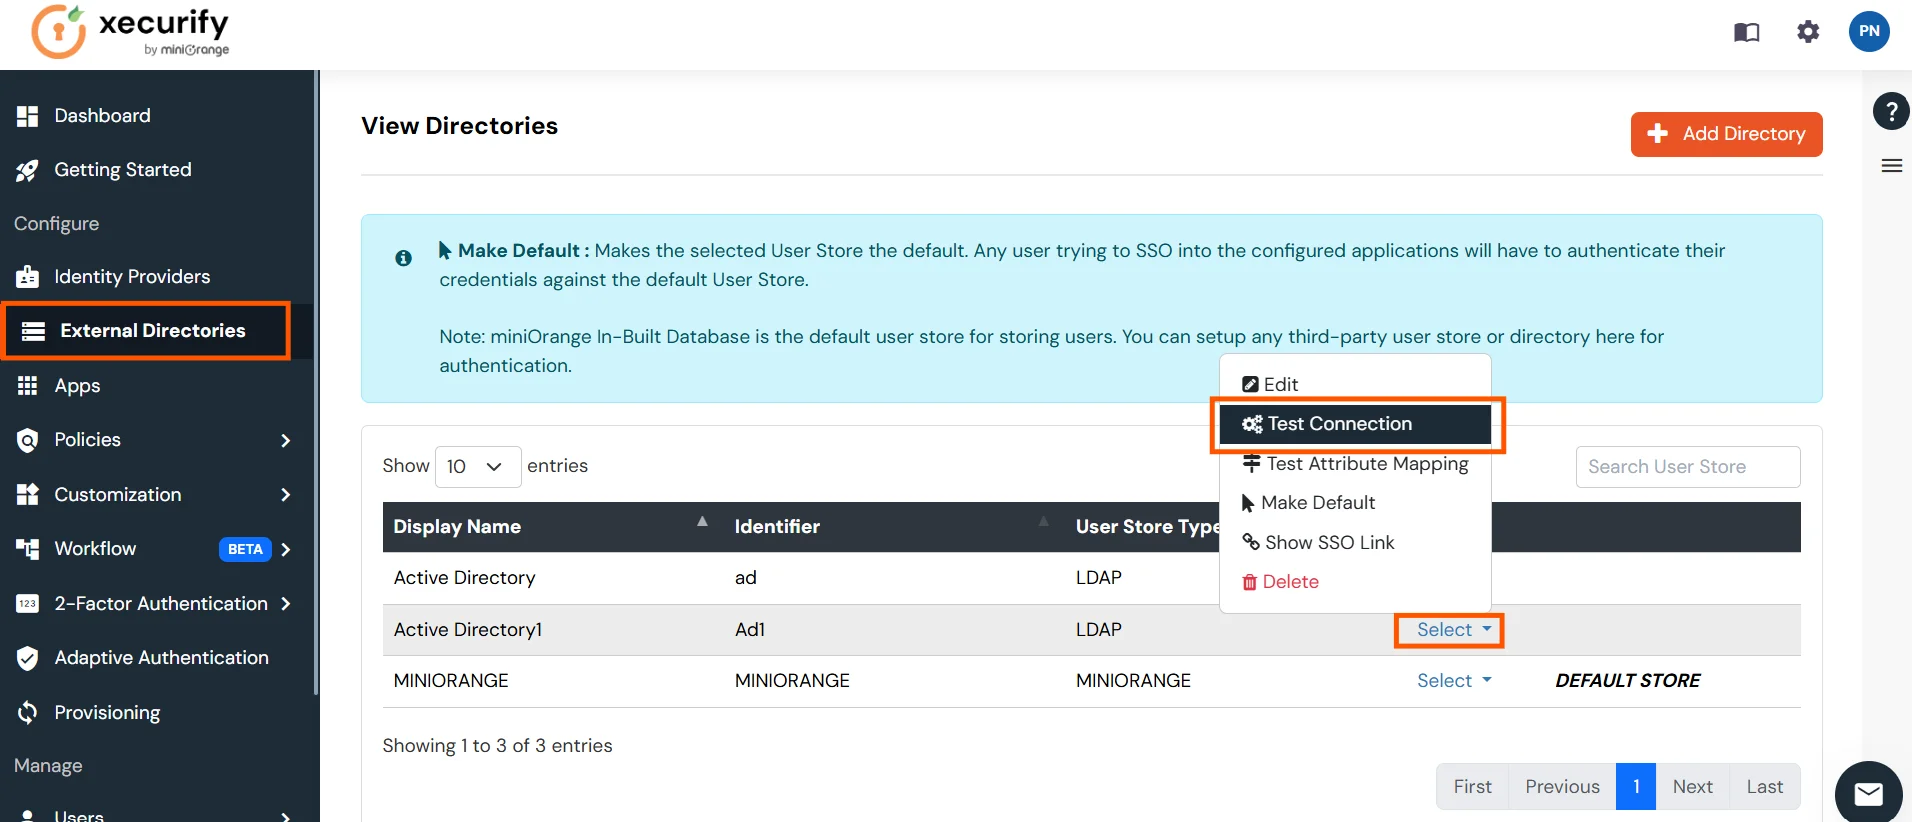
You will see a list of directories under Identity Providers. From the dropdown, select AD/LDAP Directories, search for your configured directory, click the three dots next to it, and select Test Connection.
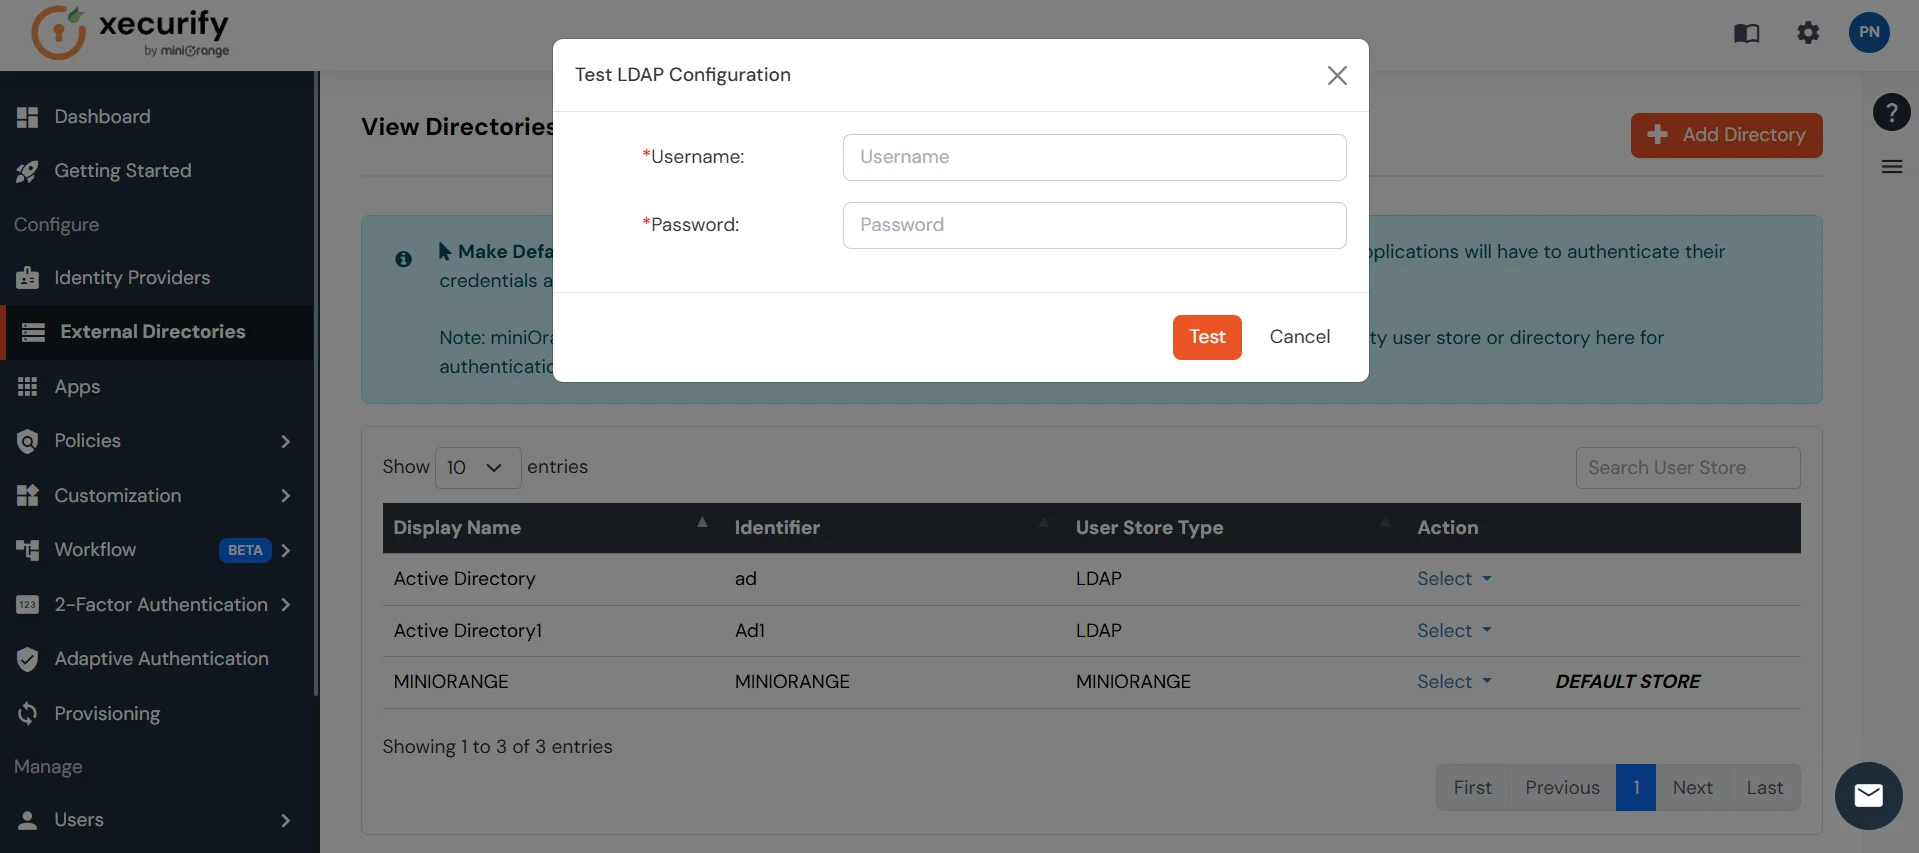
A pop-up appears prompting you to enter a username and password to verify your LDAP configuration.
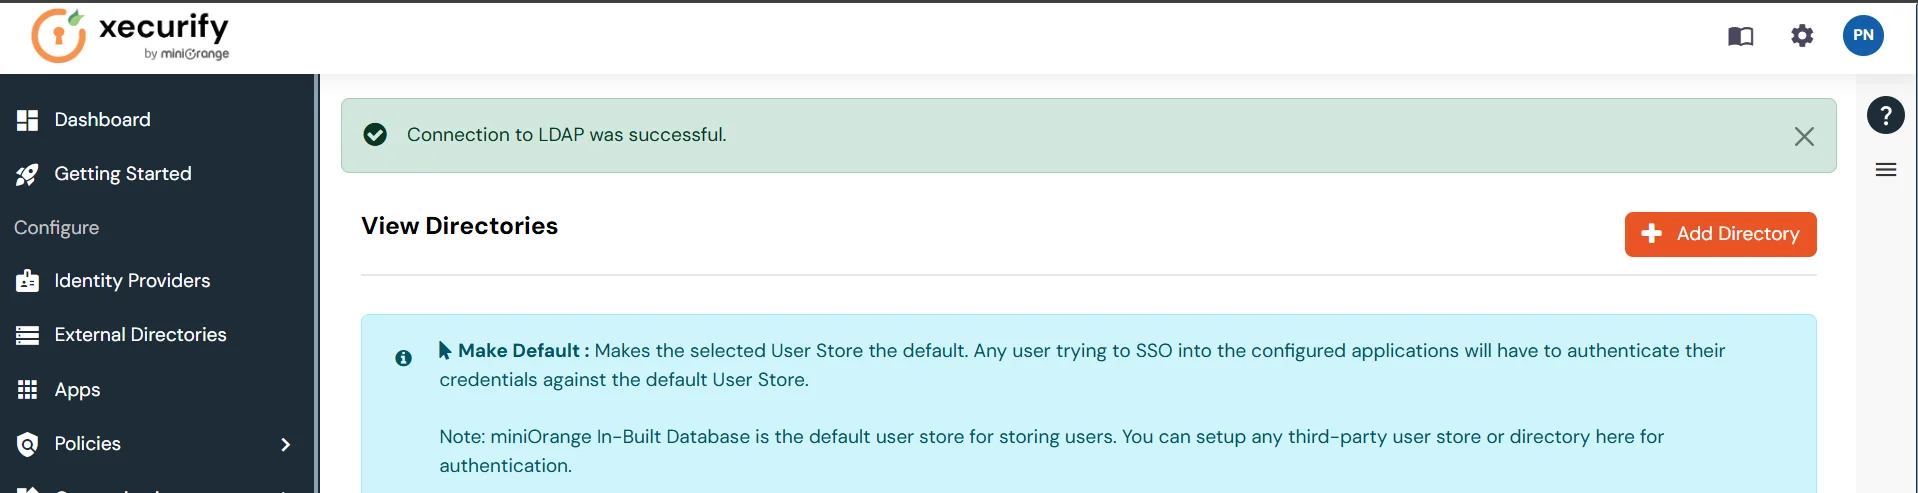
On Successful connection with LDAP Server, a success message is shown.
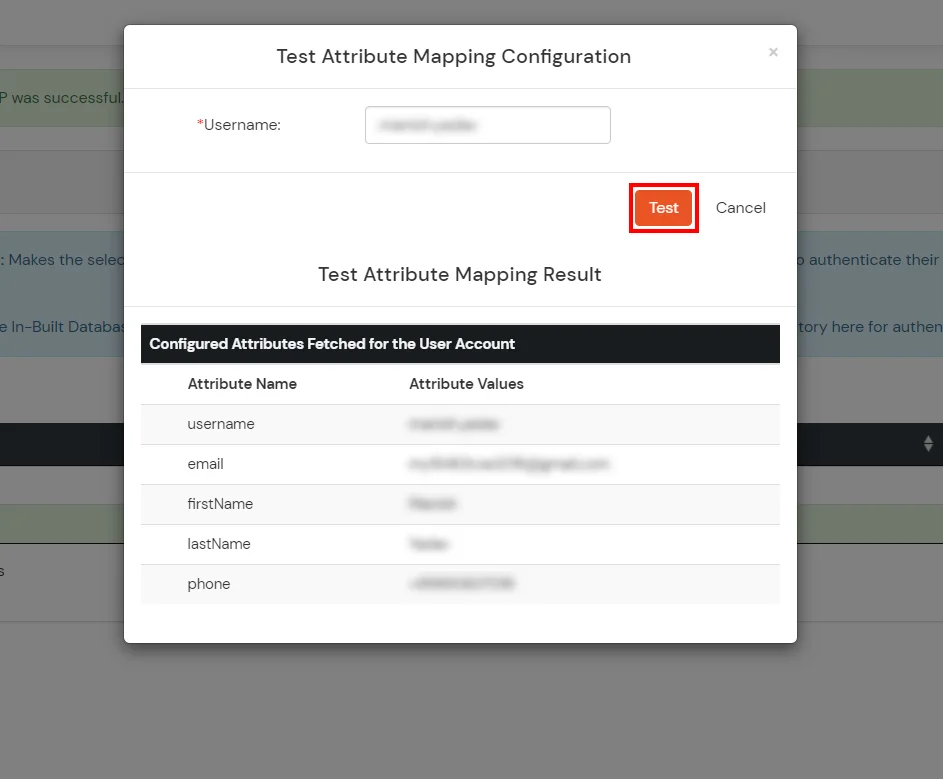
Test Attribute Mapping
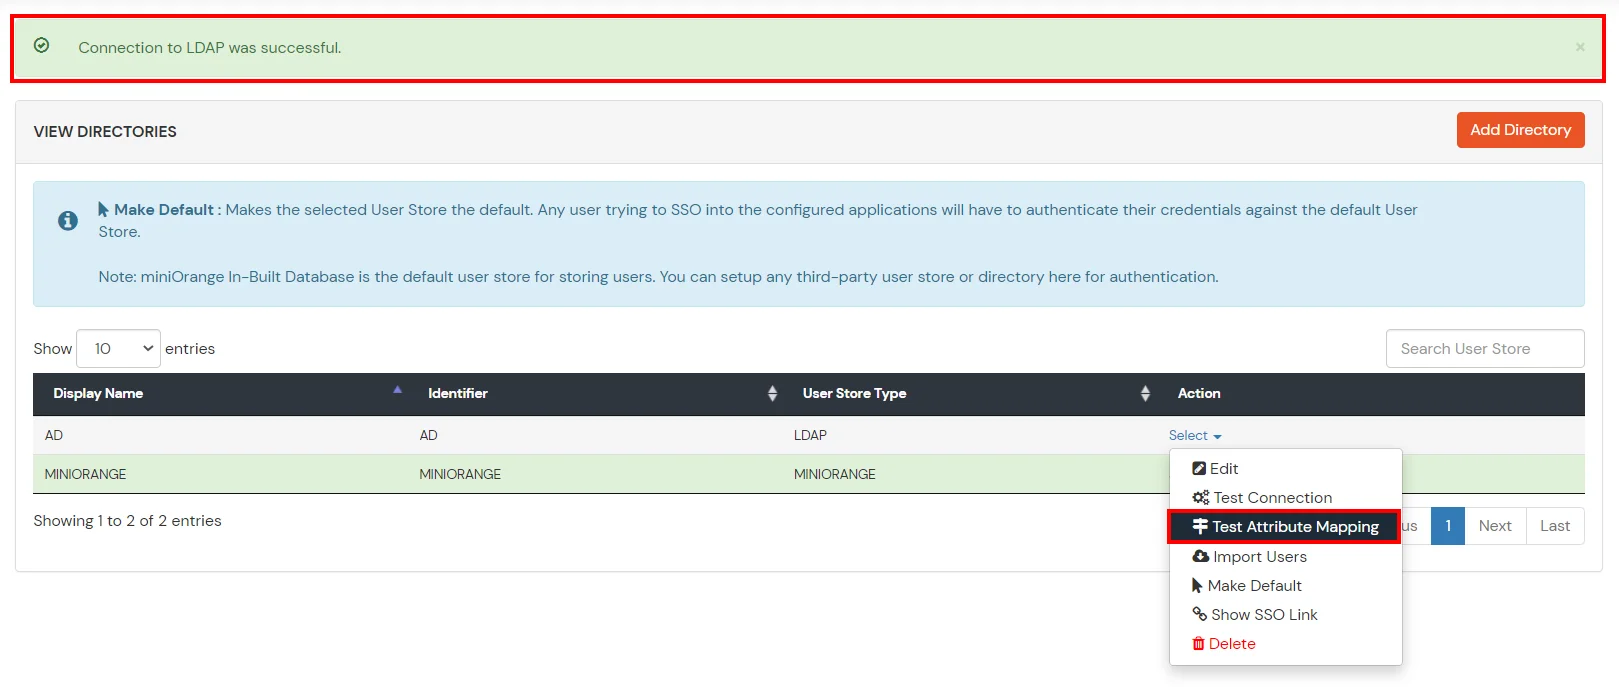
You will see a list of directories under Identity Providers. From the dropdown, select AD/LDAP Directories, search for your configured directory, click the three dots next to it, and select Test Attribute Mapping.
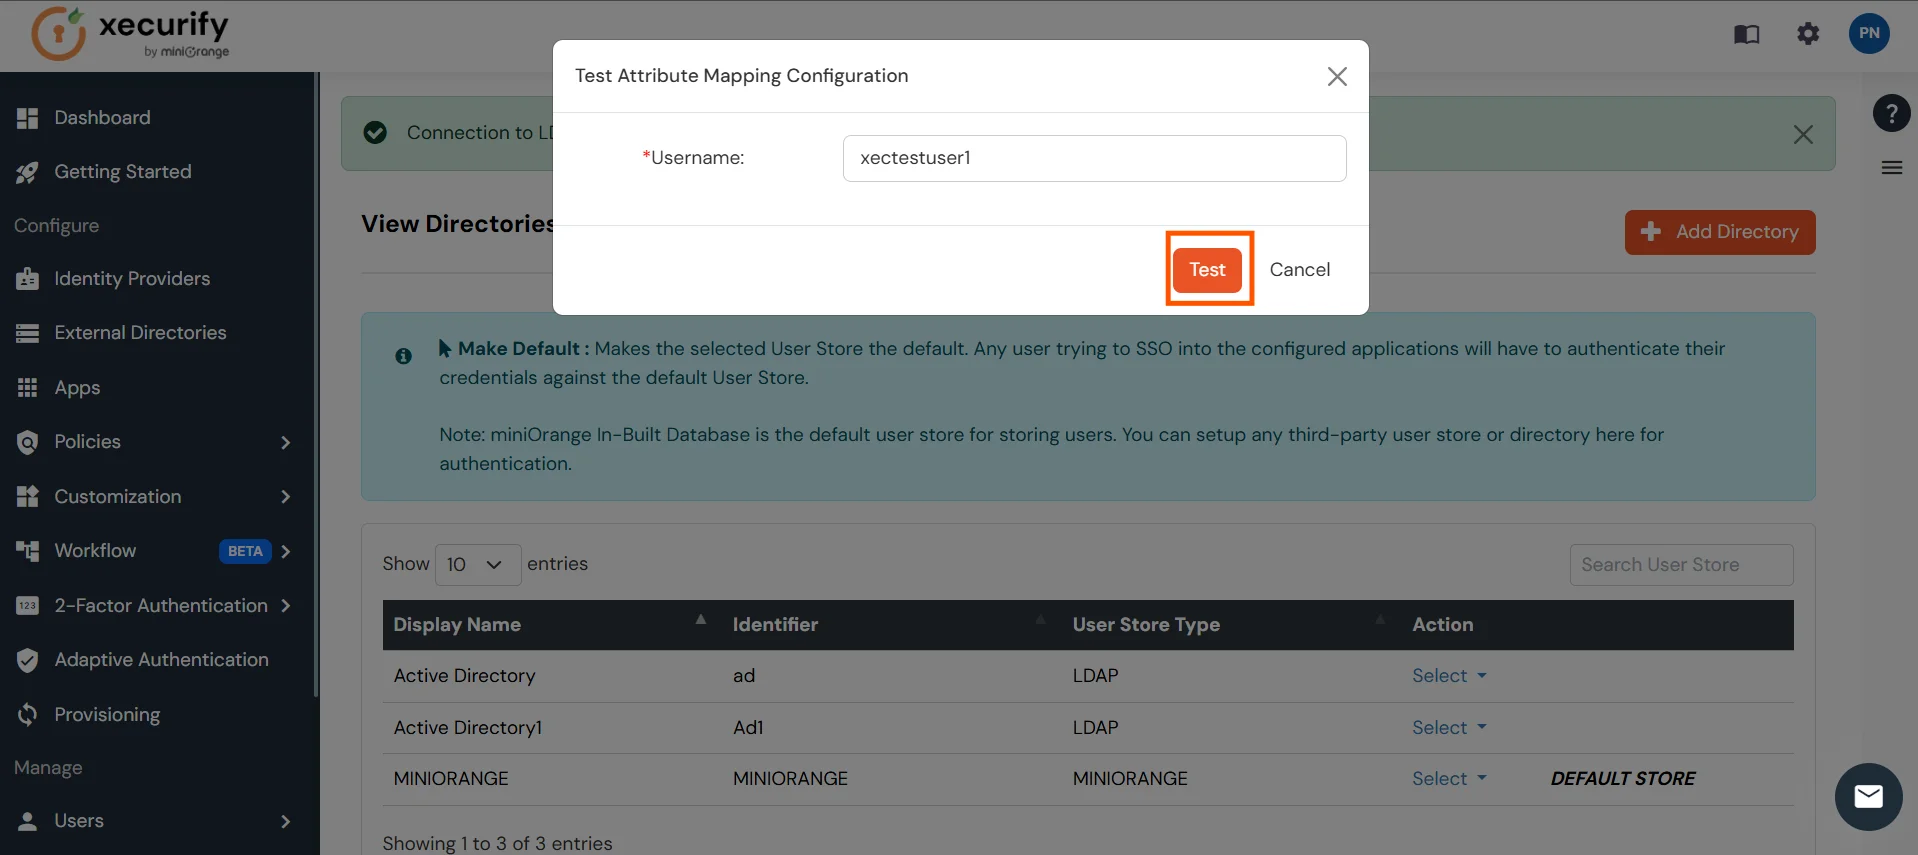
A pop‑up appears to enter a username and click Test.
The Test Attribute Mapping Result will be displayed.
Set up AD as External Directory configuration is complete.
Note: Refer our guide to setup LDAP on windows server.
miniOrange integrates with various external user sources such as directories, identity providers, and etc.