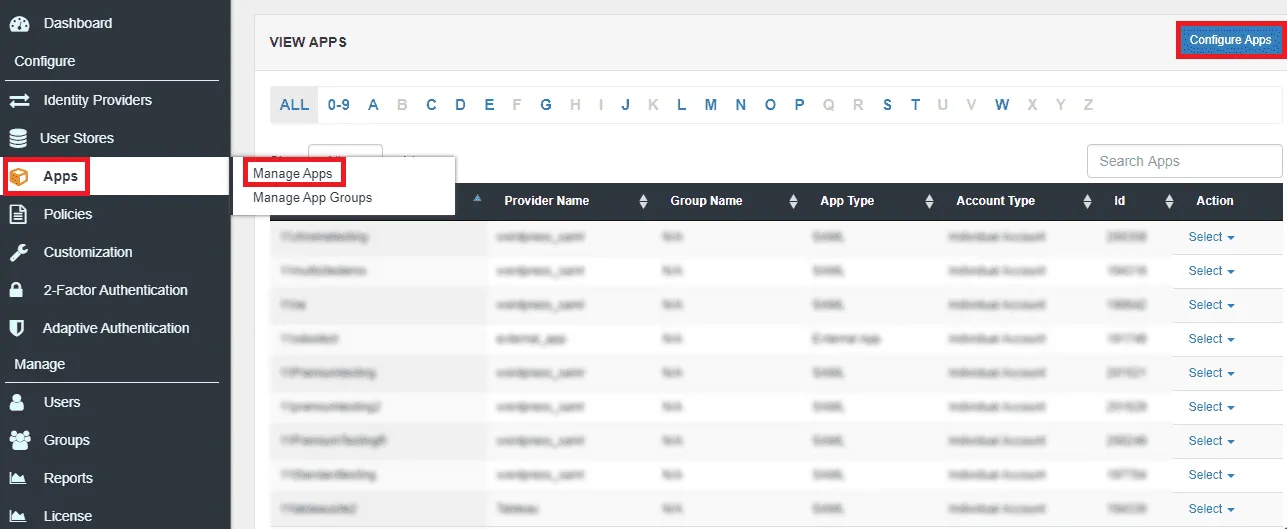
Hello there!
Need Help? We are right here!
Need Help? We are right here!
Search Results:
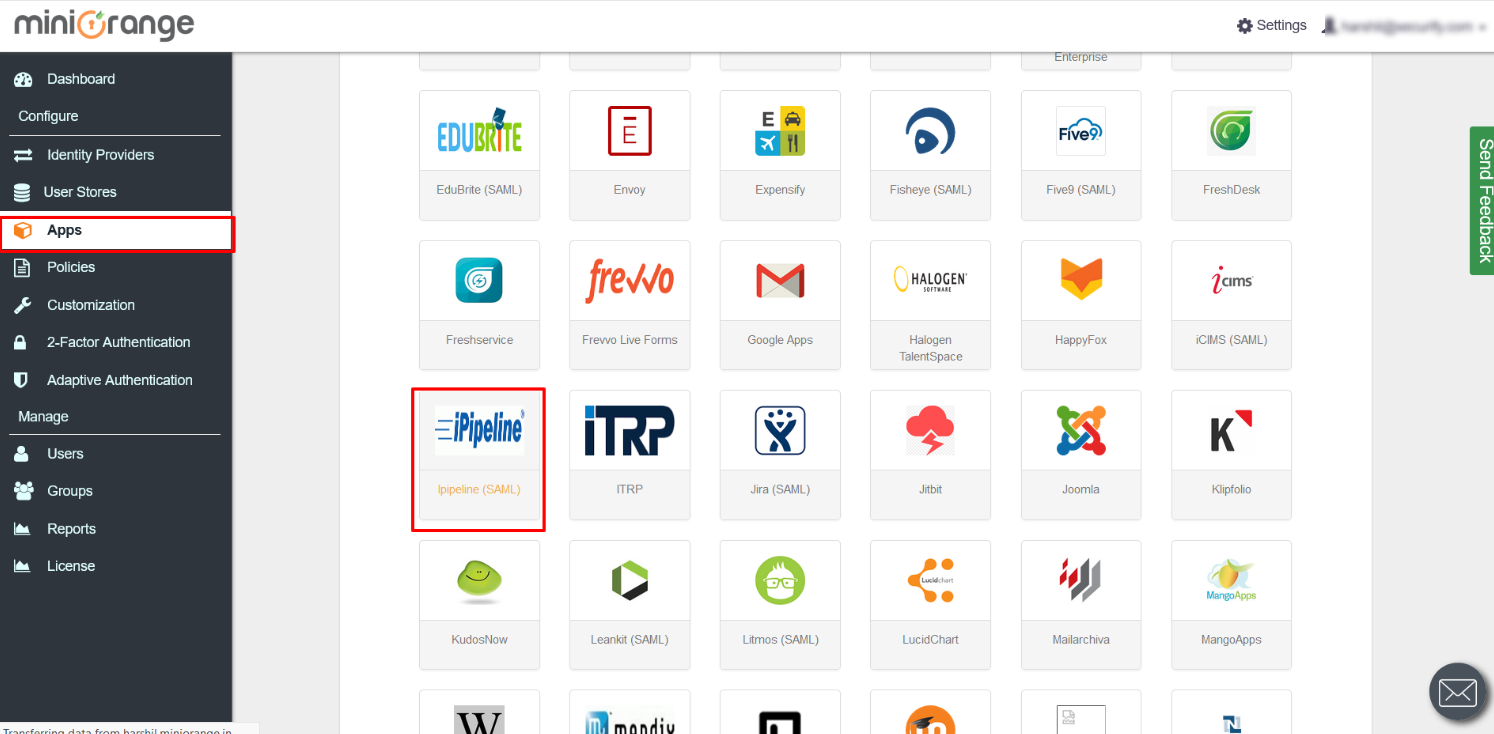
×miniOrange provides secure access to Ipipleine for enterprises and full control over access of iPipeline application. Single Sign On (SSO) into your iPipeline Account with one set of login credentials.
miniOrange Identity Management Features
miniOrange Single Sign-On (SSO) Solution provides easy and seamless access to all enterprise resources with one set of credentials. miniOrange also provides secure authentication by establishing a trust relationship between the Service Provider and Identity Provider. miniOrange Single Sign-On supports SSO to any type of device or application whether they are in the cloud or on-premise. Learn More
Secure your iPipeline application from password theft using multi-factor authentication methods with 15+ authentication types provided by miniOrange. Our multi-factor authentication methods prevent unauthorized users from accessing information and resources having passwords alone as an authentication factor. Enabling second-factor authentication for iPipeline protects you against password thefts. Learn More
miniOrange provides IP blocking/IP restriction for iPipeline login which adds security to Gmail, Web, and other applications. In this, we provide you option for IP blocking which includes both automatic (based on user behavior) and manual IP blocking which includes blacklisting and whitelisting of IP addresses to provide access restriction, the office only access, intranet access & network restriction. Learn More
miniOrange Adaptive Authentication aims to provide a better experience to reduce the authentication burden on users while enforcing strong authentication where it is needed the most. For example, when a user attempts to access an application via an unregistered device then they may be prompted to register it. If the user logs in from a geographical location other than their office, they may be asked to answer security questions. Learn More
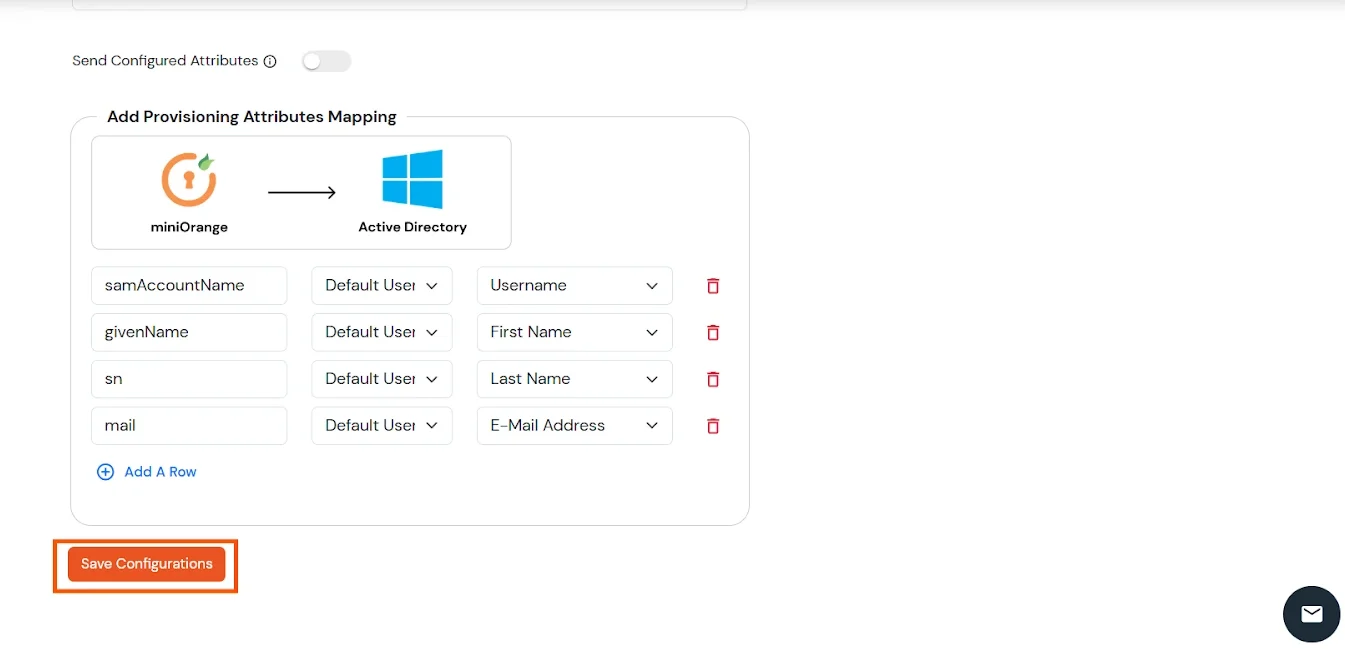
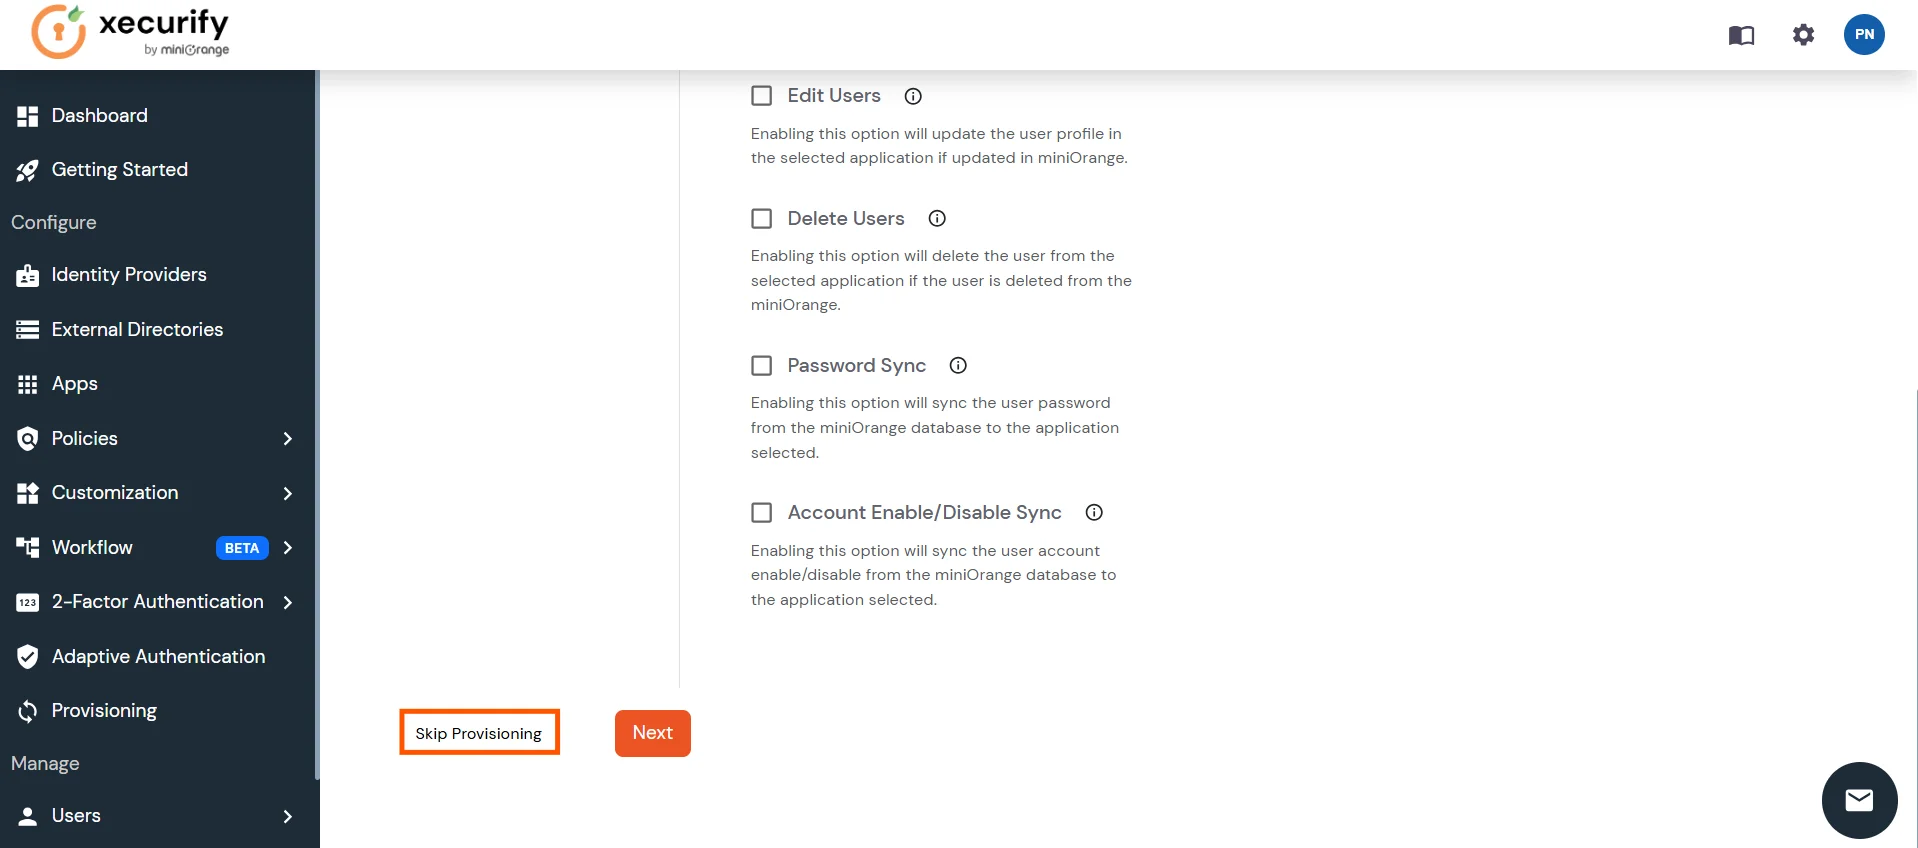
miniOrange User Provisioning provides an easy way of creation, management, and maintenance of end-users especially for large enterprises to reduce the risk for unauthorized access of information. User provisioning includes the creation, updating and deletion of user accounts. User provisioning makes life easier for admins because they do not have to manually arrange access for each user. Learn More
miniOrange supports both IdP (Identity Provider) and SP (Service Provider) initiated Single Sign On (SSO)
In IdP Initiated Login, SAML request is initiated from miniOrange IdP.
In SP Initiated Login, SAML request is initiated by iPipeline.
miniOrange provides user authentication from external directories like ADFS, Microsoft Active Directory, Microsoft Entra ID, OpenLDAP, Google, AWS Cognito etc. It also provides user authentication with other IDPs like Shibboleth, PING, Okta, OneLogin, KeyCloak and many more.
Can't find your IDP ? Contact us on idpsupport@xecurify.com. We'll help you set it up in no time.
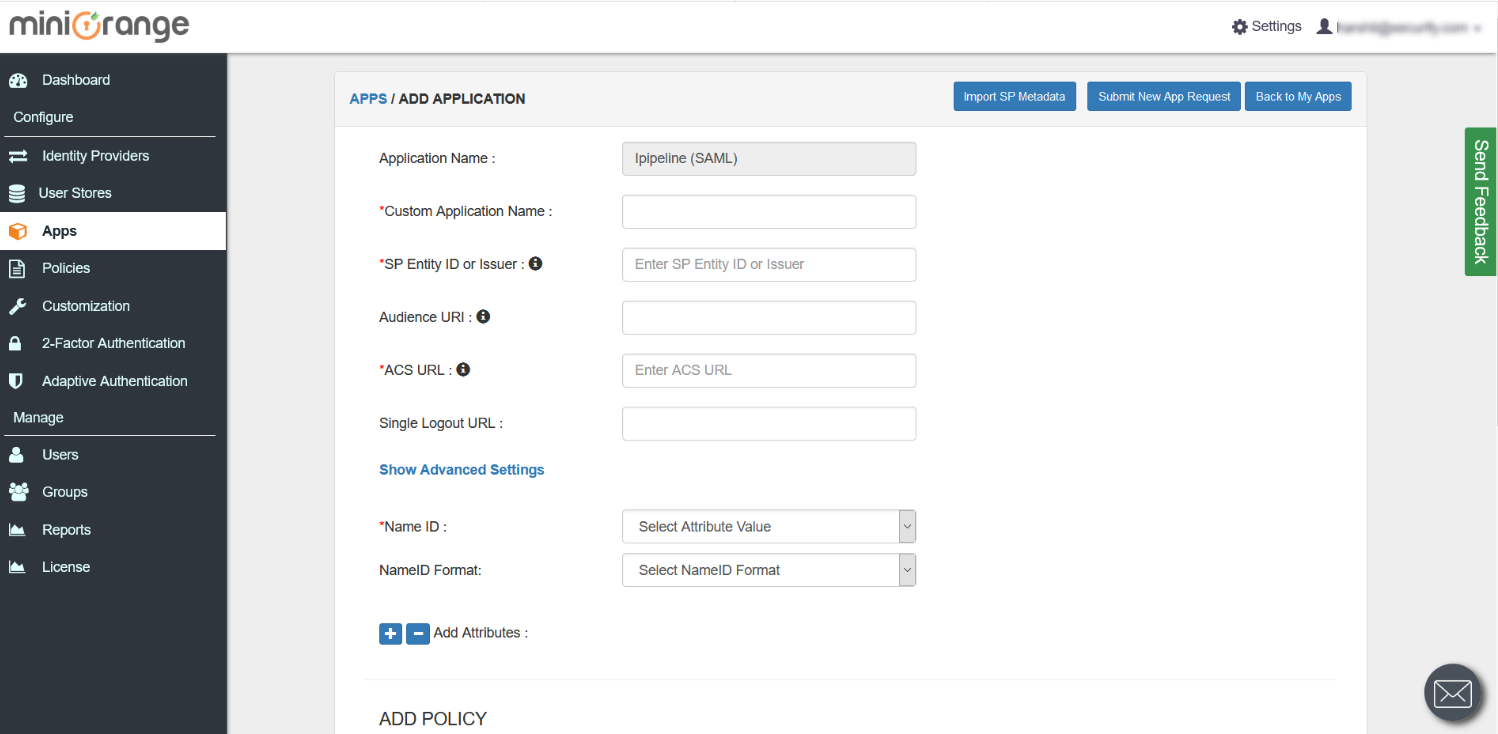
| Custom Application Name | Choose appropriate name according to your choice |
| SP Entity ID or Issuer | Contact iPipeline support for Entity ID |
| ACS URL | https://federate-uat.iPipeline.com/sp/ACS.saml2 |
| NameID | Email Address |
| NameID format | Select urn:oasis:names:tc:SAML:1.1:nameid-format:emailAddress |
You need to configure bellow attributes by clicking on Add Attributes .
| AttributeName | Description | Values |
| CompanyIdentifier | Mandatory. Used to determine Username | Example: 1234 |
| ChannelName | Mandatory. Used to determine Username | Example: ABC |
| Action | Mandatory. Used to tell service what action to take. Like (CREATE) | Example: CREATE |
| Groups | Mandatory. Defines Group user is associated with and what systems user has access to. | Example: 01234-UsersGroup |
| TimeOutUrl | Mandatory. The attribute name must be present but the value of this attribute is no longer used. An empty or null value for this attribute is required | |
| ApplcationData | Mandatory. The attribute name should be present but an empty value for this attribute is allowed. |
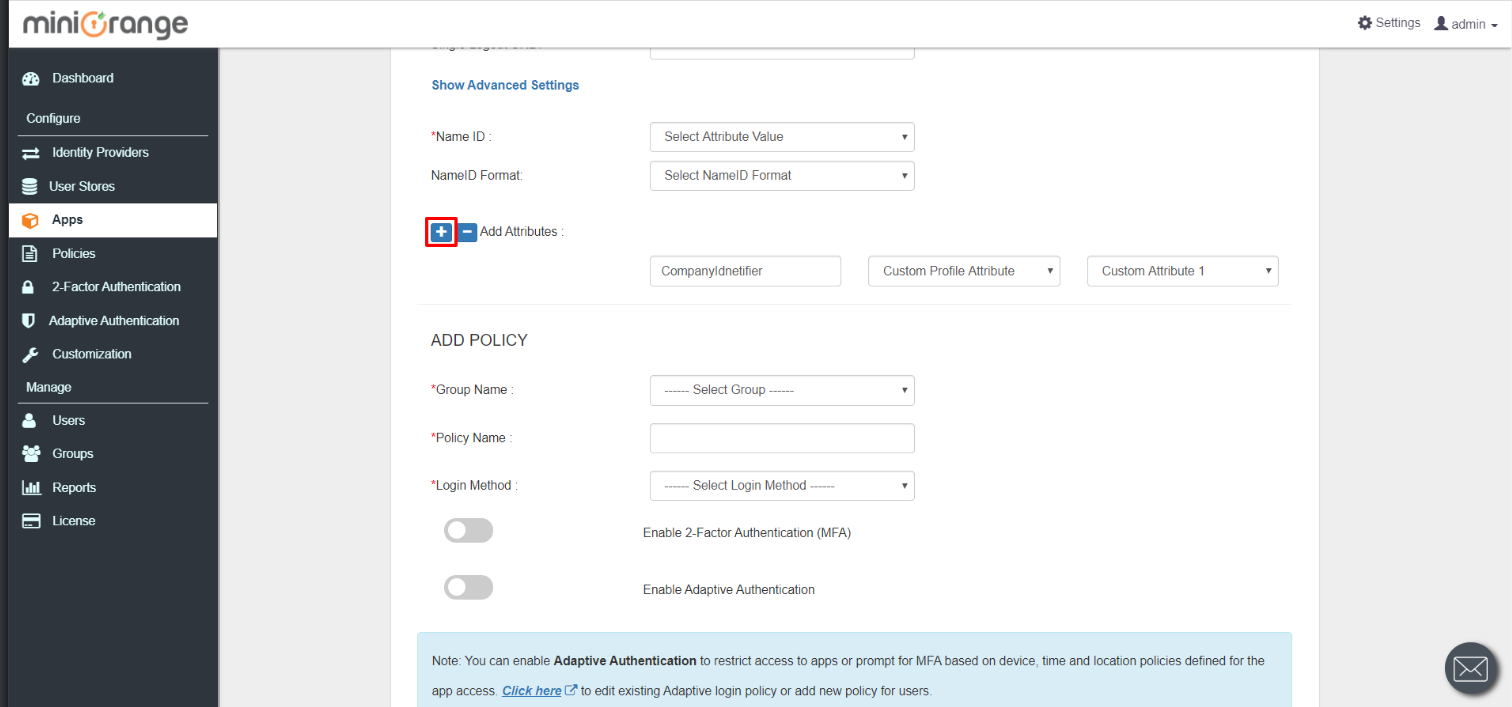
Click on + to add atrributes.
Likewise you can configre all six custom attributes. After configuring, it will look like the image shown below.

Now fill Group, Policy and Login Method related details. For that you can refer above image.
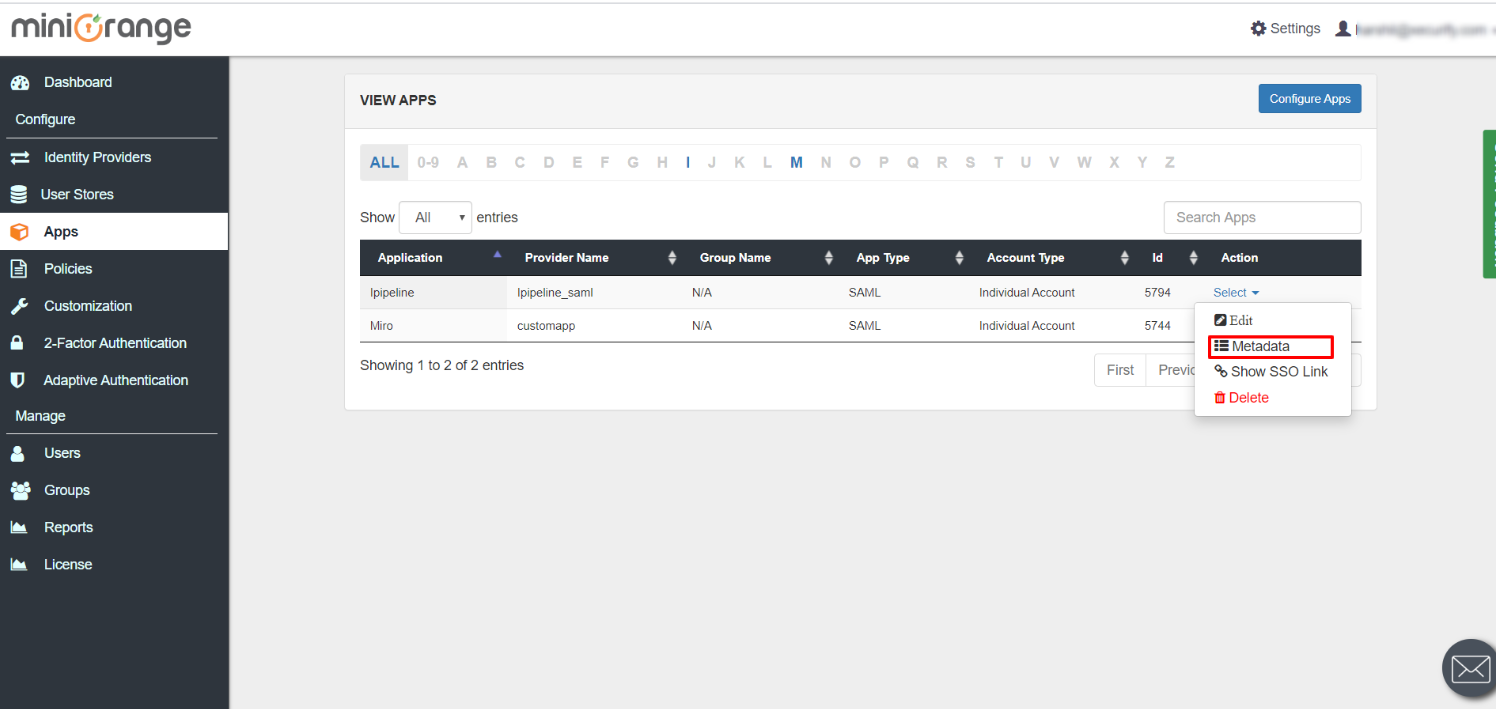
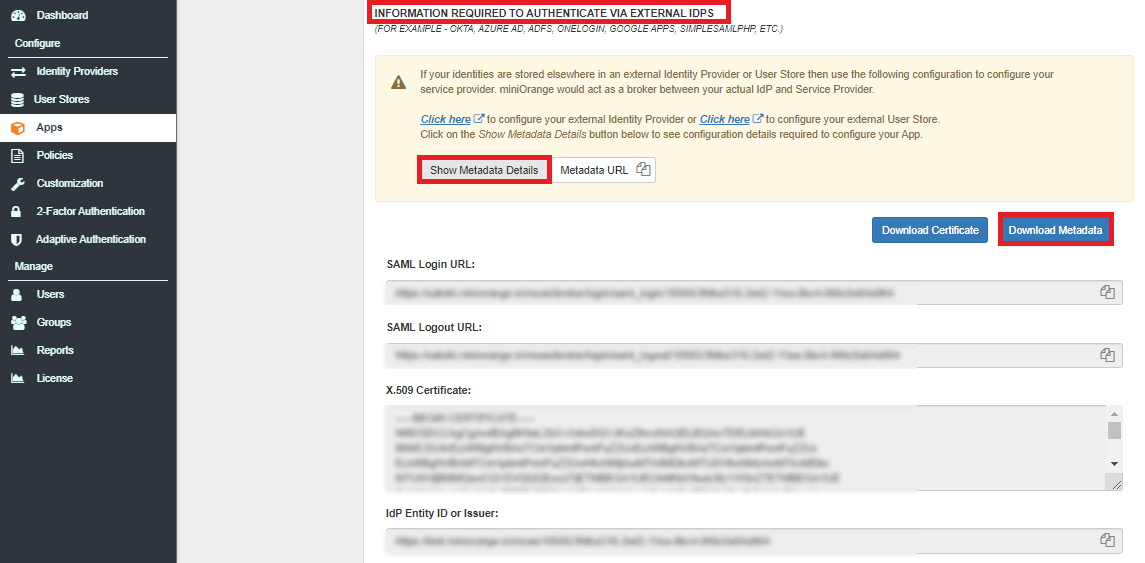
After saving the app details, an app will be configured in miniorange with metadata as you can see in below image -
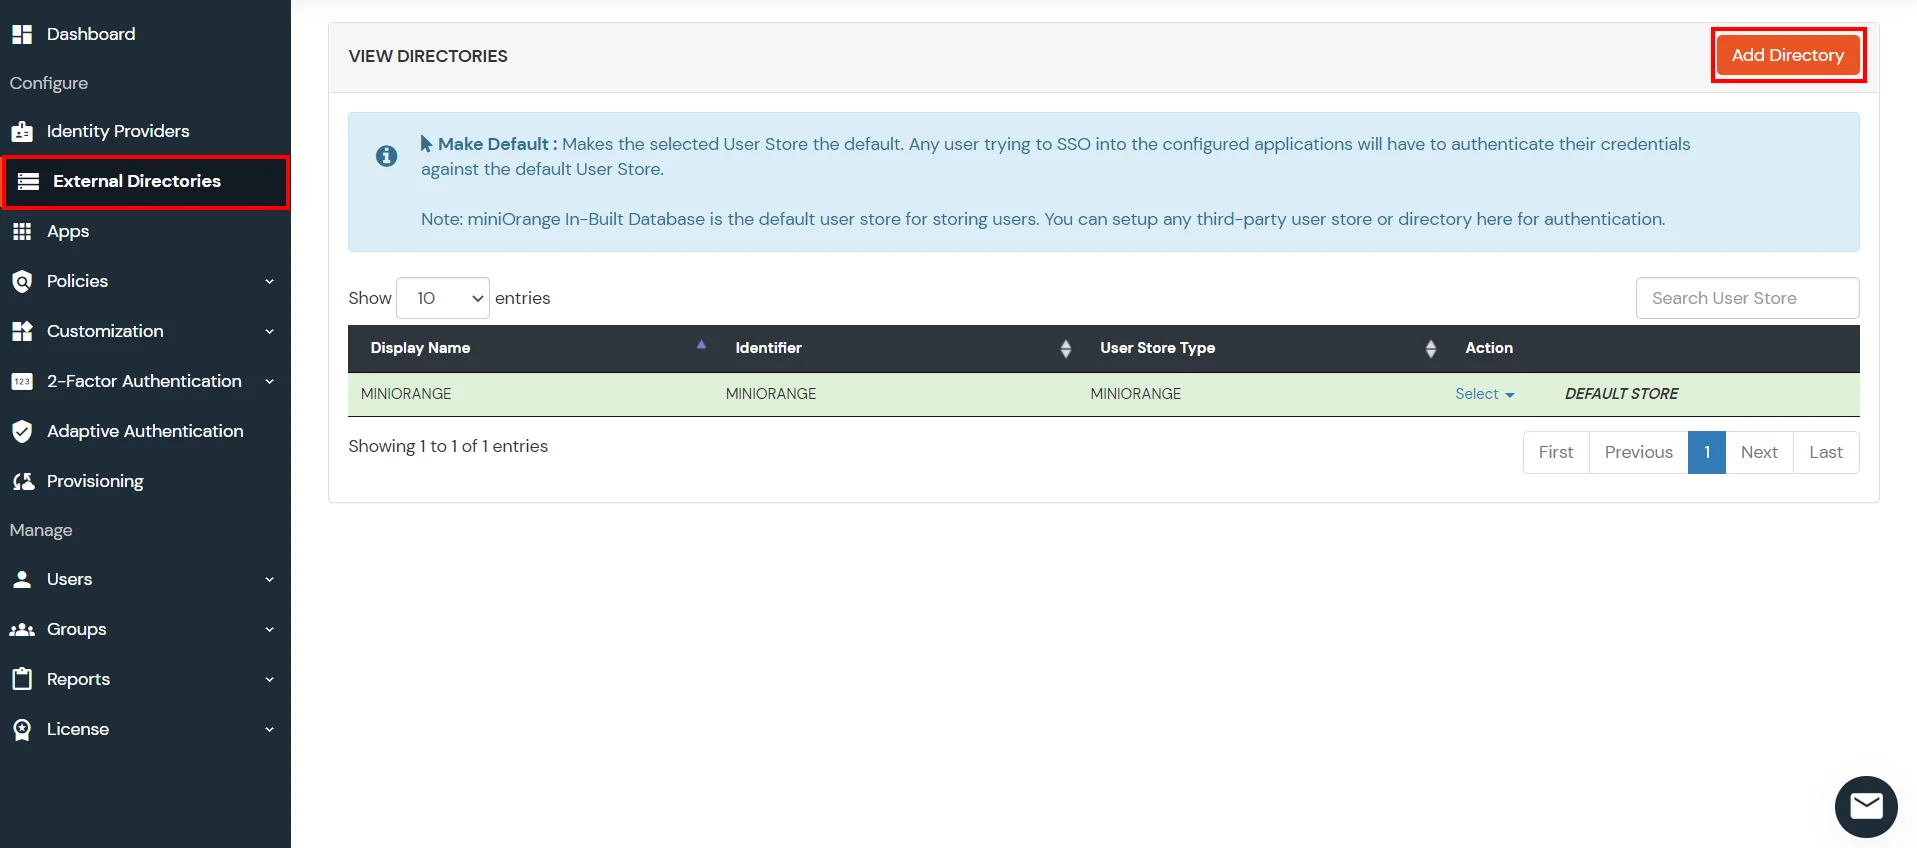
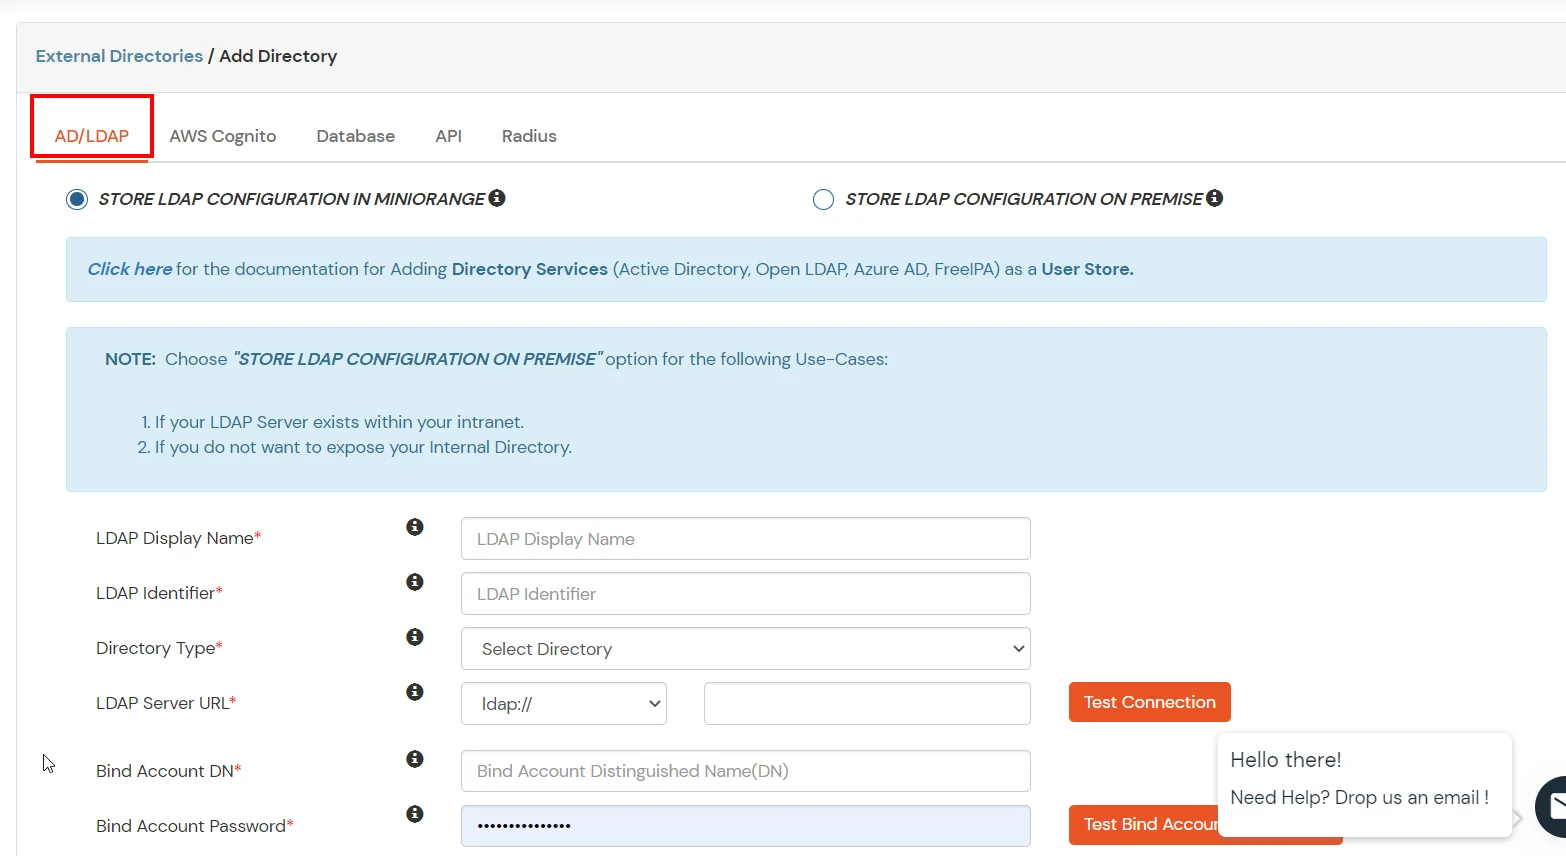
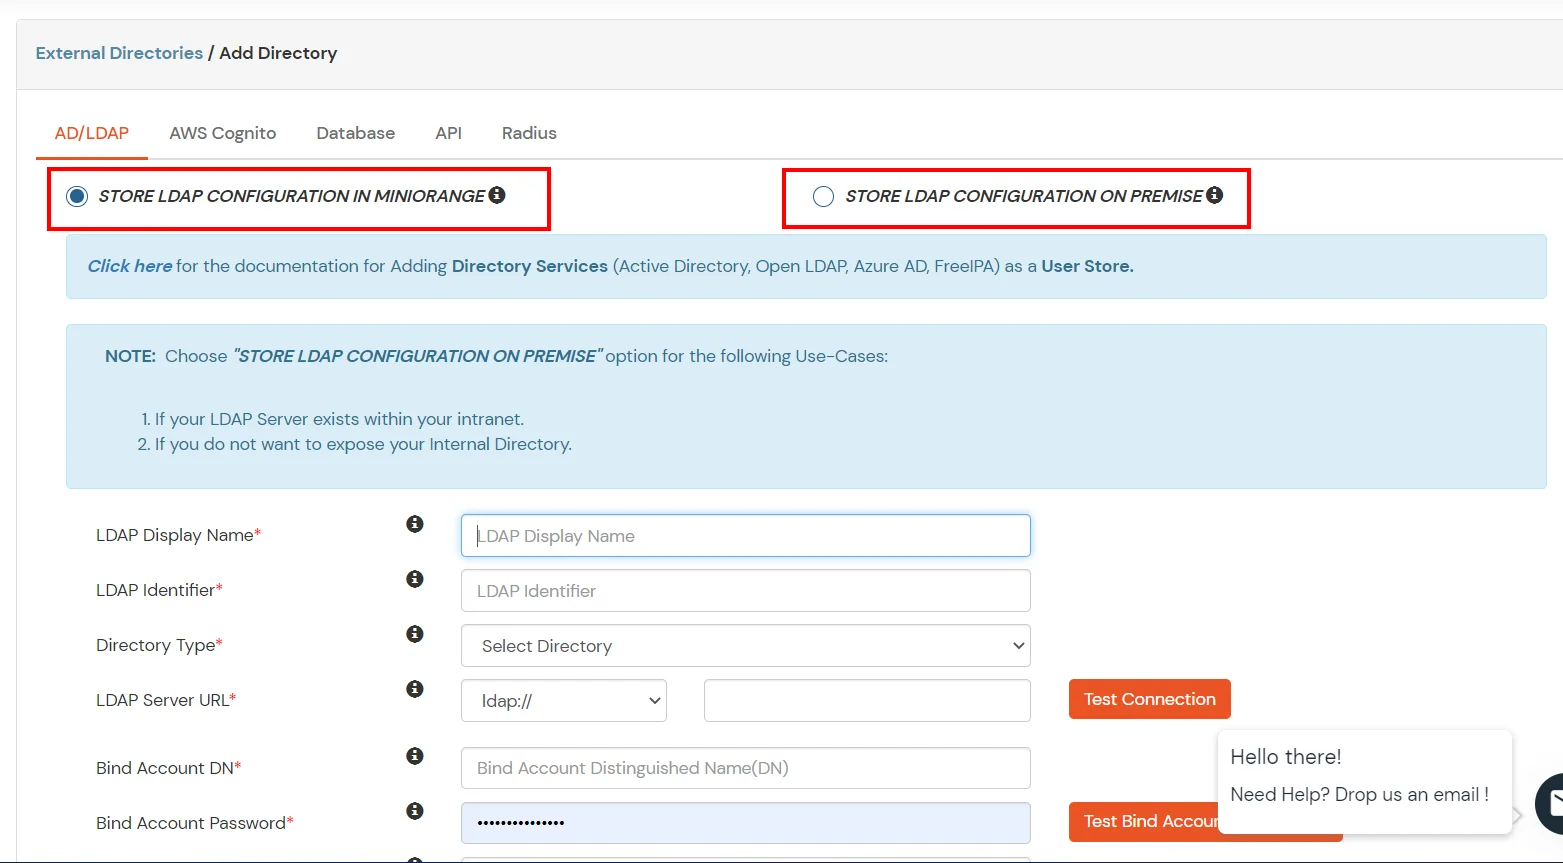
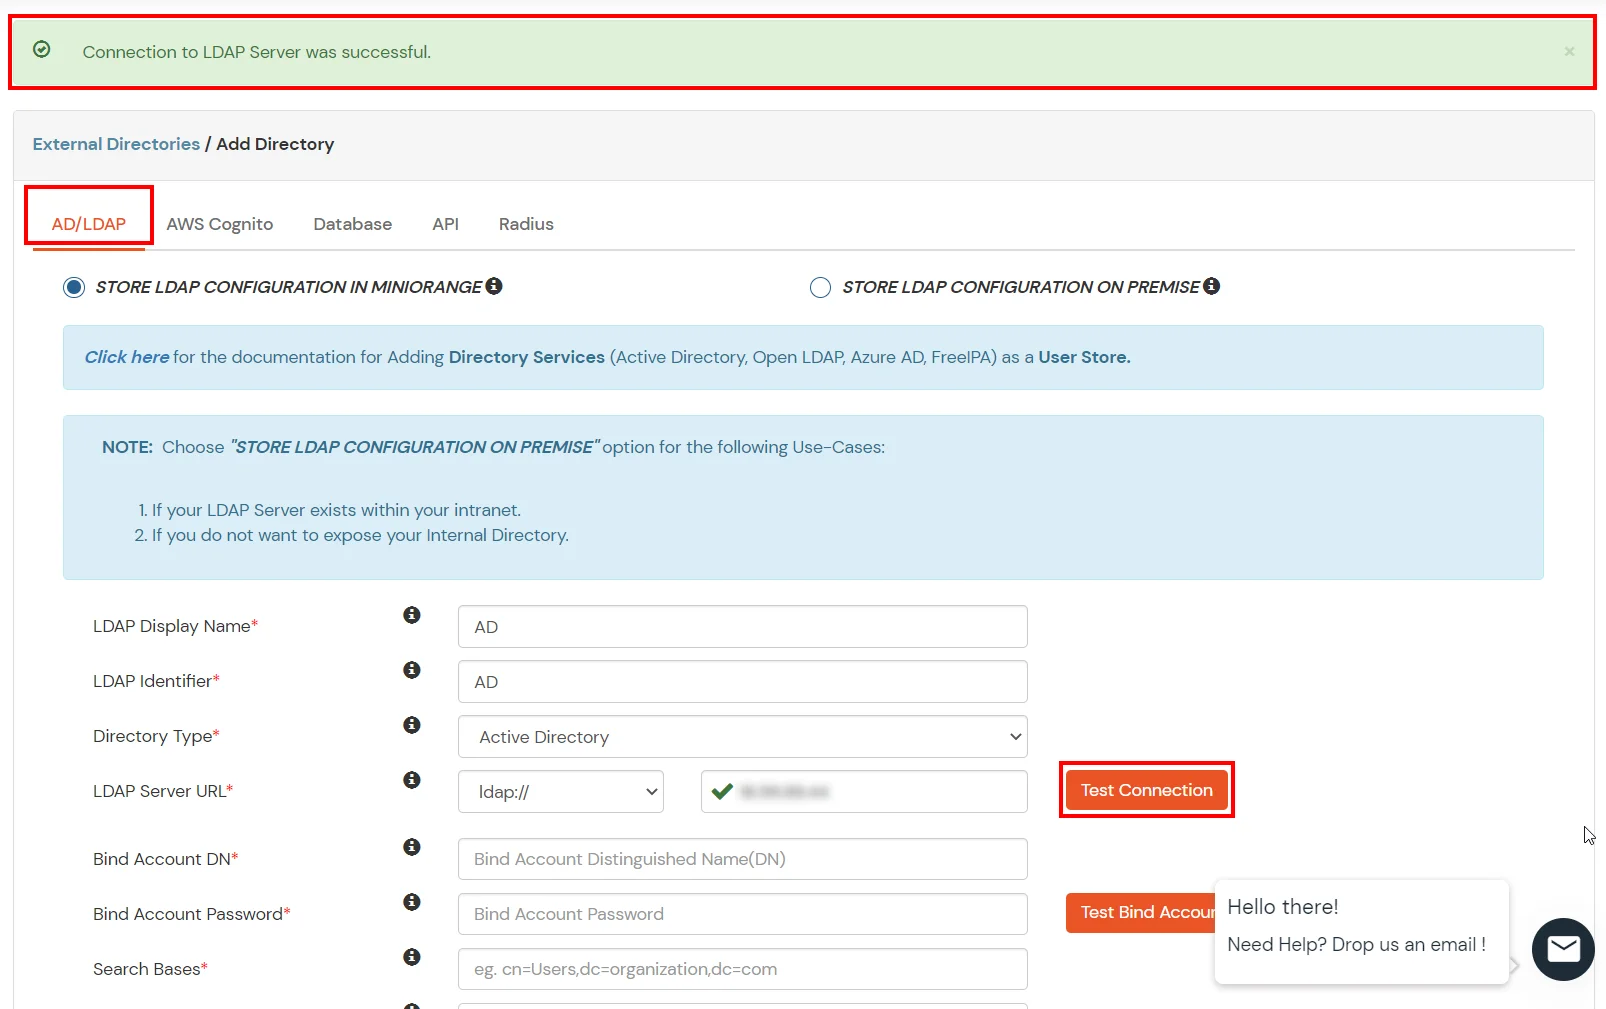
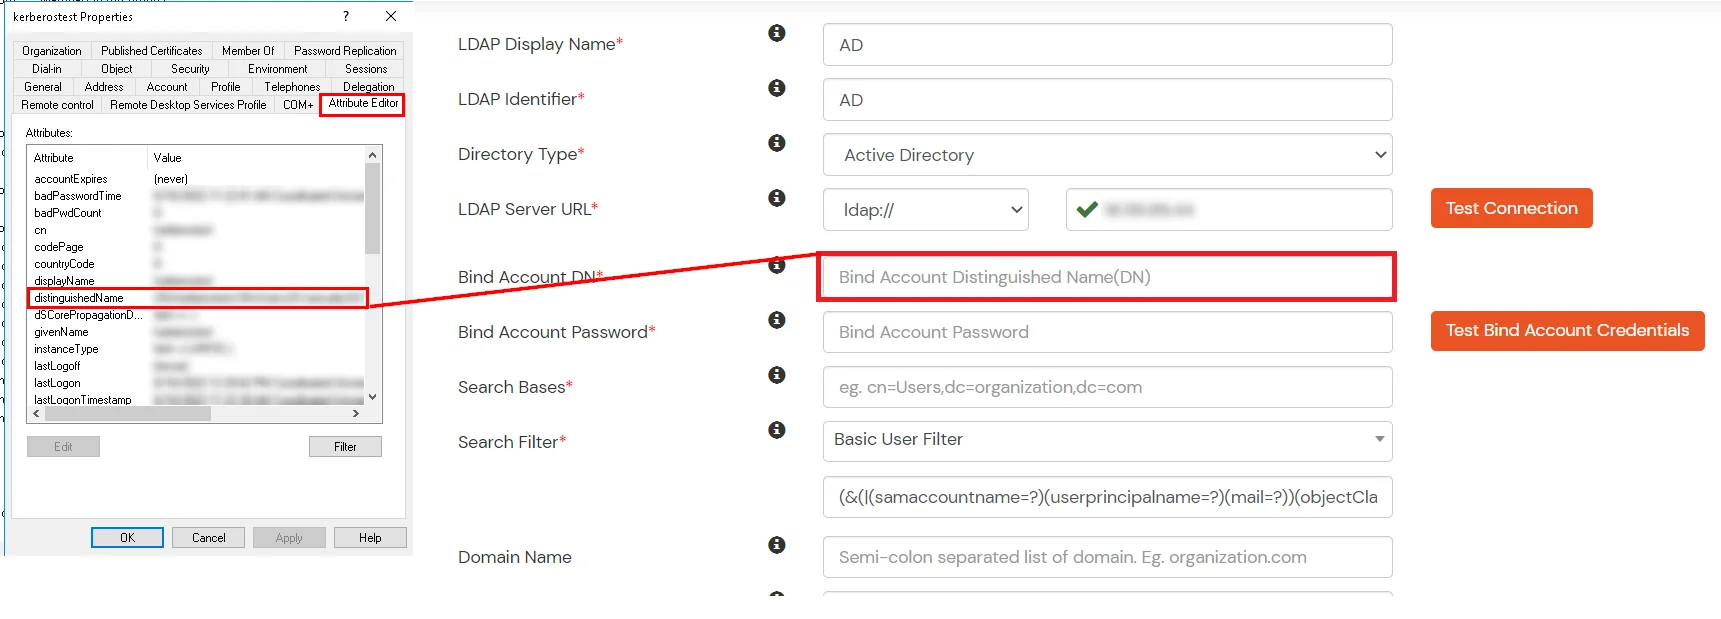
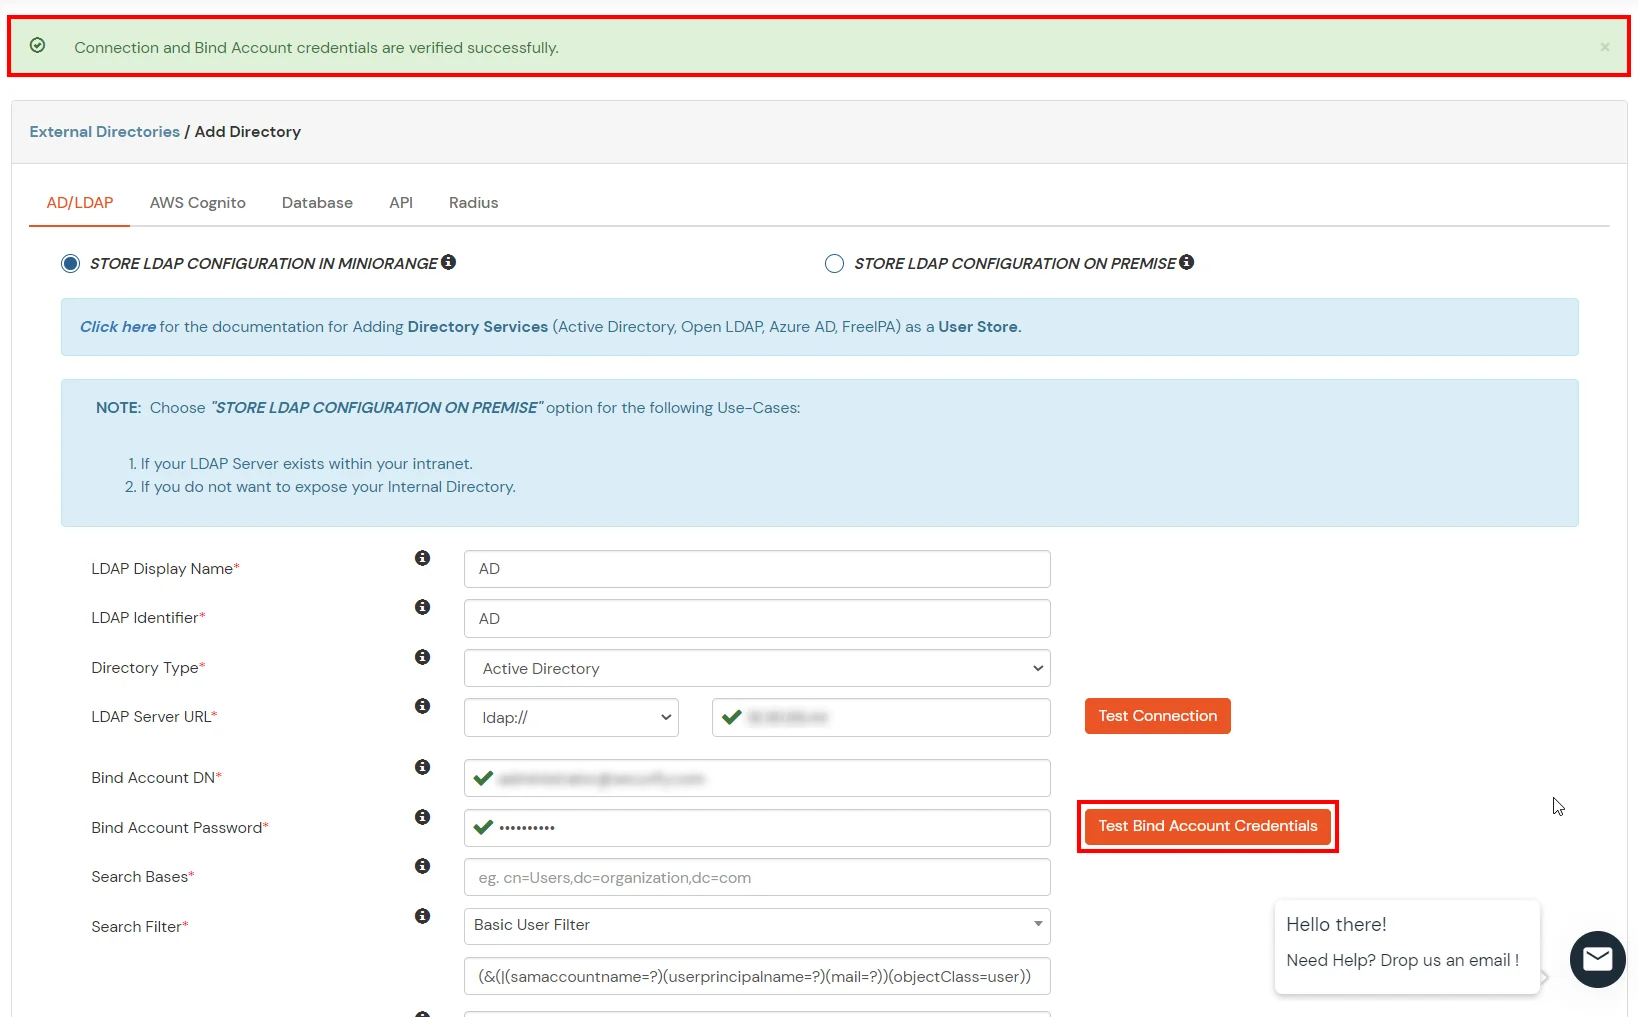
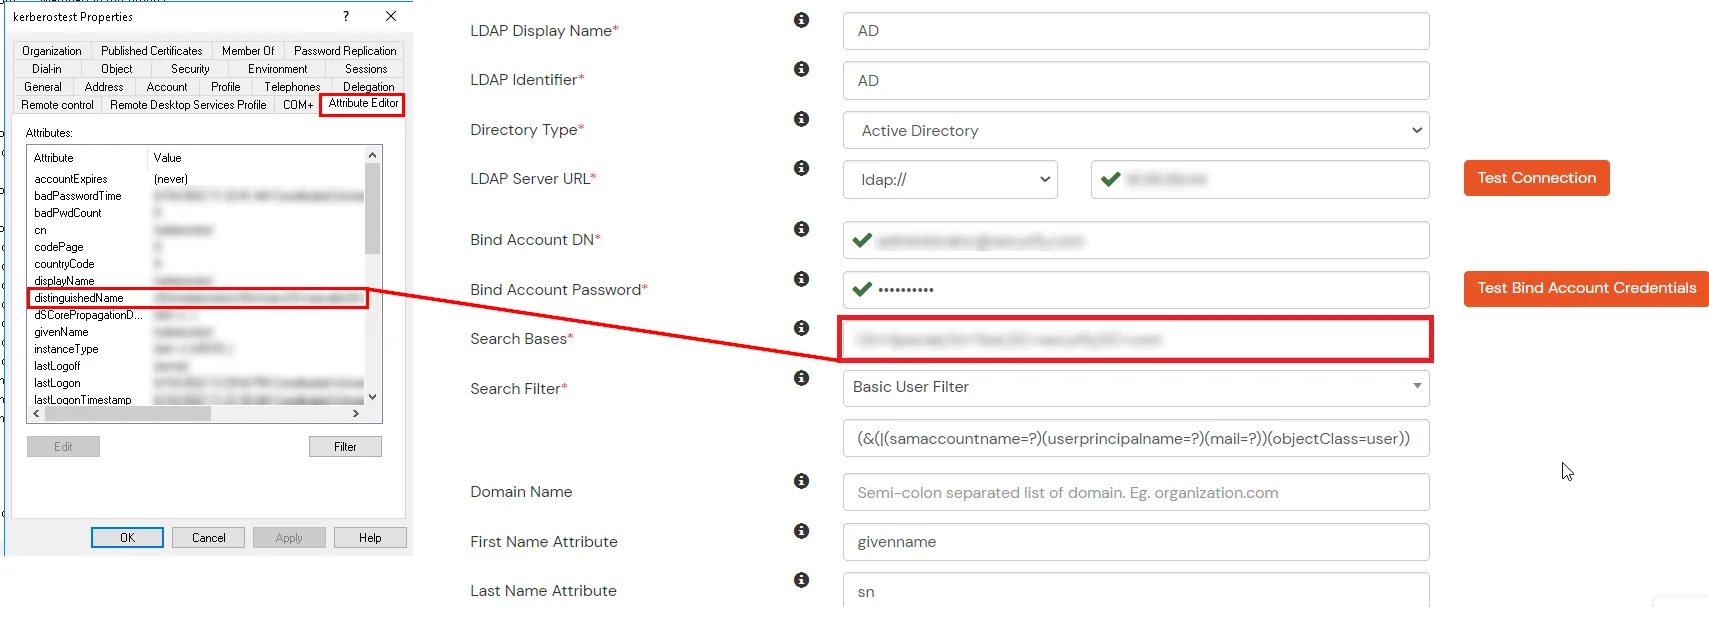
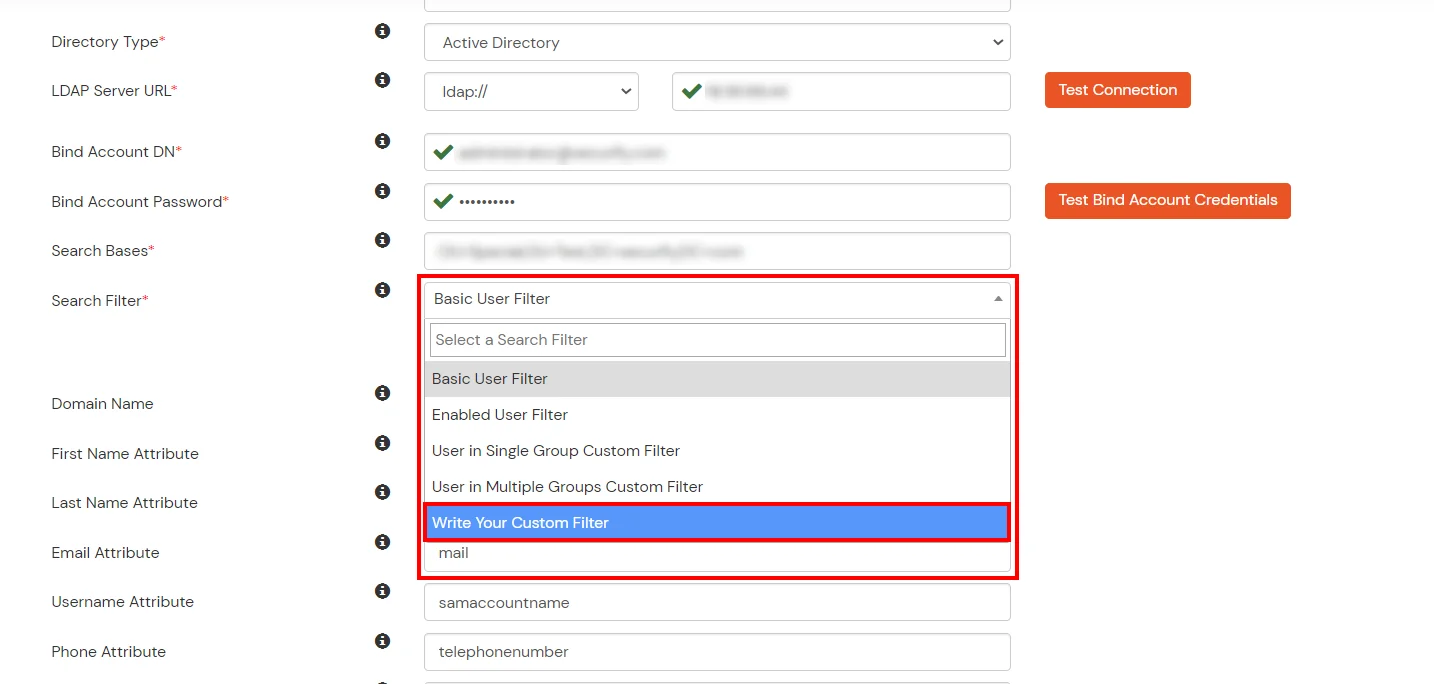
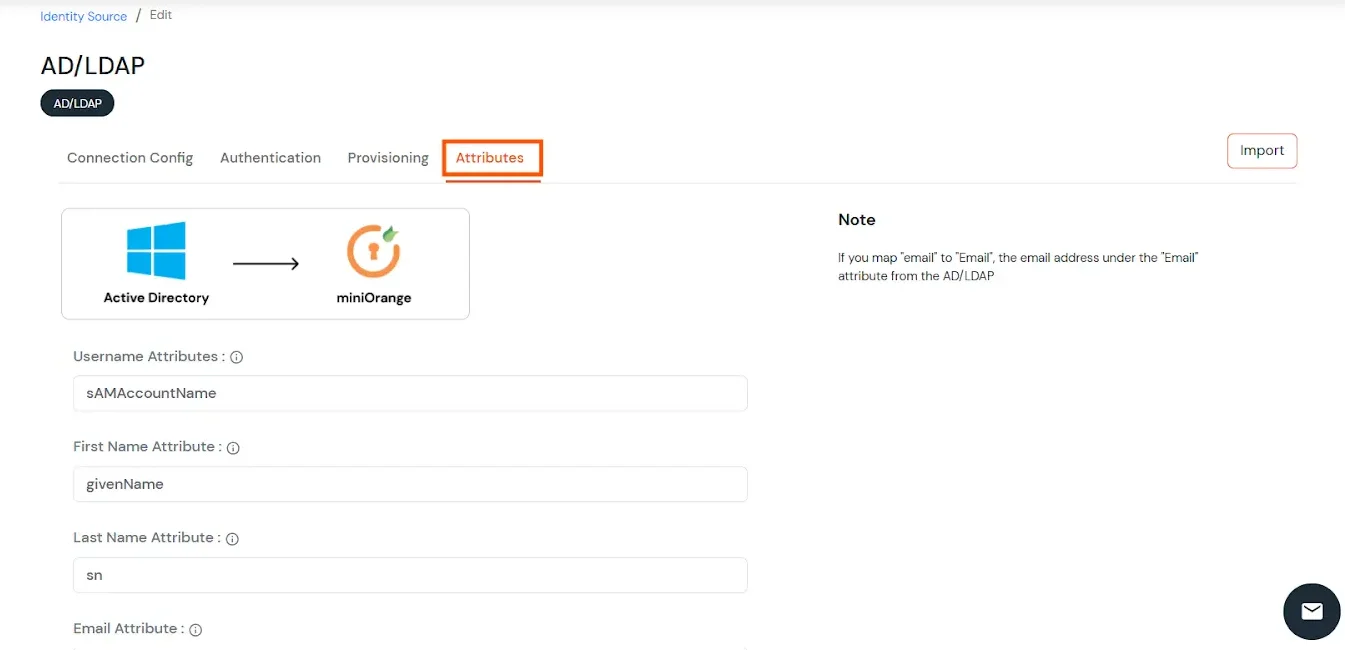
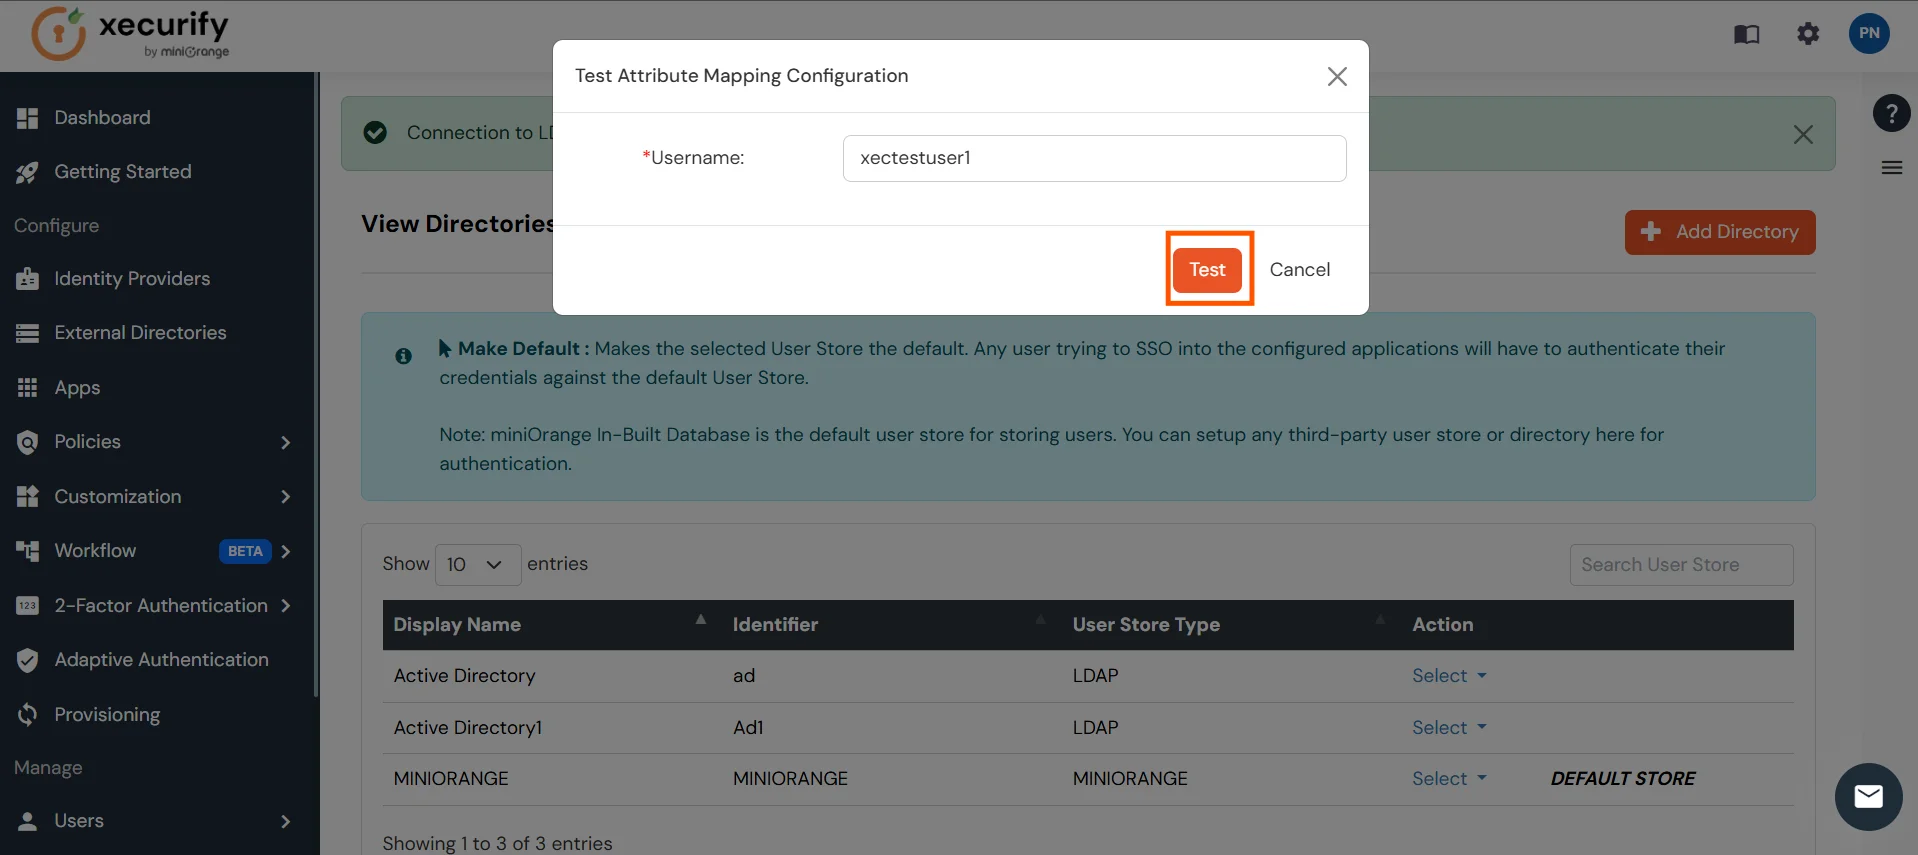
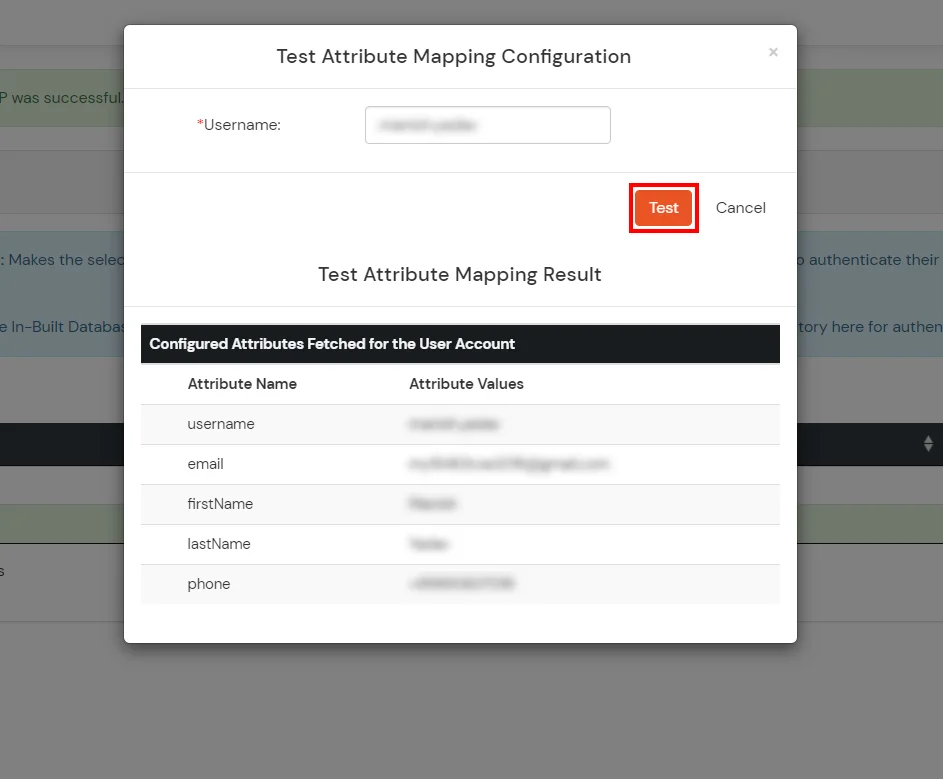
2.1: Setup AD as User Directory

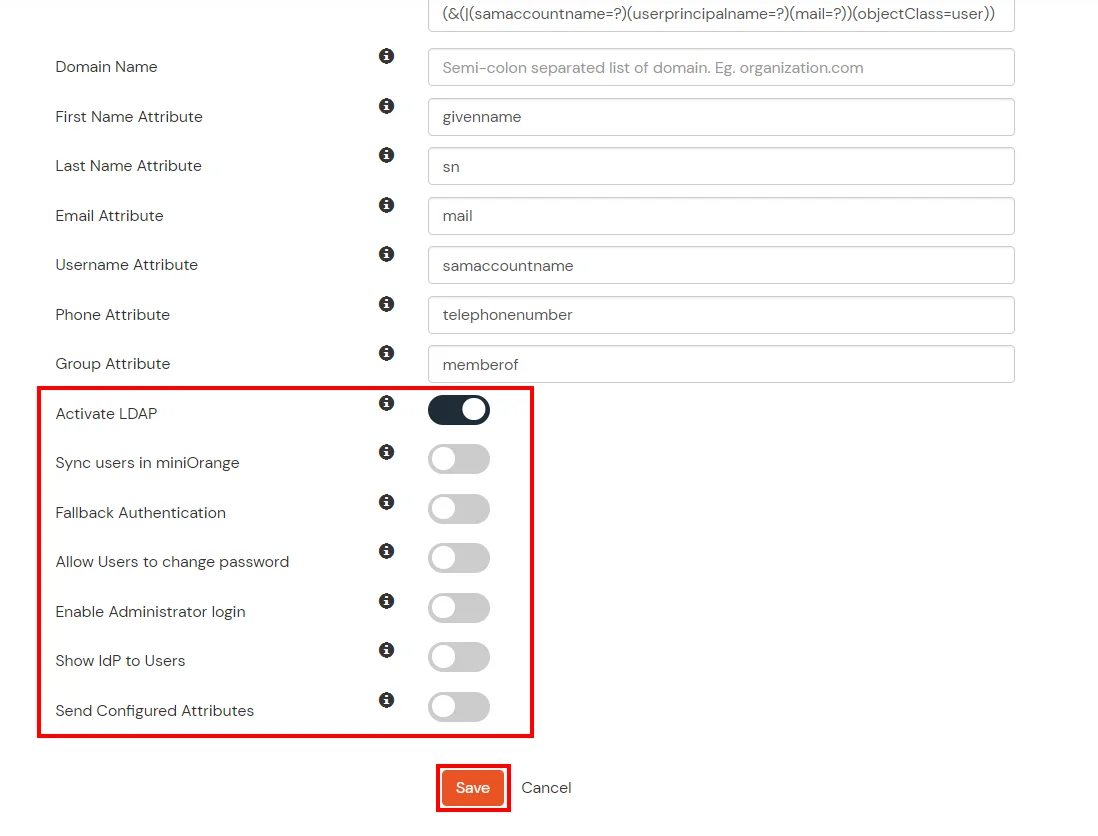
Here's the list of the attributes and what it does when we enable it. You can enable/disable accordingly.
| Attribute | Description |
|---|---|
| Activate LDAP | All user authentications will be done with LDAP credentials if you Activate it |
| Fallback Authentication | If LDAP credentials fail then user will be authenticated through miniOrange |
| Enable administrator login | On enabling this, your miniOrange Administrator login authenticates using your LDAP server |
| Show IdP to users | If you enable this option, this IdP will be visible to users |
| Sync users in miniOrange | Users will be created in miniOrange after authentication with LDAP |
Attribute Name sent to SP = organization
Attribute Name from IDP = company
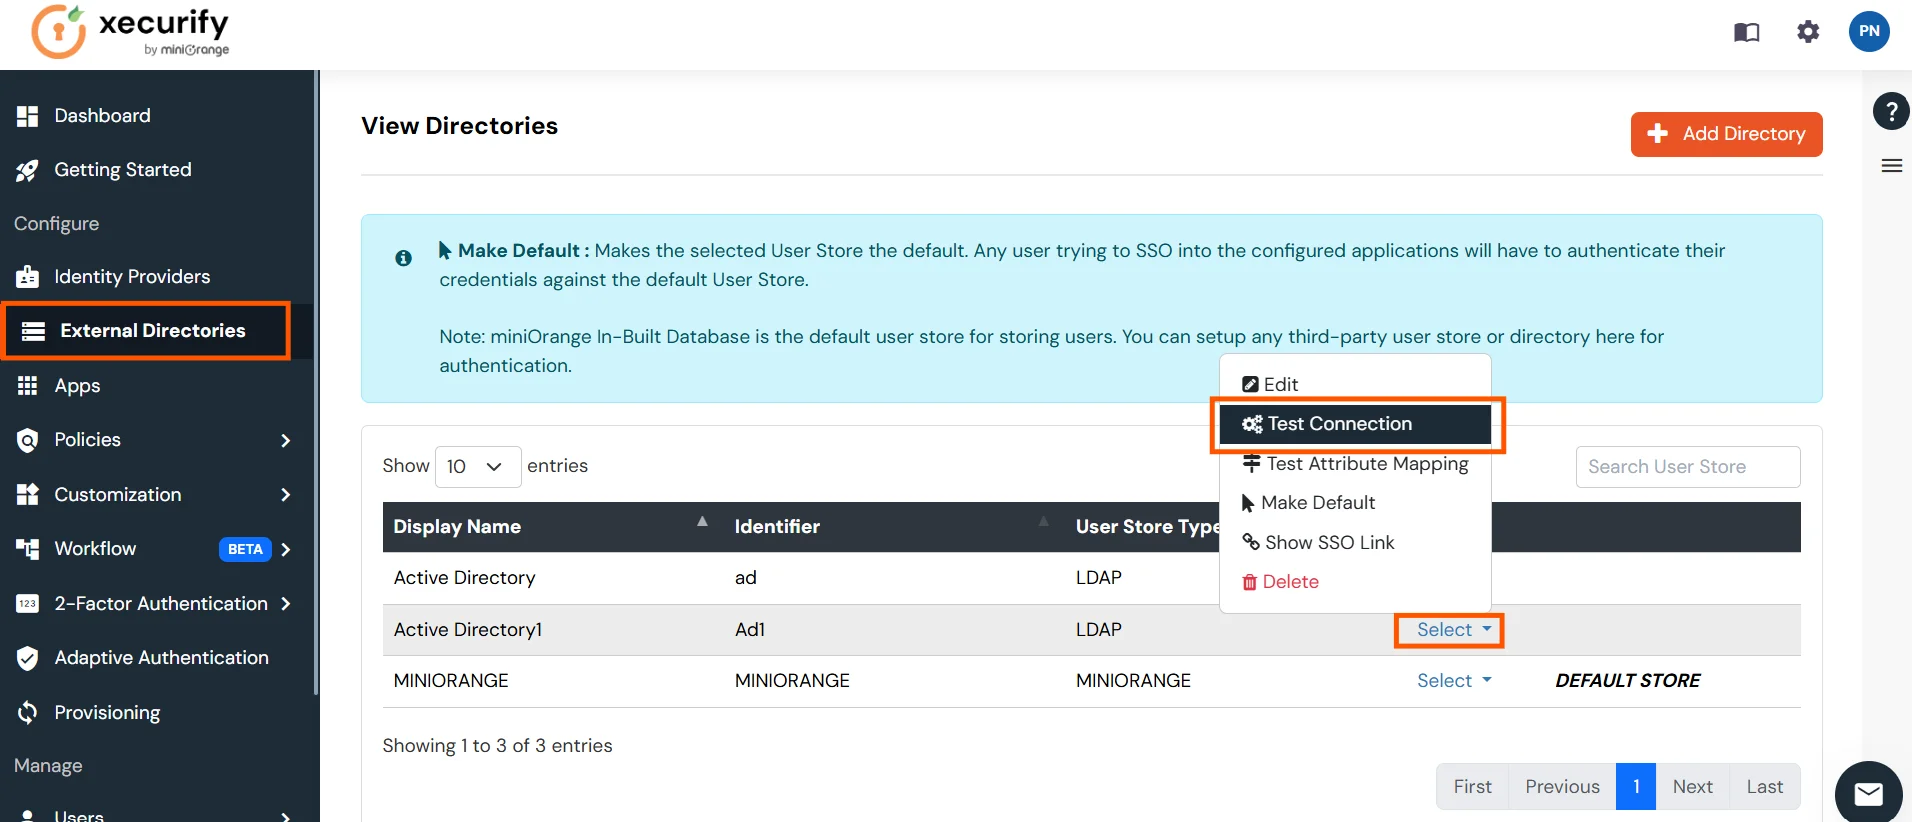
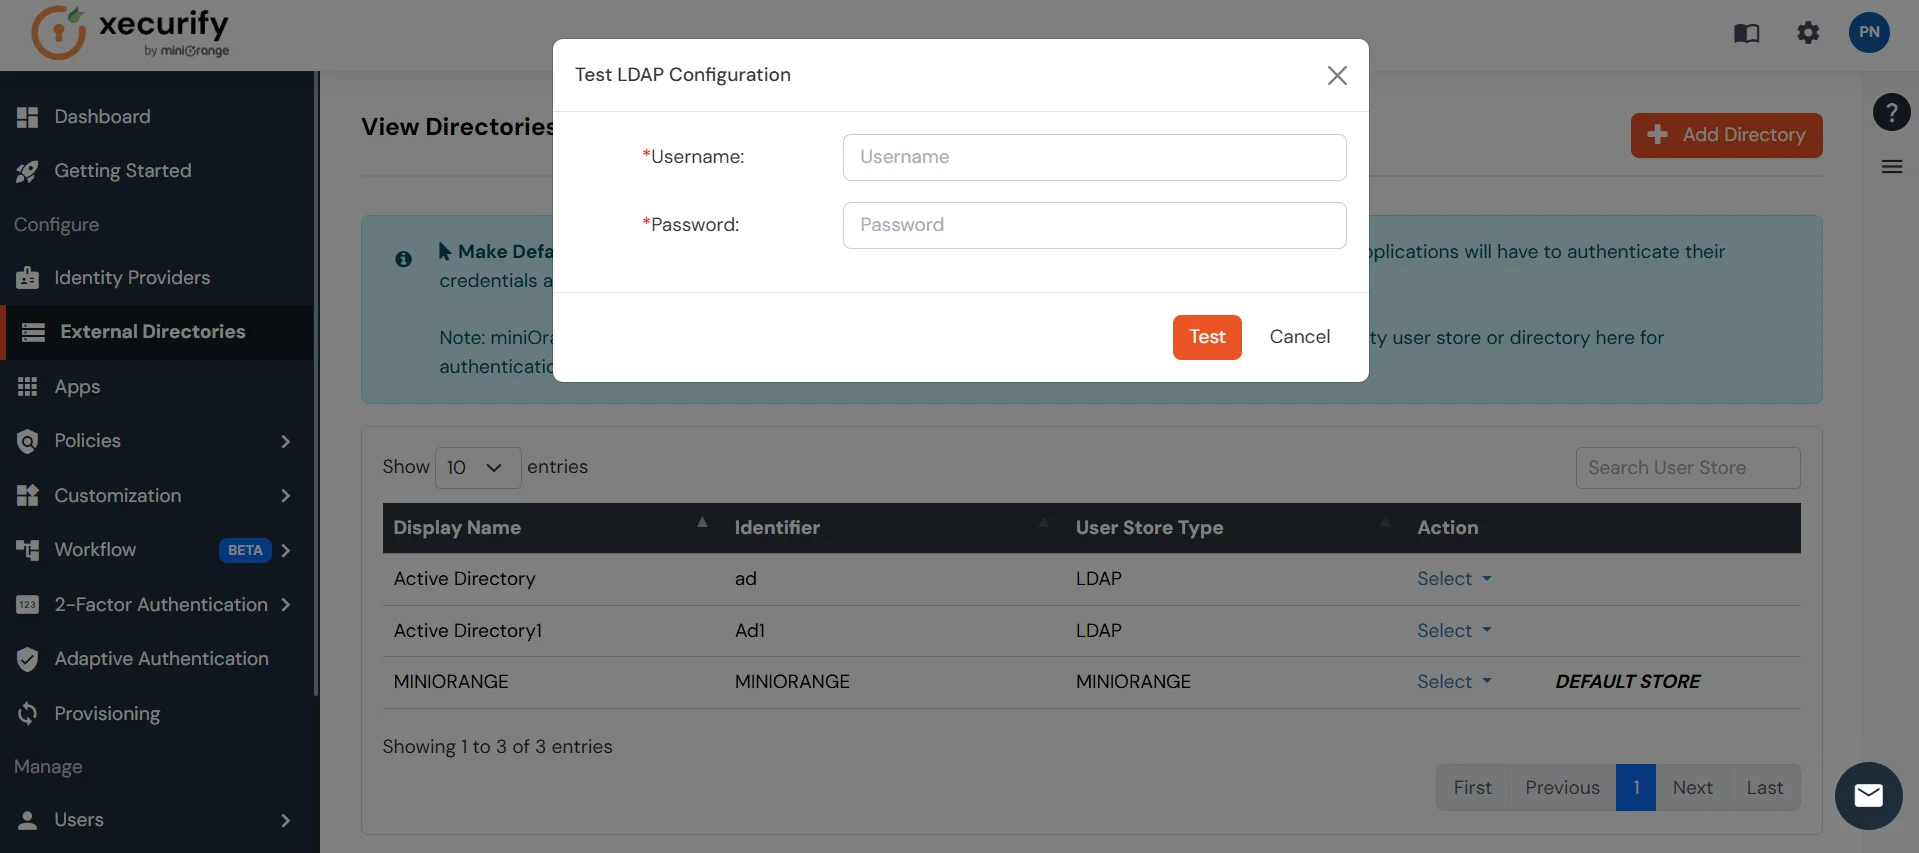
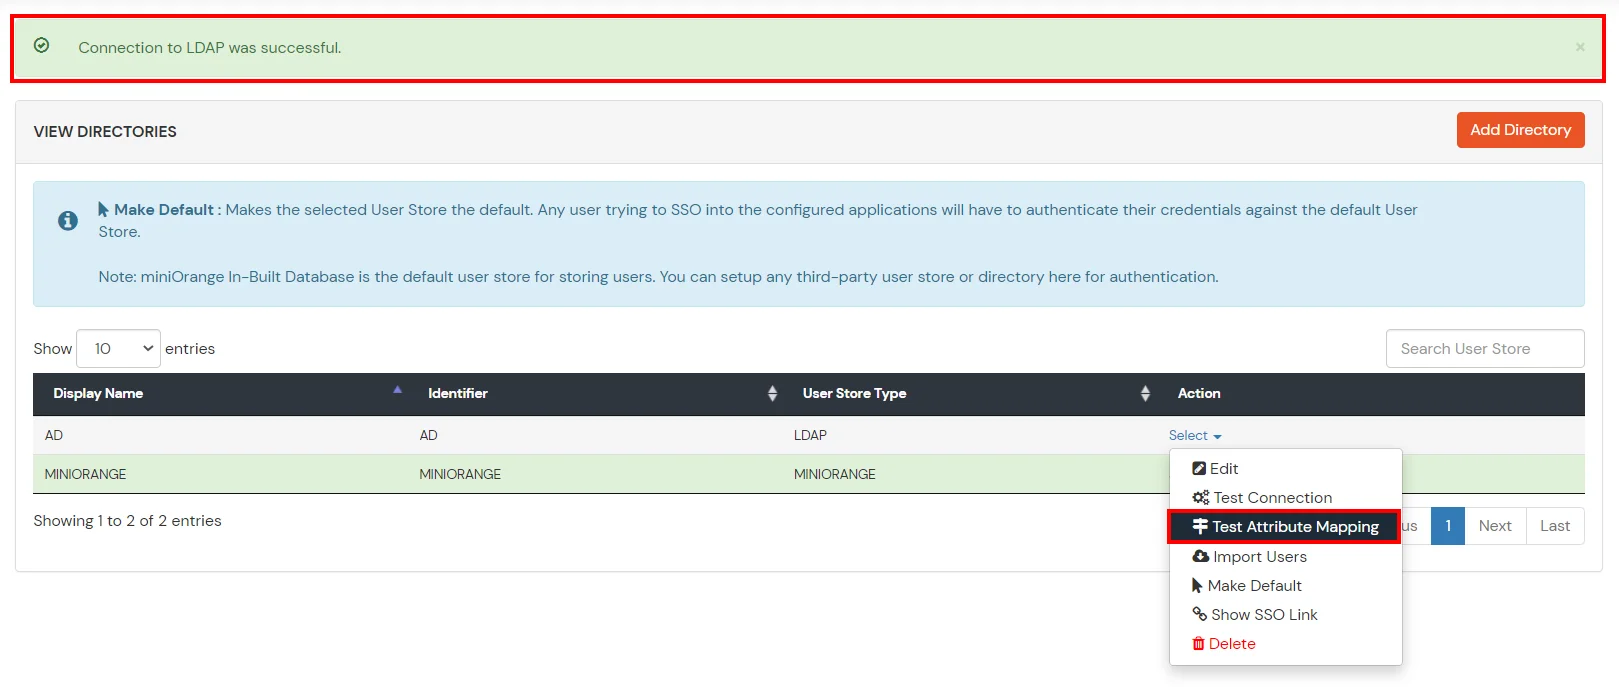
Set up AD as External Directory configuration is complete.
Note: Refer our guide to setup LDAP on windows server.
2.2: Setup miniOrange as a User Store
2.2.1 Create User in miniOrange
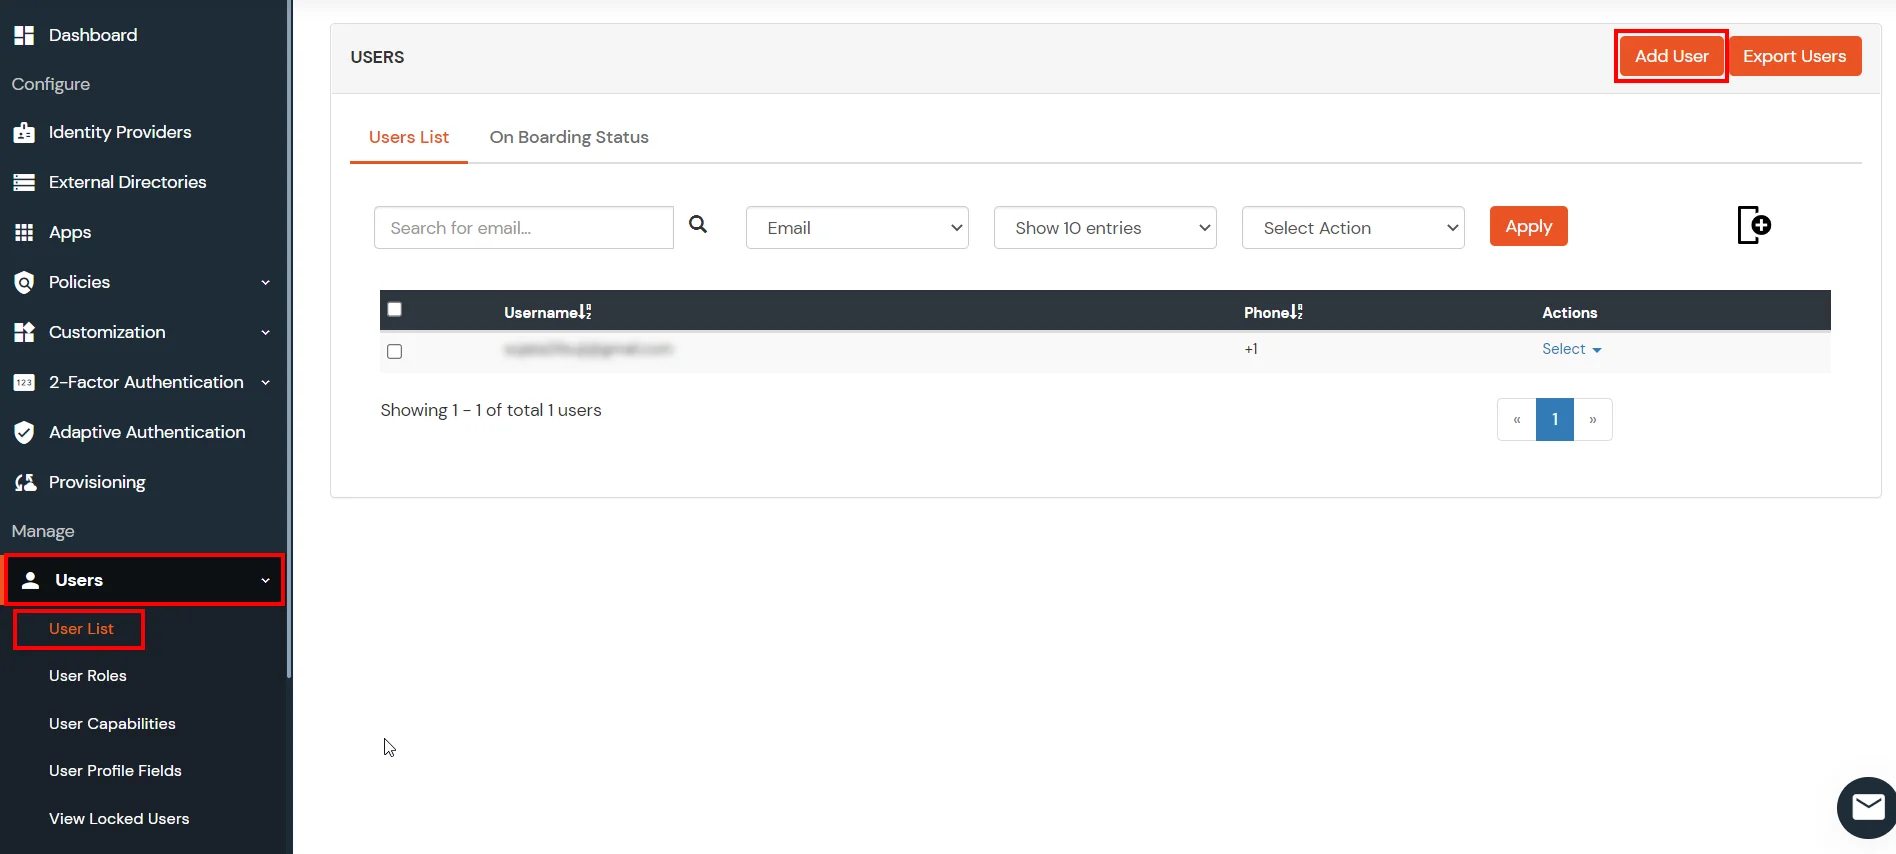
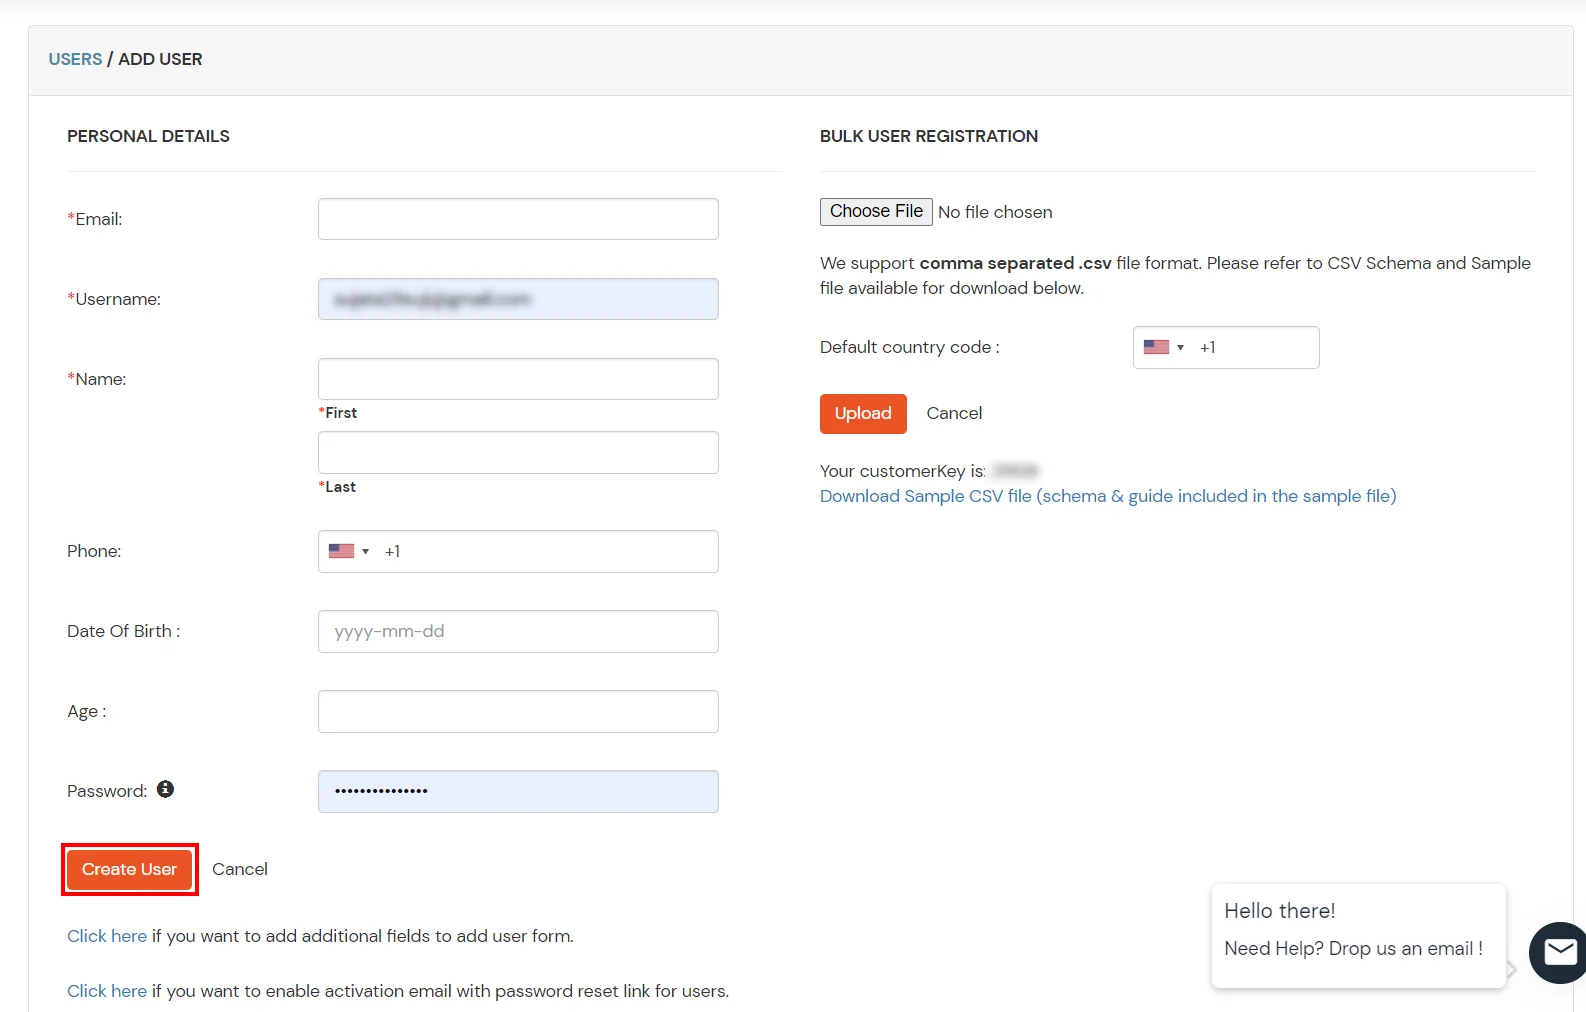
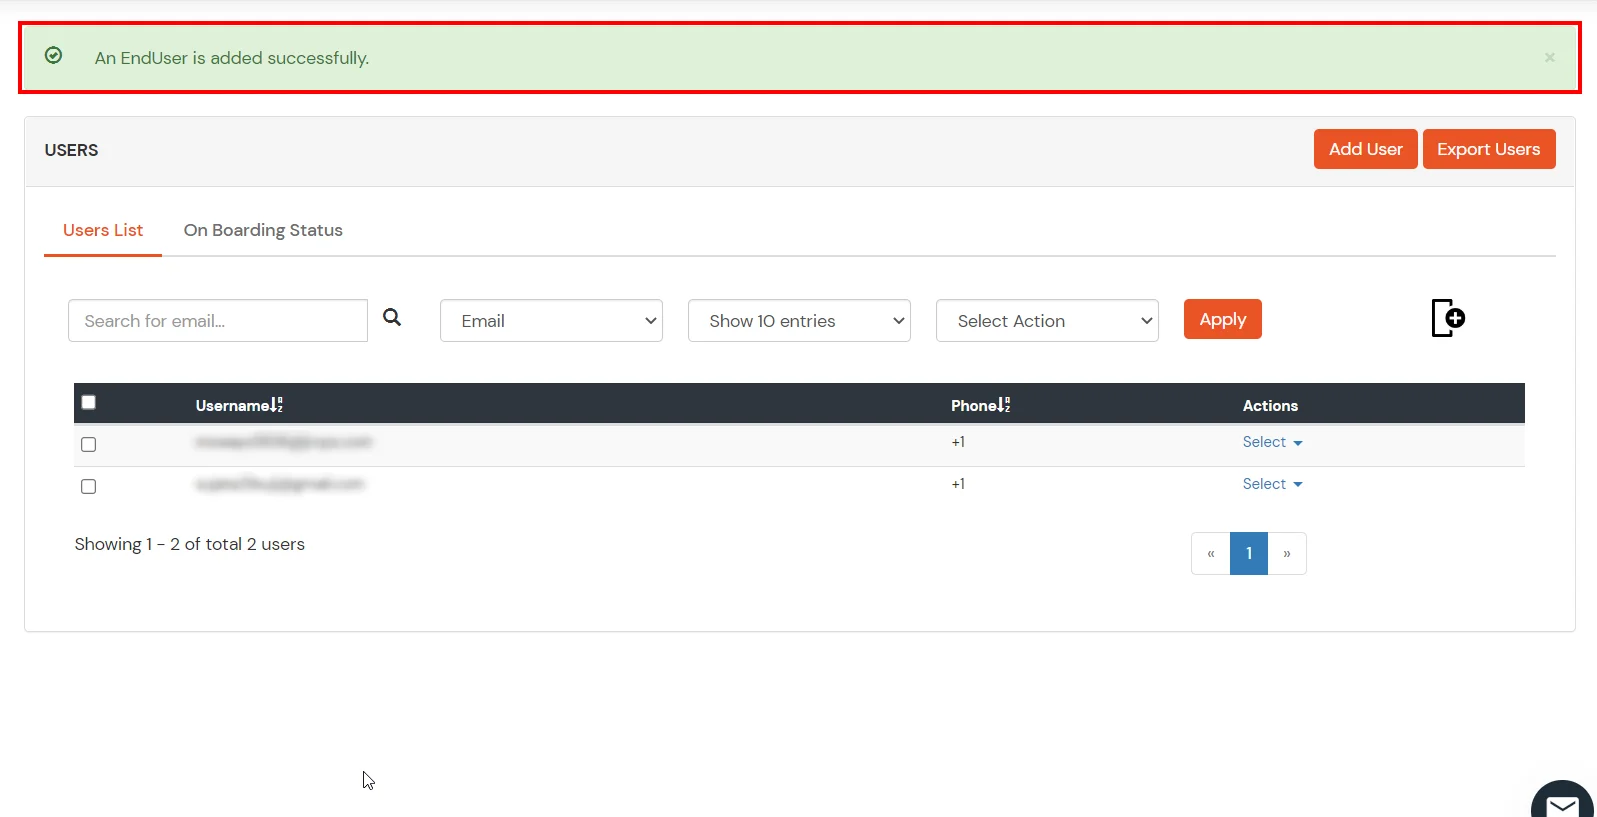
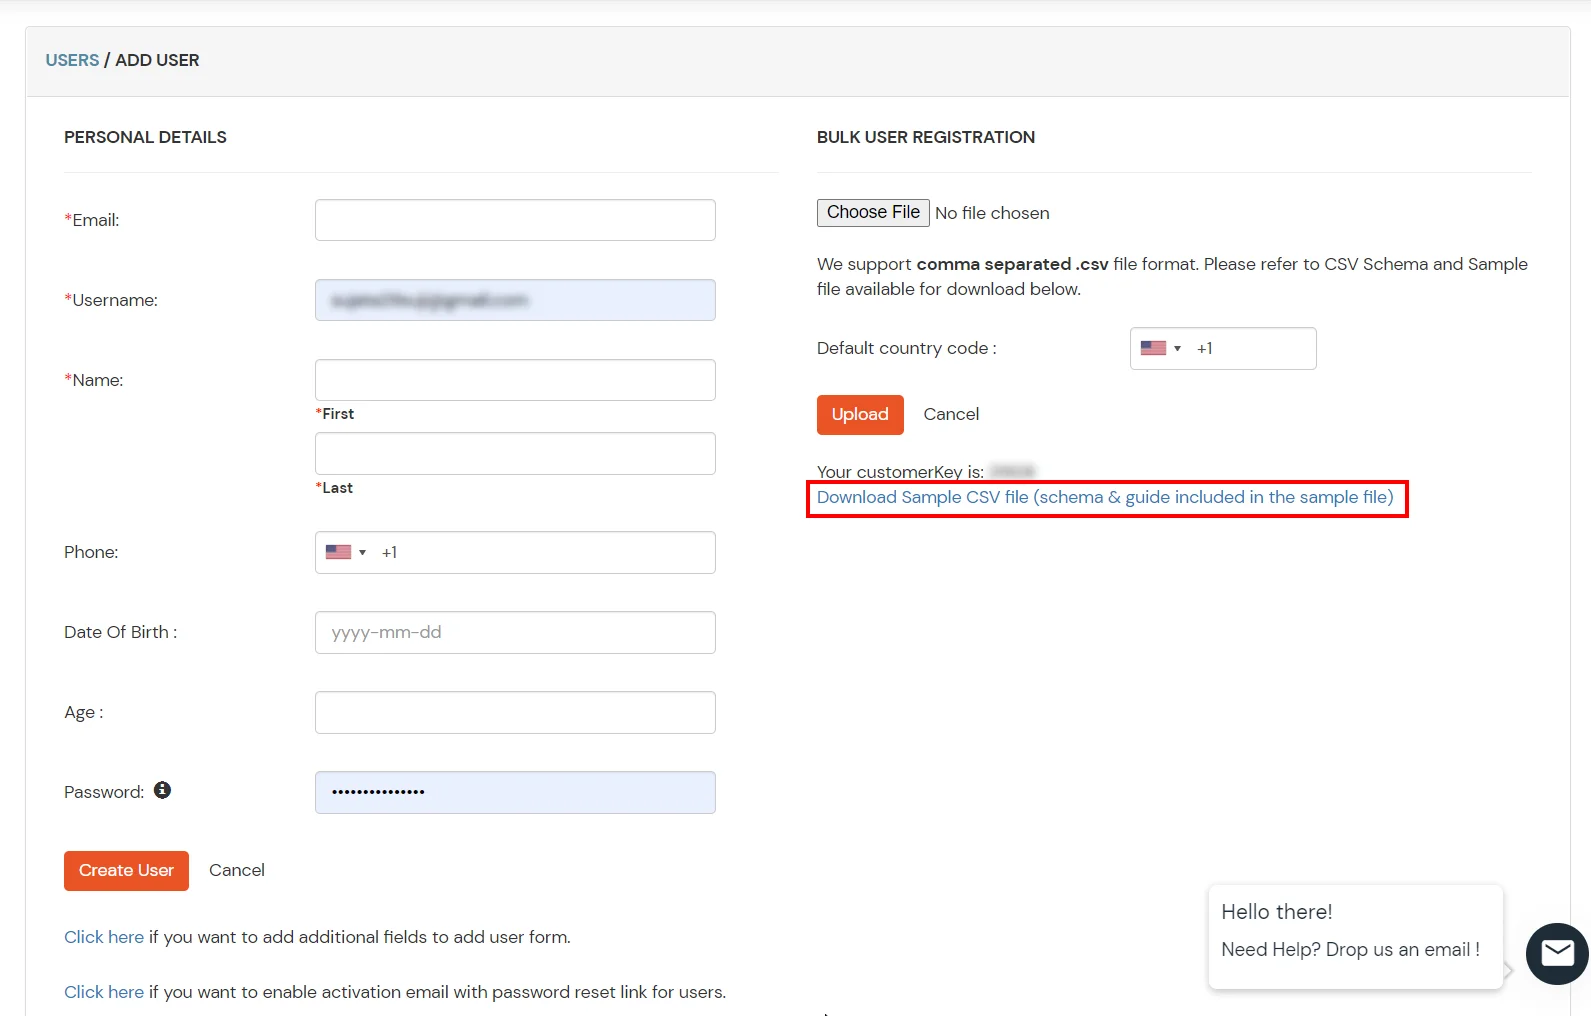
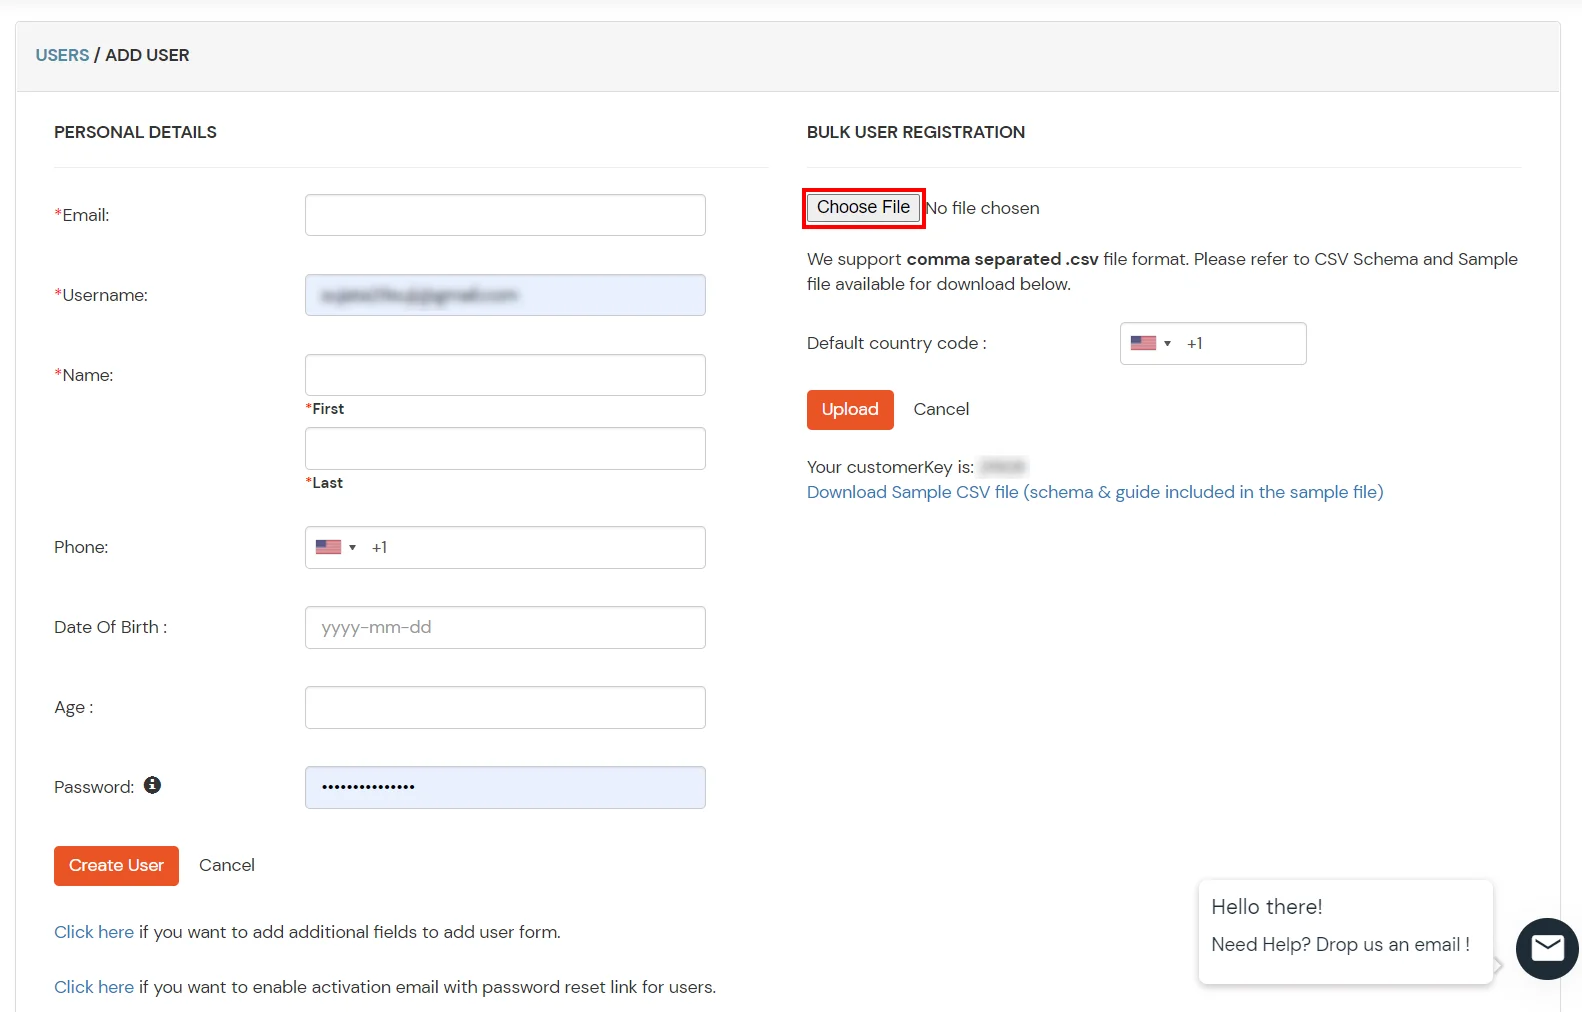
2.2.2 Bulk Upload Users in miniOrange via Uploading CSV File.
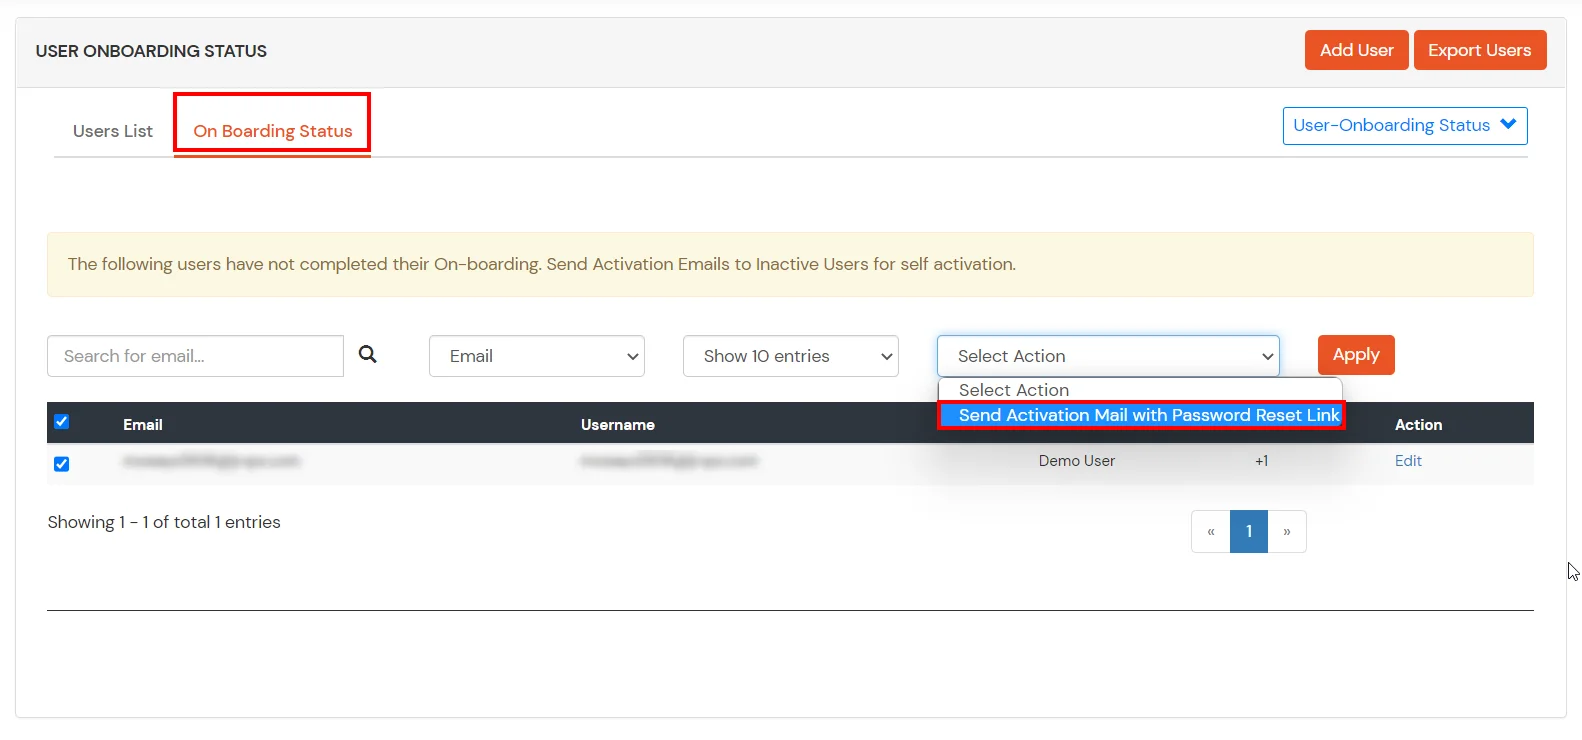
2.2.3 Self User Registration
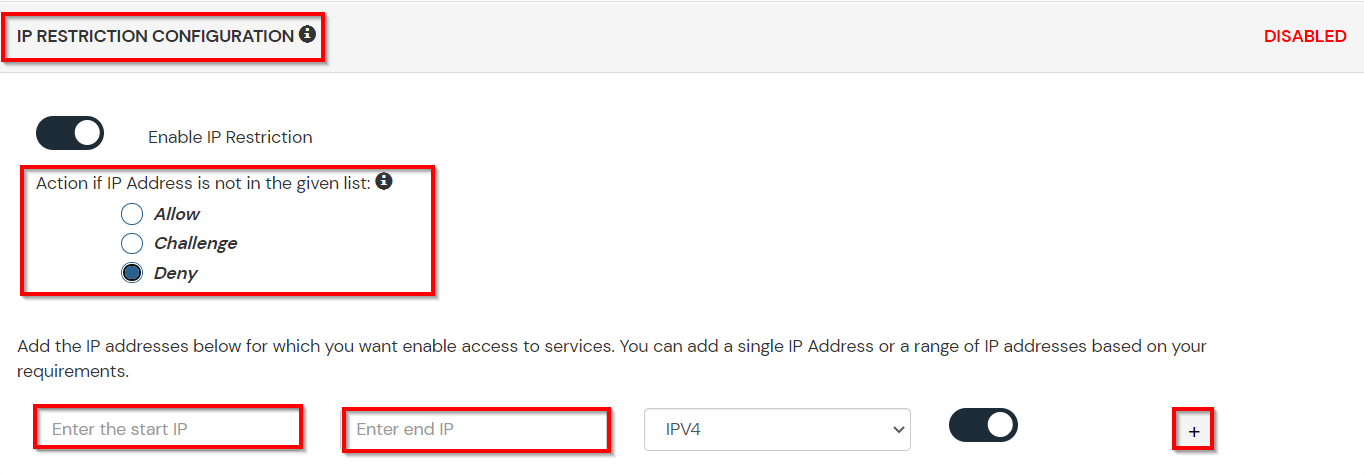
3.1: Restricting access to iPipeline with IP Blocking
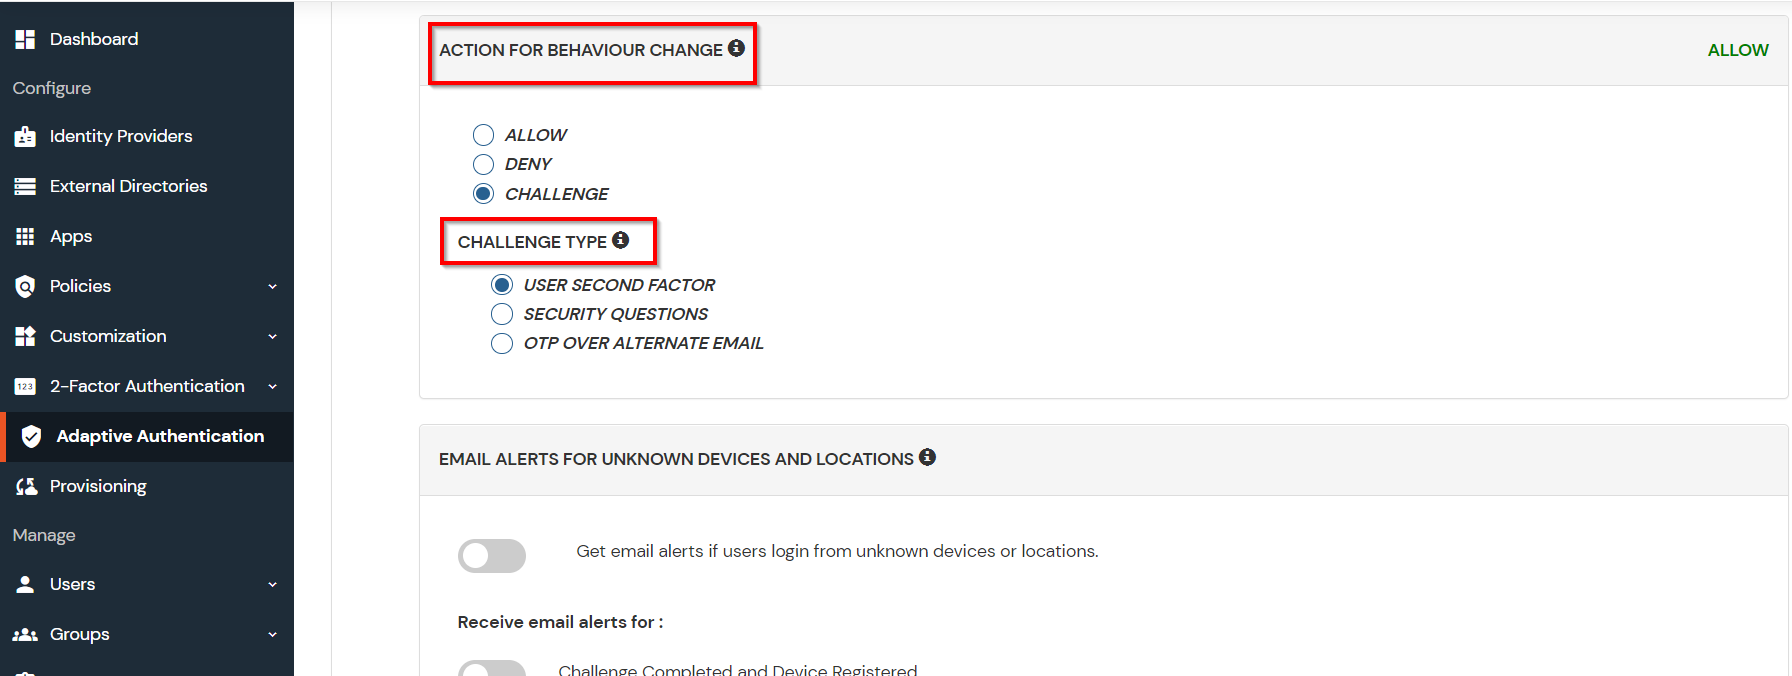
You can use adaptive authentication with iPipeline Single Sign-On (SSO) to improve the security and functionality of Single Sign-On. You can allow a IP Address in certain range for SSO or you can deny it based your requirements and you can also challenge the user to verify his authenticity. Adaptive authentication manages the user authentication bases on different factors such as Device ID, Location, Time of Access, IP Address and many more.
You can configure Adaptive Authentication with IP Blocking in following way: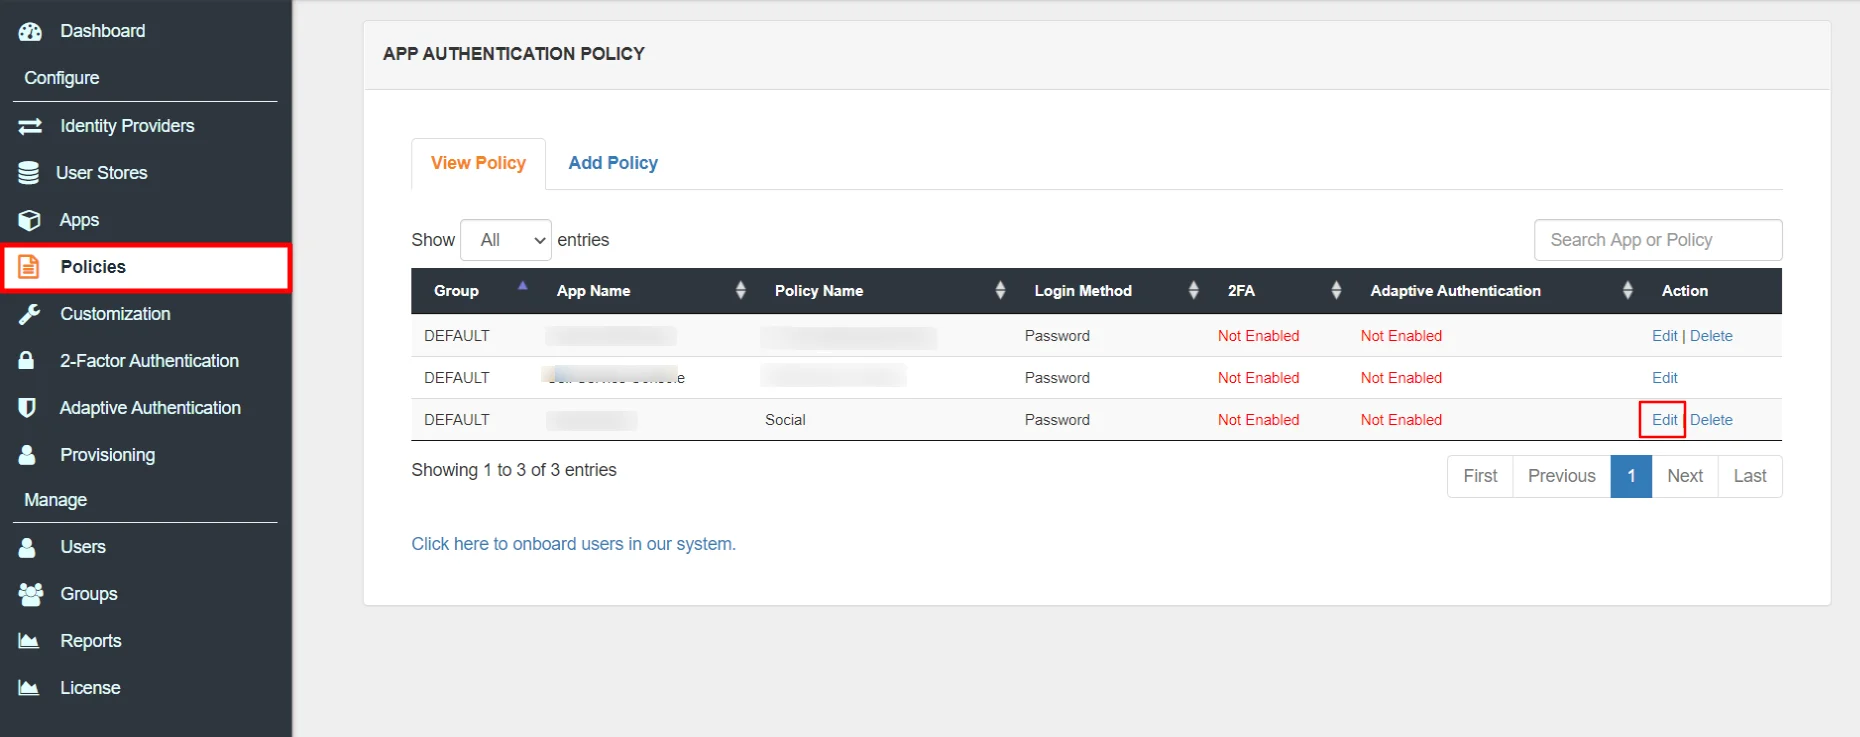
| Attribute | Description |
|---|---|
| Allow | Allow user to authenticate and use services if Adaptive authentication condition is true. |
| Challenge | Challenge users with one of the three methods mentioned below for verifying user authenticity. |
| Deny | Deny user authentications and access to services if Adaptive authentication condition is true. |
| Attribute | Description |
|---|---|
| User second Factor | The User needs to authenticate using the second factor he has opted or assigned for such as |
| KBA (Knowledge-based authentication) | The System will ask user for 2 of 3 questions he has configured in his Self Service Console. Only after right answer to both questions user is allowed to proceed further. |
| OTP over Alternate Email | User will receive a OTP on the alternate email he has configured threw Self Service Conolse. Once user provides the correct OTP he is allowed to proceed further. |
3.2: Adaptive Authentication with Limiting number of devices.
Using Adaptive Authentication you can also restrict the number of devices the end user can access the Services on. You can allow end users to access services on a fixed no. of devices. The end users wii be able to access services provided by us on this fixed no. of devices.
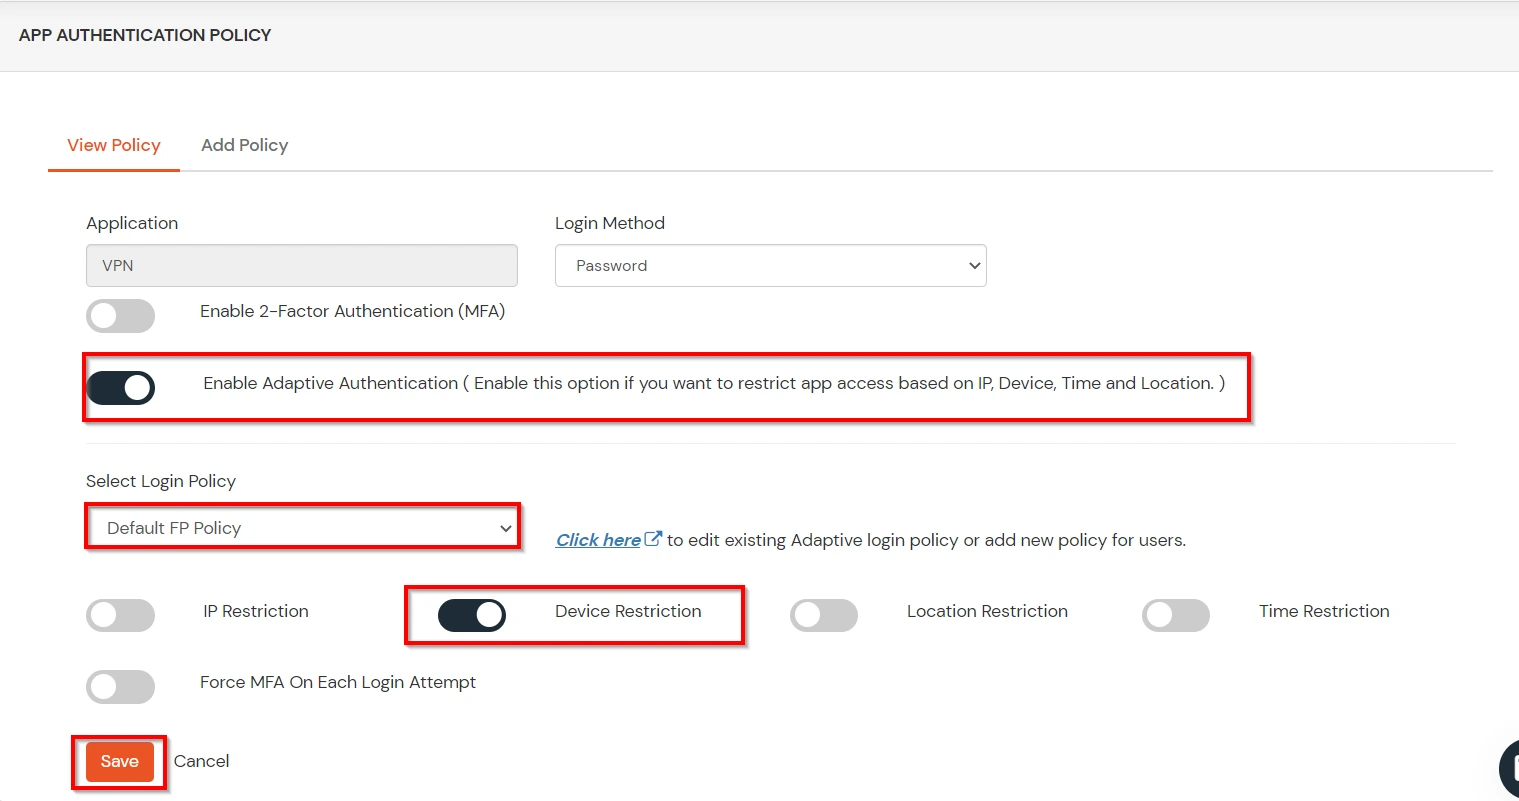
You can configure Adaptive Authentication with Device Restriction in follwing way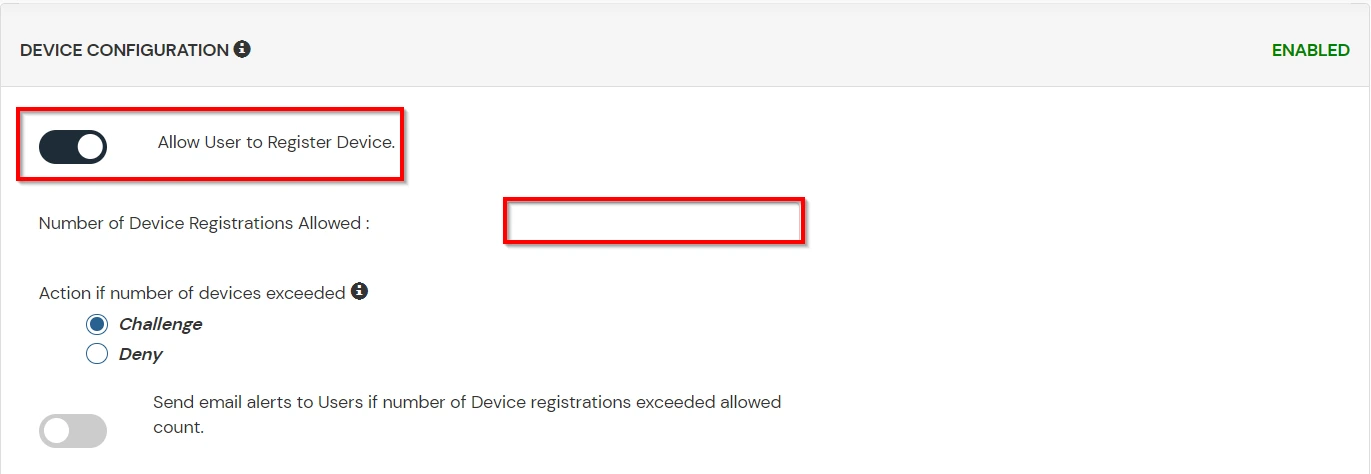
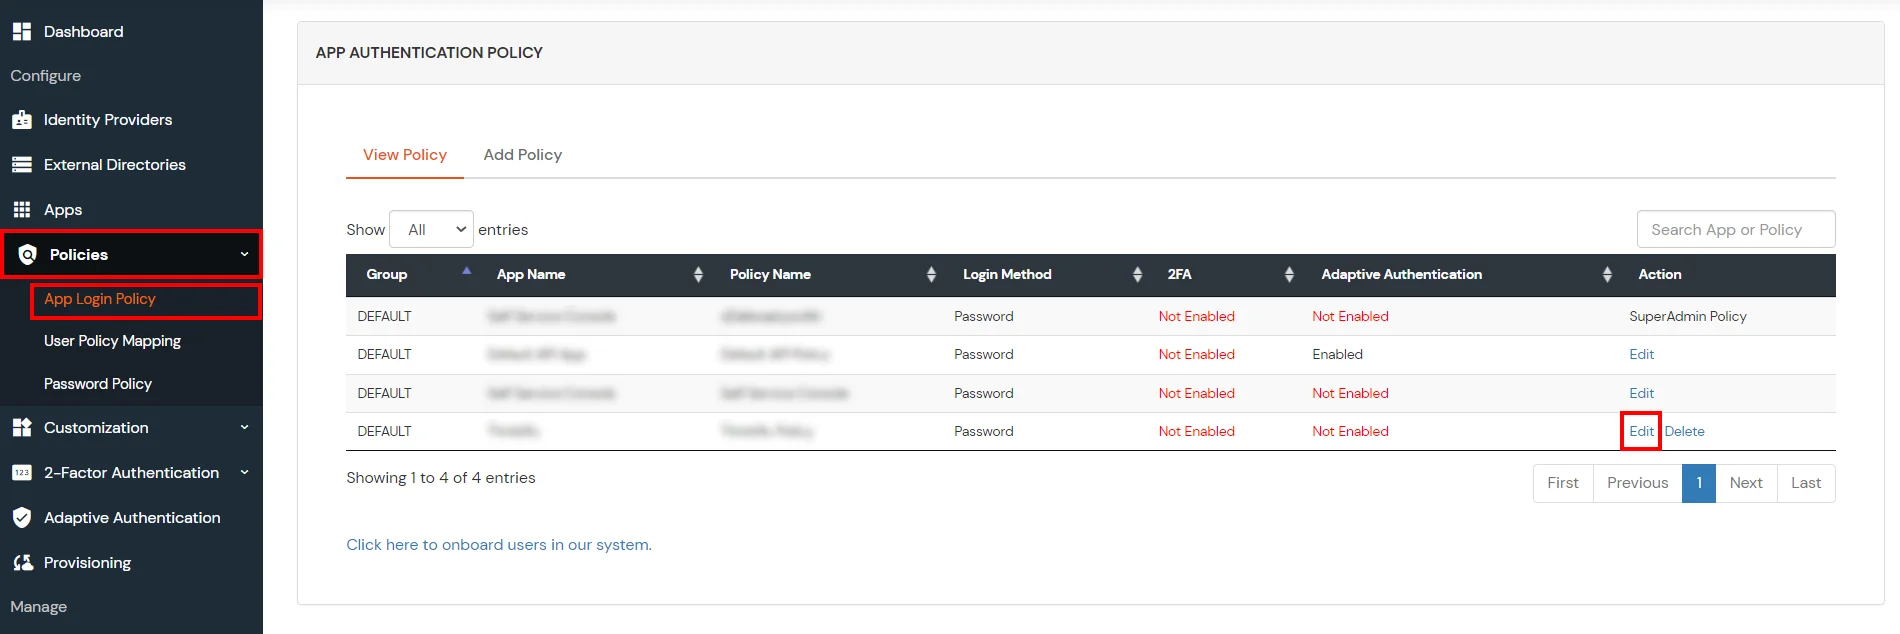
3.3: Add Adaptive Authentication policy to iPipeline.
The most practical way to strengthen authentication is to require a second factor after the username/password stage. Since a password is something that a user knows, ensuring that the user also has something or using biometrics thwarts attackers that steal or gain access to passwords.
Traditional two-factor authentication solutions use hardware tokens (or "fobs") that users carry on their keychains. These tokens generate one-time passwords for the second stage of the login process. However, hardware tokens can cost up to $40 each. It takes time and effort to distribute them, tracks who has which one, and replace them when they break. They're easy to lose, hard to use, and users consistently report high levels of frustration with token-based systems.
miniOrange authentication service has 15+ authentication methods.
You can choose from any of the above authentication methods to augment your password based authentication. miniOrange authentication service works with all phone types, from landlines to smart-phone platforms. In the simplest case, users just answer a phone call and press a button to authenticate. miniOrange authentication service works internationally and has customers authenticating from many countries around the world.
miniOrange provides 24/7 support for all the Secure Identity Solutions. We ensure high quality support to meet your satisfaction.
Try Nowminiorange provides most affordable Secure Identity Solutions for all type of use cases and offers different packages based on customer's requirement.
Request A QuoteWe offer Secure Identity Solutions for Single Sign-On, Two Factor Authentication, Adaptive MFA, Provisioning, and much more. Please contact us at -
+1 978 658 9387 (US) , +91 97178 45846 (India) | info@xecurify.com