Add & Update User Accounts
Add Users in Active Directory:
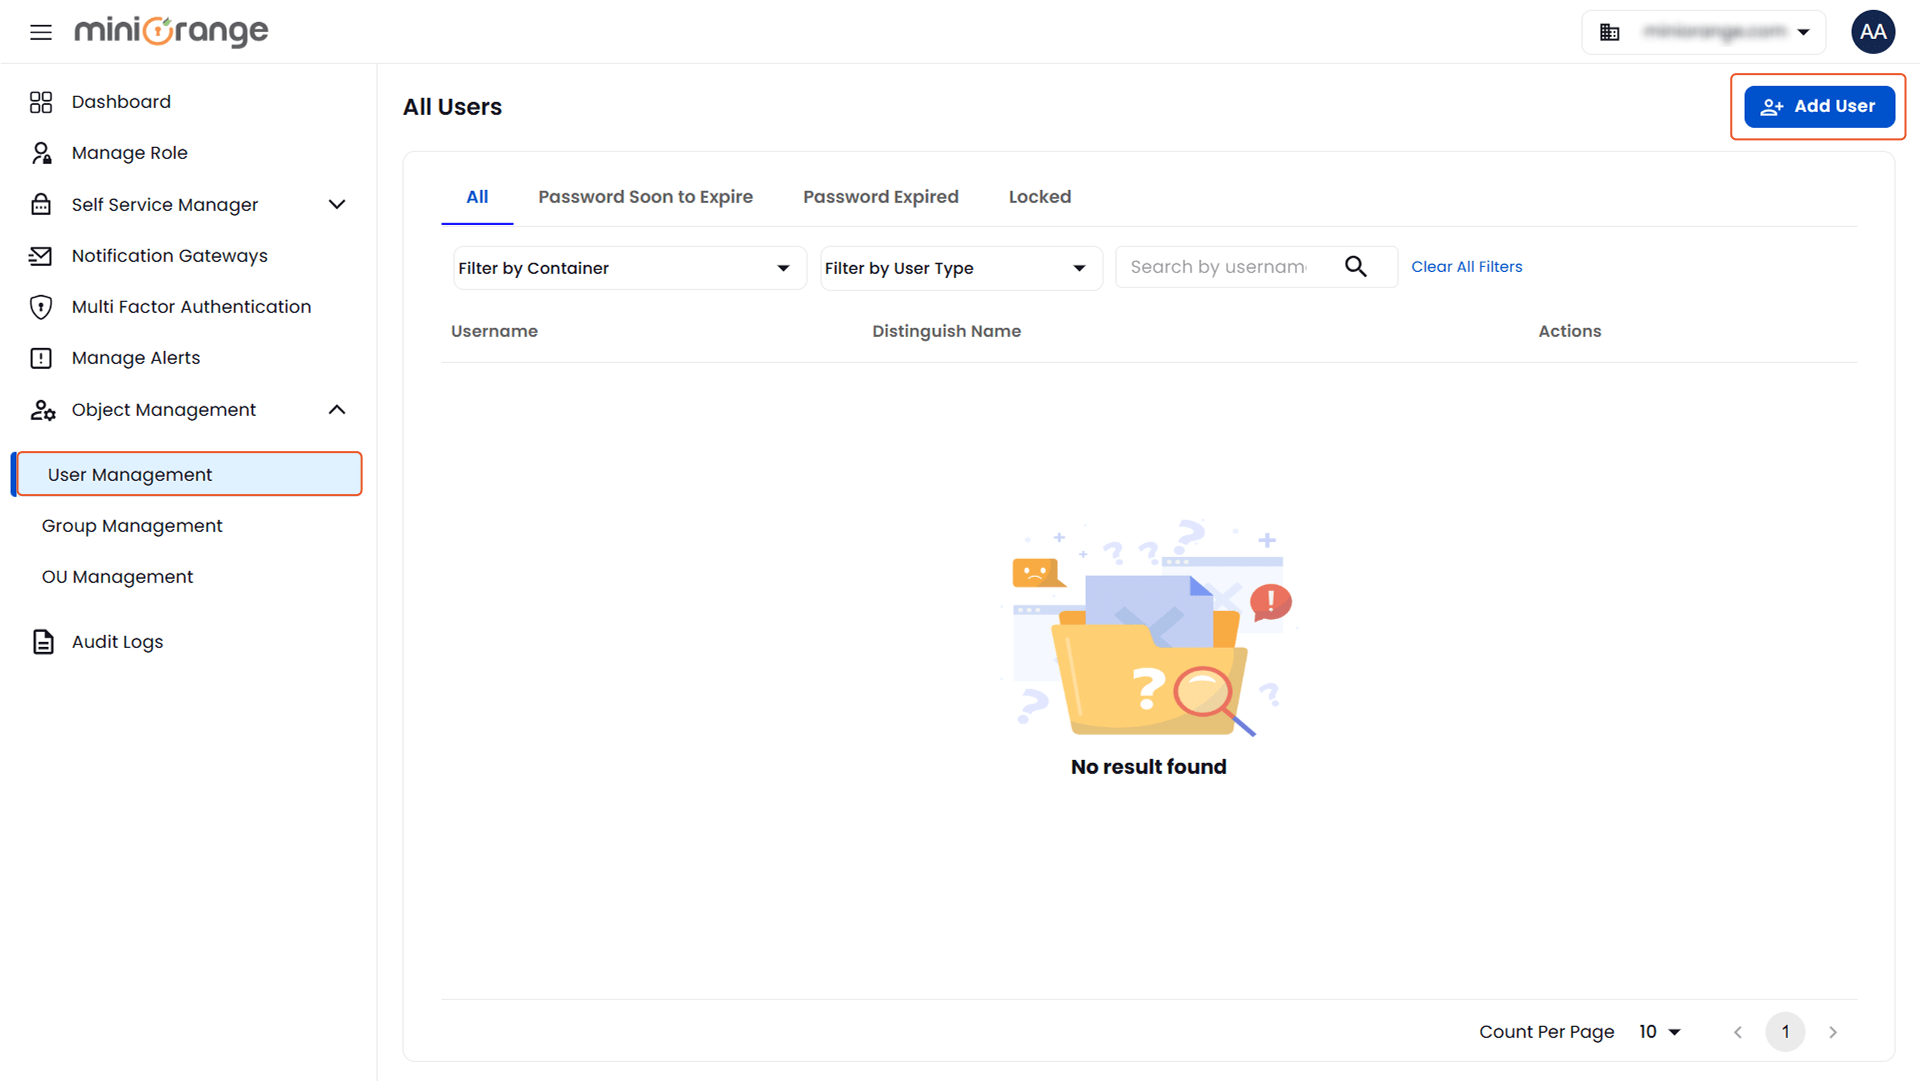
To create a new user account:
- Navigate to Object Management > User Management.
- Click on the Add User button.
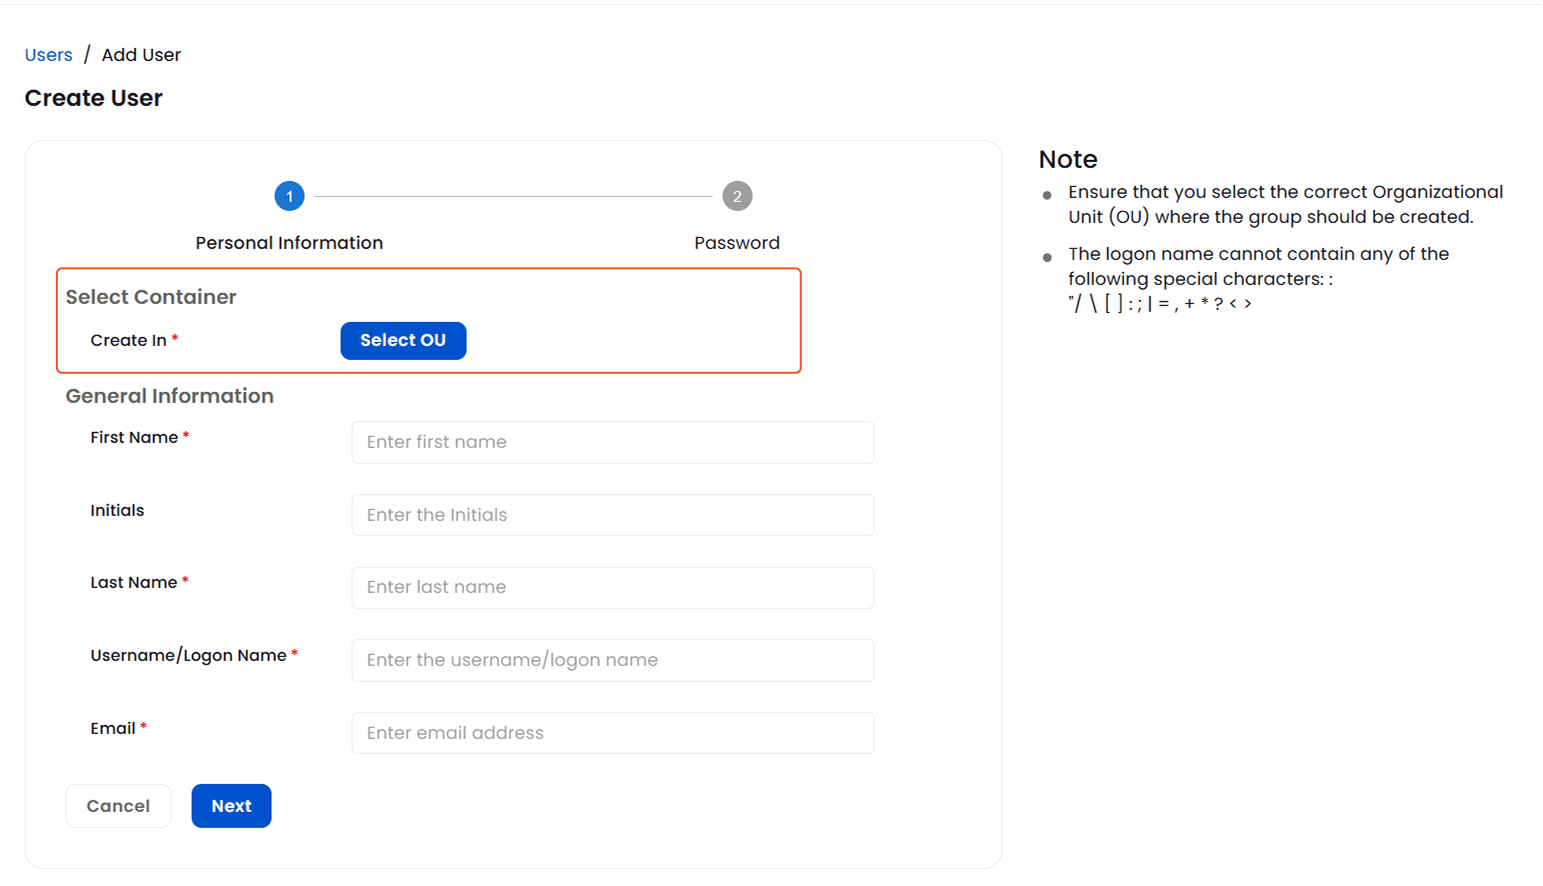
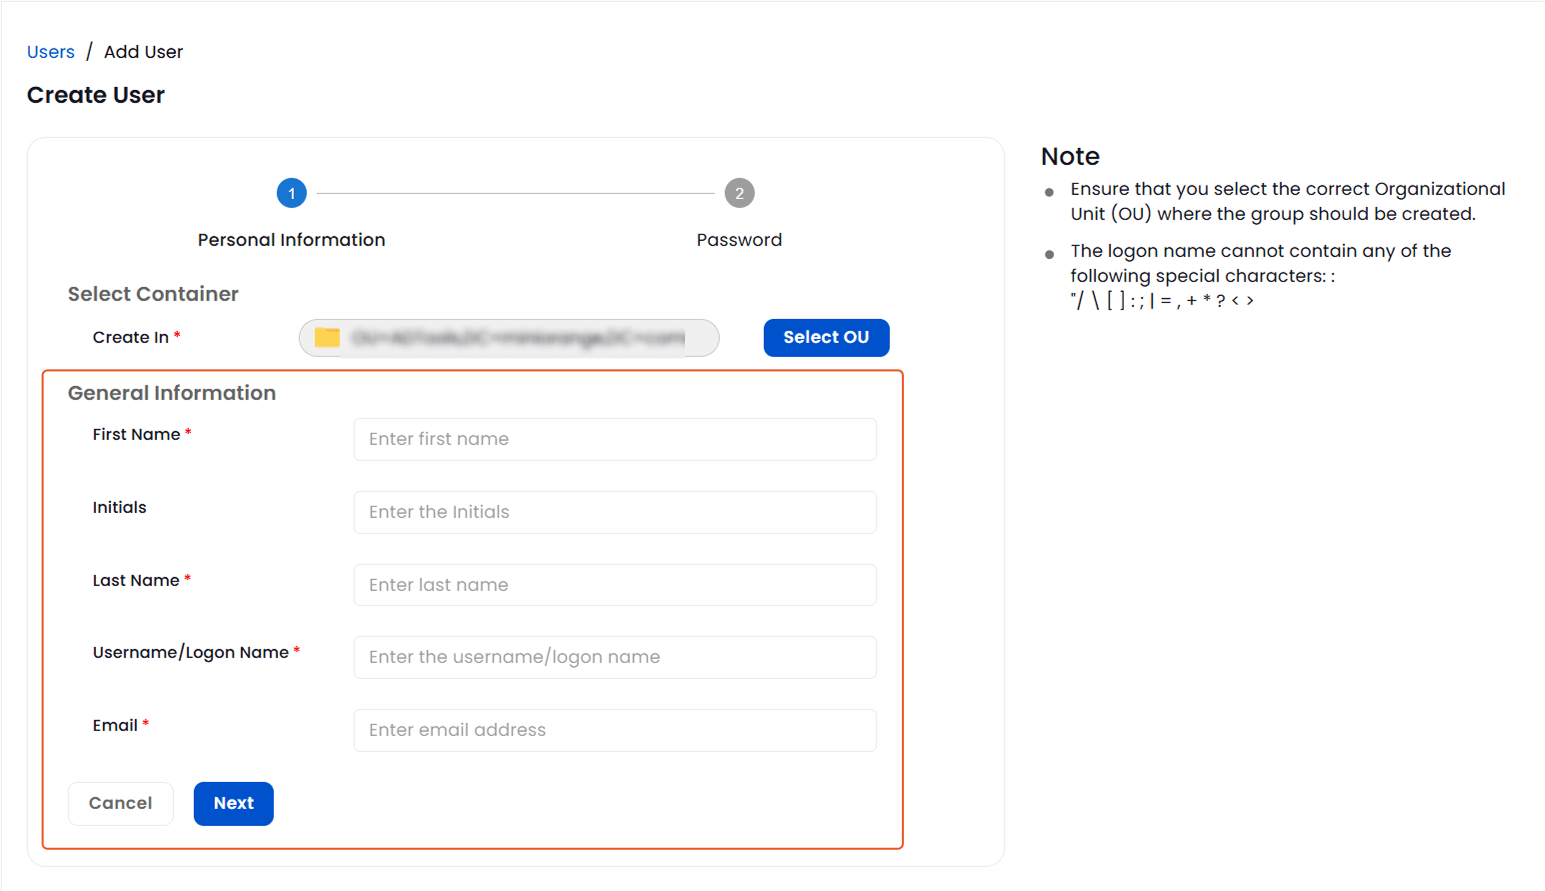
Step 1: Select Container:
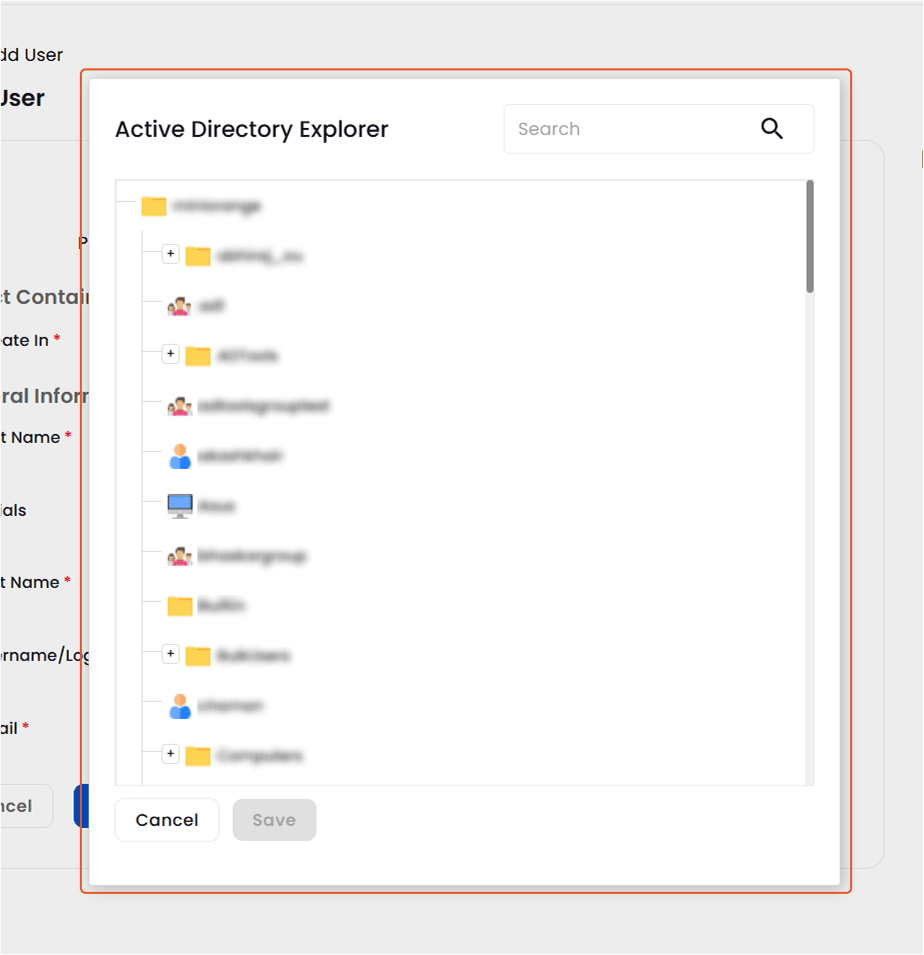
- Click Select OU to choose the container where the new user will be created.
- In the Active Directory Explorer select the desired organizational unit.
- After selecting the desired OU, click Save to confirm.
Step 2: Enter General User Information
- Fill in the following fields:
- First Name
- Initials
- Last Name
- Username / Logon Name
- Email Address
- Click Next to proceed to password settings.
Step 3: Set Password Preferences
Step 4: Configure Account Properties
Step 5: Save the User
- Once all fields are configured, click Save Details to add the user to Active Directory.

Modify or Update User Account Information in AD Tools:
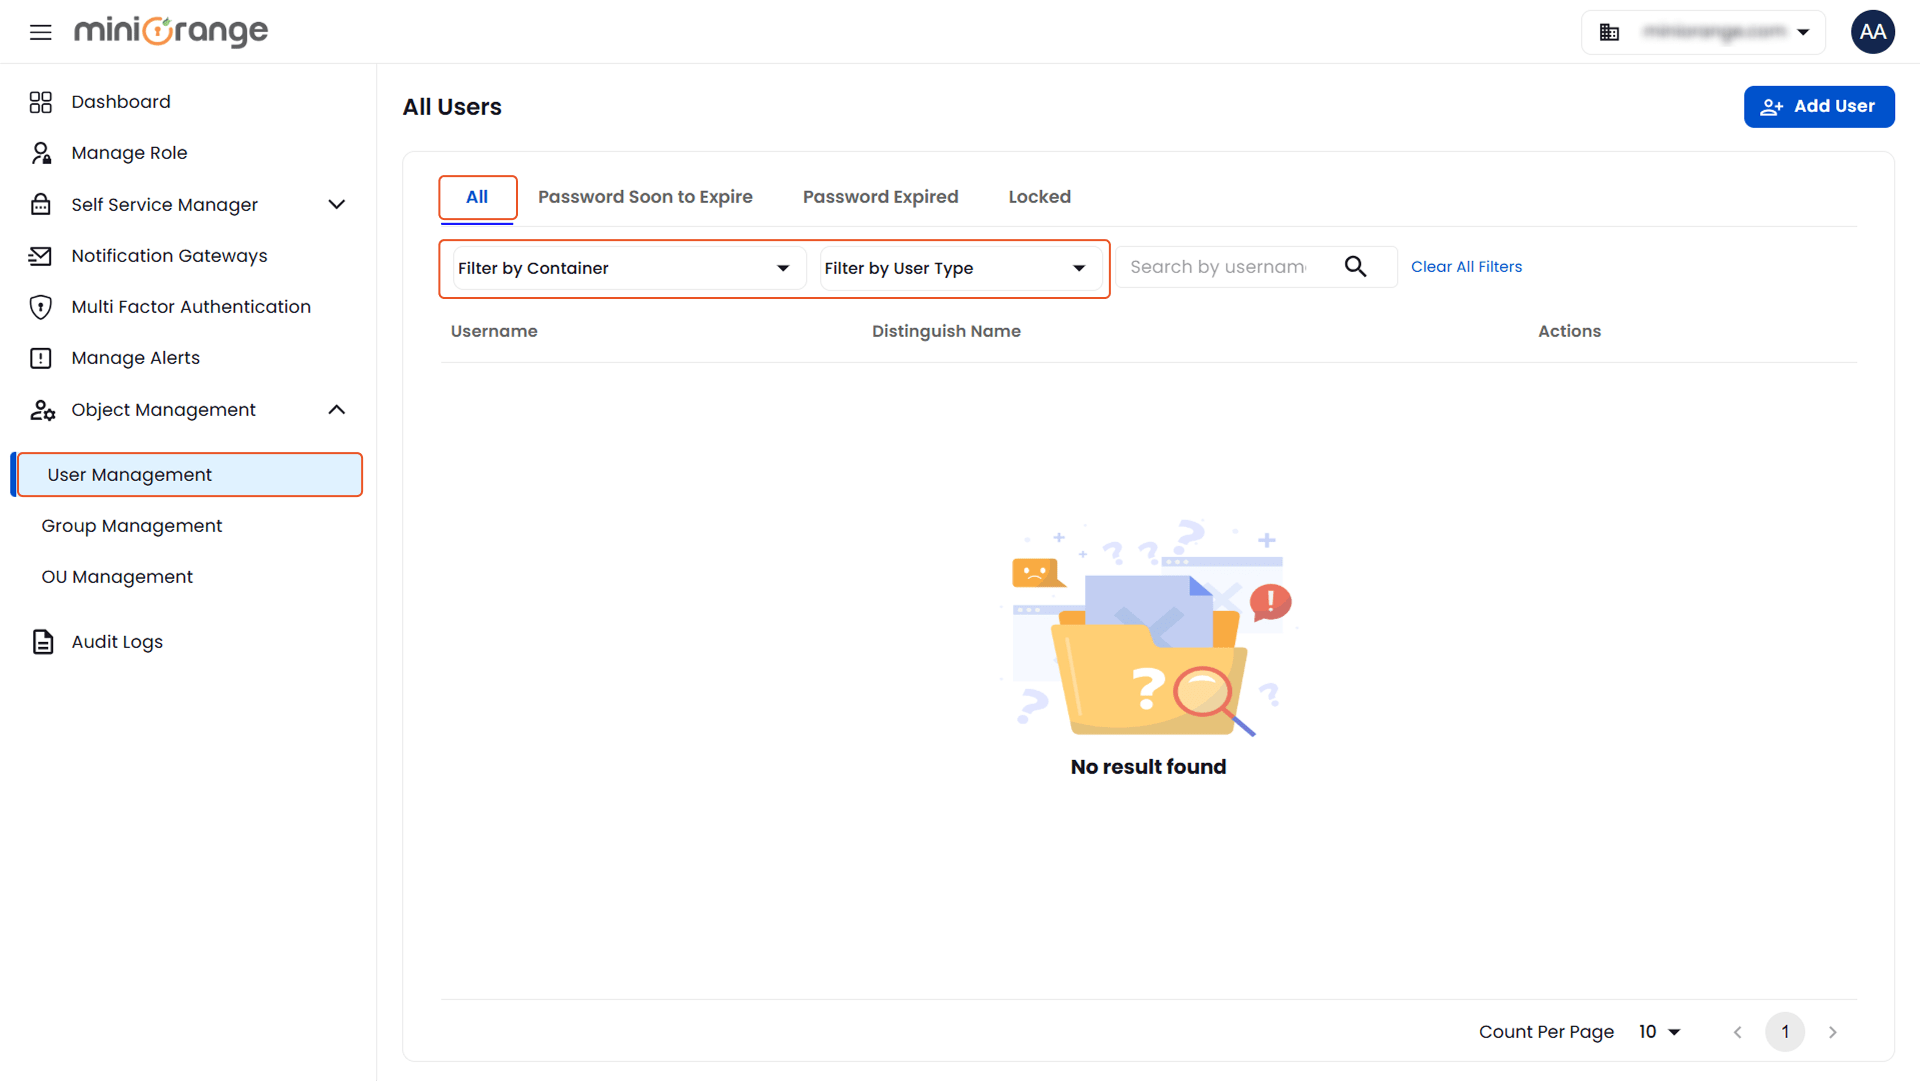
To update an existing user's details:
- Navigate to Object Management > User Management.
- Under the All Users tab, search for users by:
- Selecting a container via the Filter by Container dropdown.
- Filtering by user type using the Filter by User Type dropdown.
- Enter the username in the search bar and click the search icon.
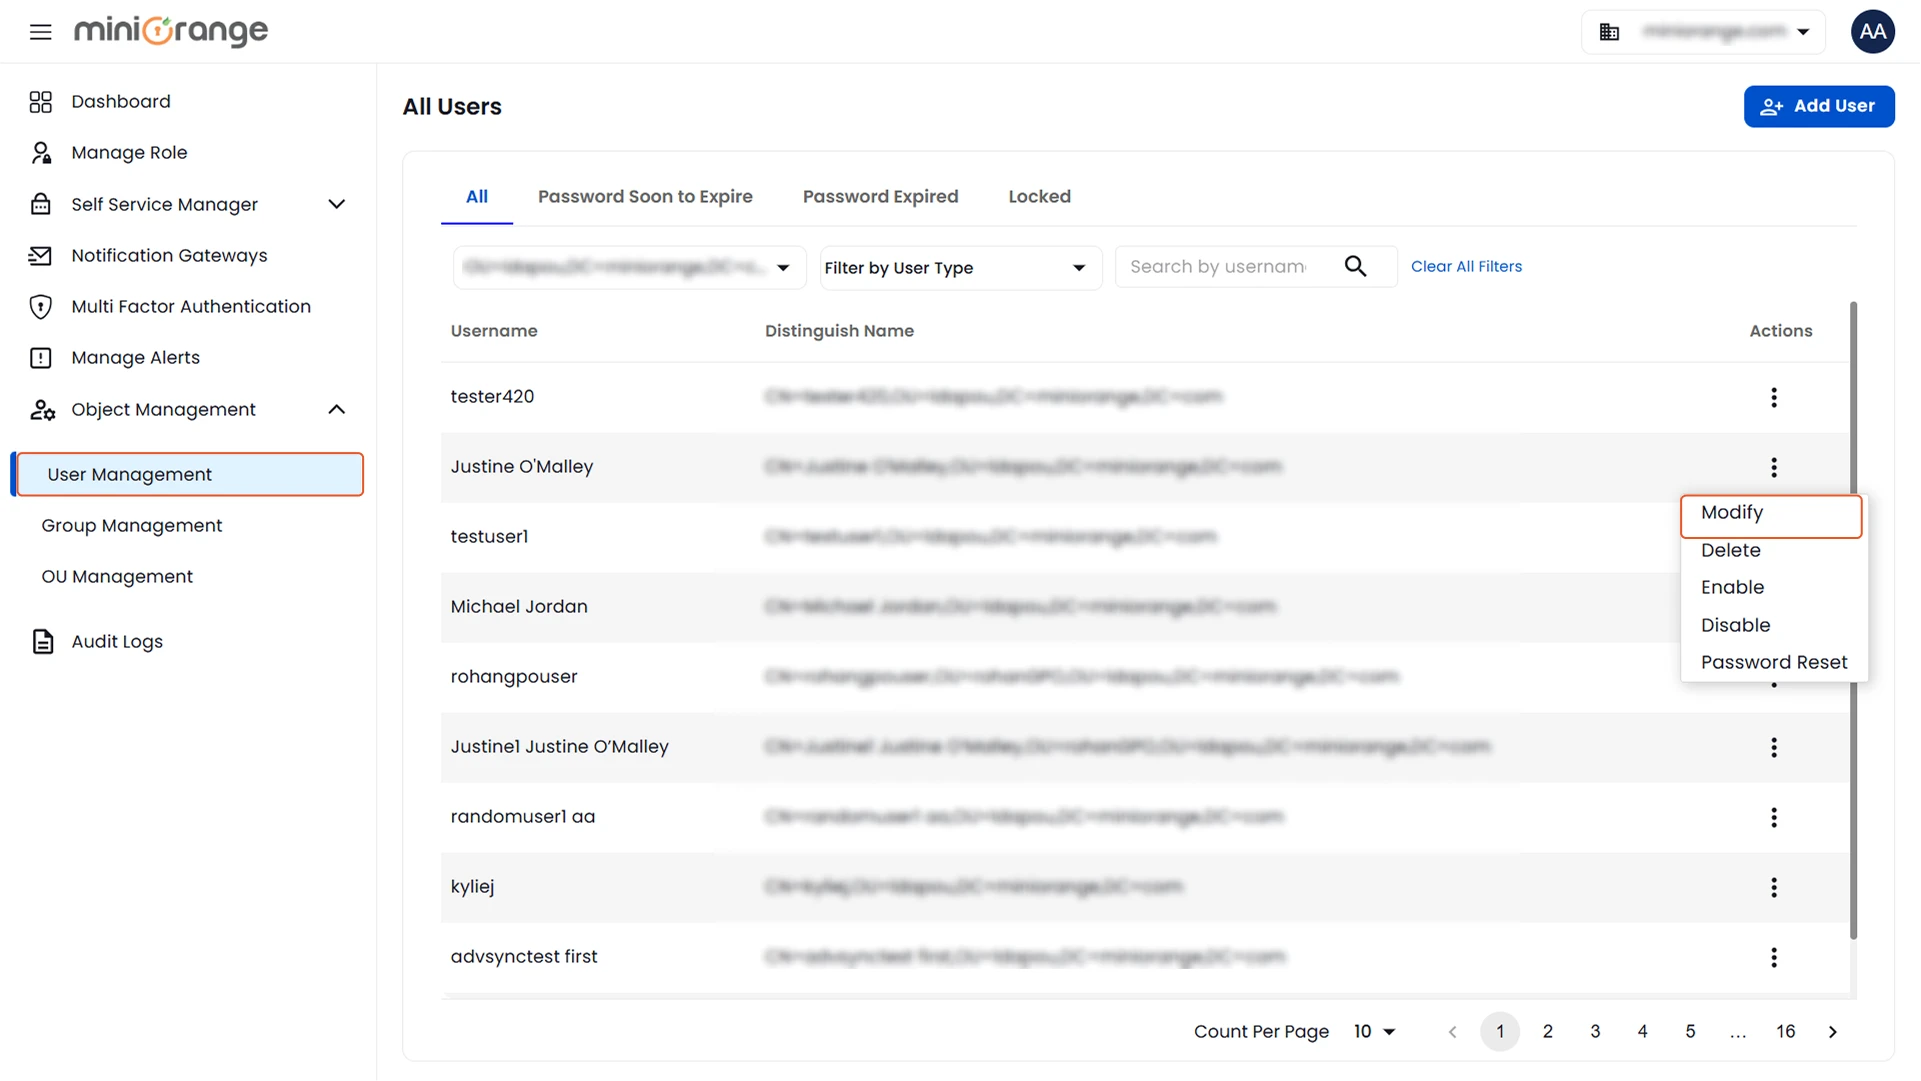
- In the user list, go to the Actions column and click the three-dot icon next to the desired user.
- From the dropdown options, select Modify User.
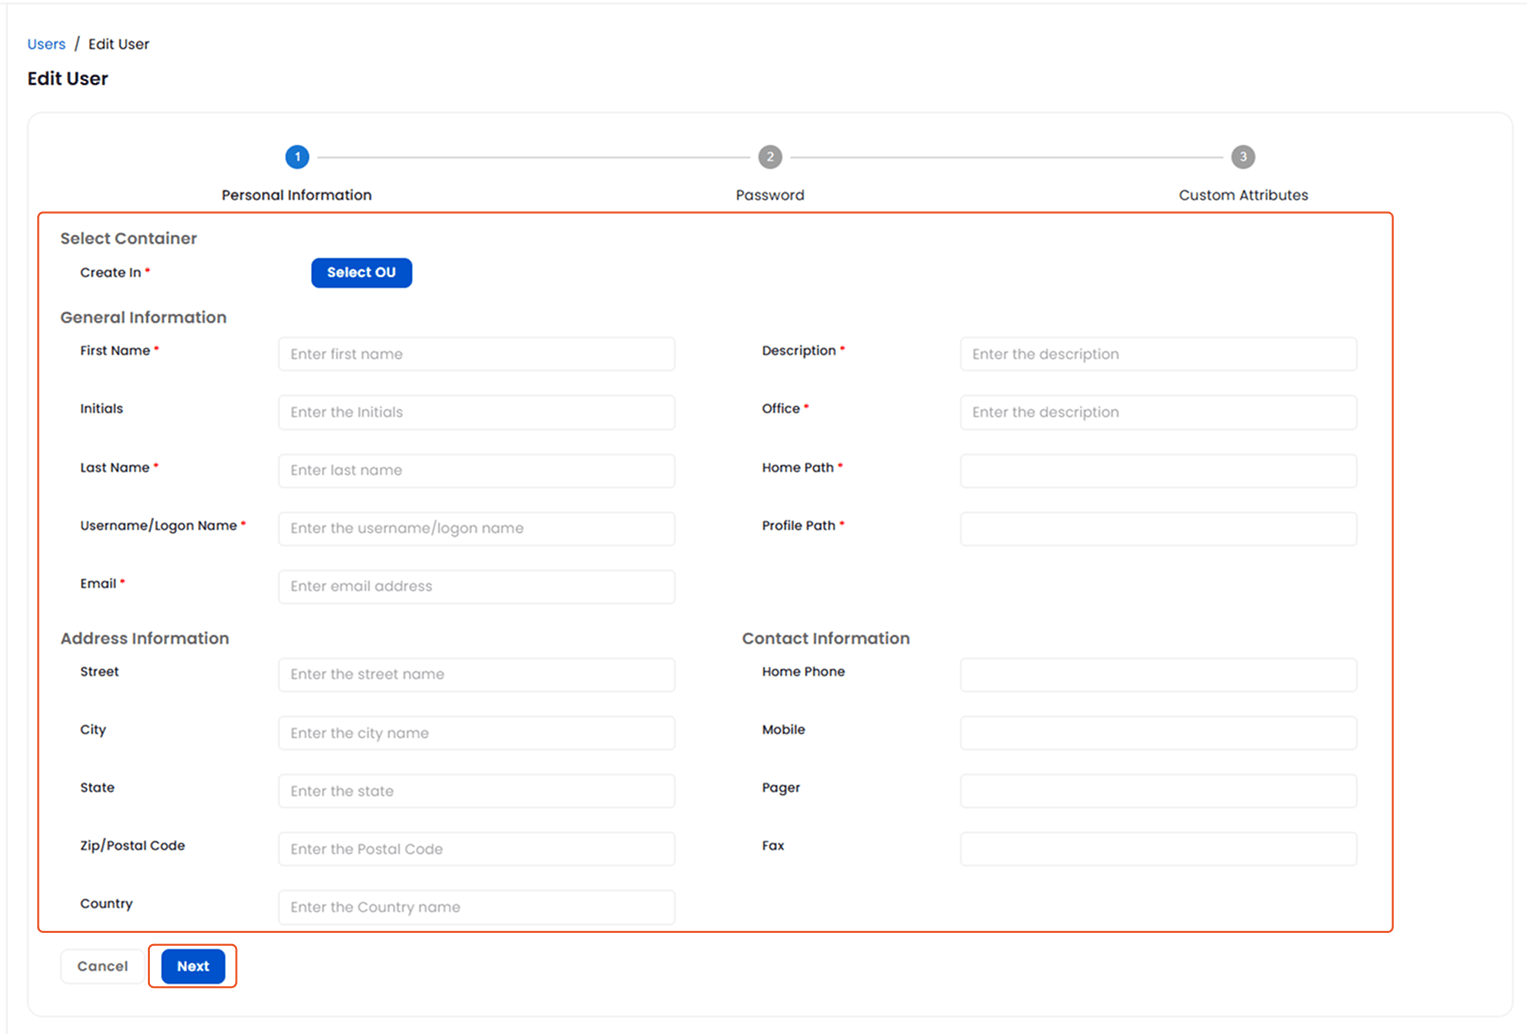
Step 1: Edit Personal Information
Update the following fields as needed:
- Container (OU): Select a new organizational unit if required.
- General Information: First Name, Initials, Last Name, Username/Logon Name, Email, Description, Office, Home Path, Profile Path.
- Address Information: Street, City, State, Zip/Postal Code, Country.
- Contact Information: Home Phone, Mobile, Pager, Fax.
- Click Next to proceed to password-related settings.
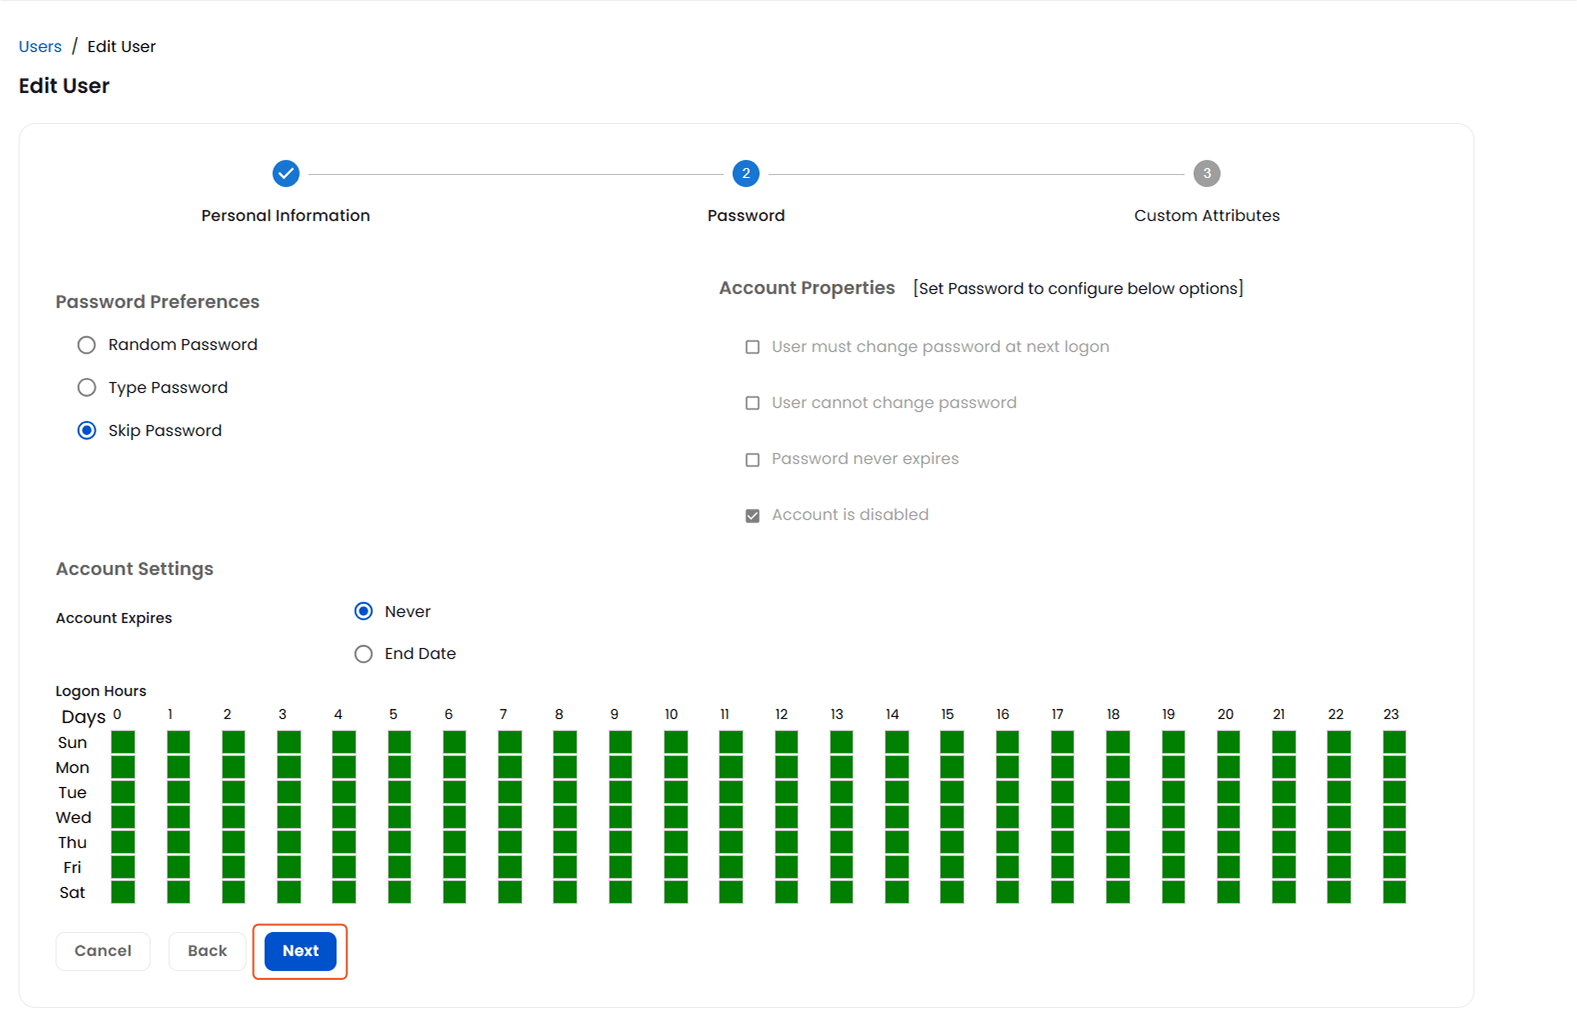
Step 2: Configure Password Settings
Step 3: Set Account Settings
- Account Expiration:
- Never: Password does not expire.
- End Date: Set a specific date for password expiration.
- Logon Hours:
- Configure allowed login hours.
- Green blocks: login allowed, Gray blocks: login restricted.
- Click Next to proceed to custom attributes.
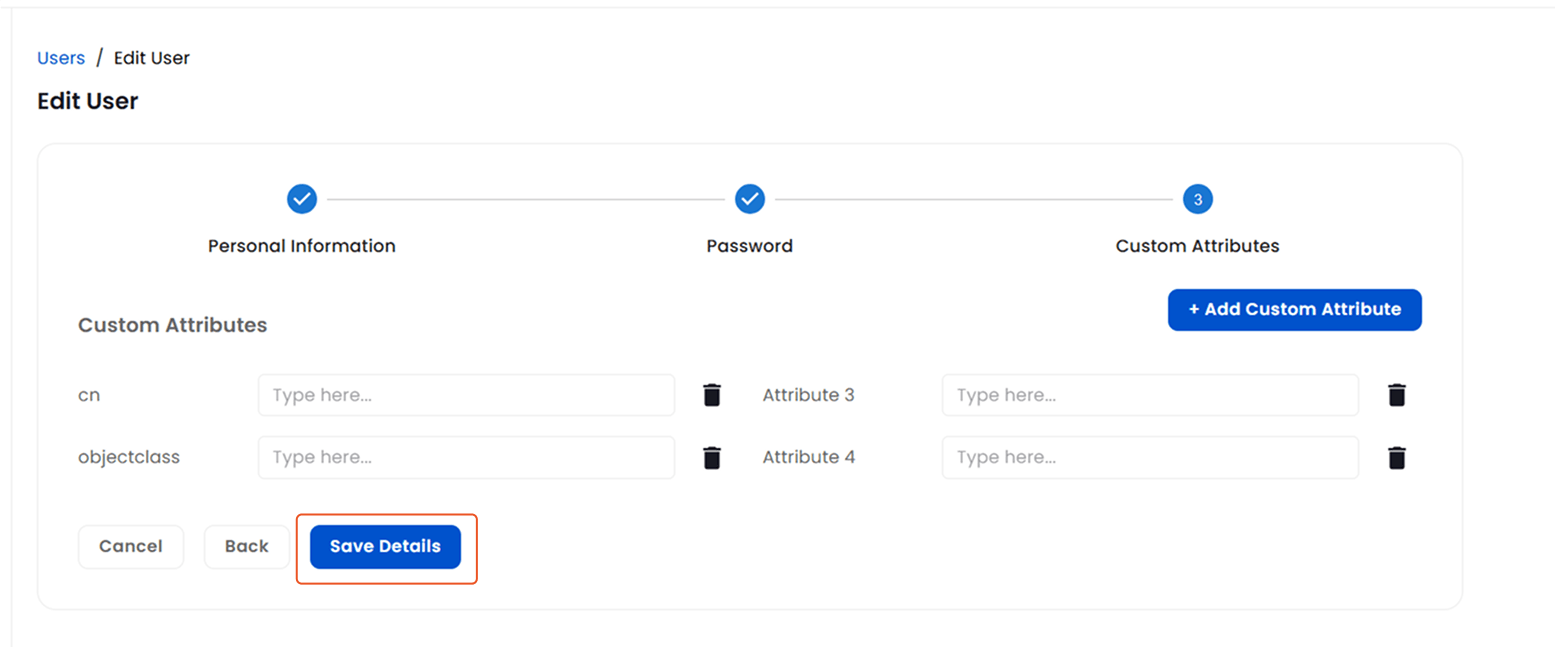
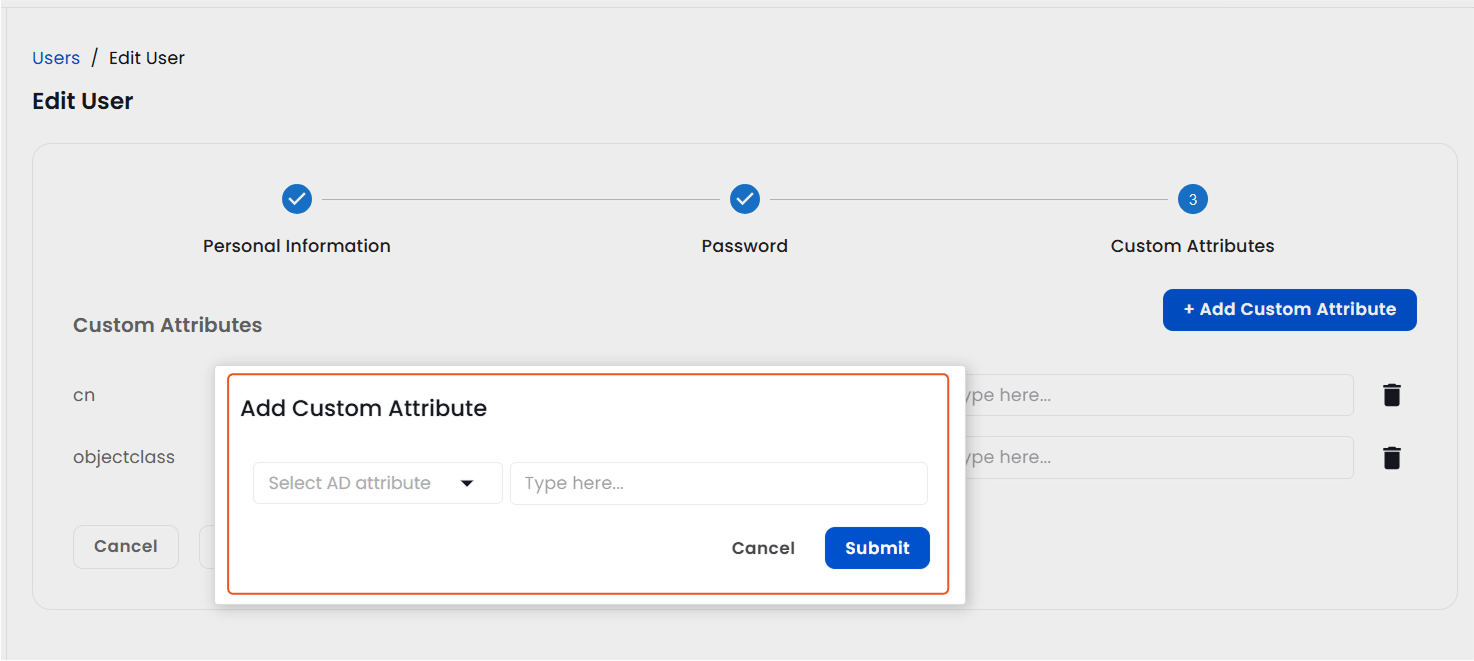
Step 4: Manage Custom Attributes
- You can edit or delete existing custom attributes.
- To add a new one, click Add Custom Attribute:

- Select an LDAP Attribute from the dropdown.
- Enter the attribute value.
- Click Submit to add it.
- Once all updates are complete, click on Save Details to apply the changes to the user account.