How to add a SCIM Server App
miniOrange SCIM Server application is used for outbound provisioning using SCIM protocol. In outbound provisioning, A user gets provisioned from miniOrange to another application using SCIM protocol.
Steps to setup provisioning from miniOrange to SCIM supported app
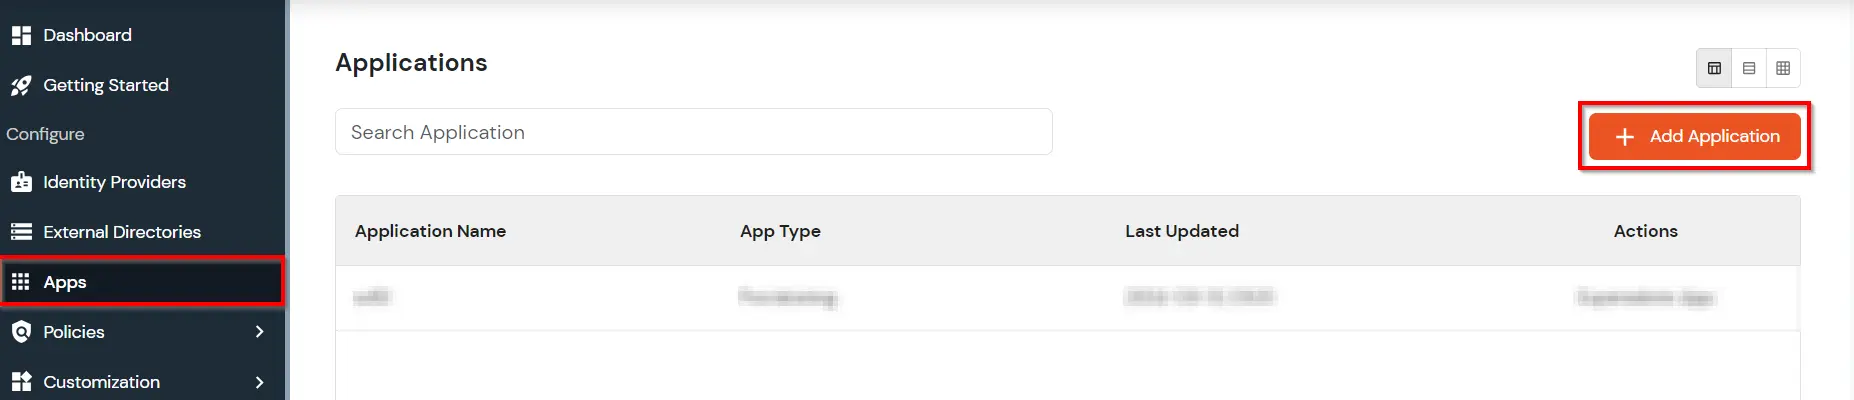
- Login into miniOrange Admin Console.
- Click on Apps. It shows a list of all configured applications and option to modify them. Click on Add Application.
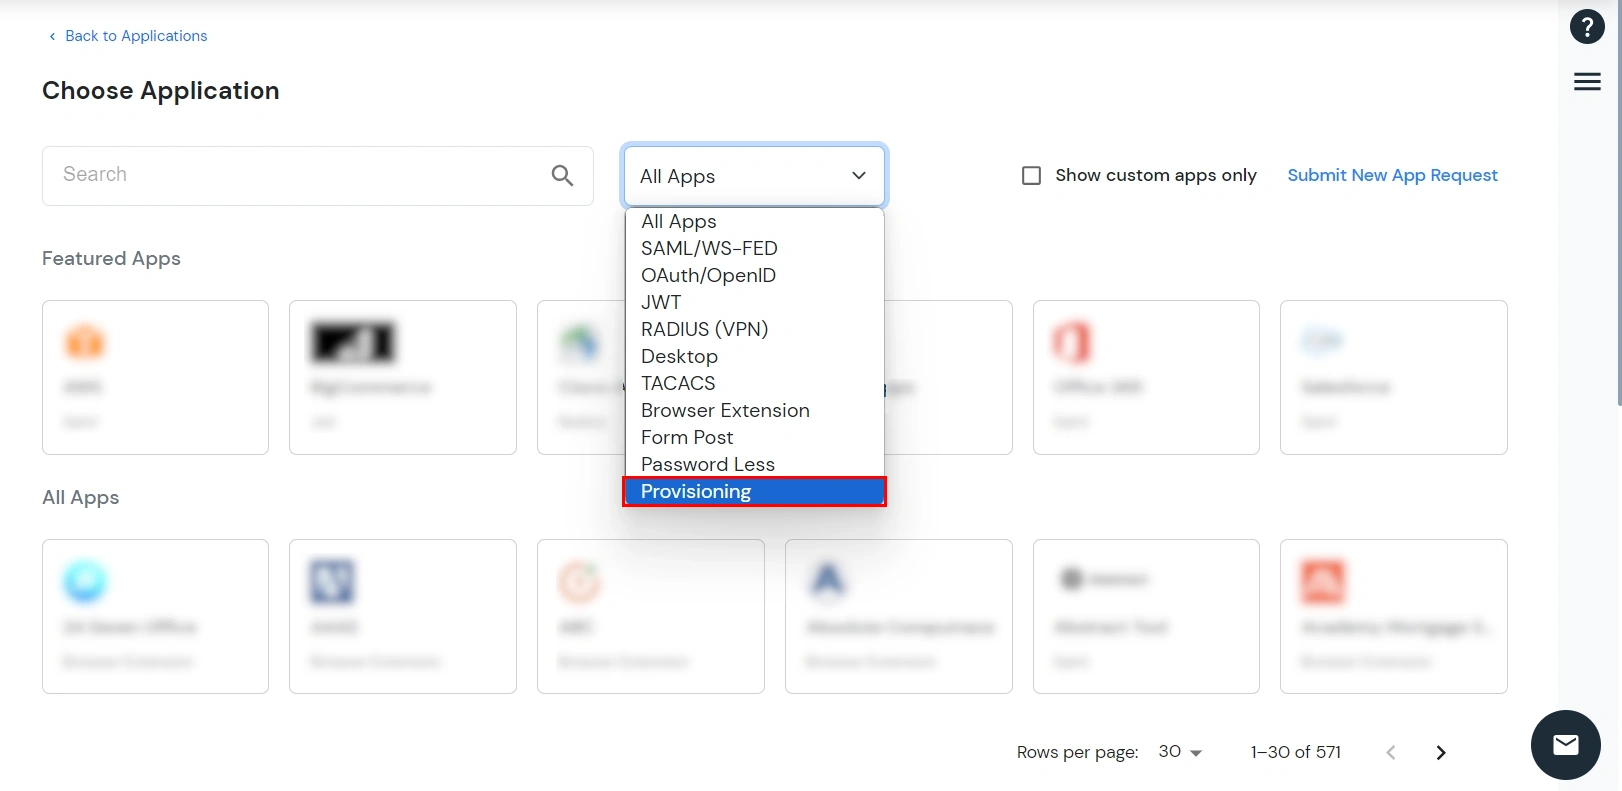
- Select Provisioning from the All Apps dropdown.
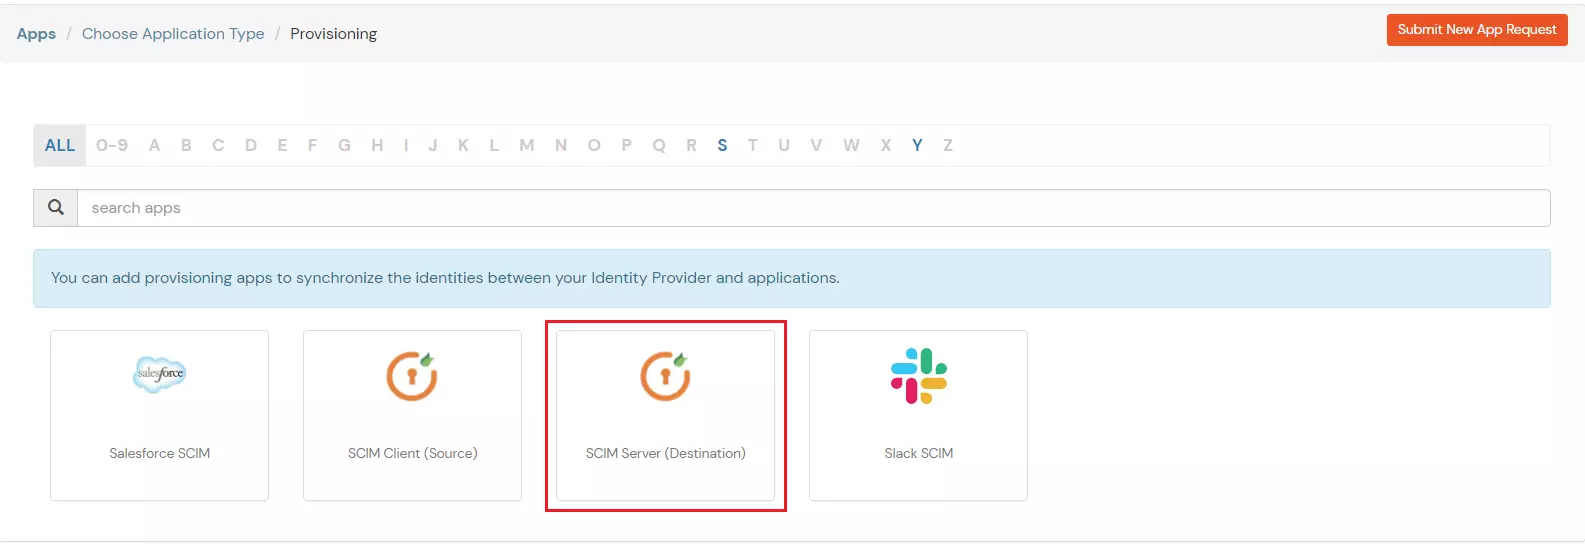
- Search for your application from the list, if your application is not found. Search for SCIM Server and you can set up your app via SCIM Server (Destination).
- Under Basic Settings, enter Display Application Name and click the Save button to add the app.

- In the Authorization Configuration section, enter the SCIM Base URL and Bearer Token that you copied from the application.
- Click the Test Connection button to verify details.
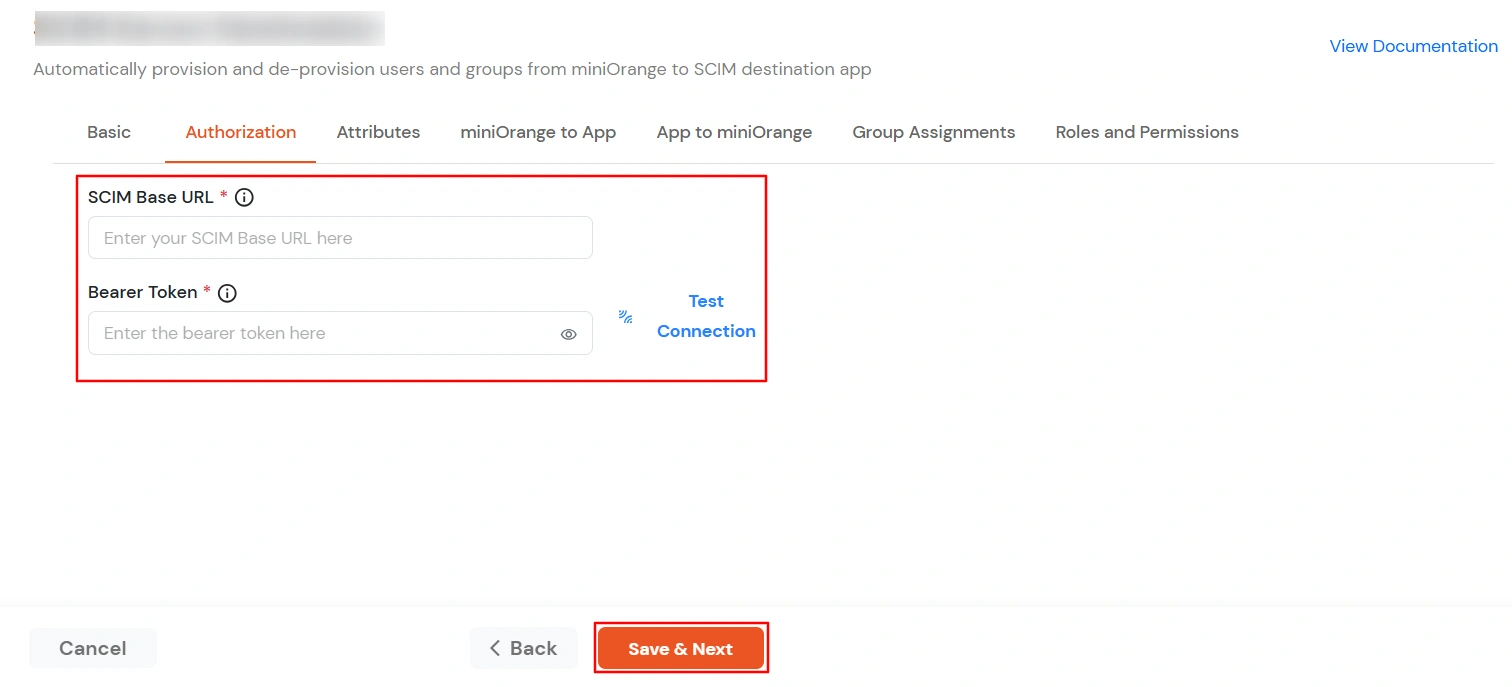
- Then, click Save & Next button.
2. Attribute Mapping
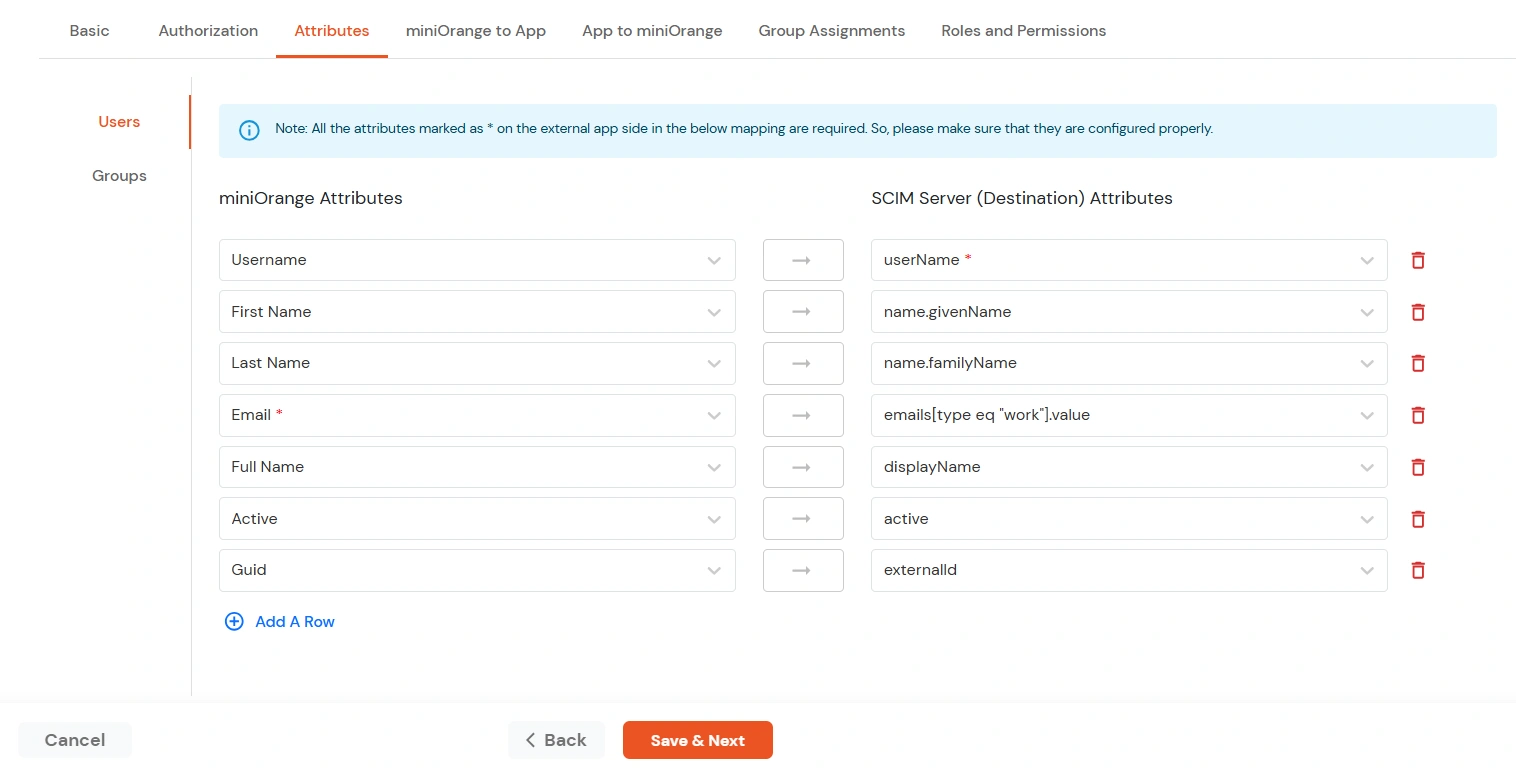
- Navigate to the Attributes Mapping tab in your application SCIM Provisioning configuration.
- Under this tab, you'll find two sections: Users and Groups, where you can map miniOrange attributes to SCIM Server attributes for synchronization.
Users Mapping:
Note: The userName, name.givenName, name.familyName, emails[type eq \"work\"].value, displayName and active fields are required for SCIM integration.
- In the Users section, map the attributes from miniOrange Attributes to the corresponding SCIM Server Attributes.
- Once all required mappings are configured, click the Save & Next button to proceed.
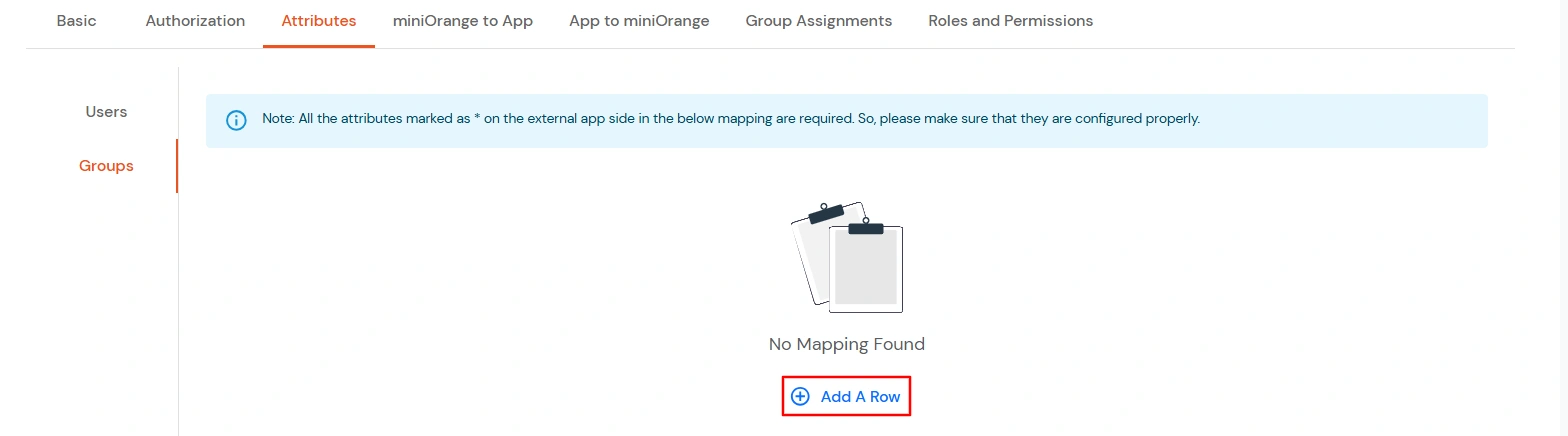
Groups Mapping:
Note: If you don't need group provisioning, skip this step.
- Click on the Groups tab.
- Click Add A Row to add a new mapping.
- From the miniOrange Attributes dropdown, choose an attribute (like Group Name).
- In the SCIM Server (Destination) Attributes field, type the attribute (like displayName).
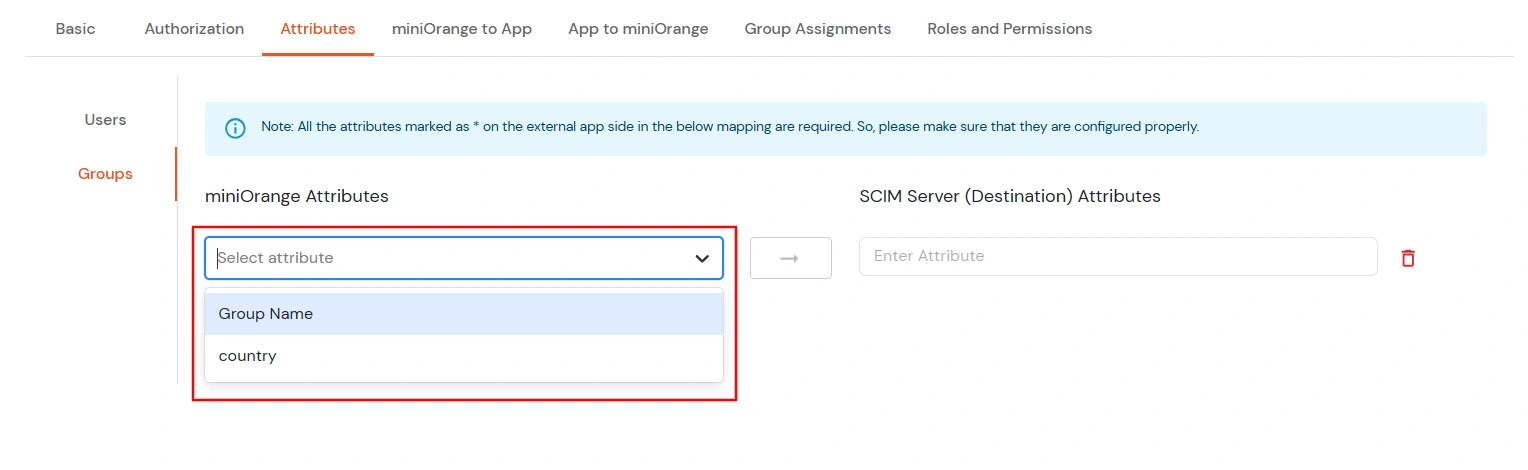
- Click Save & Next when done.
3. miniOrange to App
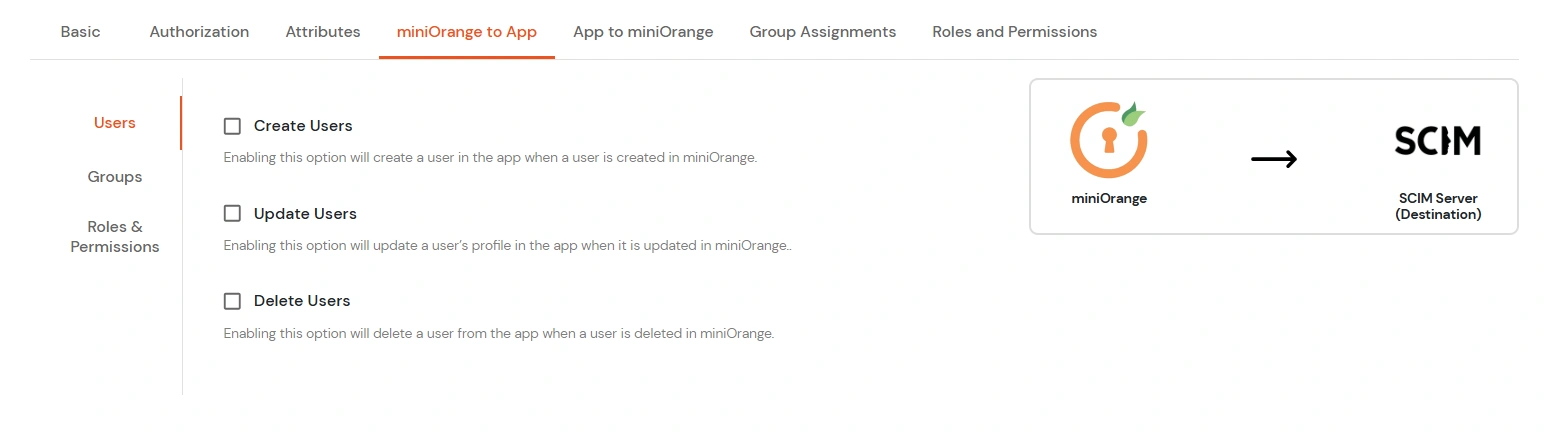
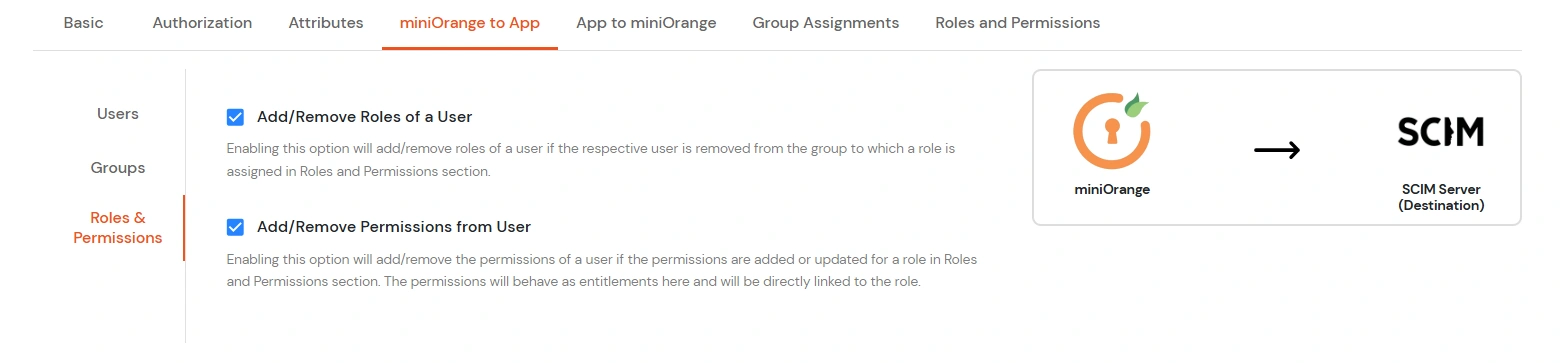
- In the miniOrange to App tab, there are three sections: Users, Groups, and Roles and Permissions. Each section contains a list of attributes along with their functions. You can enable or disable these attributes as needed.
|
Attribute |
Description |
| Users |
Create Users |
Enabling this option will create the user in the selected application upon user creation in miniOrange. |
| Update Users |
Enabling this option will update the user profile in the selected application if updated in miniOrange. |
| Delete Users |
Enabling this option will delete the user from the selected application if the user is deleted from the miniOrange. |

|
Attribute |
Description |
| Groups |
Create Group |
Enabling this option will create the Group in the selected application upon Group creation in miniOrange. |
| Delete Group |
Enabling this option will delete the Group from the selected application if the Group is deleted from the miniOrange. |
| Add/Remove Group membership of User |
Enabling this option will add/remove the Group membership of a user from the selected application if the respective user group membership is updated from the miniOrange. |
| Update Group |
Enabling this option will update the Group in the selected application upon Group updation in miniOrange. |
|
Option |
Description |
| Roles and Permissions |
Add/Remove Roles of a User |
Enabling this option will add/remove roles of a user if the respective user is removed from the group to which a role is assigned in the Roles and Permissions section. |
| Add/Remove Permissions from User |
Enabling this option will add/remove the permissions of a user if the permissions are added or updated for a role in the Roles and Permissions section. The permissions will behave as entitlements here and will be directly linked to the role. |
- Click Save to apply these changes.
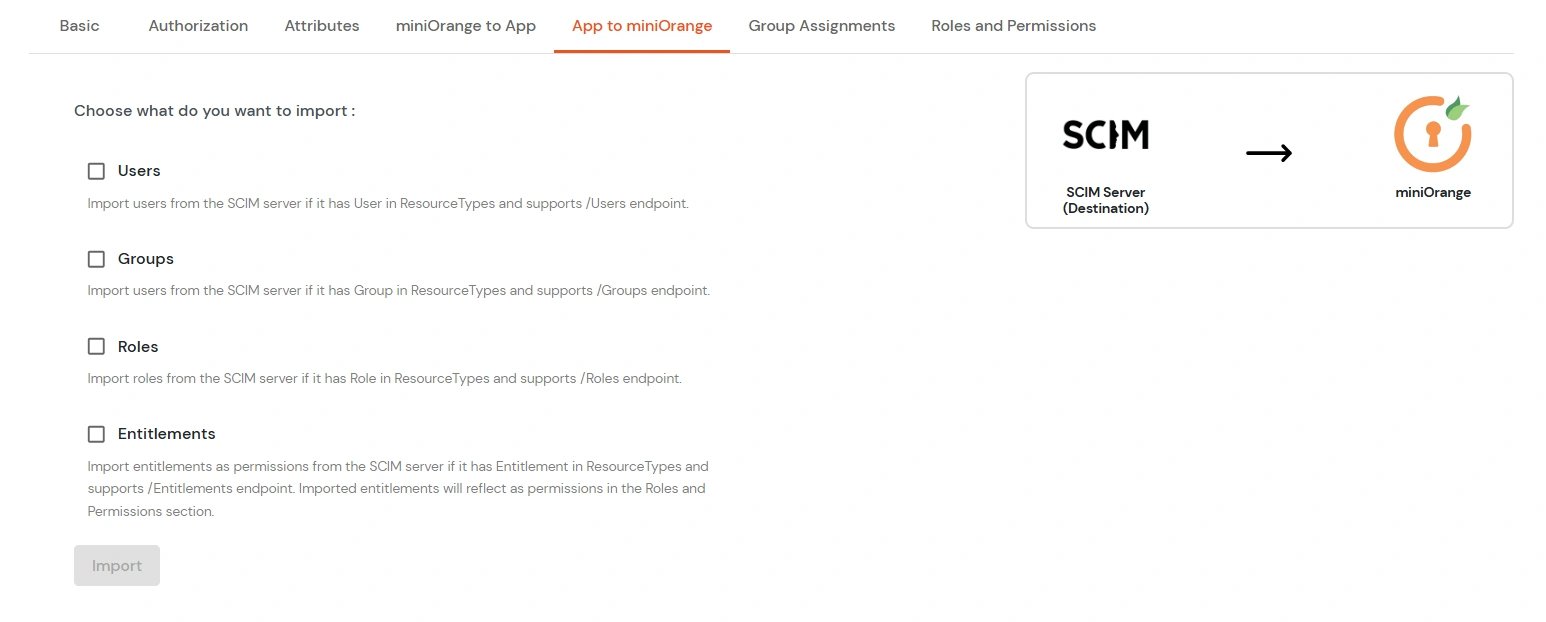
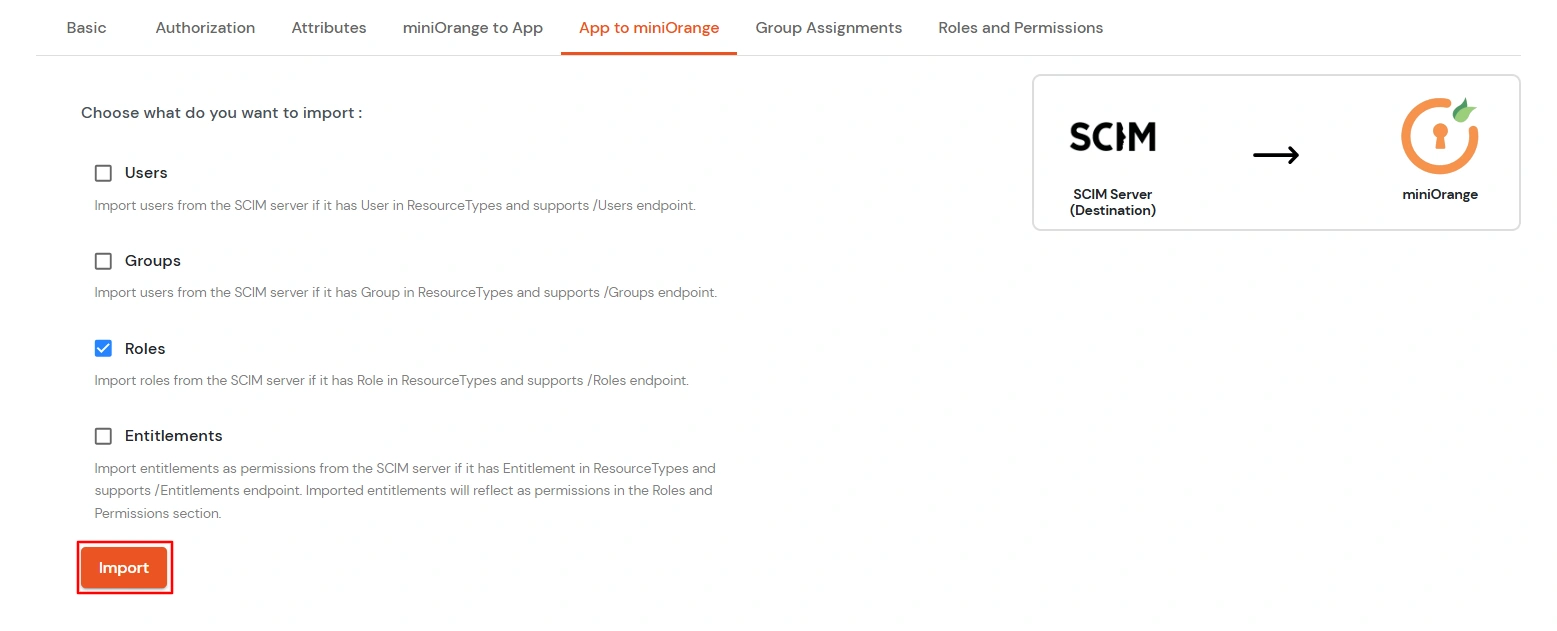
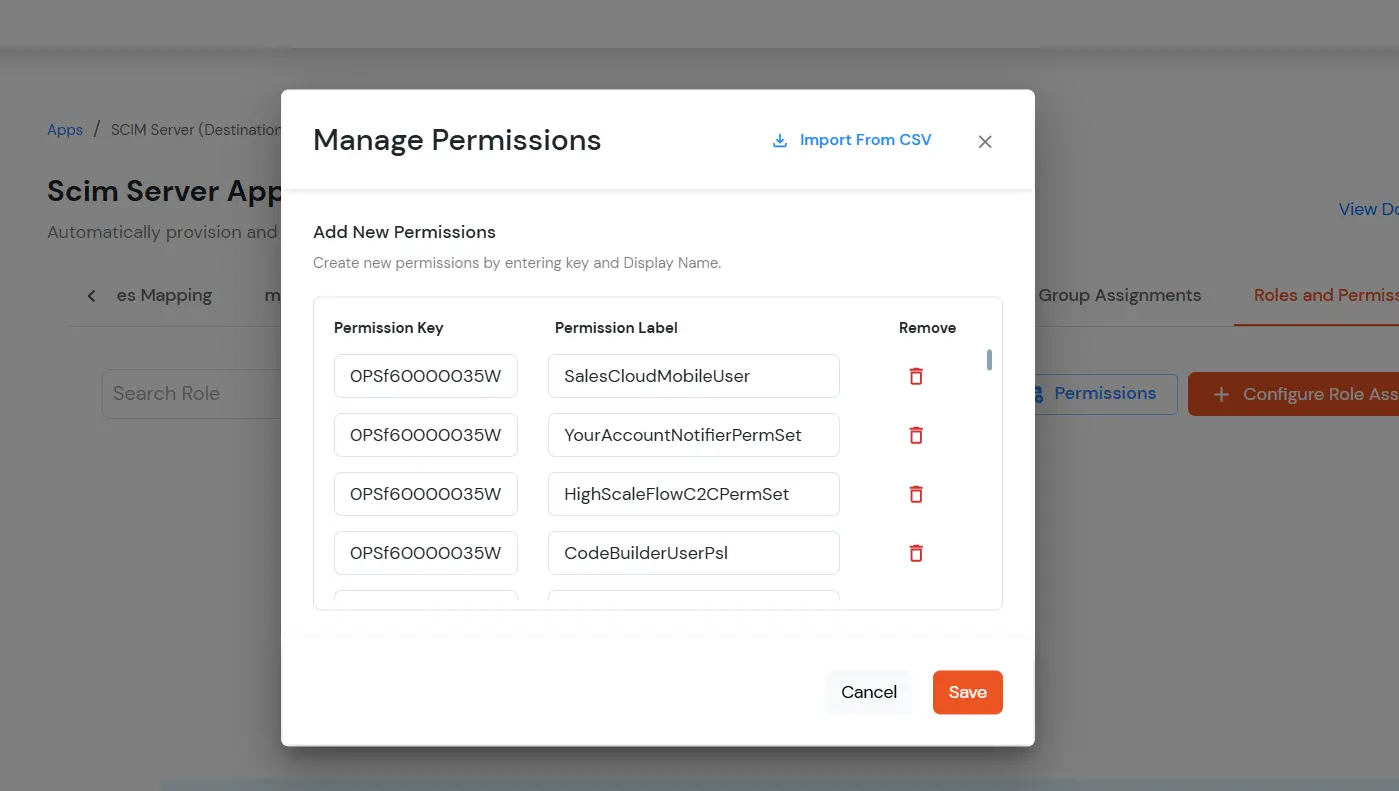
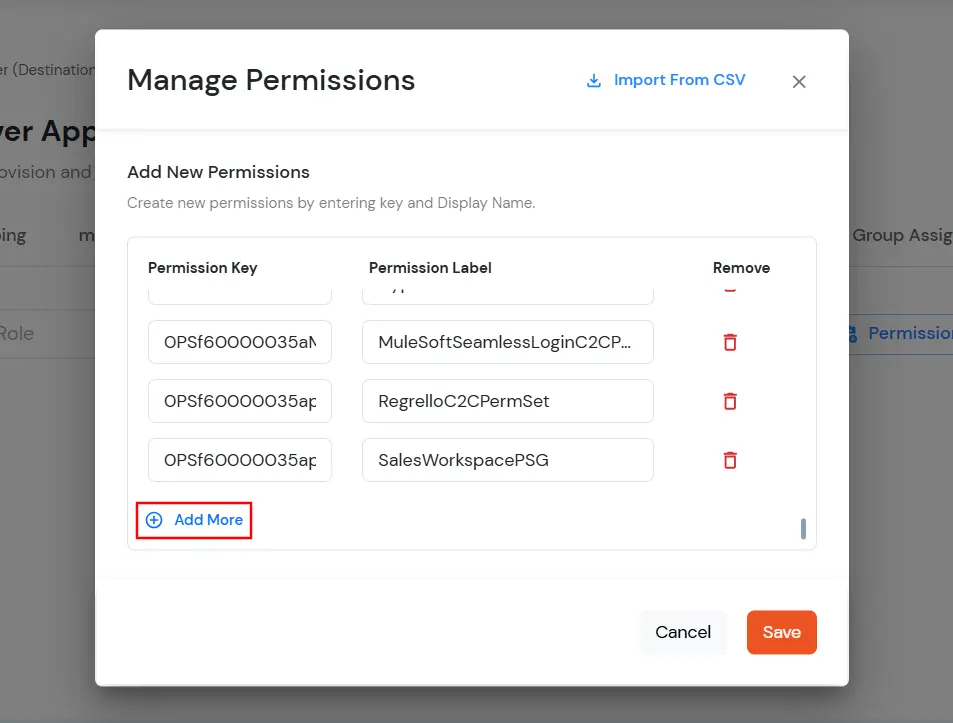
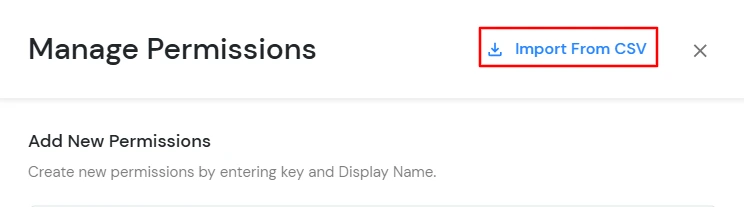
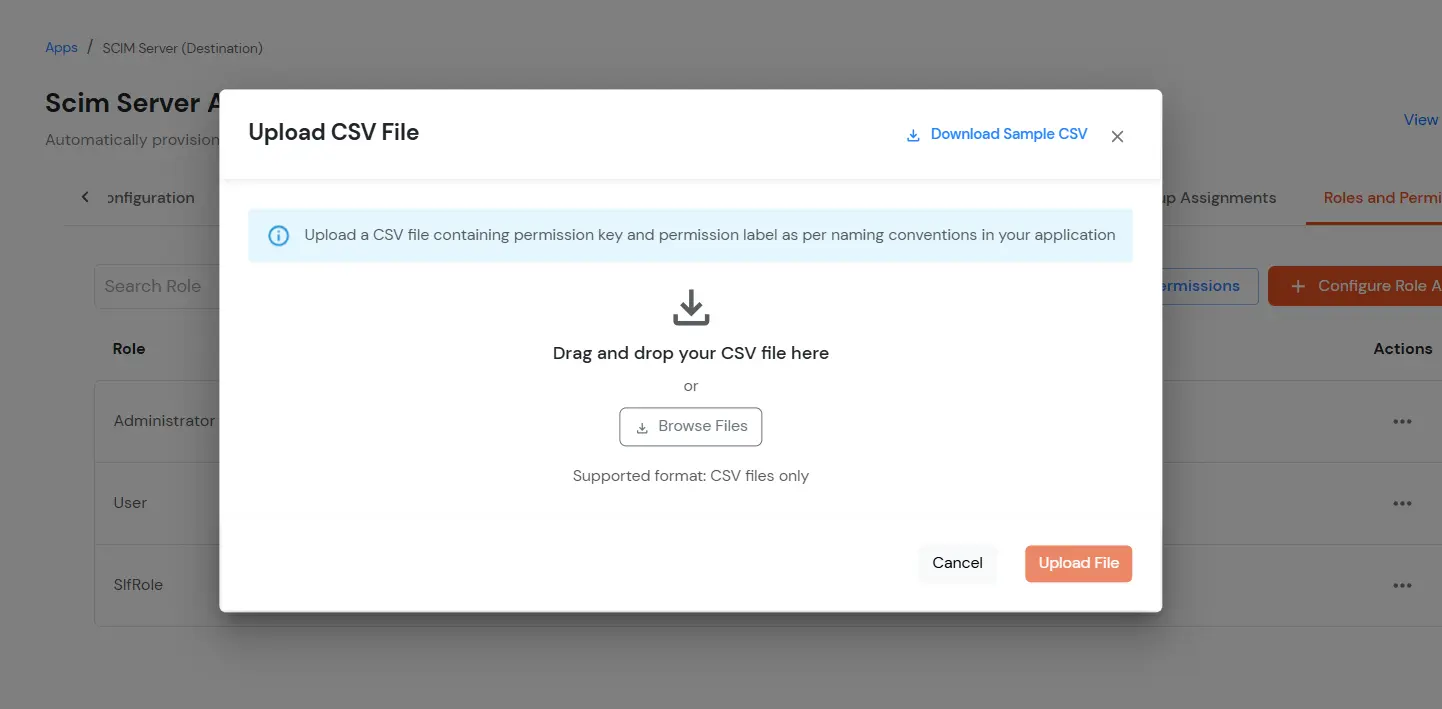
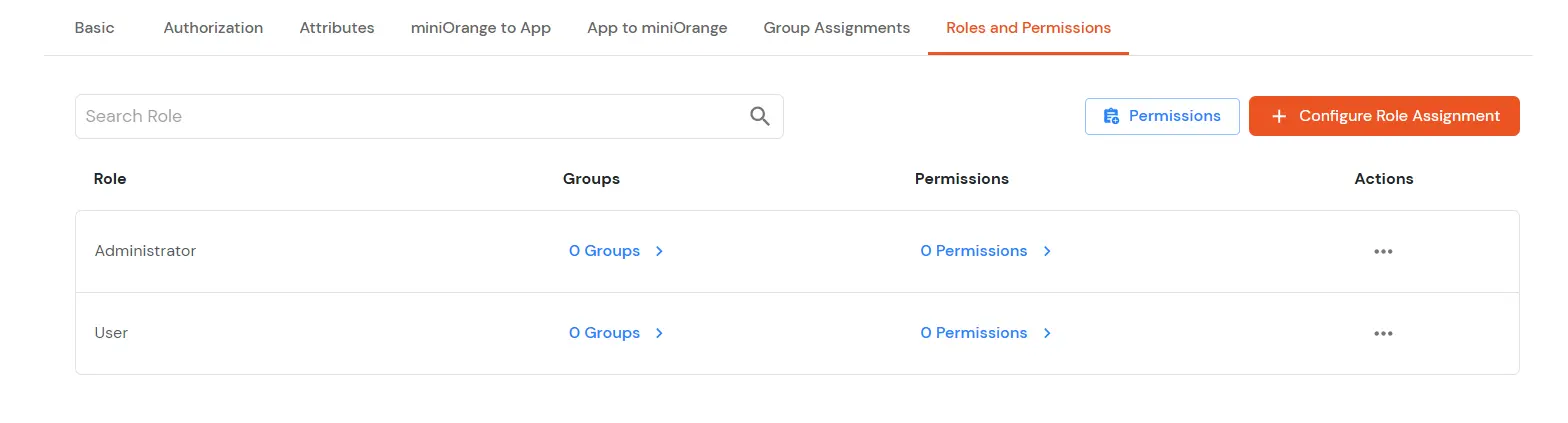
4. Import Roles and/or Entitlements
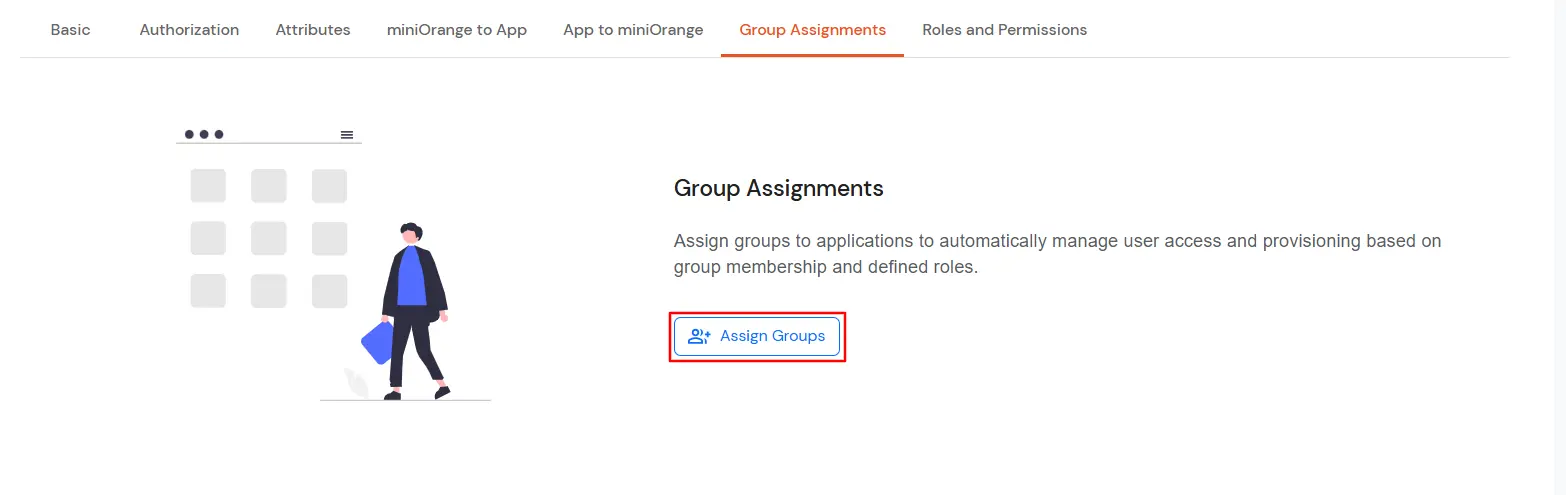
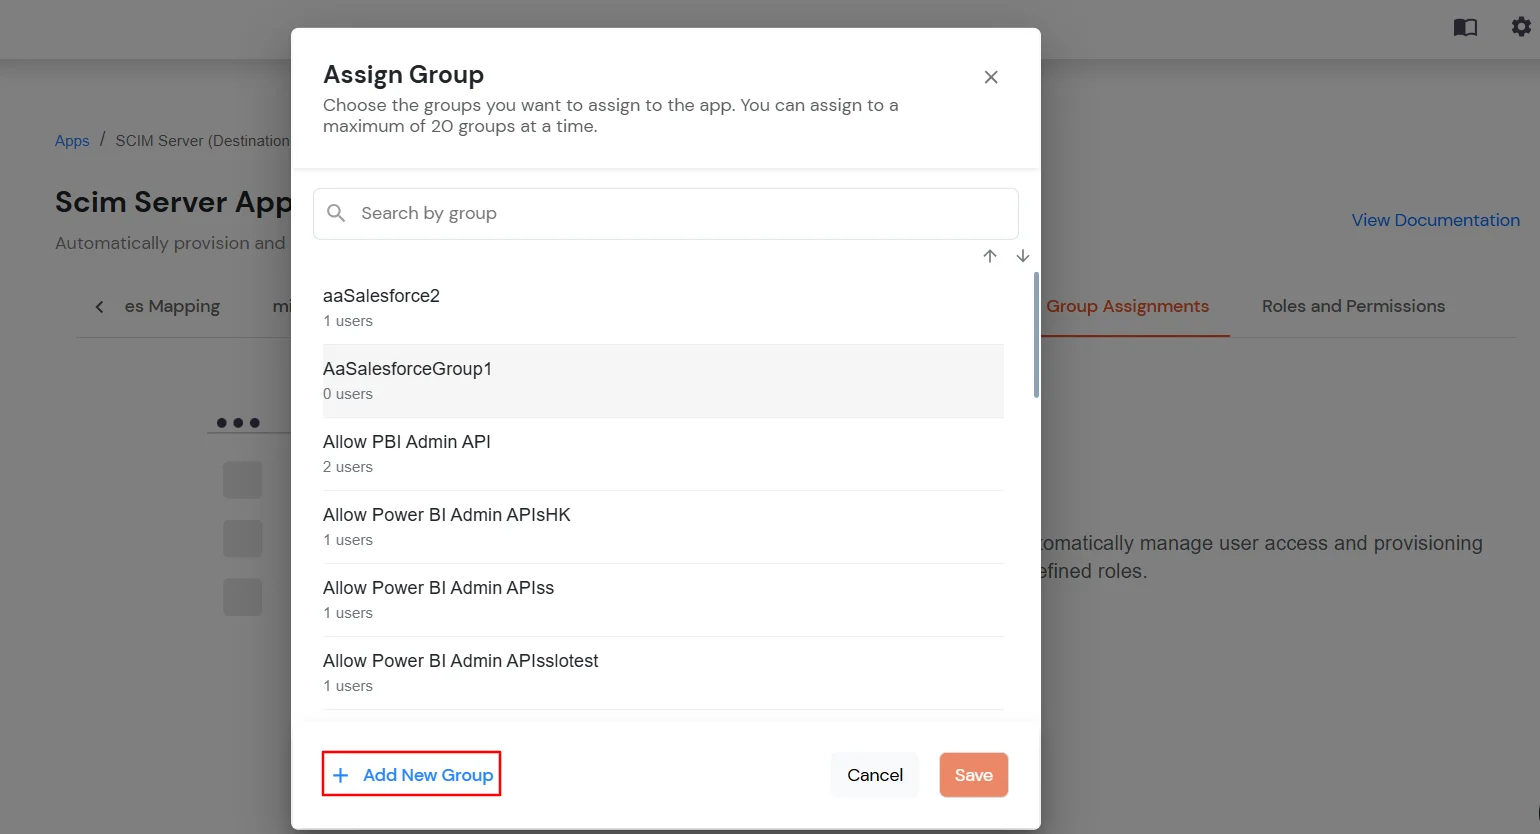
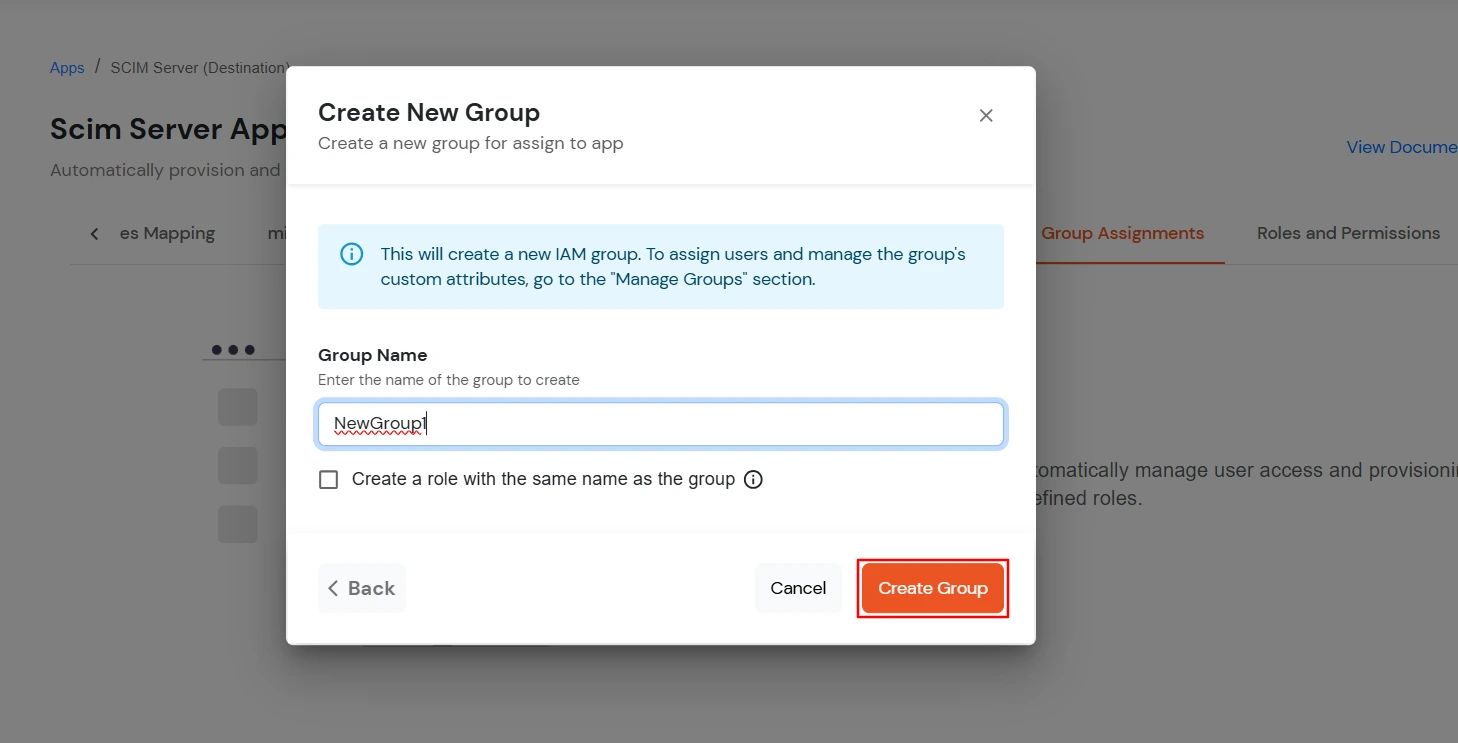
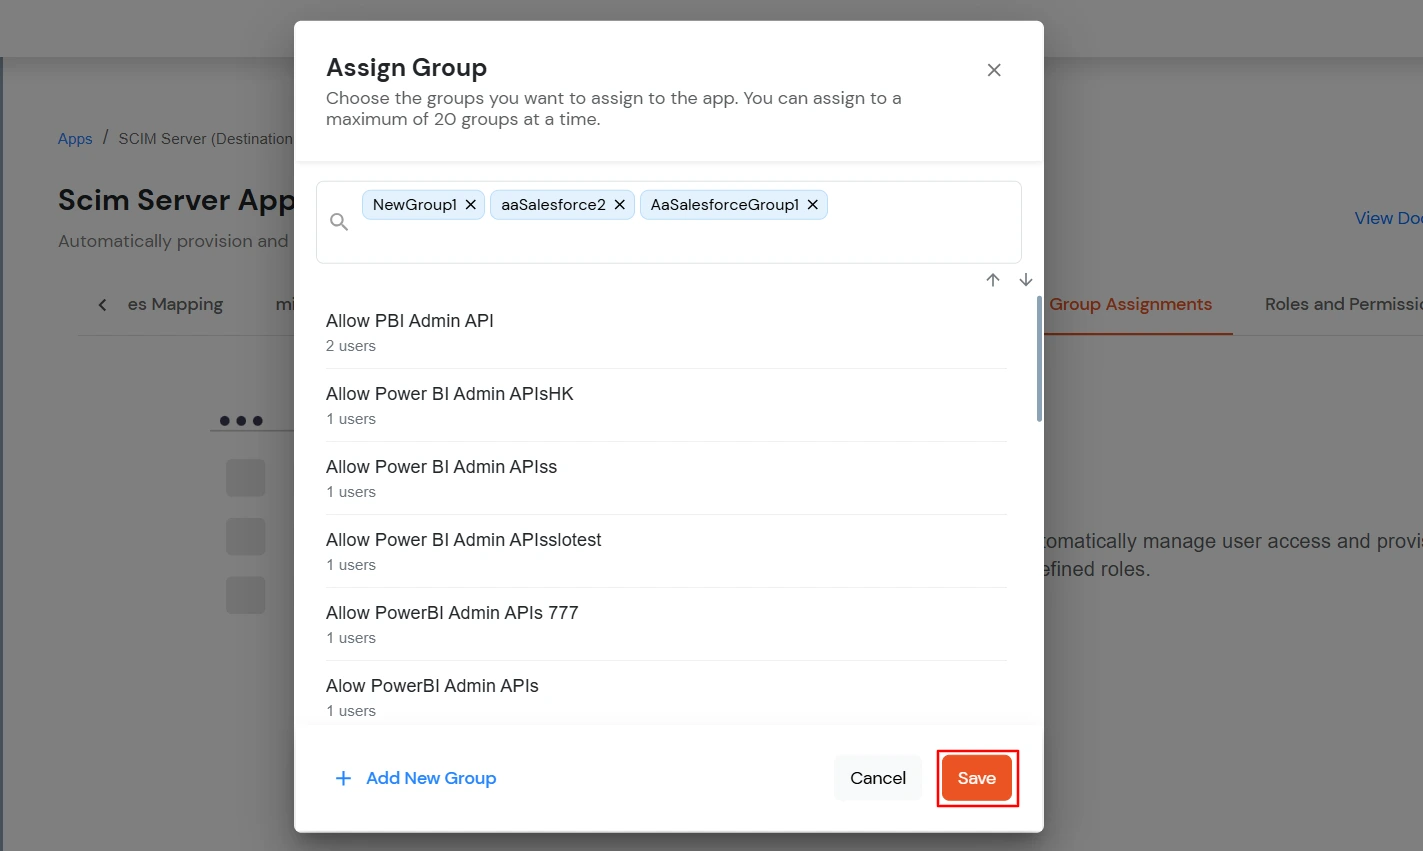
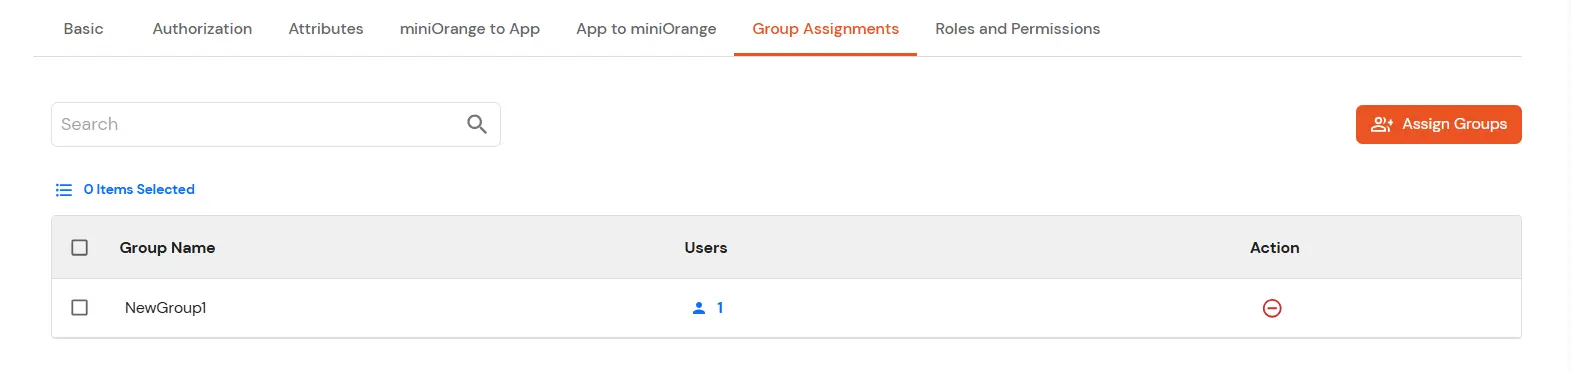
5. Assign Groups
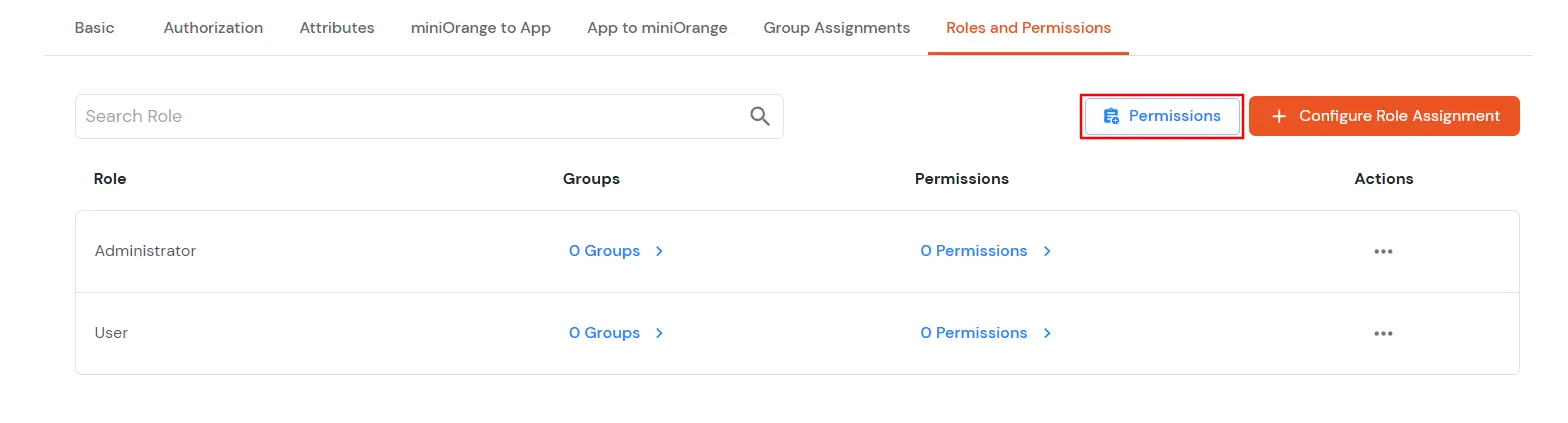
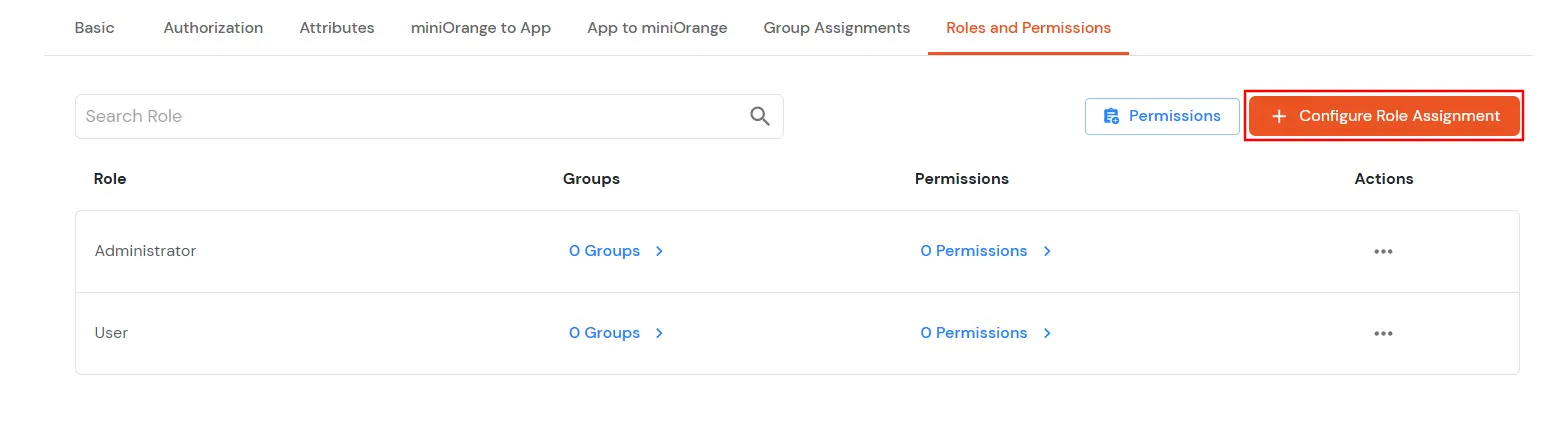
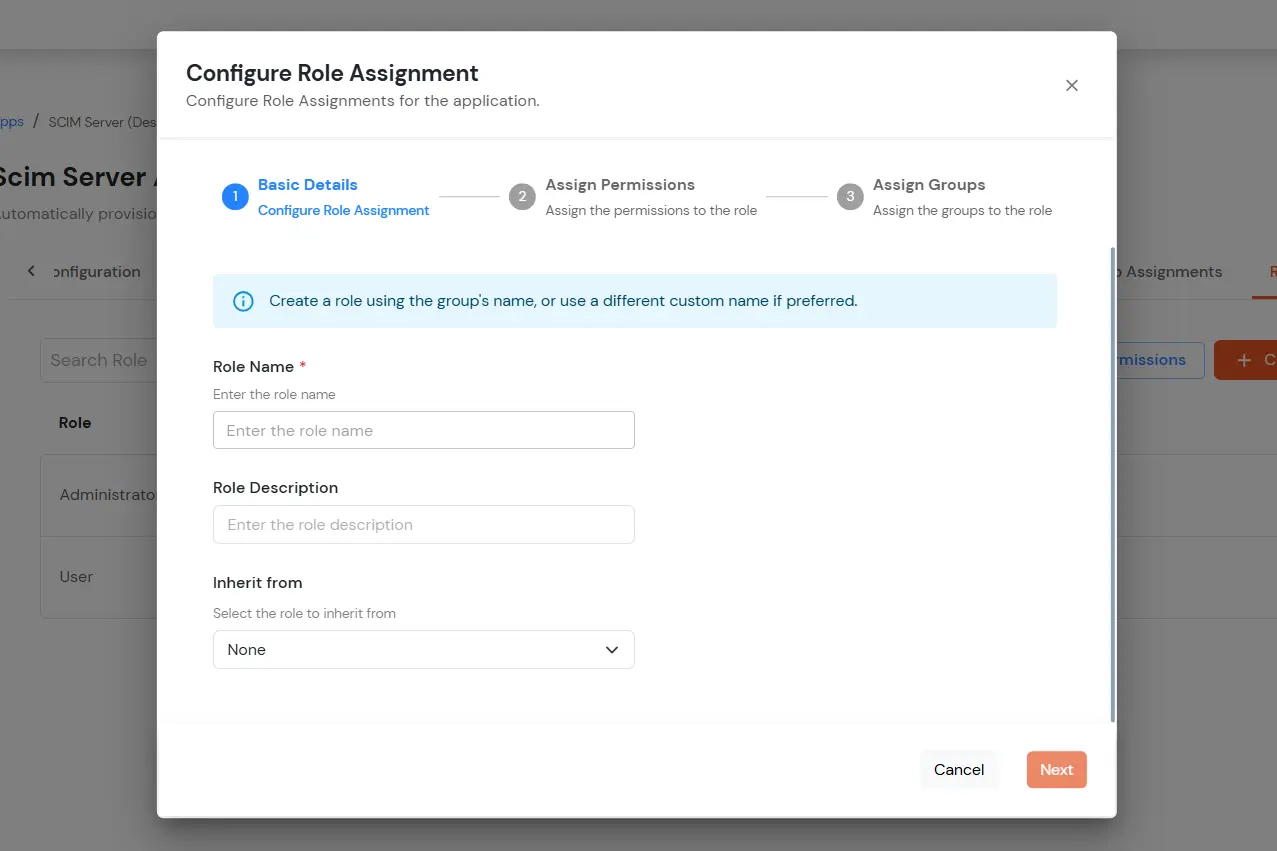
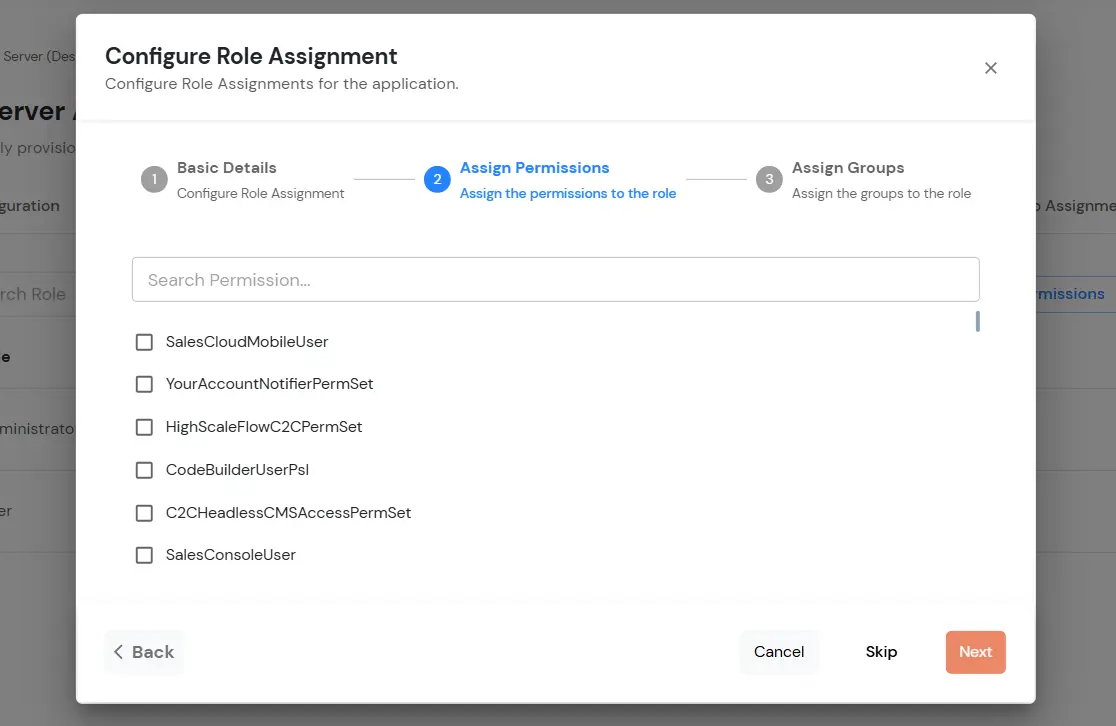
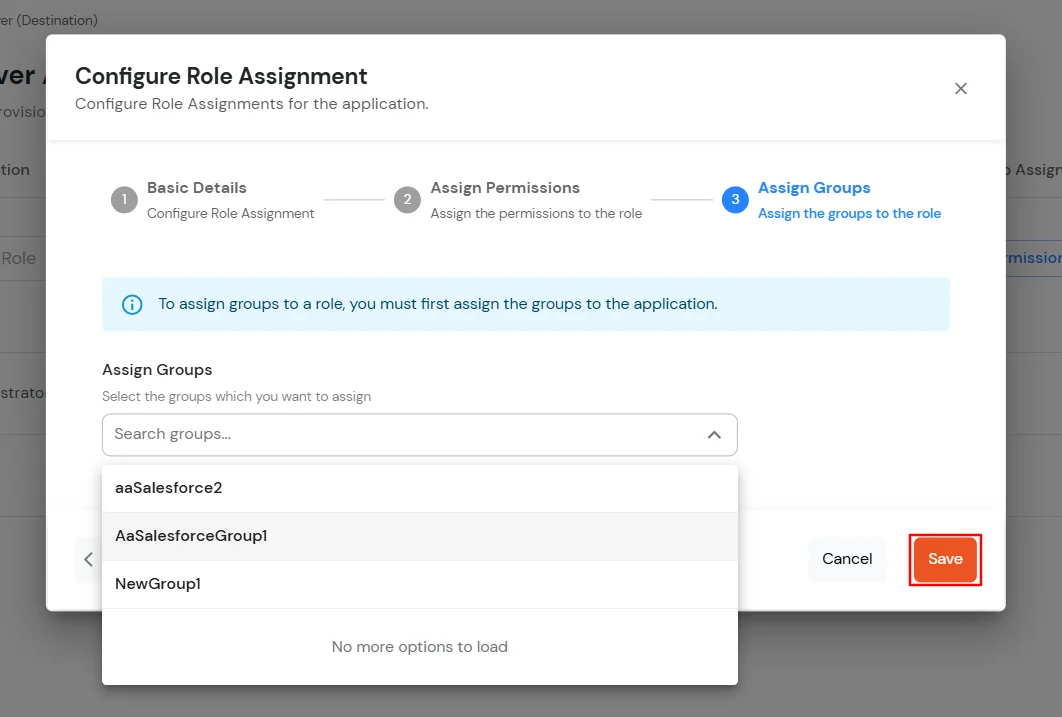
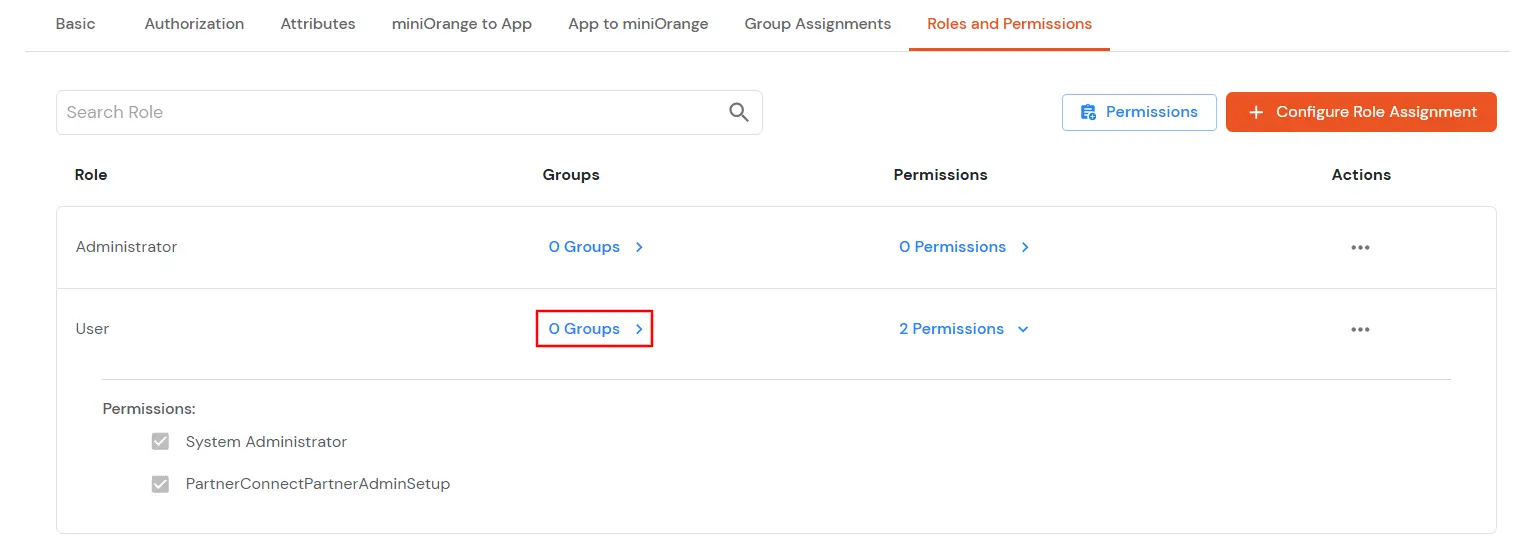
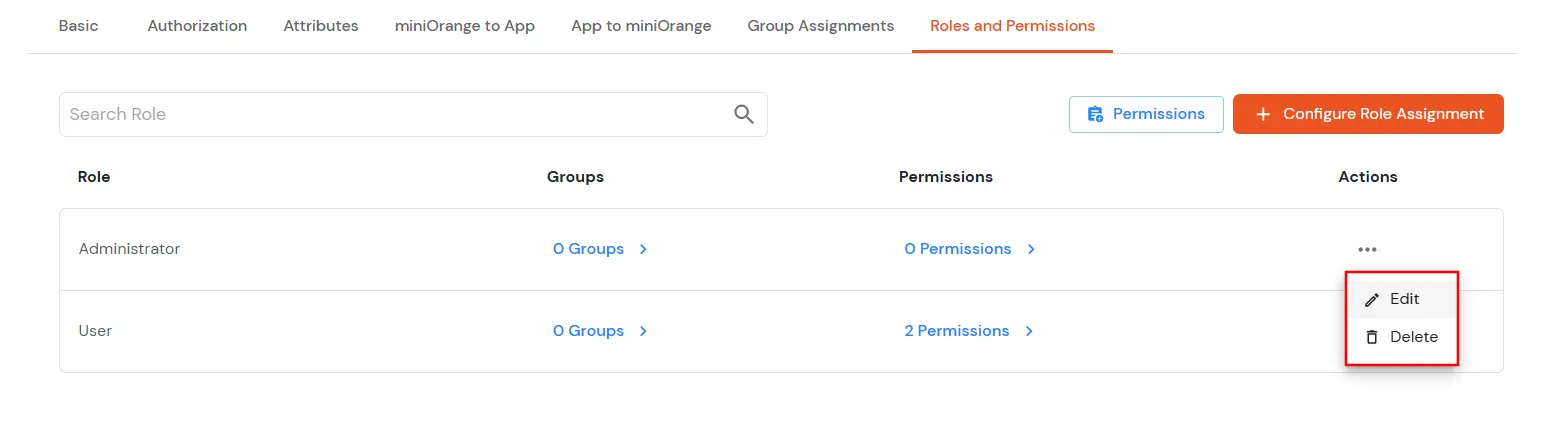
6. Roles and Permissions
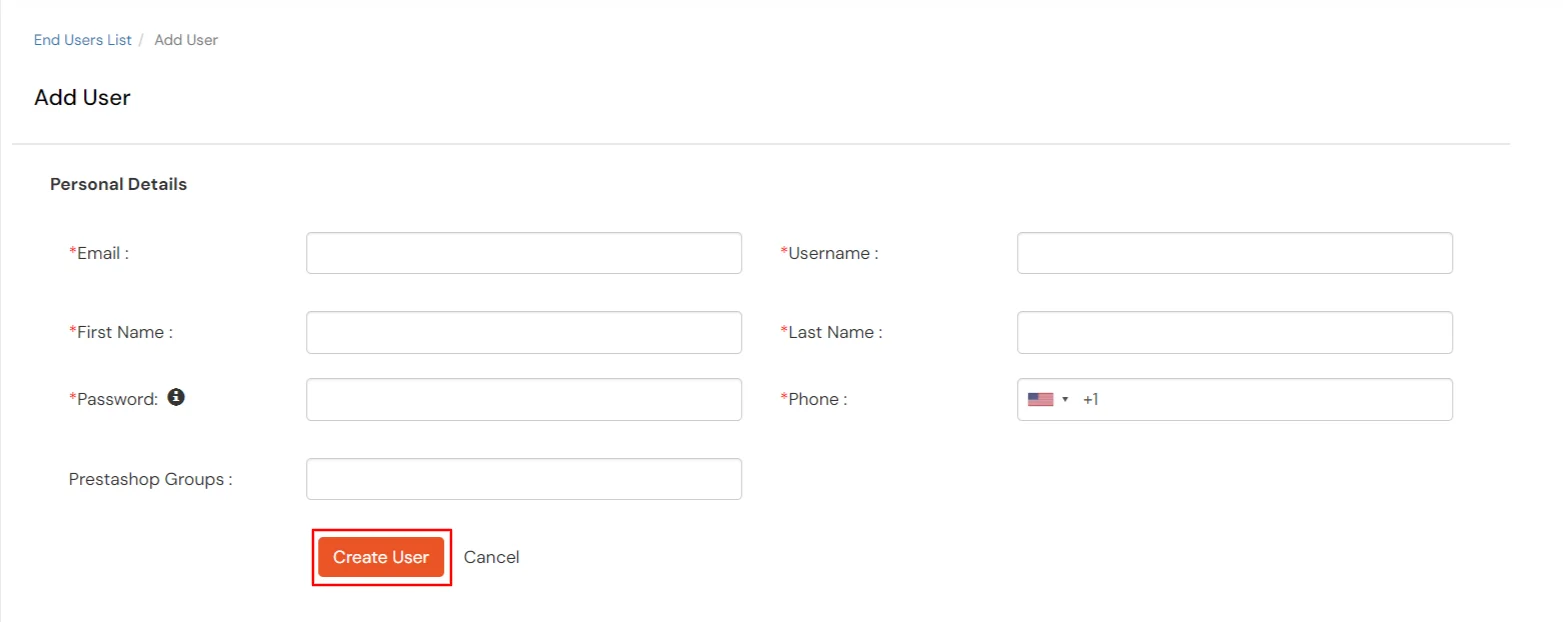
7. Add Users
- Go to Users > View Direct End-Users and click Add User.
- Enter the Users Details and the user will be created.
8. Deprovisioning the user
To De-provision any user you can either delete the user from the miniOrange or remove the user from the group associated with the application.
- Steps to remove a user from the Group
- Go to the Groups section in the left navigation panel > Manage Groups.
- Click on the Users field for the group, you have created previously.
- Select the user you want to remove from the group.
- Click on Select Action.
- Select Remove from the Group.
- Click on Apply.
- Steps to delete a user in miniOrange
- Go to the Users section in the left navigation panel > User List.
- Click on the select option for the user you want to remove.
- Click on Delete in the drop-down menu.
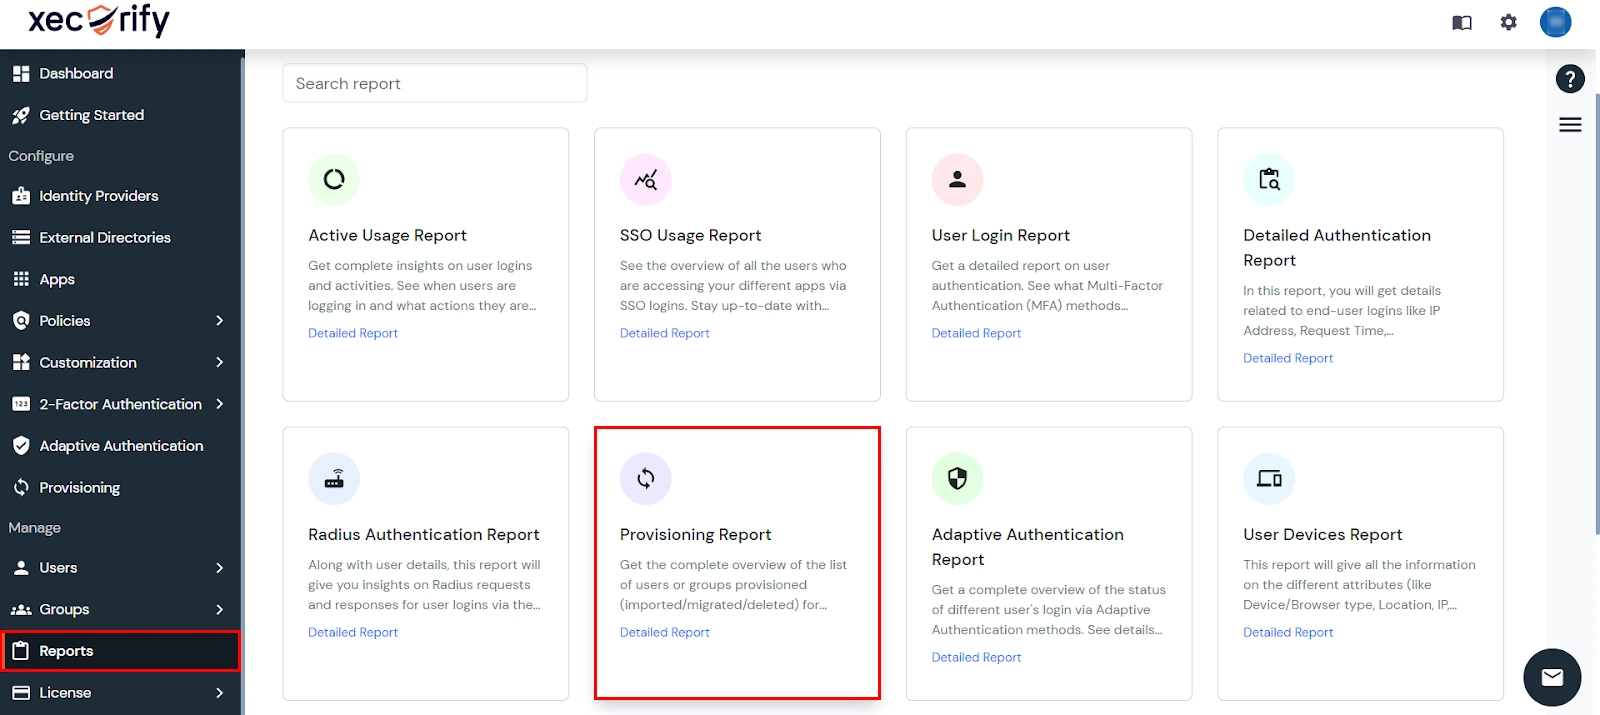
View Provisioning Reports
How to access Provisioning Reports?
- Navigate to Reports in the left-hand navigation pane, search for Provisioning, and select Provisioning Report.
- Filter the reports by specifying Enduser Identifier and Application Name criteria. Additionally, choose the desired timespan for the reports. Once done, click on the Search.
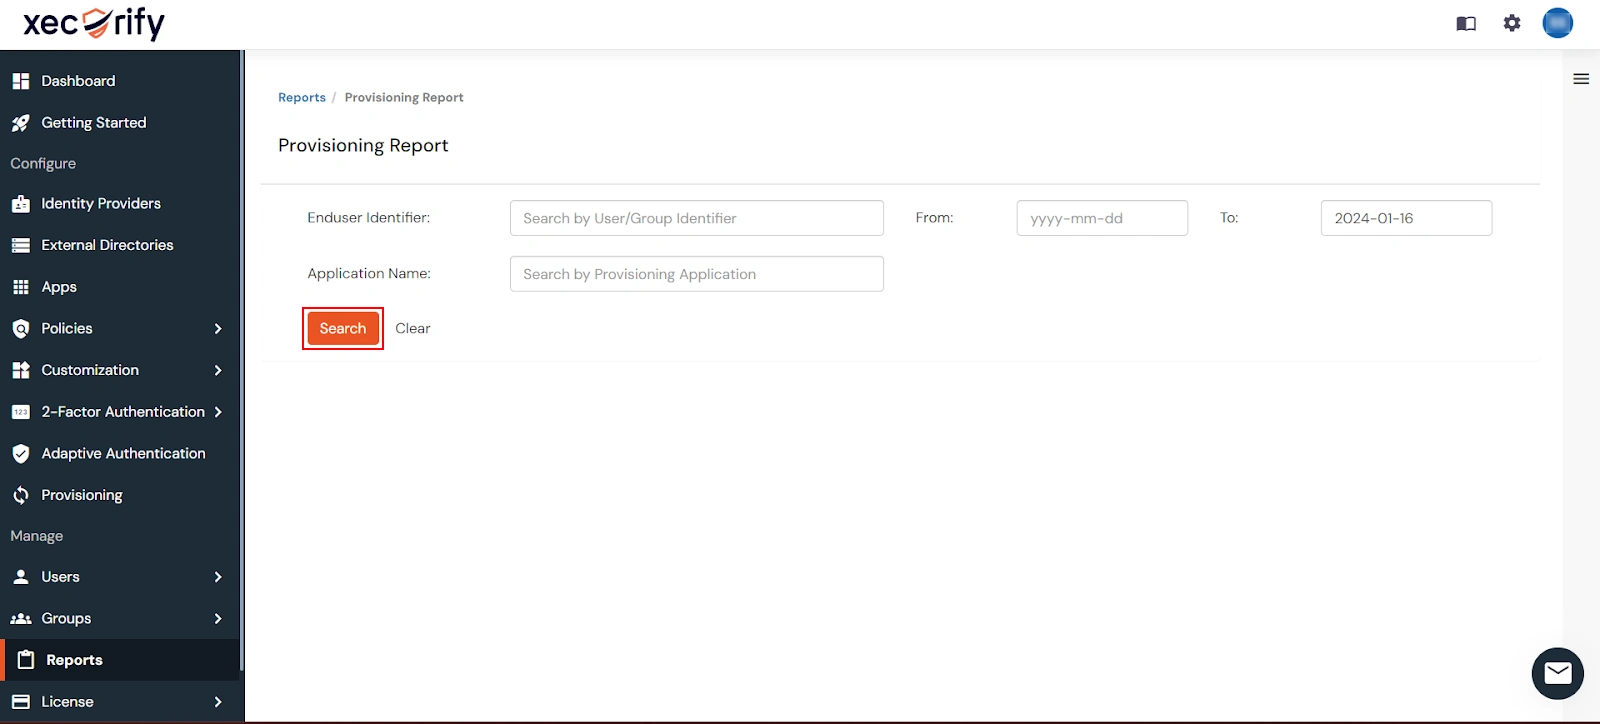
- Alternatively, you can directly click on Search to retrieve all provisioning reports based on time without applying any specific filters.