Adaptive Access Policy
Configuring Adaptive Access Policy (MFA) for users is crucial due to the elevated privileges they have. Specific users have access to certain levels of sensitive systems and data, making them targets for malicious actors.
Admins can dynamically adjust the authentication requirements based on risk factors like location, device and behavior by implementing adaptive MFA. This ensures that even if an attacker gains access to admin credentials, they still face significant hurdles, reducing the likelihood of a successful breach.
Moreover, while balancing security and user experience is vital for regular users, the security of admin accounts should take precedence. Adaptive MFA allows for stricter authentication policies for administrators without impacting the daily workflow of typical users.
Note:
The Adaptive Authentication section has been moved from the left navigation menu. You can now access and manage adaptive authentication policies by navigating to Policies >> Adaptive Access Policy.
Adaptive MFA Configuration
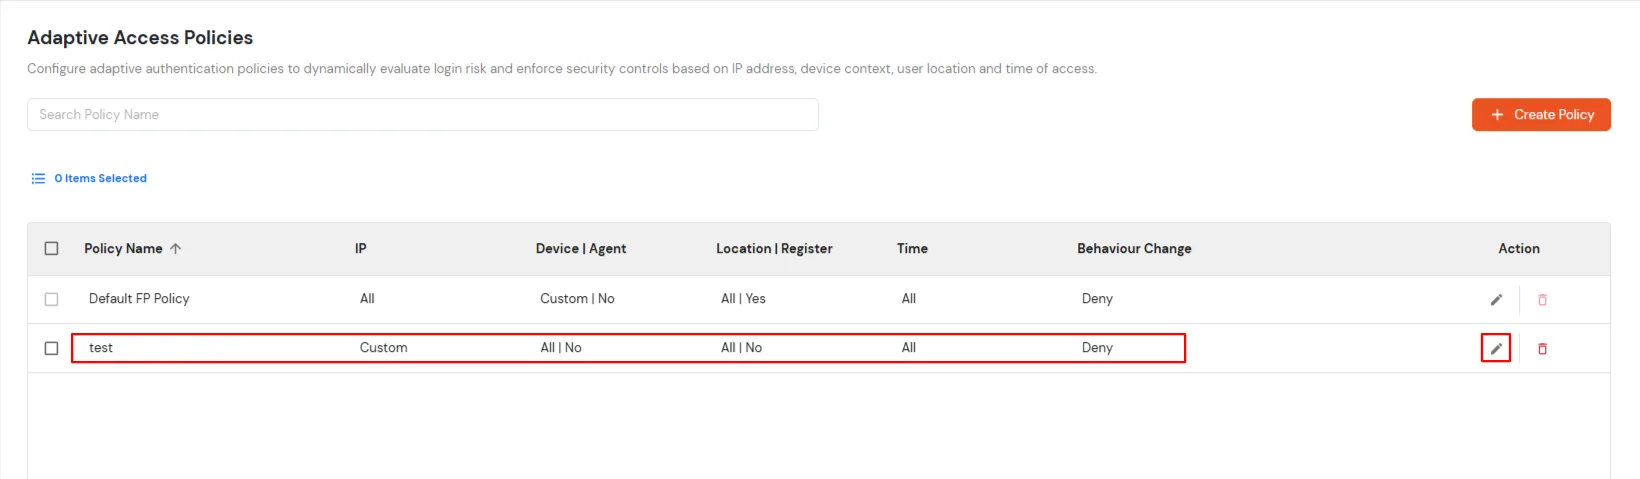
- Login to miniOrange Admin Console and navigate to the Policies >> Adaptive Access Policy.
- Click on the Create Policy button on the upper right.
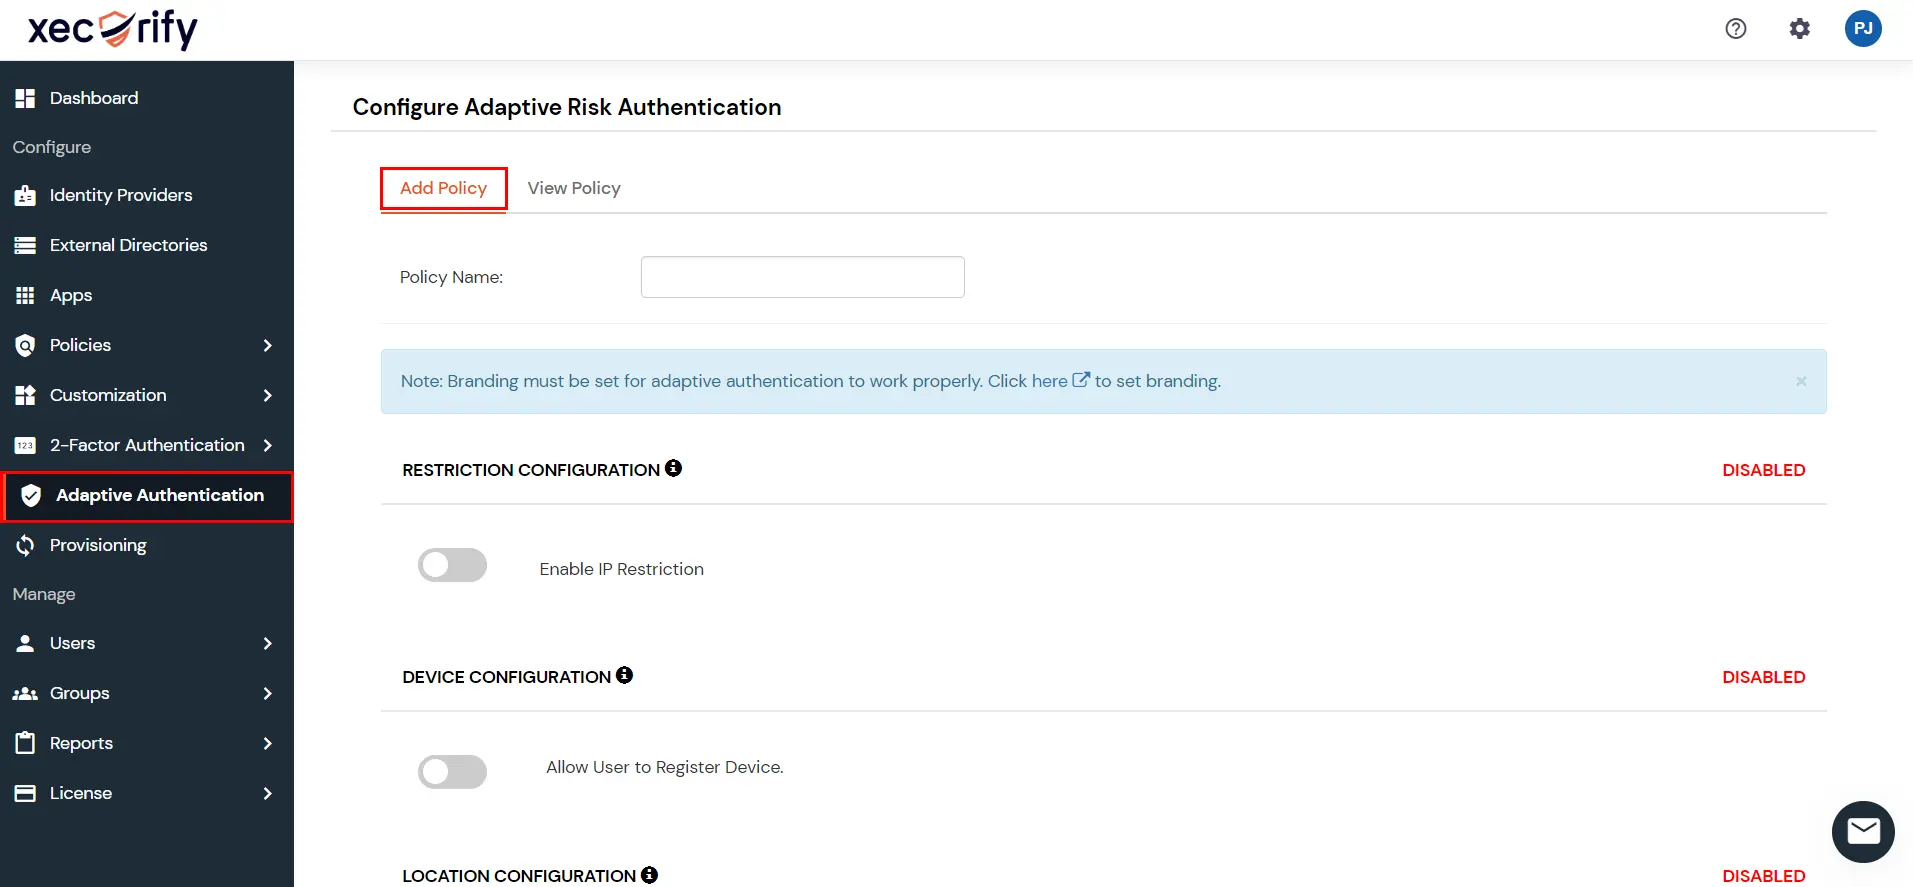
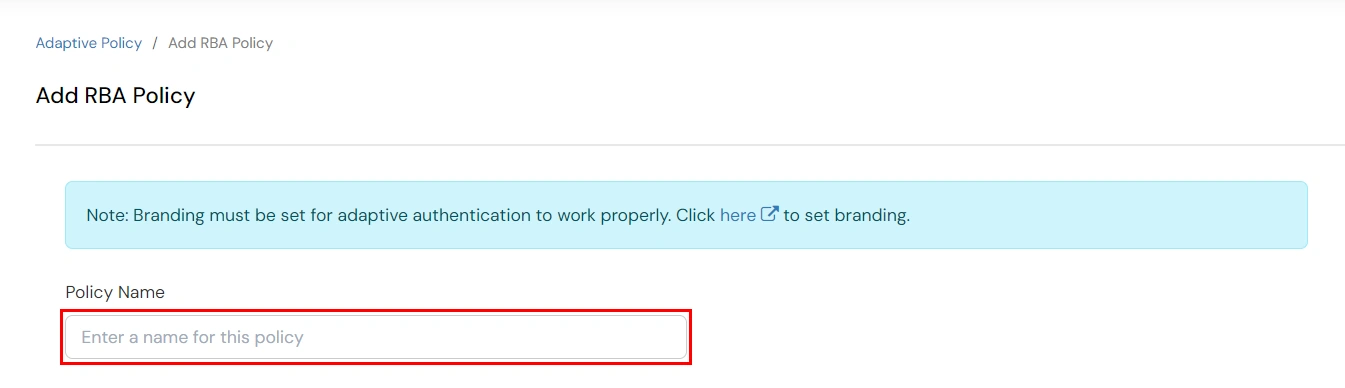
- Enter a Policy Name for your Adaptive Authentication Policy in the required field.
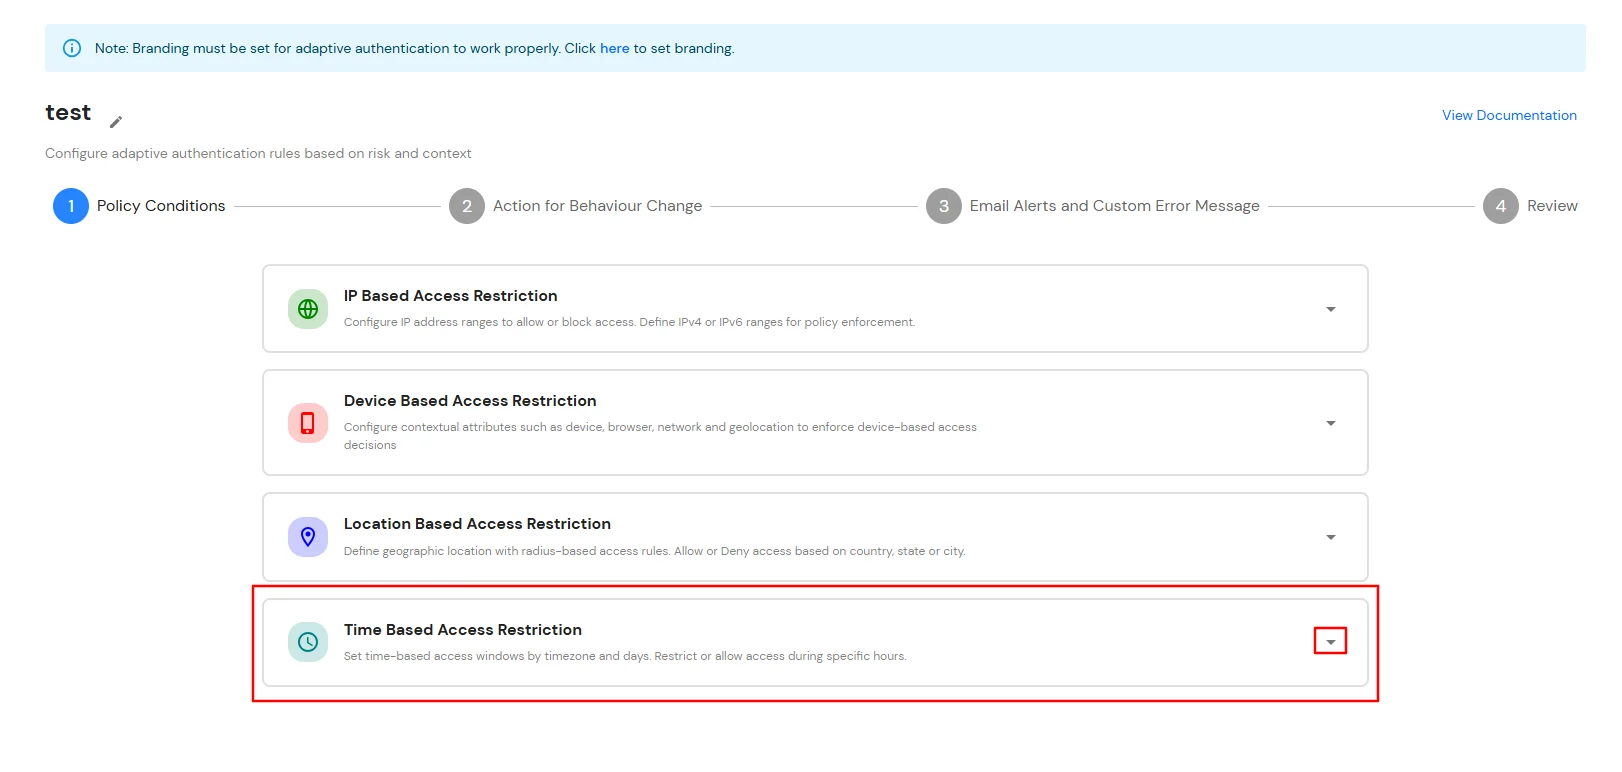
1. Policy Conditions
There are four different sections you can configure in an Adaptive Access Policy:
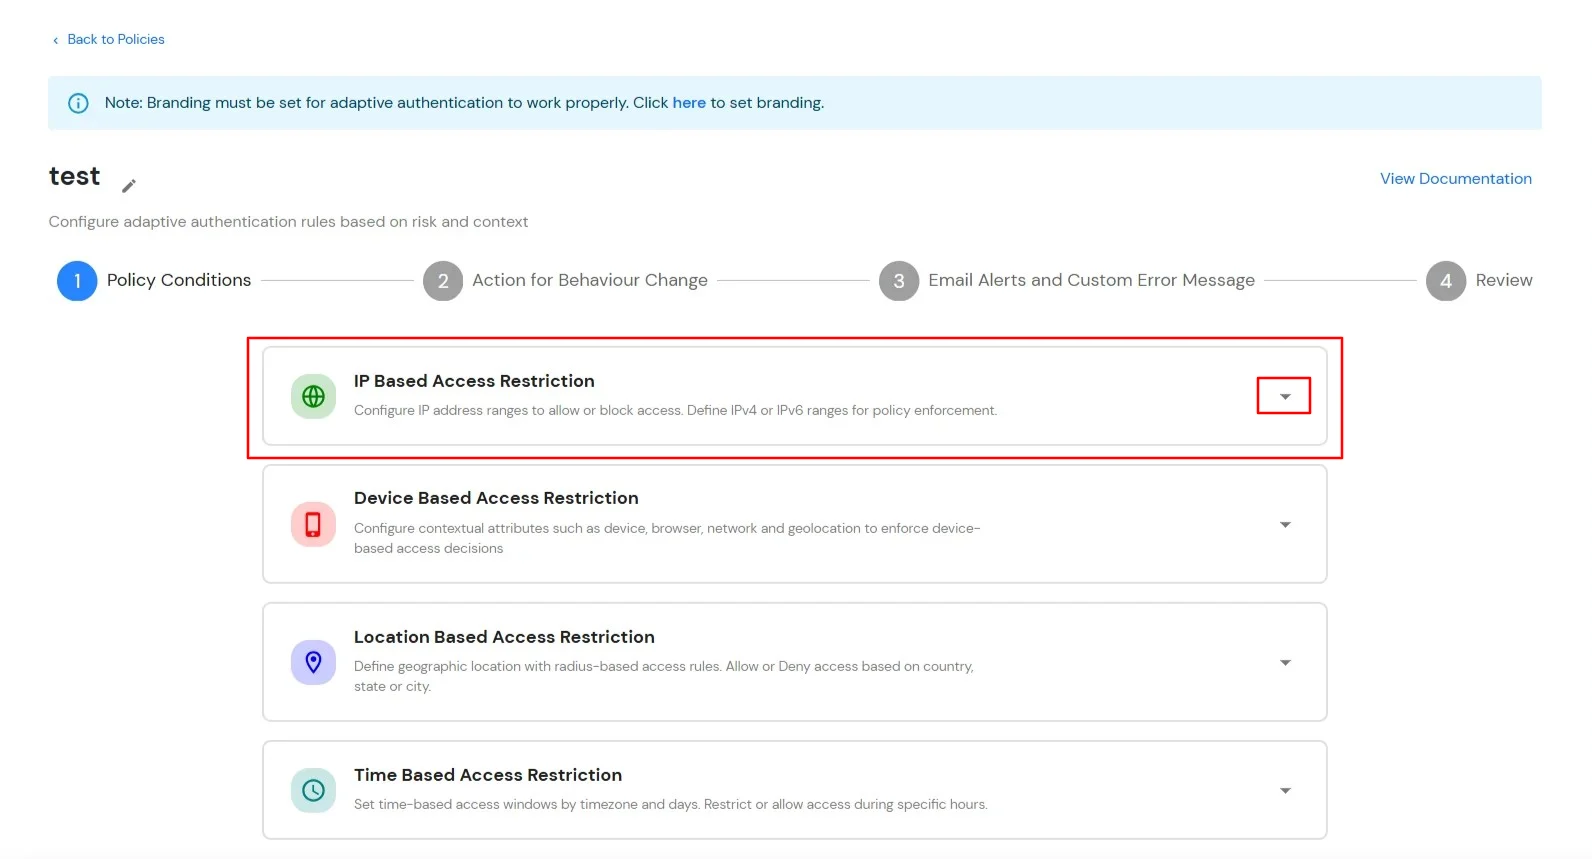
1.1 IP Based Access Restriction
In IP restriction, the admin configures a list of IP addresses to allow or deny access. When a user tries to log into any application configured with Adaptive Access Policy, their IP address is checked against the configured IP list and the action is decided as per the configuration (i.e., Allow, Deny or Challenge).
How to Configure IP Address:
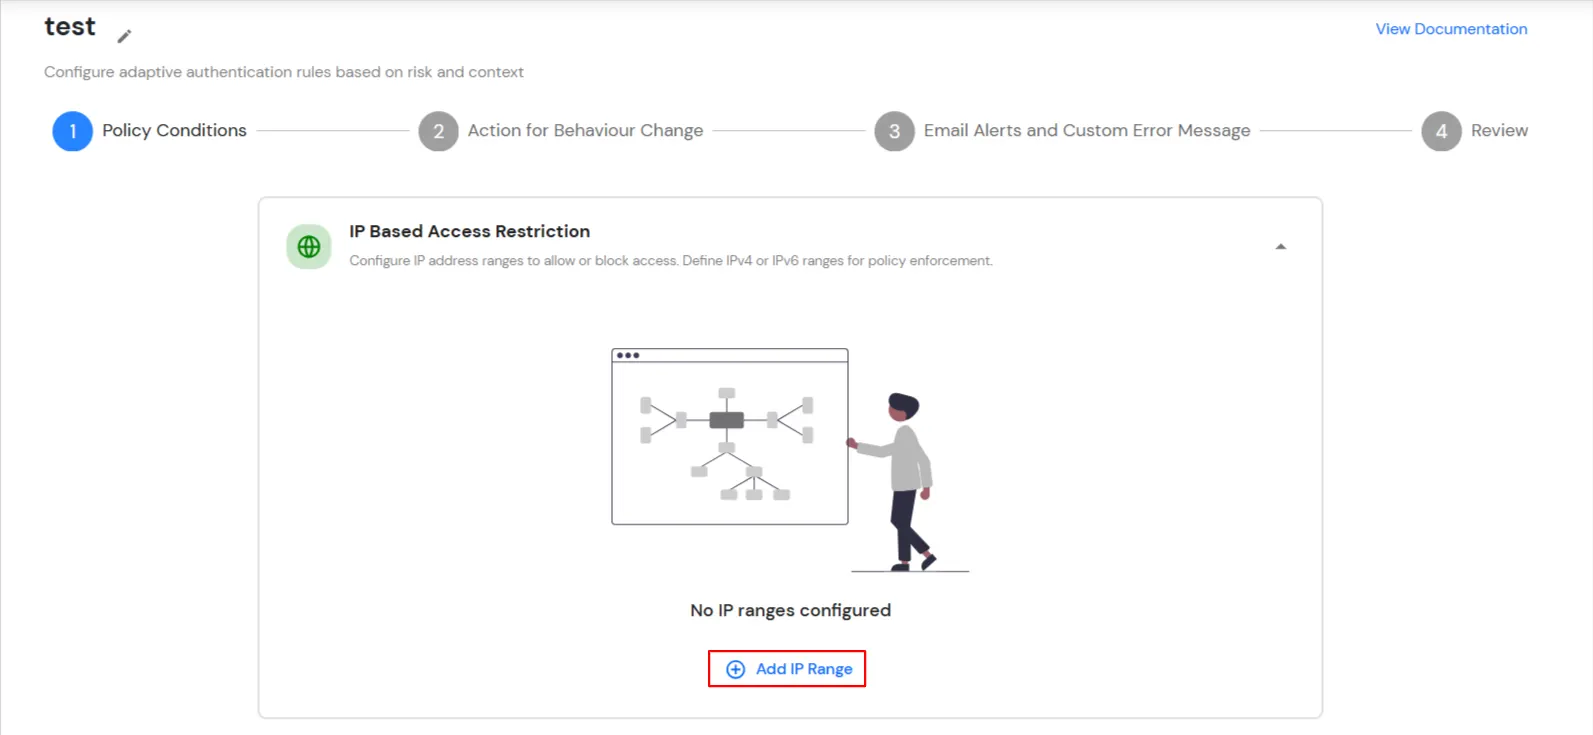
- Expand the IP Based Access Restriction section by clicking on the dropdown icon to configure IP-based access rules.
- Click on the Add IP Range button to add a new IP address or IP range to the policy.
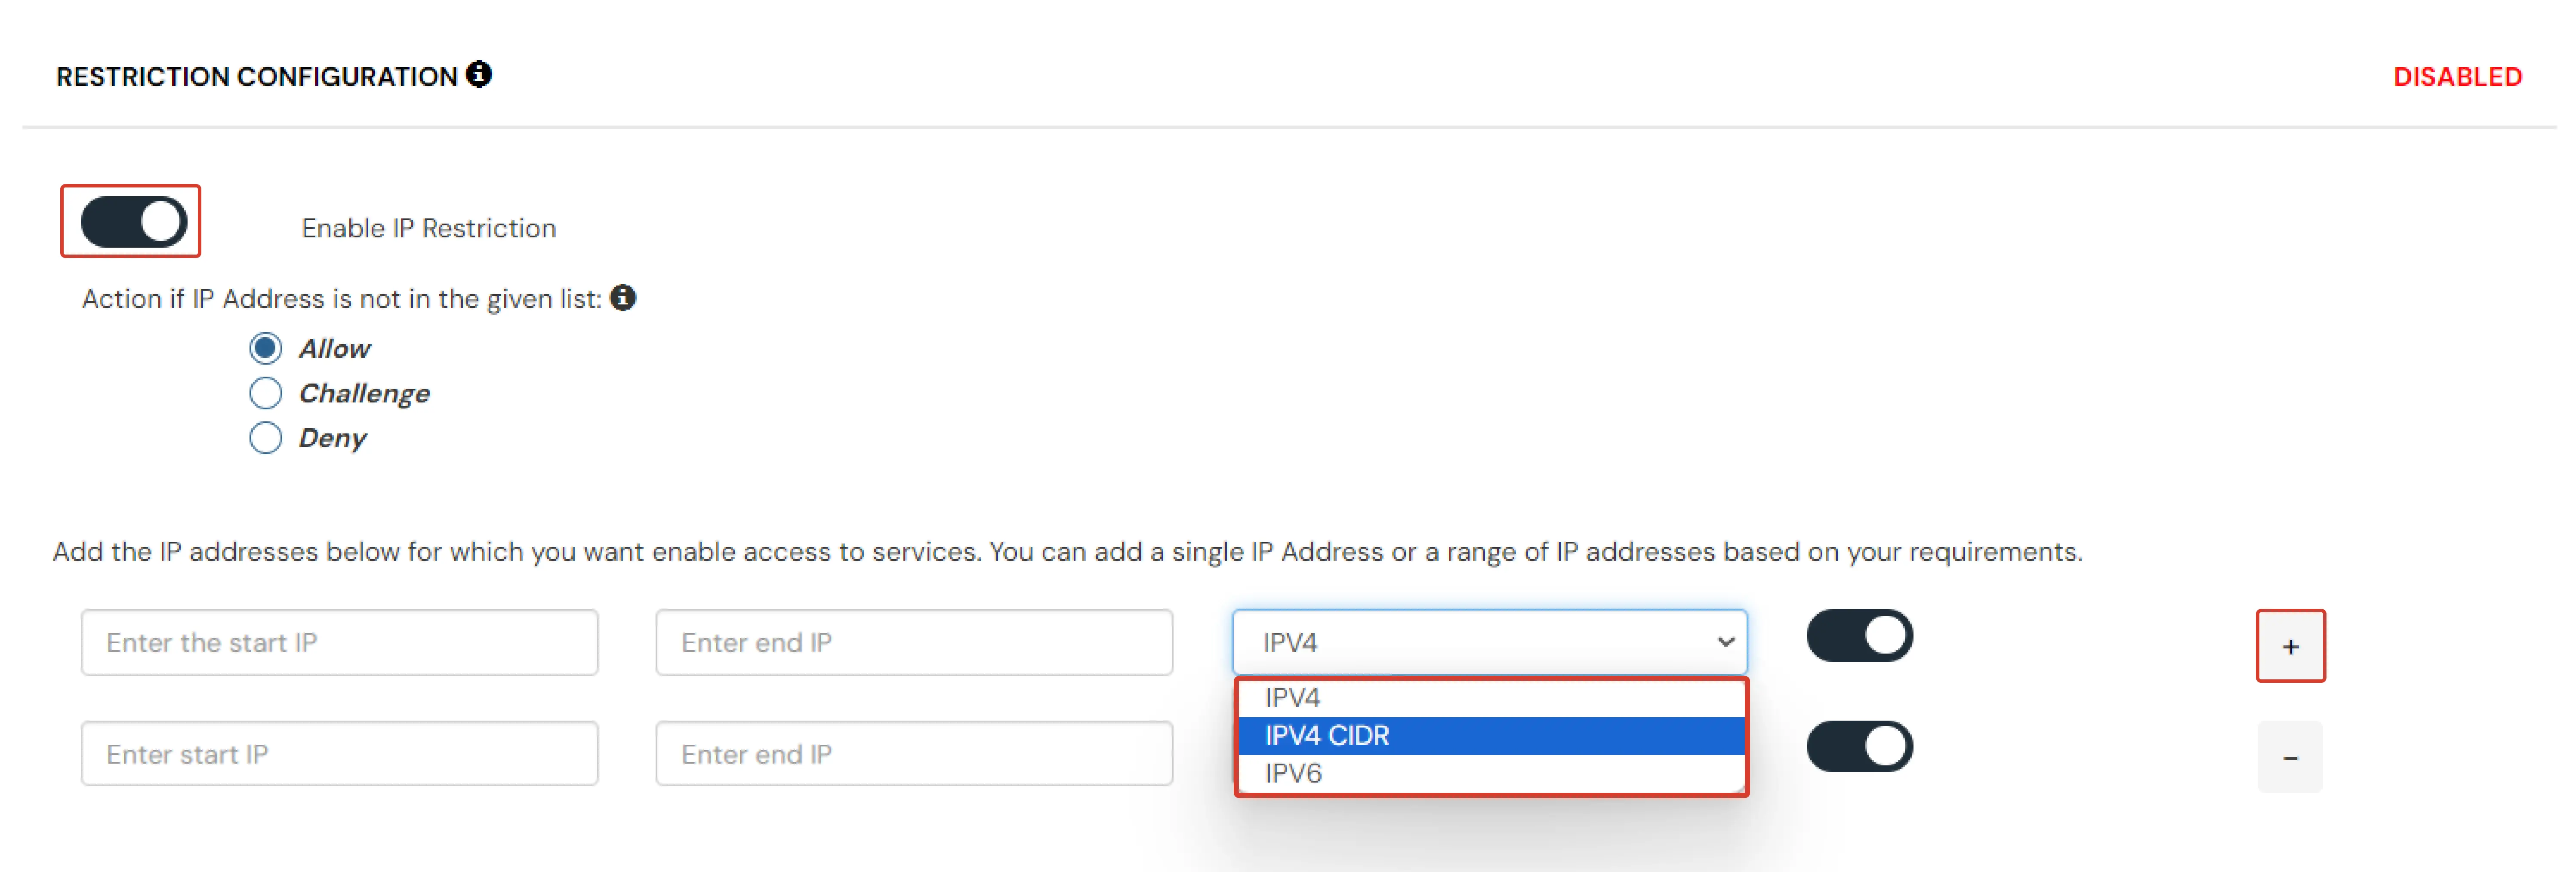
- Select Add IP if the User's IP Address is not in the configured list.
- Specify the IP Address that you want to whitelist. For the IP Range other than the whitelisted one, you can select the above setting to reflect.
- Choose either allow or deny by selecting the radio button next to it.
- If a user tries to log in with the whitelisted IP address, they will always be allowed access.
- We support IP address range in three formats i.e., IPv4, IPv4 CIDR and IPv6. You can choose whichever is suitable for you from the dropdown menu.
- You can add multiple IP and IP ranges by clicking on the Add IP Range.
1.2 Device Based Access Restriction
Device restriction lets admins control application access using device trust. You can use Agentless Device Restriction (browser-based fingerprinting) or Agent-Based Device Restriction (installed agent with risk scoring) depending on your security requirements.
How to Configure Device-Based Access Restriction:
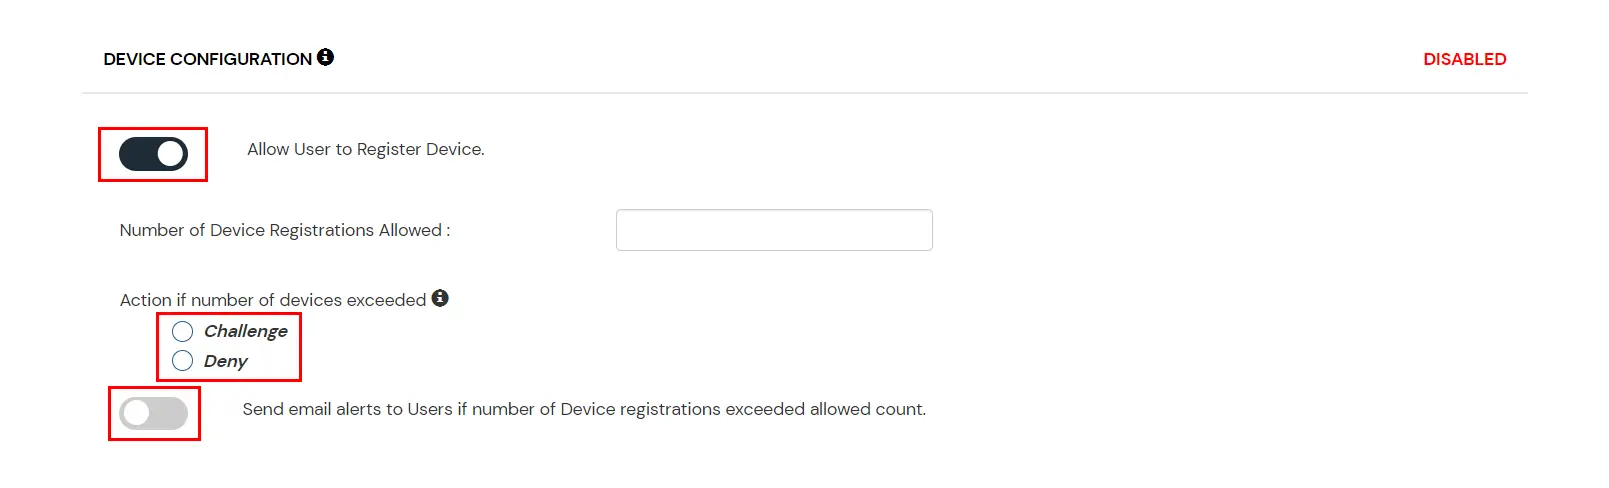
- Enable the Device Configuration toggle.

- You can configure device restriction using either Agentless or Agent-Based methods:
Agentless Device Restriction
- Number of Device Registrations Allowed: Specifies the maximum number of devices a user can register.
- Enable Mobile Device Restriction: Blocks login attempts from mobile devices.
- Enable Device Auto-Registration: Allows automatic device registration.
Agent-Based Device Restriction
- Prerequisites for enabling Agent-Based Device Restriction:
- All end users must install the Device Agent on their devices before accessing the application.
- Users without the agent are blocked and see: Please install the miniOrange Device Agent on your device and try again.
- The Device Agent is currently supported on Windows devices only.
- Click Download Agent to get the installation file for end users.
- Under Device Registration Method, choose one of the following:
- Self Registration by User: Users can register their own devices up to the defined limit. Provides flexibility with moderate security.
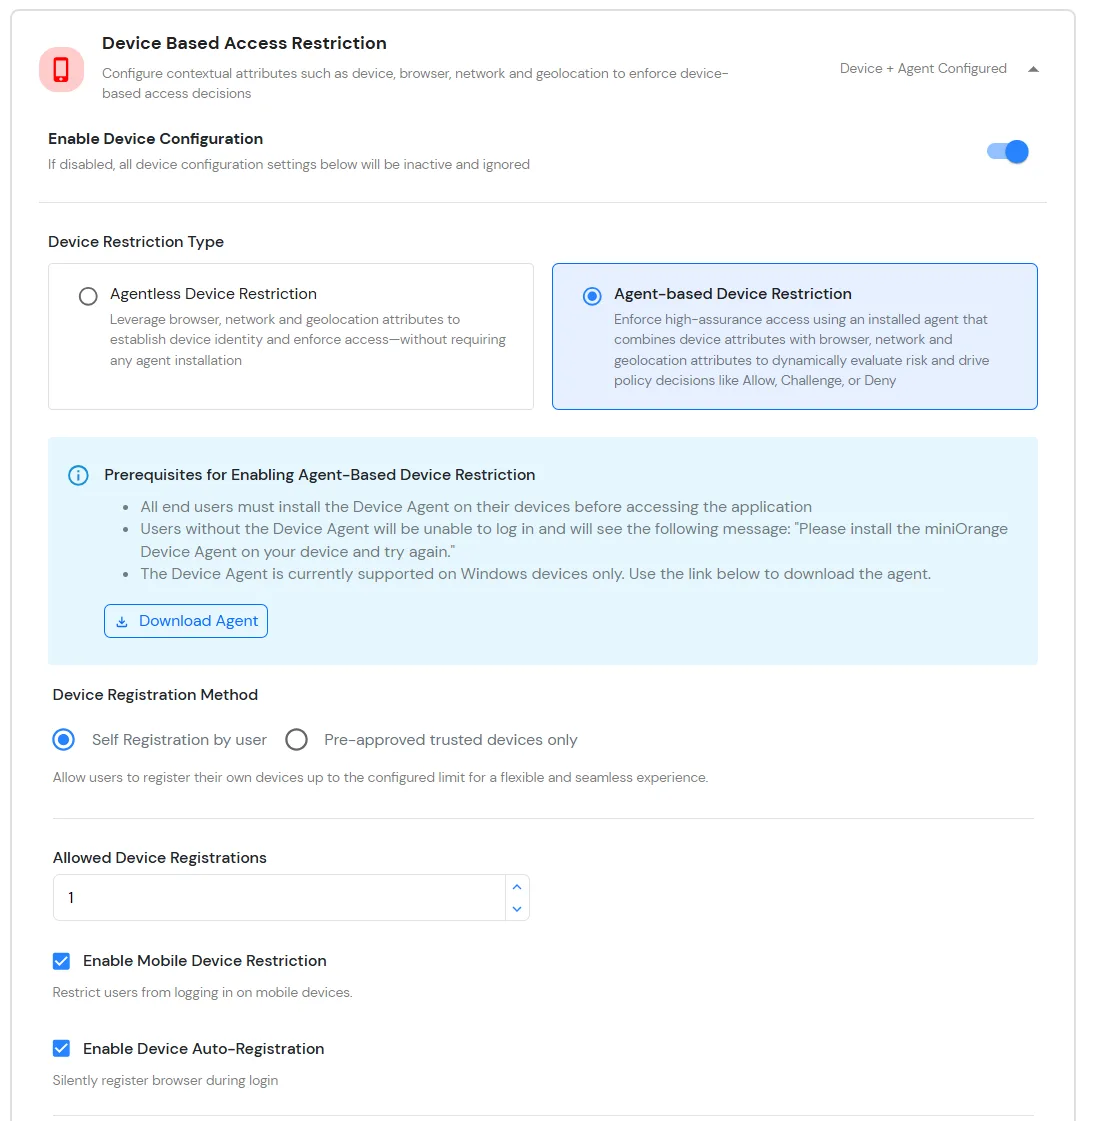
- Number of Device Registrations Allowed: Specifies the maximum number of devices a user can register.
- Enable Mobile Device Restriction: Blocks login attempts from mobile devices.
- Enable Device Auto-Registration: Allows automatic device registration.
- Pre-Approved Trusted Devices Only: Higher security. The admin manually manages trusted device information. Select this option and click Upload Pre-Approved Trusted Devices (CSV) to import devices (you can skip this step if devices are already uploaded).
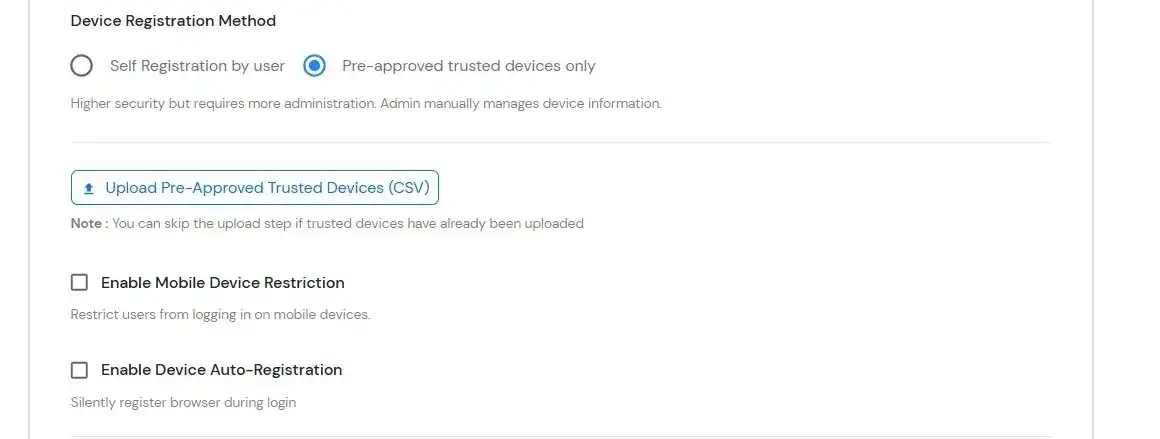
- Upload a CSV file containing pre-approved users and devices (users must already exist in miniOrange). Download Sample CSV for reference.
- Configure the following options:
- Enable Mobile Device Restriction: Blocks login attempts from mobile devices.
- Enable Device Auto-Registration: Allows automatic device registration.
- Configure Risk Engine for Device Trust Evaluation
The Risk Engine allows you to evaluate device trustworthiness by analyzing multiple device attributes and calculating a risk score. Based on this score, user access is allowed, challenged or denied during login and device registration.
- Navigate to the Risk Engine section and click Configure.

- Configure Risk Parameters:
- In the Risk Parameters tab, review the list of device attributes grouped by category.
- The Device Identifiers category contains mandatory attributes (such as Installation ID, BIOS UUID, Machine SID, etc.). These attributes are always enabled and cannot be disabled or reprioritized, as they are critical for device fingerprinting.
- For other categories (Hardware, Network, Software, Location), enable the attributes you want to use for device trust evaluation.
- Set a Priority for each enabled attribute:
- High: Strong impact on risk score
- Medium: Moderate impact
- Low: Minimal impact
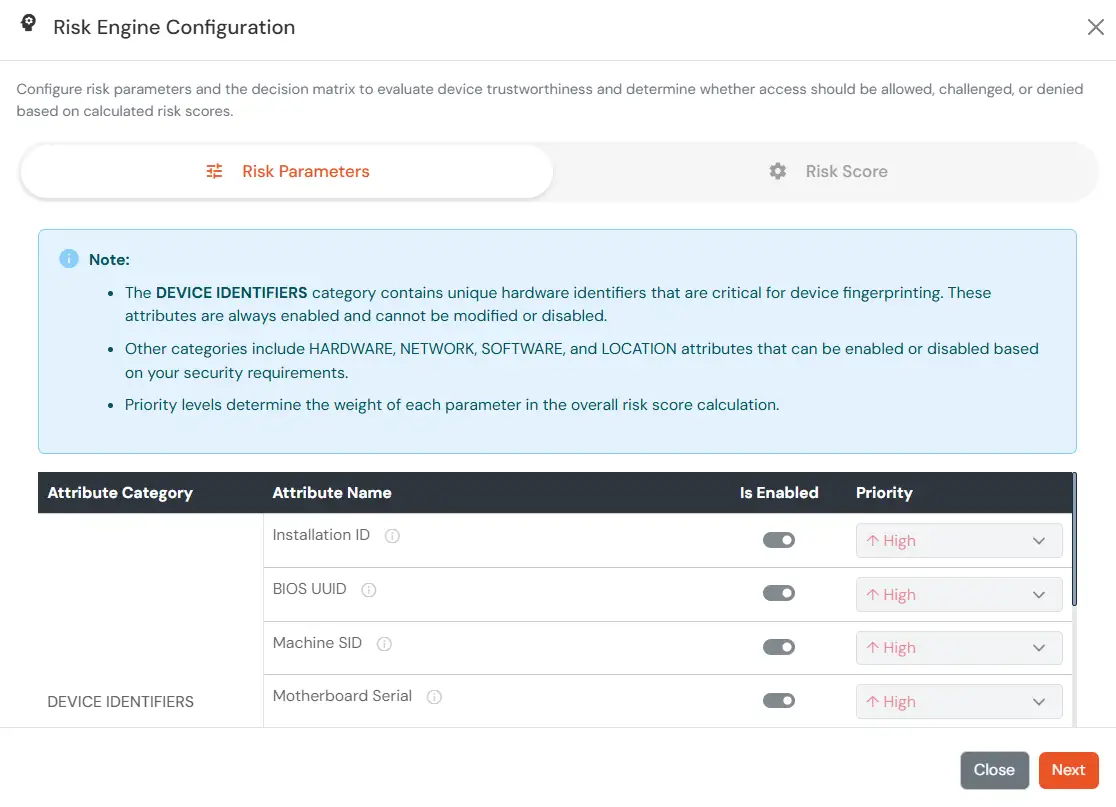
- Click on Save Changes.
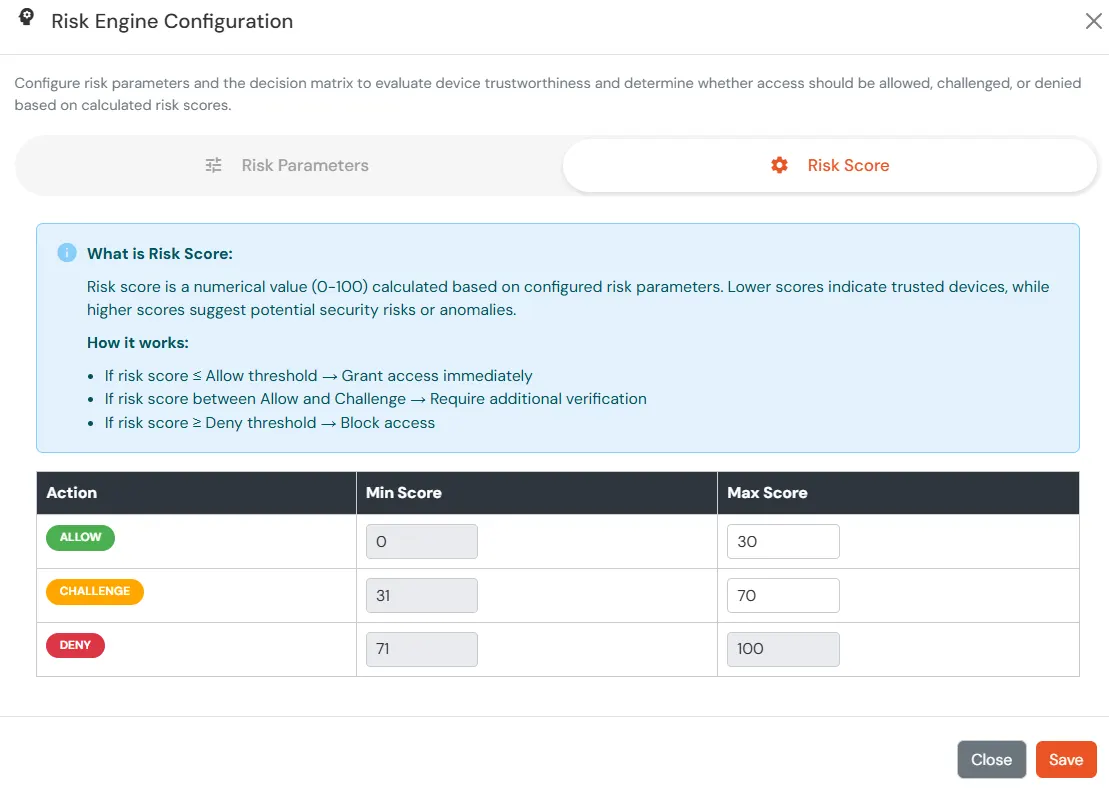
- Configure Risk Score
- In the Risk Score, define the score ranges (0–100) that determine the authentication outcome during user login.
- Lower risk scores indicate trusted devices.
- Higher risk scores indicate potential security risks or anomalies.
- Configure the thresholds as follows:
- Allow: Allow user to authenticate without challenge and registration.
- Challenge: Allow user authentication with a challenge, e.g., when the device limit is exceeded.
- Deny: Deny user authentication, e.g., when the device limit is exceeded, when device attribute is mismatch.
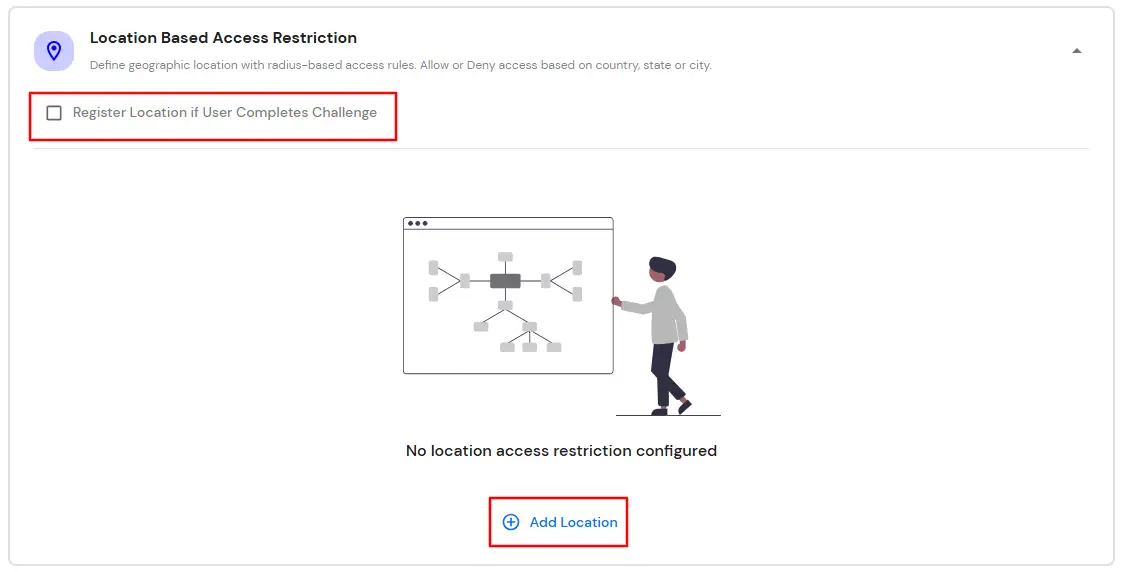
1.3 Location Based Access Restriction
In location restrictions, the admin configures a list of locations where they want to allow or deny end-user access based on the condition set by the admin. When a user tries to log in with Adaptive Access Policy enabled, their location attributes, such as latitude, longitude and country code, are verified against the location list configured by the admin. Based on this, the user will be either allowed, challenged or denied.
How to Configure Location-Based Access Restriction:
- Expand the Location Based Access Restriction section by clicking on the dropdown icon to configure Location Based Access Restriction rules.
- Click on Add Location.
- In the Enter Location input field, enter the Location Name and then select the correct location from the search results using the UP & DOWN navigation keys.
- Add the In and Around Distance for your location in the next input field. This will be the total area in and around the location we have configured using the Latitude and Longitude points.
- In the next select list, select your distance parameter as either KMS (Kilometers) or Miles. For each location you add, you can choose to either allow or deny it by enabling or disabling the switch button next to it.
- You can click on the Add Location to add more than one location.
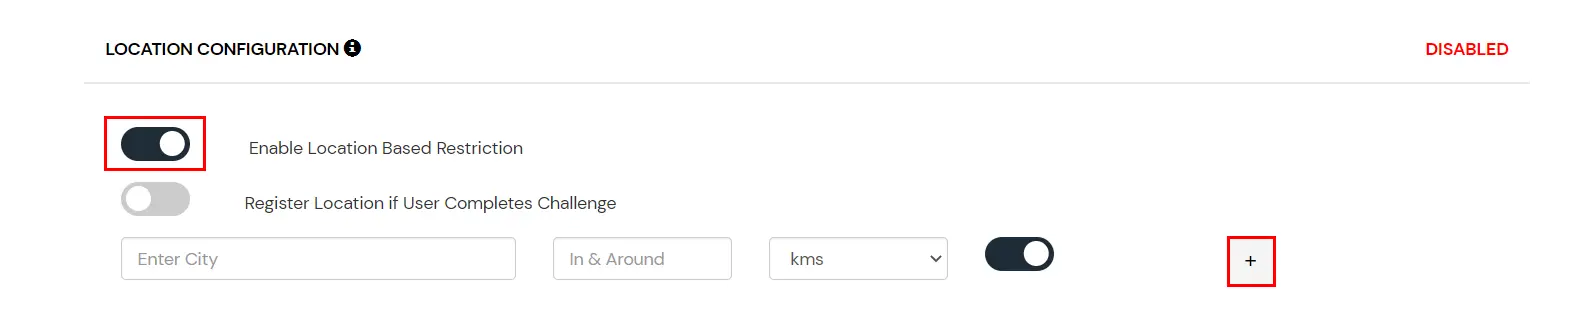
- Save the changes you made by scrolling down at the bottom of the page.
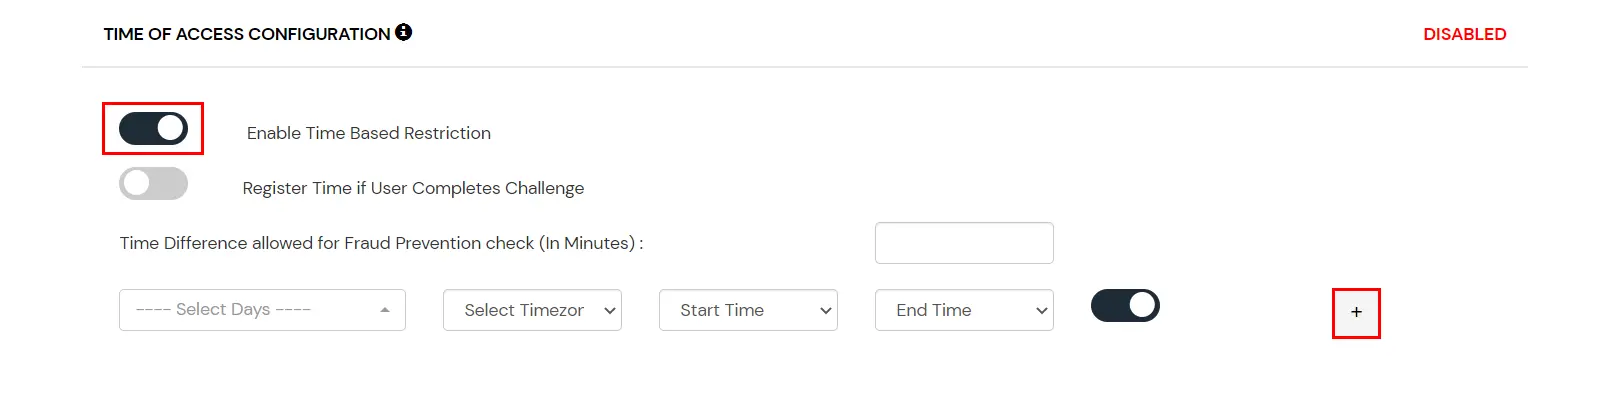
1.4 Time Based Access Restriction
In time restriction, the admin configures a time zone with start and end times and users are either allowed, denied or challenged based on the condition in the policy. When an end-user tries to log in with Adaptive Access Policy enabled, their time zone-related attributes, such as time zone and current system time, are verified against the list configured by the admin. Based on the configuration, the user is either allowed, denied or challenged.
How to Configure Time-Based Access Restriction:
- Expand the Time Based Access Restriction section by clicking on the dropdown icon to configure Time Based Access Restriction rules.
- Click on Add Time.
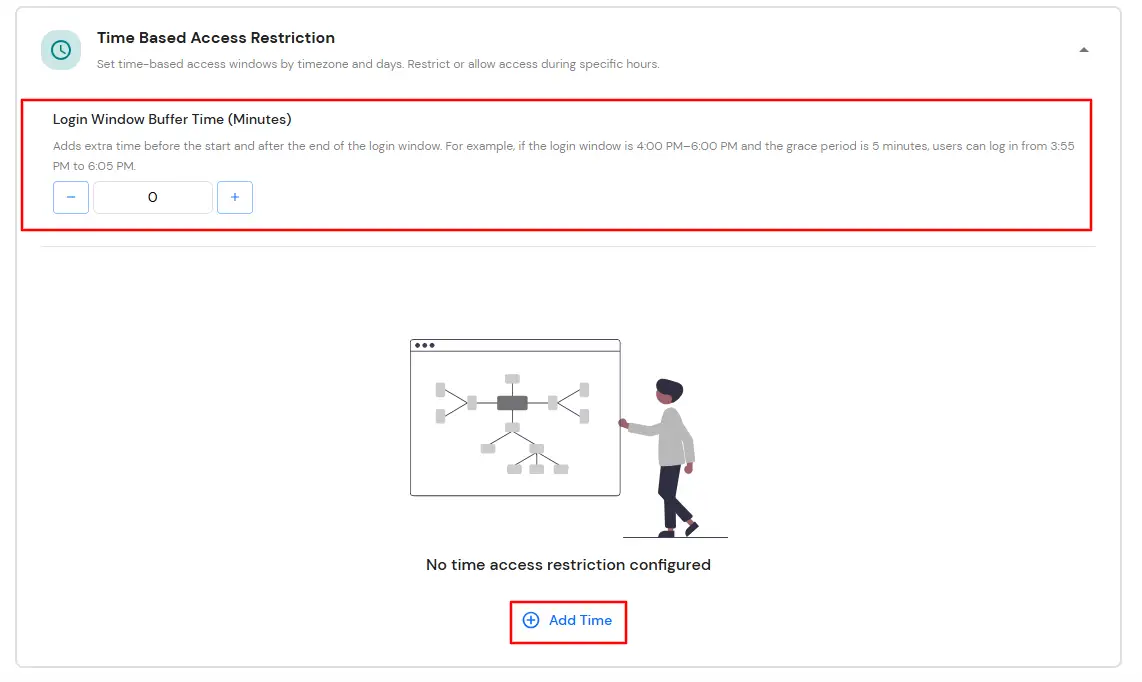
- From the Select Timezone list, select the timezone. From the Start Time and End Time lists, select the appropriate values. For each time configuration you add, use the dropdown menu to select whether to Allow or Deny it.
- Enter the value in minutes in the input field next to the Login Window Buffer Time (Minutes). This value allows you to specify some relaxation before your start time and after your end time. (so if the start time is 6 AM and the end time is 6 PM with a time difference value set to 30 minutes, then the policy will consider the time from 5:30 AM to 6:30 PM). If no value is entered in this field, the default value is set which is 0 minutes.
- You can click on the Add Time button to include more than one Time Configuration and then follow the above step.
- Click on Next.
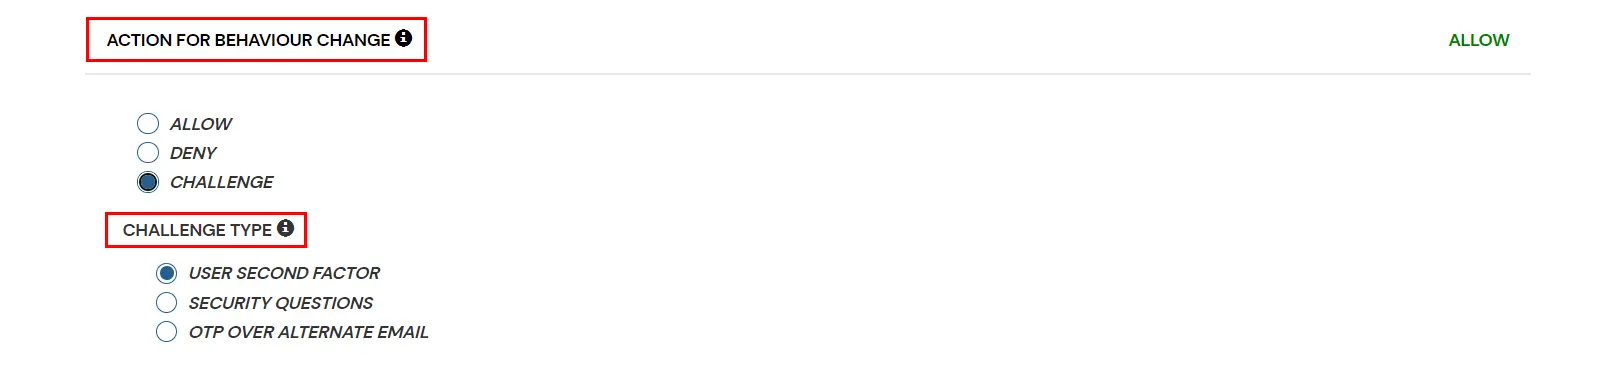
2. Action for Behavior Change
- You can configure one of the three possible actions for your Adaptive Access Policy as explained below:
| Attribute |
Description |
| Allow |
Allow users to authenticate and use services if Adaptive Access Policy condition is true. |
| Deny |
Deny user authentications and access to services if Adaptive Access Policy condition is true. |
| Challenge |
Challenge users with one of the three methods mentioned below for verifying user authenticity. |
Challenge Type Options:
| Factors |
Description |
| User Second Factor |
The user needs to authenticate using the second factor they have selected or been assigned, such as
- OTP over SMS
- PUSH Notification
- OTP over Email and many more.
|
| KBA |
The system will ask the user for 2 of 3 questions they have configured in their Self-Service Console. Only after the correct answers to both questions will the user be allowed to proceed further. |
| OTP over Alternate Email |
User will receive an OTP on the alternate email they have configured through the Self Service Console. Once the user provides the correct OTP, they are allowed to proceed further. |
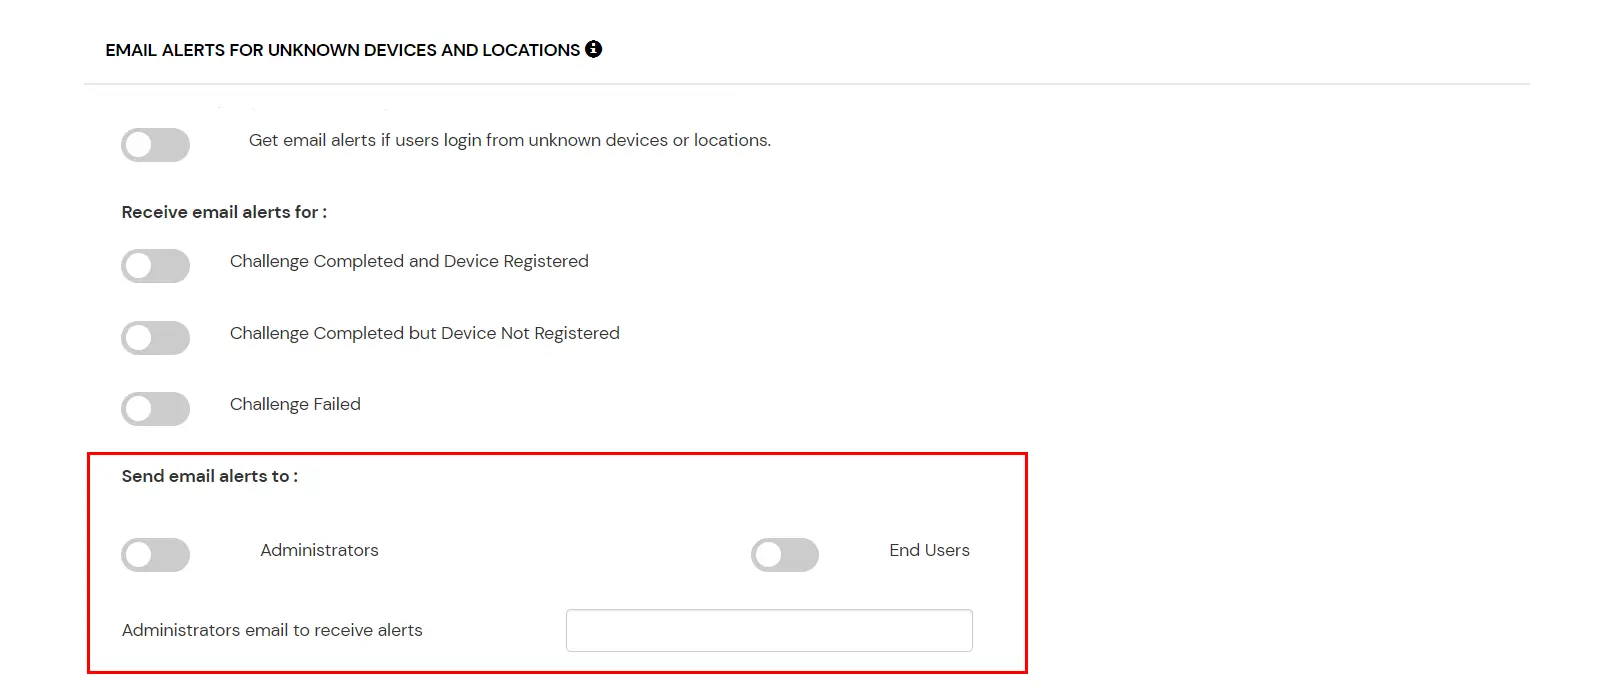
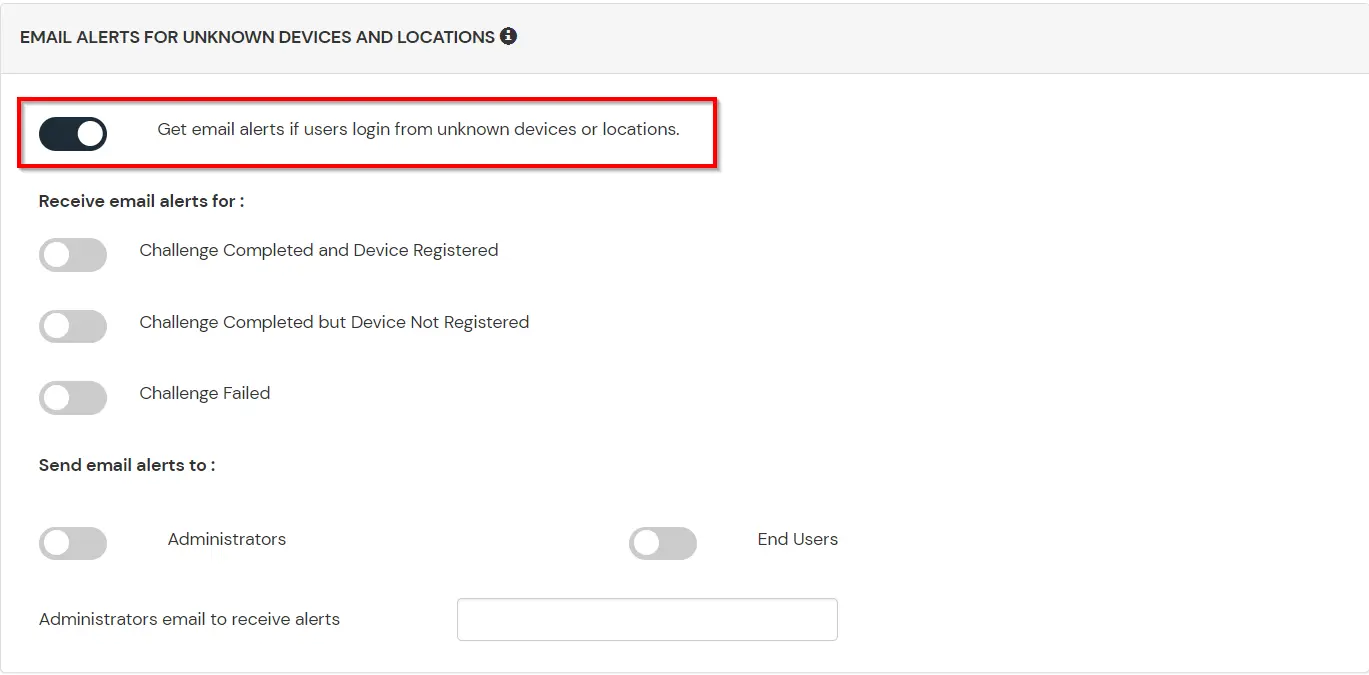
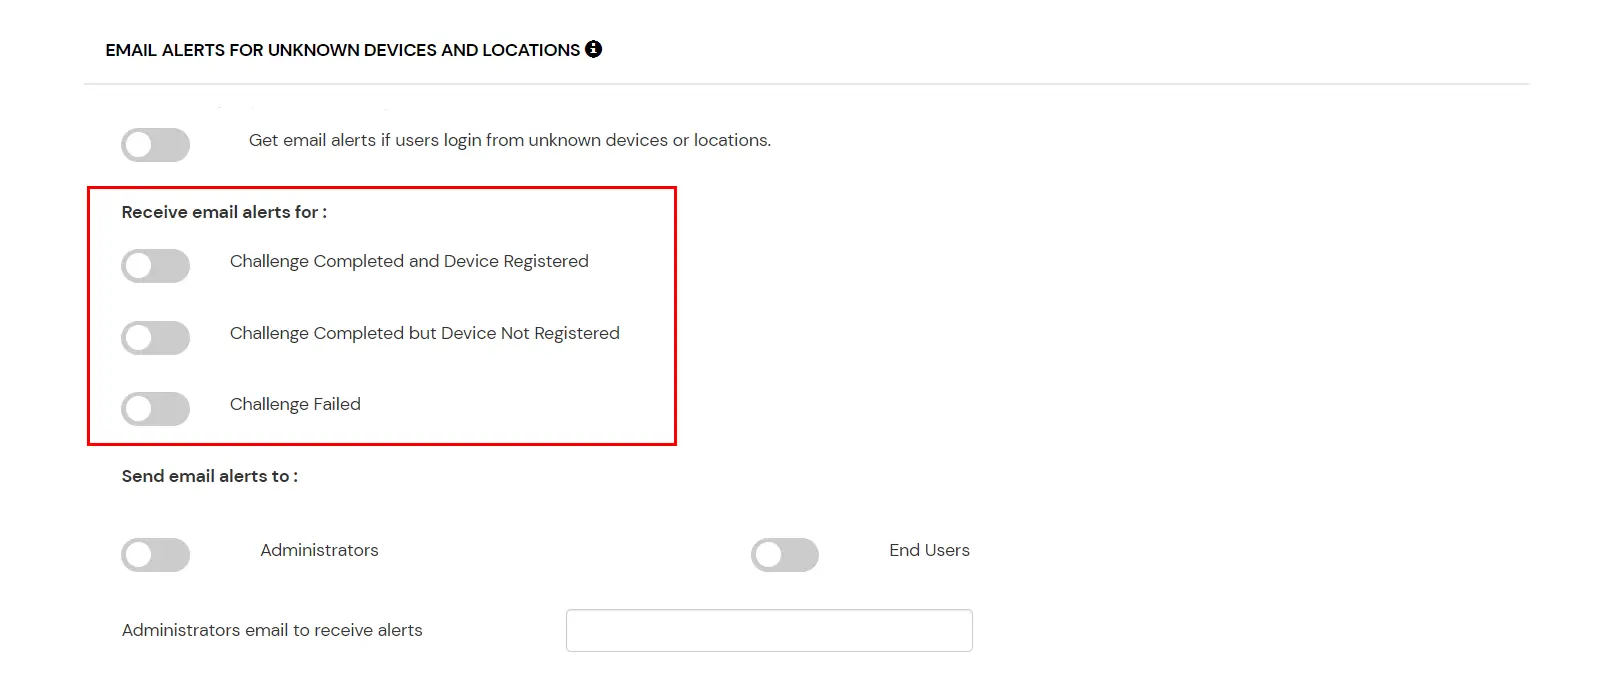
3. Email Alerts and Custom Error Message
4. Review
Review the configured policy conditions, behavior change actions, email alert settings and custom error messages before creating the adaptive authentication policy. This step provides a consolidated view of all configured settings, allowing you to verify the policy configuration and make any necessary changes before saving.
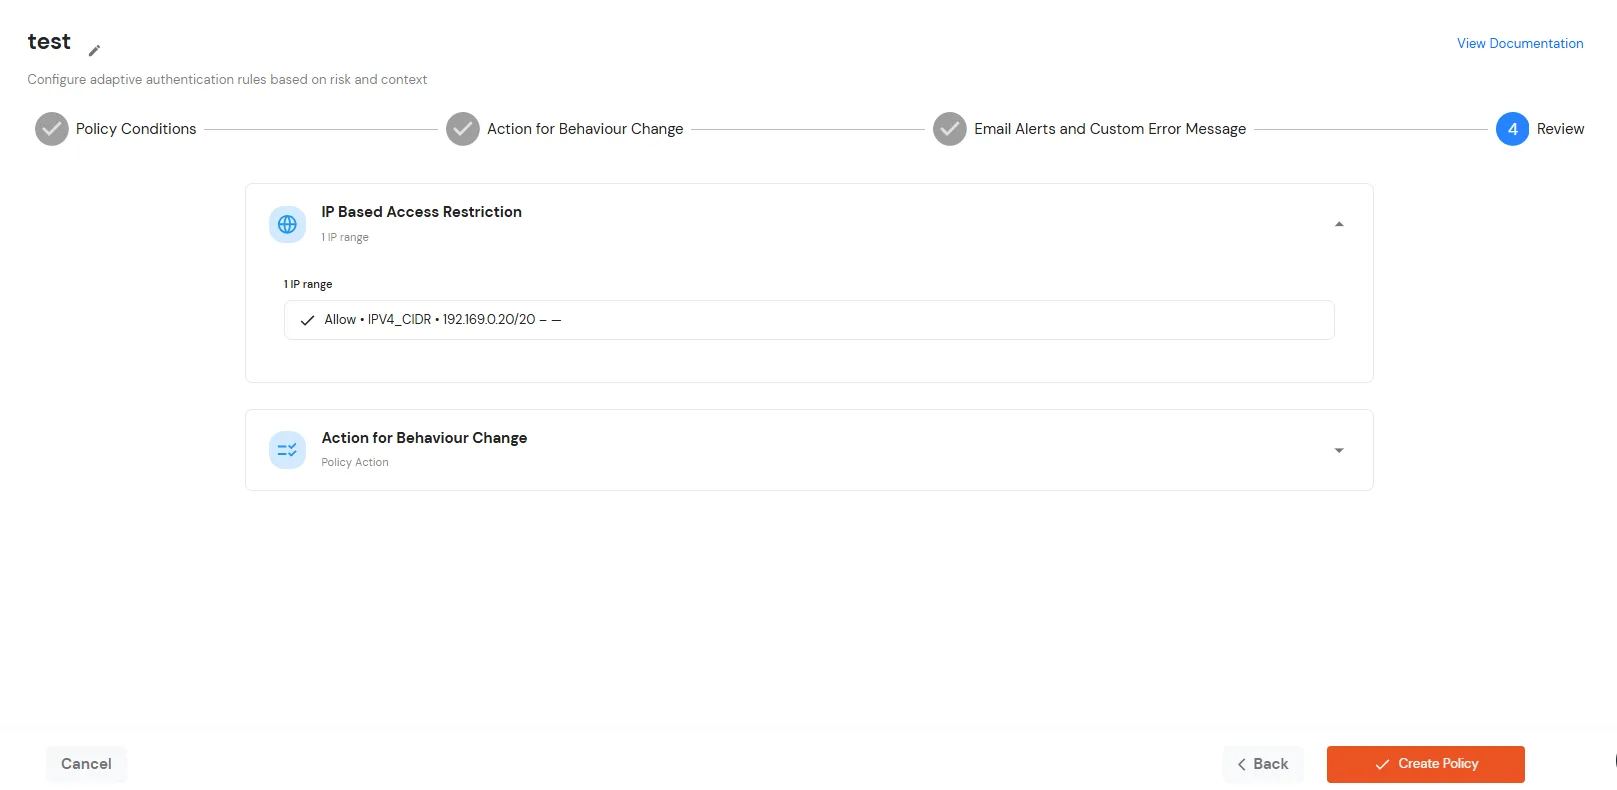
- Once you have verified all configurations, click Create Policy to save and activate the policy.
- You will see the policy listed once it’s successfully added.
- Click on the Edit icon against the login policy that you want to edit.