Manage Groups
What is a Group in miniOrange IDP?
A group is a collection of several users. Groups are used to map an application to a set of users. Groups can be used for the following purposes in miniOrange :
- To differentiate users based on their roles or departments.
- To allow access to an application to a specific set of users.
- To enable 2FA for a specific set of users.
The DEFAULT Group :
The DEFAULT group is automatically created when you complete the configuration for admin. All users under your admin account are part of the
DEFAULT group. Each newly created user is assigned to the default group automatically.
A Default group can be used to enable access to an application for all of the users or if you want to enable MFA for all users.
How to create a Group :
How will admins create groups and assign users to groups in miniOrange?
- Log into the miniOrange admin dashboard using your miniOrange credentials.
- Go to Groups >> Manage Groups from the left menu and click on Create Group on the top right corner of the page.
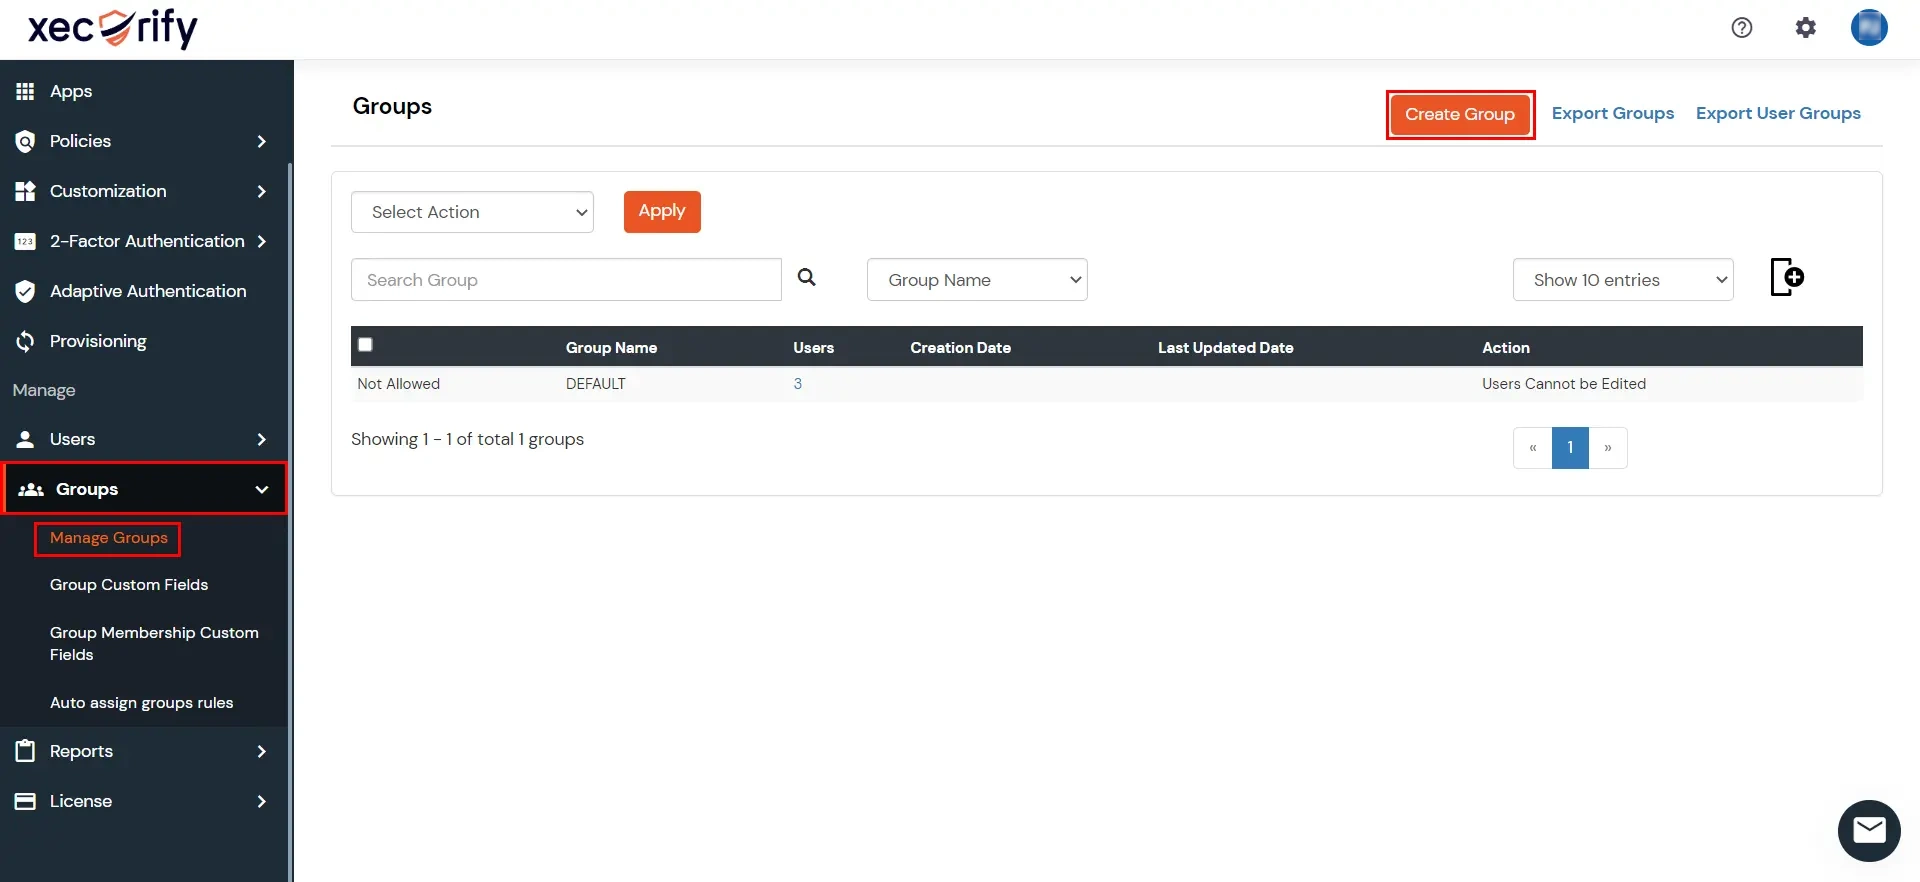
- On the Add Group Screen, give a name for the group and click on the Create Group button to add the new group.
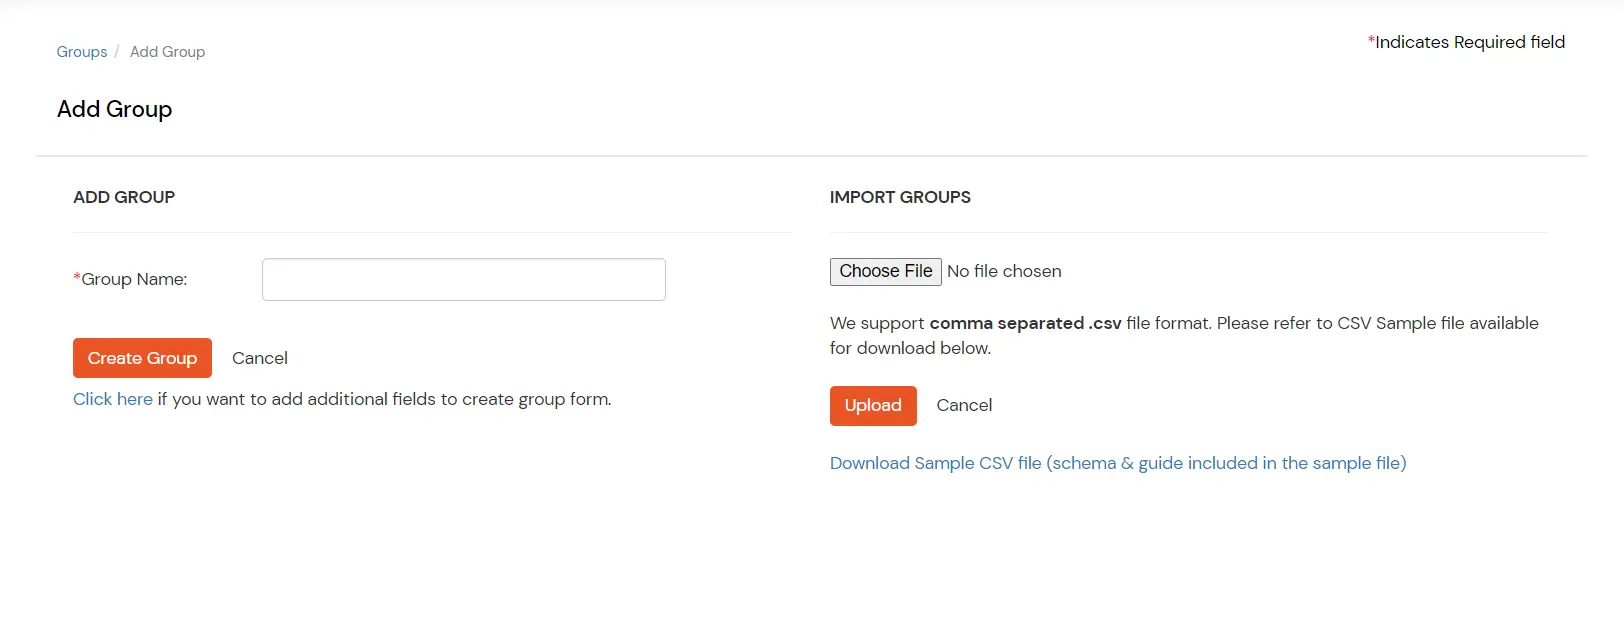
- You will be redirected to the Groups List Screen when you can see the newly created group.
Other options on the Manage Groups Page:
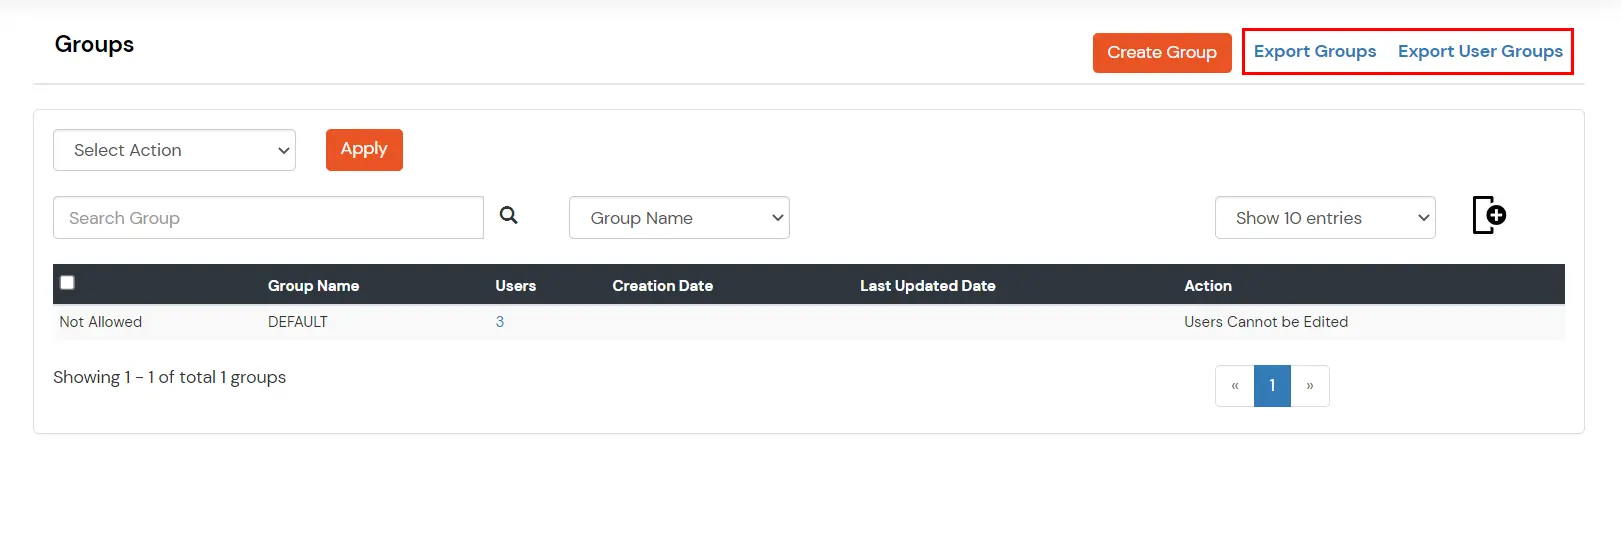
| Export Groups |
This option creates and downloads a CSV containing a list of all Groups under your account. |
| Export User Groups |
This option creates and downloads a CSV containing the User Group Mappings for all users. This exports the list of users under your account along with the groups of which the user is a member of. |
How to Add Users to a Group :
- Go to Groups >> Manage Groups from the left menu.
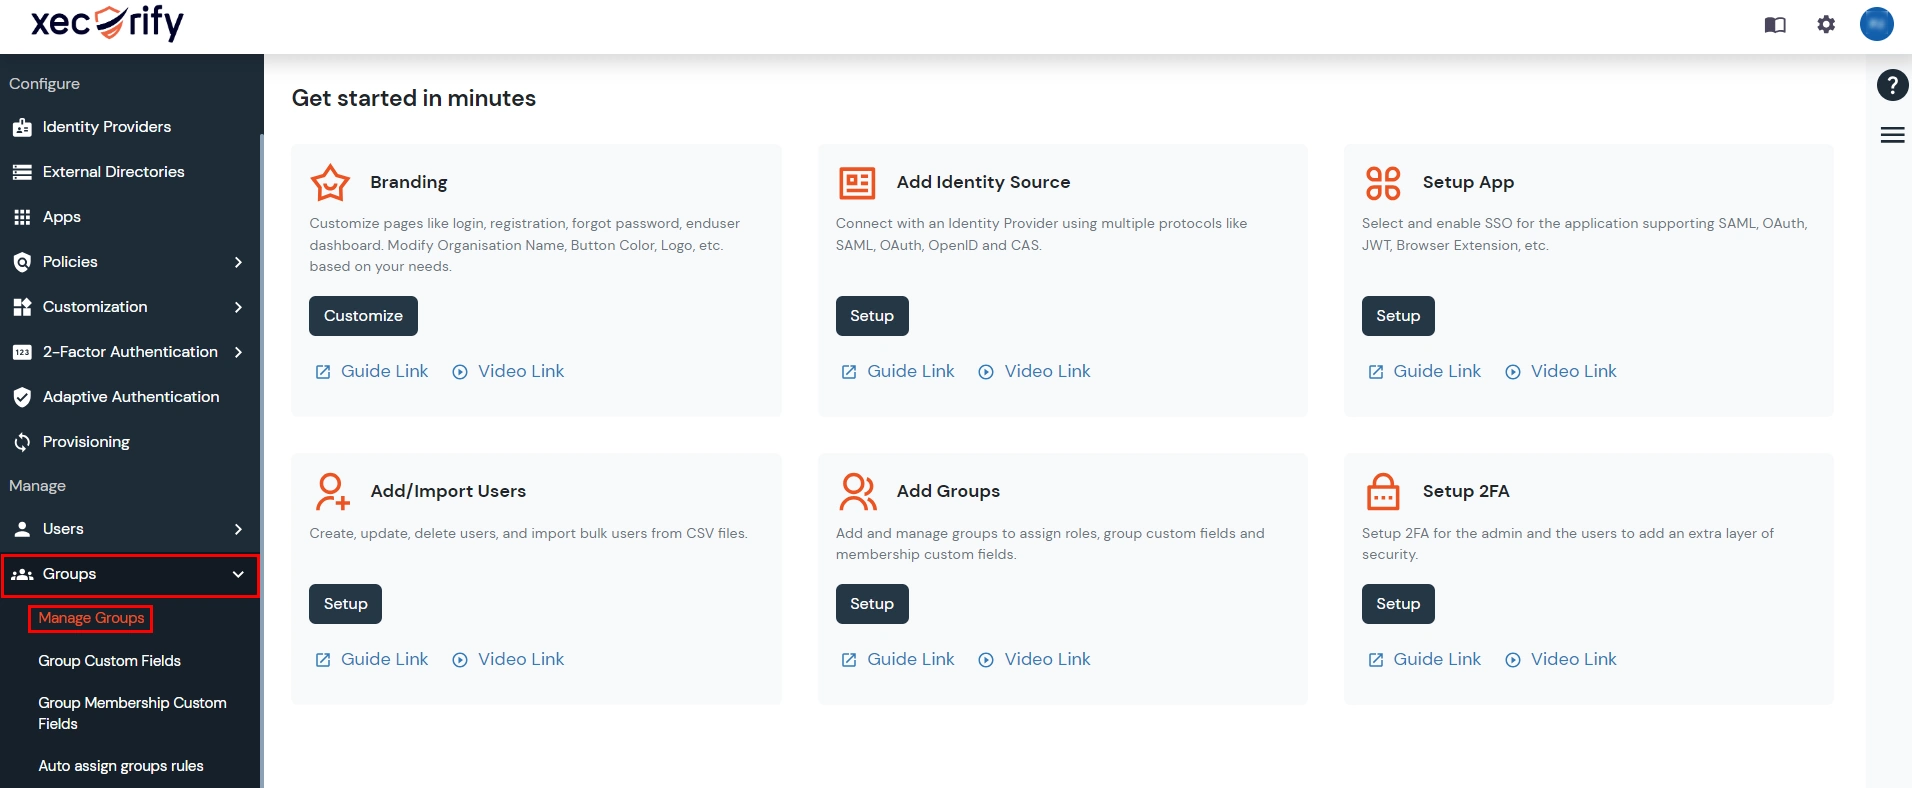
- click on the Assign users option against the group to which you want to add users.

- On the Assign Users to Groups page, you will see the list of all users who are not assigned to the selected group.
- Select the radio button against all the users you want to assign to the selected group.
- Click on Select Action Dropdown and Select the “Assign to Group” option.
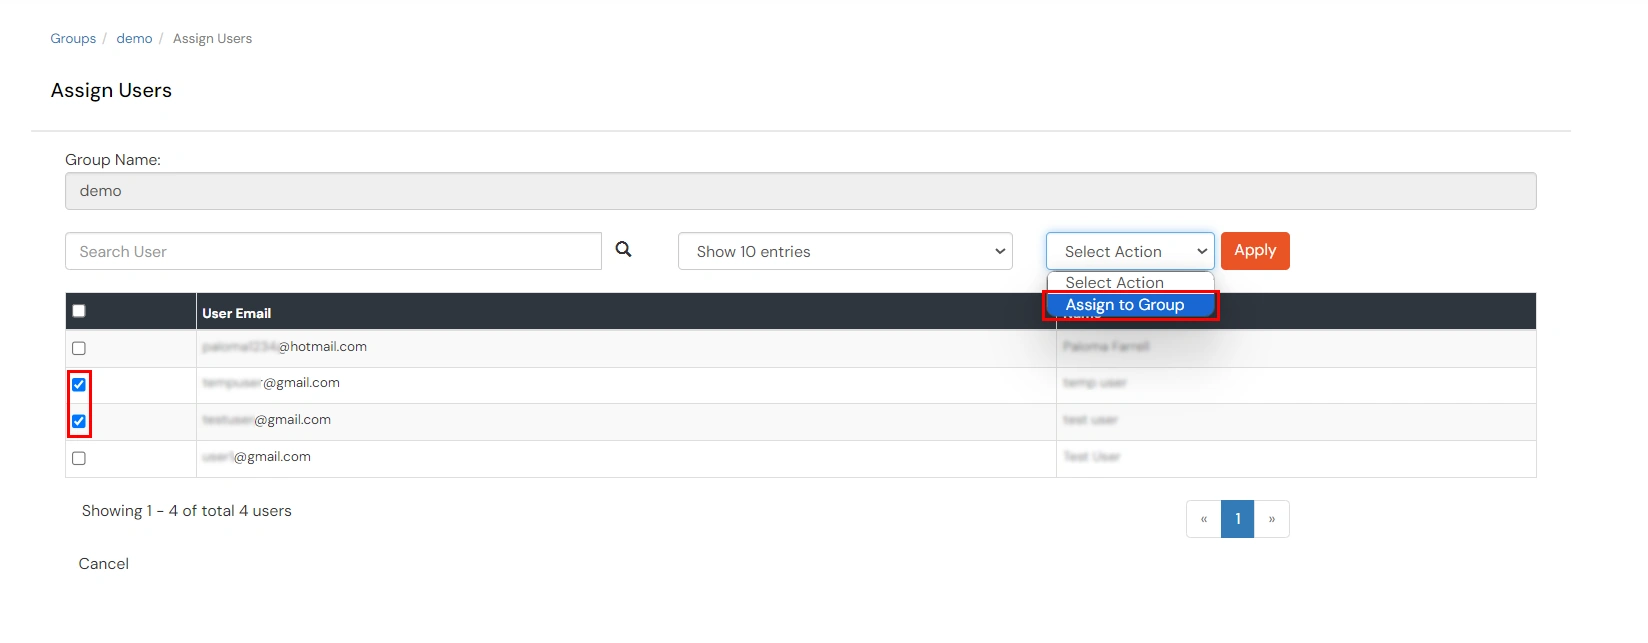
- Click on Apply to add the selected users to the group.
How to assign multiple groups to a user:
- Navigate to Users >> User list.
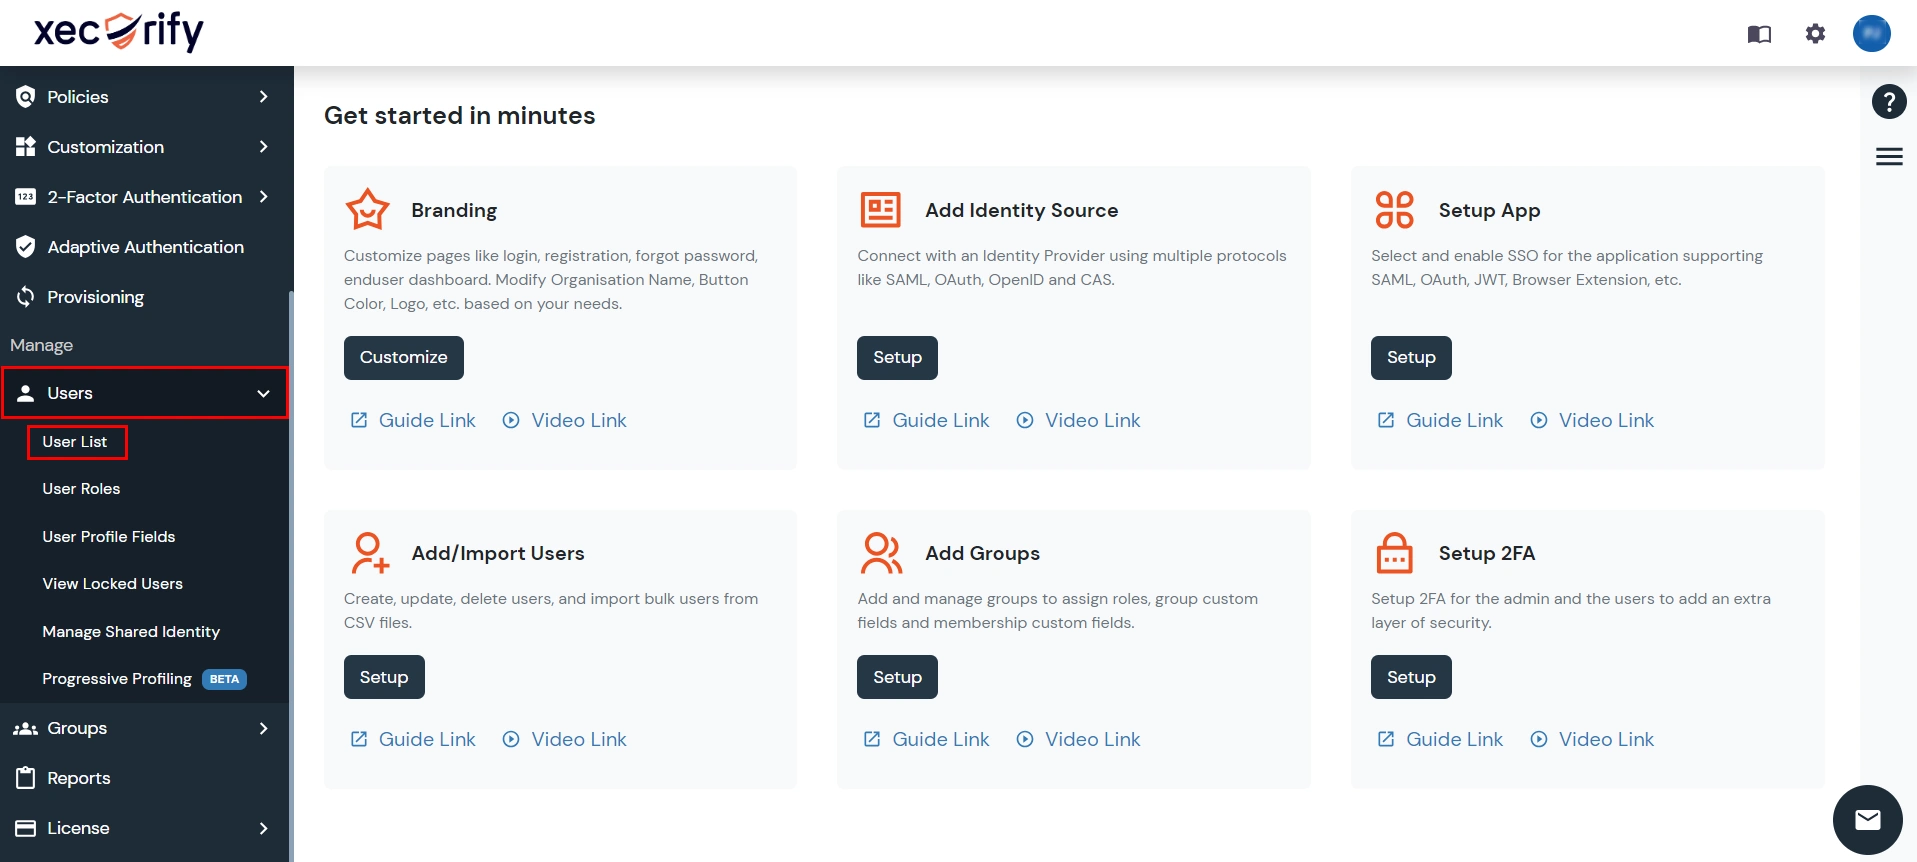
- Click on select in front of the required user. Click on View Groups.
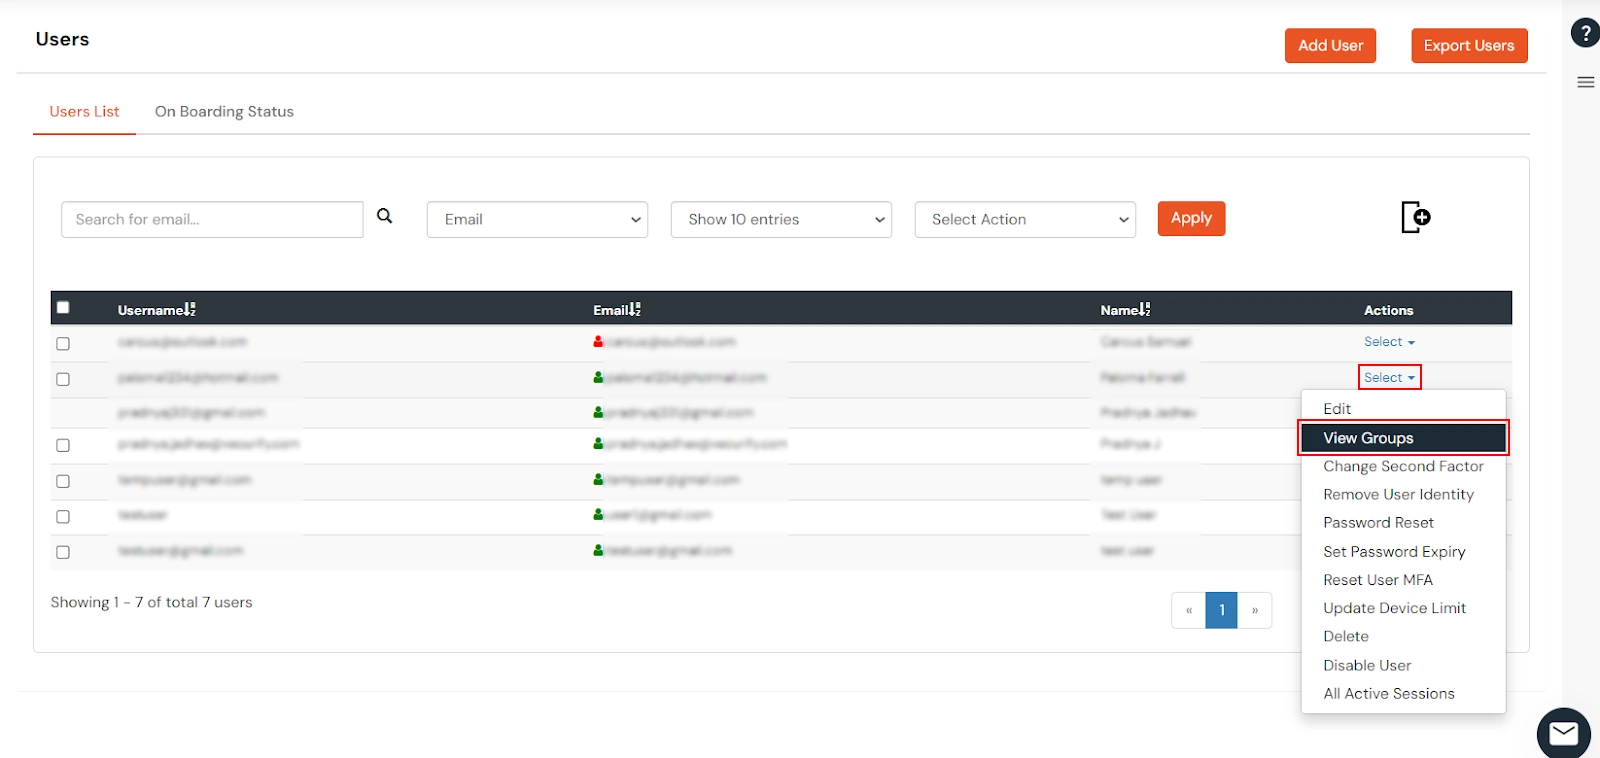
- You can see all the groups assigned to that user.
- Click on Assign Groups.
- Search for group names you want to assign to that user and select those groups.
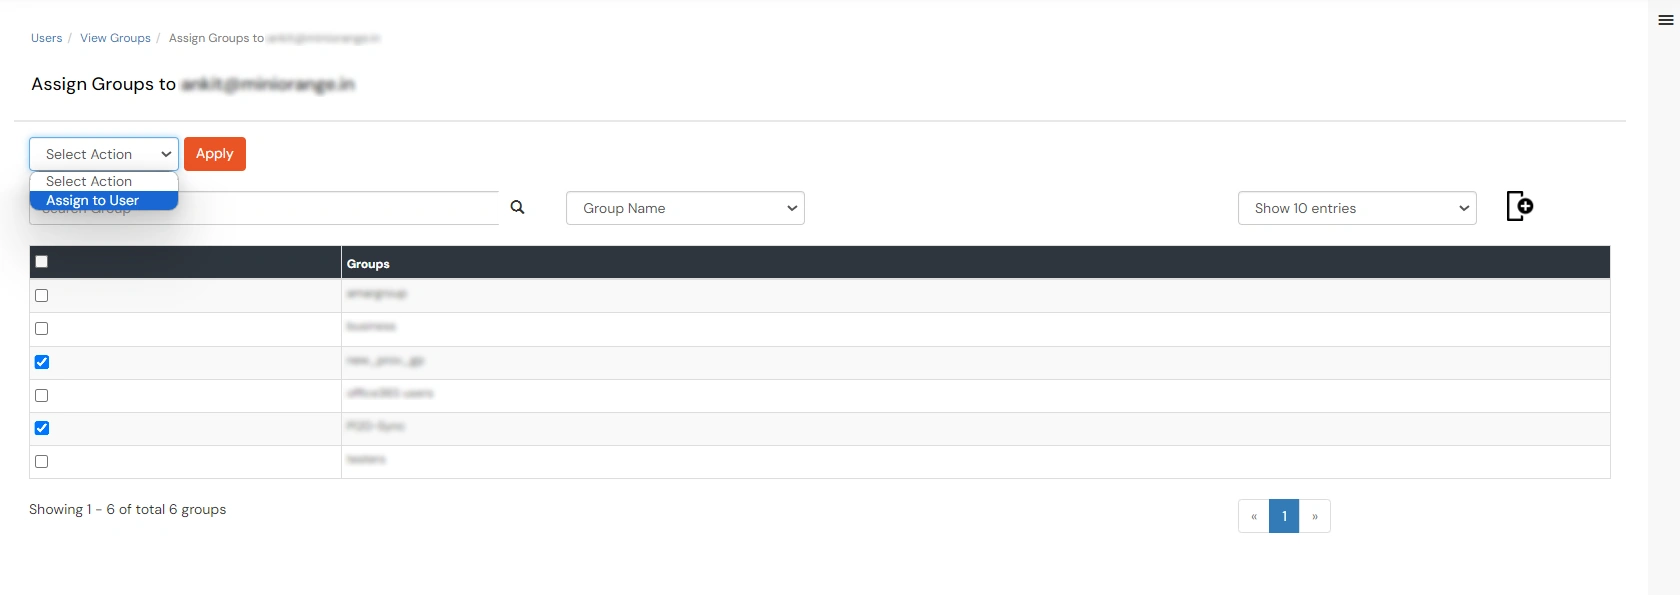
- Click on Select Action and select Assign to User. Then click on Apply.
How to View members of a Group :
- Go to Groups >> Manage Groups from the left menu.

- In the Groups List, click on the Users No. Link next to the Group Name.

- This will open the View Group Member page showing a list of all members of the Group. You can also search for members using the search bar above the user list.

How to Remove a User from a Group :
- Go to Groups >> Manage Groups from the left menu.

- In the Groups List, click on the Users No. Link next to the Group Name.

- This will open the View Group Member page showing a list of all members of the Group.

- Check the checkbox for all the users that you want to remove from the Group.
- Click on Select Action Dropdown and Select the “Remove From Group” option.

- Click on Apply to remove the selected Users from the Group.
How to Download list of all members of a Group:
- Go to Groups > Manage Groups from the left menu.

- In the Groups List, click on the Download Members option against the Group.

- This will download the CSV file containing detailed information of all users who are part of the group.
How to Delete a Group:
- Go to Groups > Manage Groups from the left menu.
- In the Groups List, click on the Delete option against the group.

How To Make a Group Default:
- Go to Groups > Manage Groups from the left menu.
- In the Groups List, select the checkbox against the group you want to make default.
- Click on Select Action Dropdown and Select the “Make Default” option and click on Apply to make it the default group.

- When a Group is made Default, any new User’s added under your account will be automatically added to the Group.


