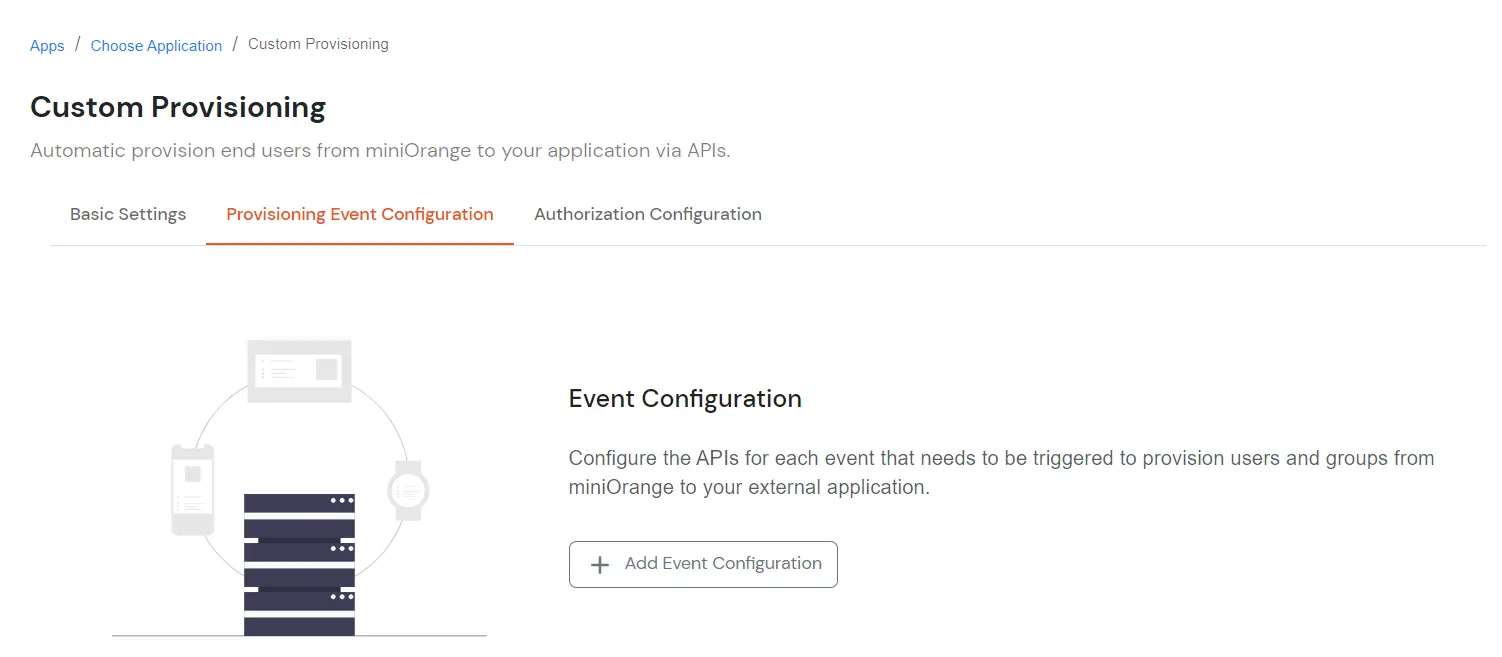
How to add a Custom Provisioning App
This guide provides a comprehensive overview of the steps needed to configure Custom provisioning effectively. By following these steps, you can streamline user management, automate access to necessary tools, and enhance security through predefined roles.
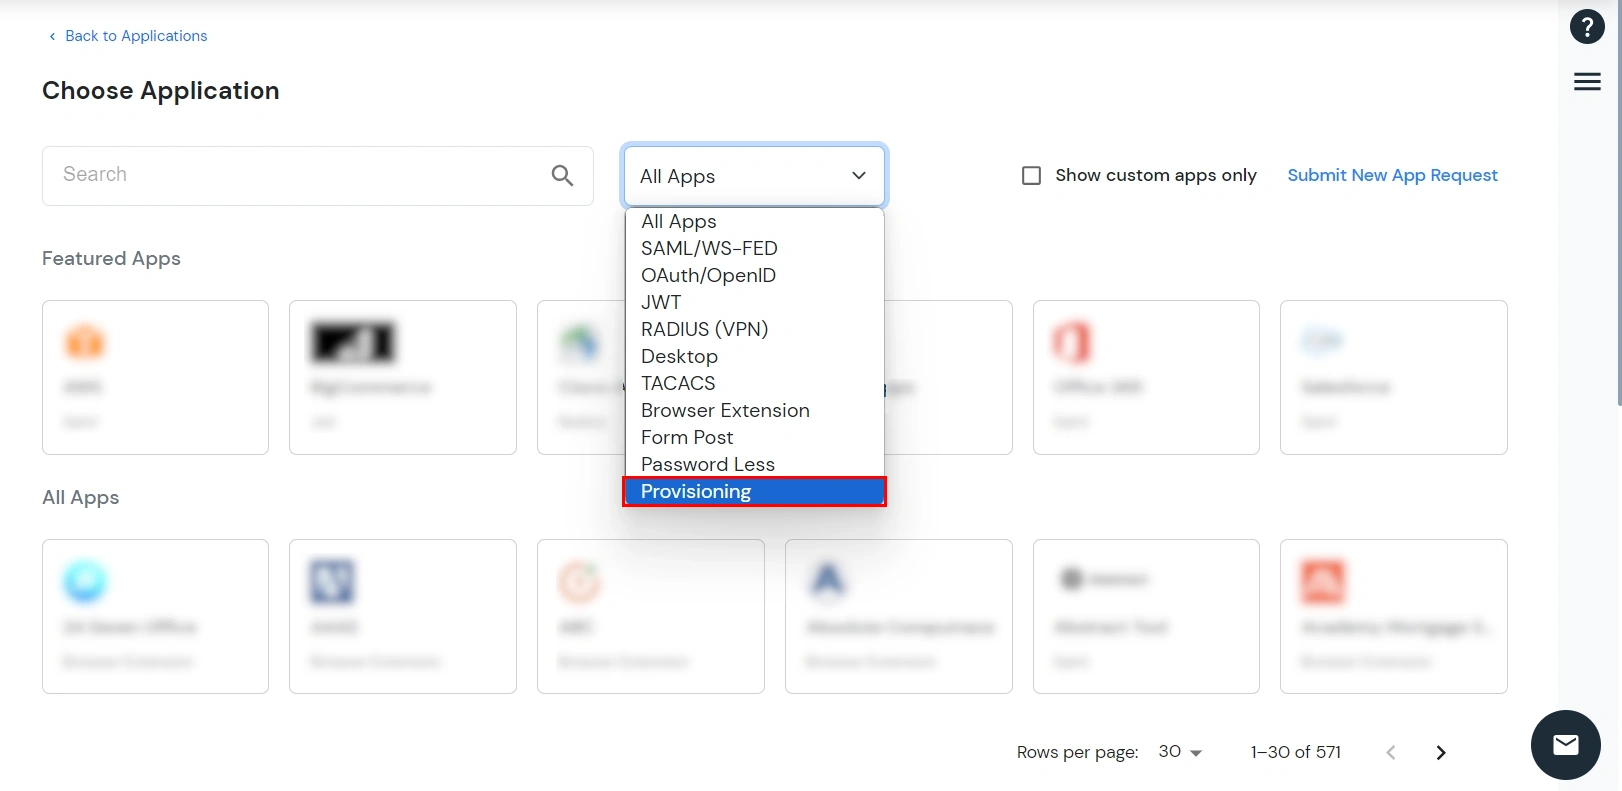
1. Create Custom App
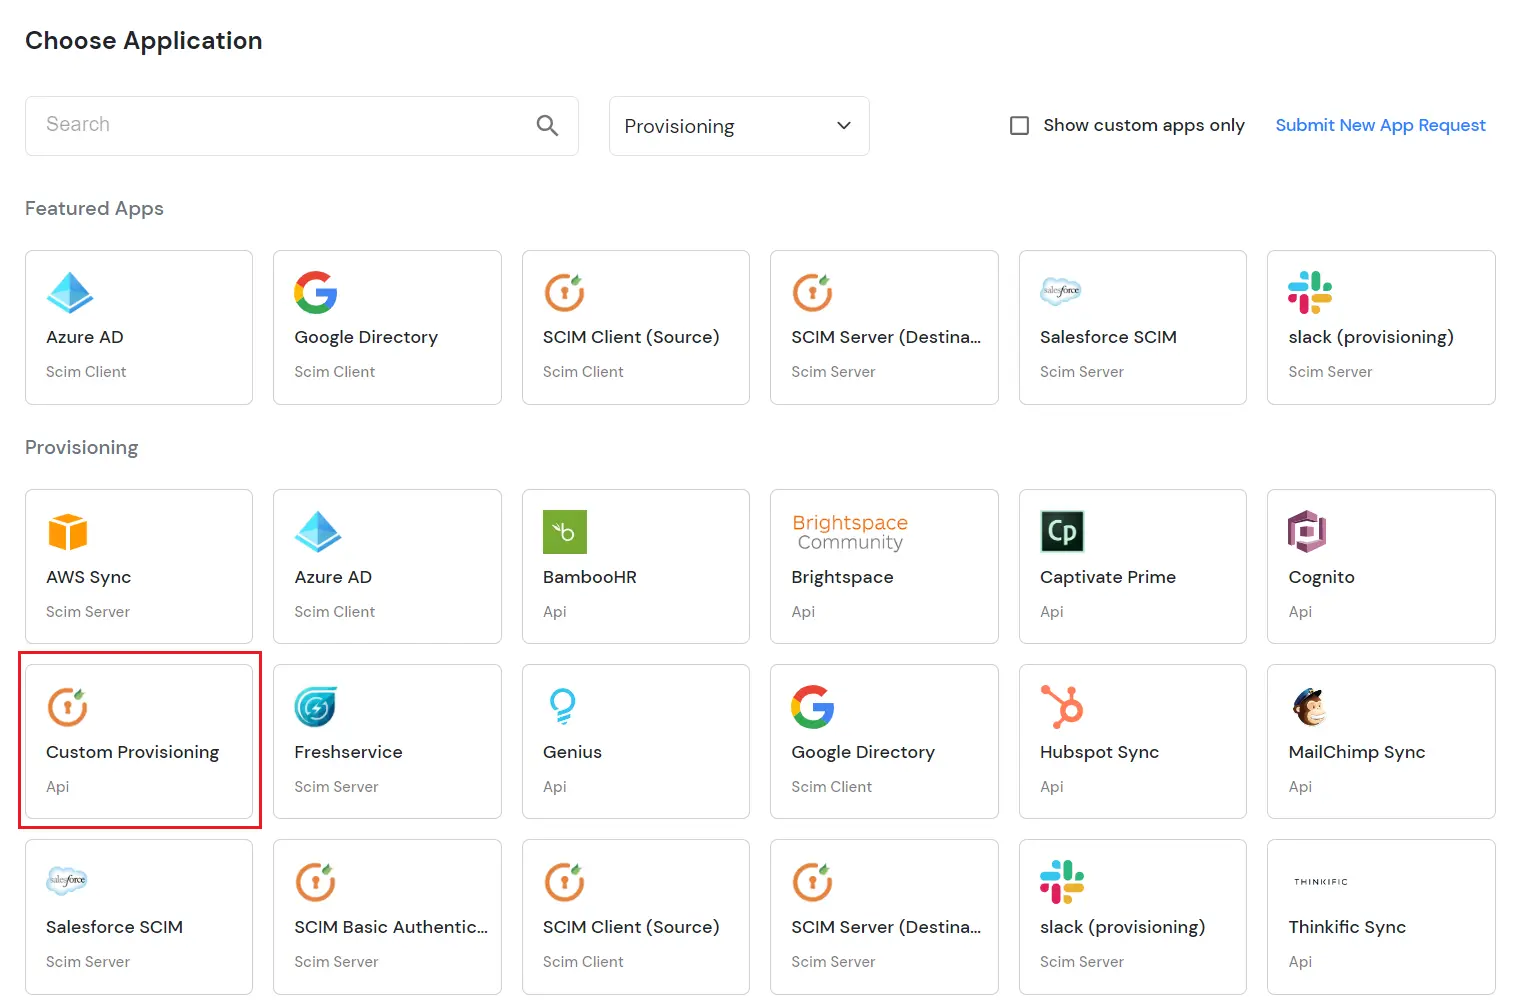
- Login into miniOrange Admin Console.
- Go to Apps and click on Add Application button.

- Under Choose Application, select Provisioning from the All Apps dropdown.
- Search for your application from the list, if your application is not found. Search for Custom provisioning and you can set up your app via Custom provisioning.
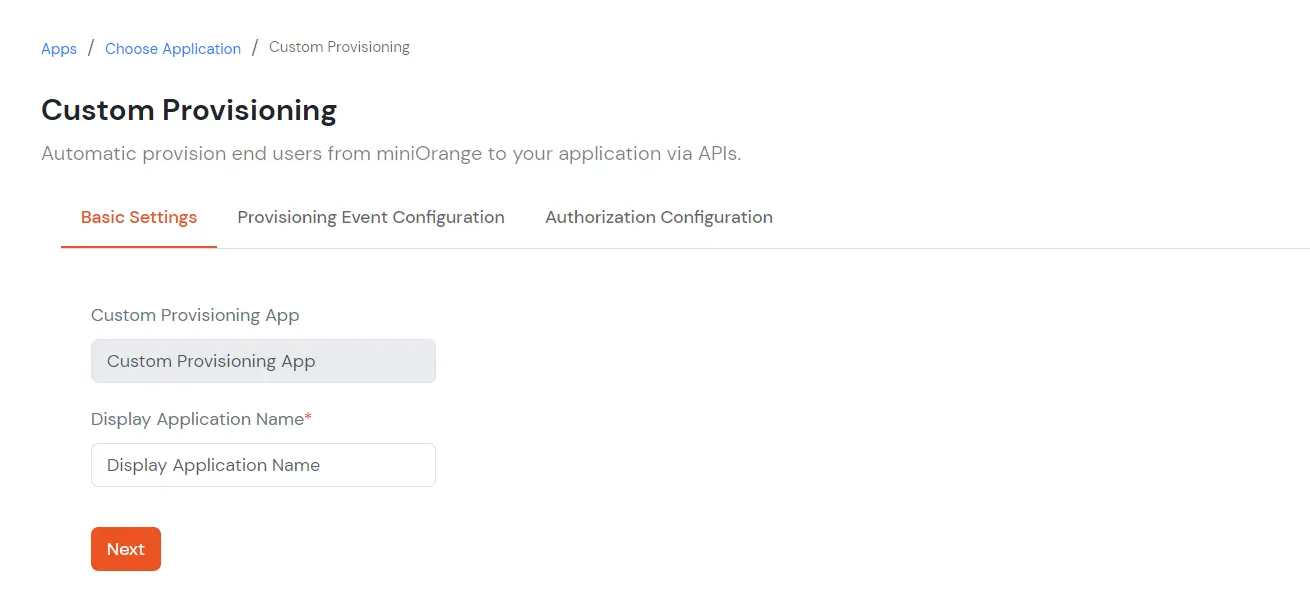
- Enter the Display Application Name and then click on Next.
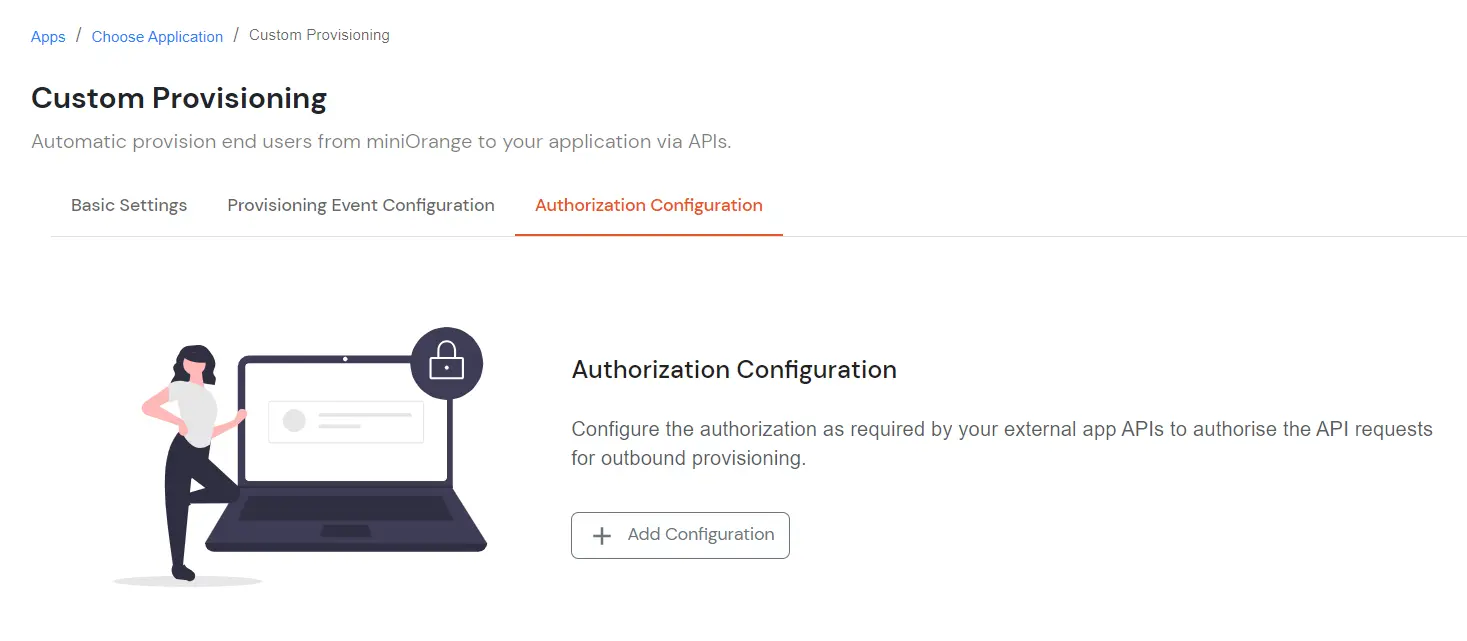
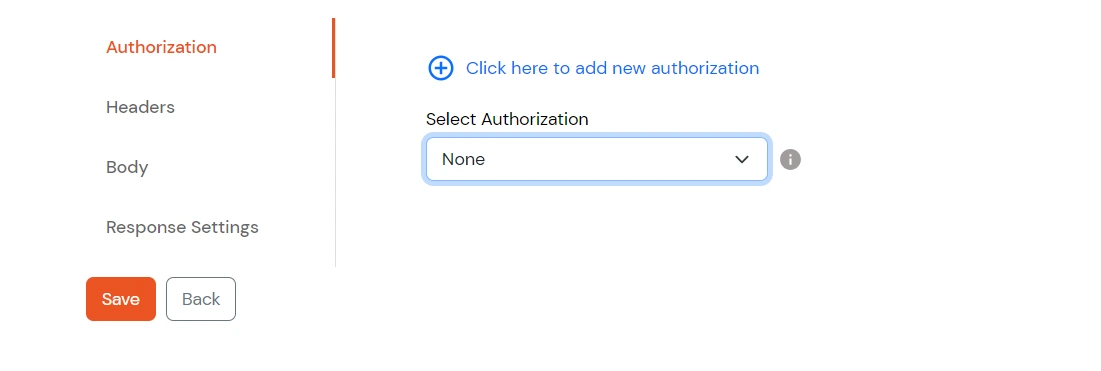
2. Add Authorization for the API’s
- Select Authorization and click on Add Configuration.
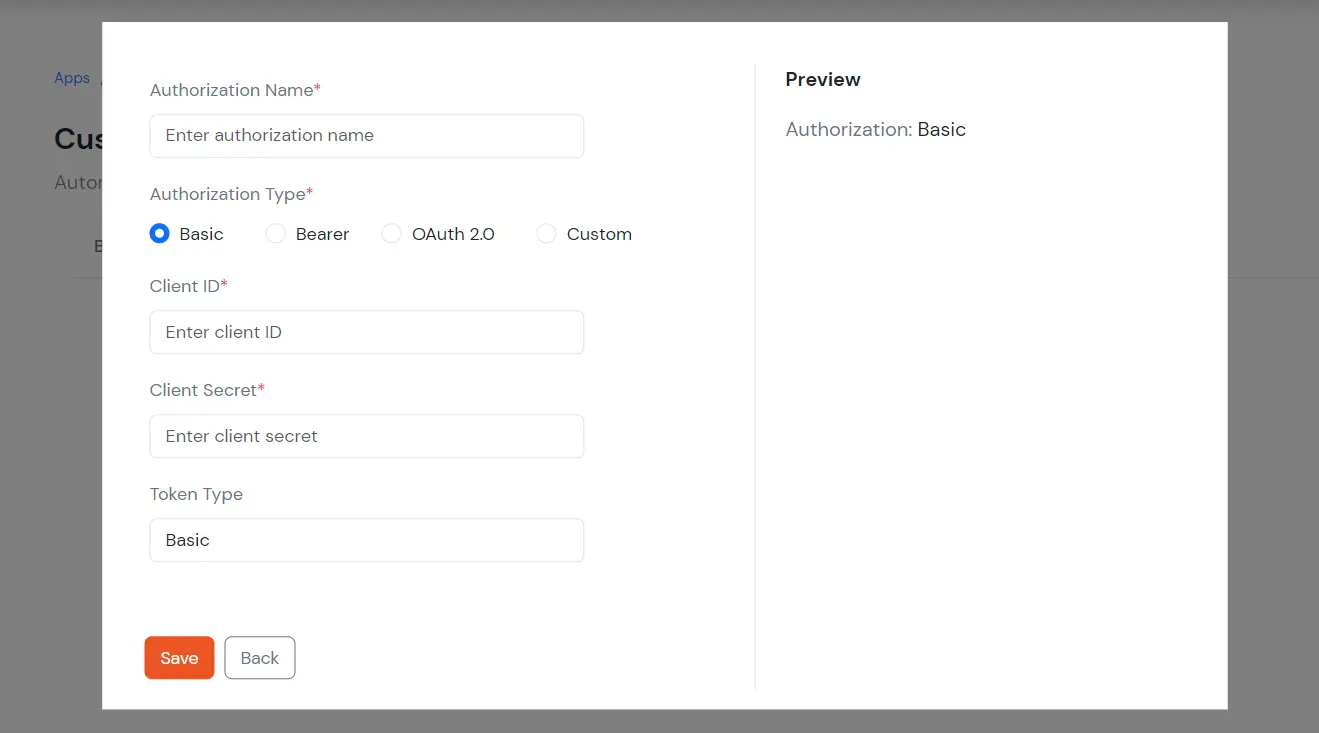
- The user can select any one of the 4 Authorization Types based on their requirements.
- Basic
- Bearer
- OAuth 2.0
- Custom
- When you select Authorization Type as Basic, add the Authorization Name, Client Id and Client Secret of the app your configuring with and click Save.
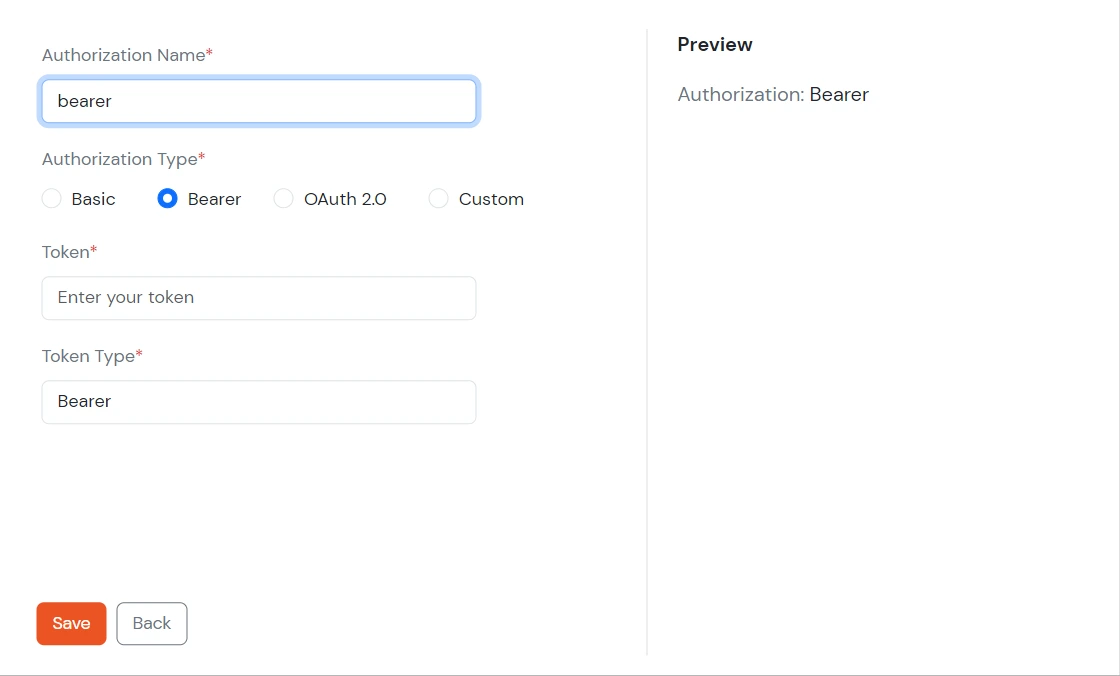
- When you select Authorization Type as Bearer, add the Token value to give access to the APIS and click on Save.
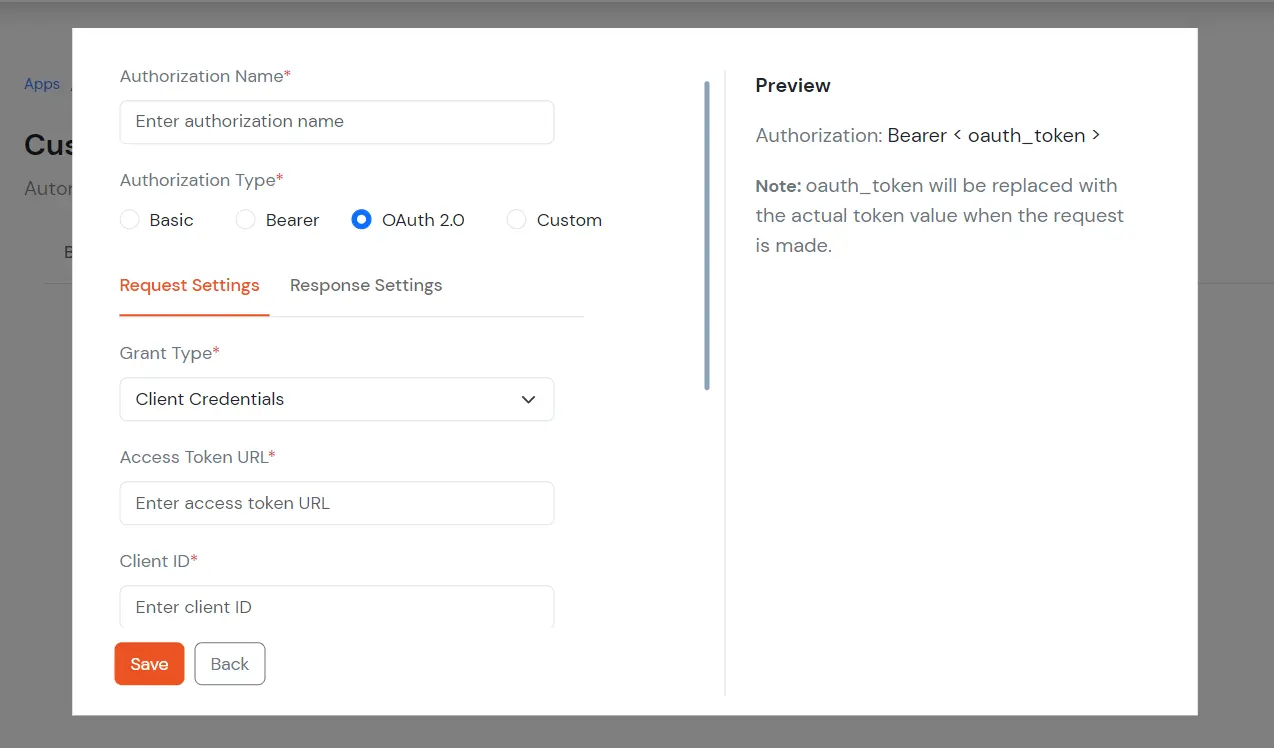
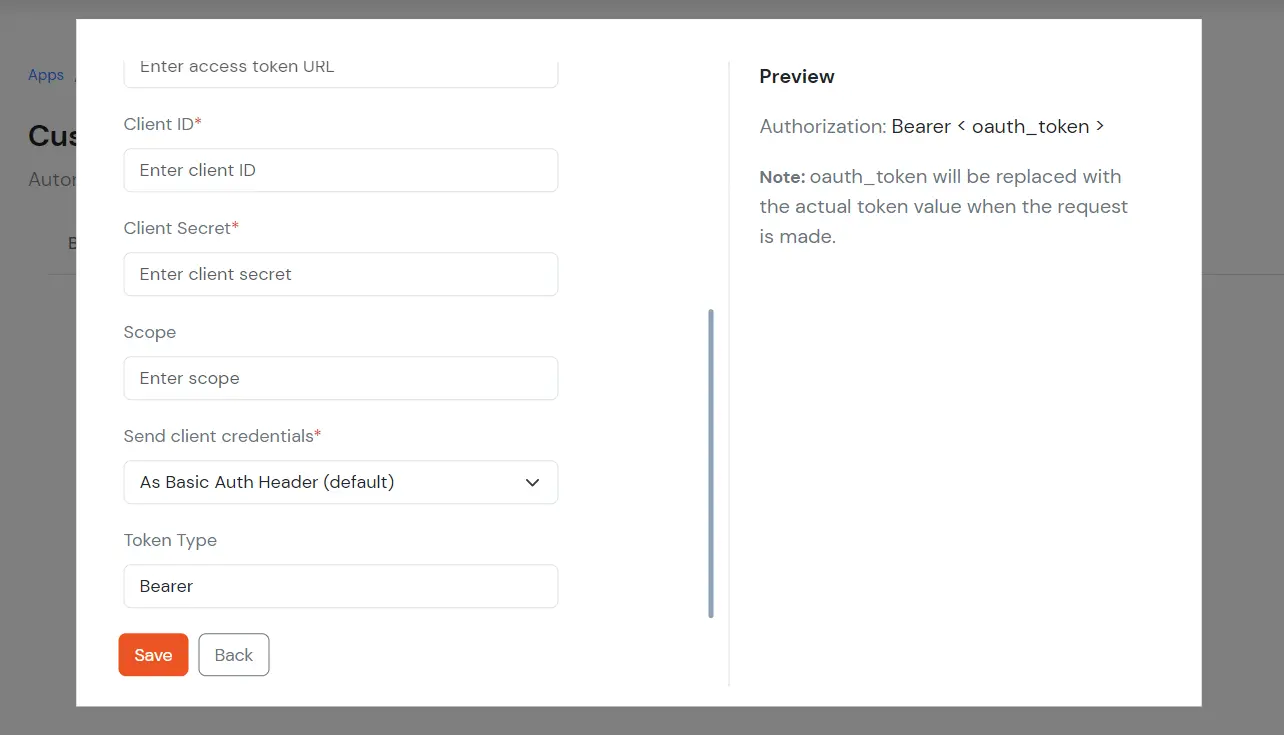
- When you select Authorization Type as OAuth 2.0, under Request Settings, enter the Access Token URL , Client ID, Client Secret, and Client Credentials of the app you are configuring, then click Save.
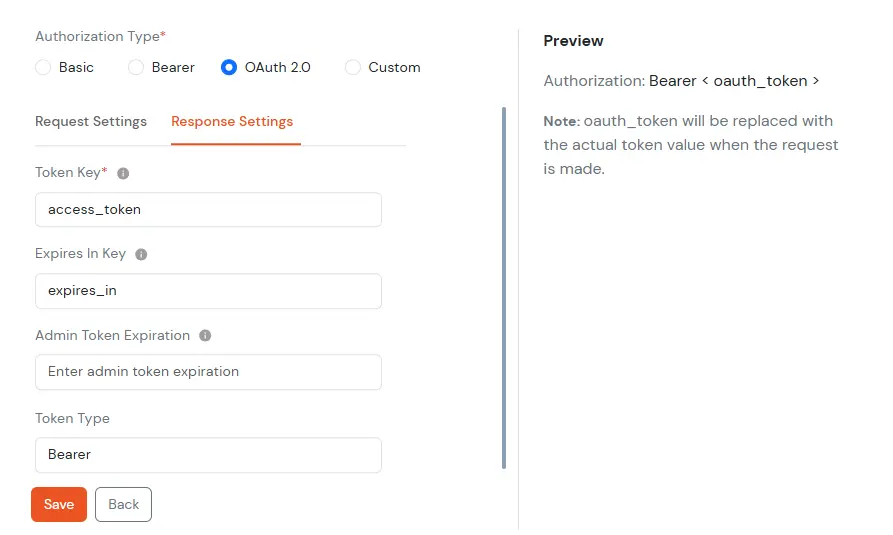
- Switch to Response Settings tab, and configure OAuth 2.0 token handling by defining Token Keys, Expiry Details, and Token Type. Click on Save.
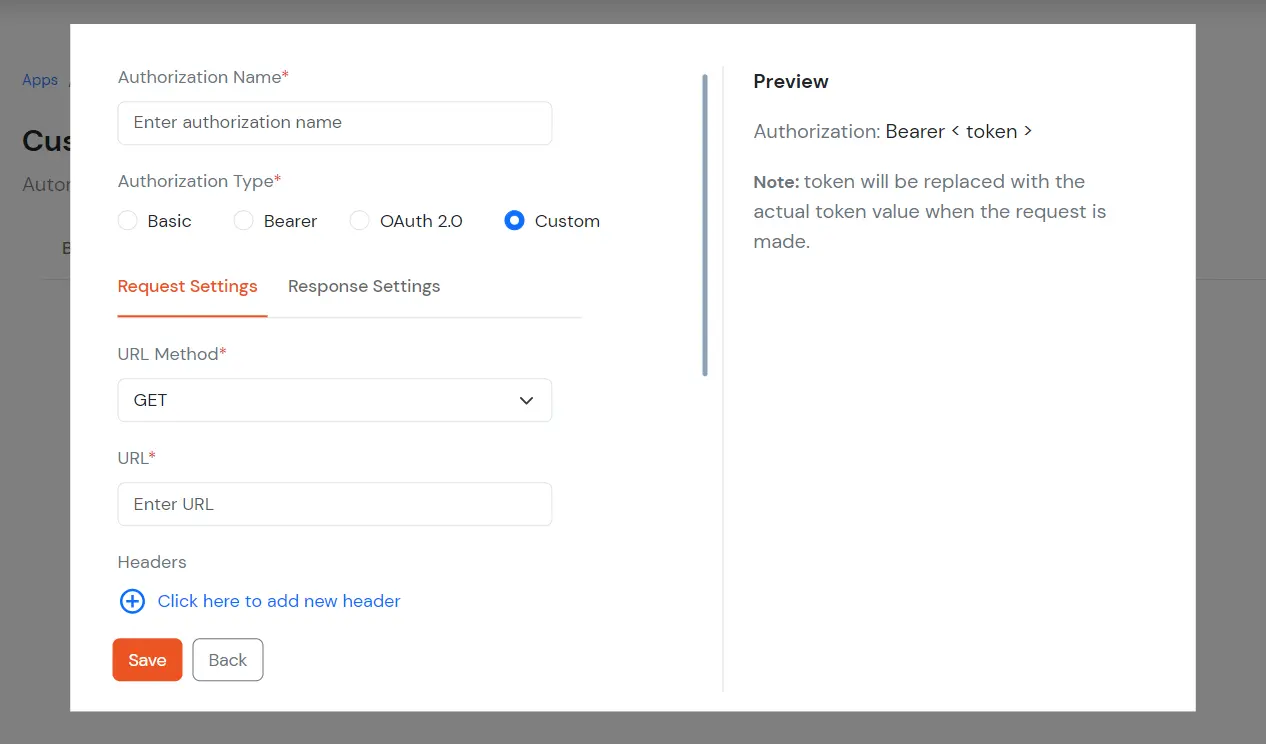
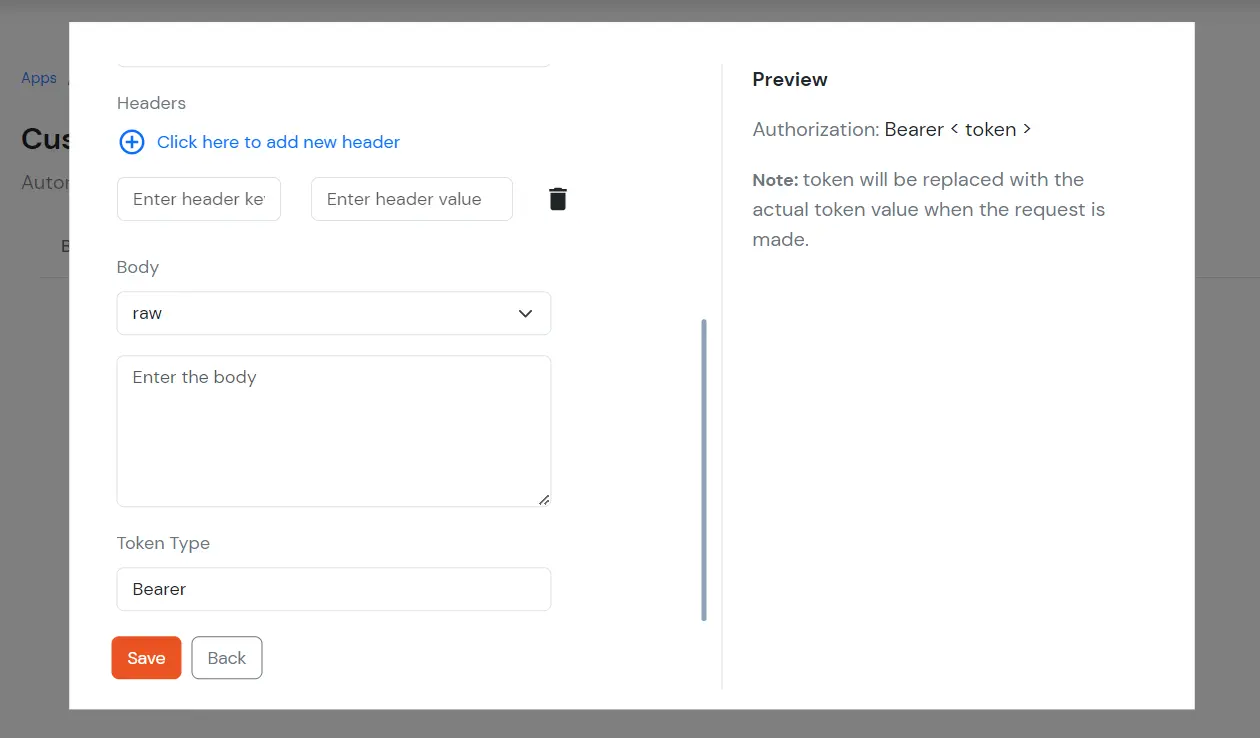
- When you select Authorization Type as Custom, select the URL Method, add URL.
3. Create User
- Select miniOrange to External App and click on Add Event Configuration.
- Add the Event Configuration Name and the API endpoint.
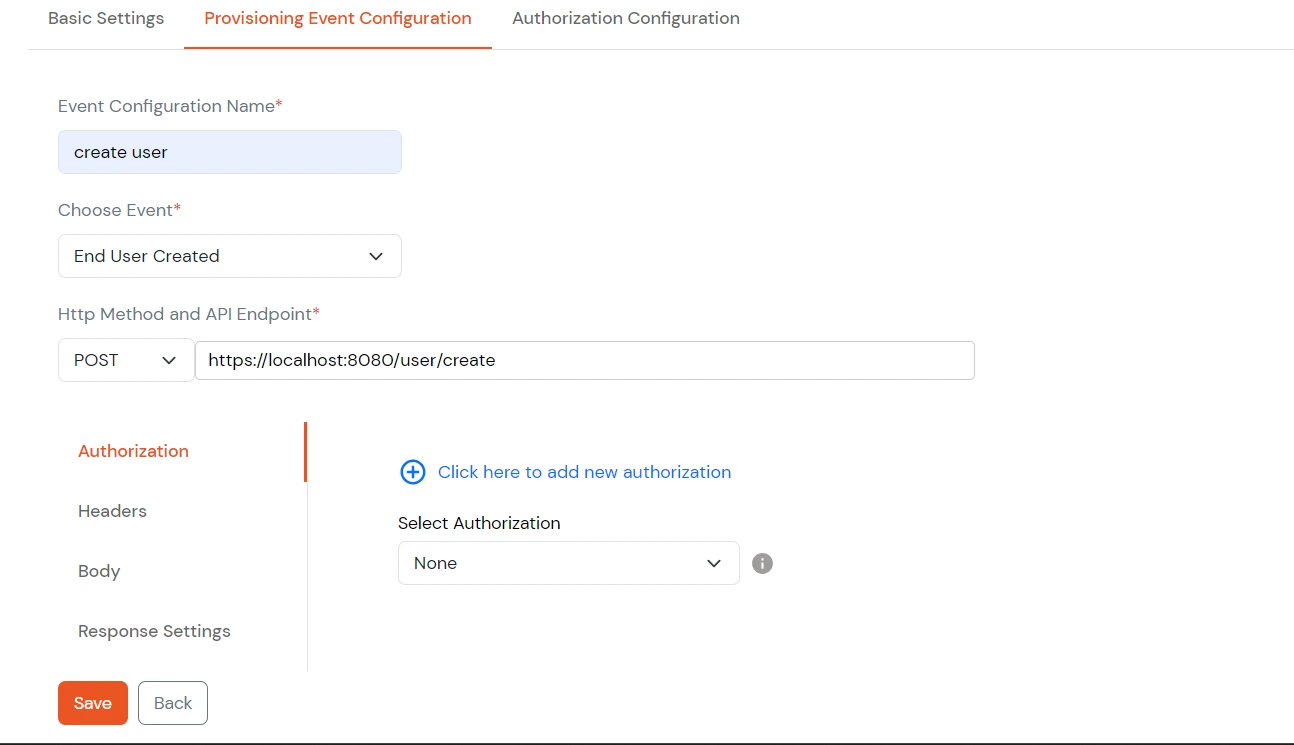
- Select the Authorization which you had created in Step 2.
- Add Headers if the API request any other information.
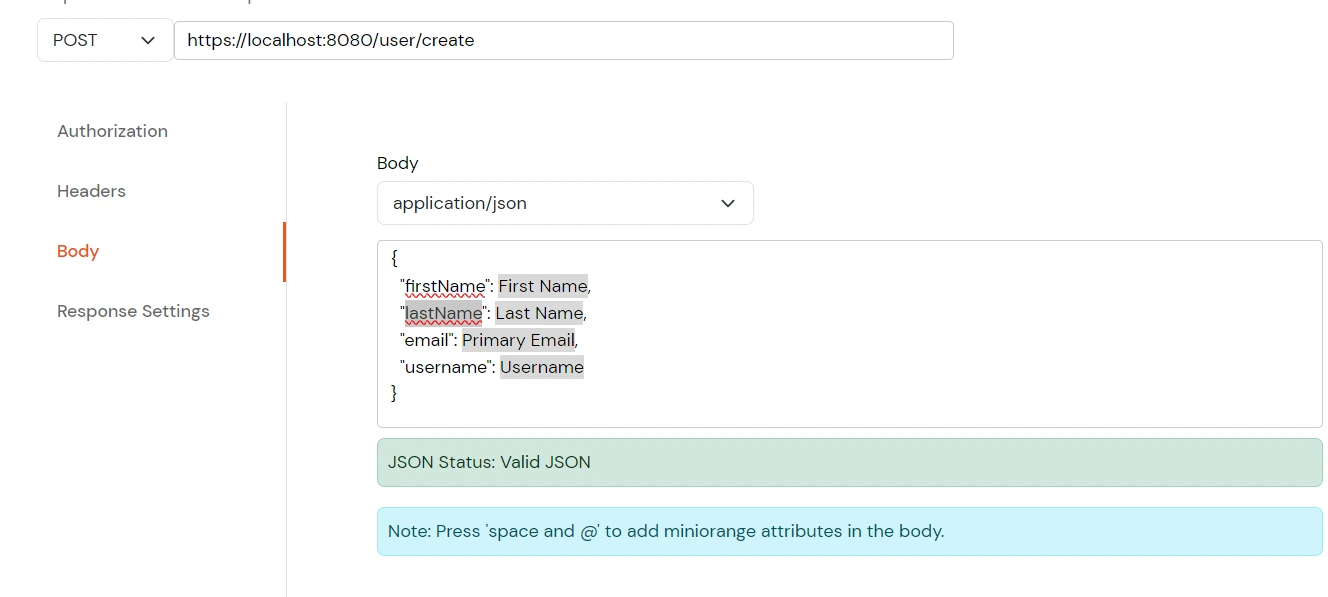
- In the request Body, map the parameters of the API with attributes of a user in miniOrange using @ symbol (You will receive a dropdown to select the user attribute).
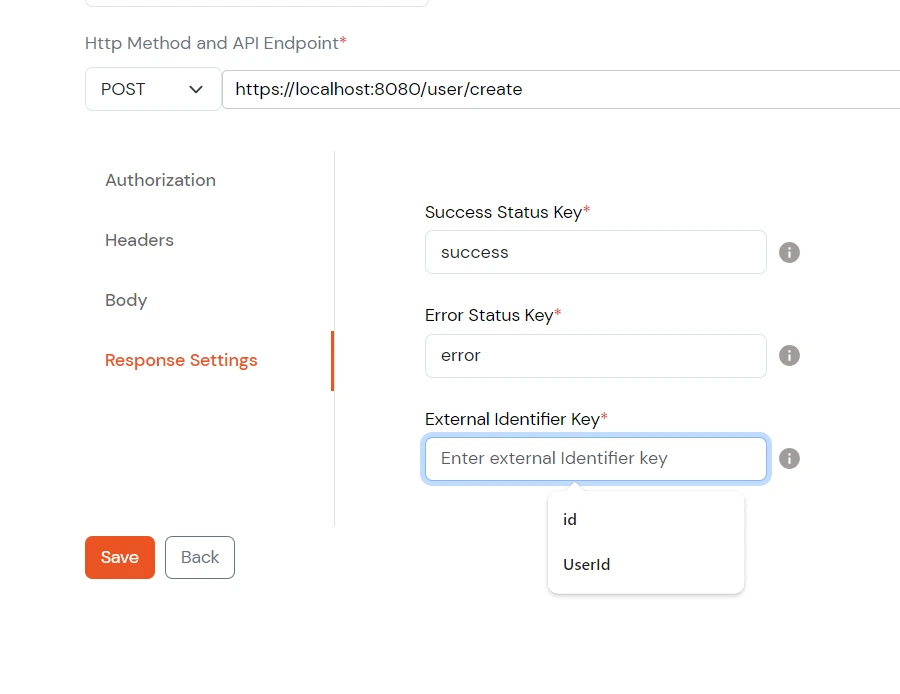
- Store the user identifier we will receive in the response to map it with other user related API's and click on Save.
- Turn on provisioning for this event to activate the configuration.

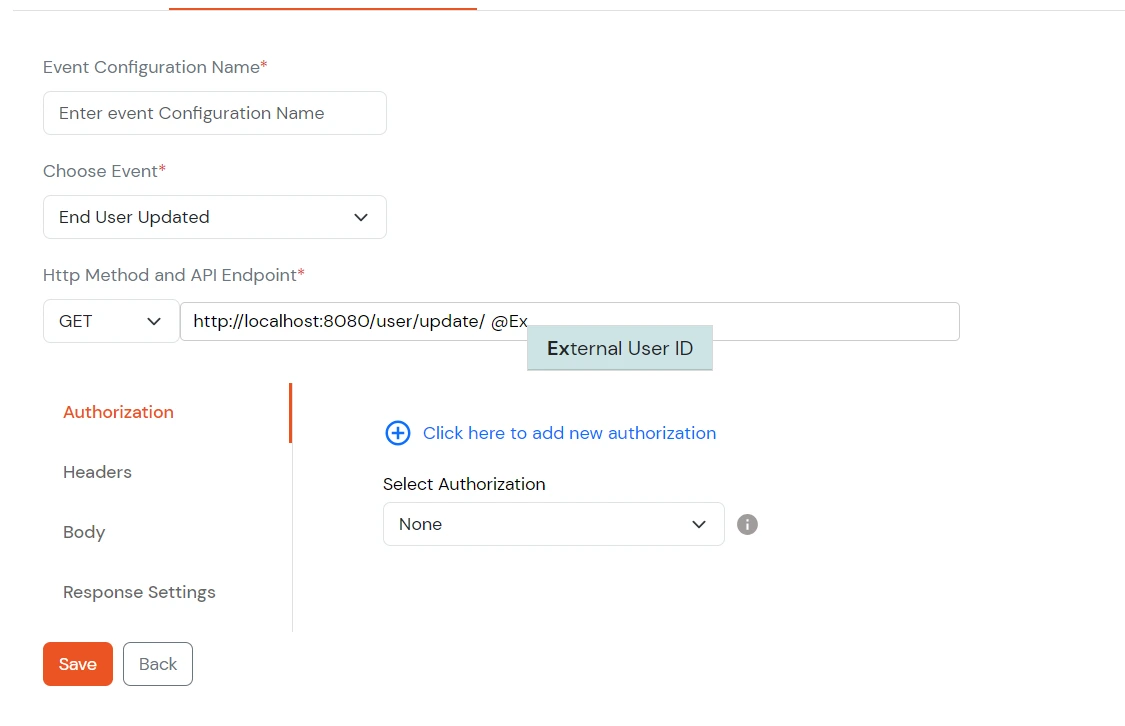
4. Update User
- Select End User Updated from the choose Event dropdown.
- Add @ExternalUserId at the end of your API Endpoint to pass the user identifier, and click Save.
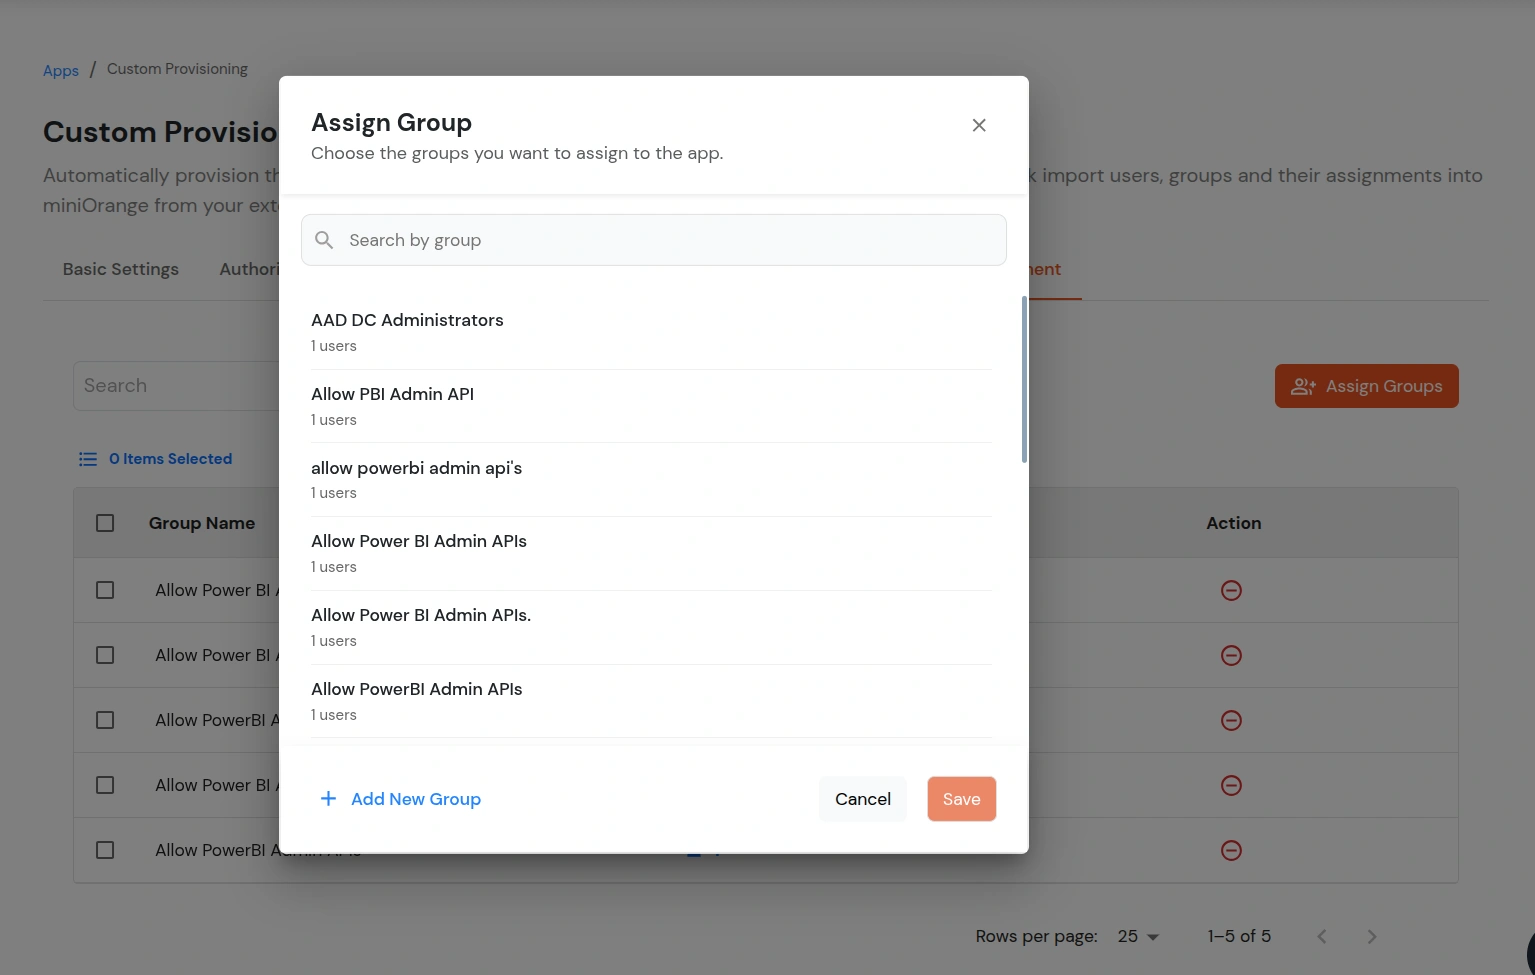
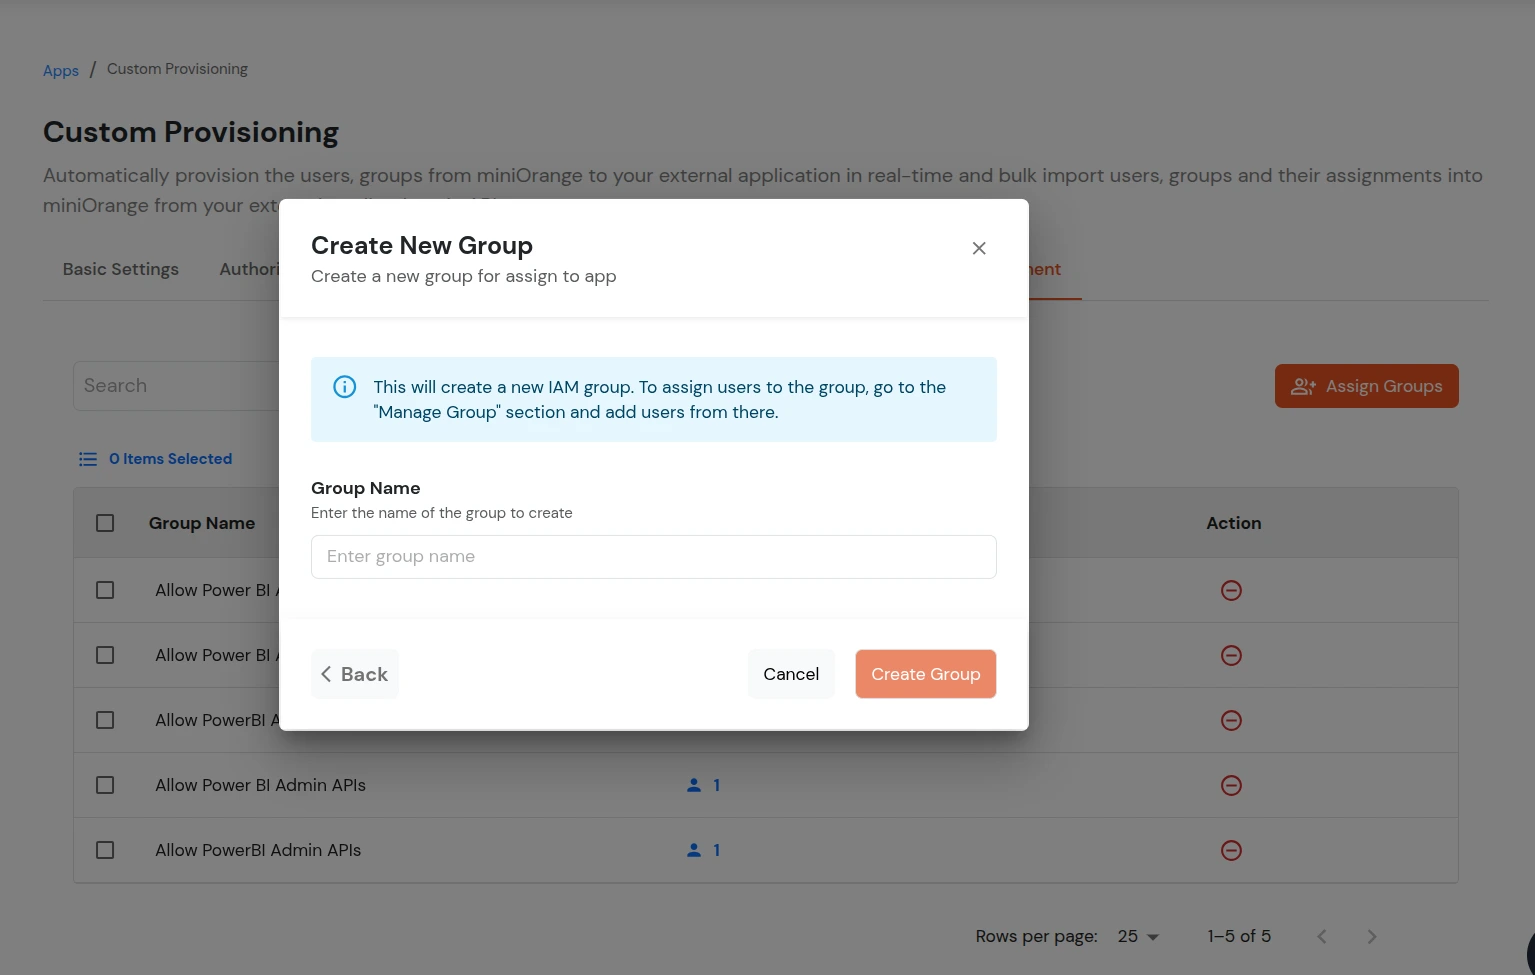
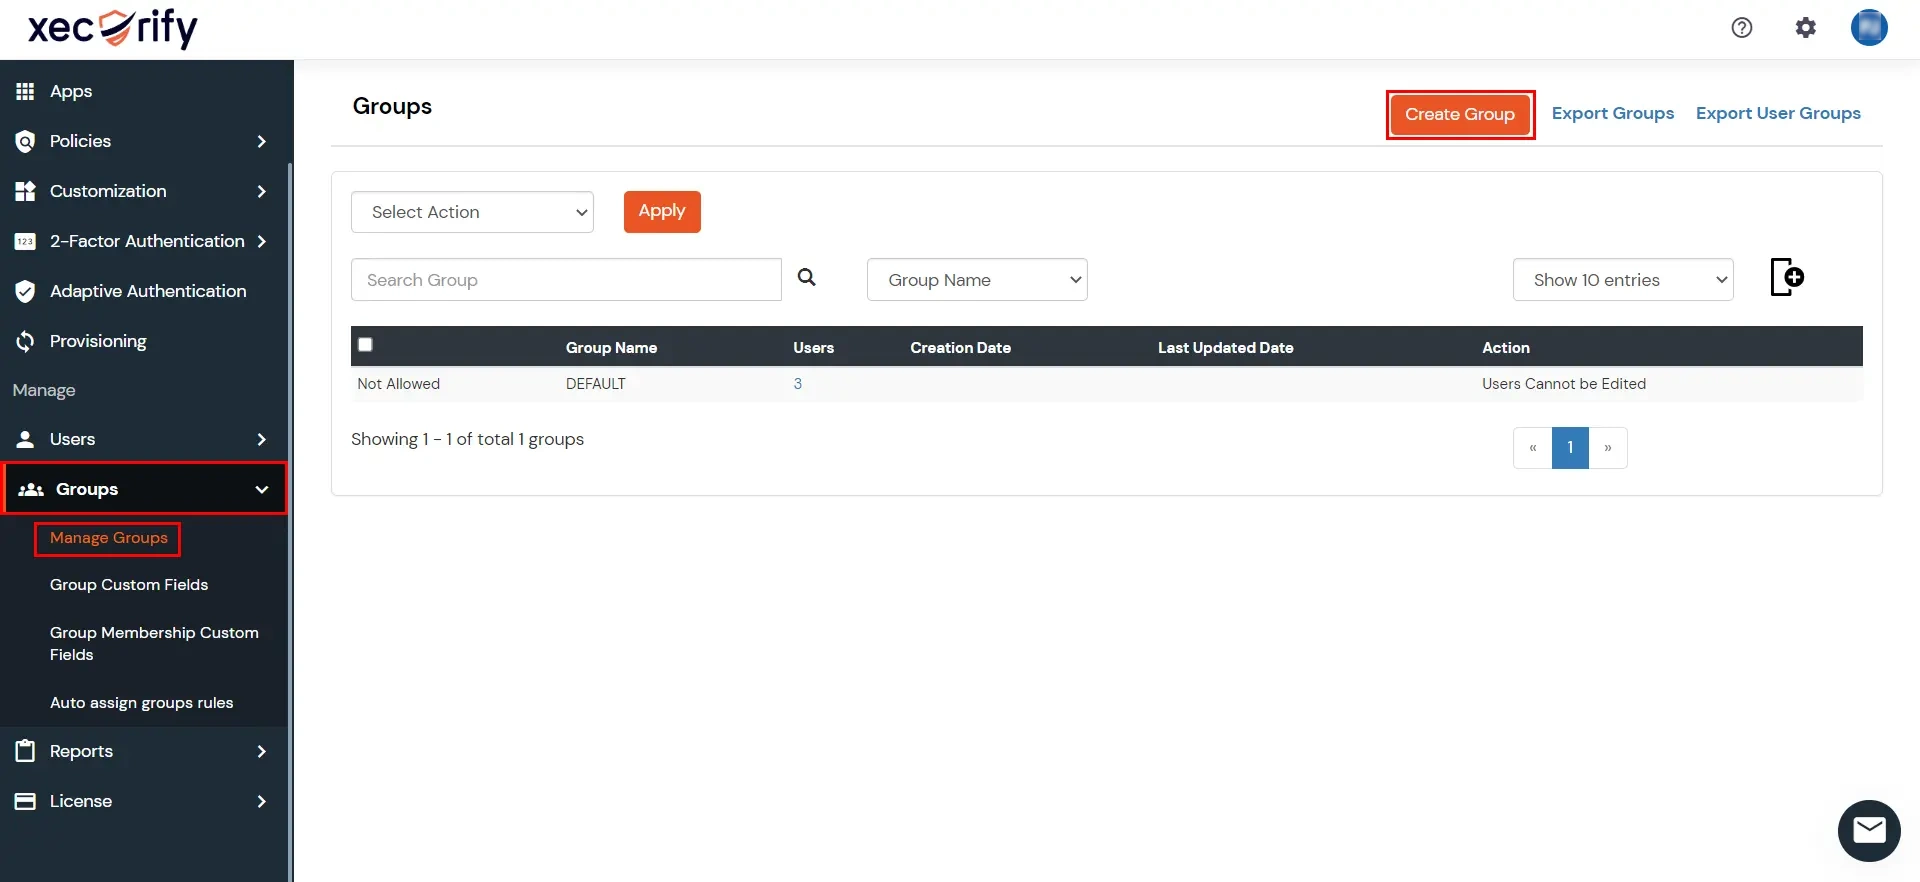
5. Create Group
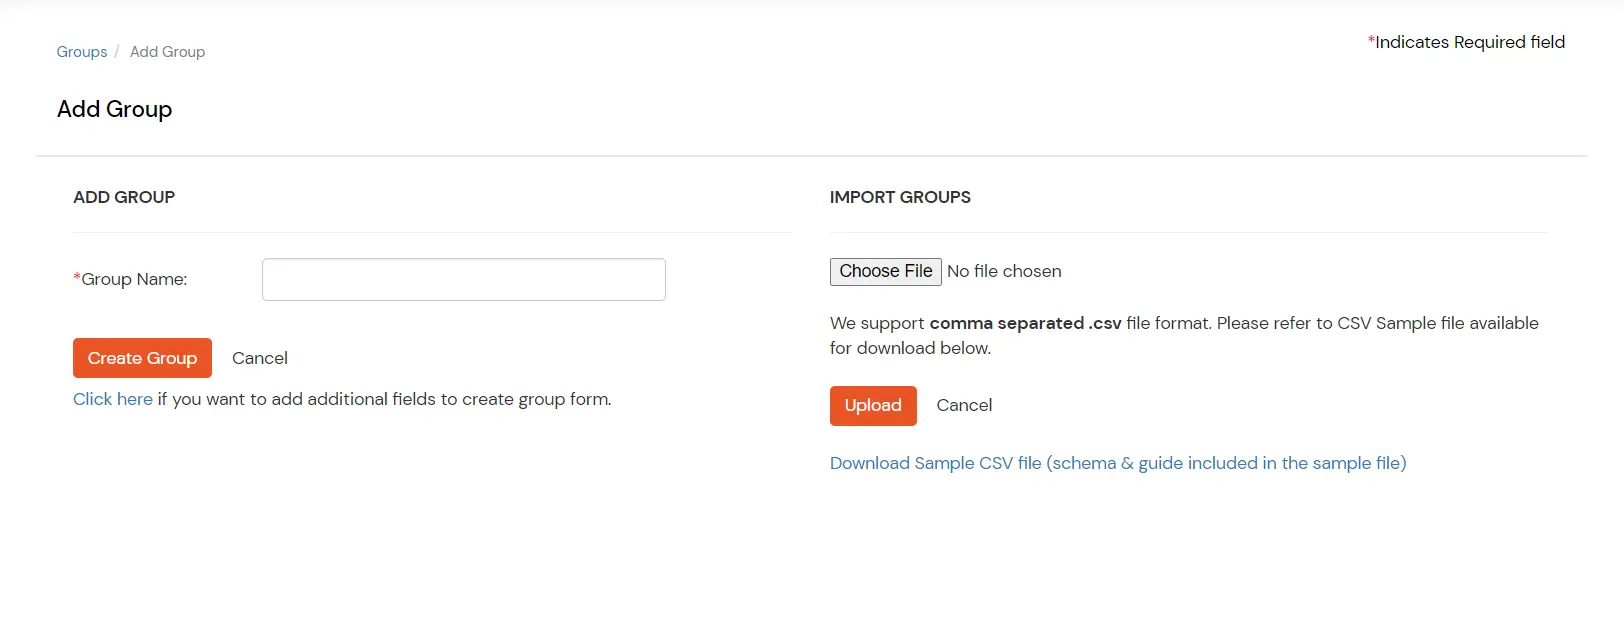
- Go to Groups >> Manage Groups from the left menu and click on Create Group on the top right corner of the page.
- Enter Group Name and create the group.
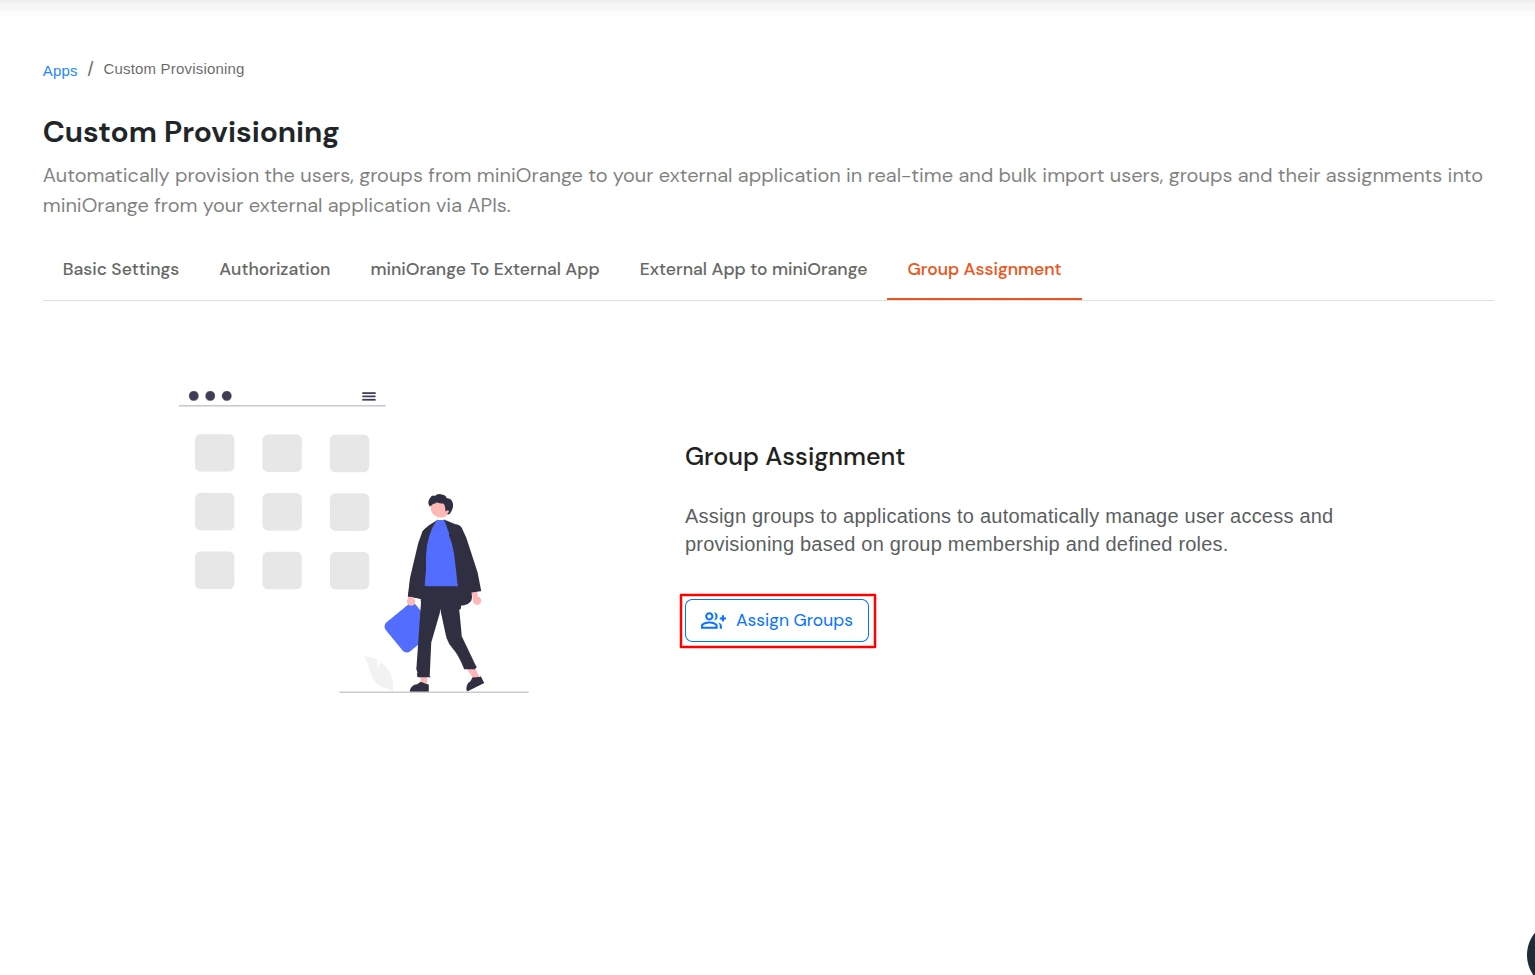
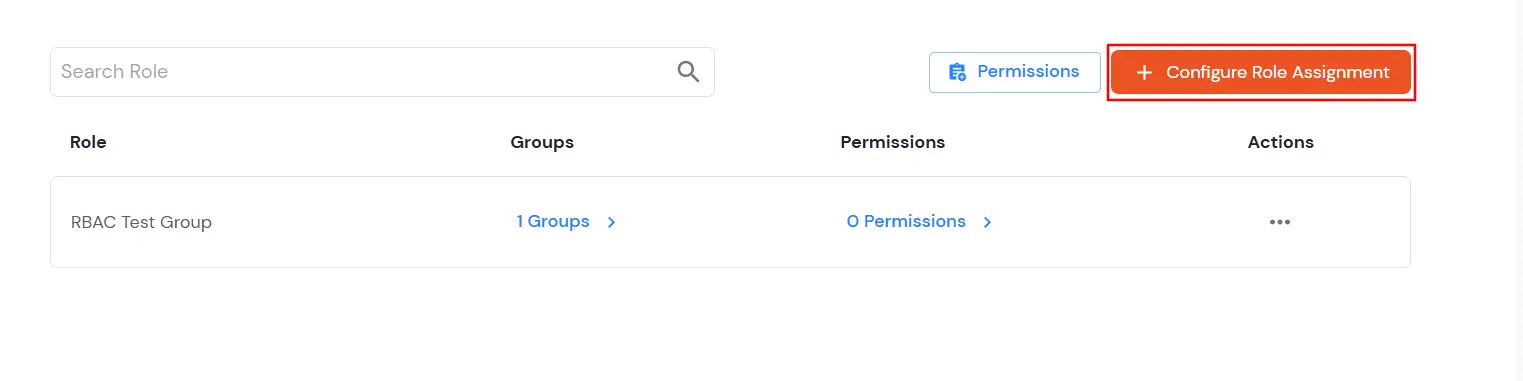
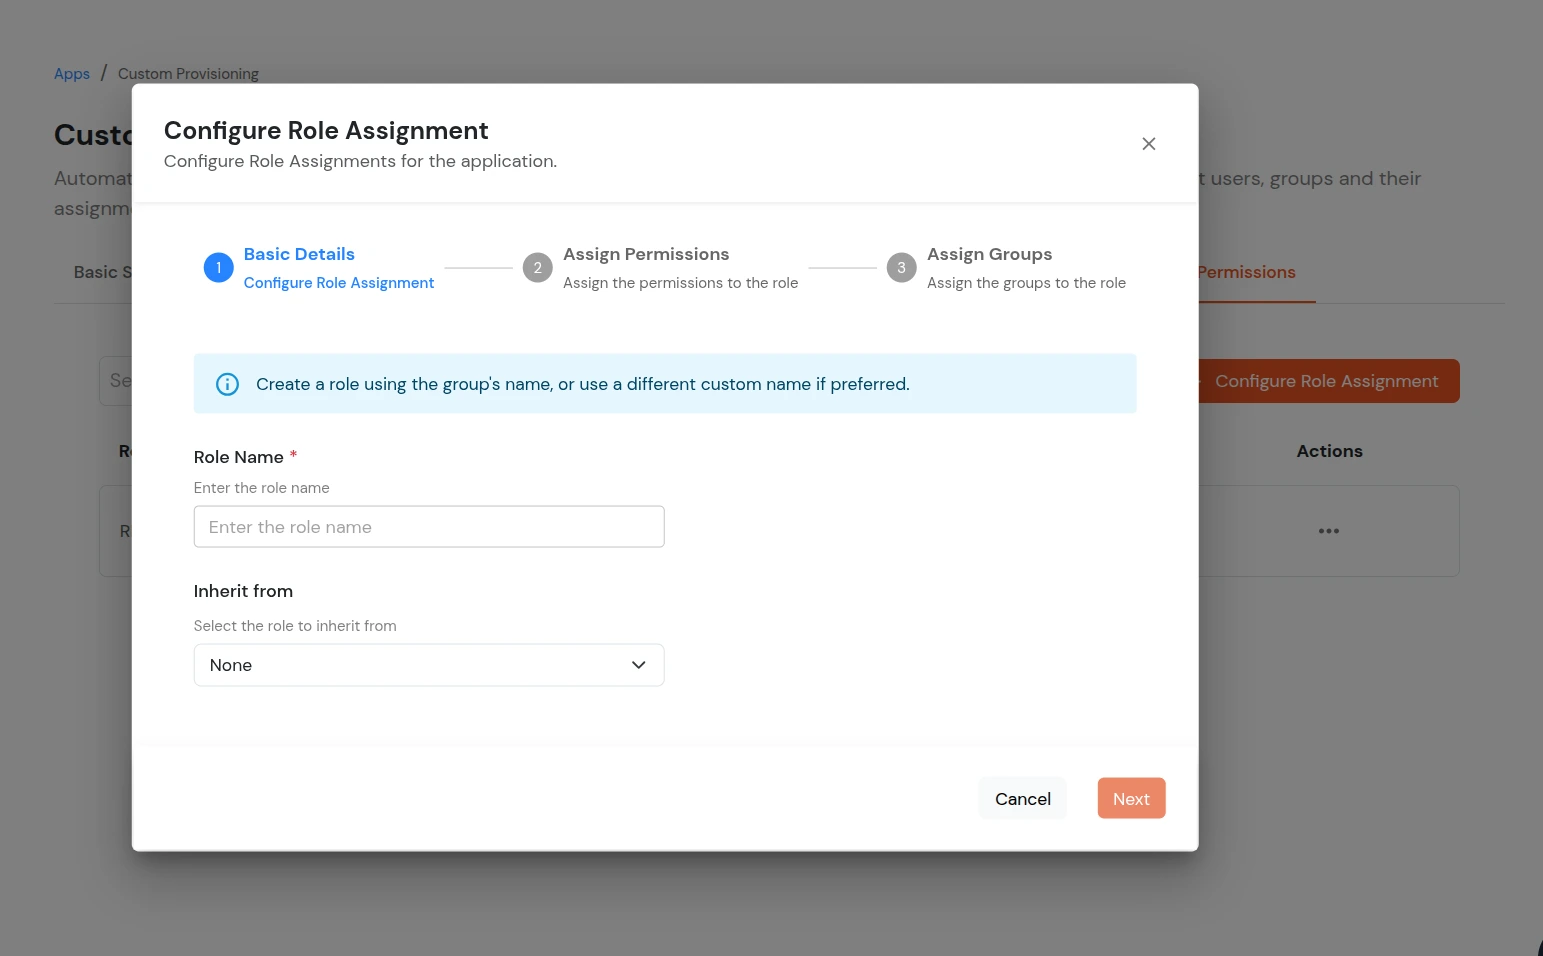
6. Group Assignment
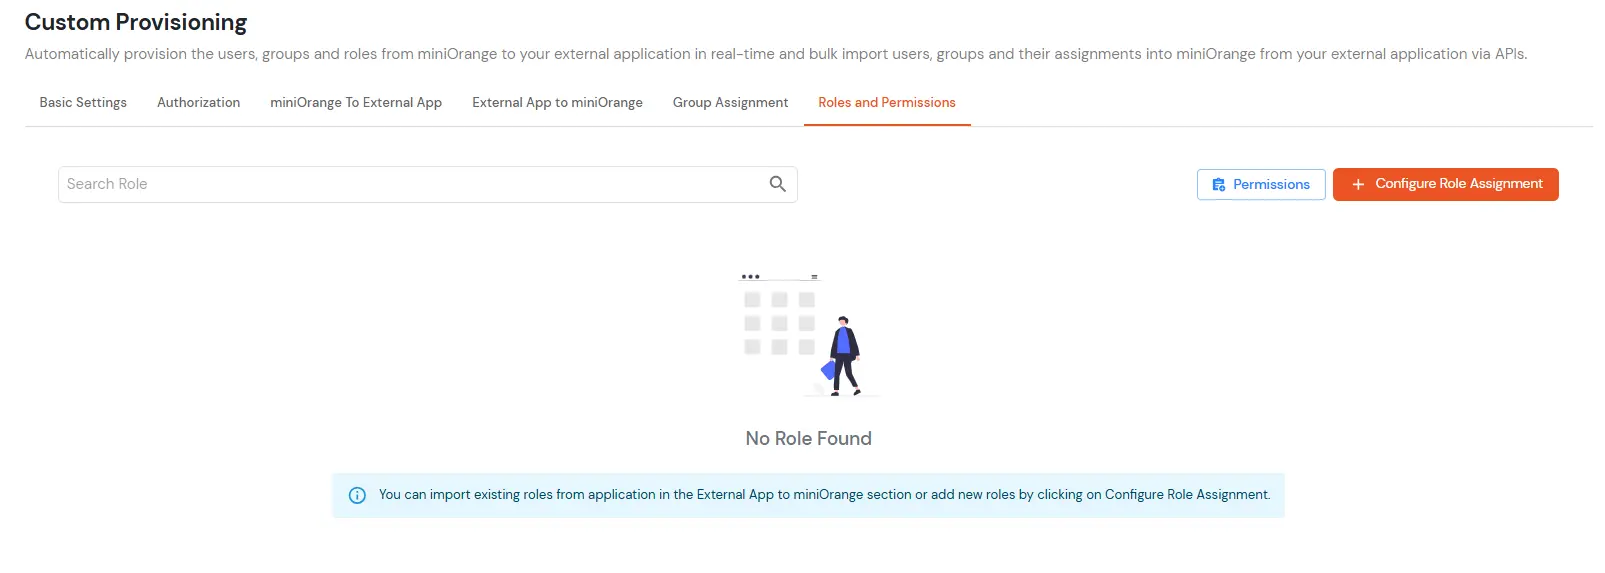
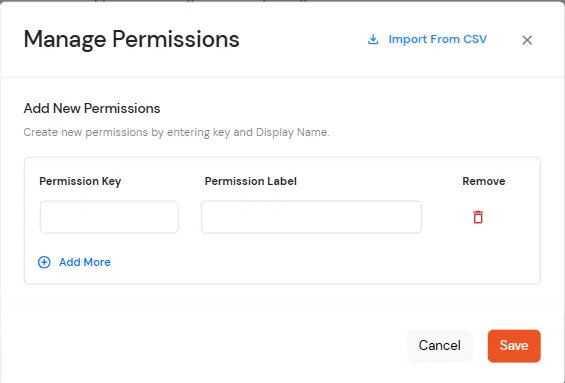
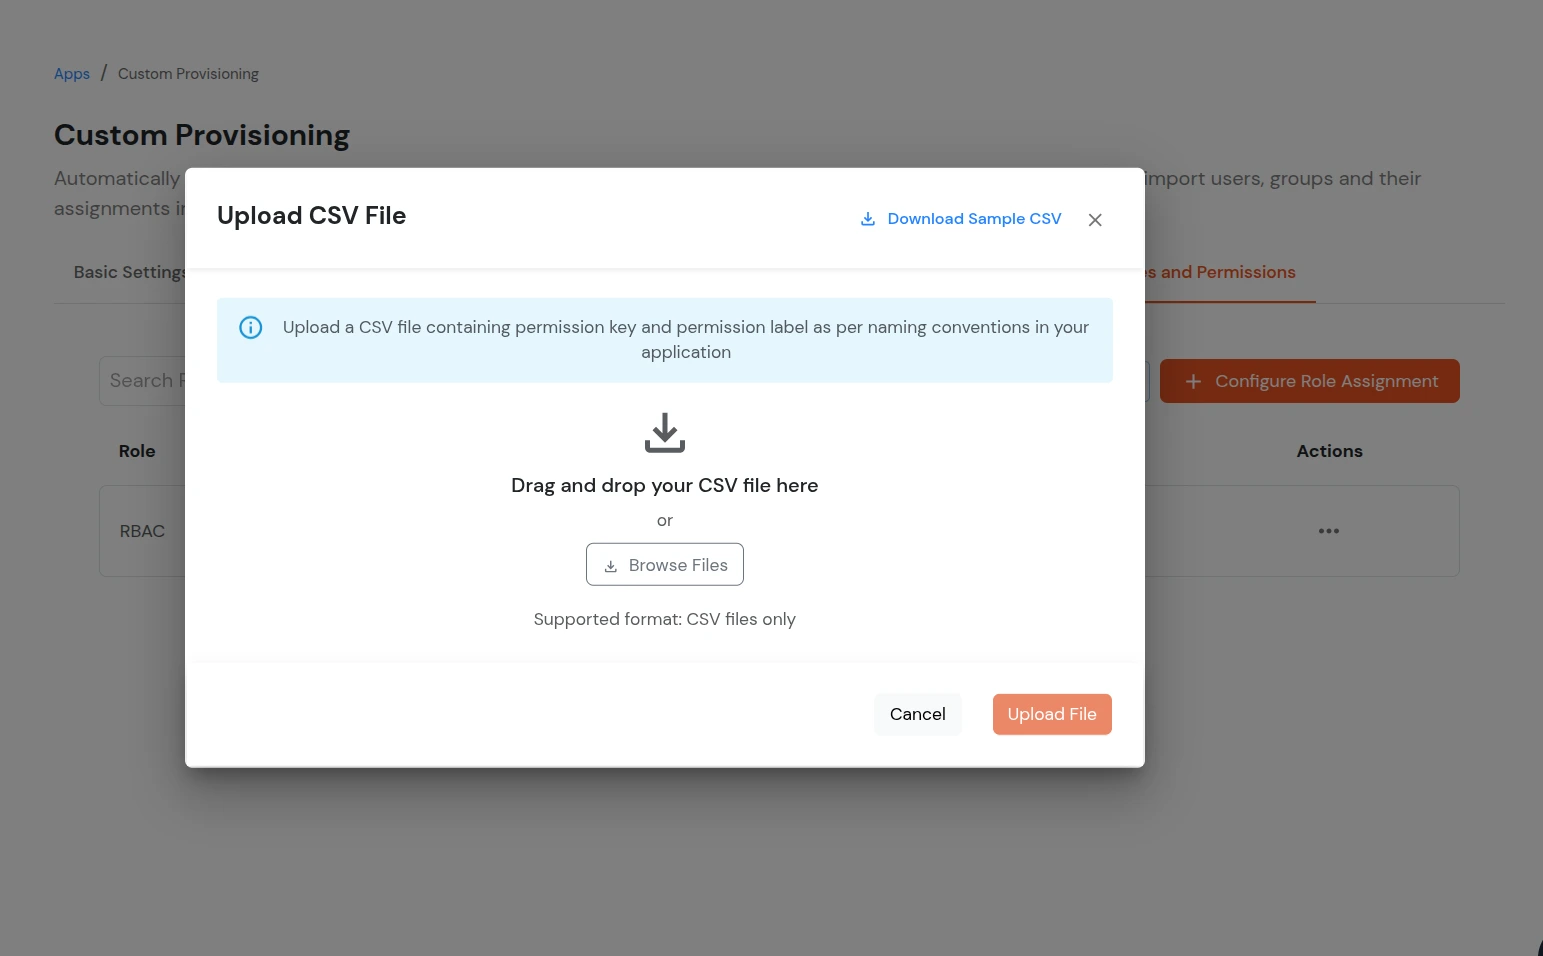
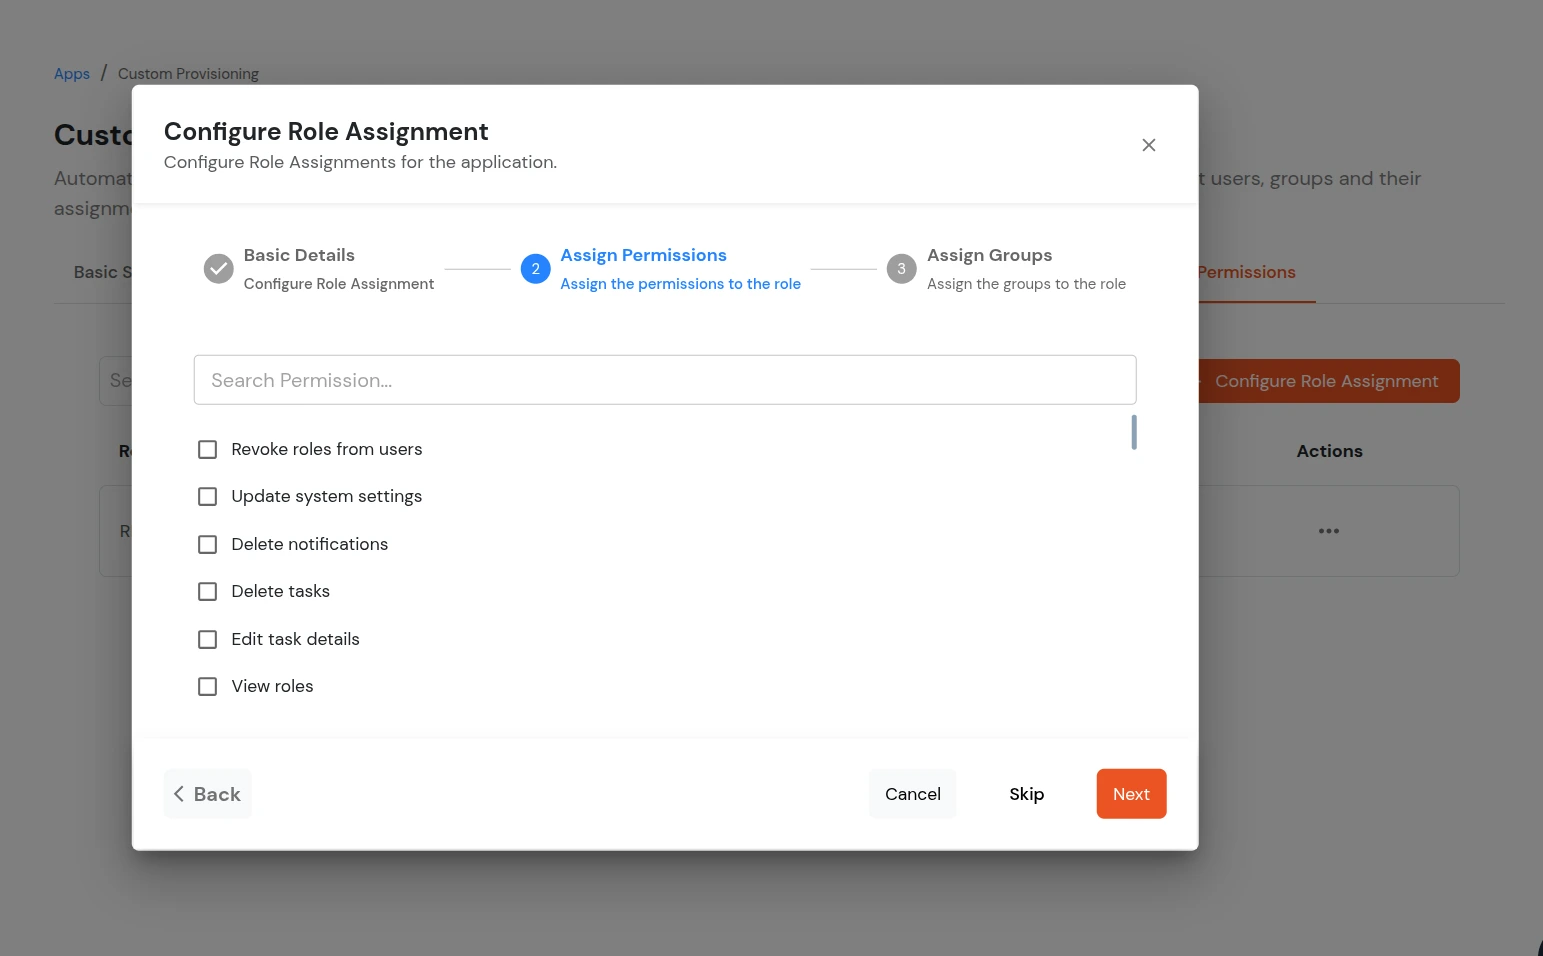
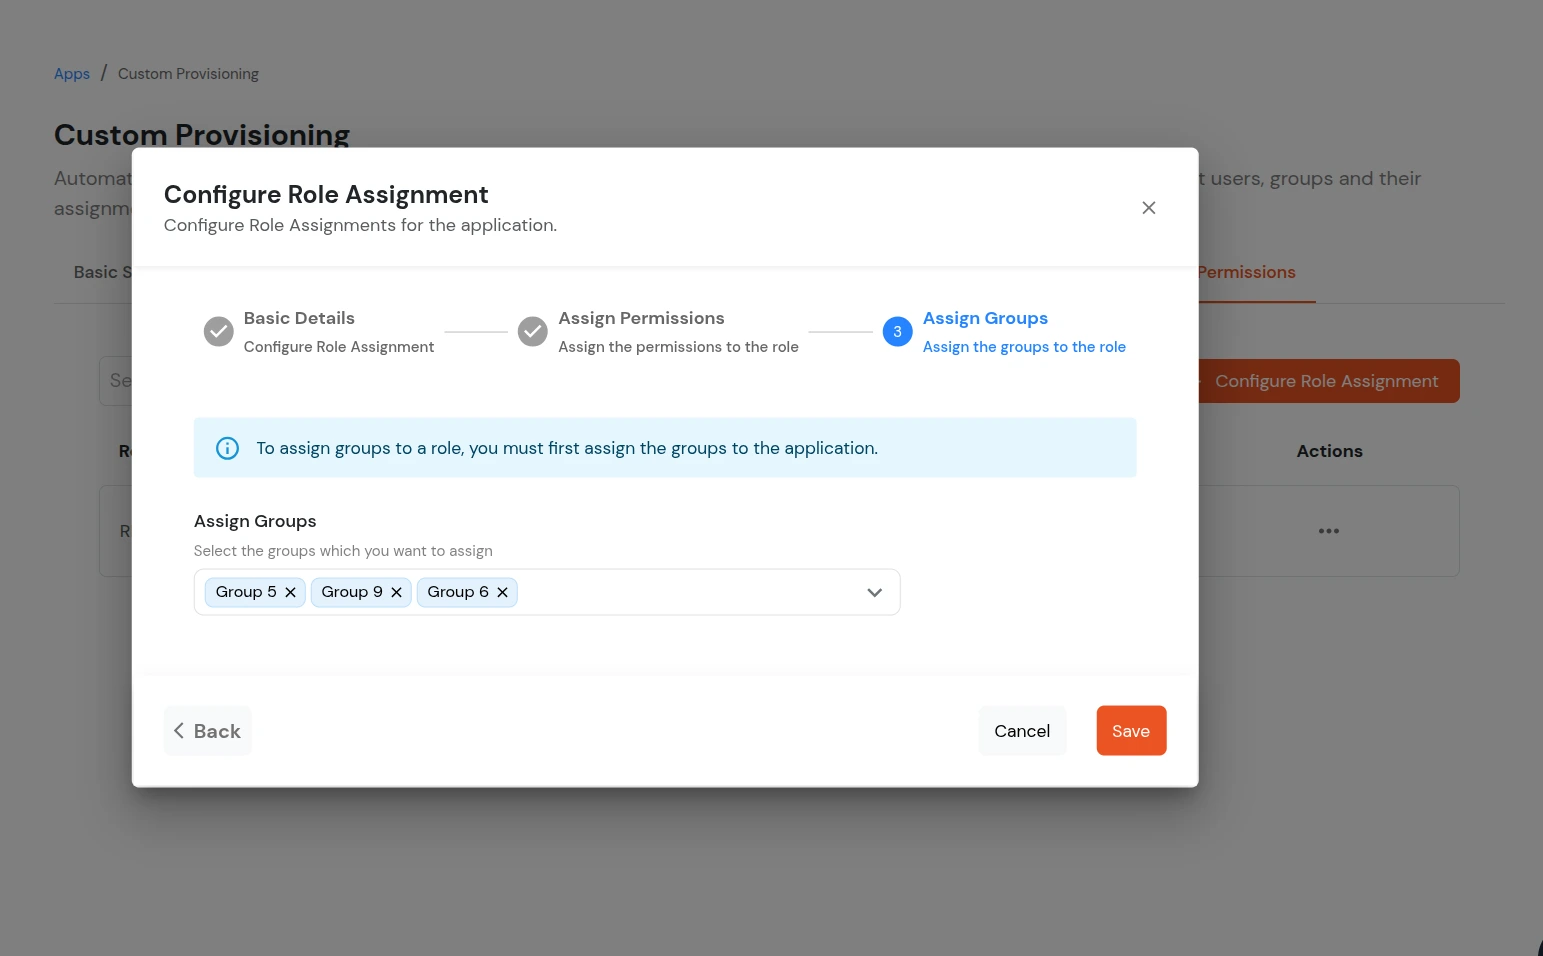
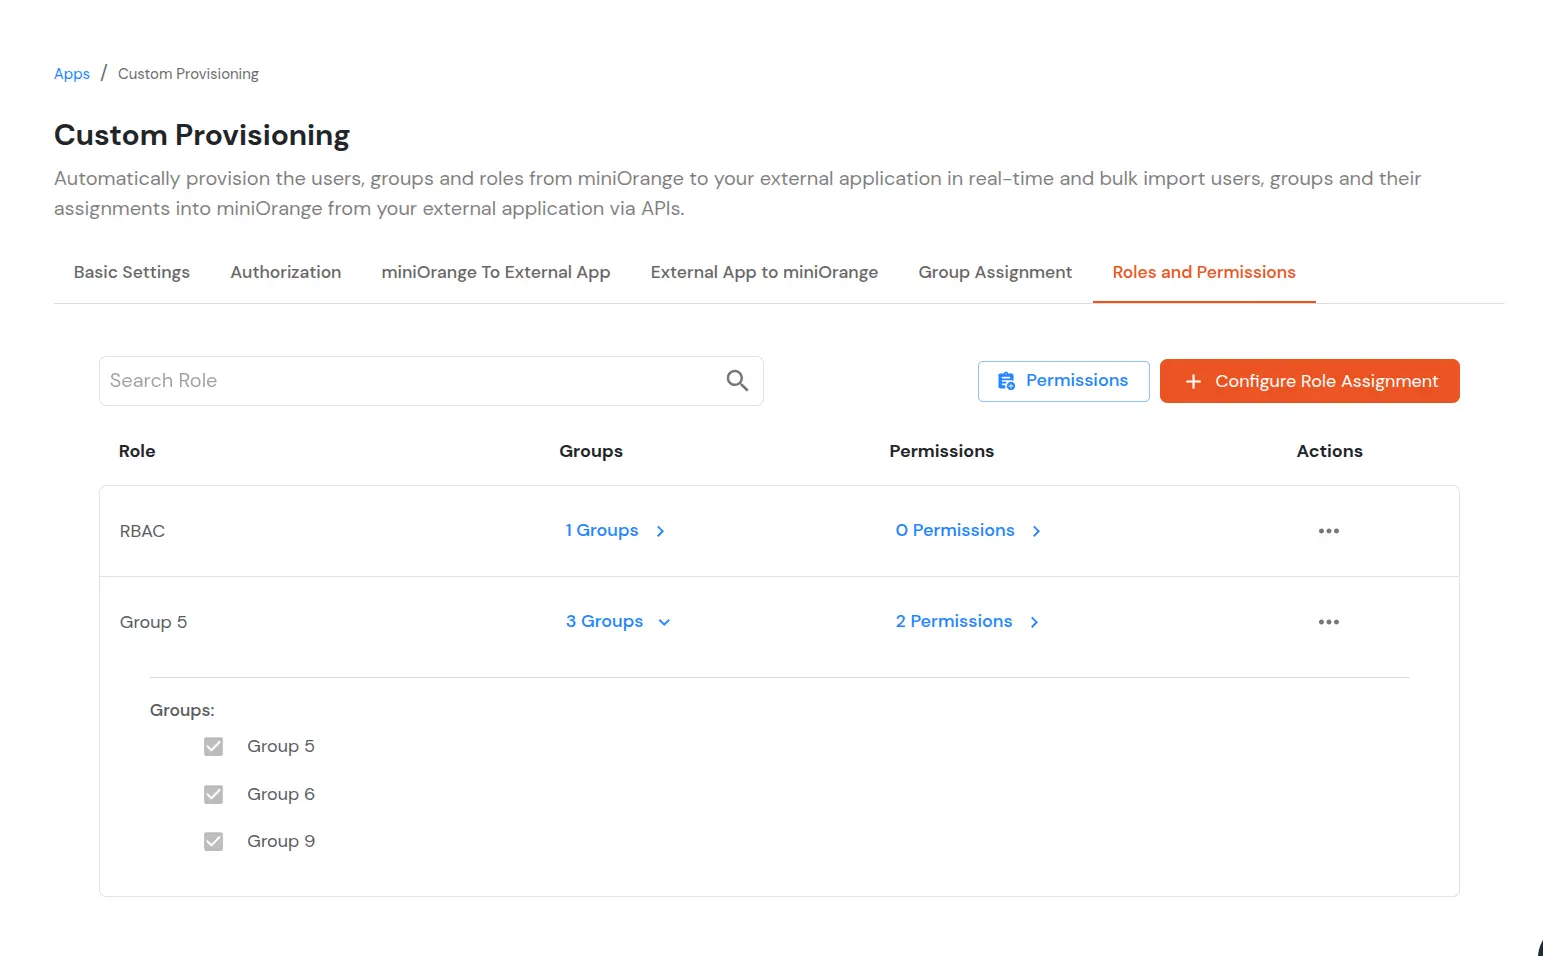
7. Roles and Permissions
Before configuring the roles and permissions in the application, you will need to configure the APIs to support roles and permissions provisioning. Please refer to the guide: Roles and Permissions APIs Configuration Guide to configure the APIs.
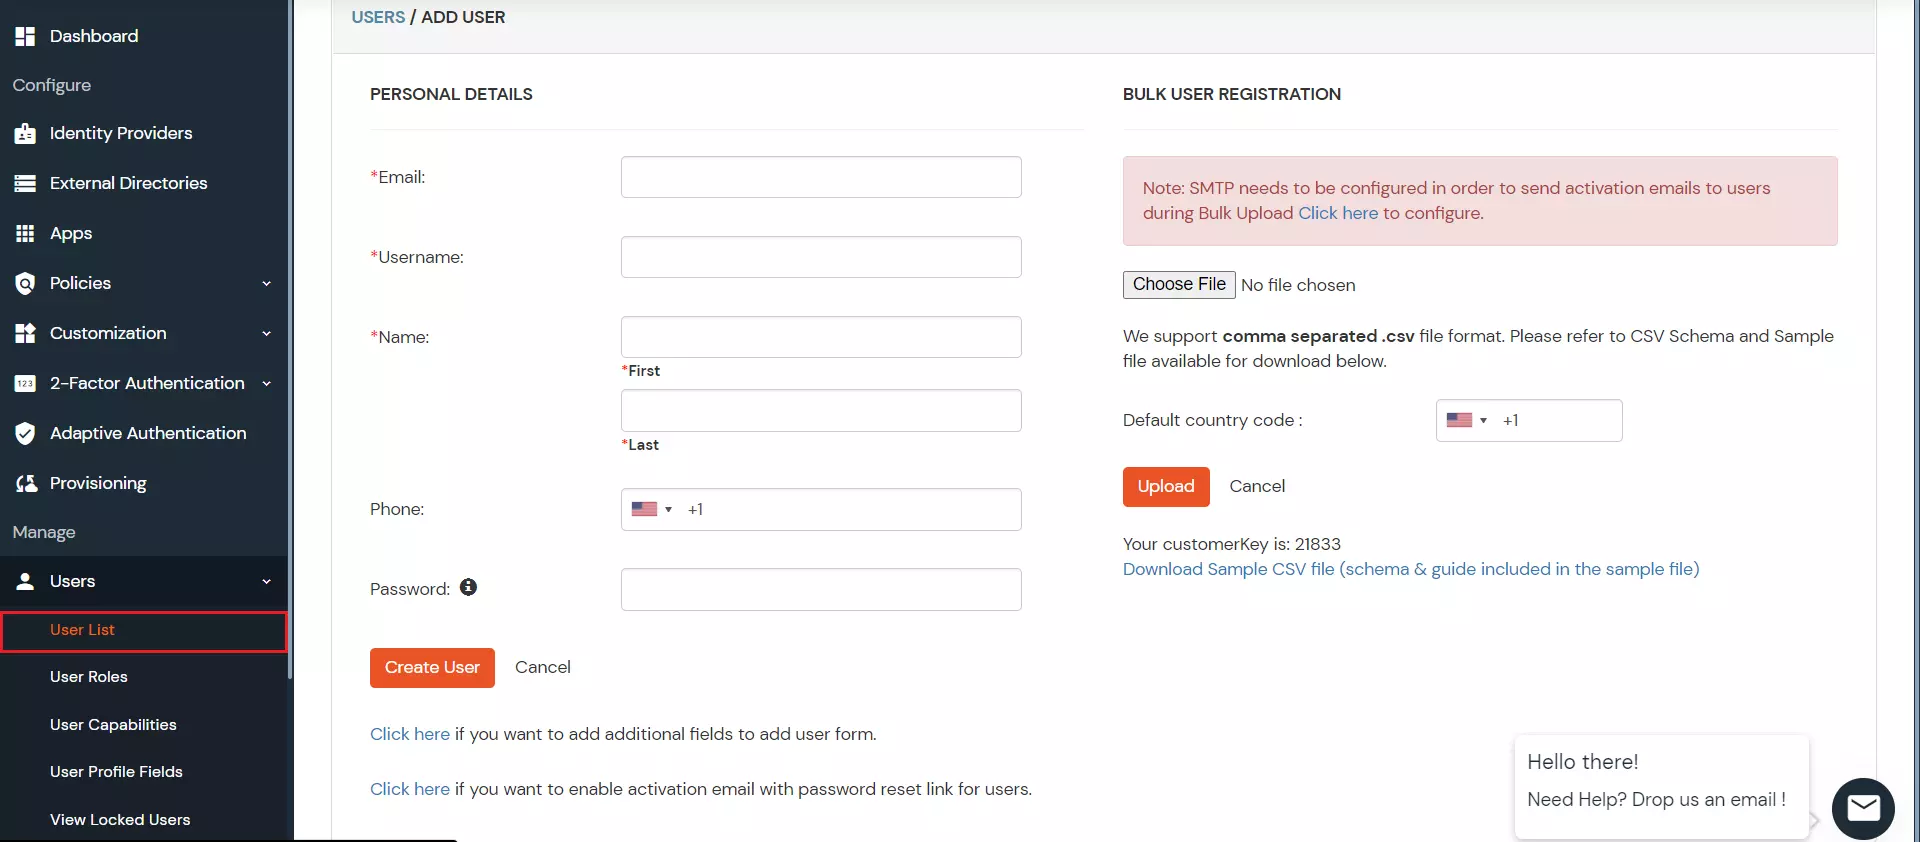
8. Add Users
- Go to Users >> User list.
- Click on Add User.
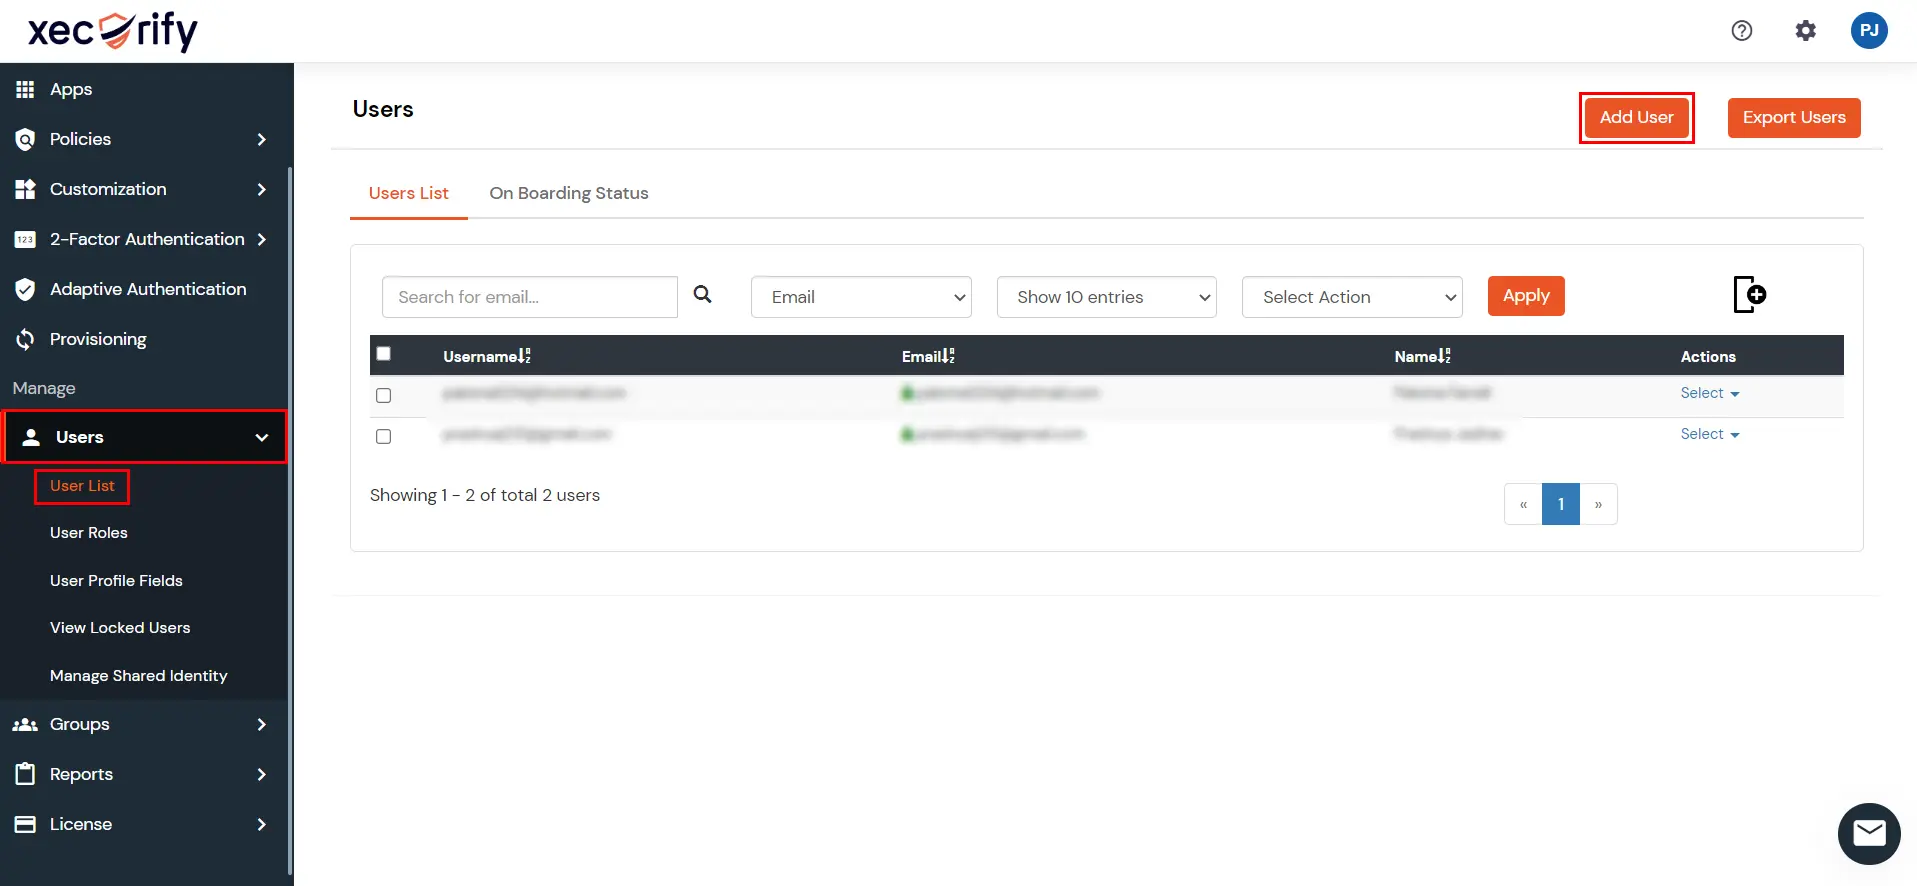
- Enter the Users Details and the user will be created.
9. Assign Users
- Click on Groups from the left menu.
- Locate the group you created in Step 5.
- Assign users to this group as required.

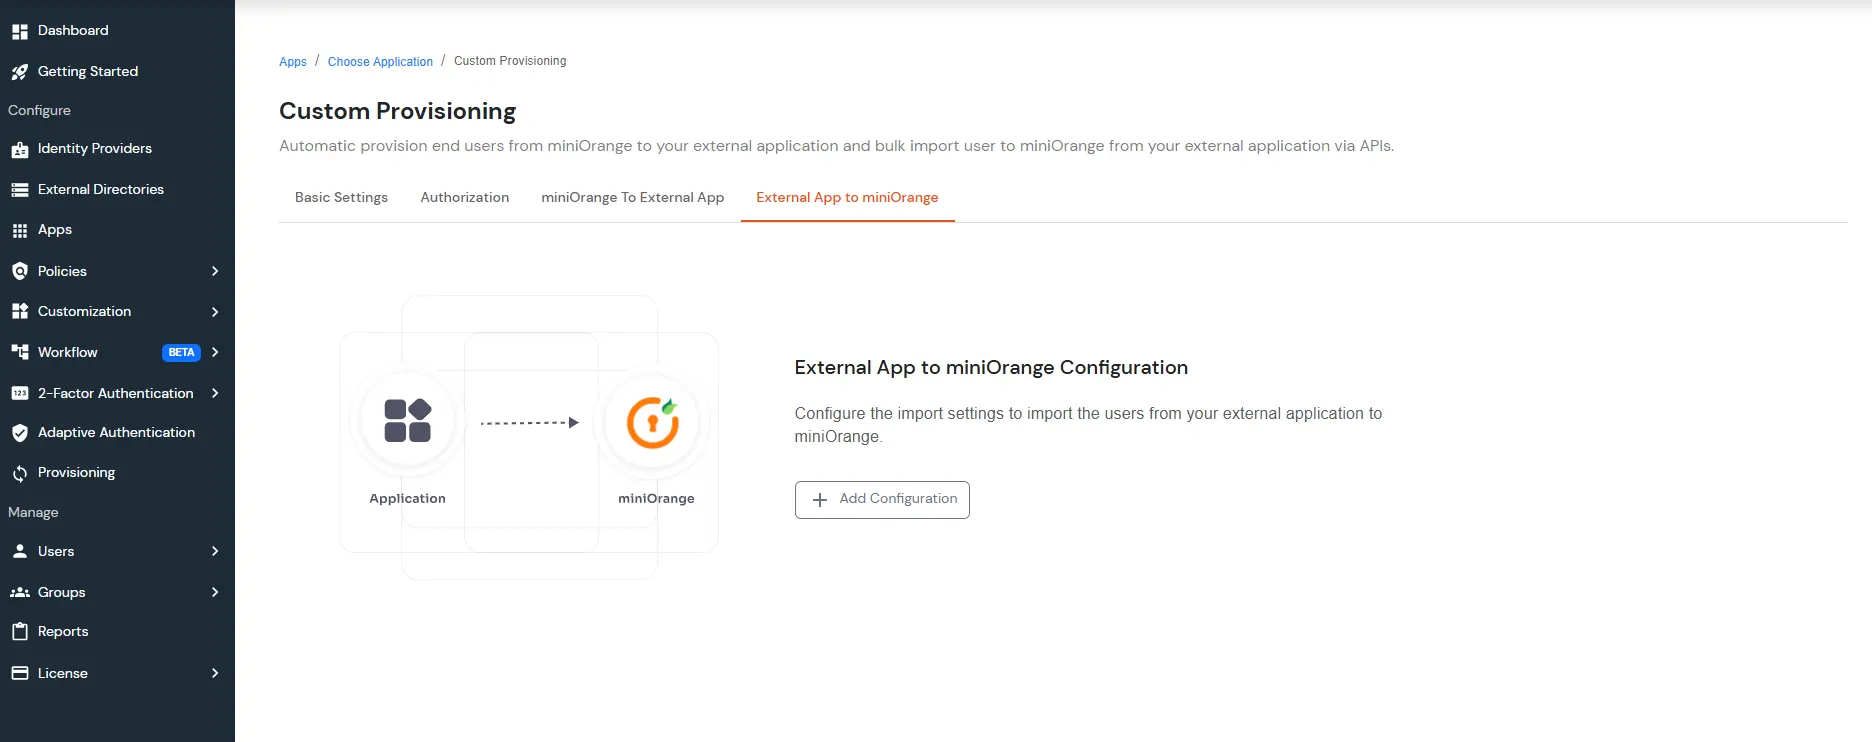
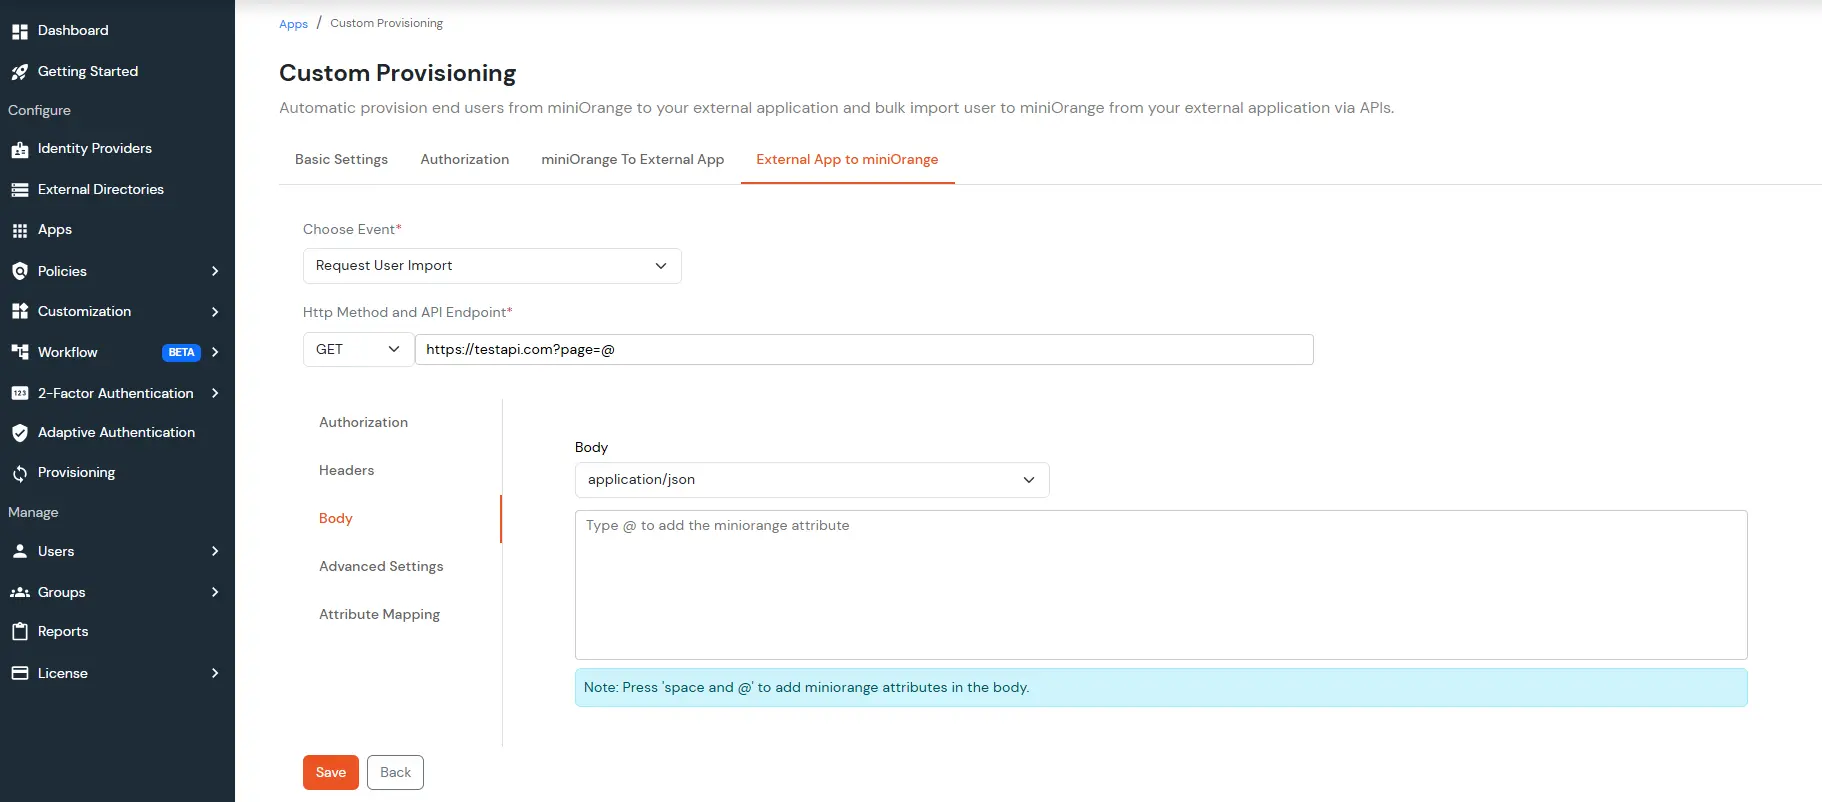
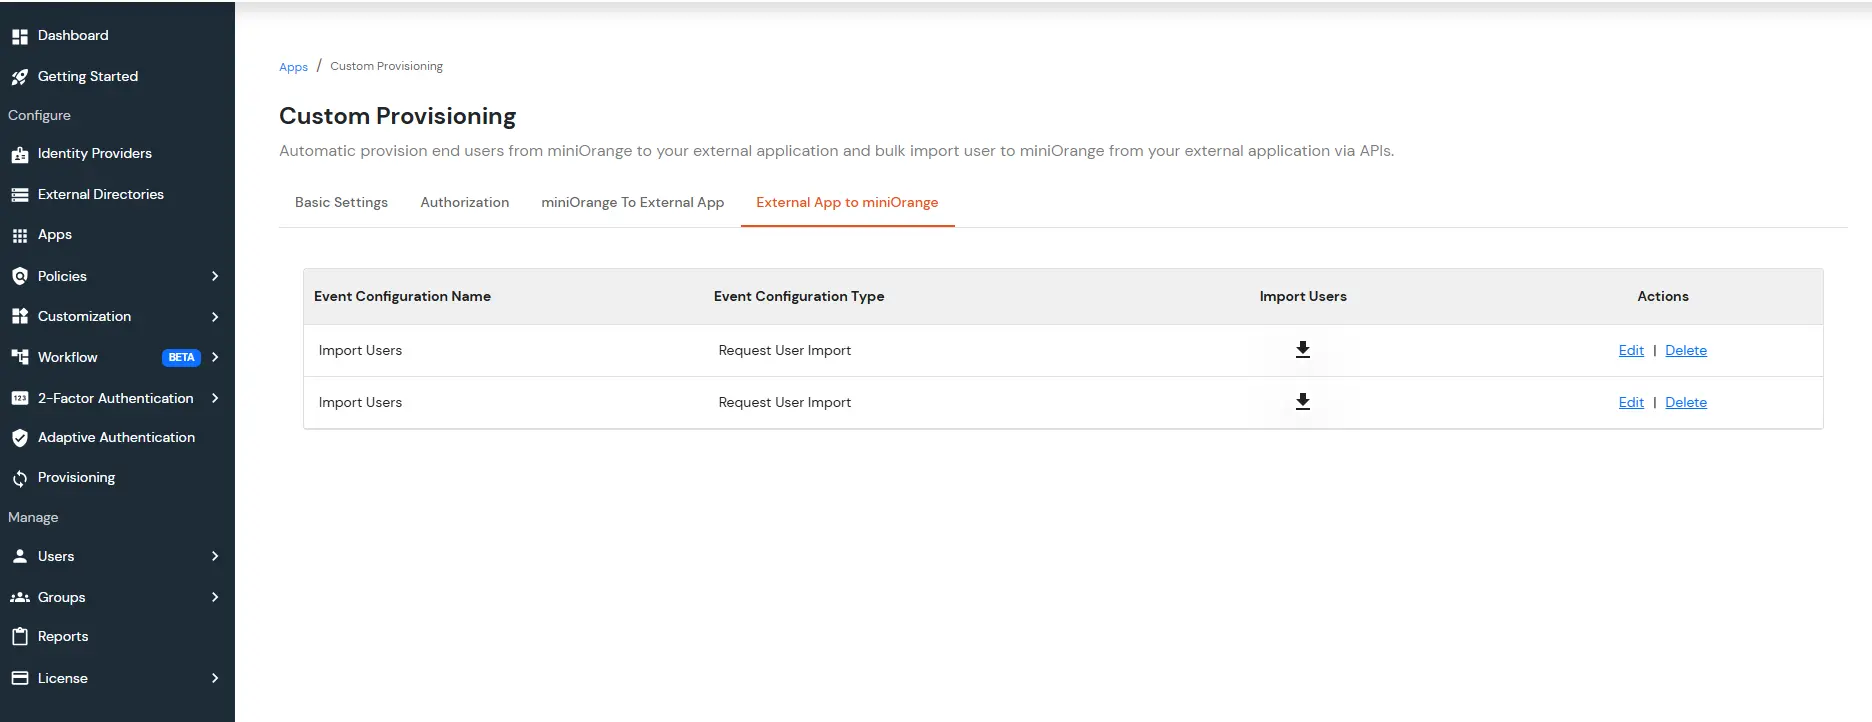
10. Import Users
- Go to the tab External App to miniOrange and click on Add Configuration.
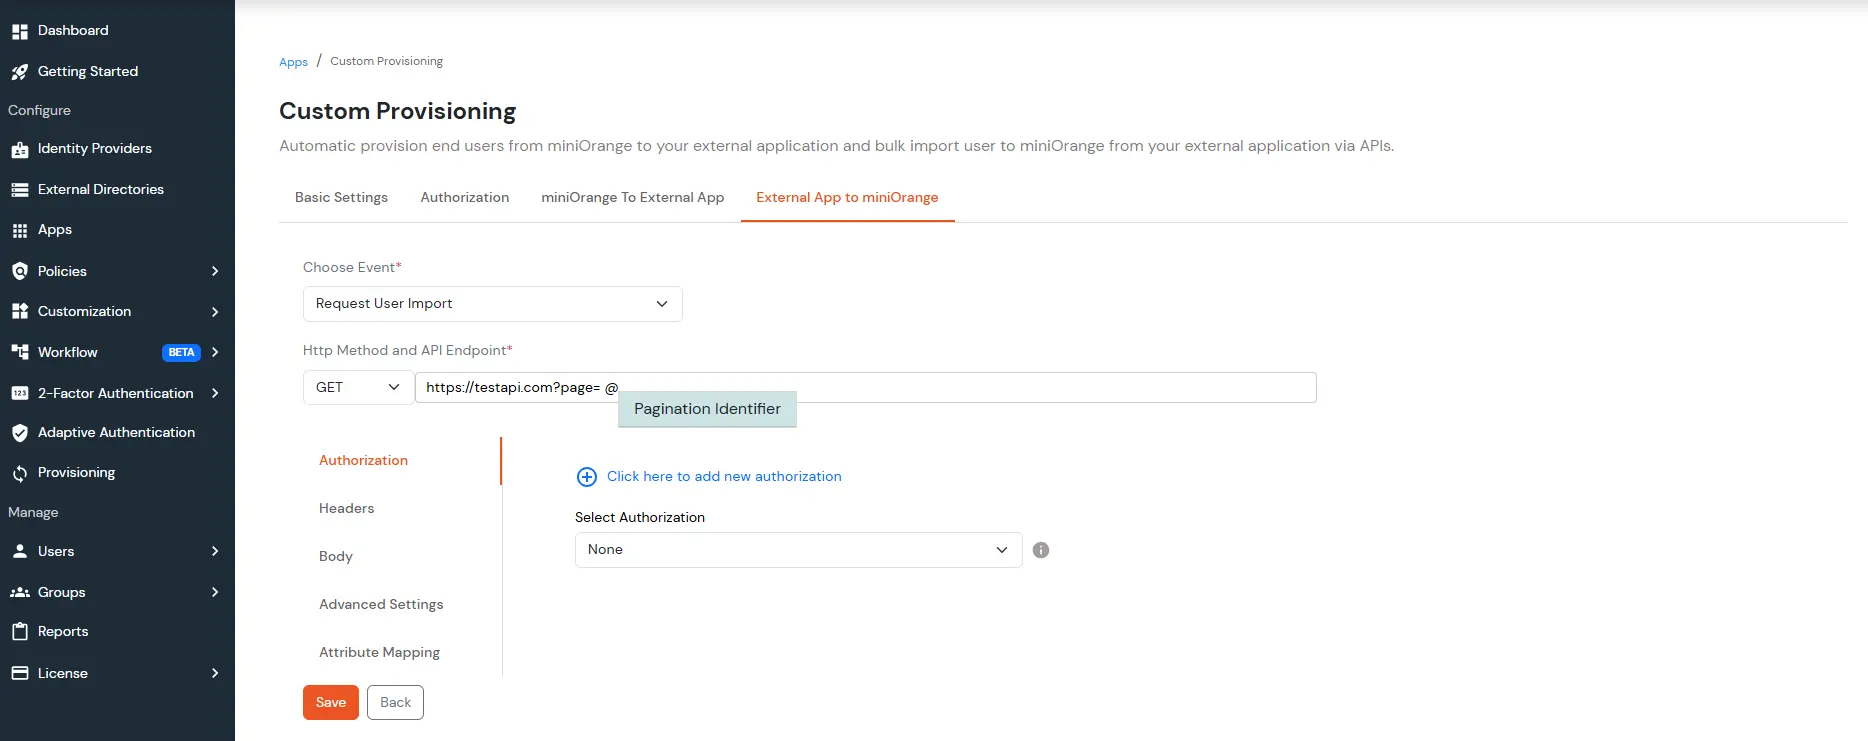
- Choose Event as Request user import from the dropdown. Then add the API endpoint URL with the correct HTTP method selected as required by your application’s API.
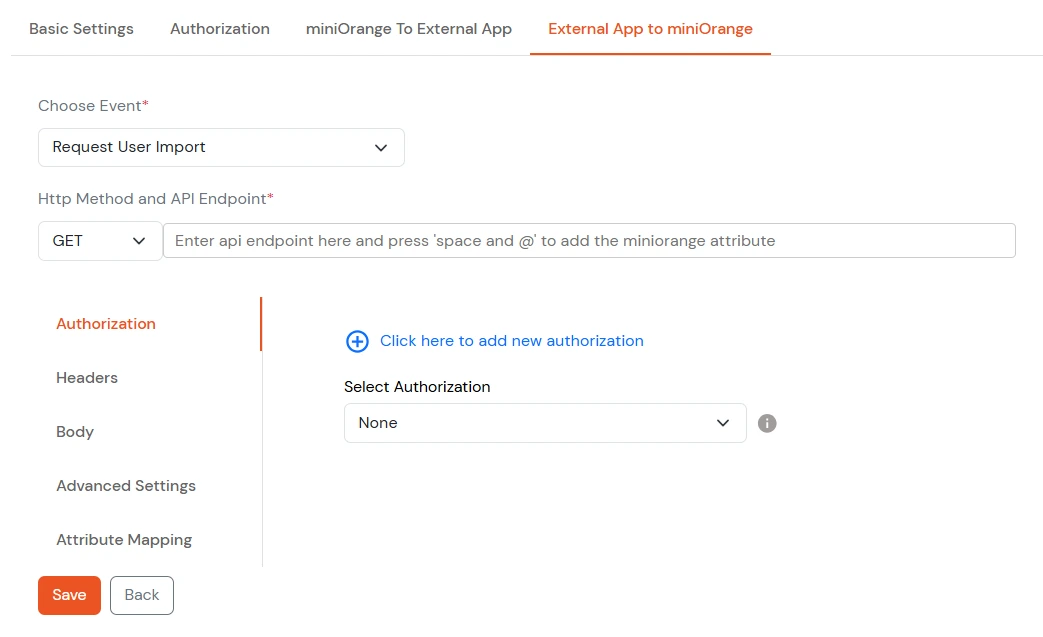
- Select the Authorization which you created in Step 2.
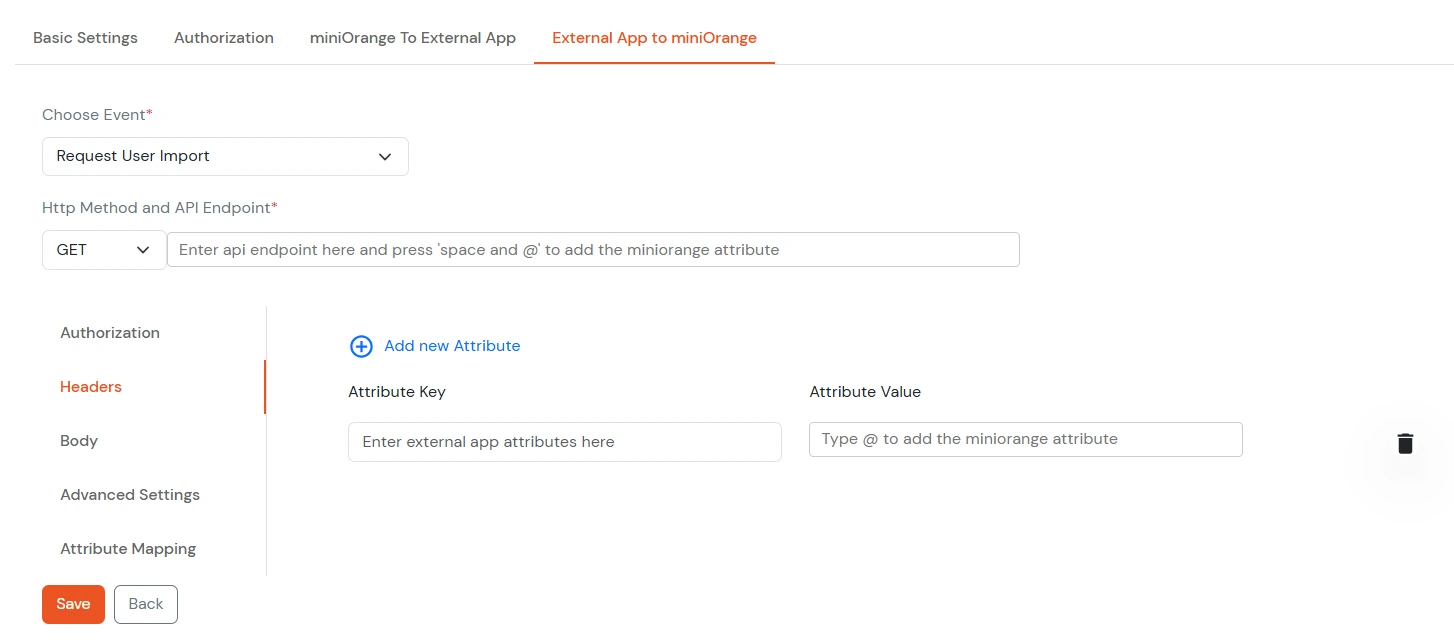
- Add headers if the API request requires them in the Headers section as shown below.
- Add Body in the API request in either x-www-urlencode or json in the Body section if required, as shown below.
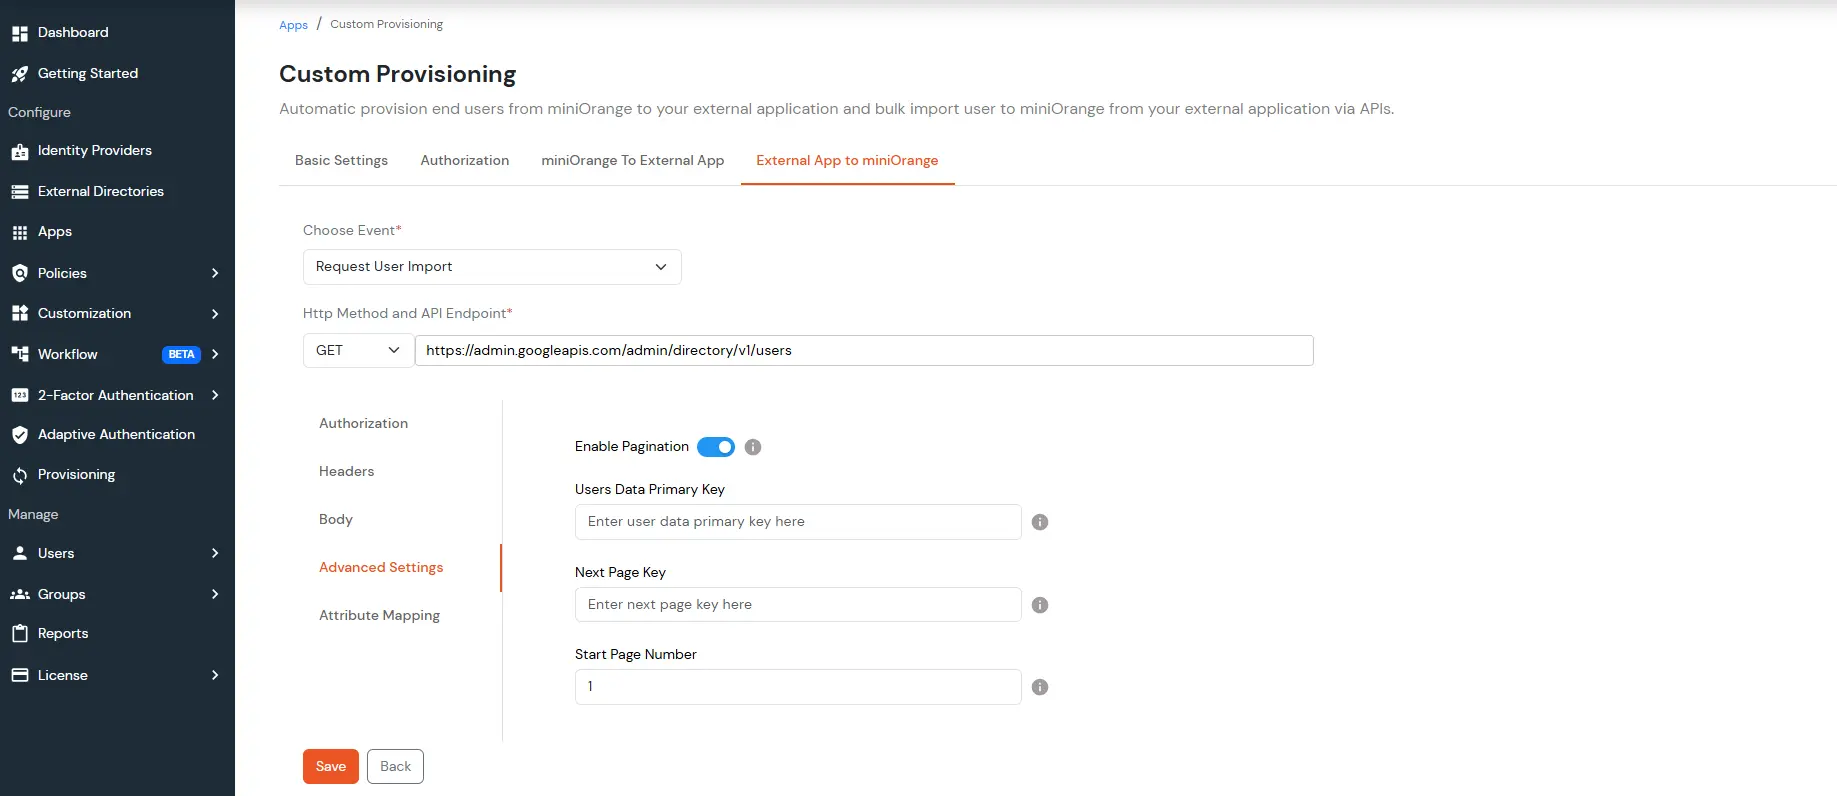
- Advanced Settings
- Fill the Users data primary key value. It is the key in the API response, which consists of the user's list. You can keep this empty if the data does not come under any key. If it's coming under nested key format, then you need to mention the nested keys separated via a dot(.) Example - users.data
- Enable Pagination - Enable this setting if your API sends the user's data in a paginated way. Also, in this case, make sure to add your pagination key in the API Endpoint URL, header or body as needed by the API using @Pagination Identifier as shown below. The pagination Identifier value will be replaced dynamically based on the below 2 settings below (Next Page Key and Start Page Number).
- Fill the Next Page Key value (Only applies if you enable pagination). It is the key in the API response, which consists of the next page/offset value to be used for pagination. You can keep this empty if your application does not send the next page/offset, and in that case, we will iterate over the pages sequentially.
- Provide the Start Page Number (Only applies if you enable pagination) if you want to configure incremental pagination; otherwise, leave it empty.
Attribute Mapping
- Map the user attributes coming from the API with the attributes of a user in miniOrange, which you would like to import from your application
- By default, you need to provide the following attributes mandatorily
- External App Identifier (configure the attribute coming from API, which is unique for the user. Example - user’s id, guid, username, email, whatever unique your app uses for other API operations)
- Primary Email (must be the attribute containing the unique email address of the user)
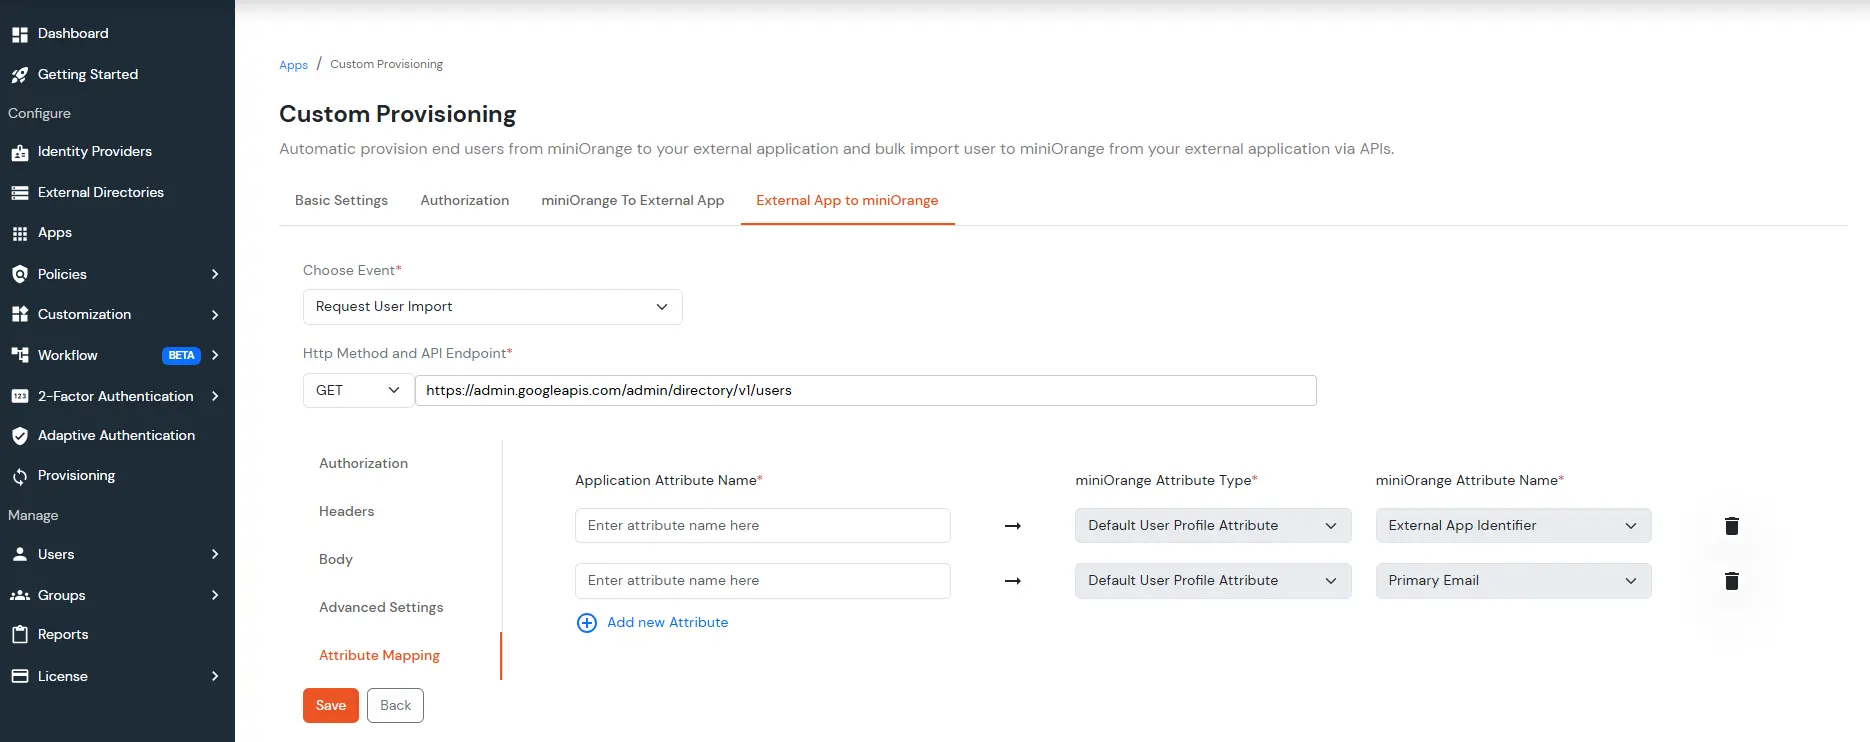
- Additionally, you can click on Add new Attribute to add more attributes which you want to import.
- Click on Save to save all the configurations. You will be redirected to the configuration list.
- Now, click on the Import users icon to initiate the user importing process. It will take a few seconds, depending on the number of users present in the application, to import.
- You can go to the Users list page to check the imported users. This may take some time, depending on the users in bulk that you want to import.
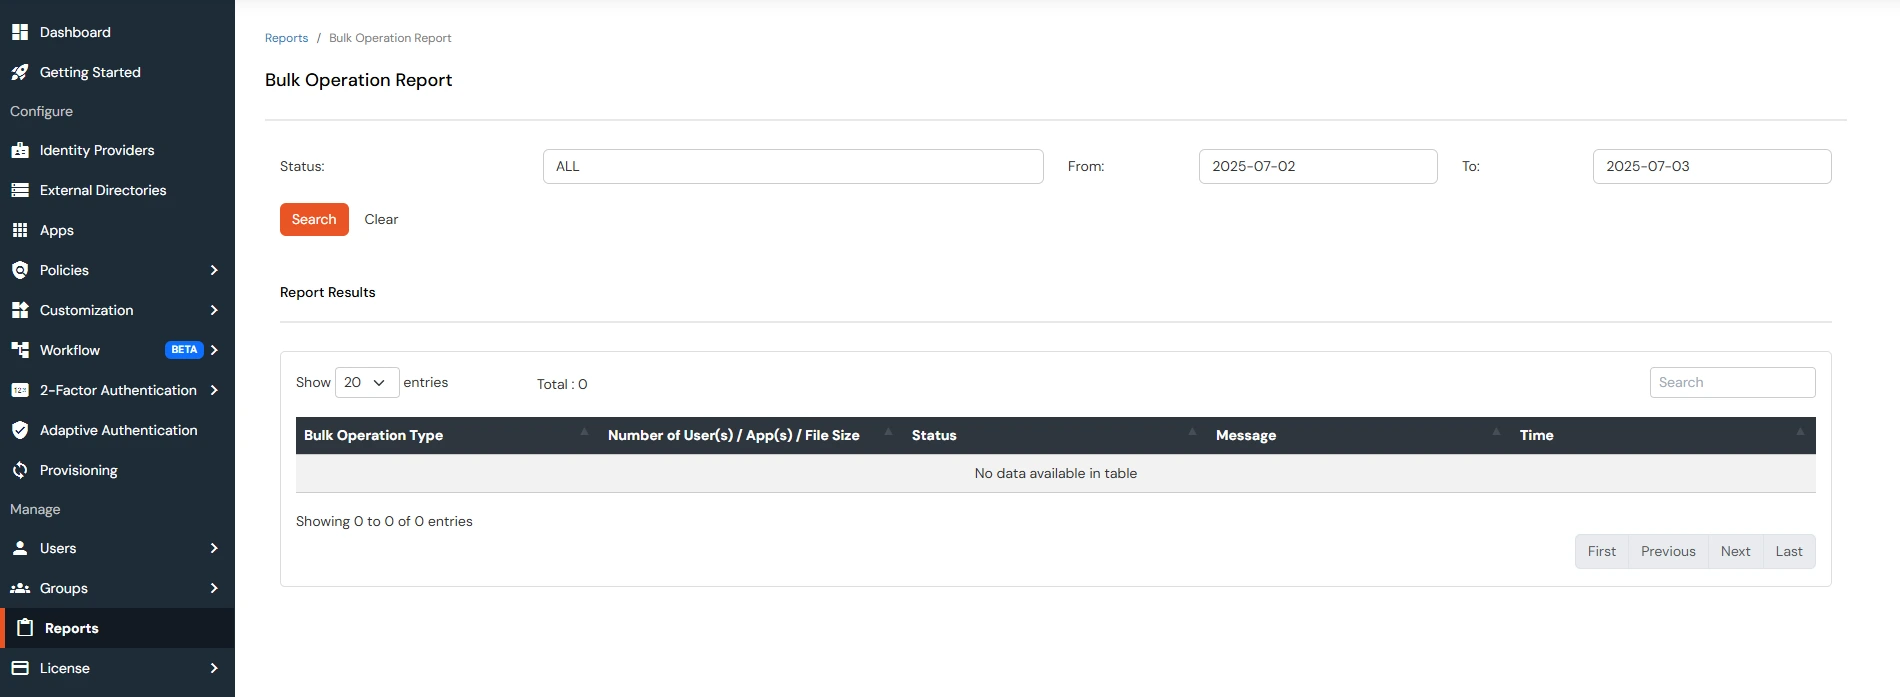
- You can also check the reports for the Import users from Reports -> Bulk Operations Report, as shown below.
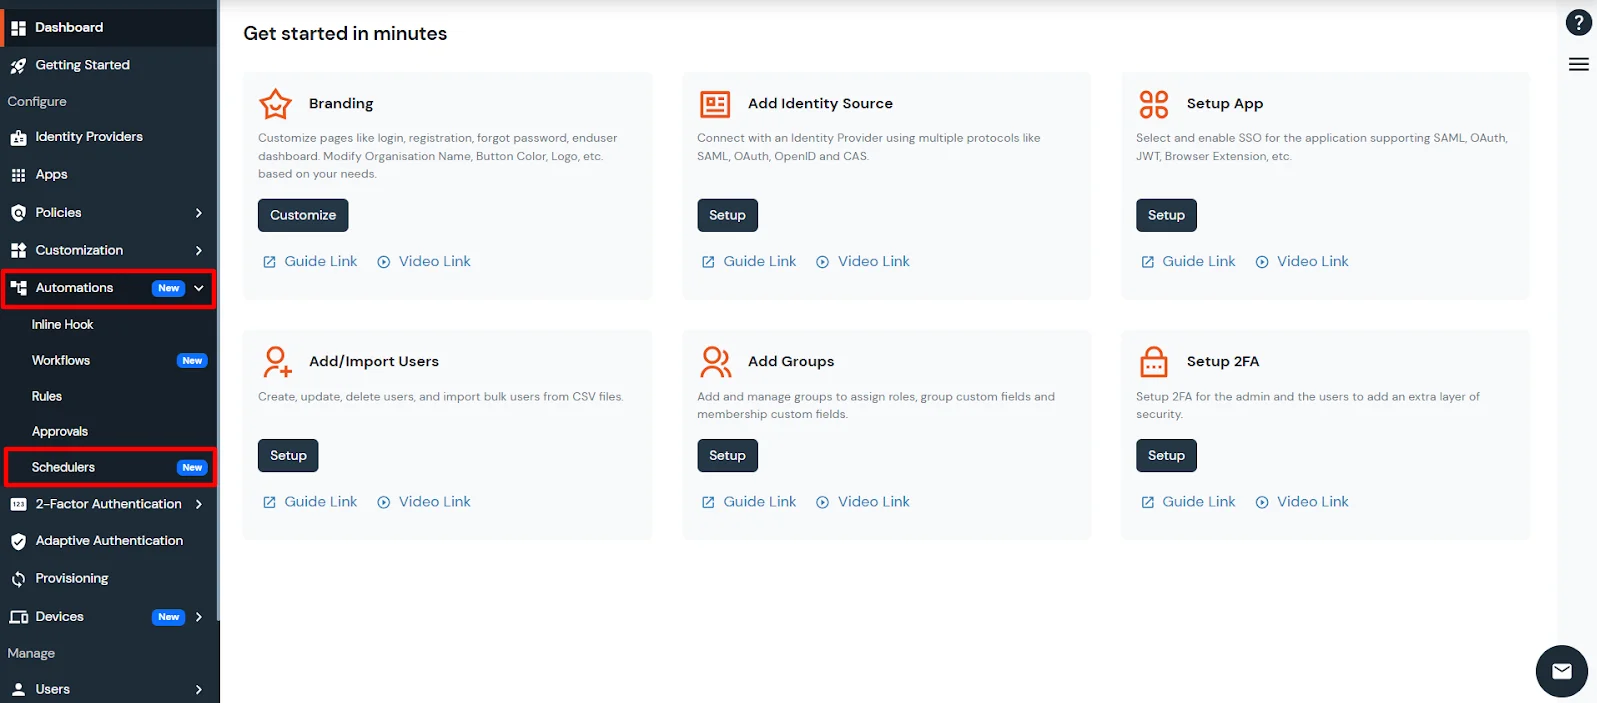
11. Automatic Scheduled-Based Import
- Navigate to the Automations tab and open the Schedulers section.
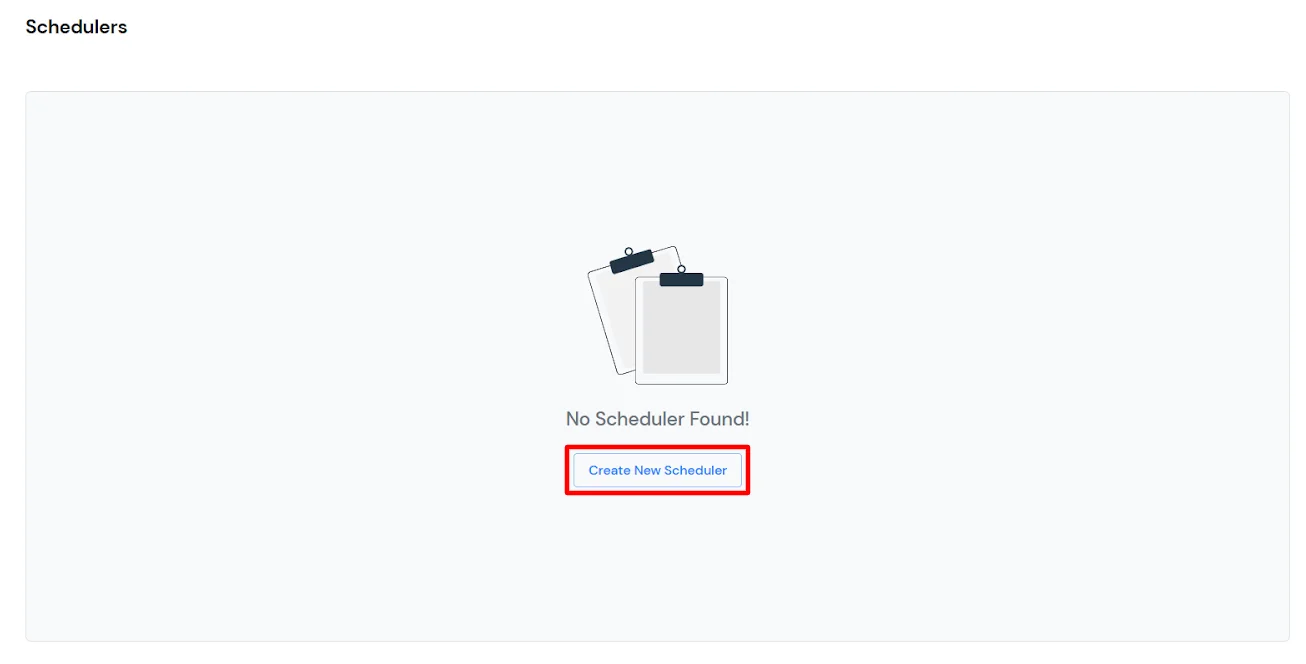
- To create a new scheduler, click on the Create New Scheduler button.
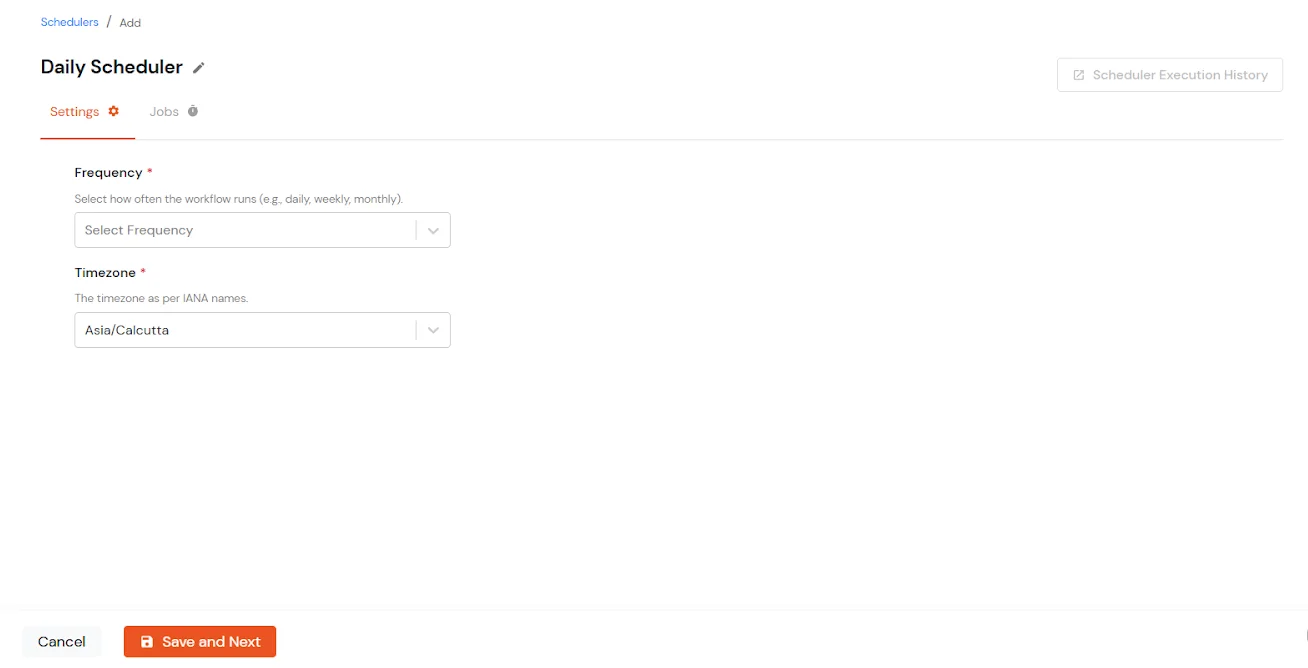
- Configure the Scheduler Settings by choosing the frequency (Once, Hourly, Daily, Weekly, Monthly).
- Specify the associated scheduling details and select the Timezone in which the scheduler should run.
- Once configured, click Save and Next.
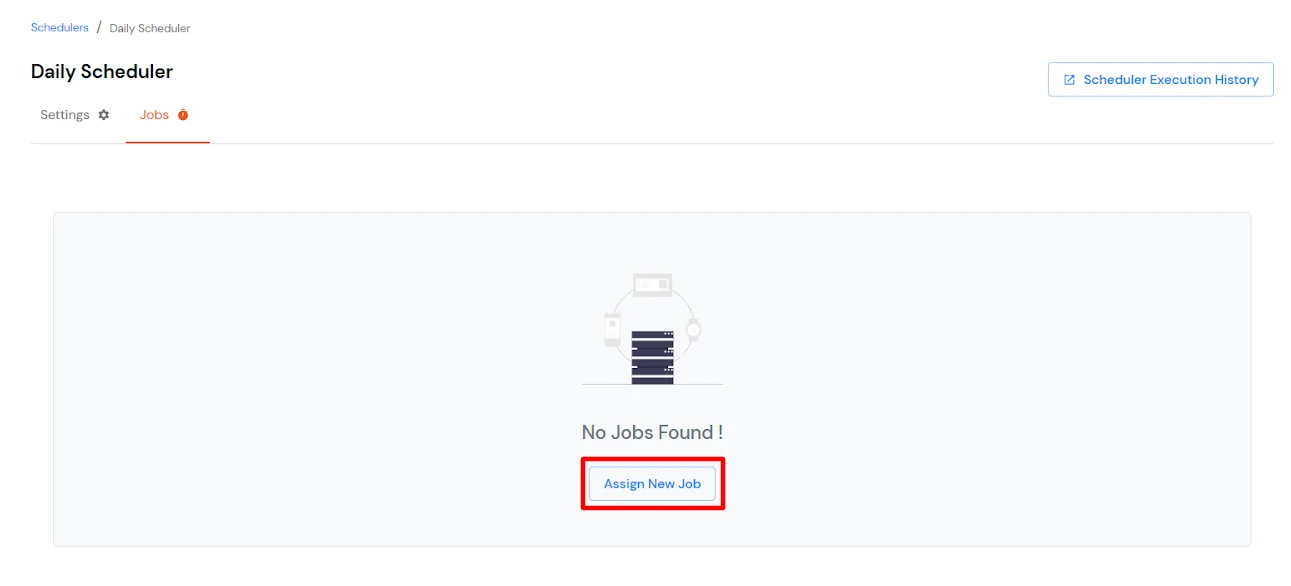
- The next step is to configure the Job and assign it to the scheduler that was created by clicking on the Assign New Job button.
- Choose the application from which the import needs to be performed, along with the job task required(Import the users, groups or user group assignments).
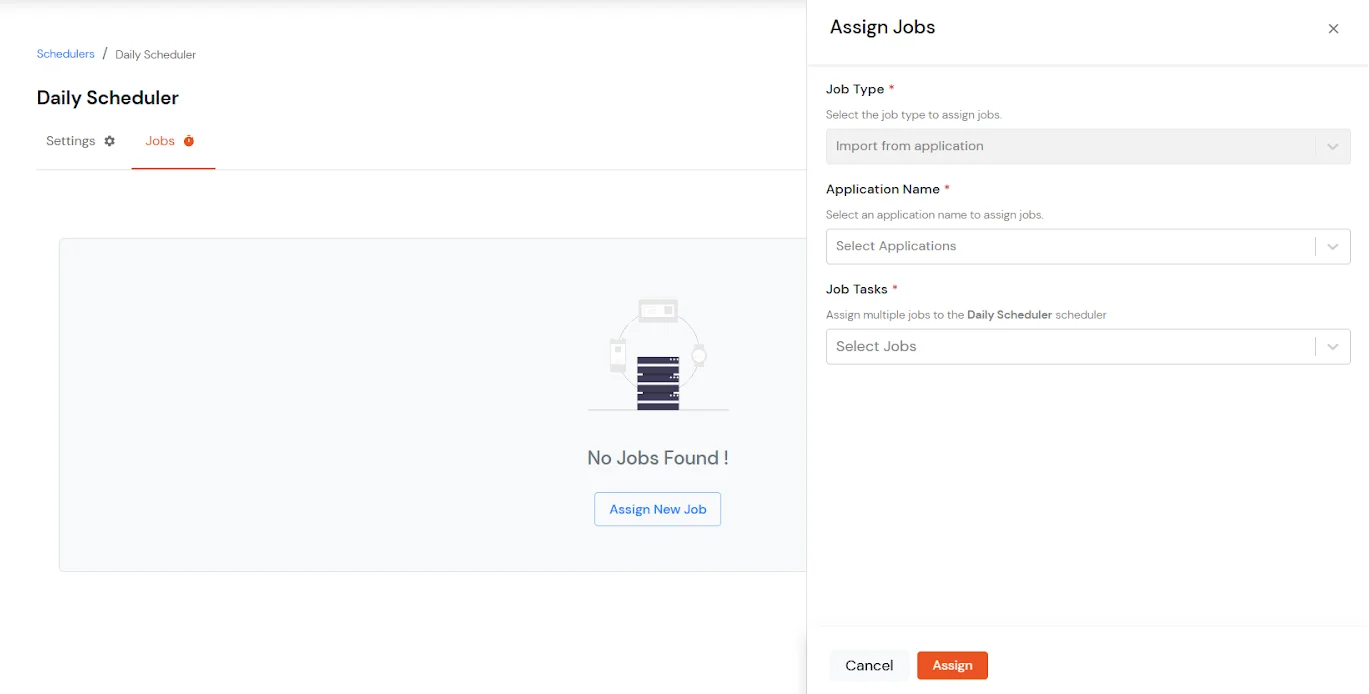
- Then click on the Assign button.
Note: If you want to import data from multiple applications, you can assign multiple jobs to the same scheduler.
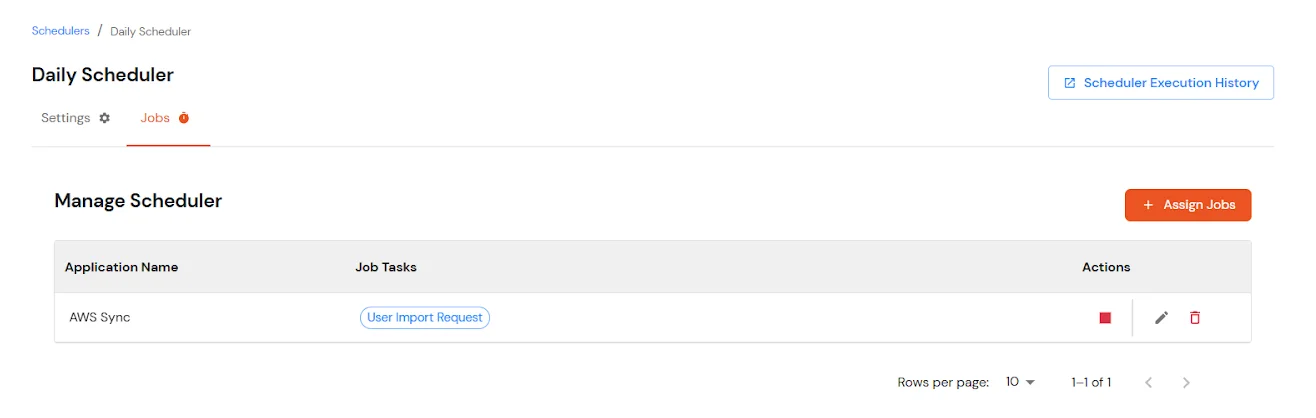
- Once the configuration is complete, automated scheduled imports will run based on the defined schedule.
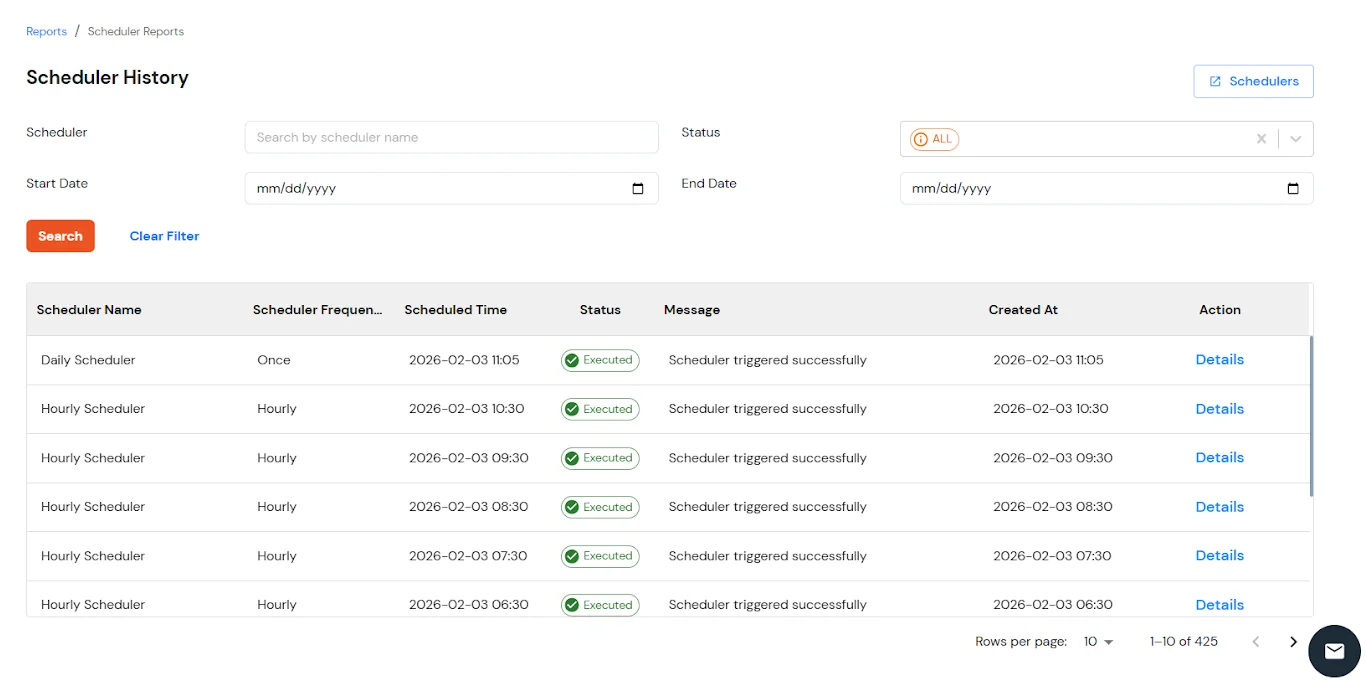
- To view scheduler execution details, navigate to Reports from the left menu and scroll down to check the Scheduler History.
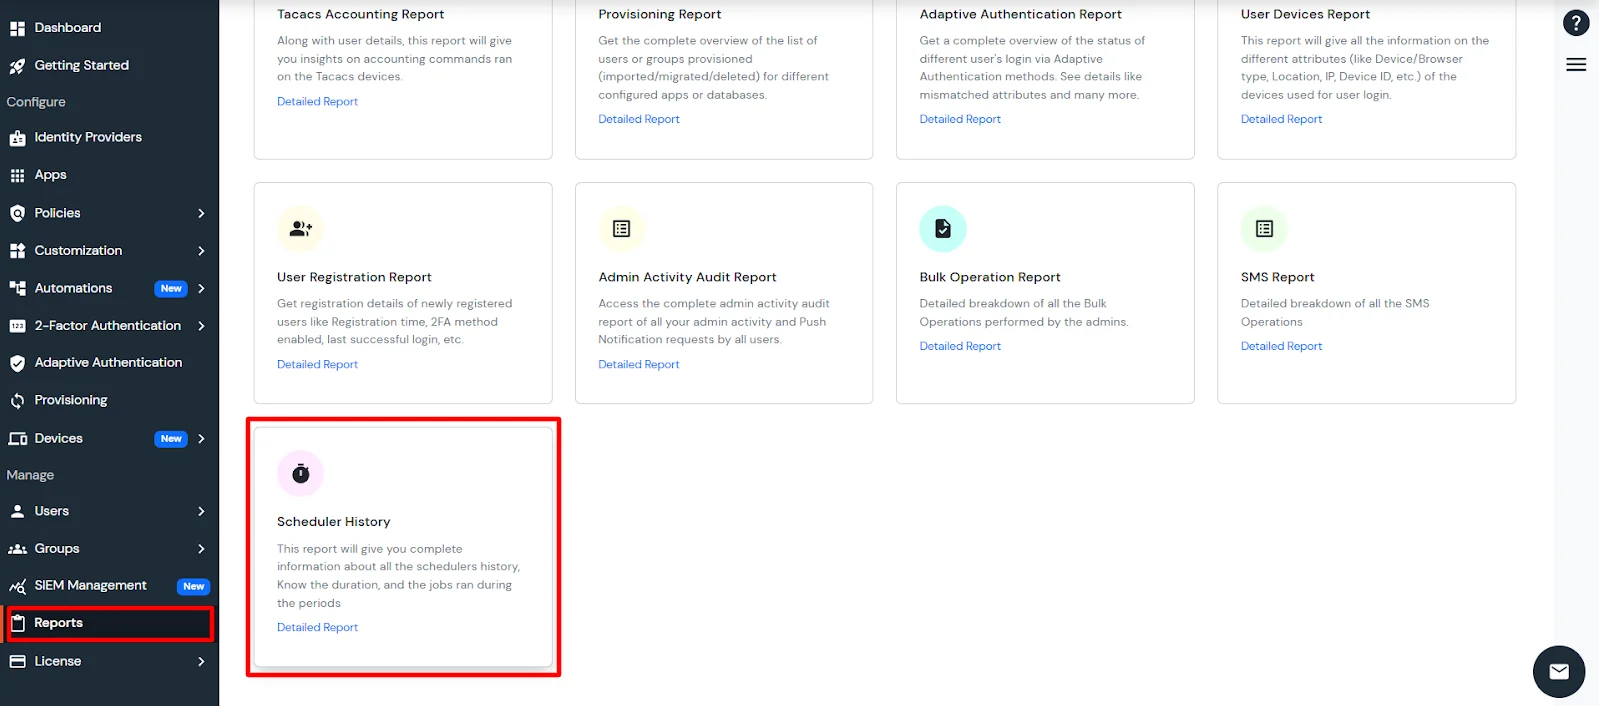
- This report will give you complete information about all the scheduler's history. Know the duration and the jobs that ran during the periods:
View Provisioning Reports
How to access Provisioning Reports?
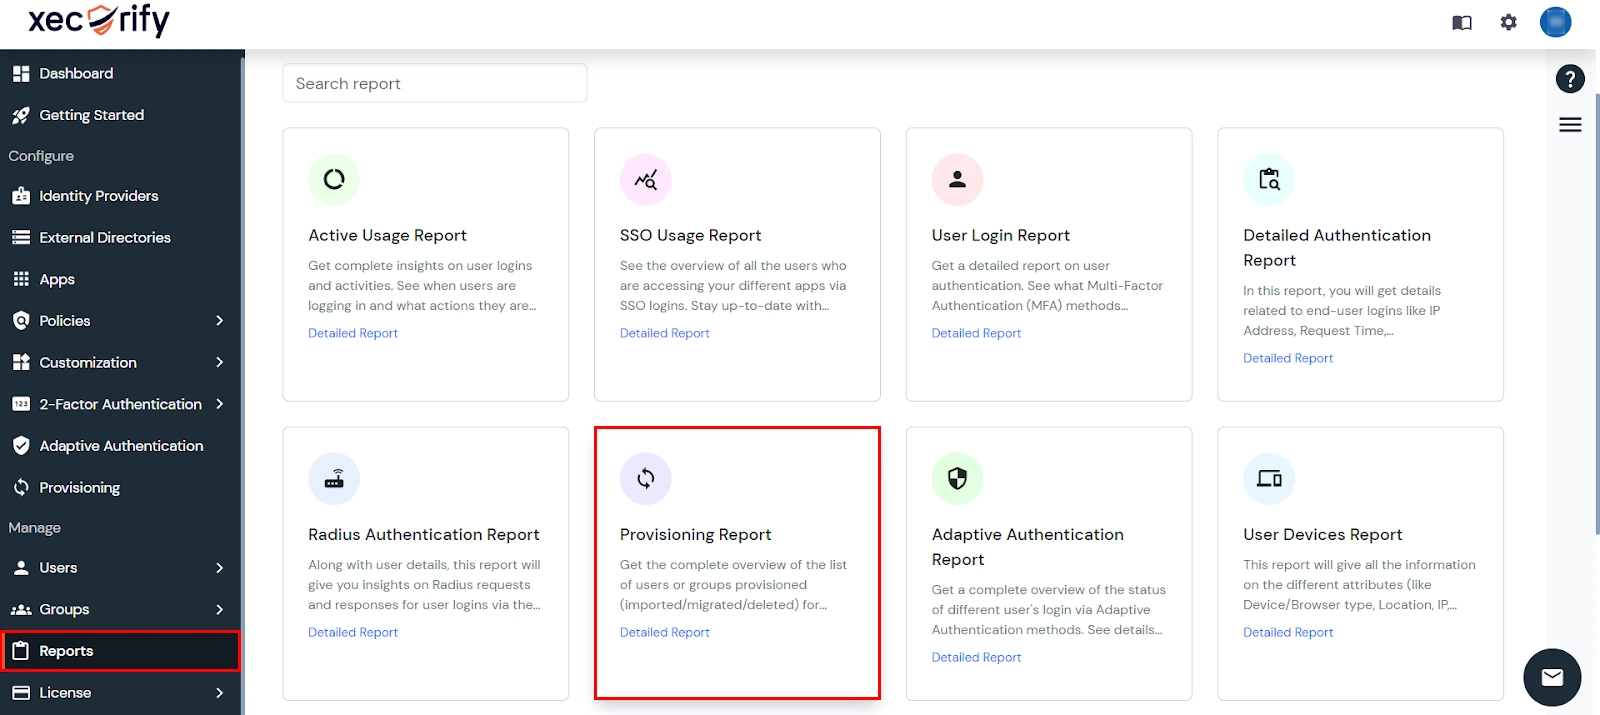
- Navigate to Reports in the left-hand navigation pane, search for Provisioning, and select Provisioning Report.
- Filter the reports by specifying Enduser Identifier and Application Name criteria. Additionally, choose the desired timespan for the reports. Once done, click on the Search.
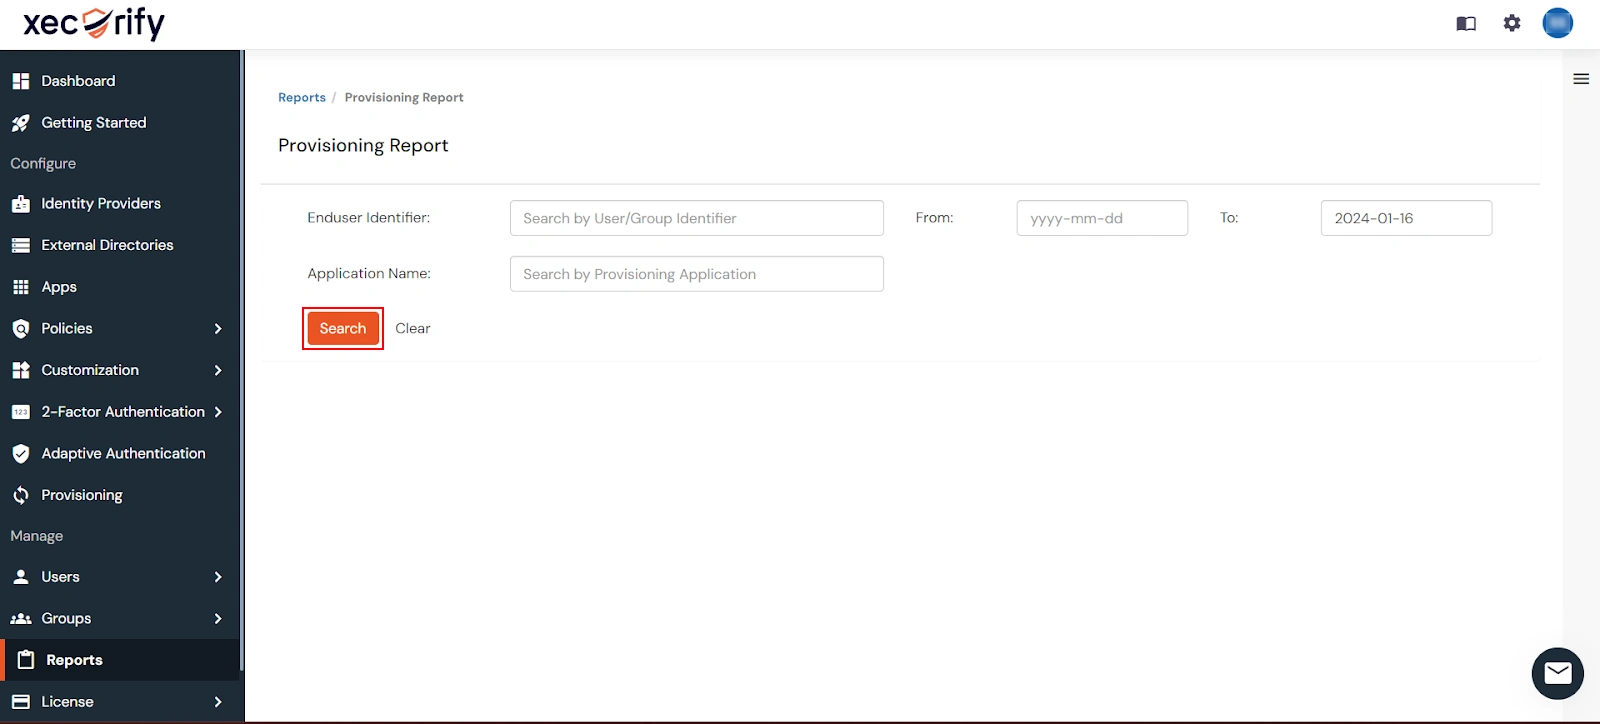
- Alternatively, you can directly click on Search to retrieve all provisioning reports based on time without applying any specific filters.