Hello there!
Need Help? We are right here!
Need Help? We are right here!
Search Results:
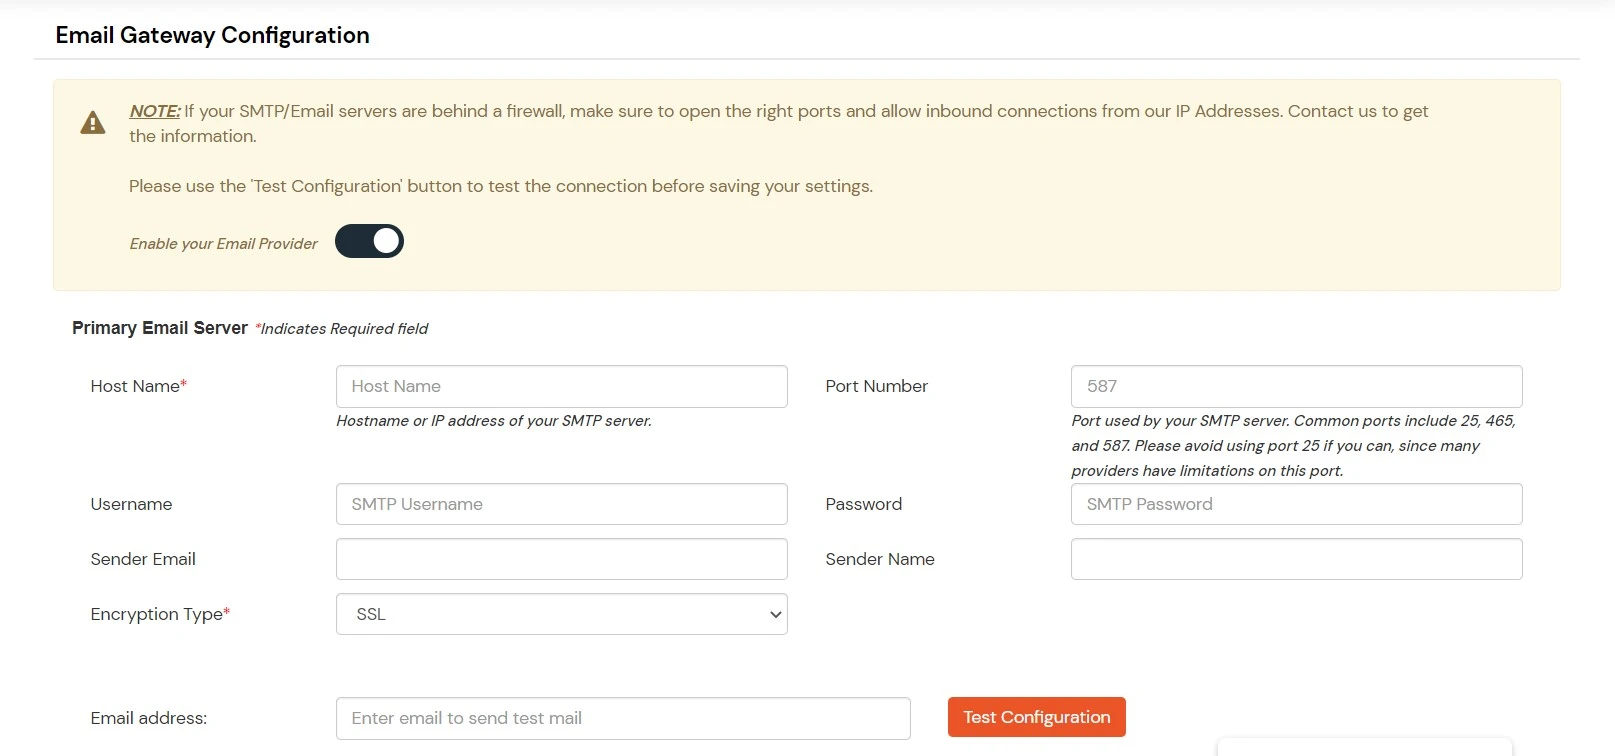
×By default, miniOrange provides and uses it's own SMTP Gateway to send email notifications to users. If you have access to your own email provider, you can use the same to send email notificaions from your miniOrange account. Check out our list of Supported SMTP gateways.
You can configure one Primary and one secondary SMTP Server for your needs. The secondary SMTP Configuration acts as a backup in case primary SMTP Server is not reachable or using primary configuration errors out.
Note: If your SMTP/Email servers are behind a firewall, make sure to open the right ports and allow inbound connections from our IP Addresses. IPs are different based on regions and if the iam is cloud based or onpremise. Contact us to get the IP information.
You can contact idpsupport@xecurify.com for adding your own SMTP/Email Server or if you need help with any SMTP Server integration.

| Parameter | Description |
|---|---|
| Auth Type | Authentication type for your smtp server. |
| Hostname | Hostname or IP address of your SMTP server. |
| Port Number | Enter the port number. |
| Username | Your account username. |
| Password | Your account password. |
| Sender Email | Your Sender Email.(sender email address is what receivers see in the From field of your Email) |
| Sender Name | Your Sender Name. (sender name is what receivers see as from name of your Email) |
| Encryption Type | Select an encryption type out of the 2 options (SSL and TLS) which is supported by your SMTP. |