Hello there!
Need Help? We are right here!
Need Help? We are right here!
Search Results:
×This comprehensive guide covers four automated workflow types: End User Creation flows (signup and admin-created), On User Update flows, Identity Dormant Account flows, and Password Expiry Notification flows. These workflows enable administrators to streamline user management processes through event-based triggers and scheduled automation tasks.
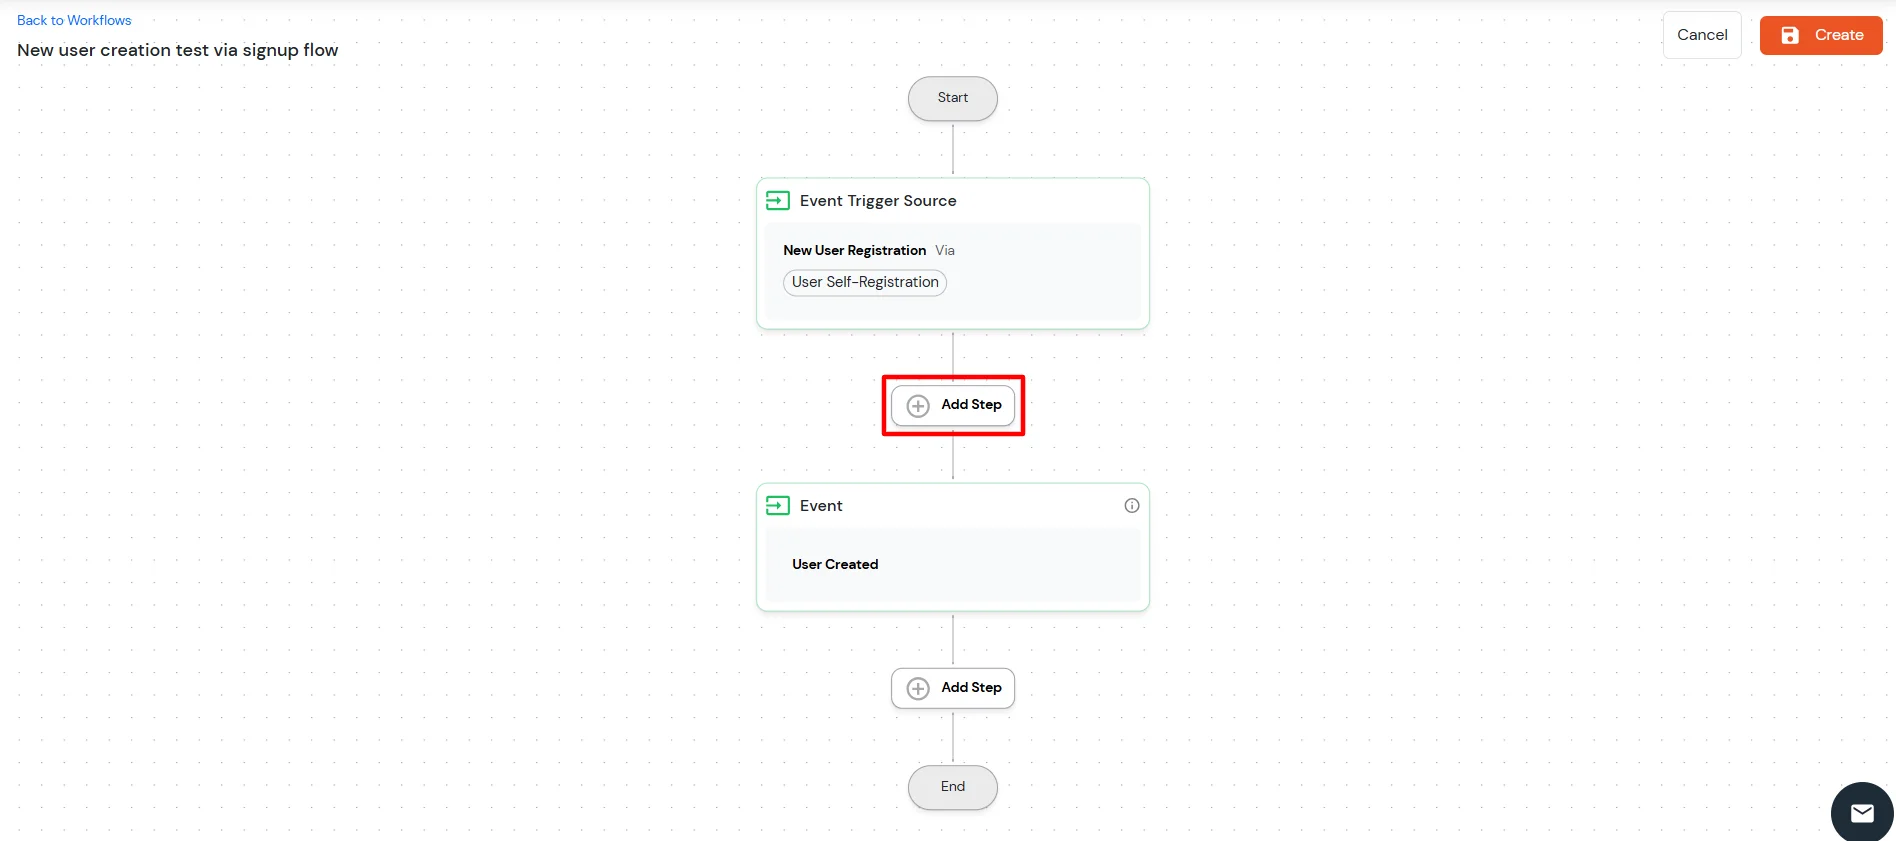
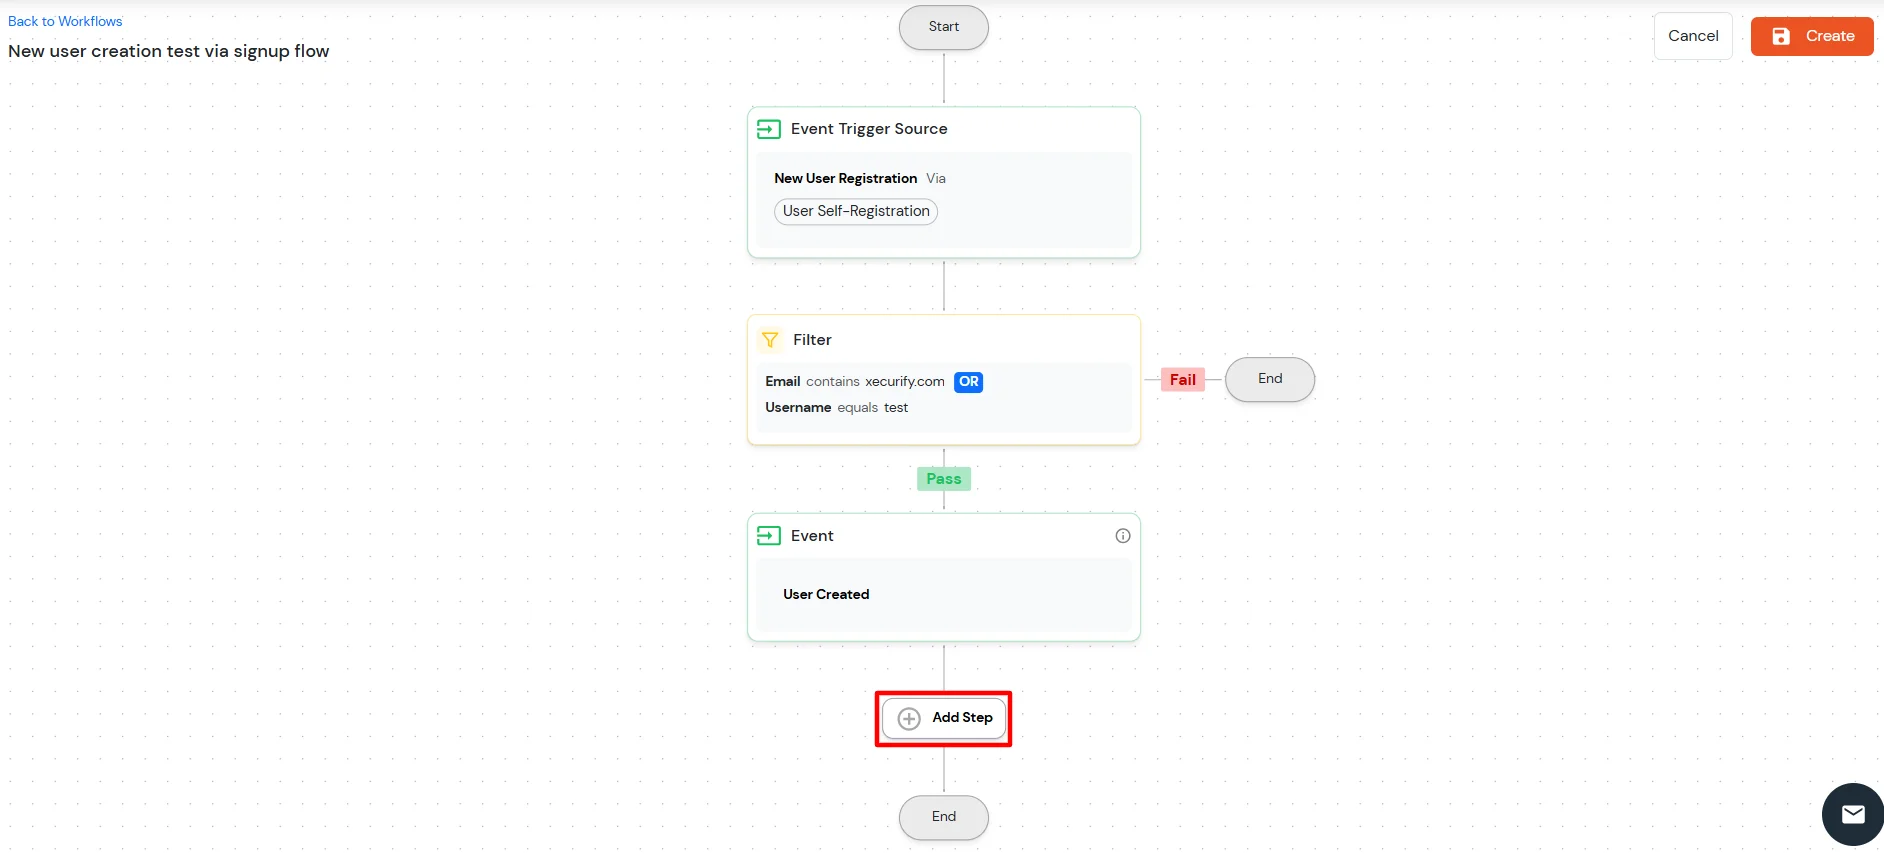
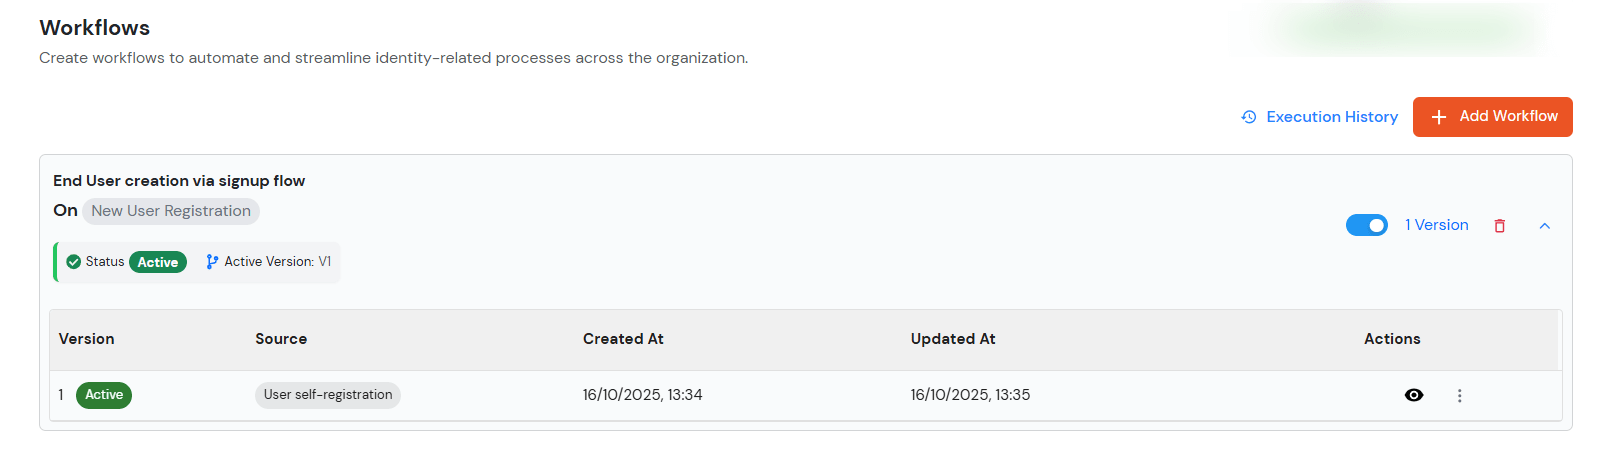
This workflow automates the end-user account creation process through signup flows and admin creation, with customizable filtering and task assignment capabilities.

| Feature | Description |
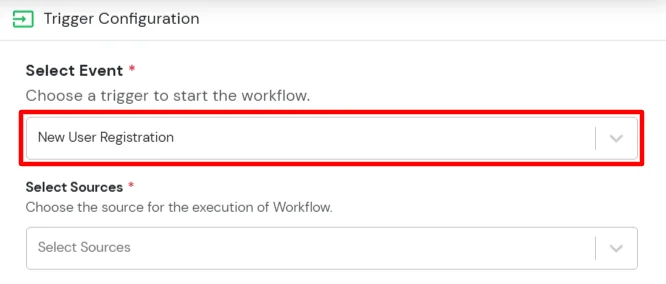
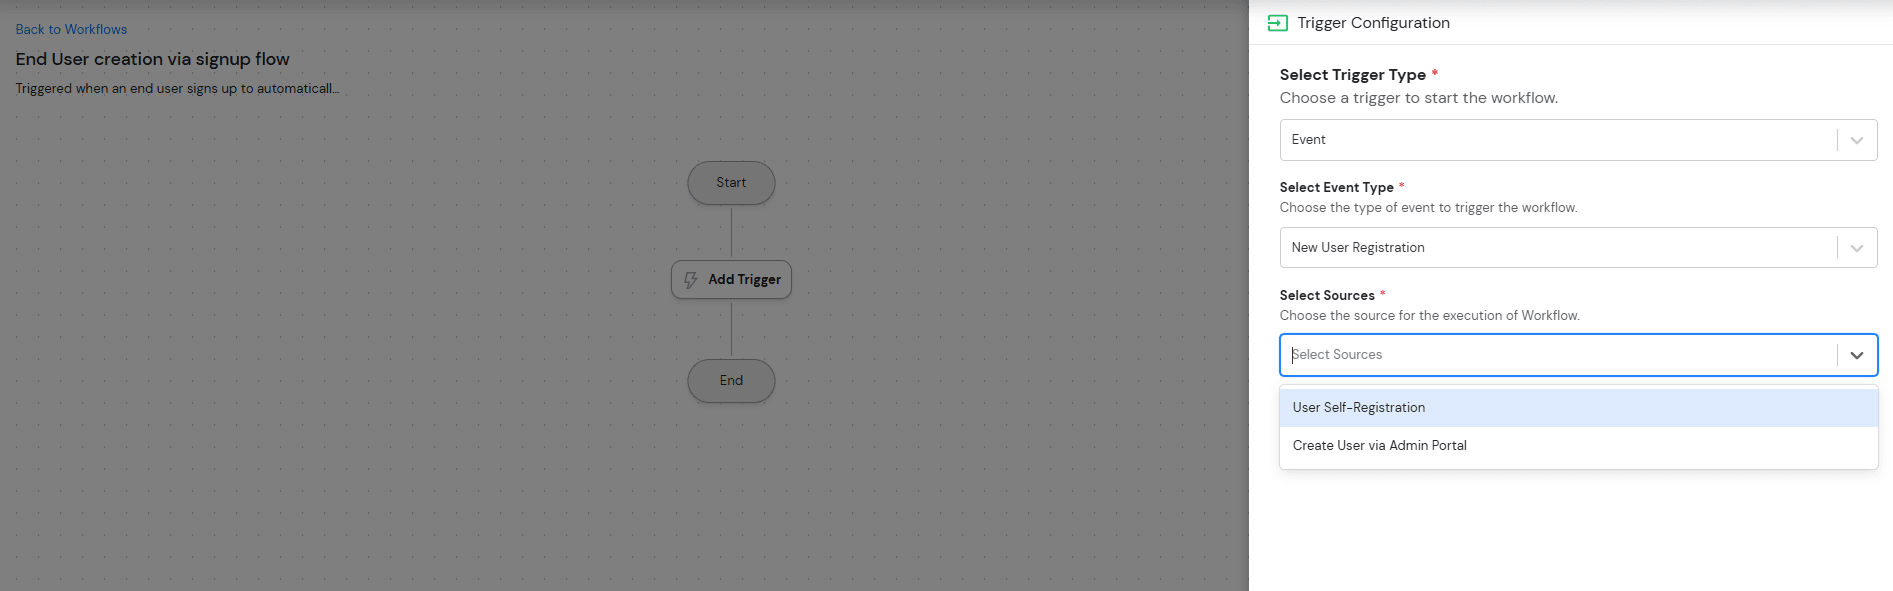
| User Self-Registration | User creation via branded signup page (e.g., https://<username>.miniorange.com/moas/idp/usersignup) |
| User Create via Admin Portal | Administrator manually creates users or through bulk csv. |
| User Create via External Source | Trigger when users are created from external identity sources. |
| User Create via API | Trigger when users are created through APIs. |
| Any Source | Trigger for events from all available sources. |

Previously, the system only supported New User Registration, which allowed administrators to create users and enabled User Self-Registration.
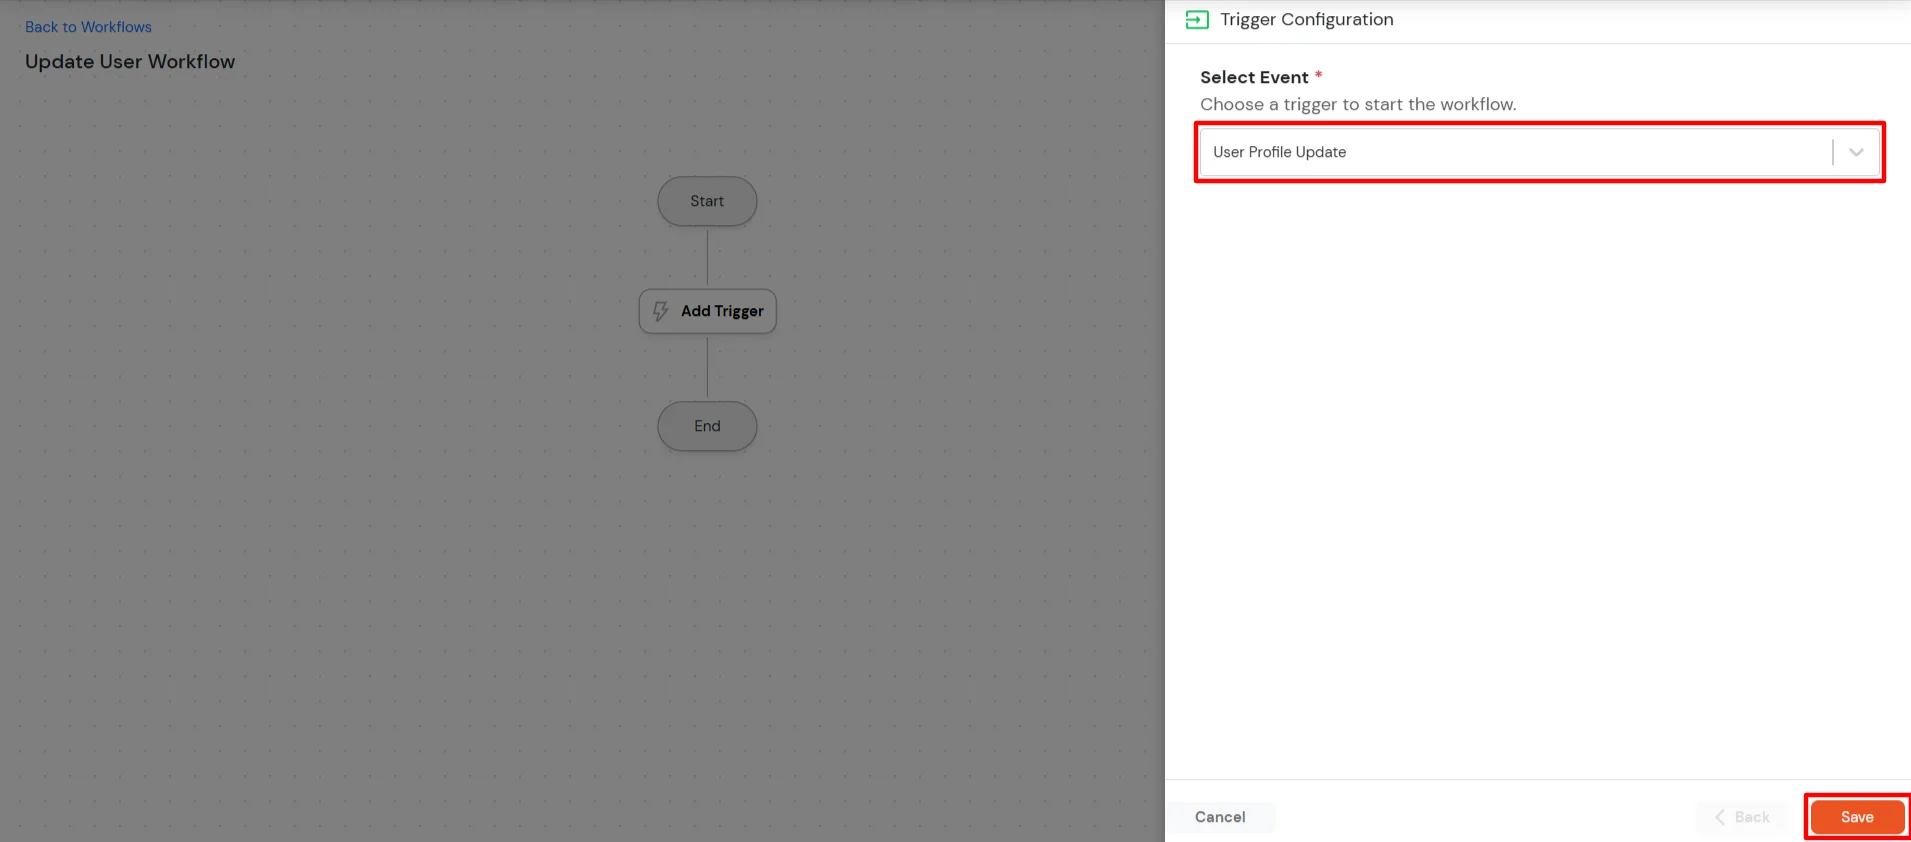
Now, the system also supports a On User Update feature.
| Feature | Description |
| User Self Profile Update | Select this source when the workflow should be triggered for profile updates made directly by end users through the self-service portal or profile settings page. |
| User Update via Admin Portal | Select this source when the workflow should be triggered for s performed manually by administrators through the Admin Portal. |
| User Update via External Source | Select this source when the workflow should be triggered for profile updates coming from external identity sources such as Active Directory, HR systems, SCIM providers, or JIT provisioning. |
| User Update via API | Select this source when the workflow should be triggered for s made through API requests. |
| Any Source | Select this option when you want the workflow to be triggered for updates from all available sources. |

Through this feature, administrators can perform the following actions:
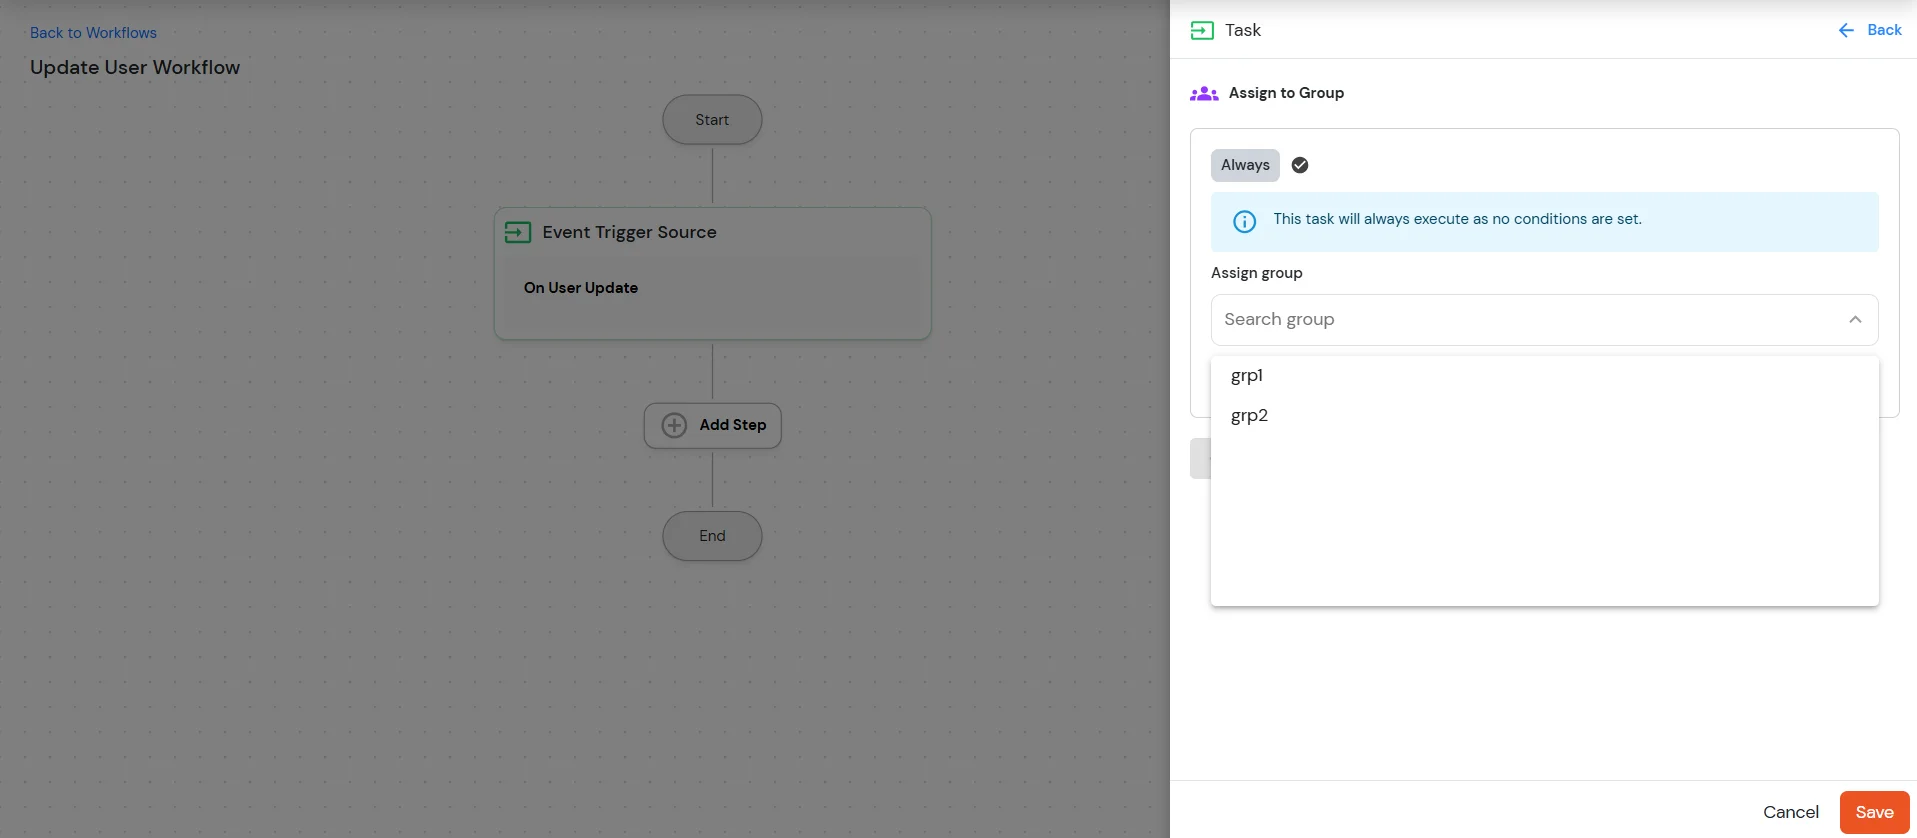
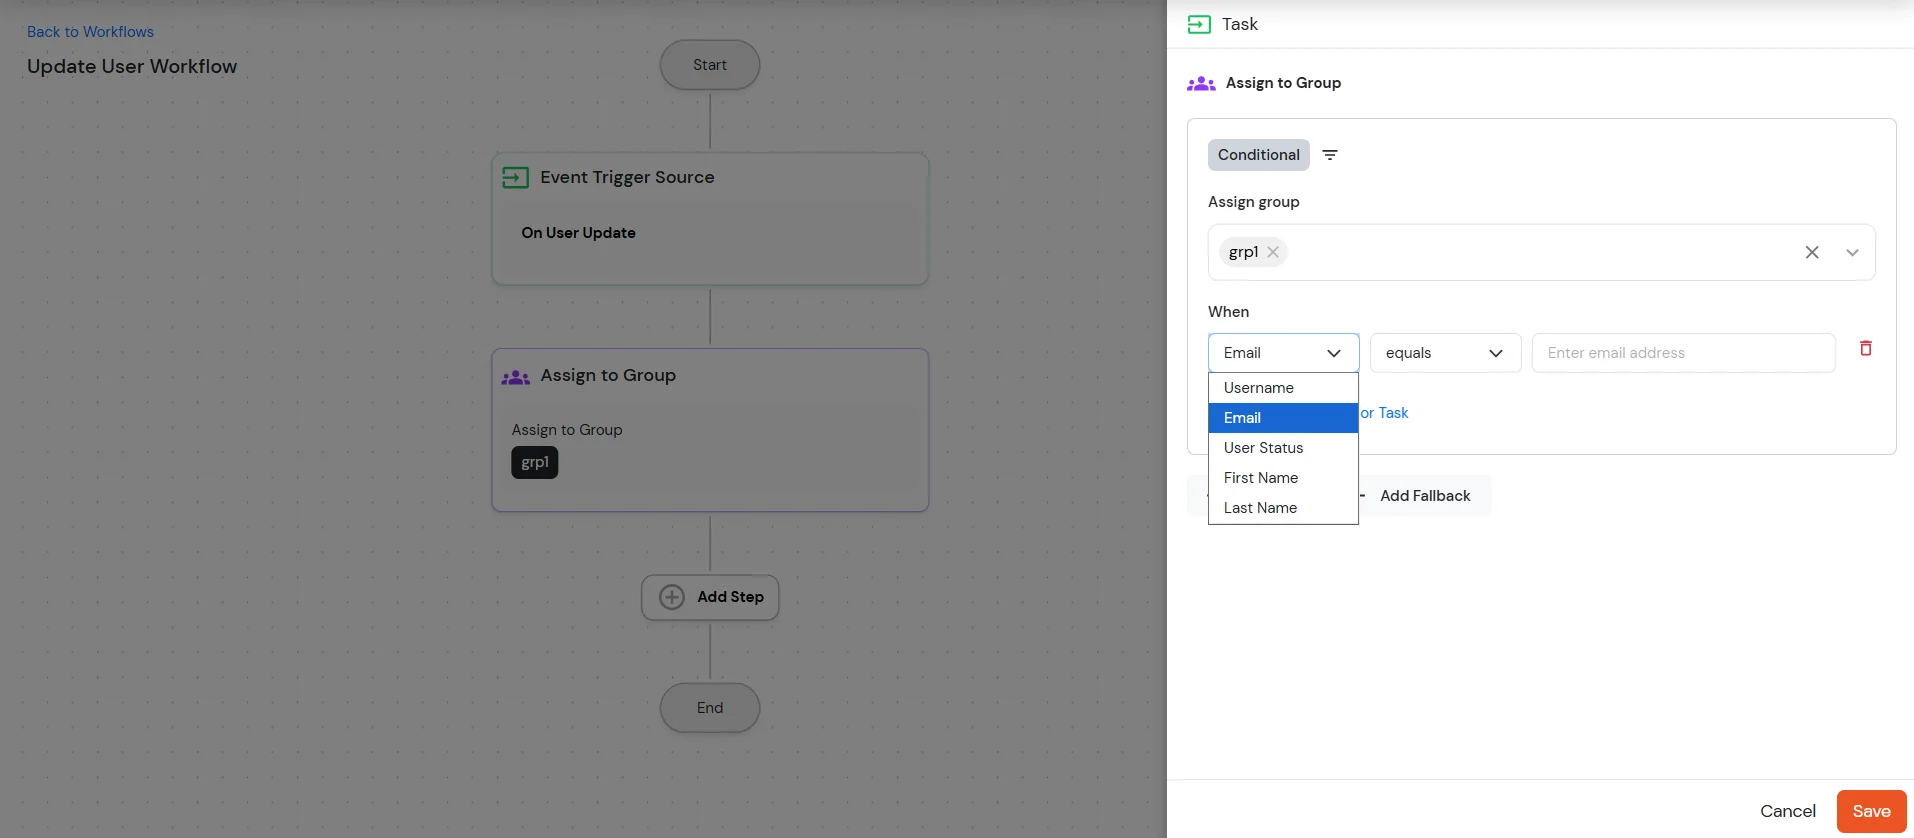
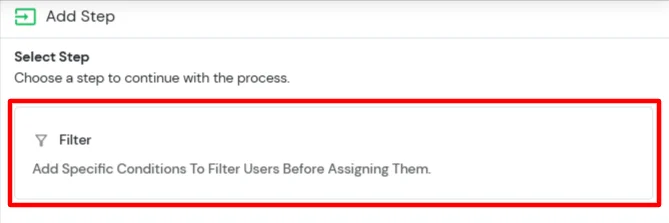
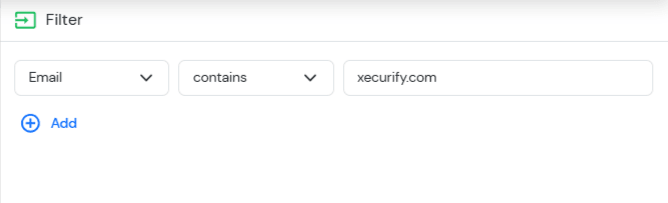
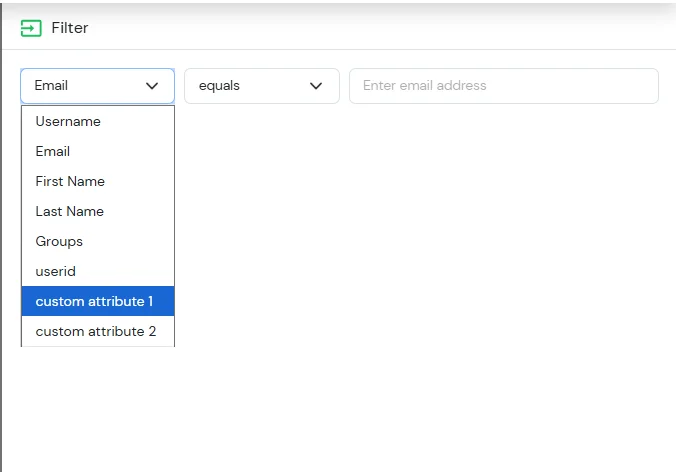
The task configuration supports filtering users based on specific attributes and operators. These filters help define the conditions under which the task will be applied to users.
The following user attributes are available for configuration:
The following operators can be used to define the filtering conditions for the selected attributes:
Administrators can configure the required attribute and apply the appropriate operator to define the condition. Based on the configured filters, the system will identify the users that match the criteria and execute the selected task accordingly.
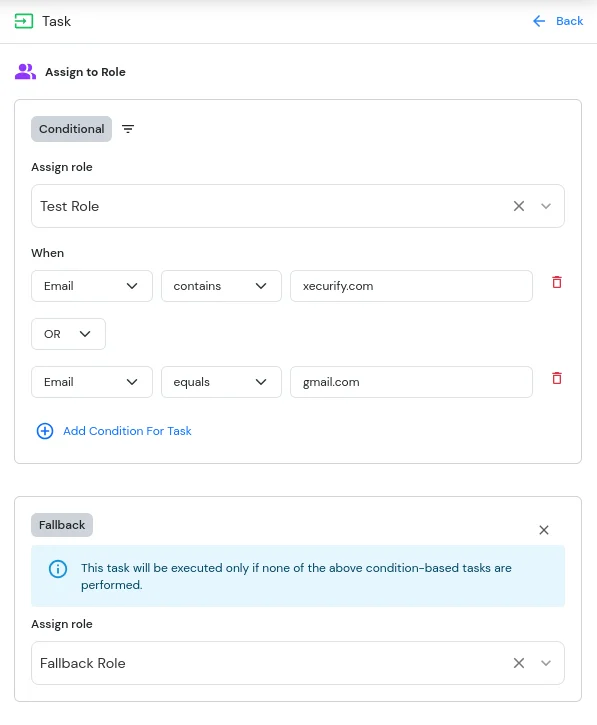
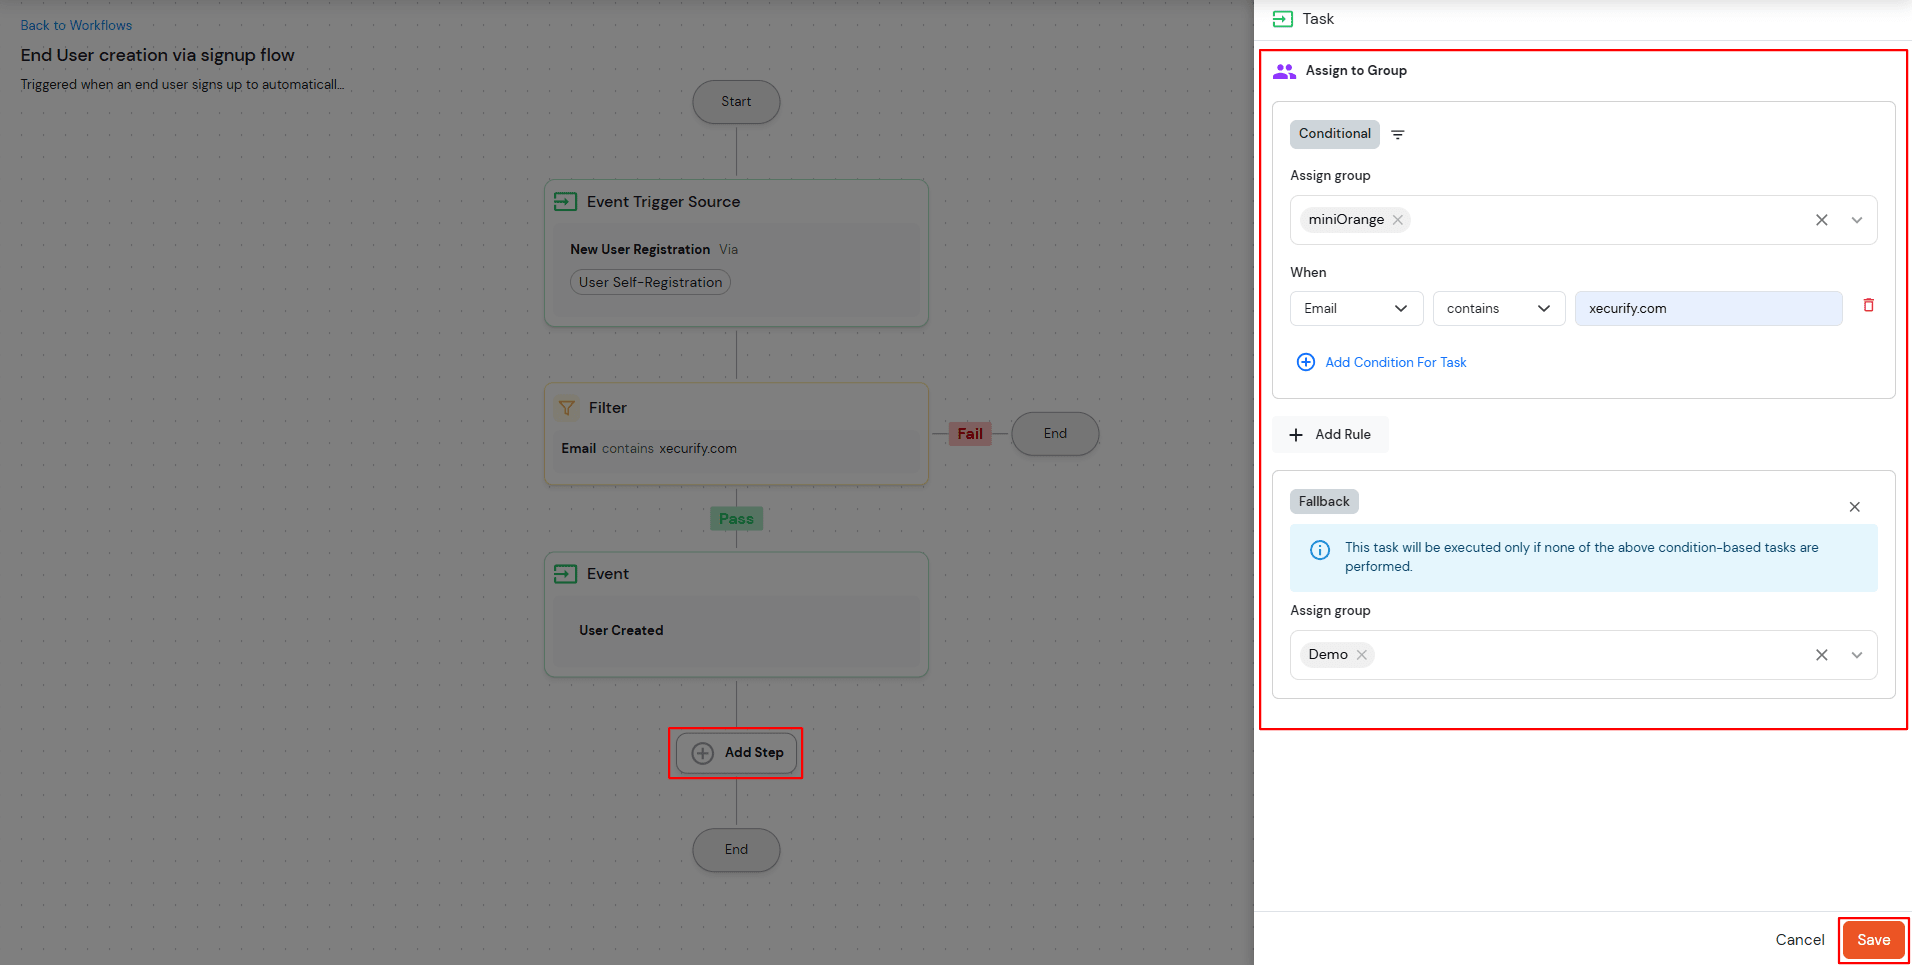
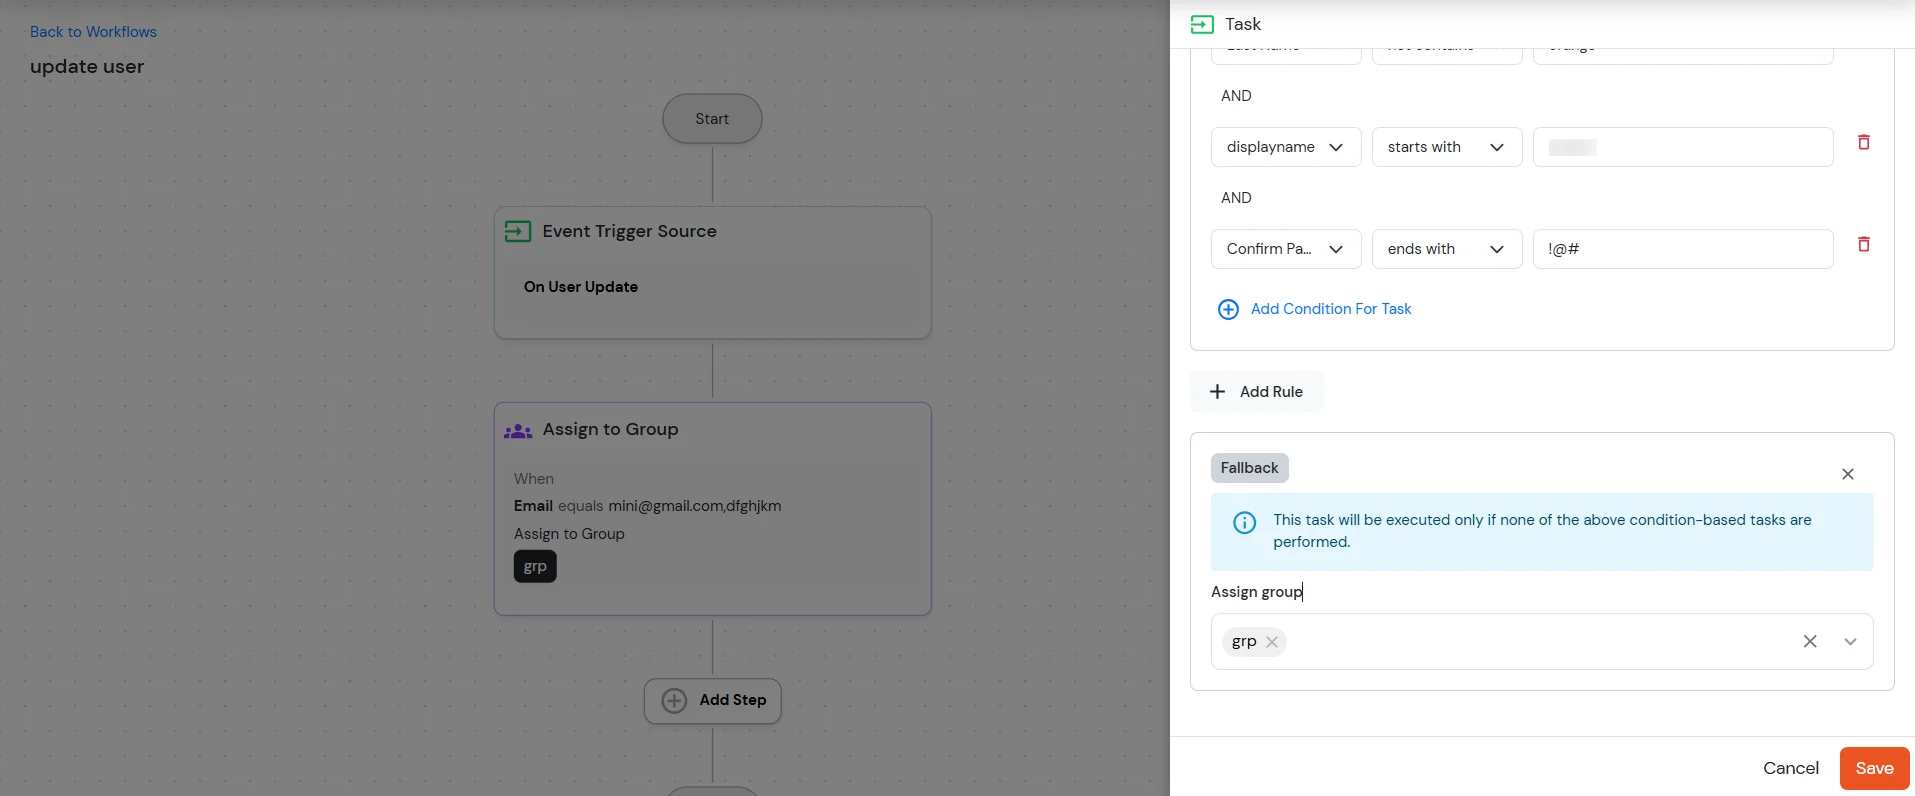
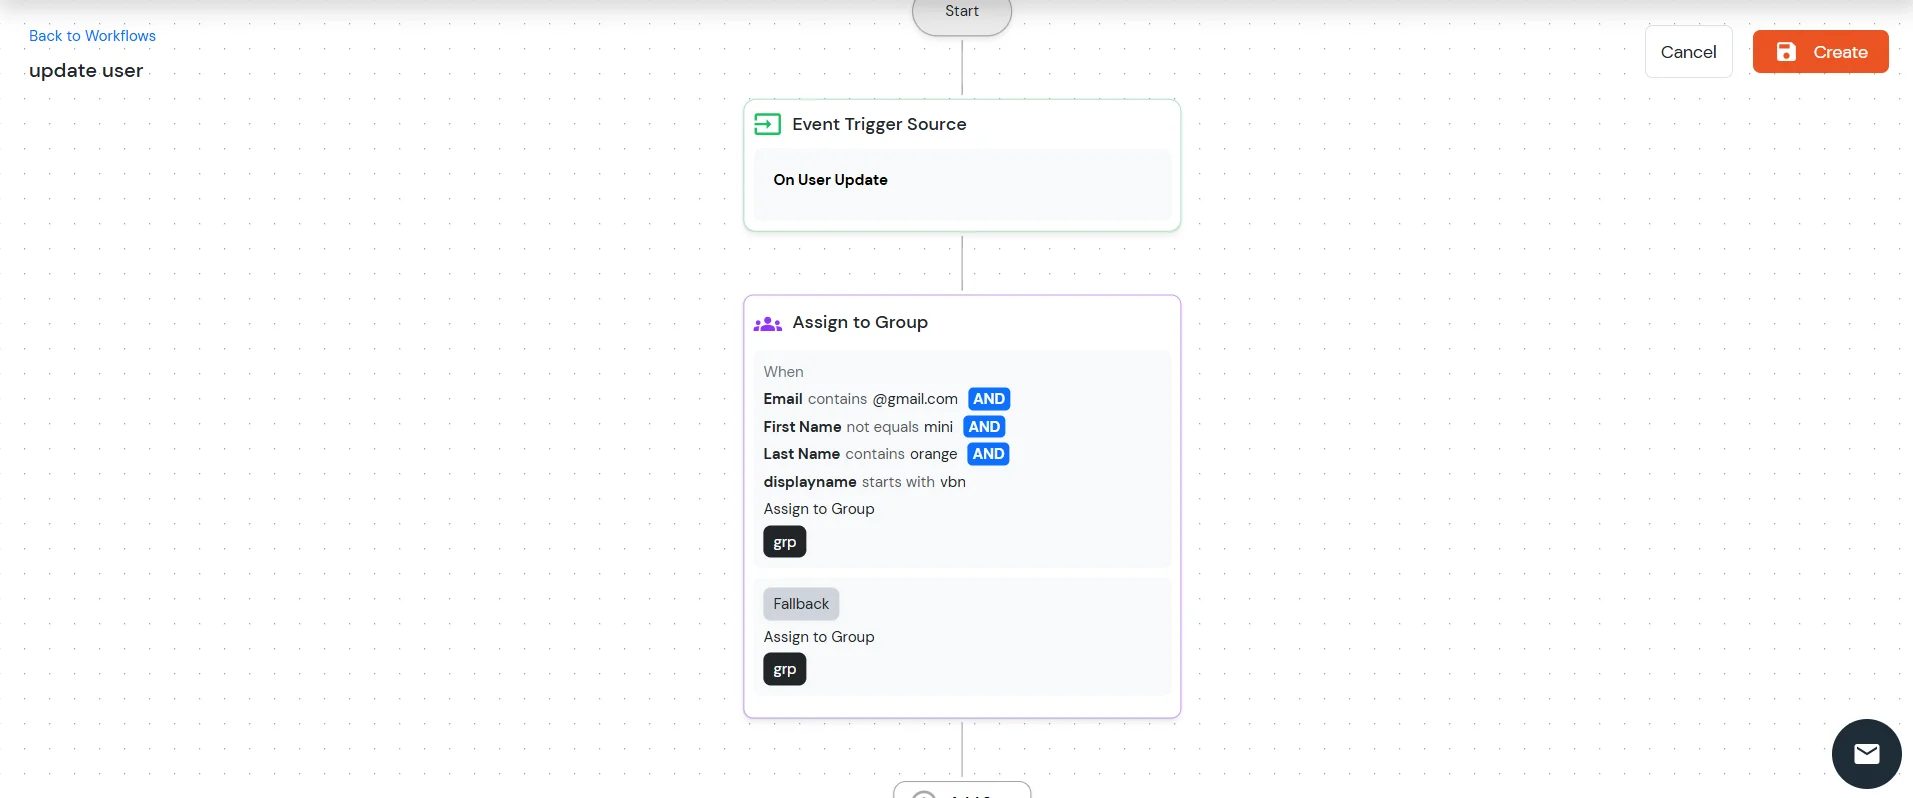
The task configuration supports defining multiple conditions using Rules and a Fallback mechanism.
The Add Rule option allows administrators to configure multiple conditions for task execution. Each rule can be created using the supported attributes and operators, and multiple rules can be combined using logical operators:
| AND | All configured conditions must be satisfied. |
| OR | At least one of the configured conditions must be satisfied. |
To add multiple conditions for a task:
This allows administrators to create complex filtering logic to determine which users the task should apply to.
The Fallback configuration defines the action that should be executed if none of the configured rule conditions are satisfied.
To configure a fallback action:
If any of the defined conditions fail or no rule matches the user attributes, the system will apply the configured fallback group.
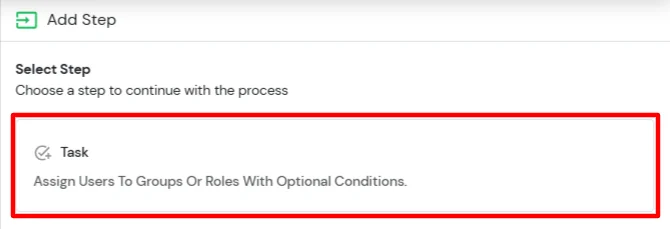
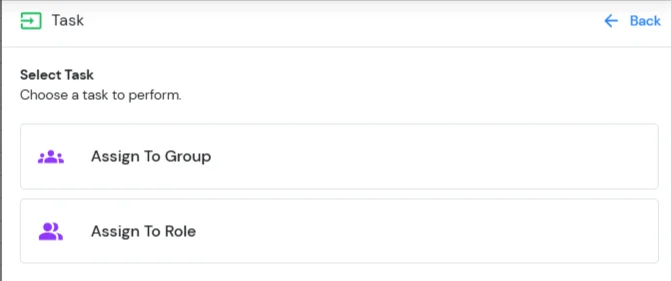
To configure multiple tasks within the workflow:
Repeat these steps to configure additional tasks as required.
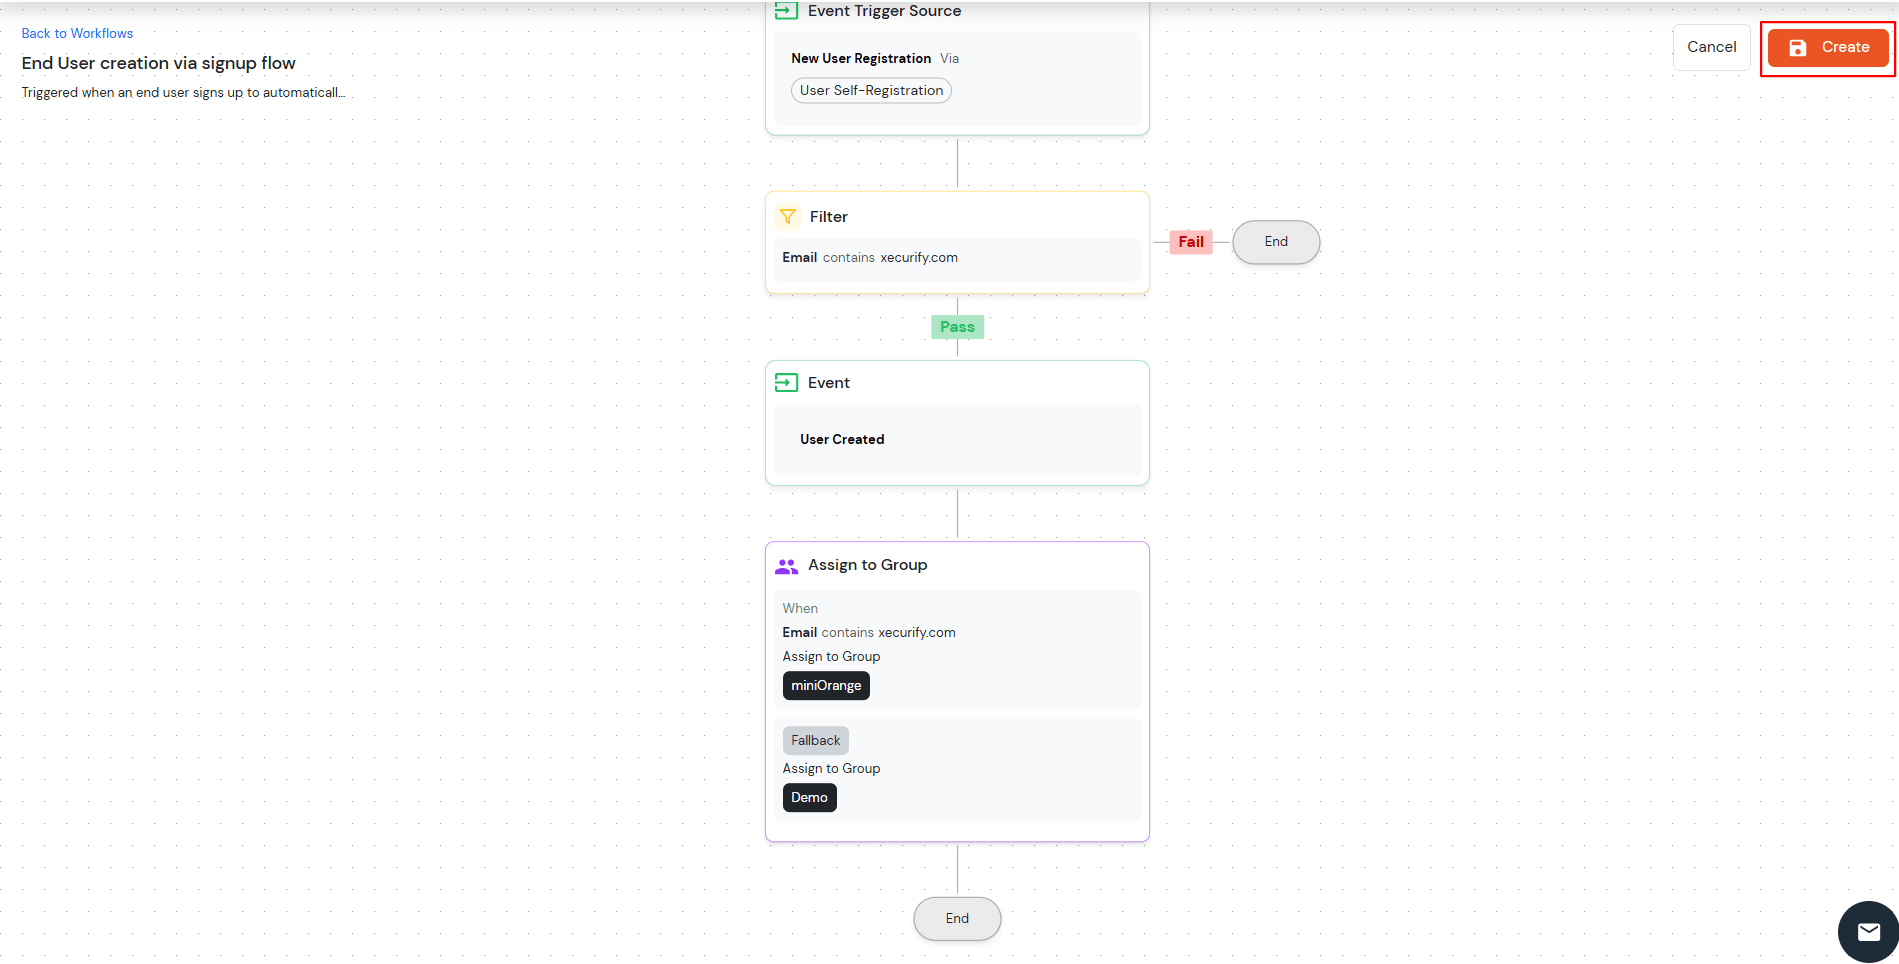
Once all tasks are configured, click the Create button to save and activate the configuration.
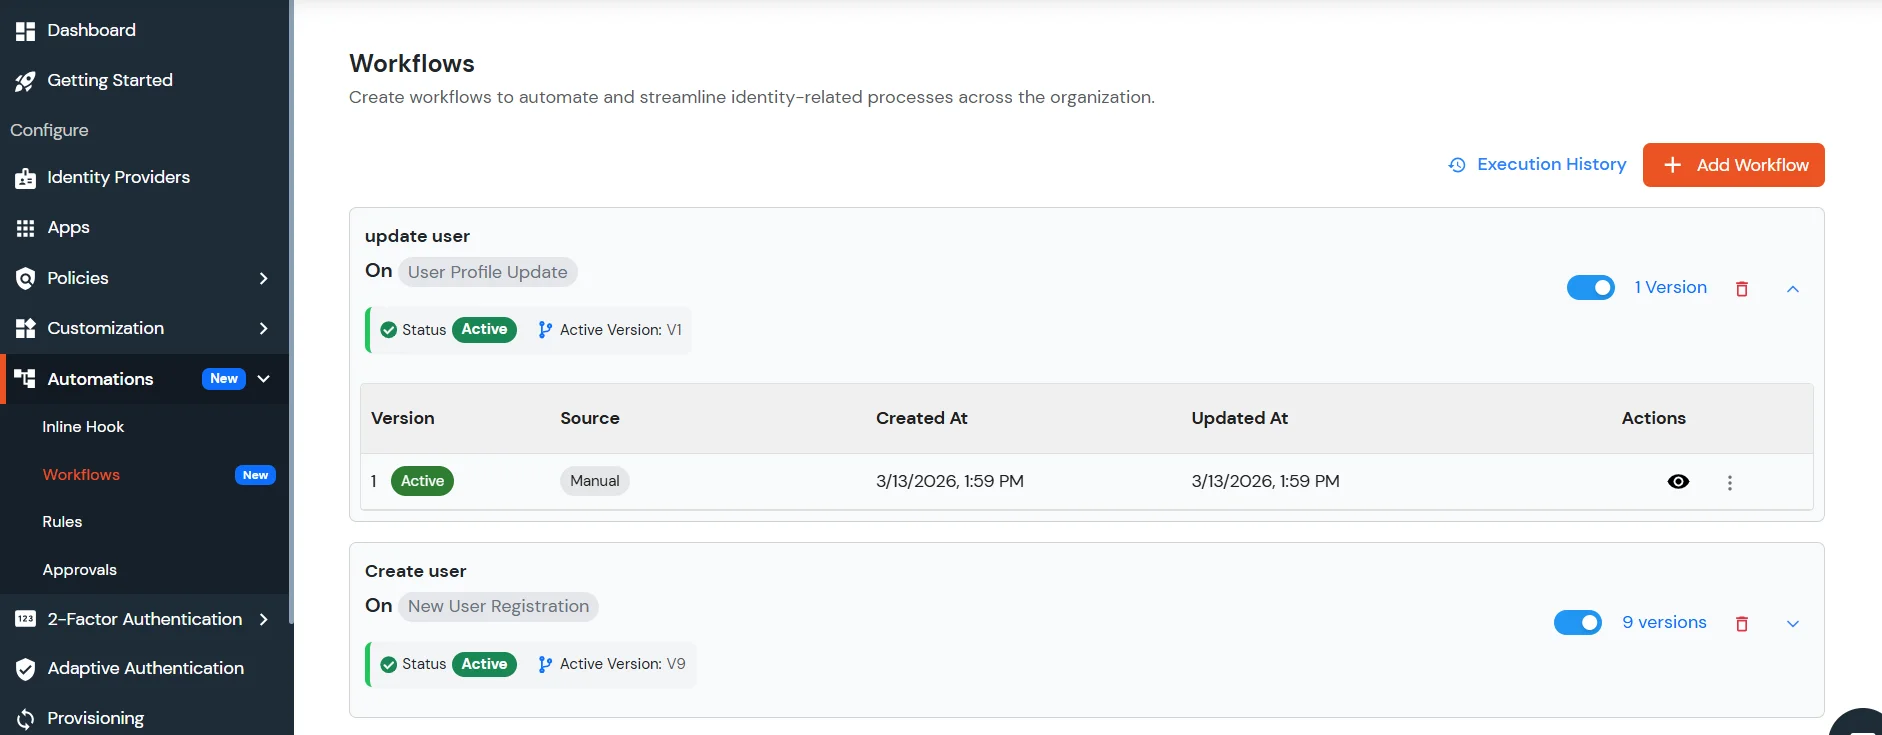
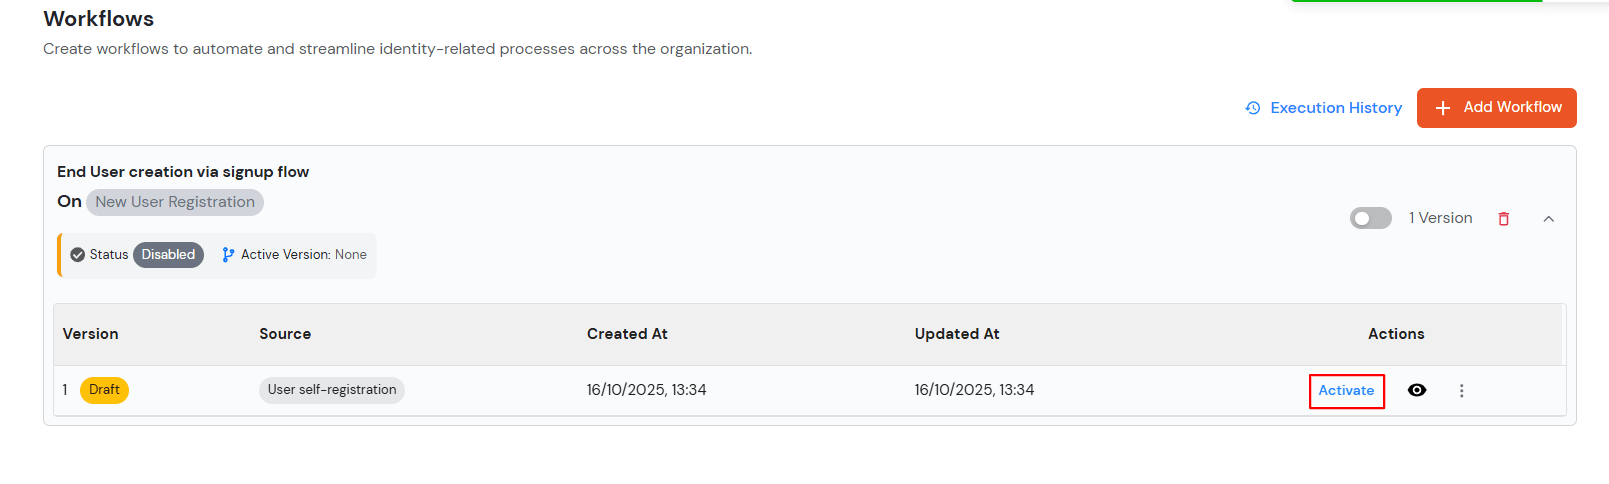
After creating the configuration, the workflow will initially be in Draft state. To enable the configured tasks:
Once the workflow is active, the configured tasks will be executed based on the defined conditions.
To verify the configuration:
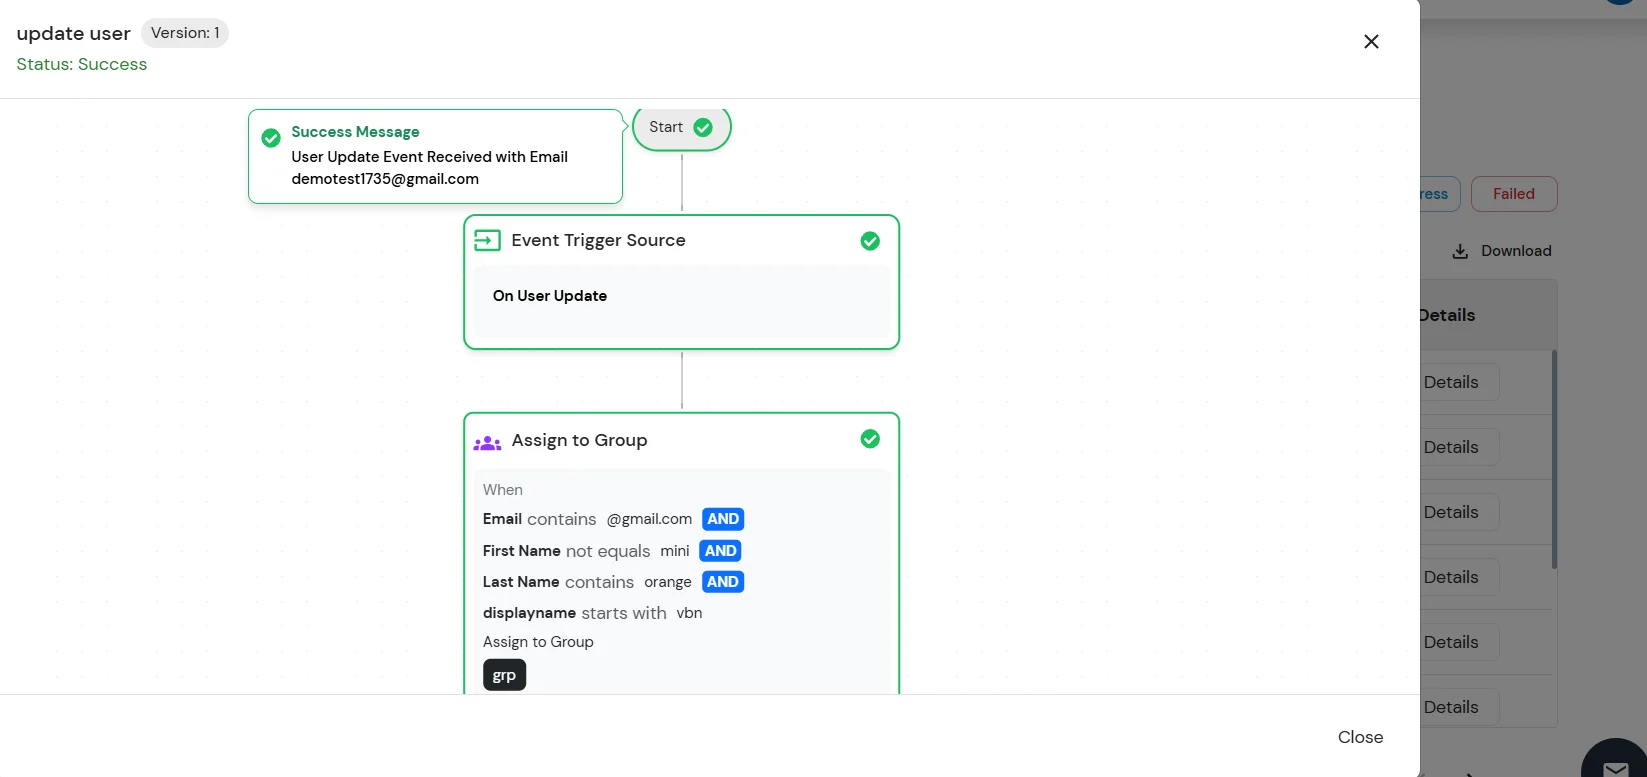
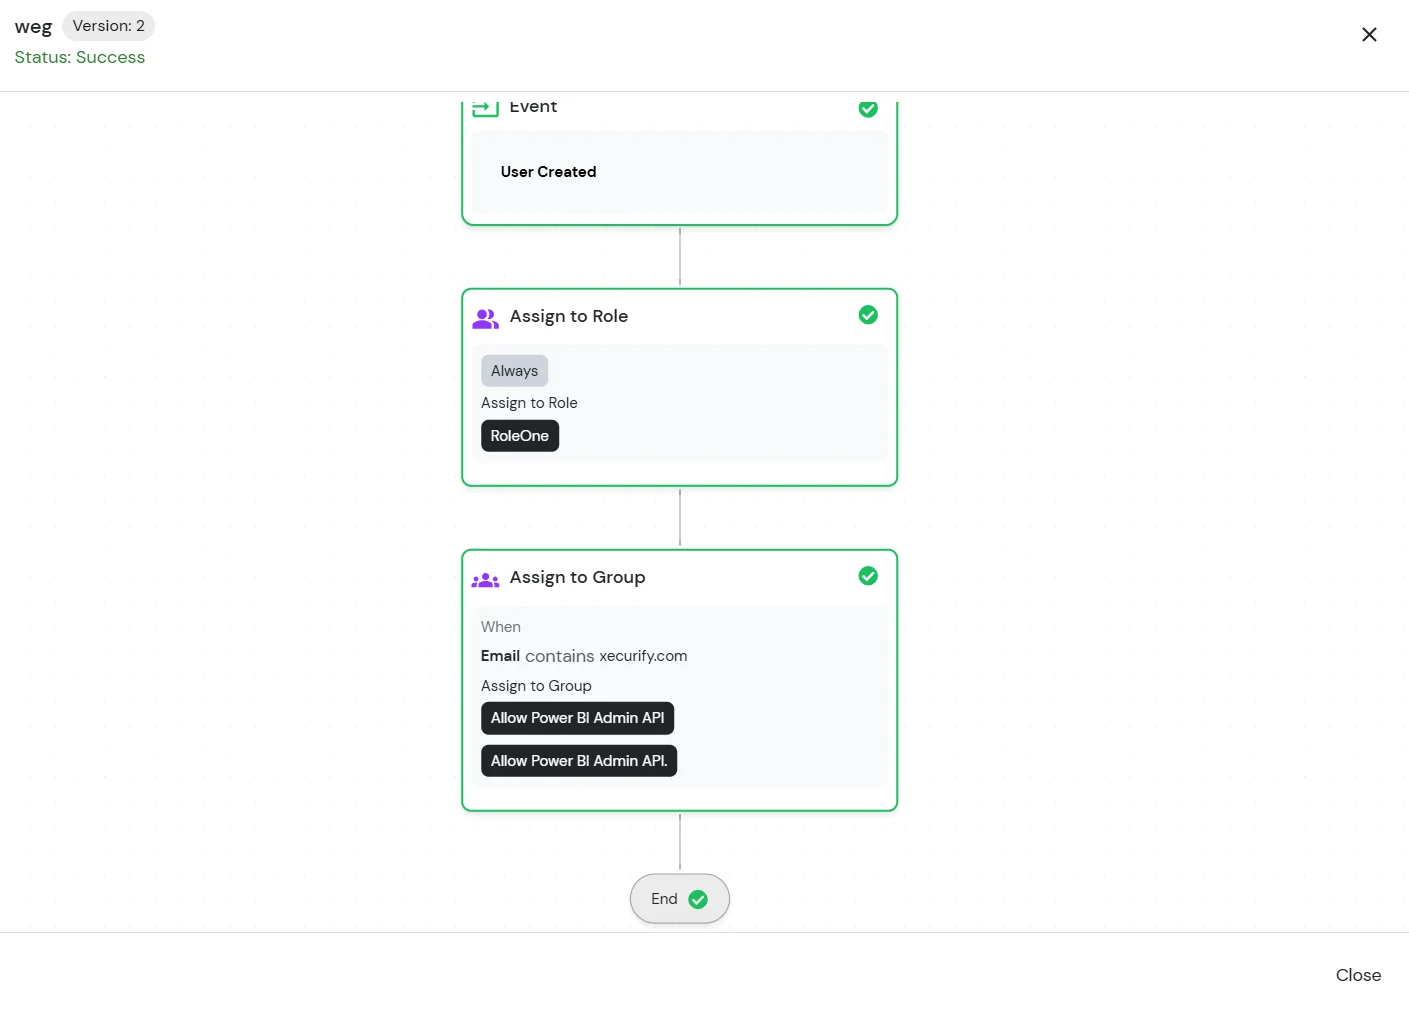
Upon saving the user profile, the system will evaluate the configured rules and execute the corresponding tasks (such as assigning or unassigning roles or groups) based on the defined conditions and fallback configuration.
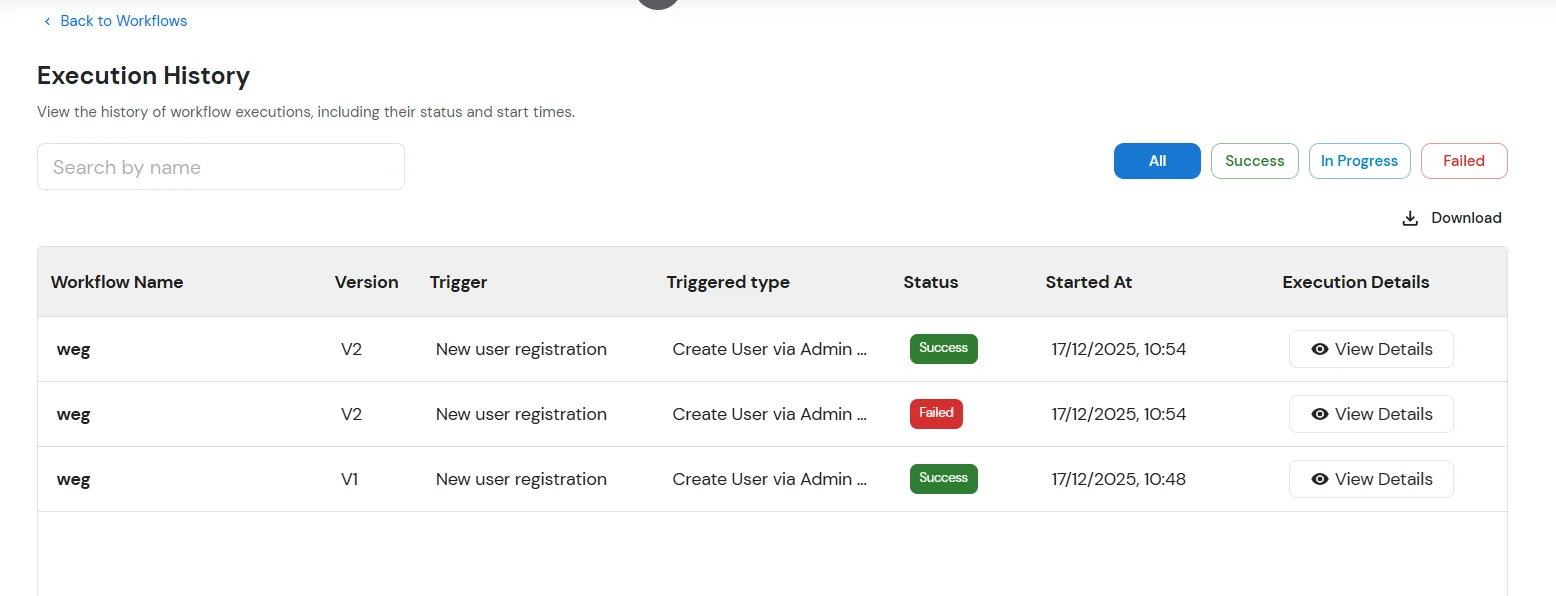
To review the execution details of the configured workflow:
The Execution History page displays the list of workflow executions along with their status and details. From here, administrators can monitor whether the configured tasks were executed successfully and review the outcomes for each user update operation.
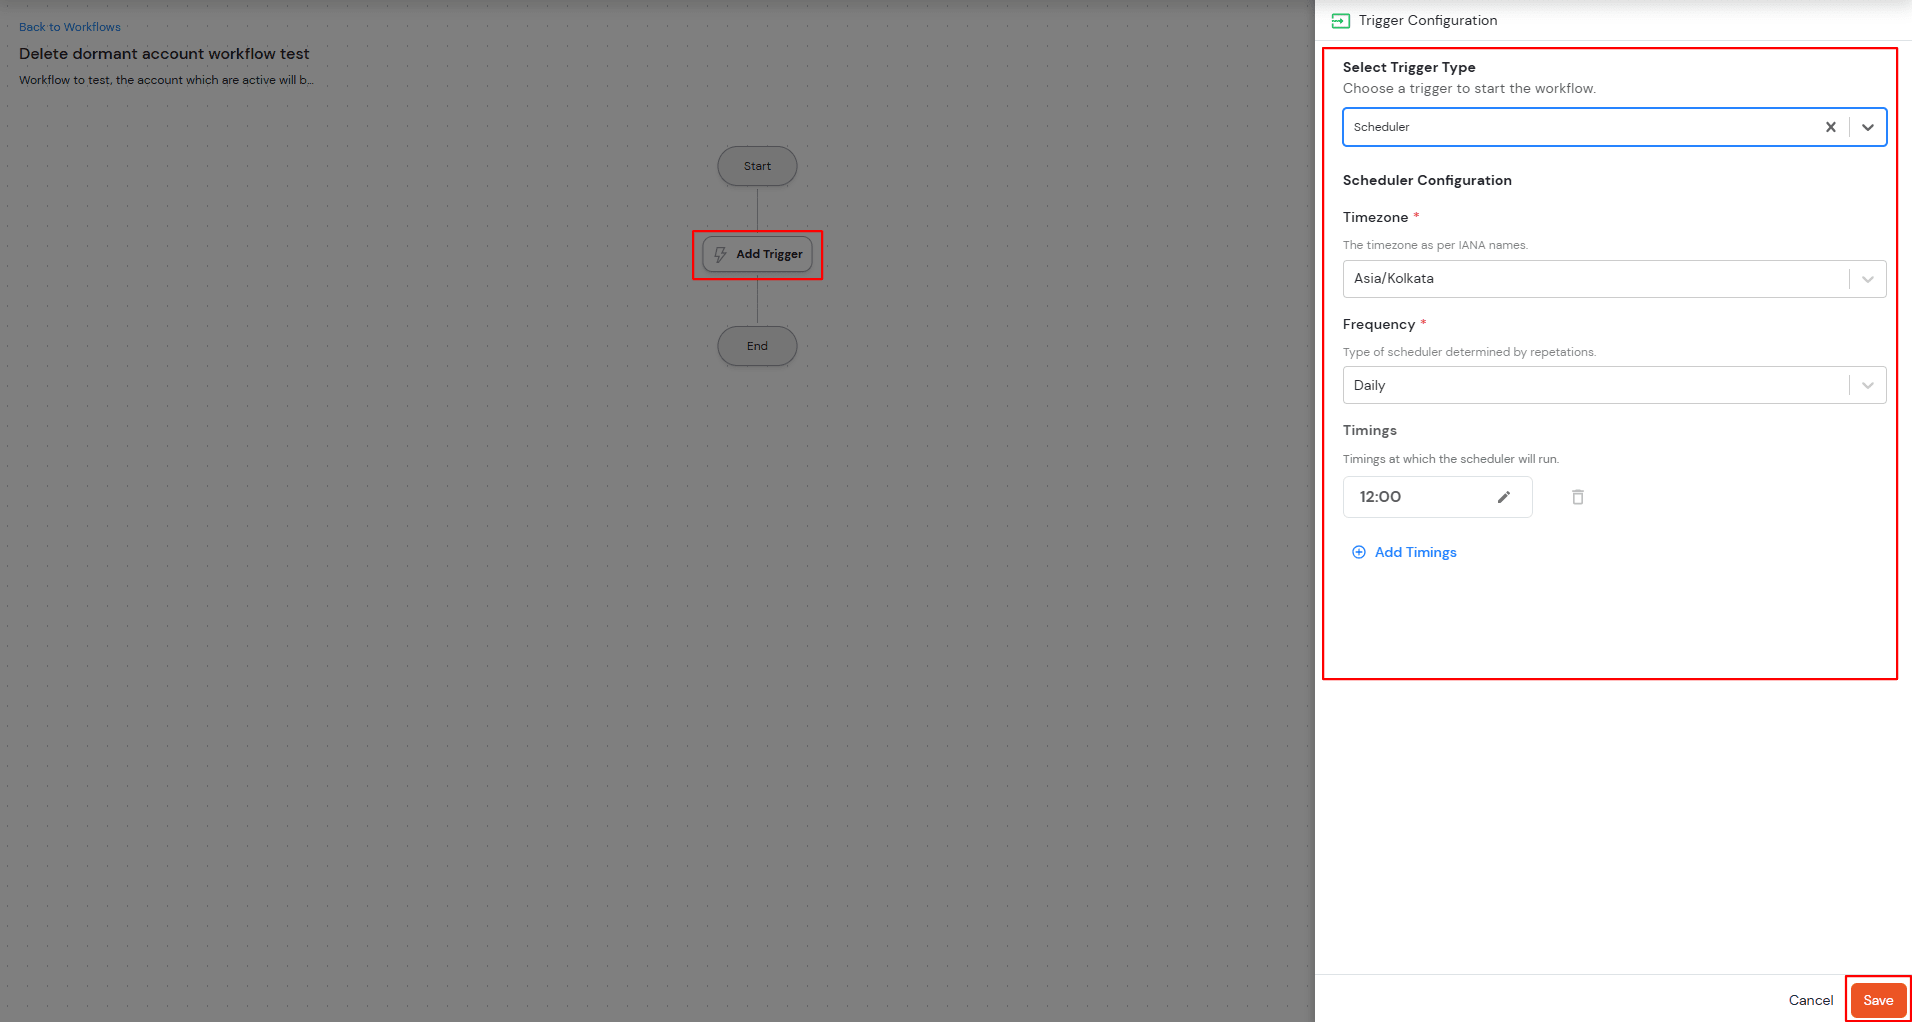
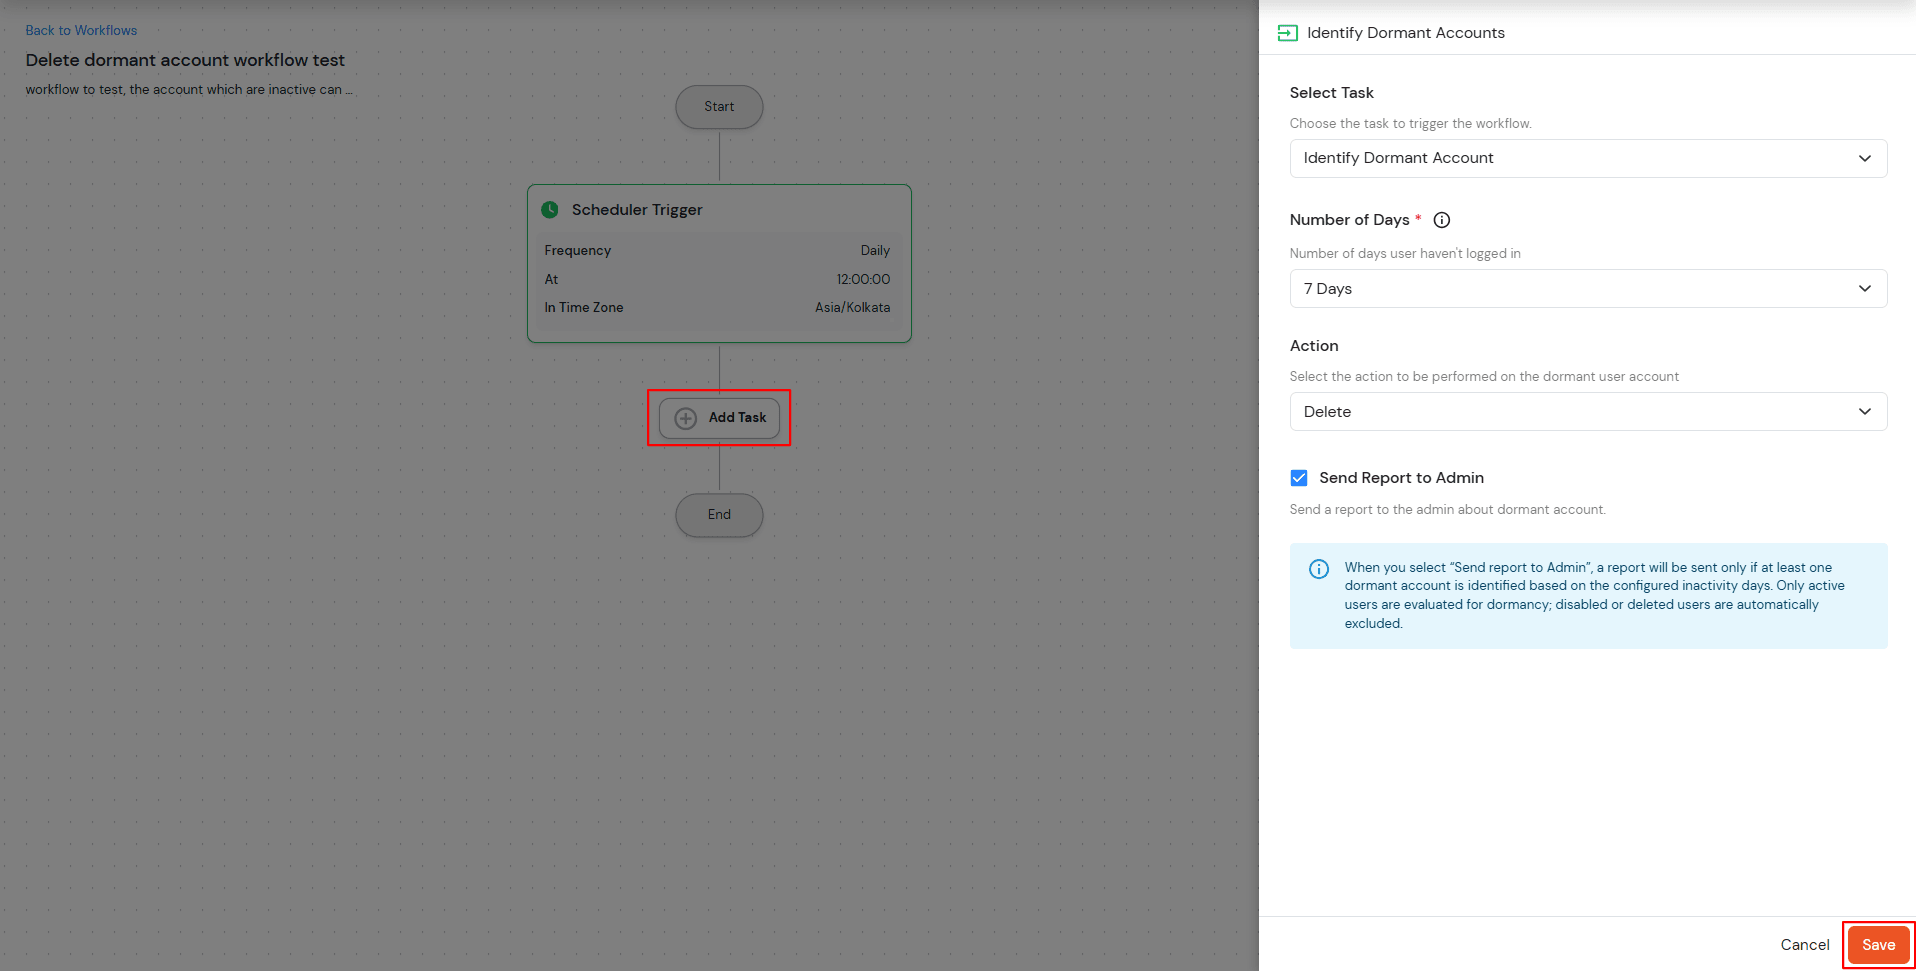
This scheduler-based workflow automatically identifies and manages dormant user accounts based on configurable inactivity periods.
| Number of Days | Select dormancy period (7, 15, 30, 45, 60, 90, 180 days, or Custom) |
| Custom Number of Days | Enter specific day count when "Custom" is selected |
| Action |
Choose account handling method: |
| Send Report to Admin | Available for Delete/Disable actions |
| Notify User | Available only for the Disable action to inform users |

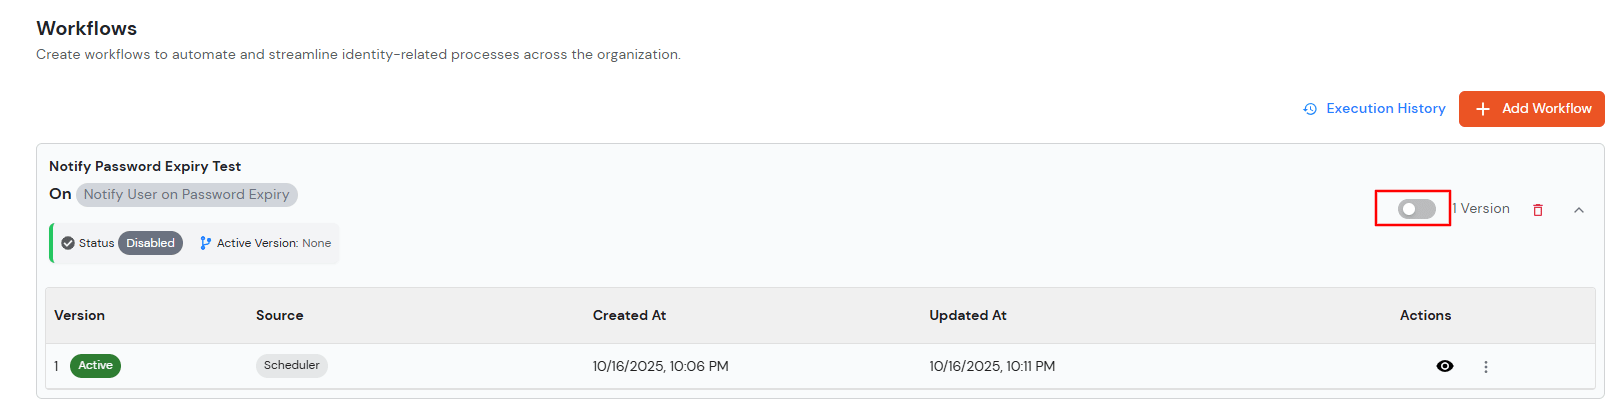
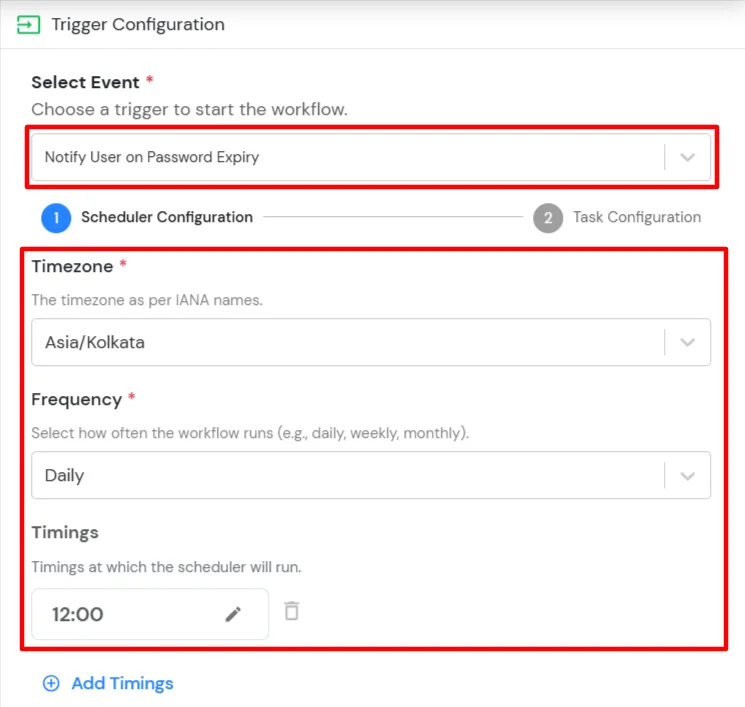
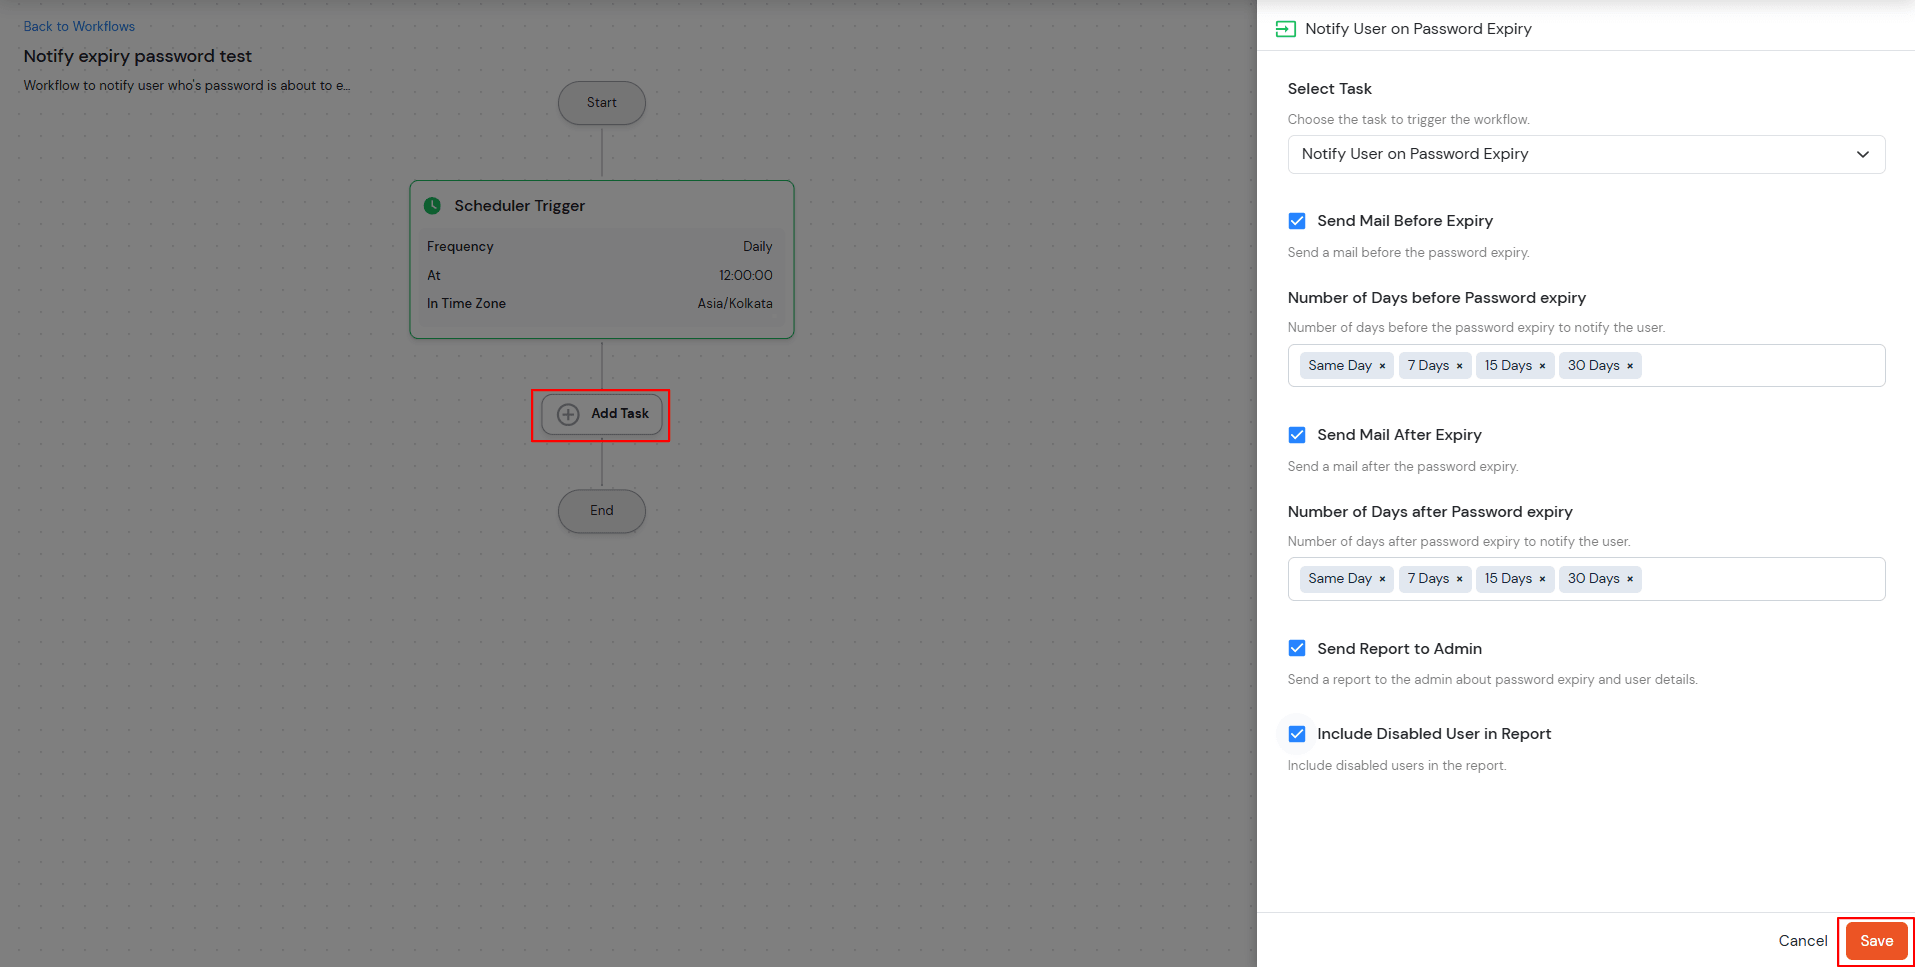
This scheduler-based workflow manages password expiry notifications for users and administrators with customizable timing options.

The User Update Workflow is triggered whenever a user's profile or associated configuration is modified through various system flows. These updates can be performed by either End Users, Administrators, or through API operations.
The workflow may be triggered through the following scenarios:
The workflow can also be triggered during JIT (Just-In-Time) user updates initiated through integrated applications or identity providers. Supported integrations include:
Different Applications and Identity Providers
In all the above cases, the system evaluates the configured workflow conditions and executes the corresponding tasks such as assigning or unassigning roles and groups based on the defined rules and fallback configuration.
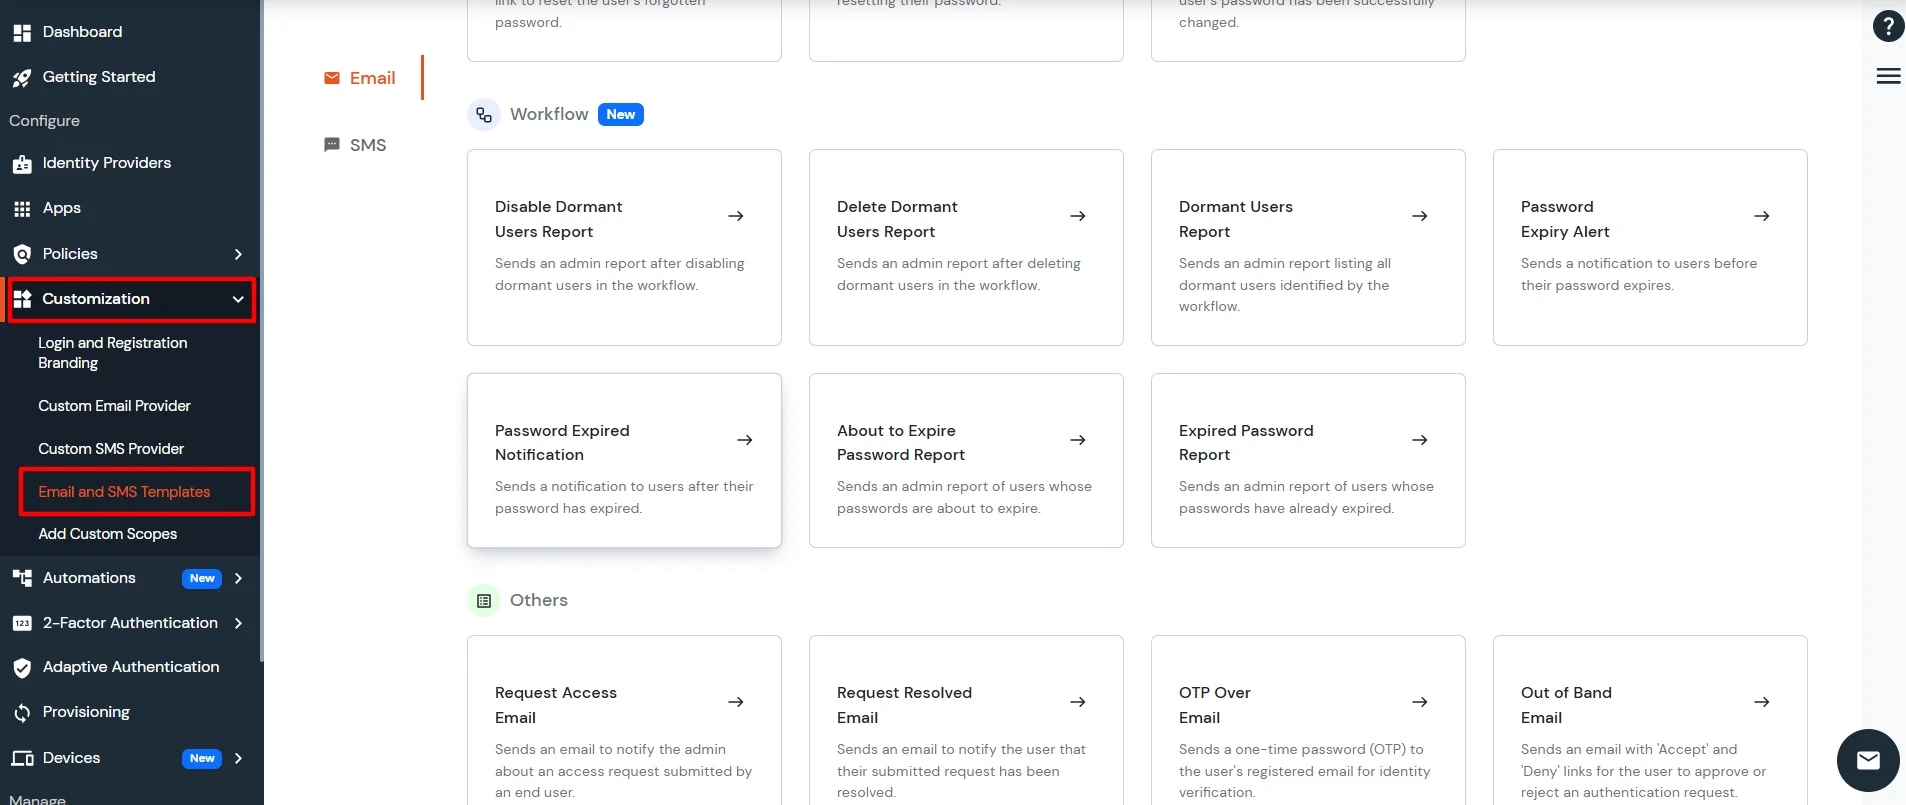
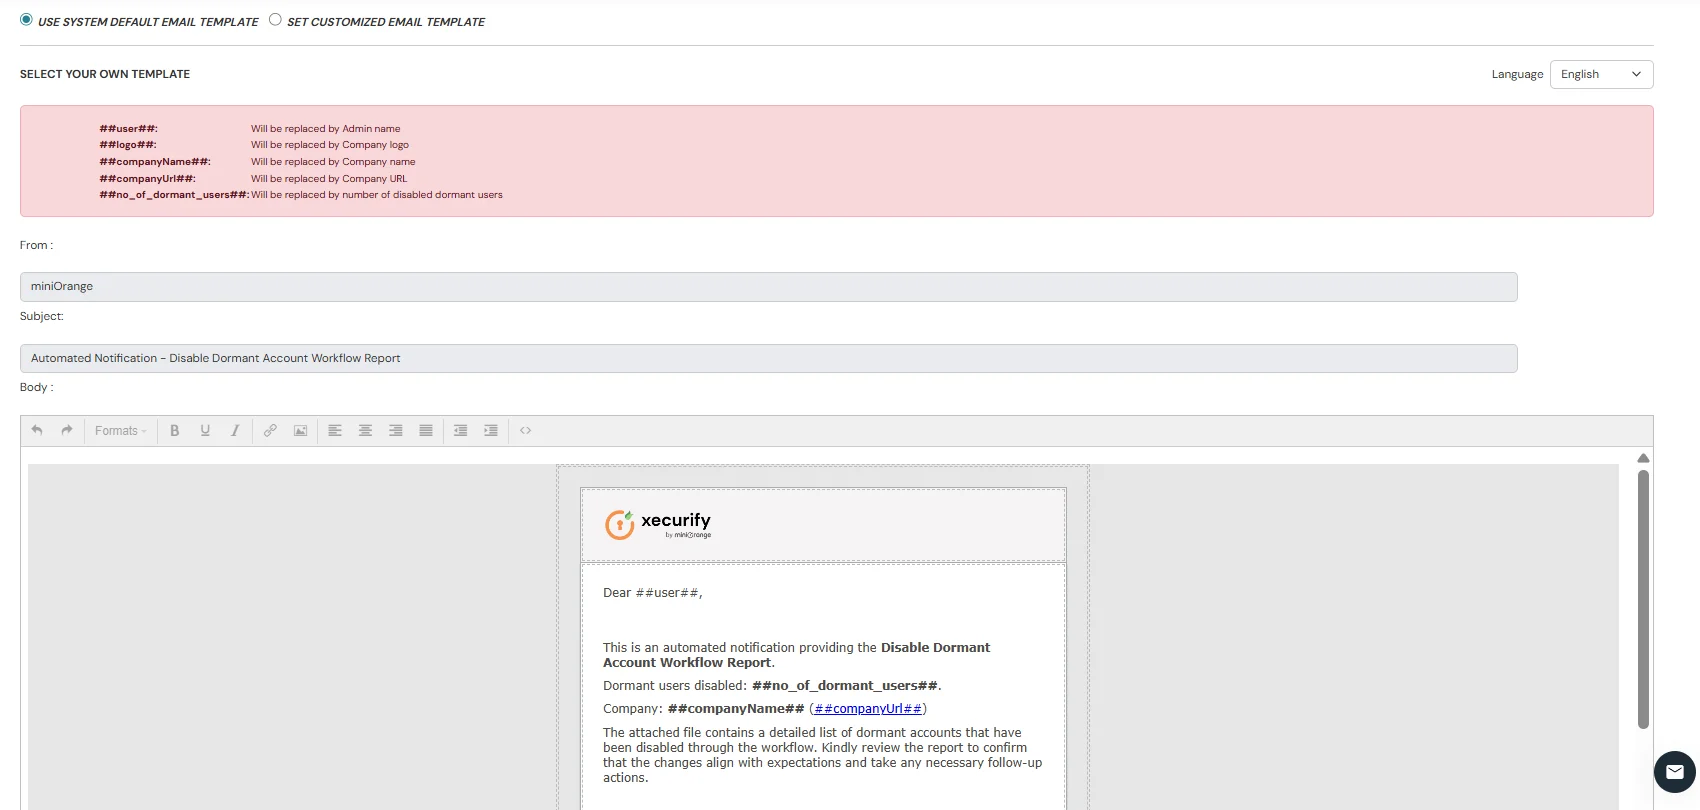
Send an Admin Report after disabling dormant users in the workflow.
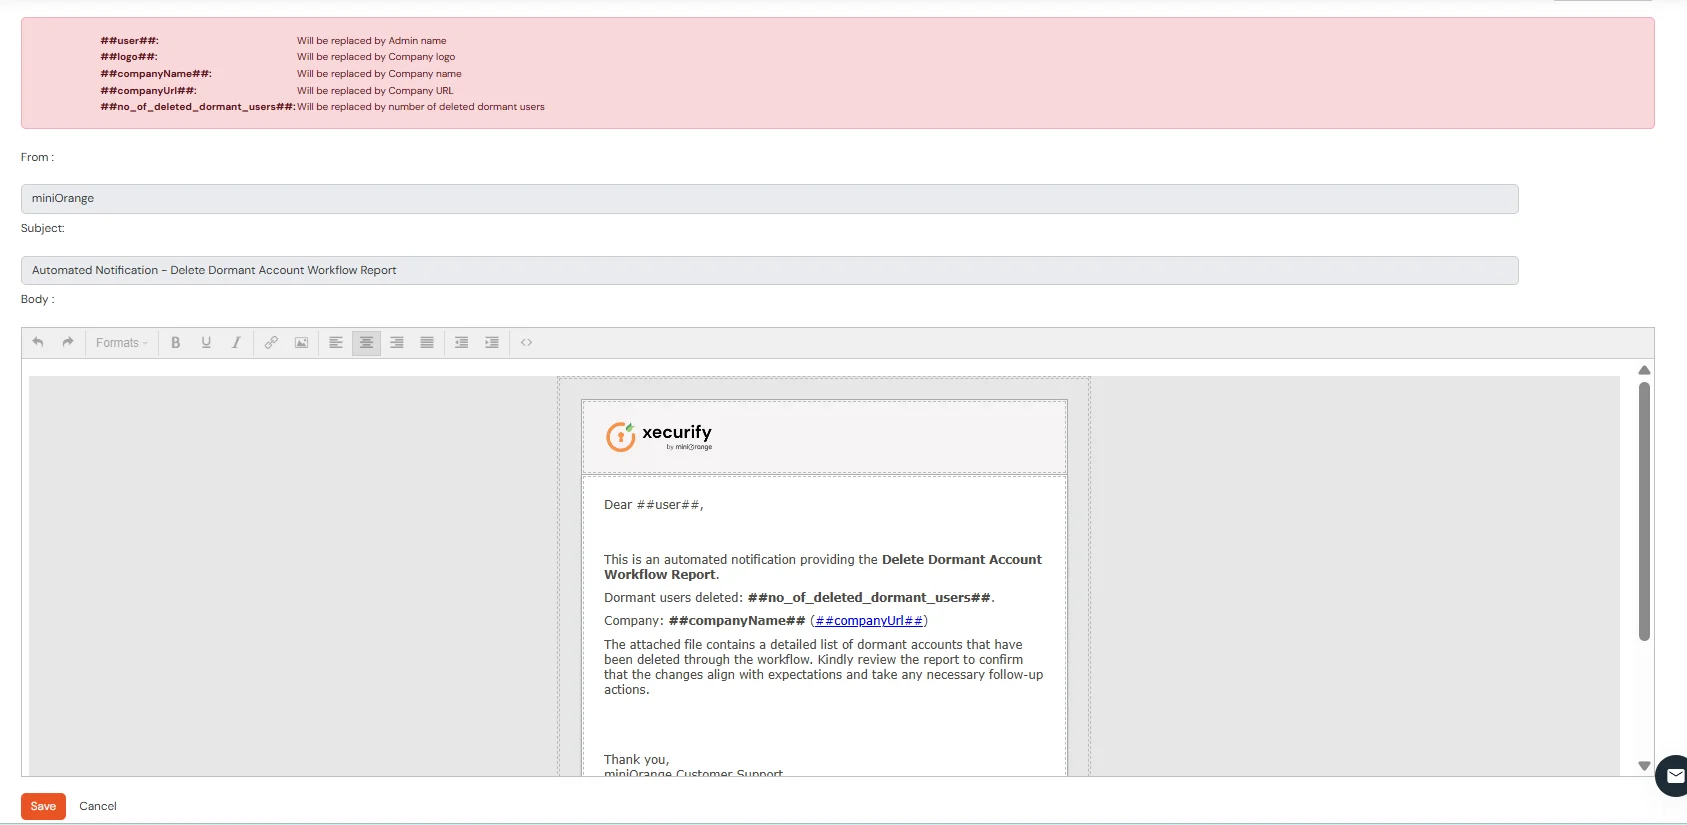
Send an Admin Report after deleting dormant users in the workflow.
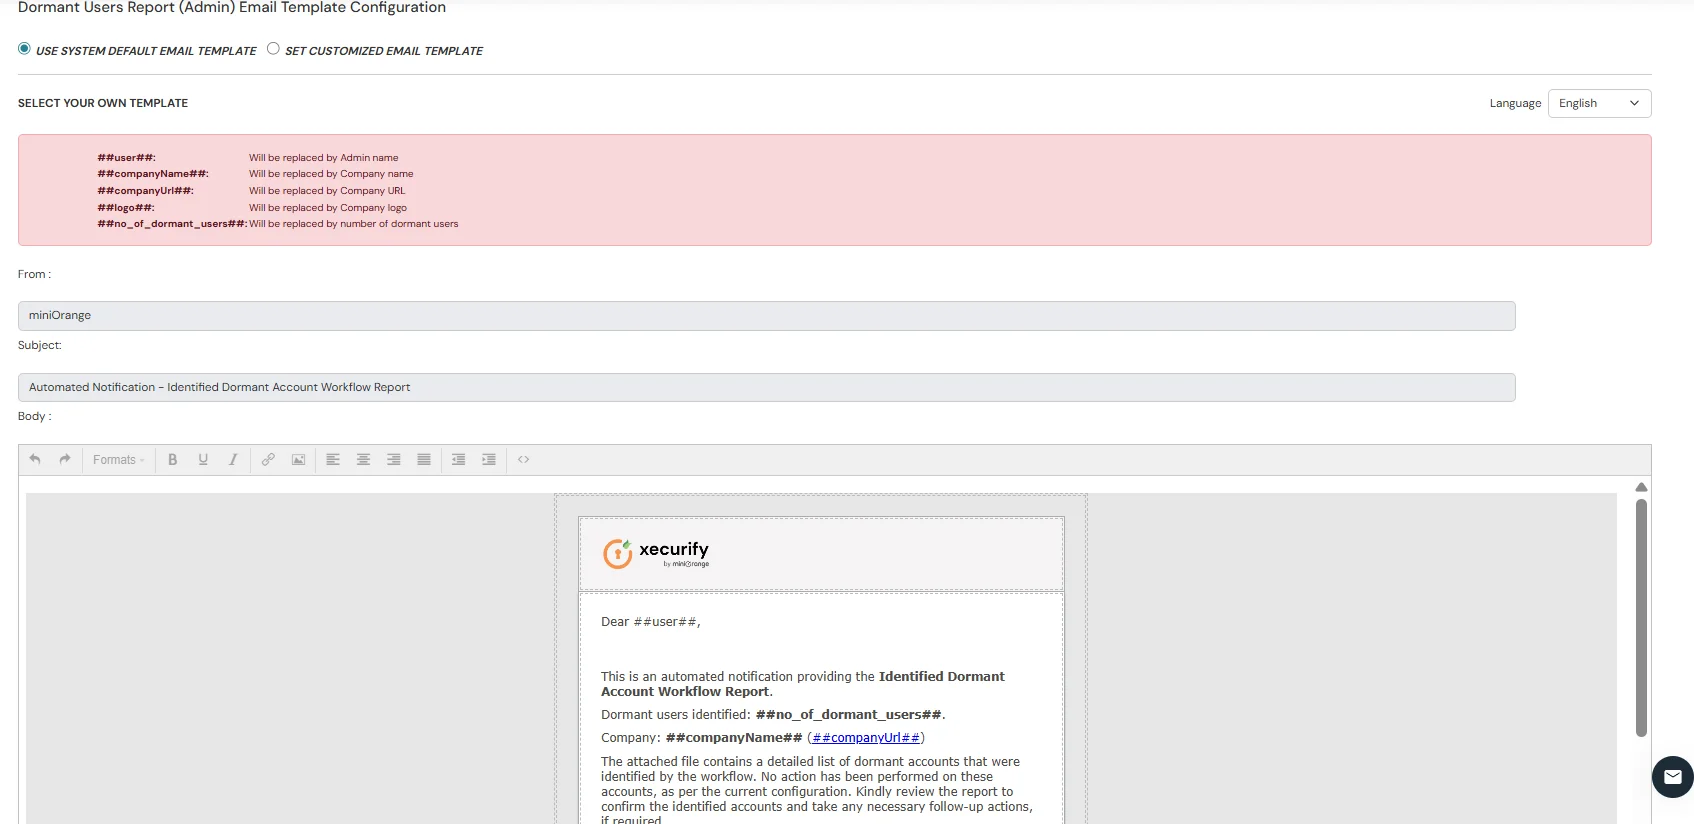
Send an Admin Report listing all dormant users identified by the workflow.
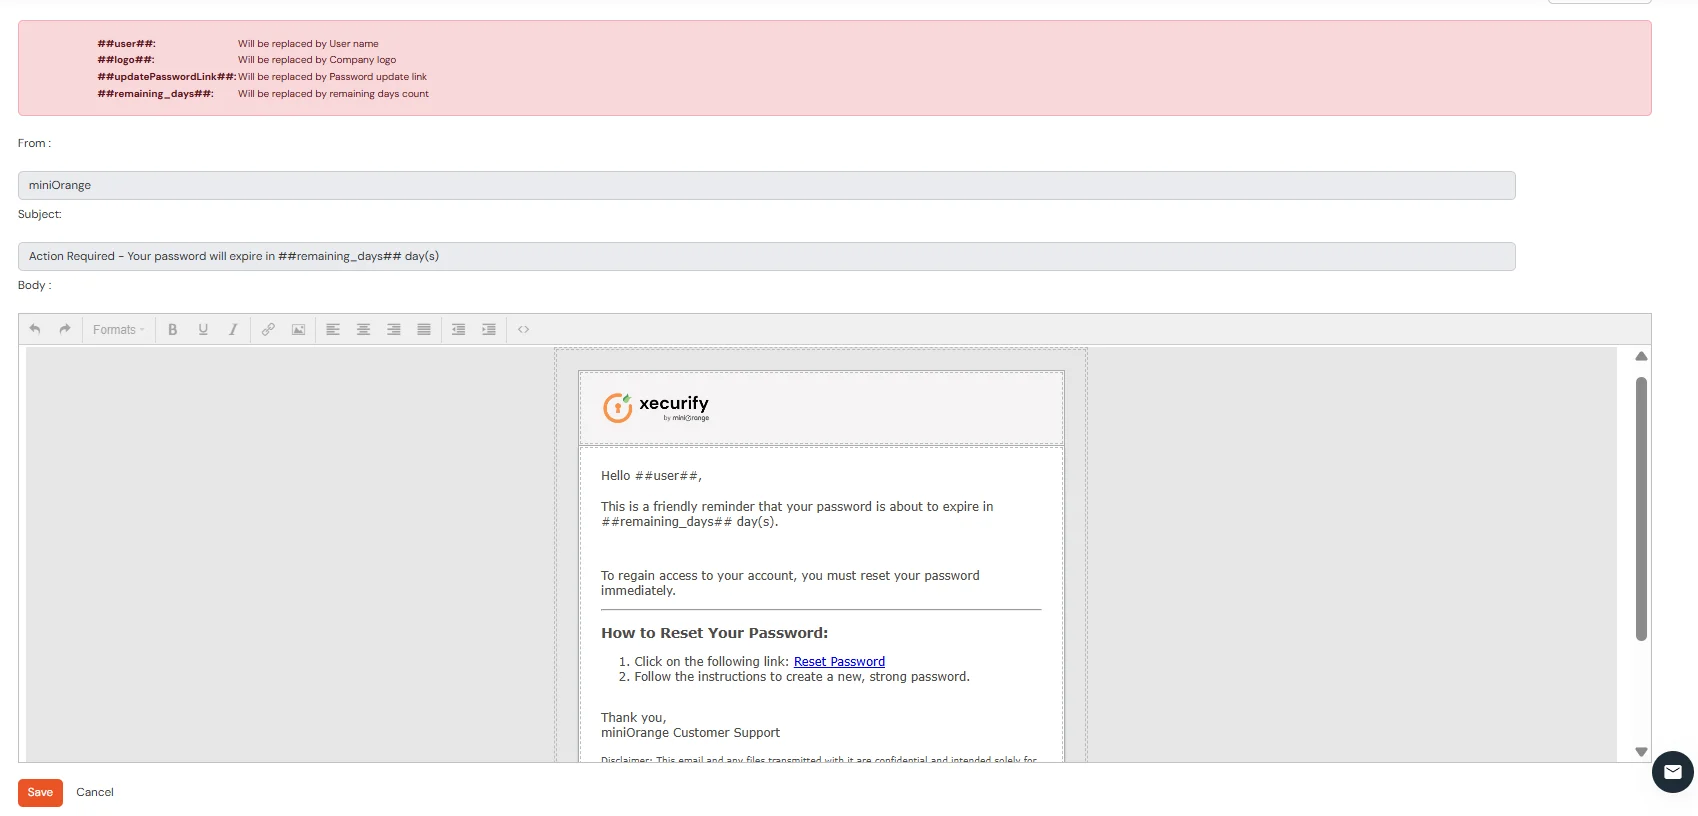
Send a notification to users before their password expiry.
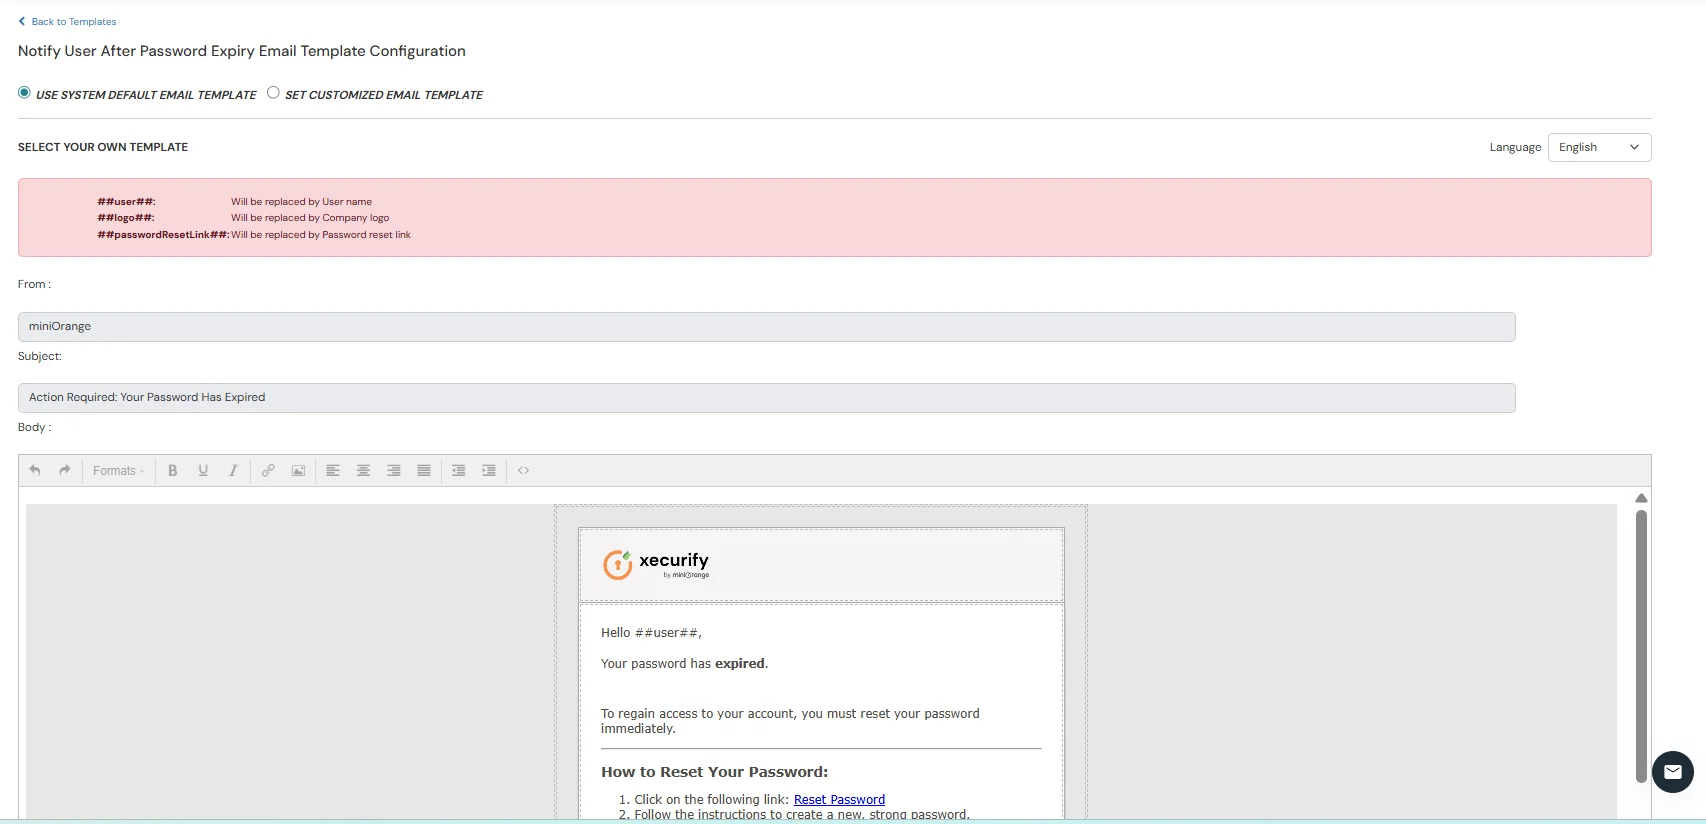
Send a notification to users after their password expiry.
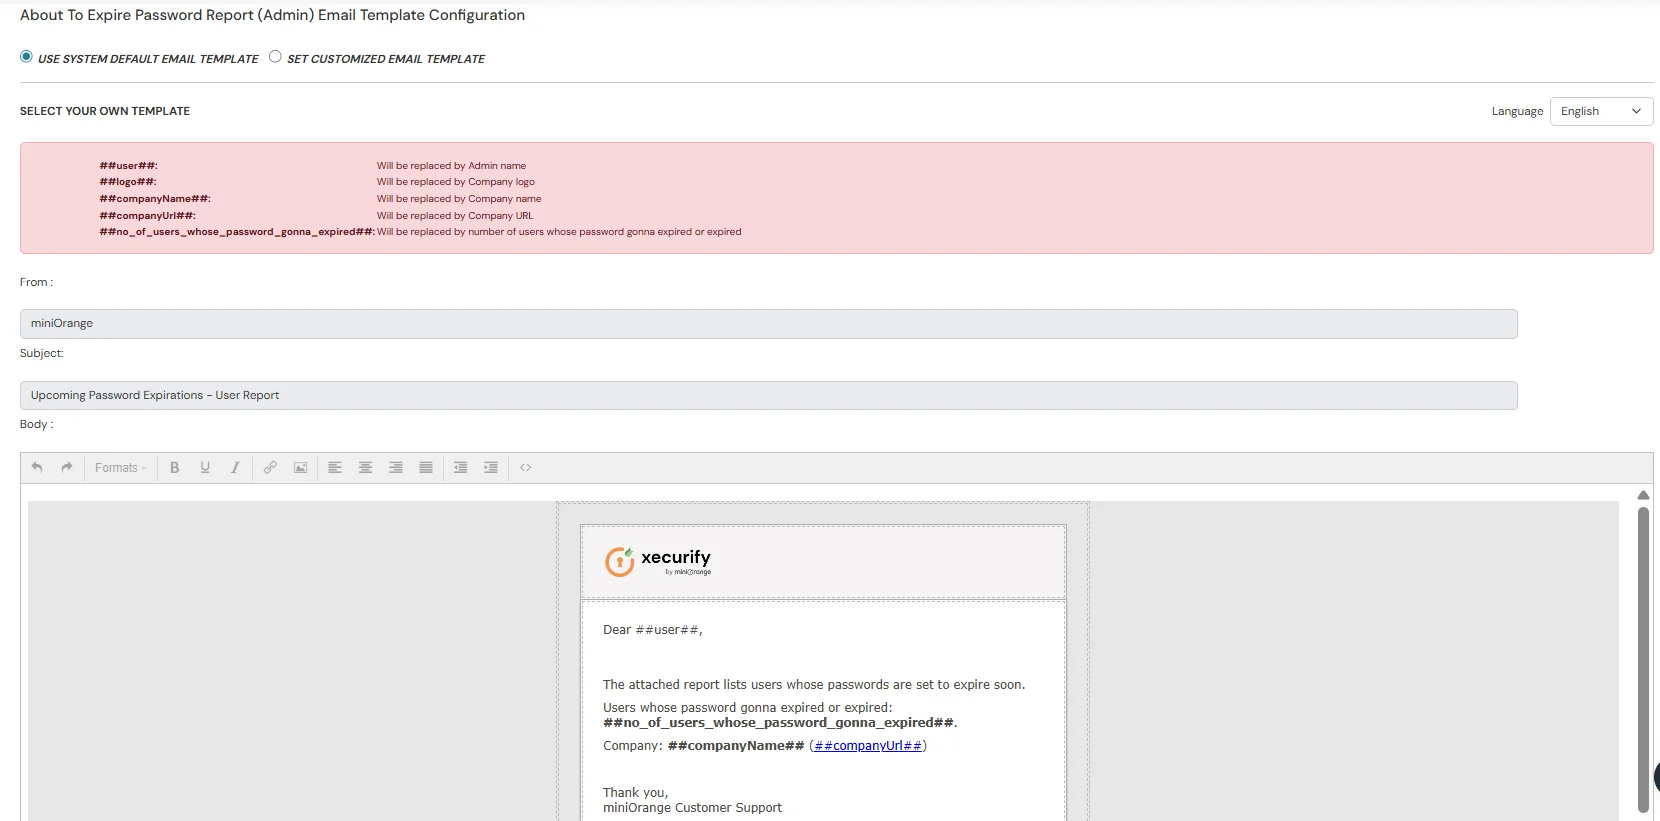
Send an admin report of users whose passwords are about to expire.
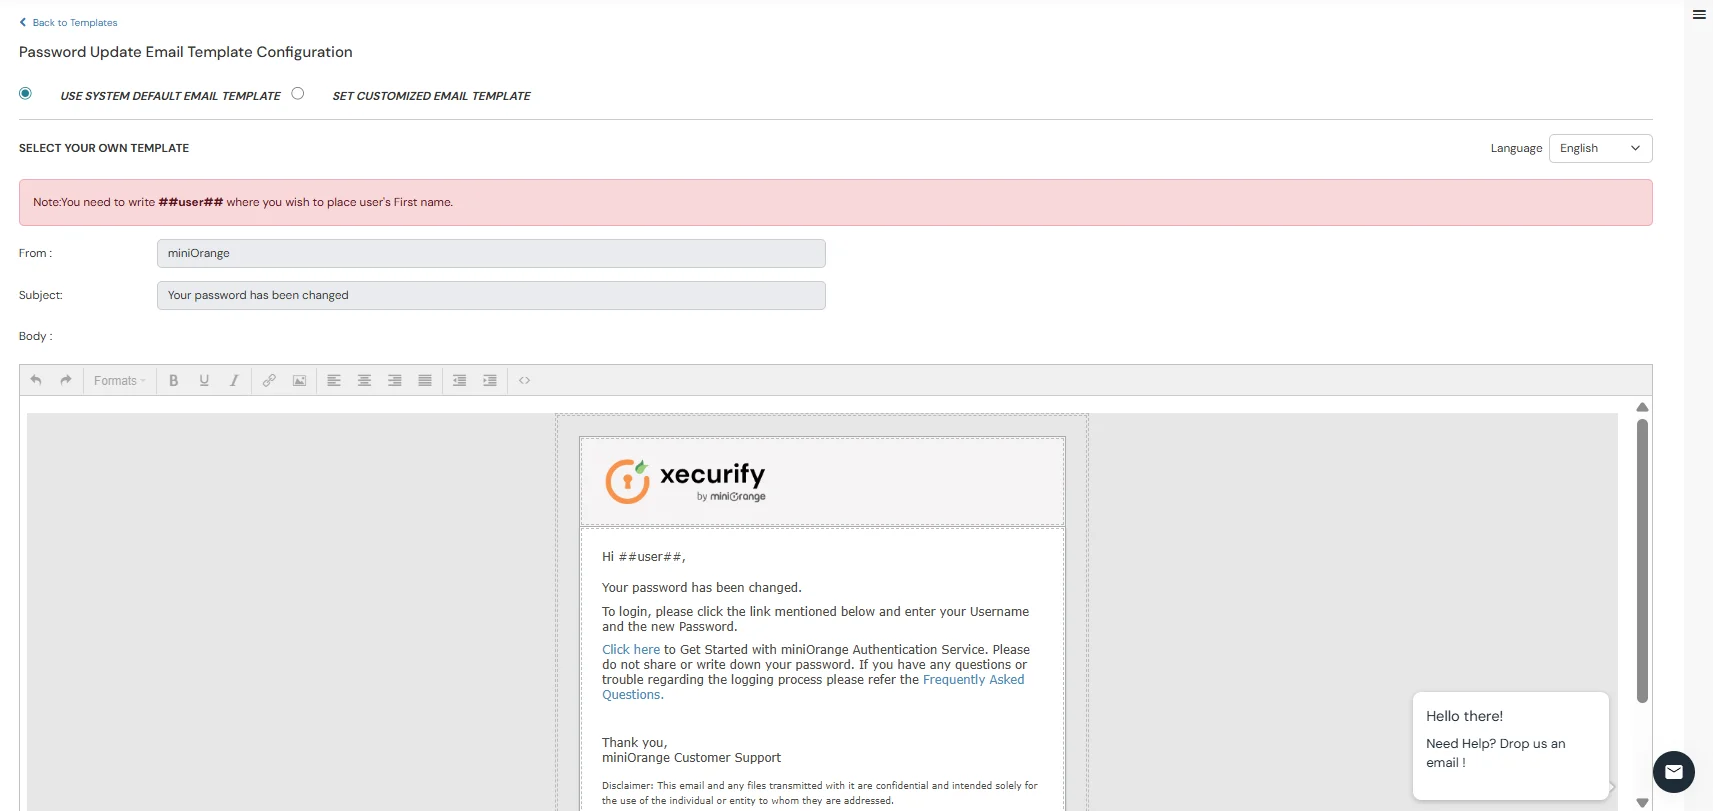
Send a confirmation email that the user's password has been successfully changed.
We have introduced a full auditing system for admin actions.
Every admin activity is now logged, including who performed the action, what action was taken, on which resource, and when it happened. The audit logs also show whether the action succeeded or failed.
Admins can view these logs in a new Audit Reports page and apply filters for easier searching.