Scheduler
This guide explains how to configure schedulers in miniOrange to automate user, group, and membership imports. It covers creating schedulers, assigning import jobs, and monitoring execution history for scheduled tasks.
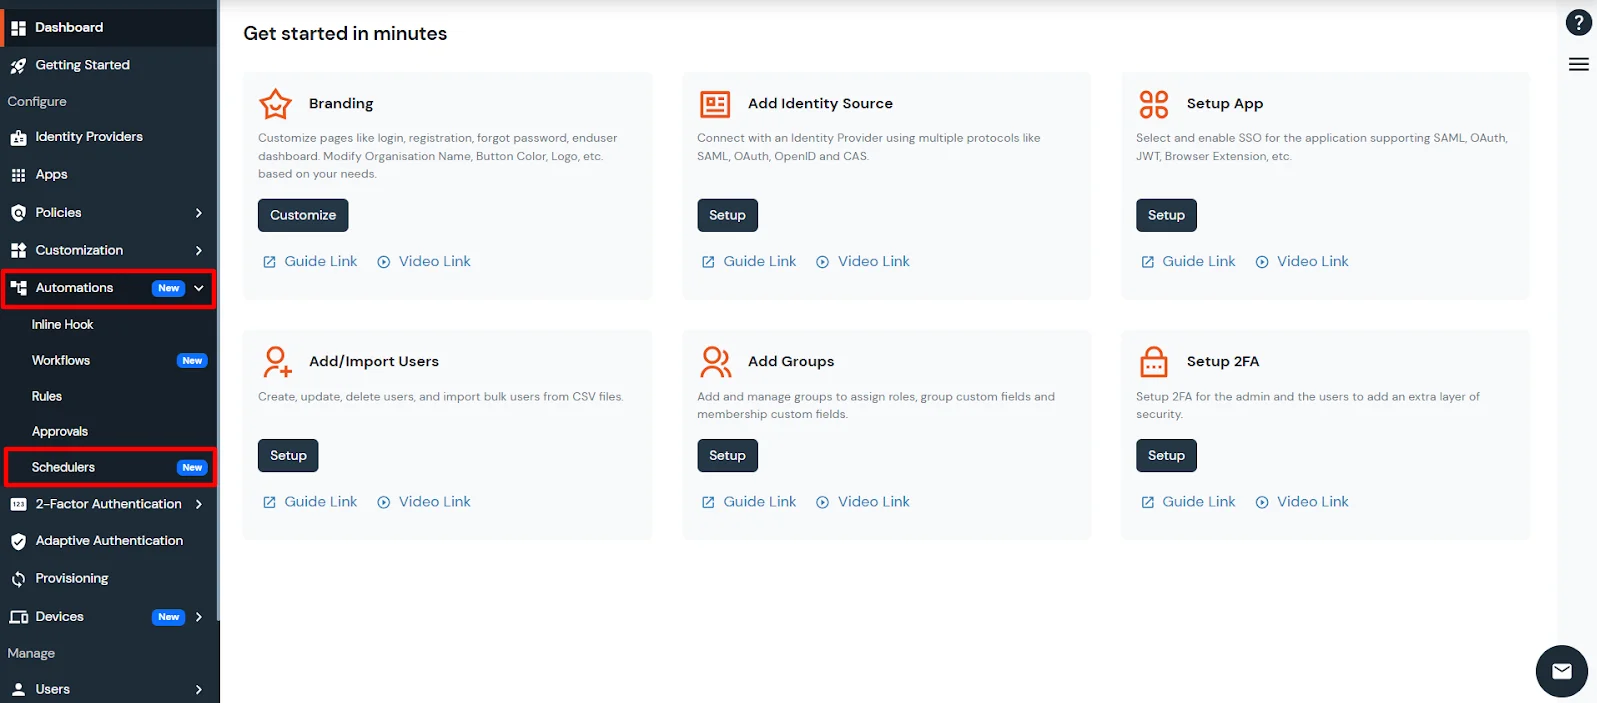
- Navigate to the Automations tab and open the Schedulers section.
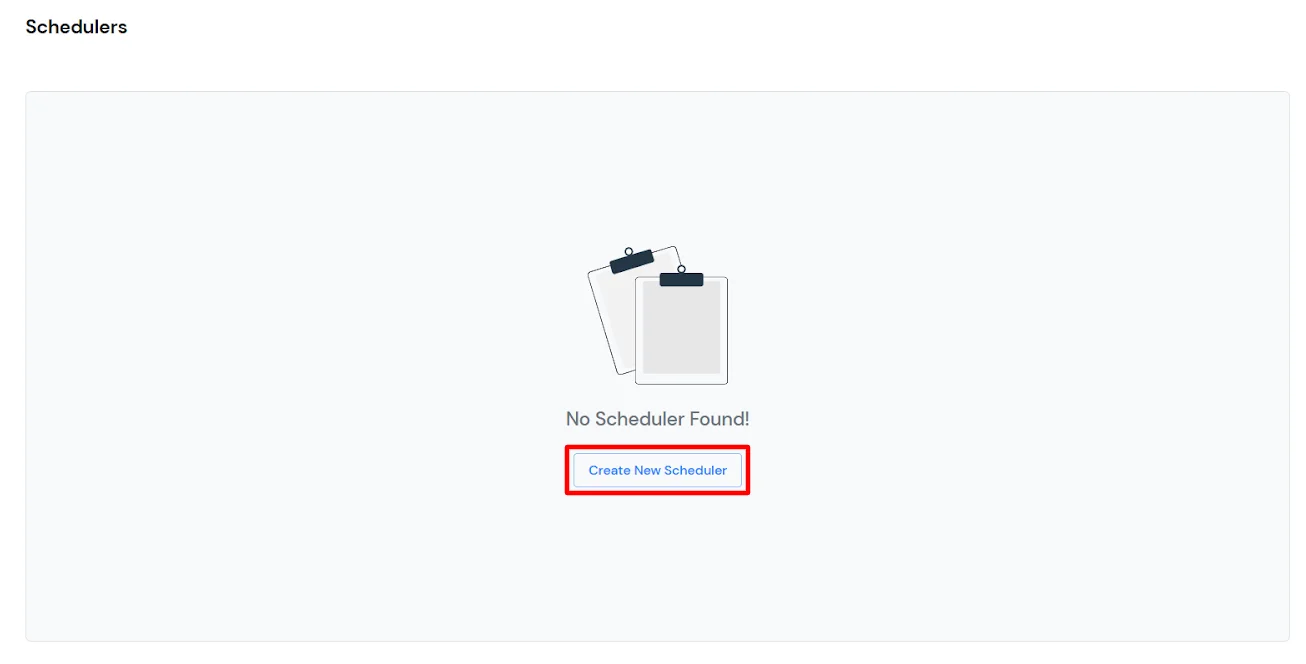
- To create a new scheduler, click on the Create New Scheduler button.
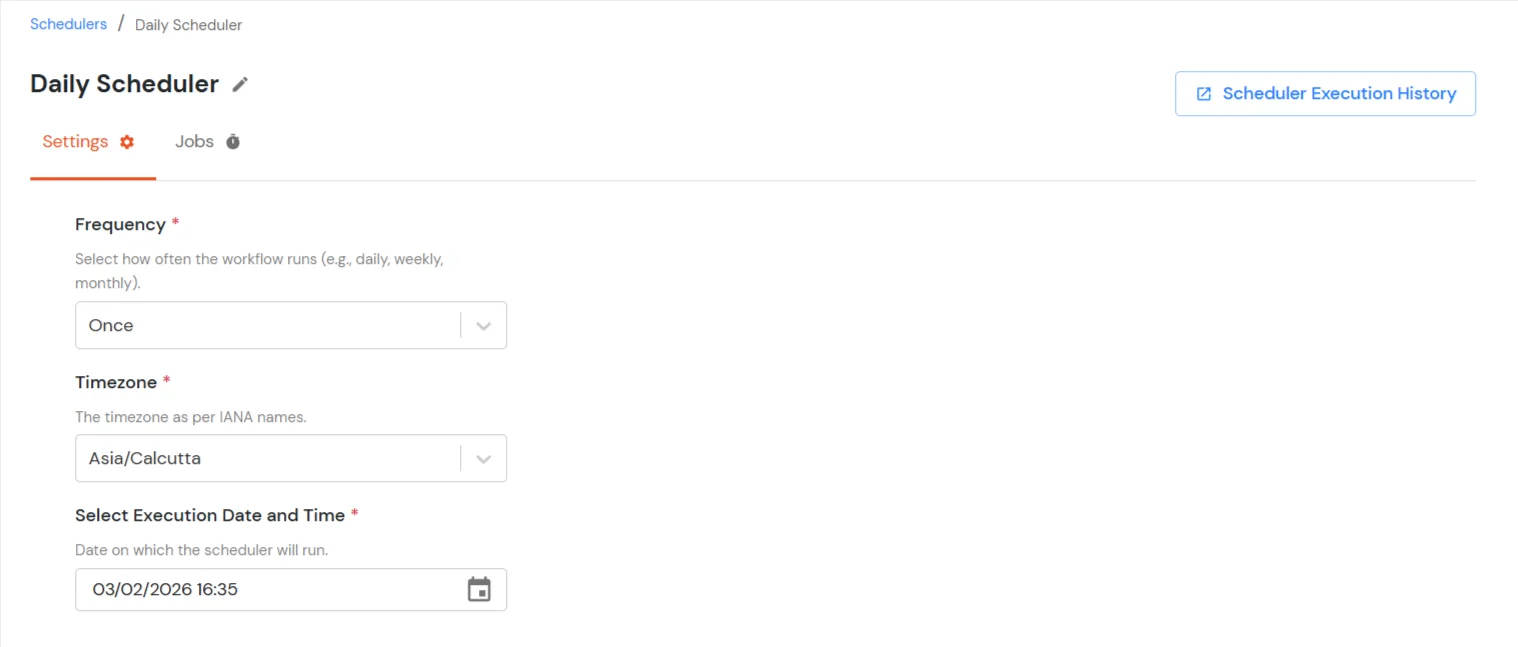
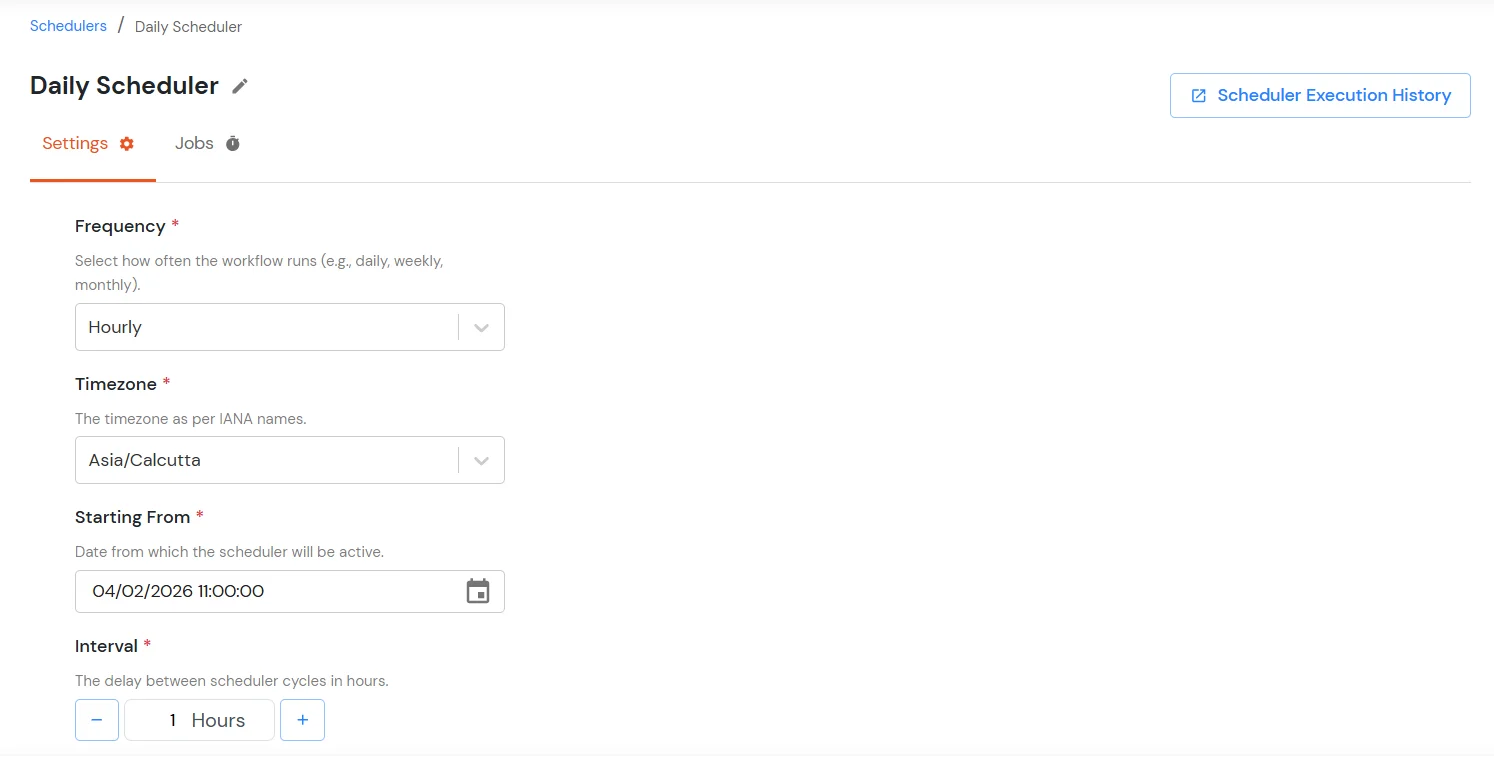
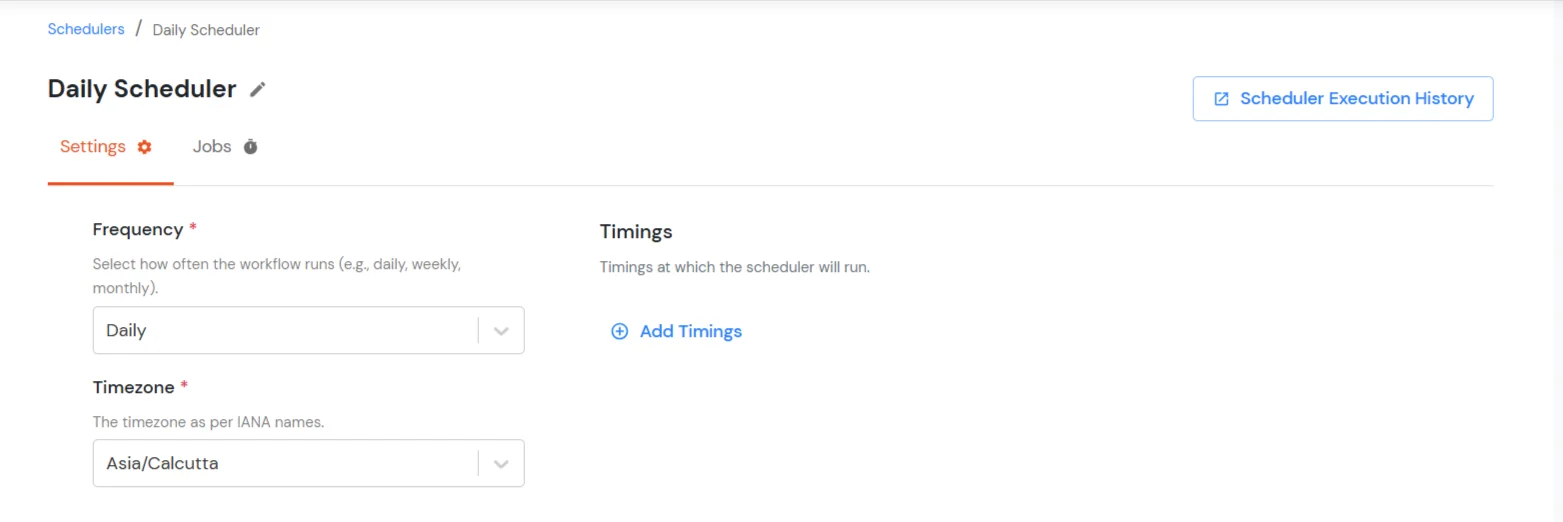
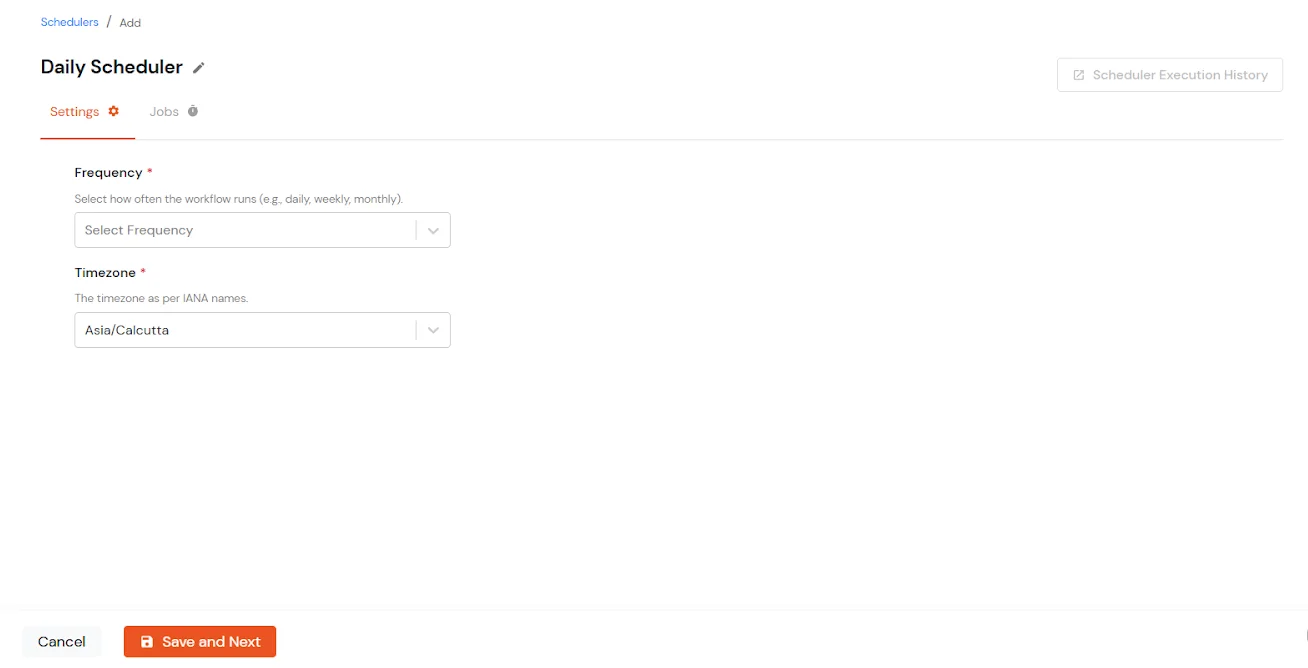
- Configure the Scheduler Settings by choosing the frequency:
- Once: Runs the scheduler once at the selected date and time.
- Hourly: Runs the scheduler repeatedly at a defined hourly interval, starting from the selected start time.
- Daily: Runs the scheduler every day at the configured time(s).
- Weekly: Runs the scheduler on selected days of the week at the specified time(s)

- Monthly: Runs the scheduler monthly, either on the last day of every month or on selected custom dates.

- Specify the associated scheduling details and select the Timezone in which the scheduler should run.
- Once configured, click Save and Next.
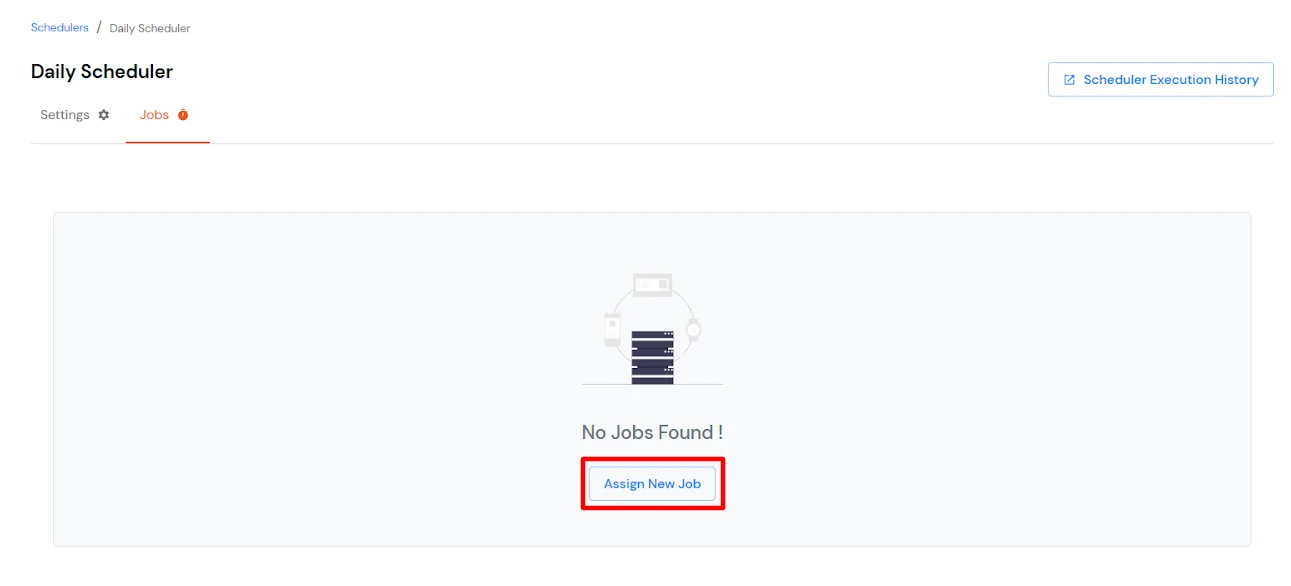
- The next step is to configure the Jobs and assign it to the scheduler that was created by clicking on the Assign New Job button.
- Select the application from which the import should be performed.
- Job Type: Select the type of job to be scheduled, such as importing data from an application into miniOrange.
- Application Name: Choose the application from which users, groups, or assignments will be imported.
- Job Tasks: Select the specific tasks to execute, such as importing users, importing groups, or syncing user-group assignments. Choose the required job task:
- User Import Request: Imports user accounts from the selected application into miniOrange based on the configured provisioning settings.
- Group Import Request: Imports groups from the selected application into miniOrange.
- Sync User Group Assignments: Synchronizes user-to-group memberships between the selected application and miniOrange.
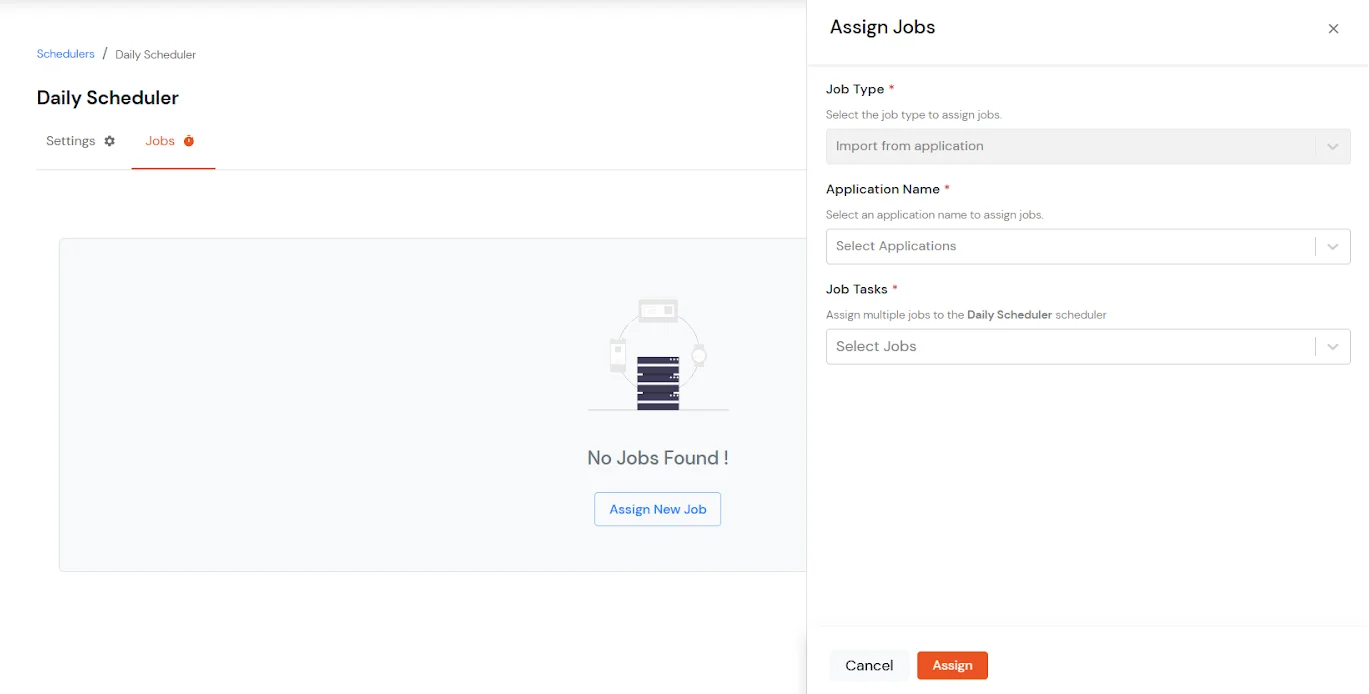
- Then click on the Assign button.
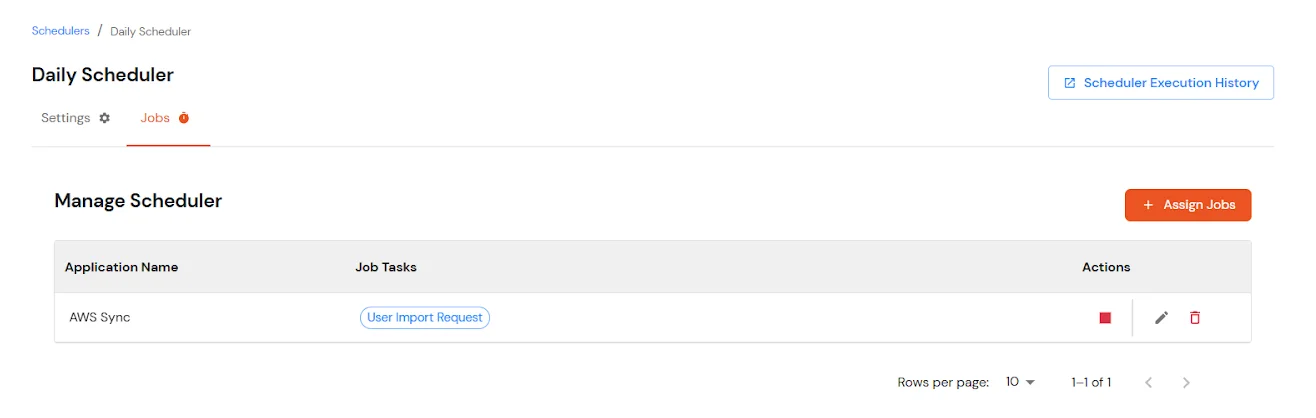
Note: If you want to import data from multiple applications, you can assign multiple jobs to the same scheduler.
- Once the configuration is complete, automated scheduled imports will run based on the defined schedule.
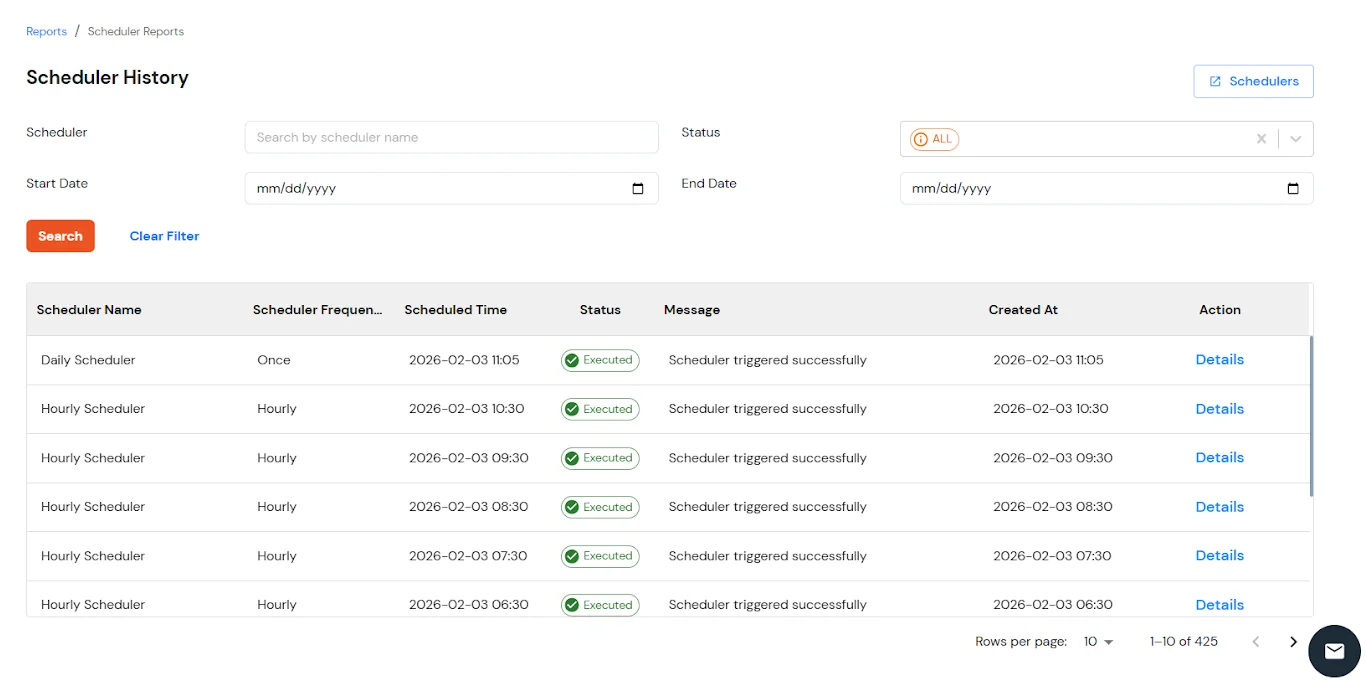
- To view scheduler execution details, navigate to Reports from the left menu and scroll down to check the Scheduler History.
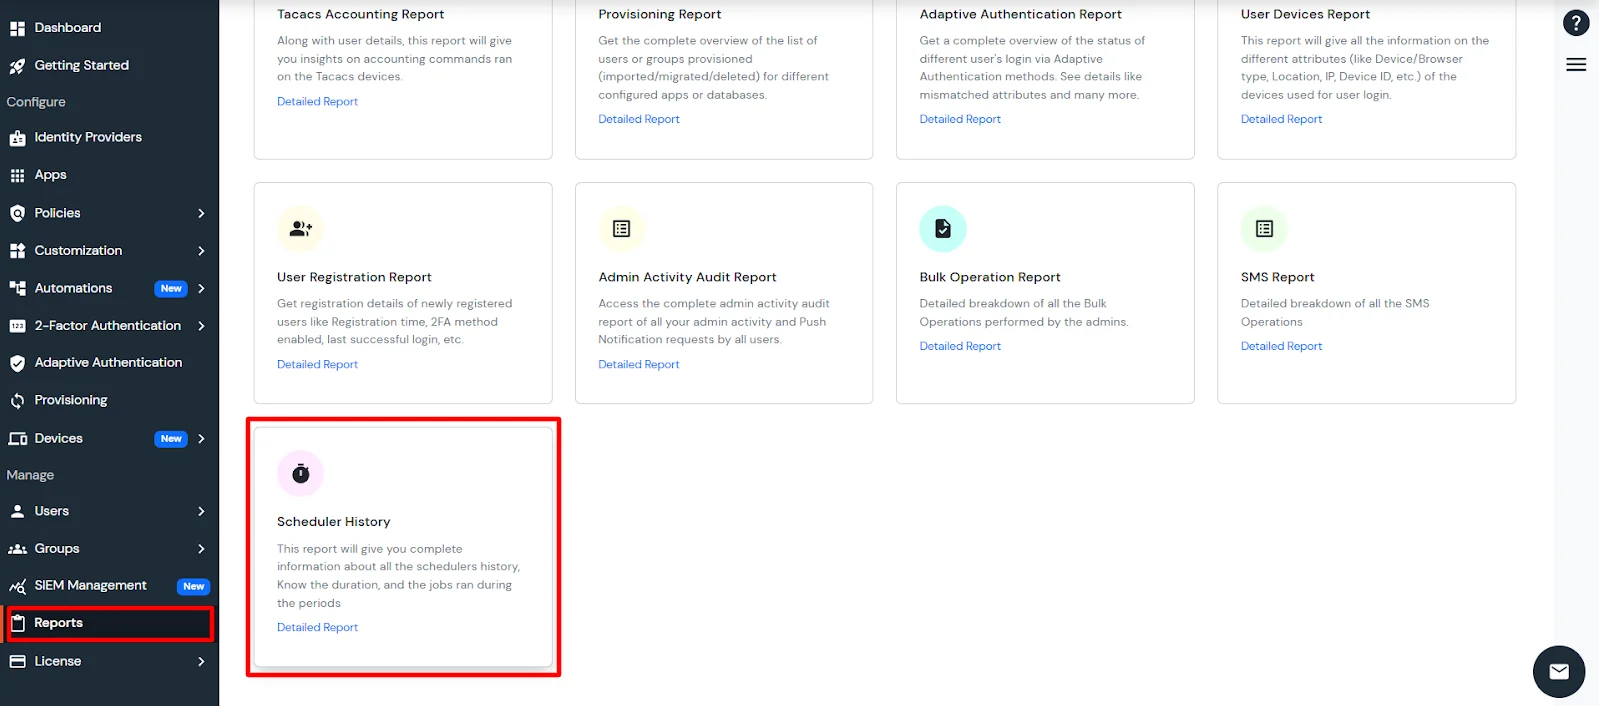
- This report will give you complete information about all the scheduler's history. Know the duration and the jobs that ran during the periods: