User Data Reports
User Data Reports provides detailed insights into user-related data, including user registrations, dormant accounts, application access, and group memberships. It allows users to customize report views by selecting columns,
applying filters, and sorting data based on requirements. Users can save personalized versions of reports for quick access, export report data when needed, and optionally schedule reports for automated delivery via email.
1. Access Reports
- Navigate to the Reports section from the left nav menu to view available reports.
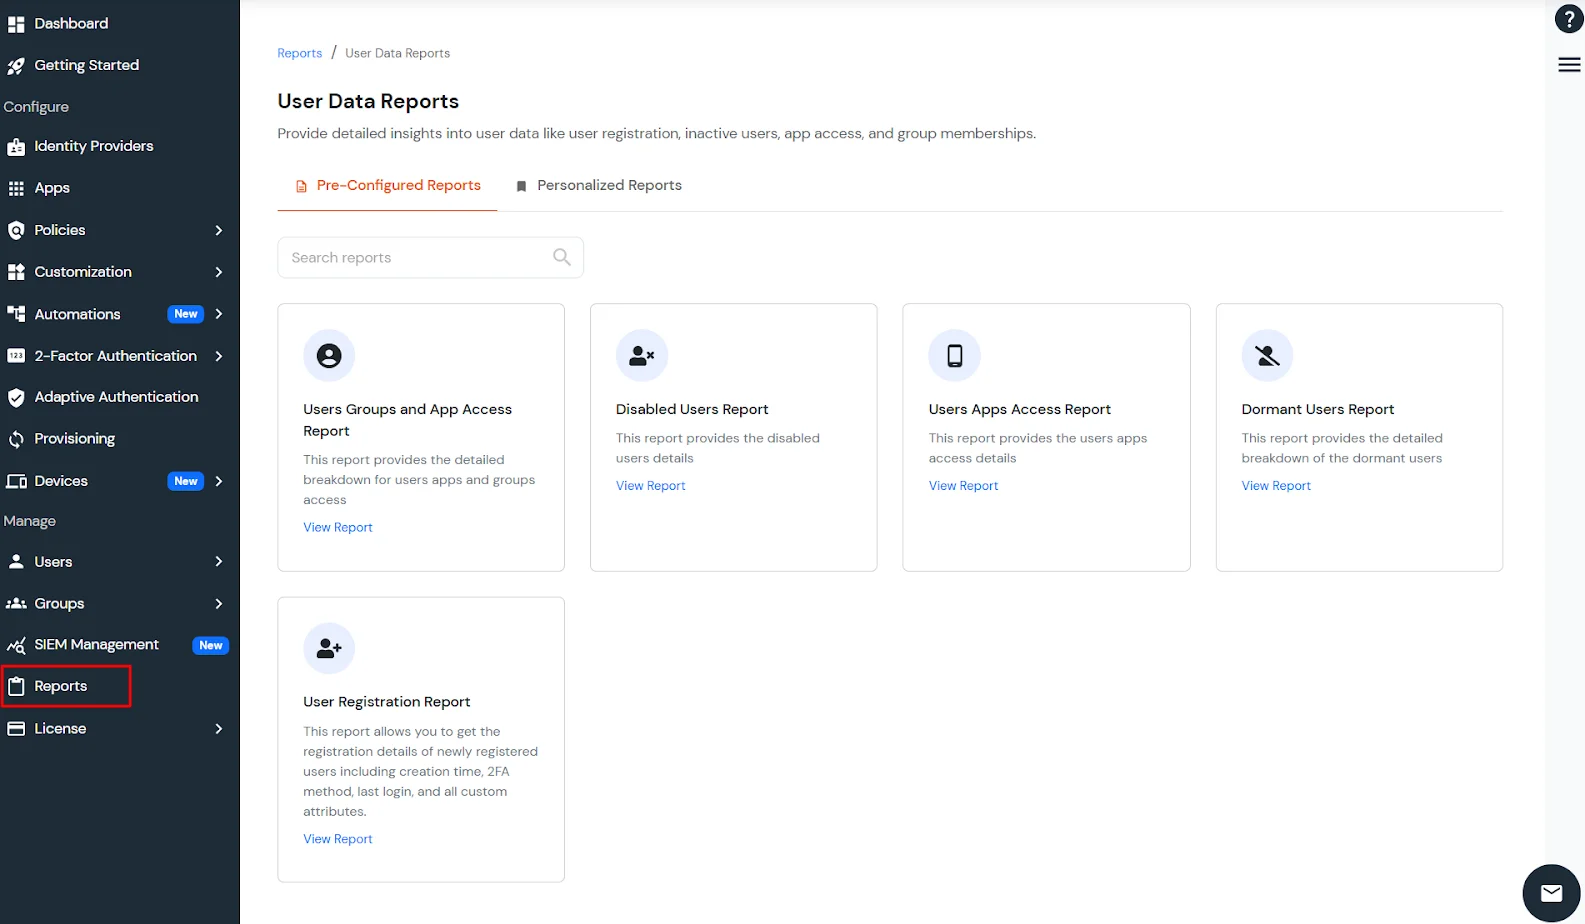
- Click on the Pre-Configured Reports tab to access predefined report templates.
- Click on the Personalized Reports tab to access saved custom reports.
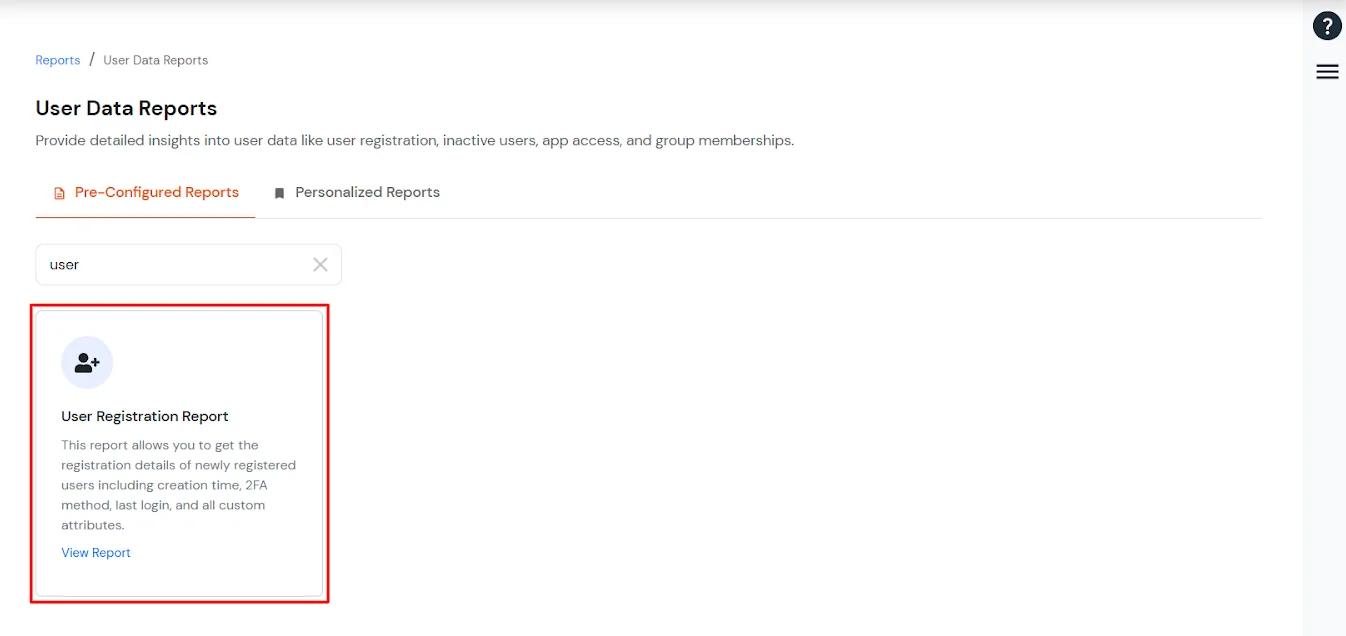
- Use the Search bar to filter reports by name or description in real time.
2. Opening a Pre-Configured Report
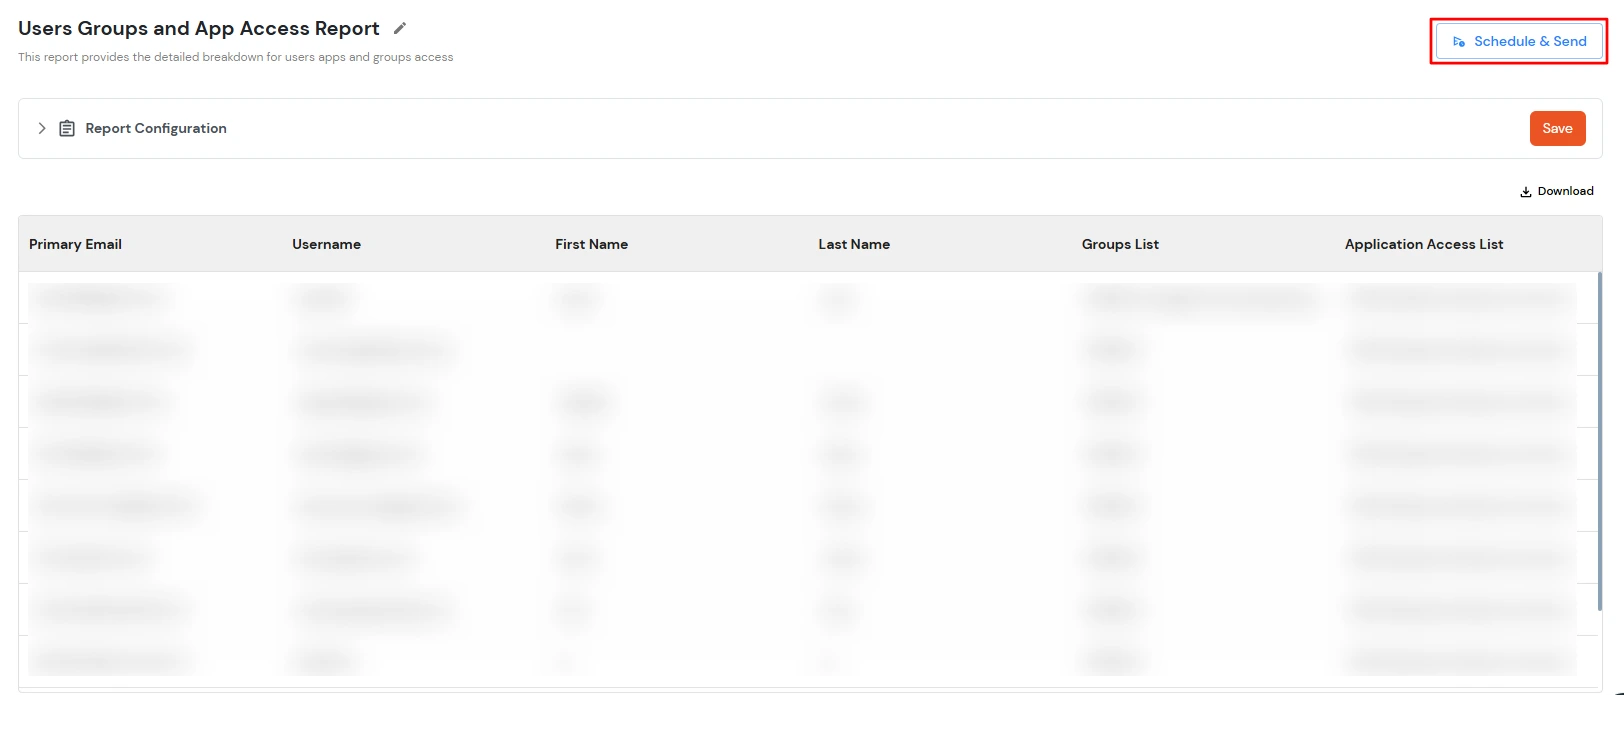
- Select a report card to open the Report Configuration panel.
- Configure the report by selecting required columns, filters, and sorting options.
- Click Apply to generate the report results.
- Click Reset to revert to the default configuration.
- Click Save as Personalized Report to save the configuration.
- Download the report results if required.
3. Manage Personalized Reports
- Navigate to the Personalized Reports tab to view saved reports.
- Select View Report to open the report.
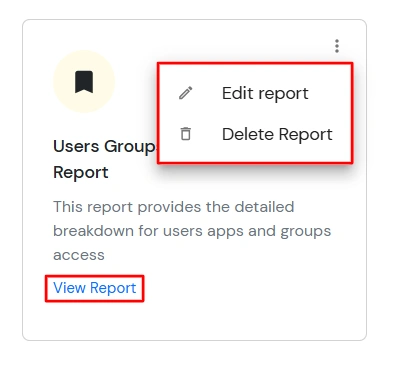
- Click the overflow menu (⋮) on a report card to access actions.
-
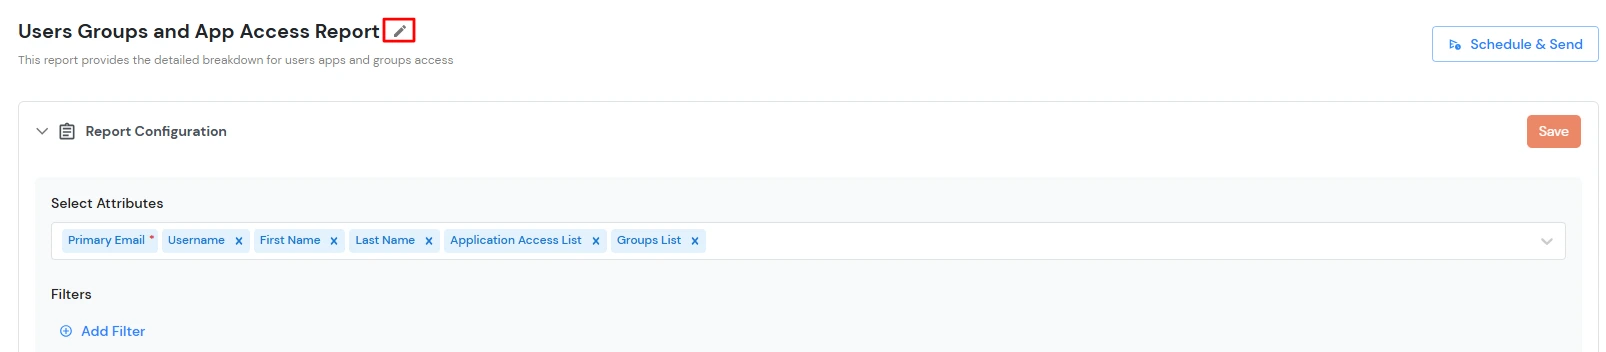
Select Edit Report to modify the report configuration.
- The Report Configuration page opens.
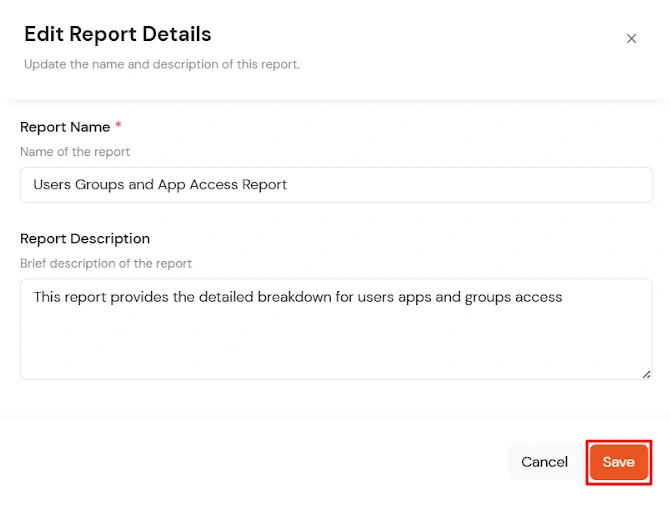
- Click the pencil icon next to the report name.
- A popup appears where you can update the Report Name and Description as required.
- Click Save to apply the changes.
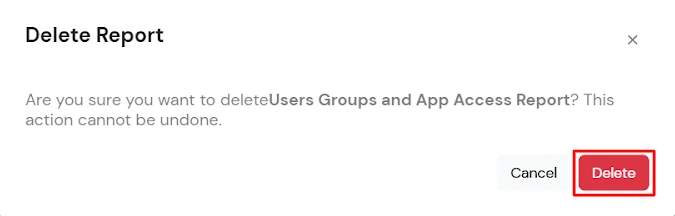
- Select Delete Report to remove the report.
- Confirm deletion in the dialog to proceed.
4. Report Configuration Panel
- Use the Select Customer section to select the required customer context (available only for Superadmin).
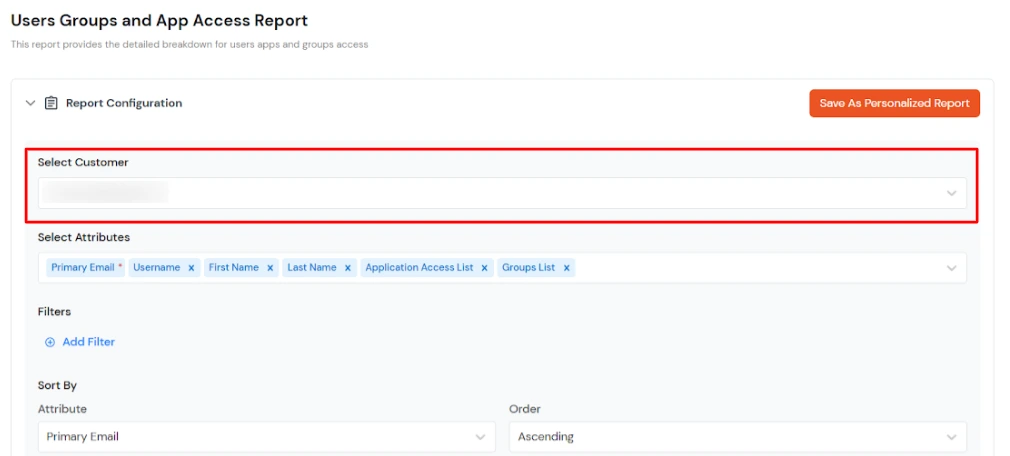
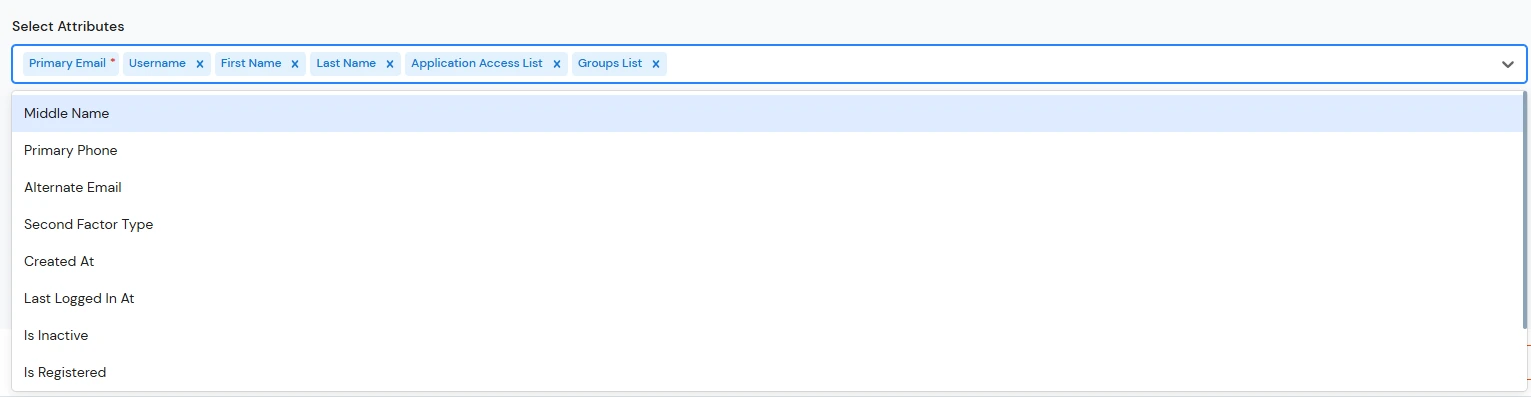
- In the Columns section:
- Select attributes to include in the report. You can select multiple attributes.
- Use search to quickly find attributes.
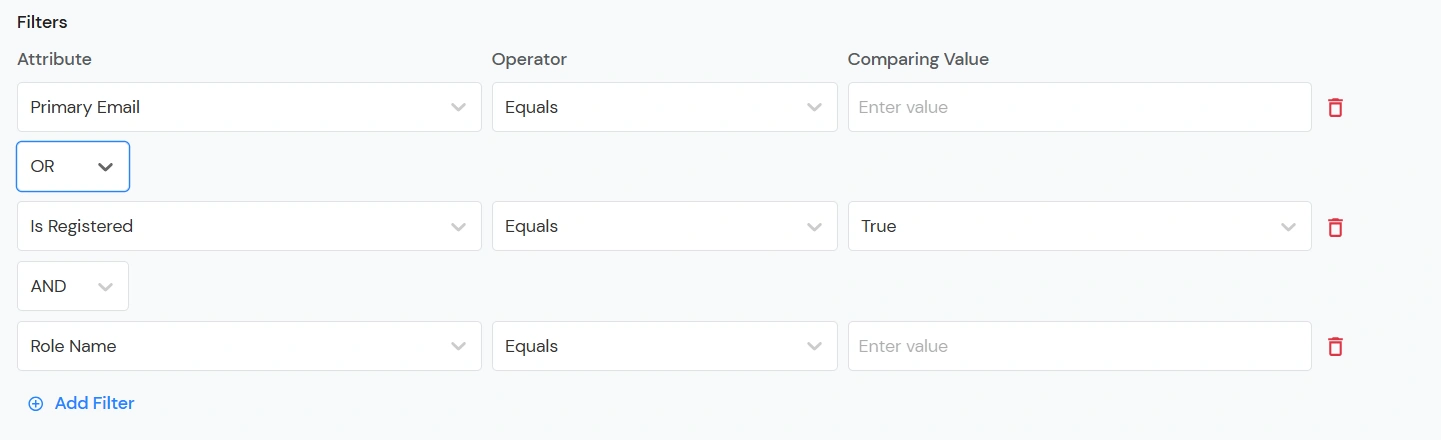
- In the Filters section:
- Add one or more filter conditions.
- Select field, operator, and value for each condition.
- Use AND/OR logic if supported.
- Remove conditions as required.
- Ensure all filters are valid before applying.
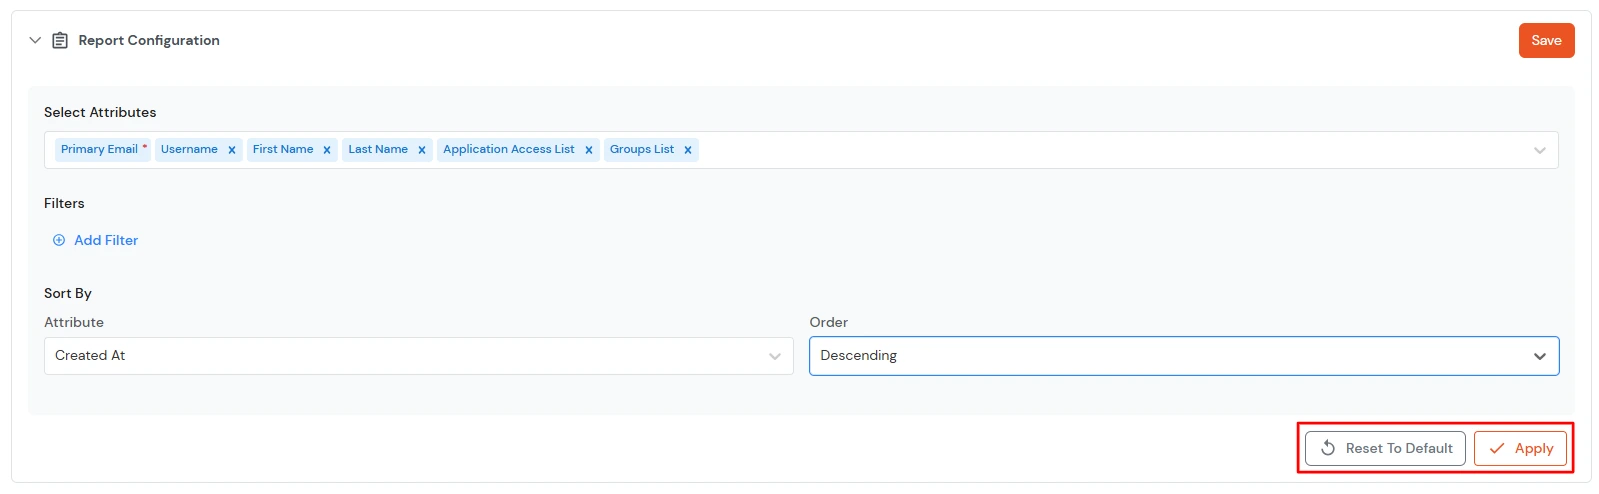
- In the Sort section:
- Select an attribute to sort by.
- Choose ascending or descending order.

- Click Apply to update the results.
- Click Reset to revert to default configuration.
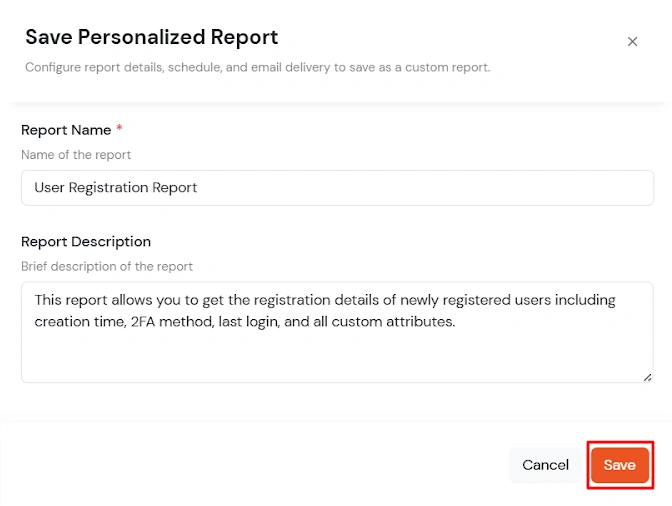
5. Save as Personalized Report
- Click Save while working on a standard template.
- Enter a Report Name (required).
- Enter a Description (optional).
- Save the report to create a new personalized version.
- The report will appear under the Personalized Reports tab.
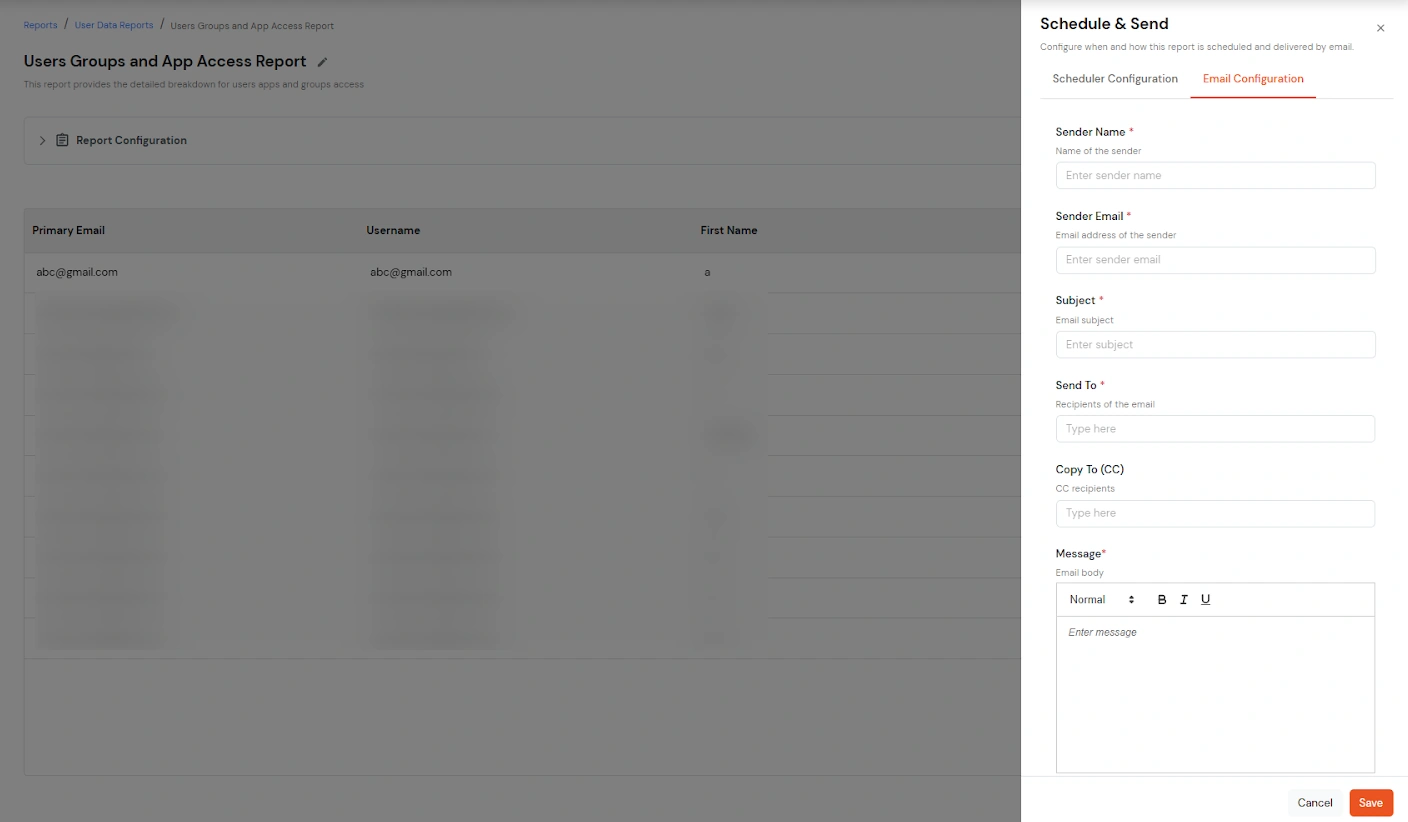
6. Configure Schedule & Send Settings
This section allows you to schedule automated report delivery and configure email settings for sharing reports with selected recipients. You can define the delivery frequency, timing, and timezone, and customize email details
such as subject, recipients, and message content.
- This is available only for saved reports.
- Open the Delivery Settings panel from the report.
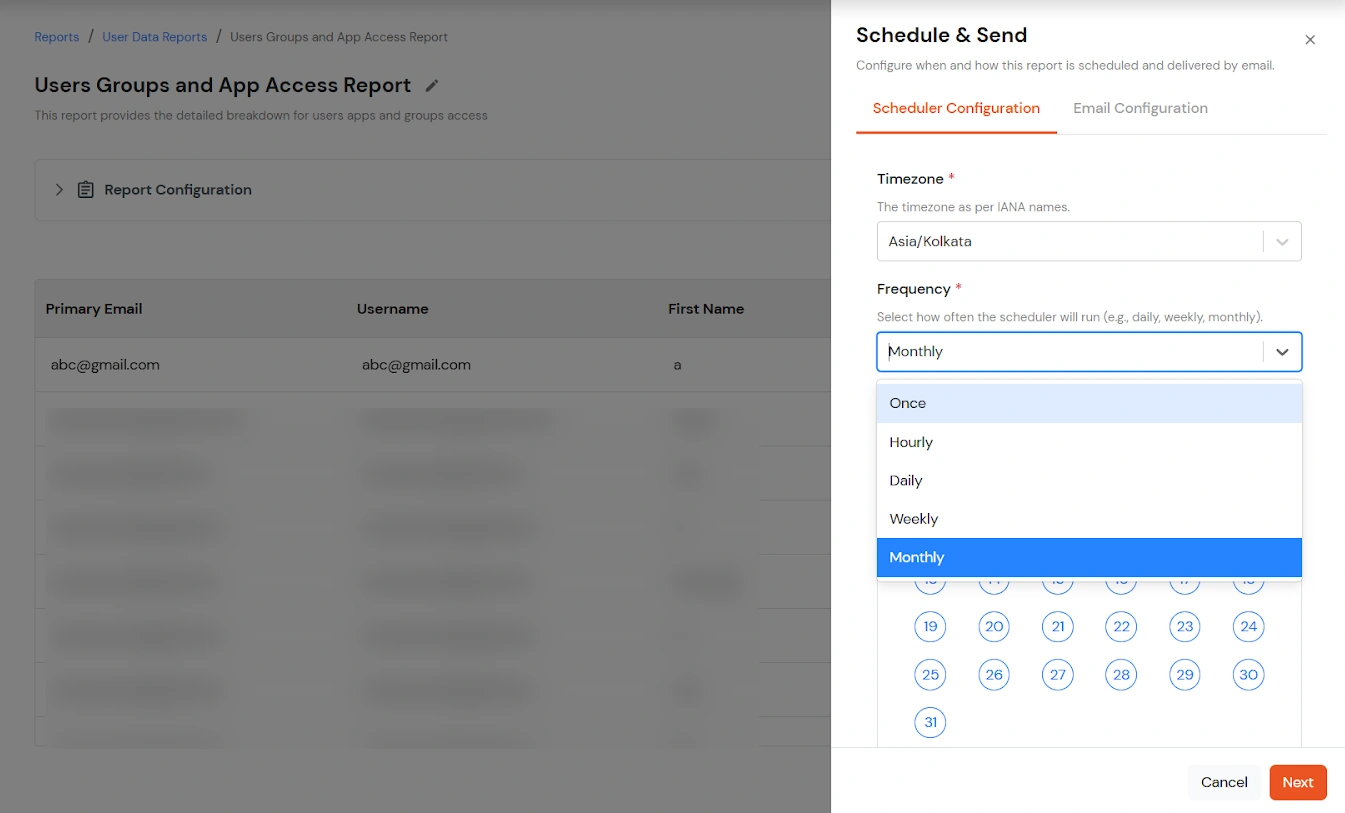
Scheduler Configuration
- Select the timezone.
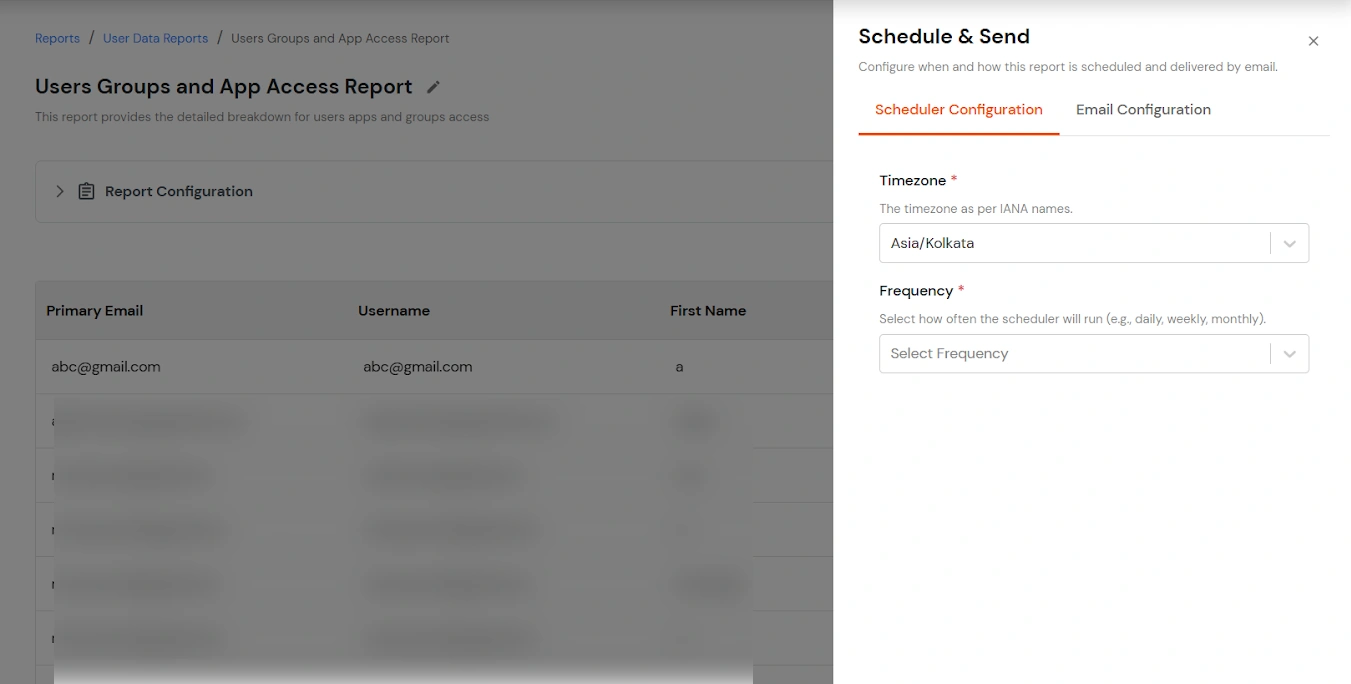
- Configure report delivery frequency (Daily, Weekly, Monthly).
- Configure an end date if required.
Email Configuration
- Configure the From address.
- Enter the email subject.
- Add recipients and optional CC.
- Enter the email message body.