App Login Policy
App Login Policies allow administrators to control how users access applications within miniOrange by defining authentication methods, access conditions, and security restrictions. These policies can be configured to enforce specific login requirements such as passwordless authentication, MFA, Magic Link login, device-based restrictions, and IP-based access controls. Administrators can assign policies to specific users, groups, or applications to ensure secure and controlled access based on organizational security requirements.
How to create a New Policy
Follow the steps below to create a new App Login Policy:
- Log in to the Admin Dashboard with relevant credentials.
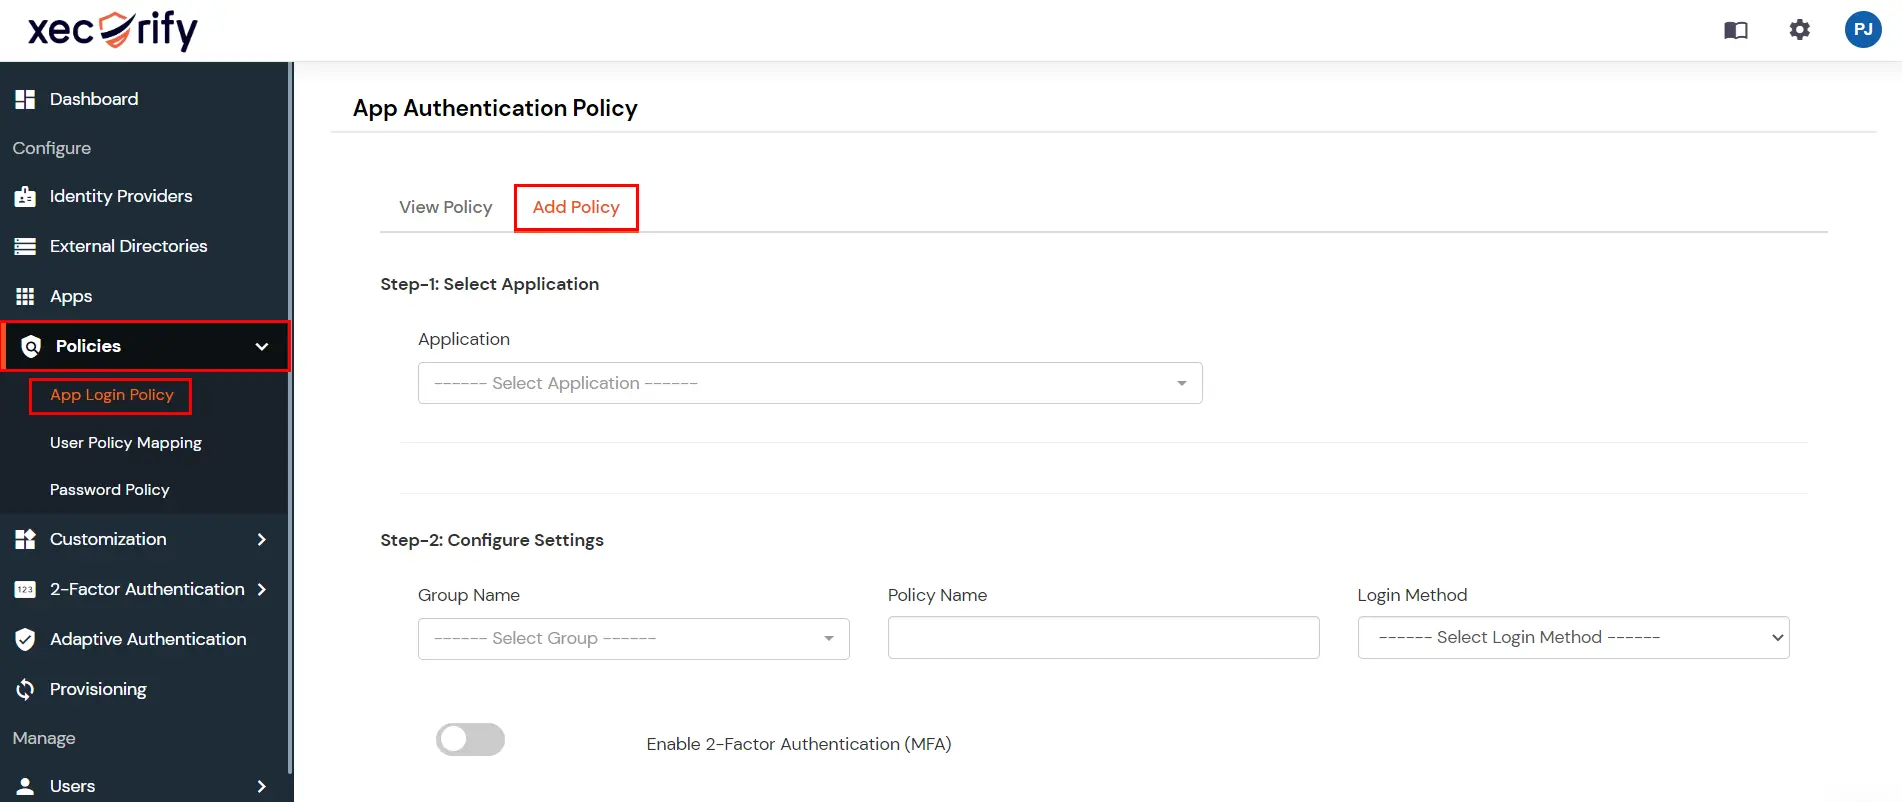
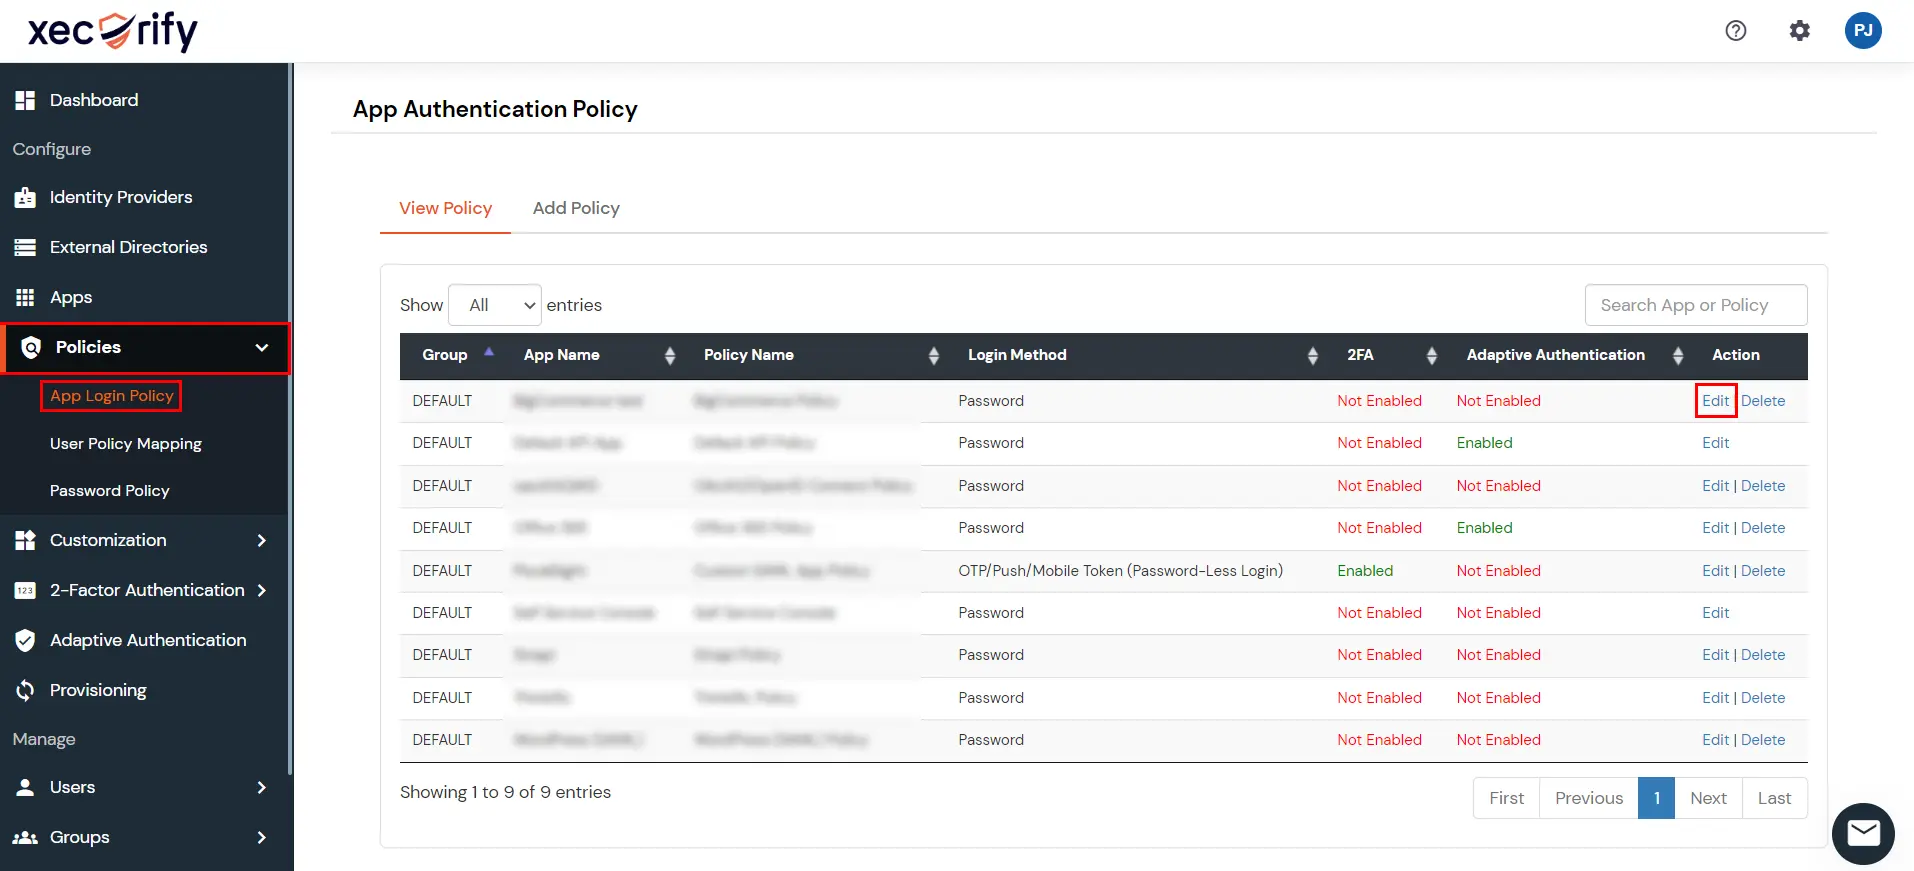
- Click on the Policies menu from the left navigation and select the App login policy option.
- Click on the + Add Policy button from the top right corner to add a new policy.
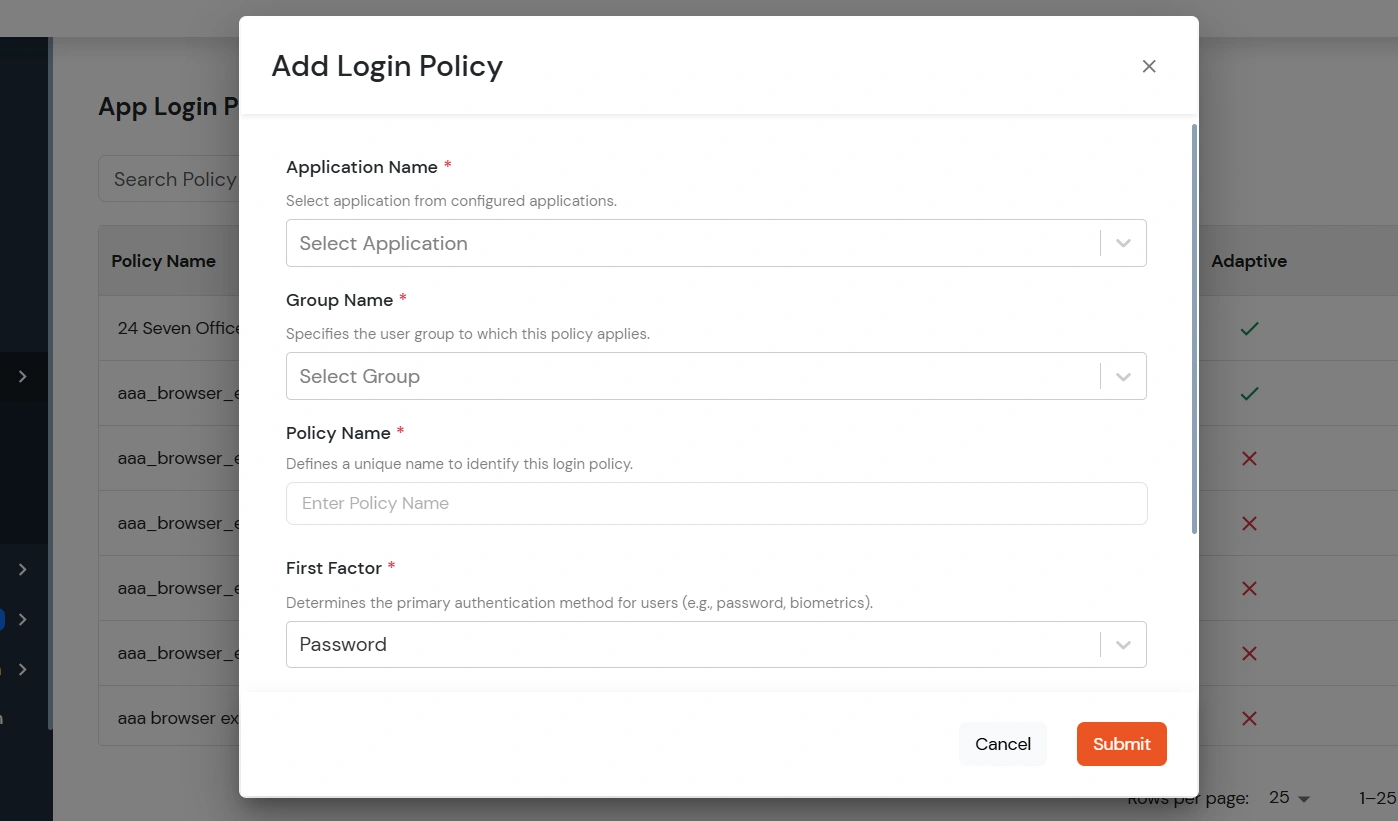
- On the Add Login Policy modal, configure the required details as mentioned in the table below. The following are mandatory details when creating a new policy.
| Application Name |
Select the application from the list of configured applications to which the login policy should be applied. |
| Group Name |
Select the user group for which the assigned application login policy will be enforced. |
| Policy Name |
A unique name for the policy so it can be identified from the list of policies. |
| First Factor |
The authentication method for users. You can choose
- Password: Users are prompted for authentication with their username/email and password.
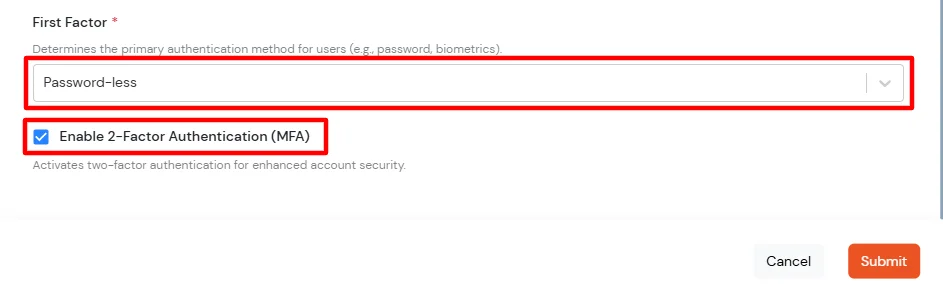
- Password-less: Users authenticate without a password using methods such as Biometric or OTP.
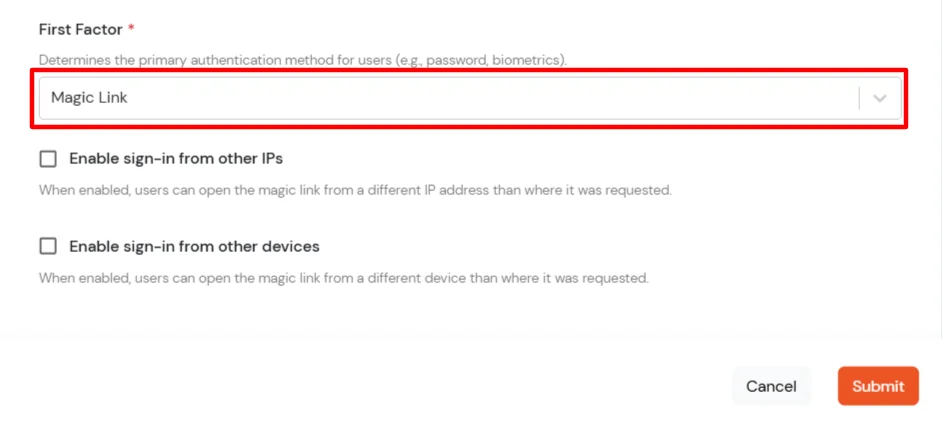
- Magic Link: Allow users to authenticate using a secure one-time login link sent via email without requiring a password. (Supported only for SAML, JWT, and OAuth/OpenID application types.)
|
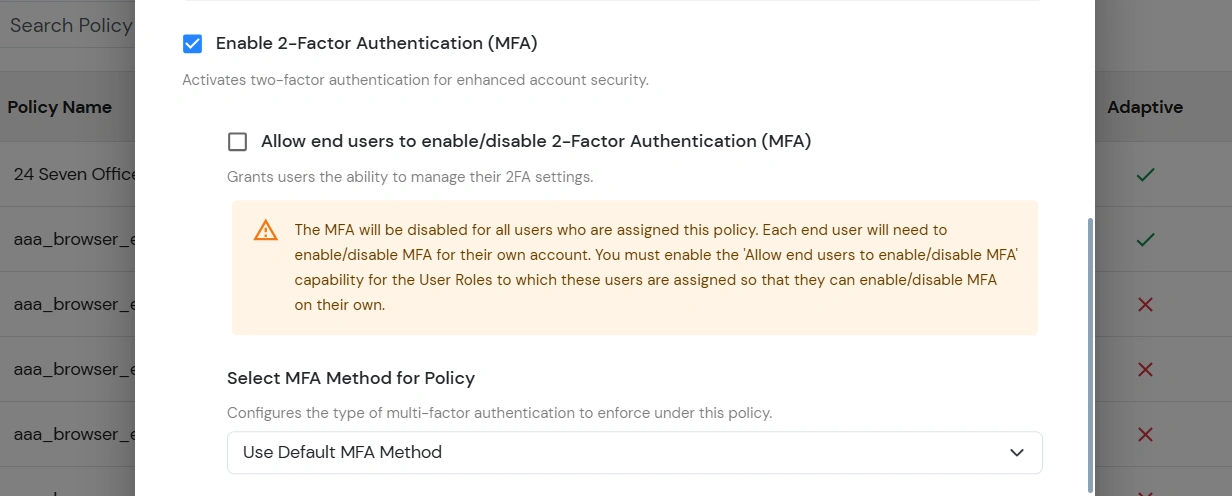
- Following are optional details that you can enable if you have selected Password as your First Factor Authentication:
| Enable 2-Factor Authentication (MFA) |
Require users to complete an additional authentication step after password verification for enhanced account security.
- Allow end users to enable/disable 2-Factor Authentication (MFA): Allow users assigned to this policy to manage their own MFA enablement settings from their account.
- Select MFA Method for Policy: Configure the MFA method that users must complete after successful password authentication. Apply the default MFA method configured at the organizational level for all users assigned to this policy. Multiple MFA methods are supported to provide flexible and secure authentication based on organizational security requirements and user convenience.
|
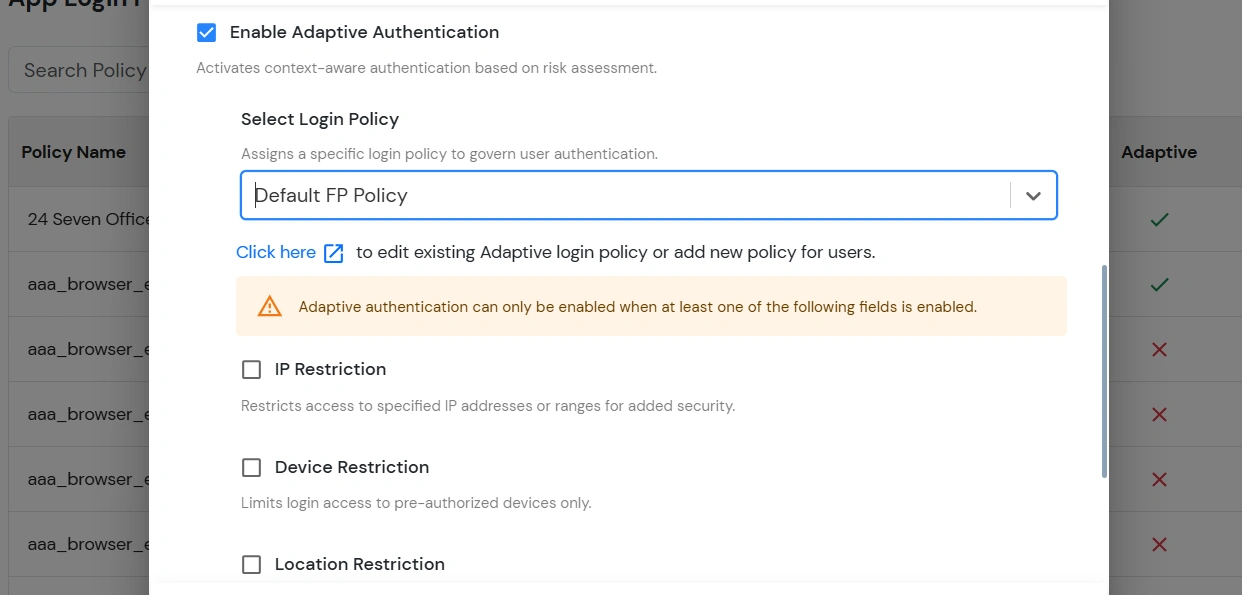
| Enable Adaptive Authentication |
Enable context-aware authentication policies based on user risk assessment and login conditions.
- Select Login Policy: Select the adaptive login policy that will be applied to users for evaluating login restrictions and authentication conditions.
- Apply Restrictions Using: Configure how multiple adaptive authentication restrictions should be evaluated during user login.
- AND: All enabled restrictions must be successfully satisfied for the login attempt to be allowed.
- OR: At least one enabled restriction must be successfully satisfied for the login attempt to be allowed.
- Adaptive Authentication Restrictions: Configure additional login restrictions and verification conditions to strengthen account security and control user access based on contextual risk factors.
- IP Restriction: Restrict login access to specific IP addresses or IP ranges for enhanced security.
- Device Restriction: Allow login access only from trusted or pre-authorized devices.
- Location Restriction: Control user login access based on geographic location.
- Time Restriction: Restrict user login access to specific days or time periods.
- Force MFA On Each Login Attempt: Require users to complete MFA verification during every login attempt regardless of device or session state.
|
- If you have selected Password-less as your First Factor Authentication:
- Enable 2-Factor Authentication (MFA): Adds an extra verification step to improve login security and prevent unauthorized access.
- If you have selected Magic Link as your First Factor Authentication: This allows users to securely log in using a one-time login link sent to their registered email address. The link is valid for 15 minutes, can be used only once, and also supports cross-device authentication for a seamless login experience.
- Enable sign-in from other IPs: Allow users to access the Magic Link from a different IP address than the one from which the login request was initiated.
- Enable sign-in from other devices: Allow users to open and use the Magic Link from a different device than the one used to request the login link.
Notes
- Supports SP-initiated SSO only.
- 2FA is not supported with Magic Link authentication.
- Click on Submit to save the newly added policy.
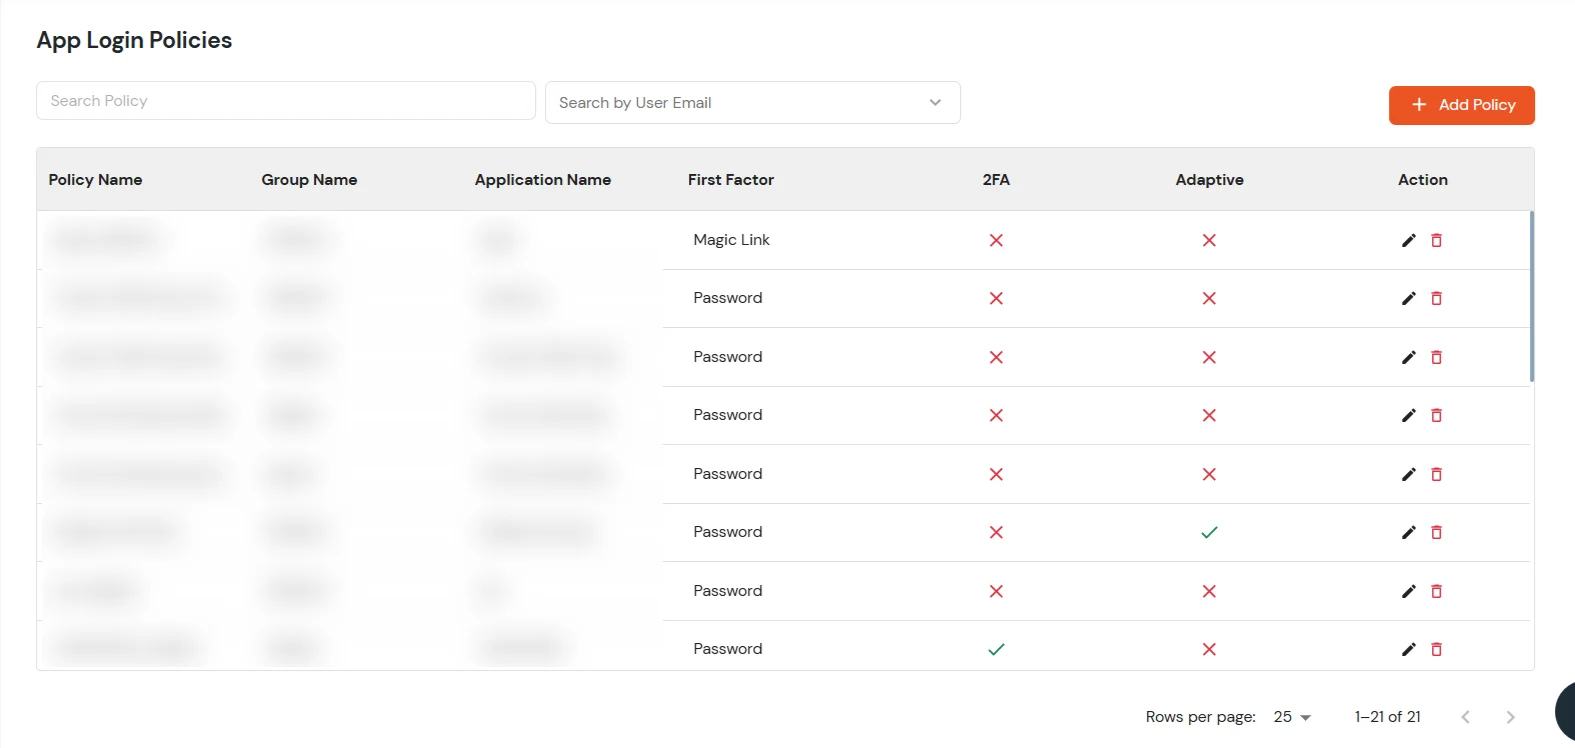
- You will see the policy listed once it’s successfully added.
How to edit a Policy
To edit the existing policy, follow these steps:
- Click on the Edit icon against the login policy that you want to edit.
- A modal will open for you to update the Edit Login Policy details.
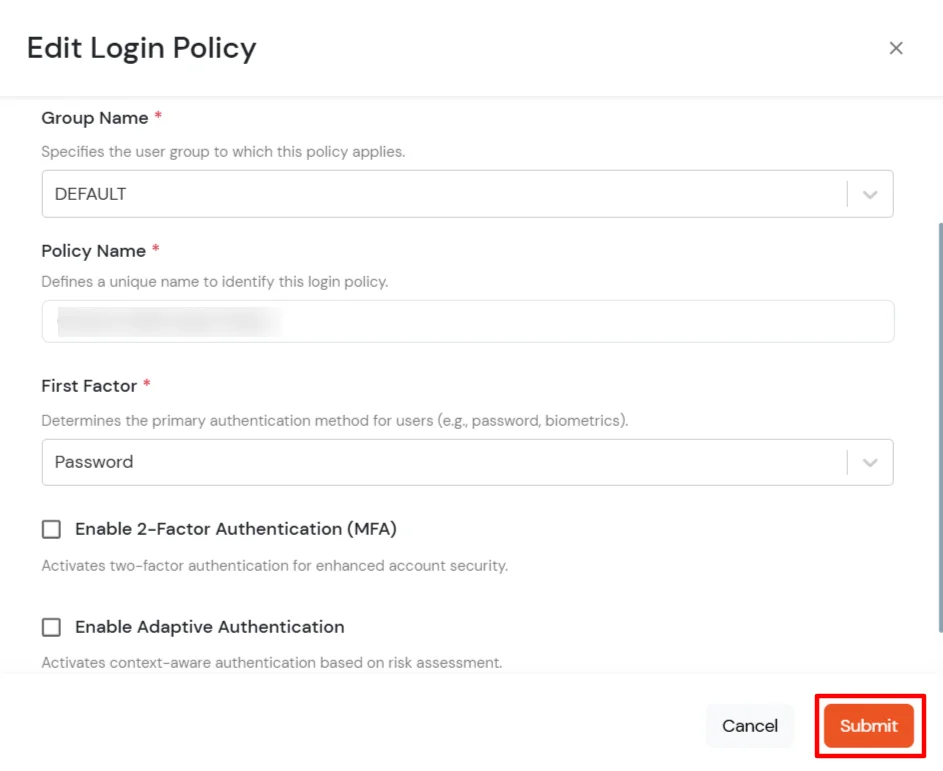
- Update the required details and click on Submit to save the changes.
- You will see the updated policy listed once it’s successfully updated.
How to restrict application access to a particular set of users?
Create a user group with only the users who should access the application, assign them to the group, then follow How to create a New Policy to add a policy for that application and group. Remove the app’s default policy if it exists whenever broad access should no longer apply.
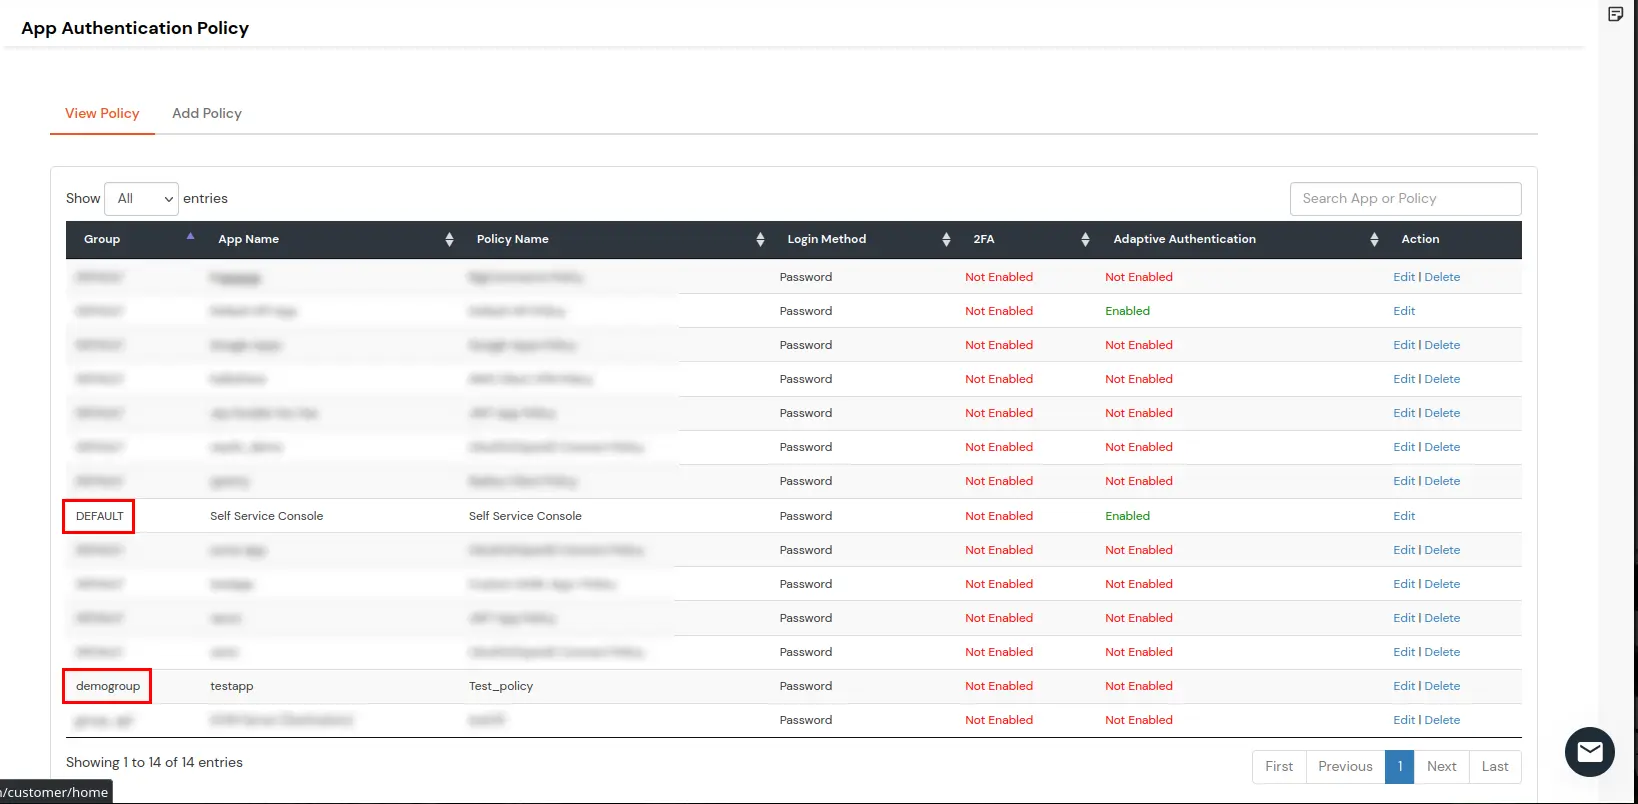
In the example below, Self Service Console uses a DEFAULT group policy so all users keep access, while testapp has only a demogroup policy—only that group can use the app.
View Policies Assigned to Users
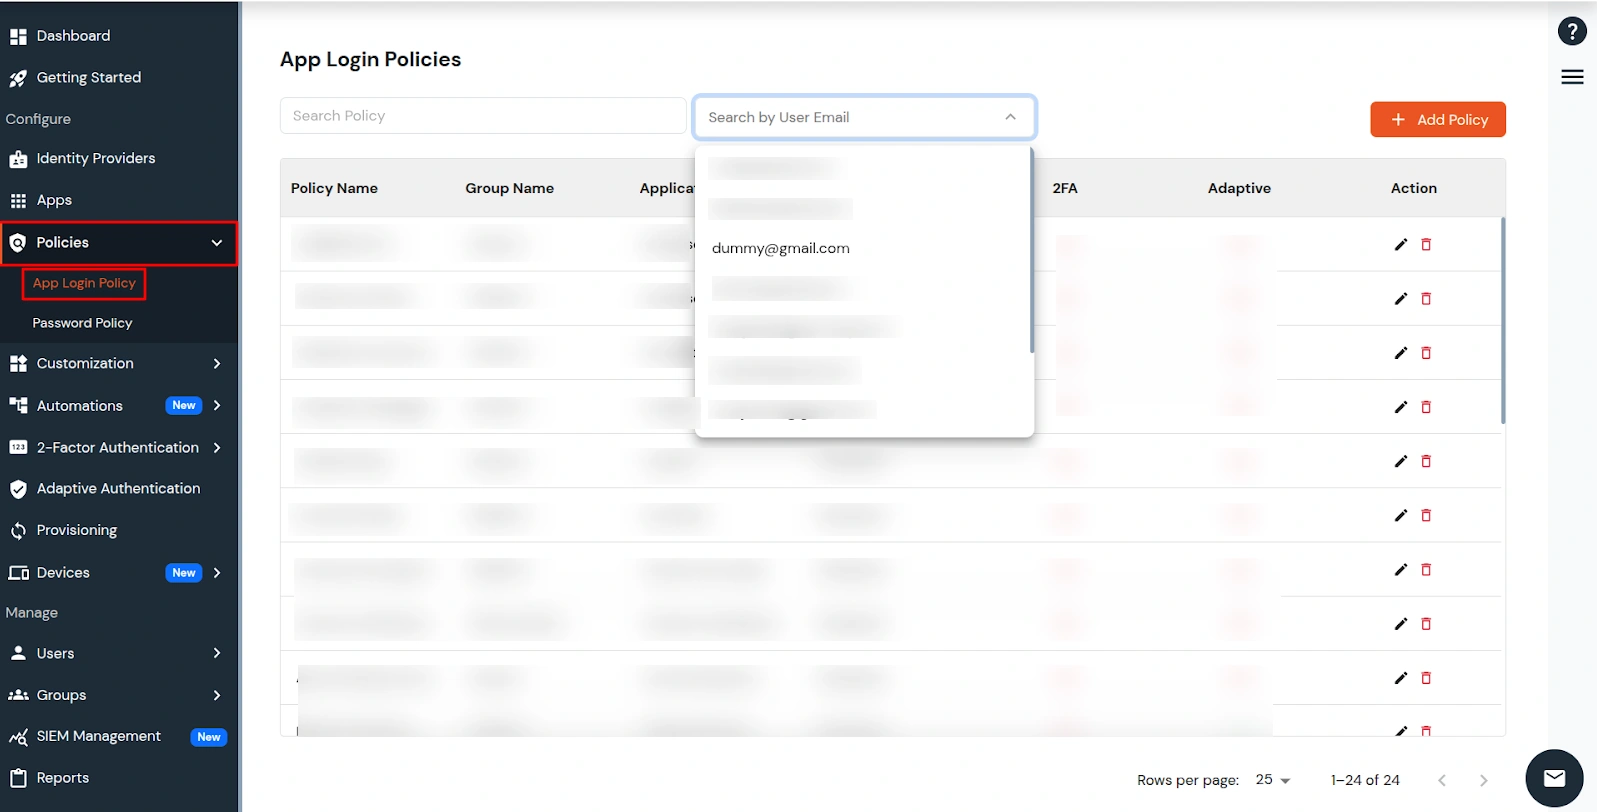
View all policies assigned to a specific user from the App Login Policies page. At the top of the list you will see Search Policy on the left and Search by User Email on the right.
- Click Search by User Email, then type to search or select the user from the dropdown list.
- The policy table updates automatically to show policies assigned to that user.
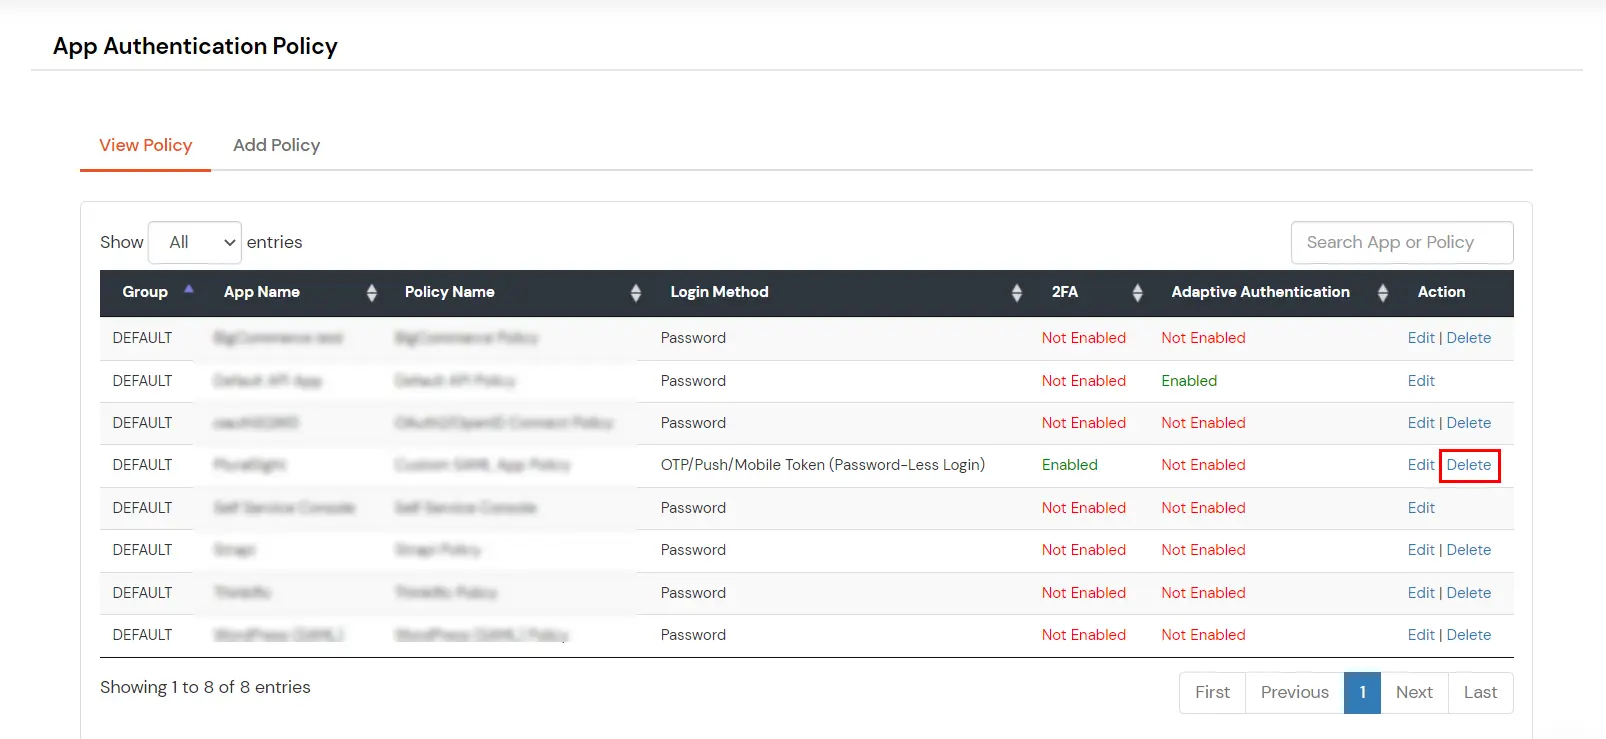
How to delete a Policy
To delete a policy, follow these steps:
- From the policy list table, locate the policy you no longer need.
- Click on the Delete icon against the required policy.
- A confirmation prompt will appear asking you to confirm the deletion.
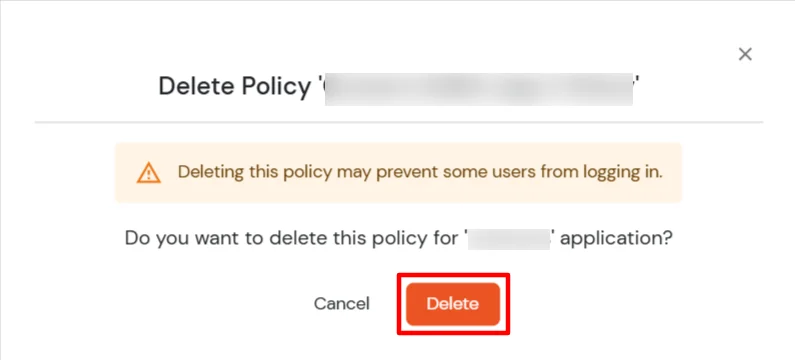
- Click on Delete to permanently remove the selected policy.