Hello there!
Need Help? We are right here!

Need Help? We are right here!
Search Results:
×The Custom Providers page lets administrators control how miniOrange delivers emails, SMS, and WhatsApp messages, such as OTPs, alerts and notifications.
Email and SMS use a miniOrange managed gateway by default, so no setup is needed.
To use your own provider instead, select Use Custom Gateway and enter your provider details. WhatsApp has no preconfigured provider, so you must configure one before using OTP over WhatsApp.
Note: To add a gateway that is not listed, or for help with a provider integration, contact idpsupport@xecurify.com.
These steps are the same for all three providers:
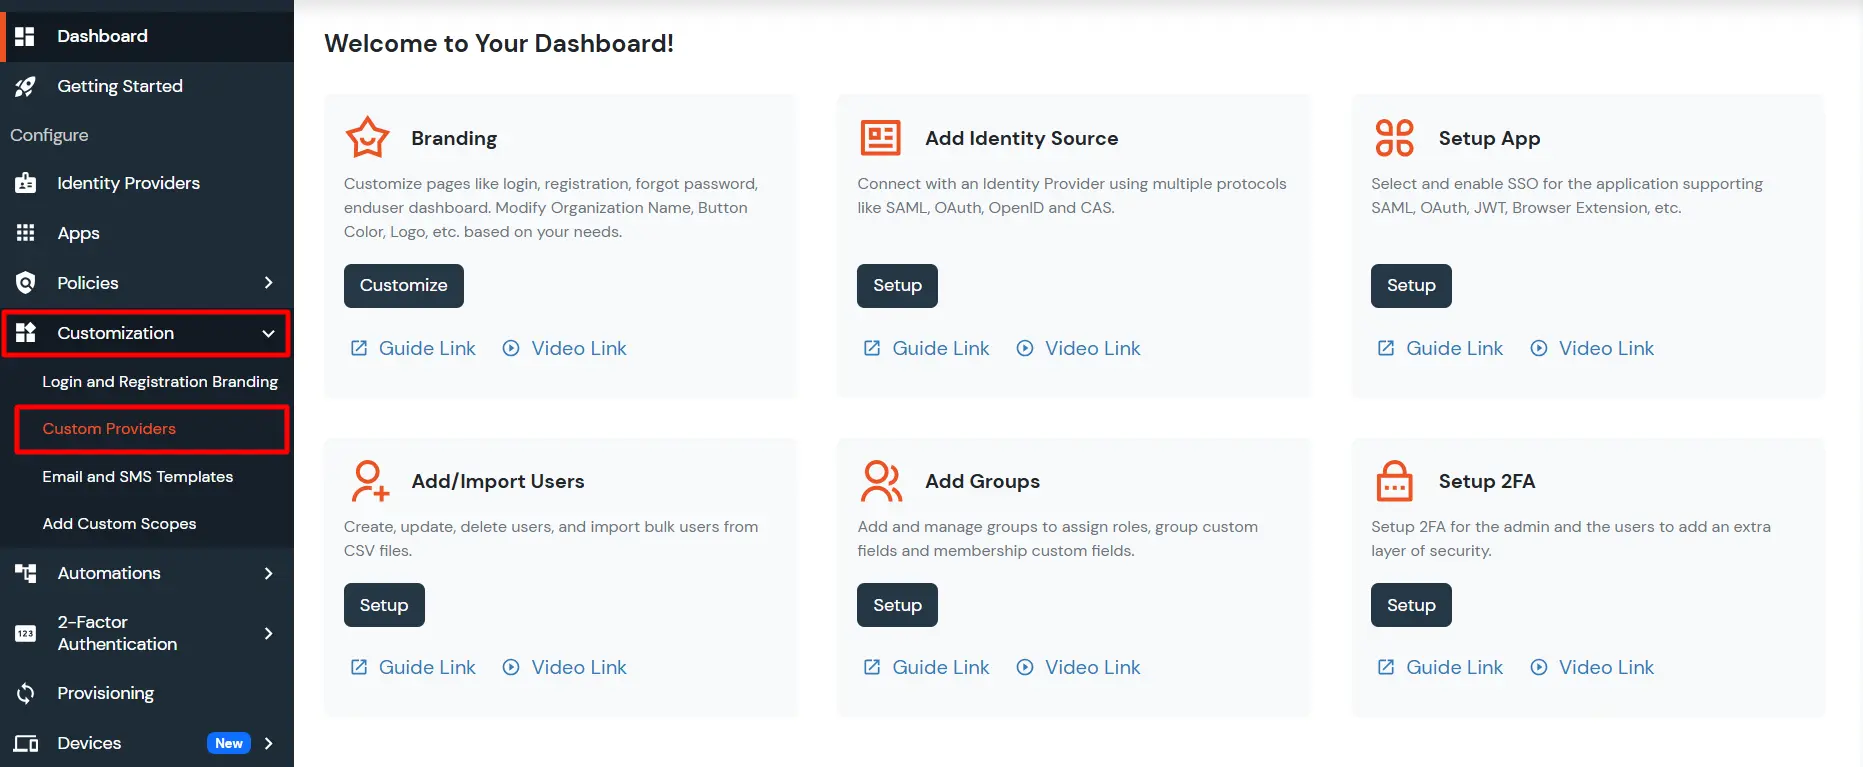
By default, miniOrange sends email notifications through its own SMTP gateway. To use your own email provider, configure it as follows. You can see the list of supported SMTP gateways for reference.
You can configure one primary and one secondary SMTP server. The secondary server is used as a backup when the primary server is unreachable or its configuration returns an error.
Note: If your SMTP or email servers are behind a firewall, open the required ports and allow inbound connections from miniOrange IP addresses. The IPs vary by region and by cloud or on-premise deployment. Contact idpsupport@xecurify.com for the IP details.

| Parameter | Description |
|---|---|
| Auth Type | Select Basic. |
| Host Name | Hostname or IP address of your SMTP server. |
| Port Number | Port used by your SMTP server. Common ports are 25, 465 and 587. Avoid port 25 if you can, since many providers limit it. |
| Username | Your SMTP account username. |
| Password | Your SMTP account password. |
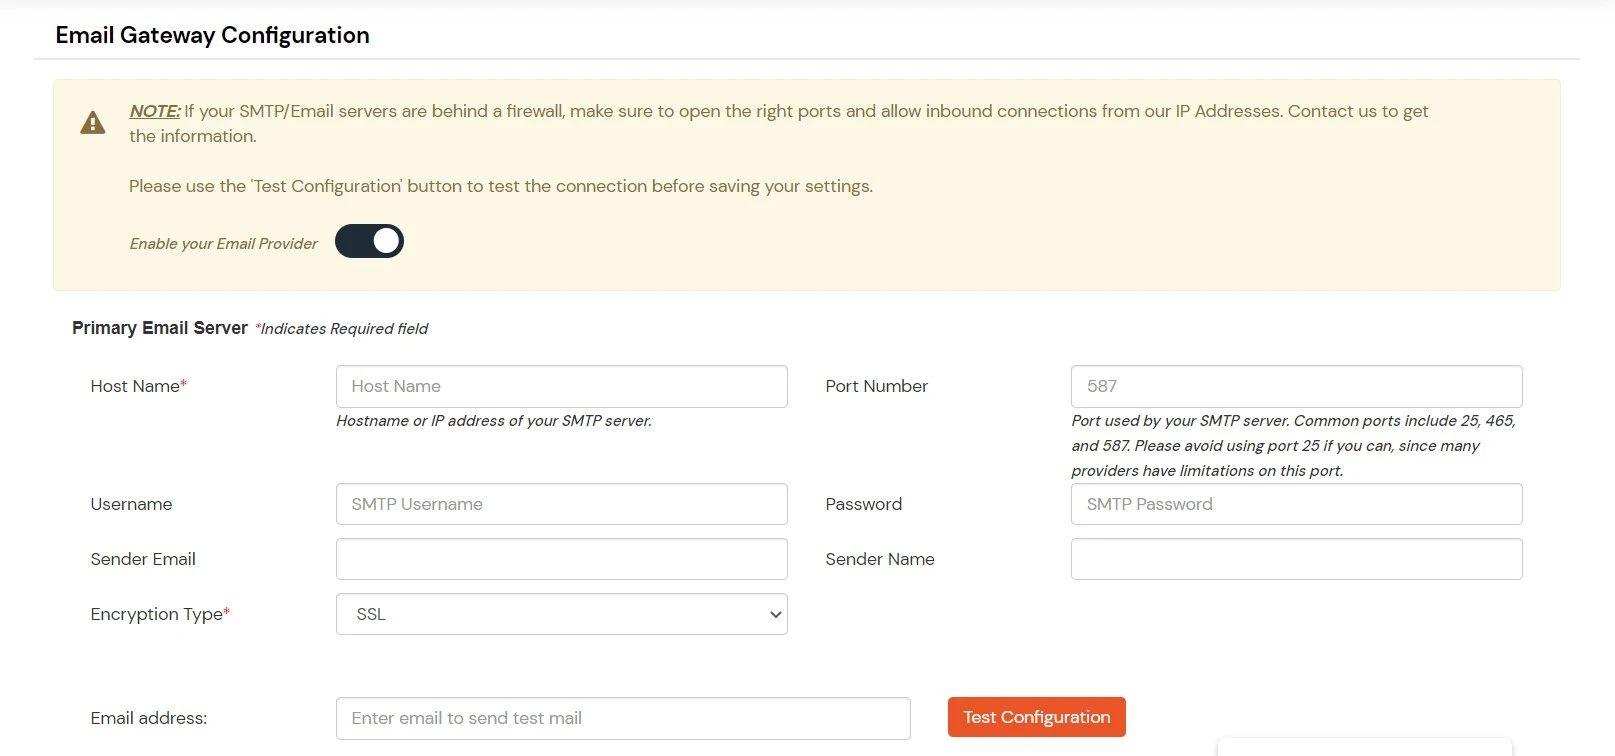
| Parameter | Description |
|---|---|
| Auth Type | Select No Auth. |
| Host Name | Hostname or IP address of your SMTP server. |
| Port Number | Port used by your SMTP server. Common ports are 25, 465 and 587. Avoid port 25 if you can, since many providers limit it. |
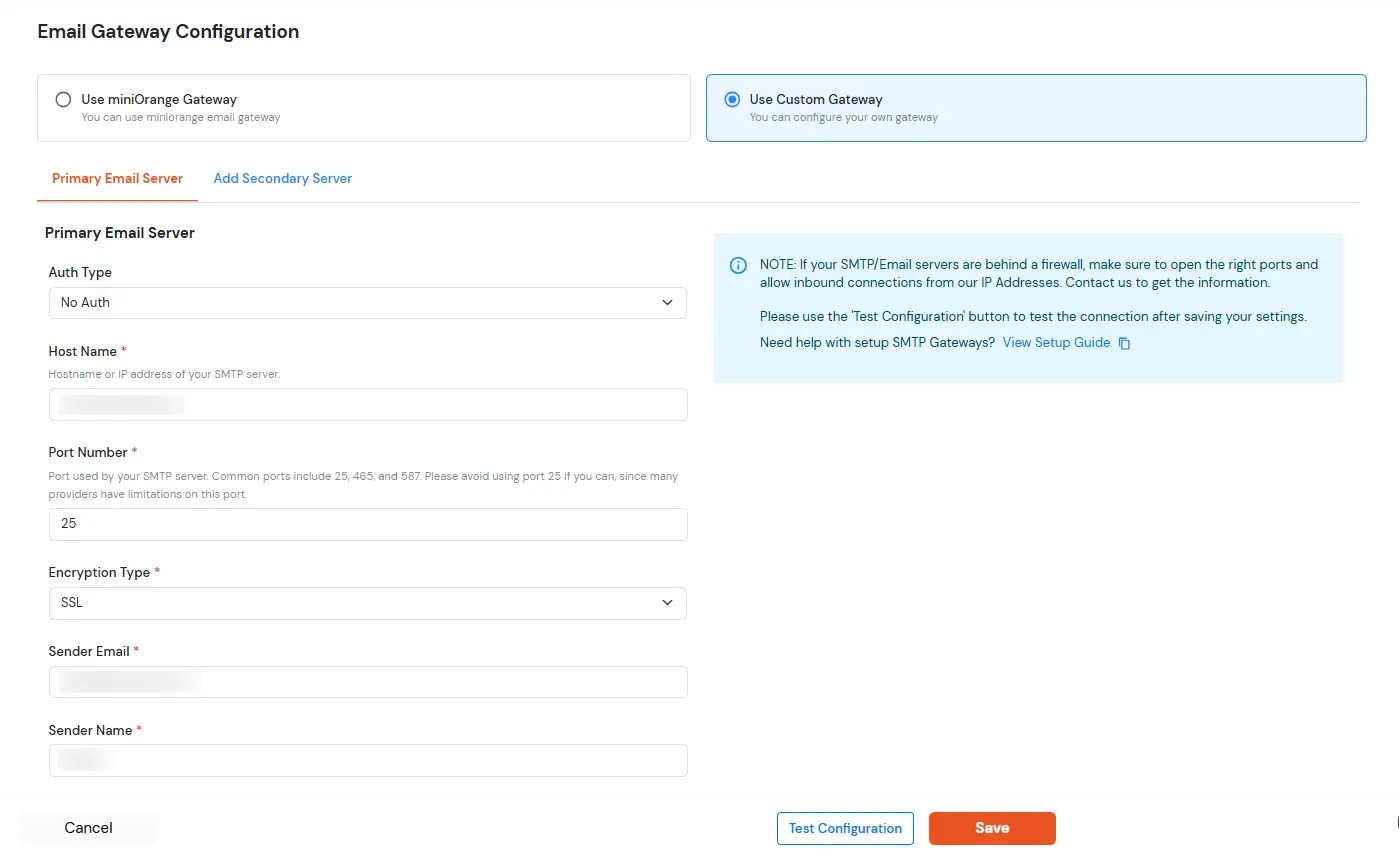
| Parameter | Description |
|---|---|
| Auth Type | Select Google (OAuth 2.0). |
| Client ID | Client ID of your OAuth app in Google. |
| Client Secret | Client secret of your OAuth app in Google. |
| Scope | Pre-filled as https://mail.google.com/. |
| Redirect URL | Read-only. Click the copy icon and add this URL as an authorized redirect URI in your Google OAuth app. |
| Auth URL | Pre-filled as https://accounts.google.com/o/oauth2/auth?prompt=consent&access_type=offline. |
| Token Endpoint | Pre-filled as https://oauth2.googleapis.com/token. |
| Host Name | Hostname or IP address of your SMTP server. |
| Port Number | Port used by your SMTP server. Common ports are 25, 465 and 587. Avoid port 25 if you can, since many providers limit it. |
| Username | Your Google account email address. |
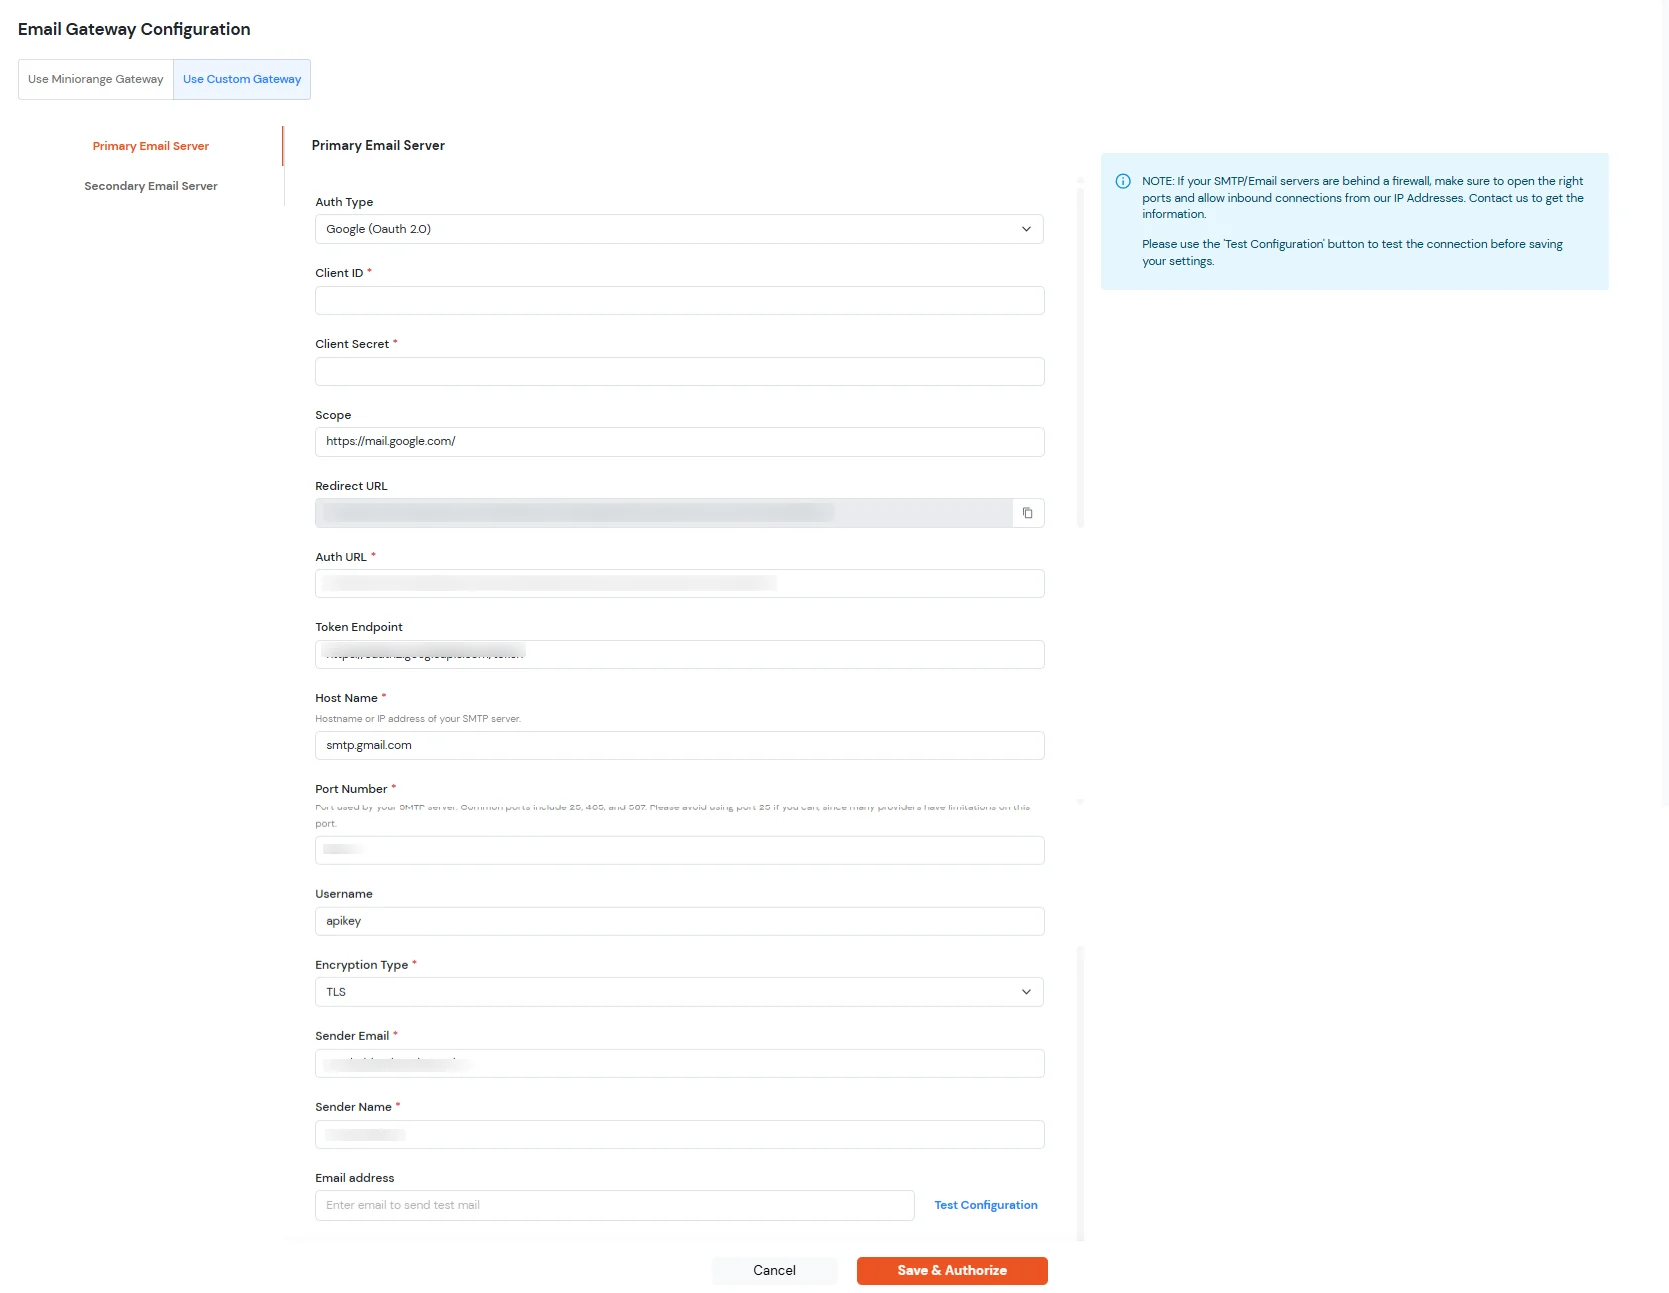
| Parameter | Description |
|---|---|
| Auth Type | Select Office 365 (OAuth 2.0). |
| Client ID | Application (client) ID of your app registered in Microsoft Azure. |
| Client Secret | Client secret of your Azure app. |
| Token Endpoint | https://login.microsoftonline.com/<your_azure_tenant_id>/oauth2/v2.0/token. Replace <your_azure_tenant_id> with your Azure tenant ID. |
| Scope | Pre-filled as https://graph.microsoft.com/.default. |
| Host Name | Pre-filled as smtp.office365.com. |
| Port Number | Port used by your SMTP server. Common ports are 25, 465 and 587. Avoid port 25 if you can, since many providers limit it. |
| Username | Your Office 365 account email address. |
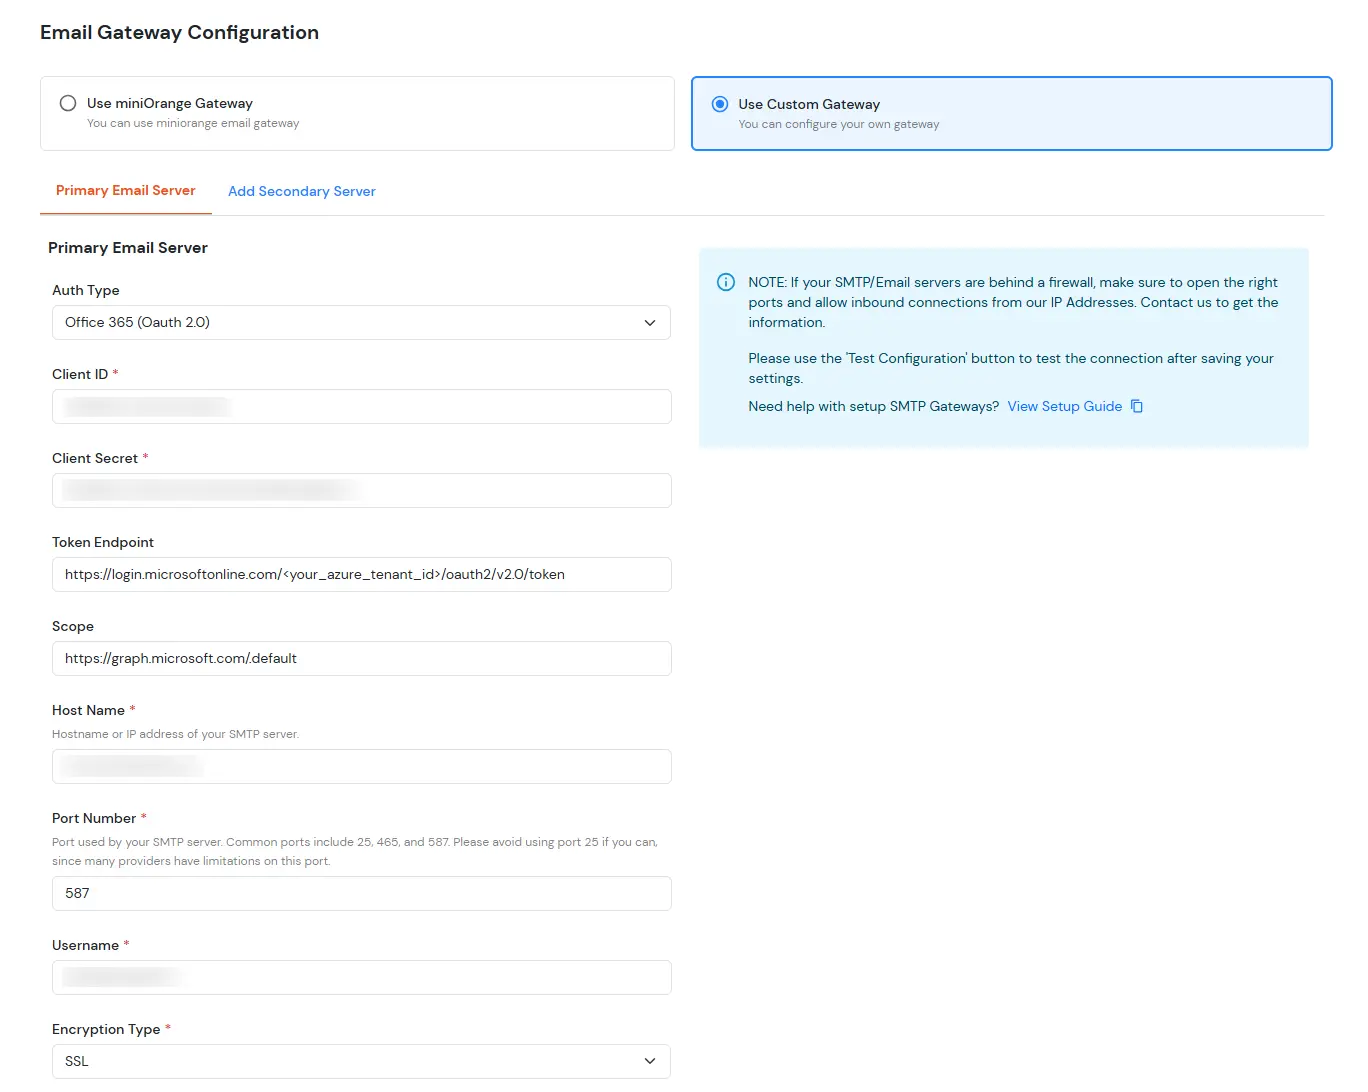
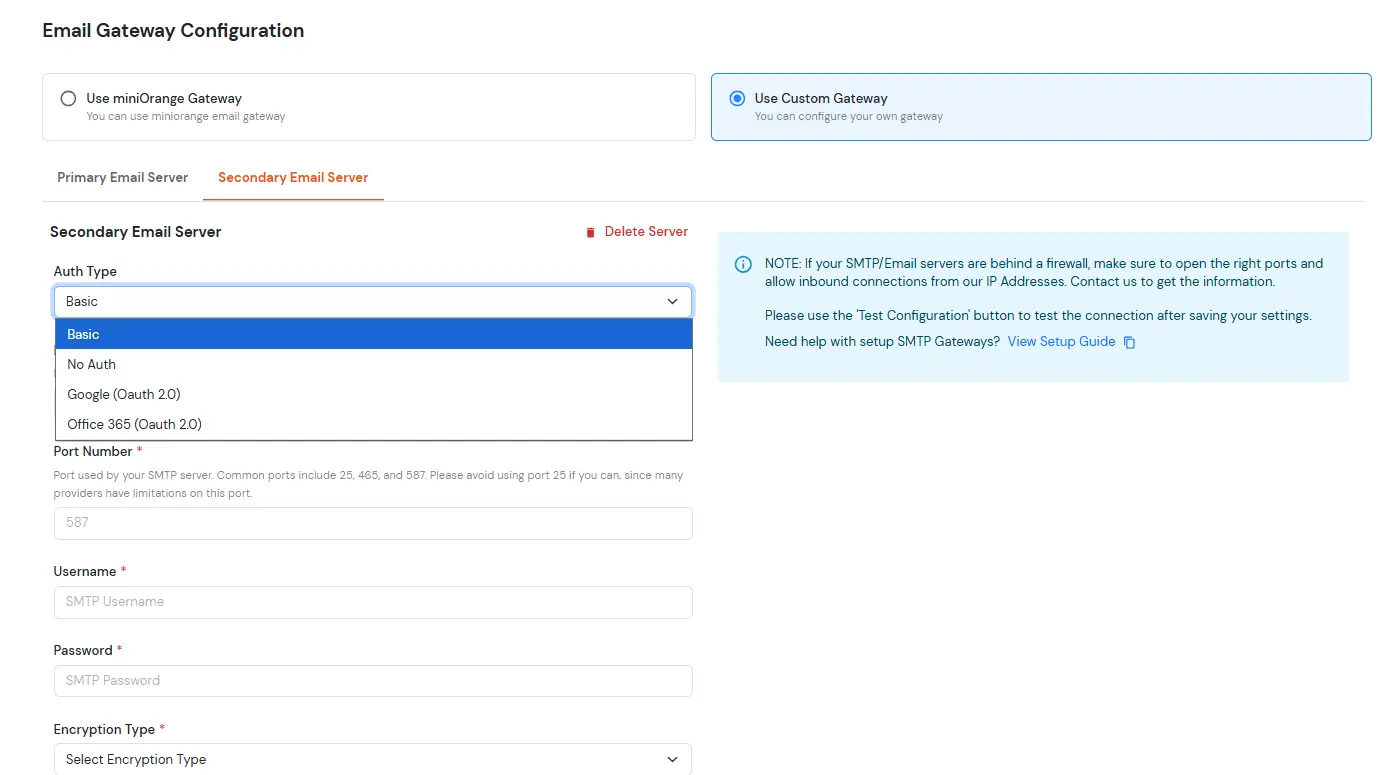
Note: To switch back to the miniOrange email gateway, select Use miniOrange Gateway and click Save.
By default, miniOrange uses its own SMS gateway. To use your own SMS provider for OTPs, alerts and text-based authentication messages, configure it as follows.

A GET request sends the account details in the URL query string. Providers such as MSG91, ClickSend and BulkGate use this method.
| Parameter | Description |
|---|---|
| Gateway URL | URL of your provider's SMS API, with the ##phone## and ##message## placeholders. Example: https://api-mapper.clicksend.com/http/v2/send.php?method=http&username=YOURUSERNAME&key=YOURAPIKEY&to=##phone##&message=##message## |
| Authentication Type |
Select the Authentication Type from the dropdown and choose the option your gateway uses:
|

A POST request sends the data in the request body. Providers such as Alibaba, Plivo and MessageBird use this method.
| Parameter | Description |
|---|---|
| Gateway URL | Endpoint URL of your provider's SMS API. Example: https://rest.messagebird.com/api/messages |
| Content-type | Select application/json, application/x-www-form-urlencoded or text/plain, as required by your gateway. |
| Authentication Type |
Select the Authentication Type from the dropdown and choose the option your gateway uses:
|
| Post fields | Key and value pairs sent in the request body. message (##message##) and phone (##phone##) are added by default. Change the keys to the names your gateway expects, and click Add Post Field to add more. |

Twilio provides APIs for SMS, voice and video. Find your Account SID and Auth Token in the Twilio console.
| Parameter | Description |
|---|---|
| Gateway URL | https://api.twilio.com/2010-04-01/Accounts/YOURACCOUNTSID/Messages.json. Replace YOURACCOUNTSID with your Twilio Account SID. |
| Authentication Type |
Select the Authentication Type from the dropdown and choose the option your gateway uses:
|
| Post fields | Set the Body key to ##message## and the To key to ##phone##. Click Add Post Field to add a From key with the phone number provided by Twilio. |

| Parameter | Description |
|---|---|
| Gateway URL | Gateway URL provided by SMSCountry. |
| Authentication Type |
Select the Authentication Type from the dropdown and choose the option your gateway uses:
|
| Post fields | Key and value pairs required by your SMSCountry account. Use ##message## for the message and ##phone## for the phone number. Click Add Post Field to add more. |
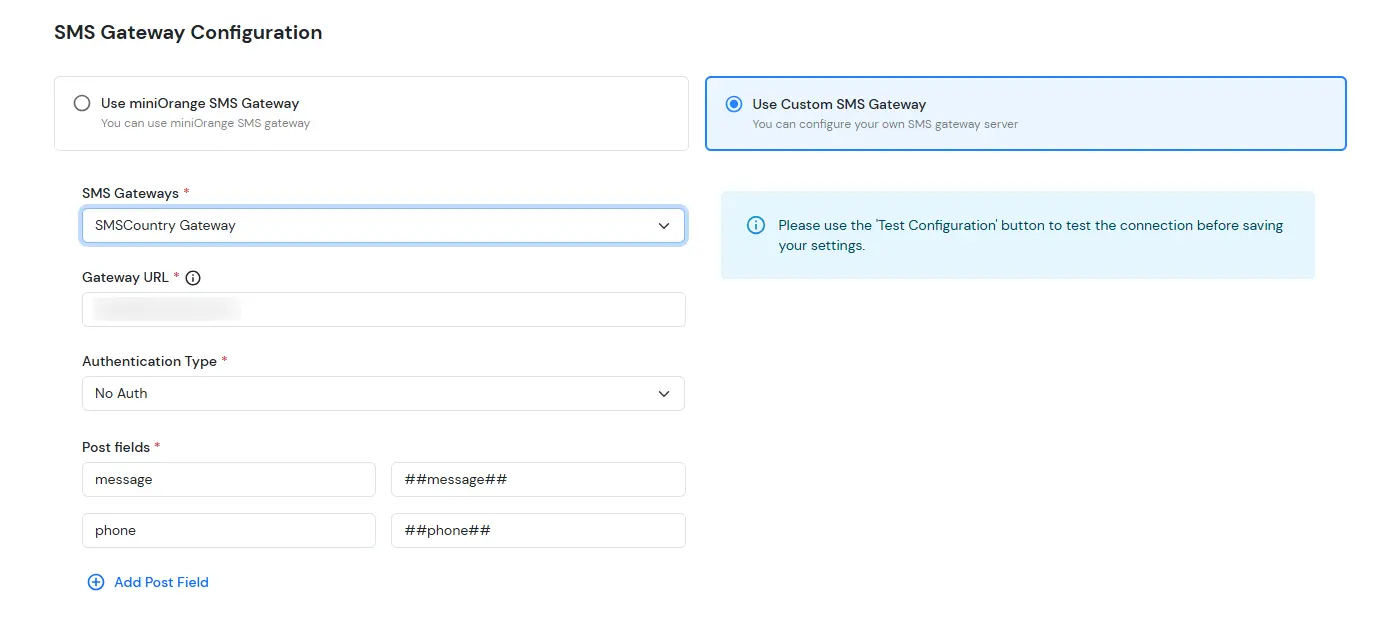
Note: To switch back to the miniOrange SMS gateway, select Use miniOrange SMS Gateway and click Save.
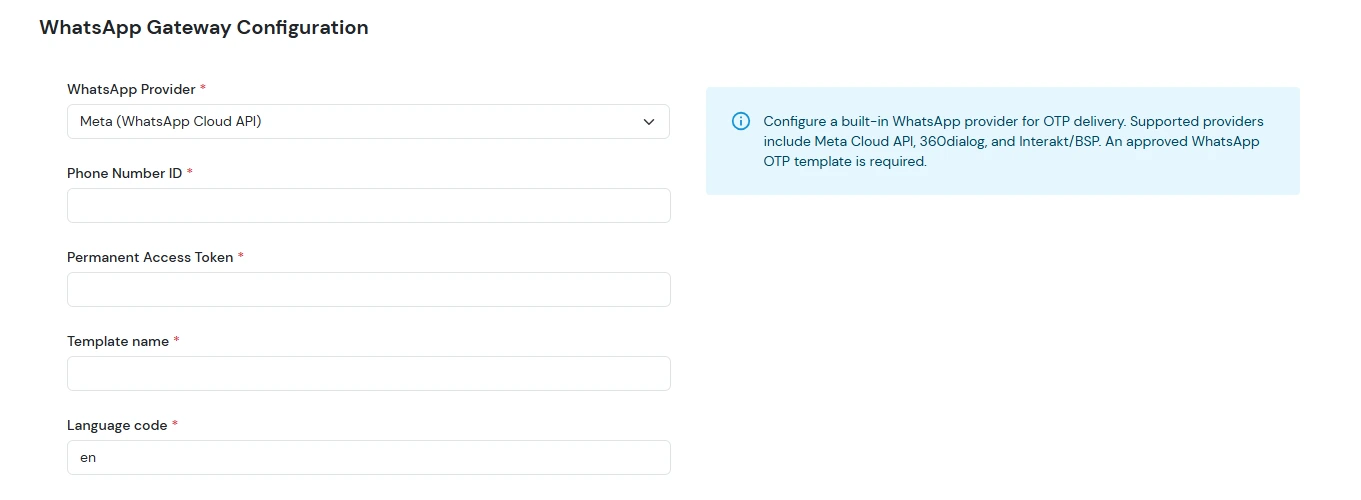
WhatsApp provider is not preconfigured. You must configure one before you can use OTP over WhatsApp for MFA. An approved WhatsApp OTP template is required for the built-in providers.
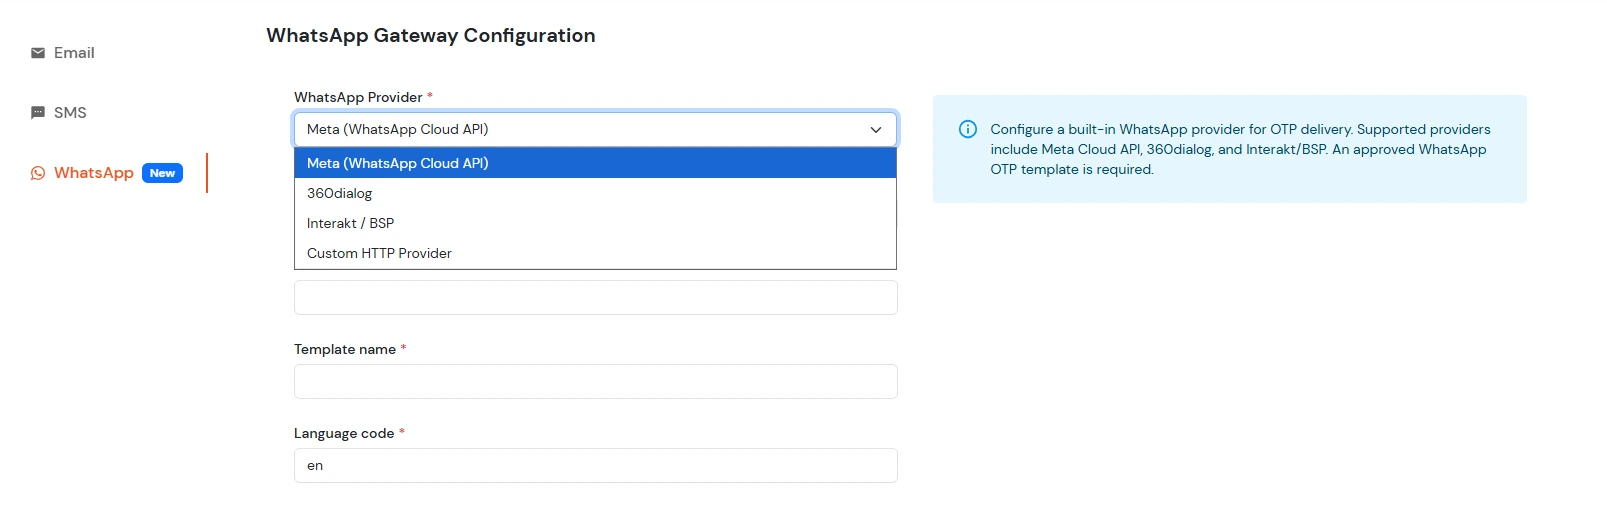
| Parameter | Description |
|---|---|
| WhatsApp Provider | Select Meta (WhatsApp Cloud API). |
| Phone Number ID | Phone Number ID associated with your WhatsApp Business account. |
| Permanent Access Token | Permanent access token generated for the WhatsApp Cloud API. |
| Template name | Name of the approved WhatsApp OTP template. |
| Language code | Language code configured for the WhatsApp template, such as en. |
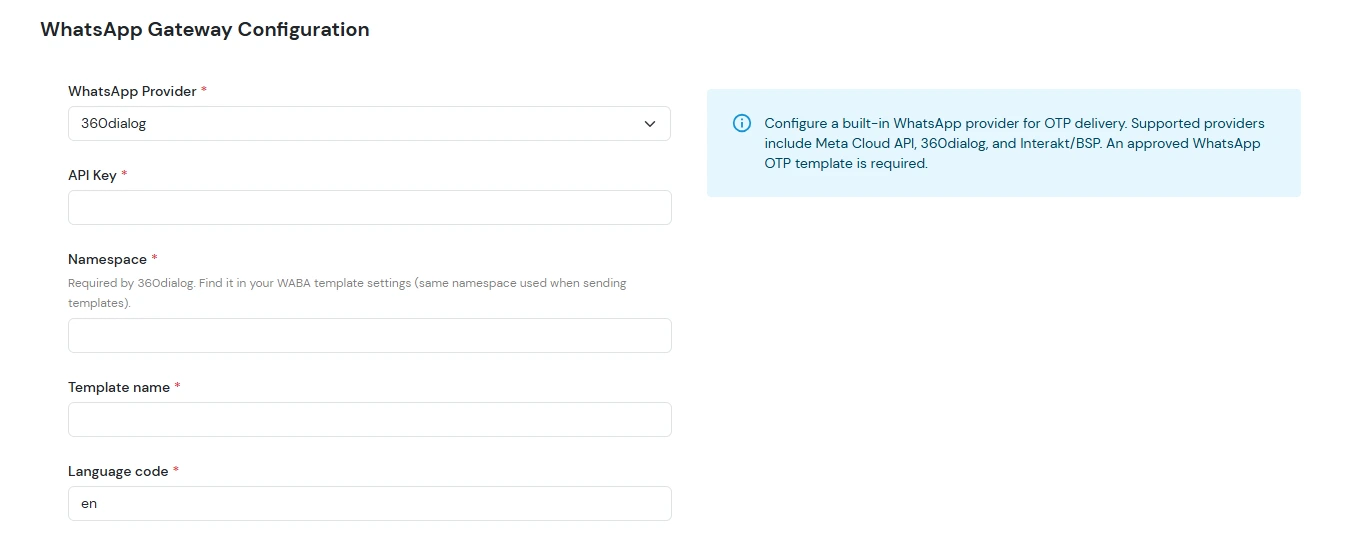
| Parameter | Description |
|---|---|
| WhatsApp Provider | Select 360dialog. |
| API Key | API key provided by 360dialog. |
| Namespace | Namespace configured in your 360dialog WABA template settings. 360dialog requires it. |
| Template name | Name of the approved WhatsApp OTP template. |
| Language code | Language code configured for the WhatsApp template, such as en. |
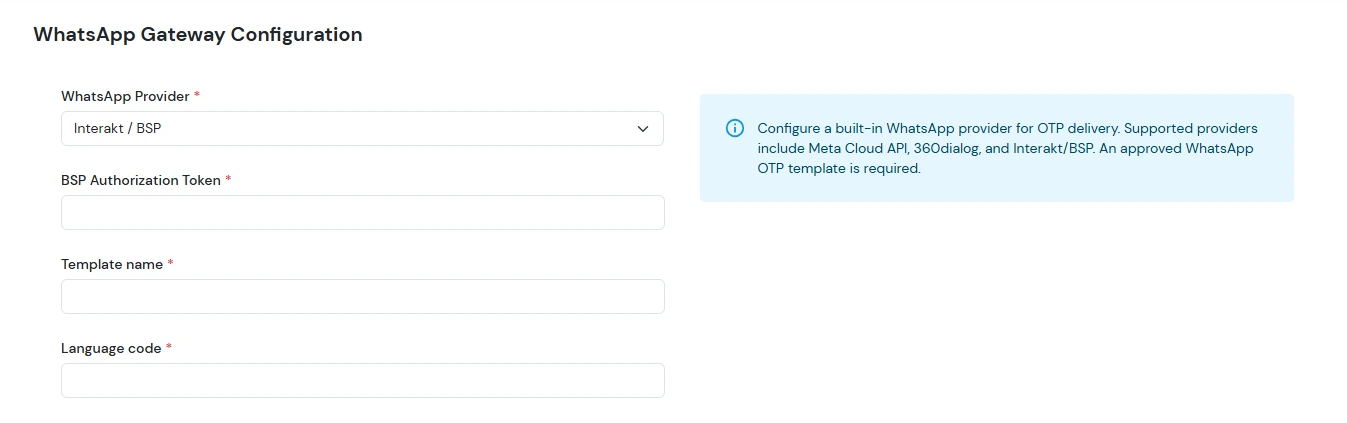
| Parameter | Description |
|---|---|
| WhatsApp Provider | Select Interakt / BSP. |
| BSP Authorization Token | Authorization token provided by your BSP. |
| Template name | Name of the approved WhatsApp OTP template. |
| Language code | Language code configured for the WhatsApp template, such as en. |
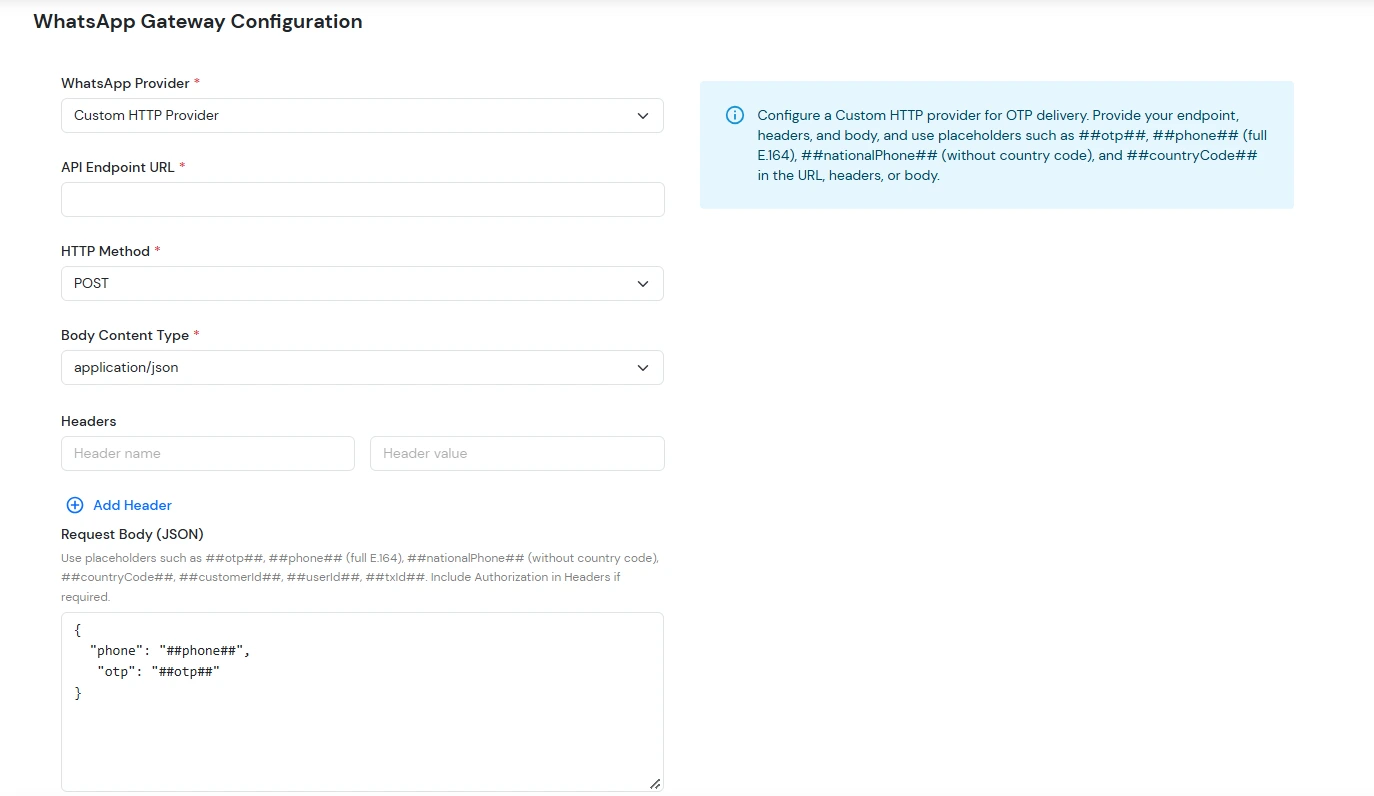
Use this option if your provider is not in the built-in list.
| Parameter | Description |
|---|---|
| WhatsApp Provider | Select Custom HTTP Provider. |
| API Endpoint URL | Endpoint URL provided by your WhatsApp provider. |
| HTTP Method | Method required by the provider, such as POST. |
| Body Content Type | Content type required by the API, such as application/json. |
| Headers | HTTP headers required by the provider, including any authentication information. |
| Request Body (JSON) | JSON request body required by the provider. |
You can use these placeholders in the API Endpoint URL, Headers and Request Body:
| Placeholder | Description |
|---|---|
##otp## |
OTP generated by miniOrange. |
##phone## |
User's phone number in full E.164 format. |
##nationalPhone## |
Phone number without the country code. |
##countryCode## |
Country code of the phone number. |
##customerId## |
Customer/tenant identifier. |
##userId## |
User identifier. |
##txtId## |
Text/message identifier. |
Example request body:
{
  "phone": "##phone##",
  "otp": "##otp##"
}
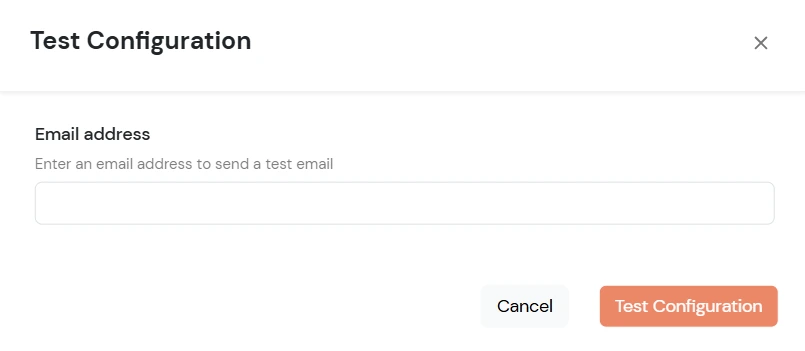
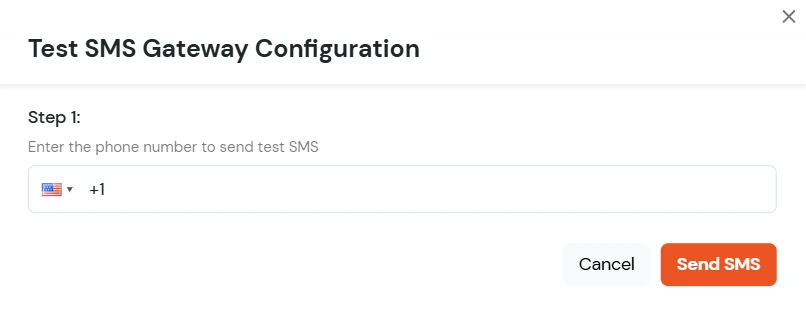
Use the Test Configuration button at the bottom of the page and follow the steps below for the provider you selected in Step 1.
Save the email gateway configuration before you run the test.
You can test the SMS gateway before or after you save the configuration.
You can test the WhatsApp provider before or after you save the configuration.
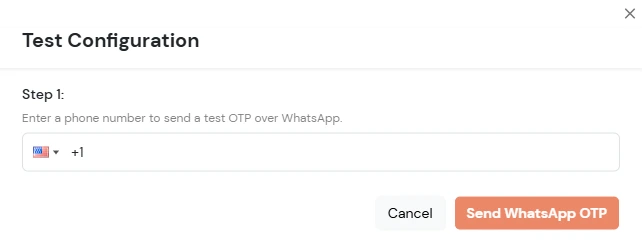
If the OTP is received, the provider is configured correctly and can deliver OTPs over WhatsApp during MFA.
Note: To add a gateway that is not listed, or for help with a provider integration, contact idpsupport@xecurify.com.
